1.Overview
- Enhanced User Engagement: Gamification captivates and entertains users, keeping them more engaged with your website.
- Increased Customer Loyalty: Rewarding customers with points and prizes encourages them to return and make more purchases.
- Customization Control: Tailor the win-wheel to match your brand’s look and feel, offering a unique and memorable experience
- Flexible Settings: Admins have the power to control spinning freedom and implement cooldown periods, ensuring the feature suits your specific audience.
- Boosted Sales: The element of surprise and reward can lead to increased sales as customers spin the wheel to unlock discounts or prizes
- Competitive Advantage: Stand out in the market by offering a unique and engaging shopping feature.
2.Download & Install
Install Points and Rewards for WooCommerce by WP Swings. Follow these steps for automatic installation:
- Go to the Admin panel navigate to the sidebar click on the ‘Plugins’ menu > ‘Add New’.
- Navigate to the ‘Add Plugins’ page
- Go to the search bar and type ‘Points and Rewards for WooCommerce’.
Once you find ‘Points and Rewards for WooCommerce’ by WP Swings, you can view the details about it such as the points release, rating, and description. One can install it, simply by clicking “Install Now”.
You can download our Subscriptions for WooCommerce plugin directly from here:
Download Rewards Plugin Zip File
Please check out our Premium Version for more enhanced features:
Points and Rewards Premium Version
3.Configure the Required Settings
To enable the gamification feature, you must reach the underlined setting configurations:
- The admins can enable the settings if they want to enable this feature for their customers.
The overall gamification is divided into two sections, one is based on the entire gamification feature, and the second one is focused on the “win-wheel”.
4.Gamification
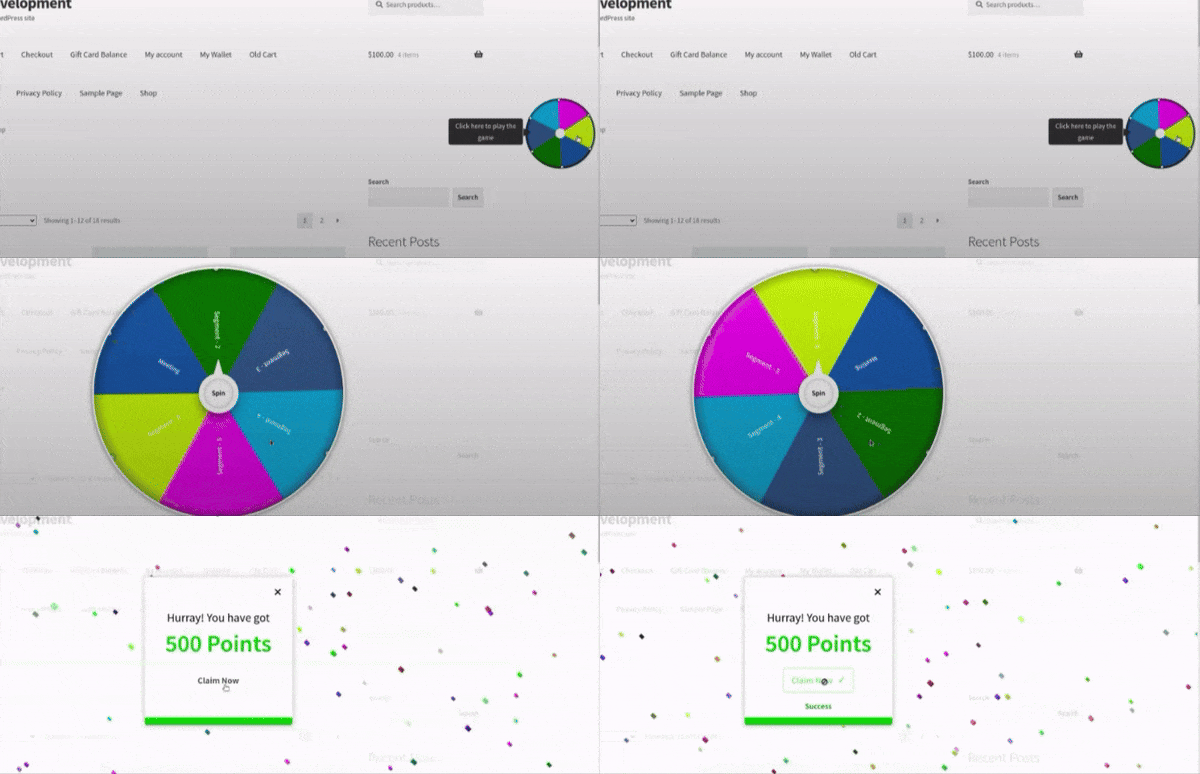
The merchants will be able to fully customize the win-wheel. Admins take the reins! Tailor your win-wheel down to the last detail: choose positions, colors, and segments, and set the points for each section. Craft an experience that’s uniquely yours. Decide whether customers can spin freely or implement cooldown periods. Keep the engagement level just right for your audience.
4.1.Gamification Settings
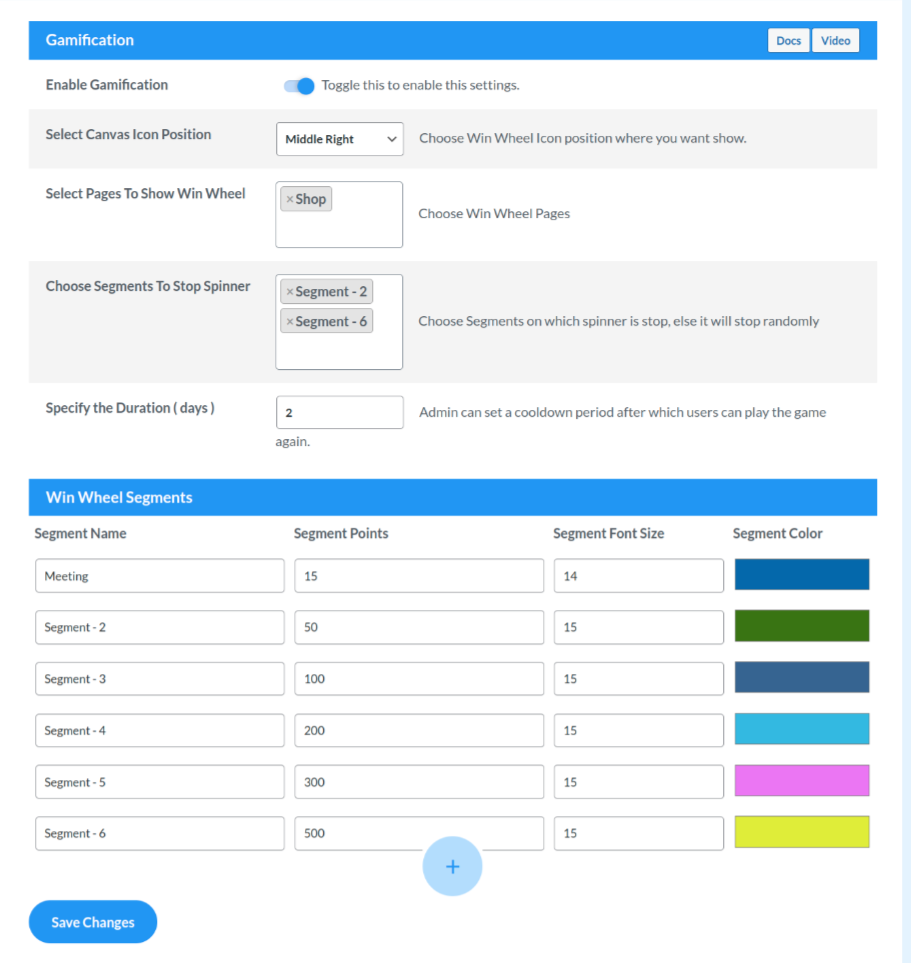
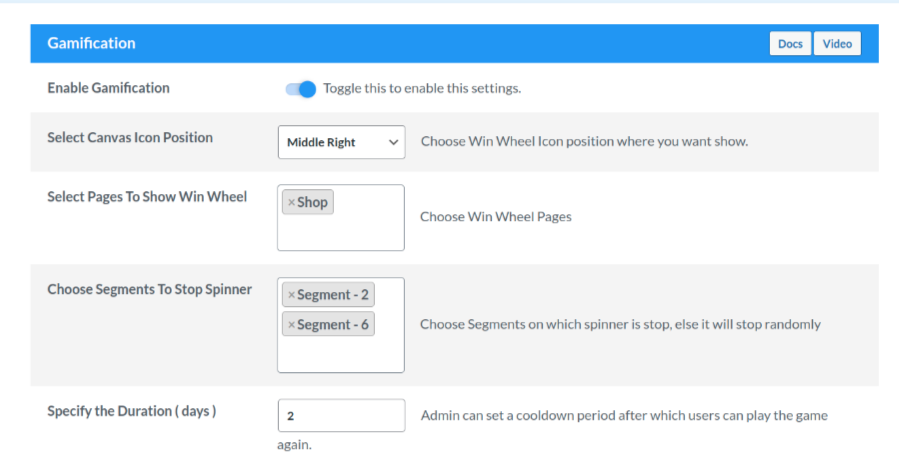
- Enable Gamification Settings: The admins can enable the settings if they want to enable this feature for their customers.
- Select Canvas Icon Positions: Merchants also gets the liberty to select the positioning of the “win-wheel”.
- Select Pages to Show Win Wheel: By utilizing this setting, the admin can select the pages where he wants to showcase the win-wheel.
- Choose the Segment to Stop Spinner: Here the admin can select a particular segment where he wants to stop the spinner. If he leaves the field blank, in that case, the spinner can stop randomly on any segment.
- Specify the Duration (days): The admins can also specify a certain number of days or a cooldown period. This is how this works, you’re the admin, and the number of days for the cooldown period that you have specified is “5 days”. So, now when a customer comes to your website and spins the wheel. He will be in a position to “claim the rewards points” after claiming the same. The win-wheel will completely disappear for the customer. After 5 days, they’ll be in a position to spin the wheel again.
4.2.Win-Wheel Segments Settings
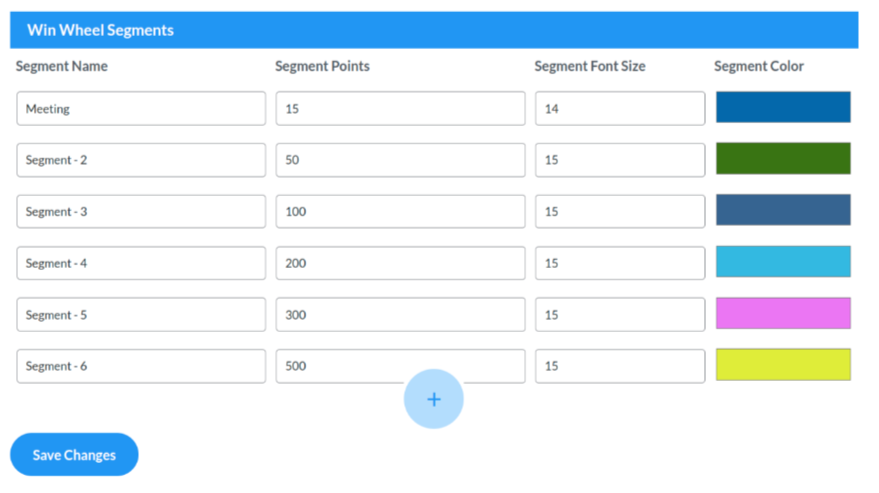
- Segment Name: The admins can also change the name of these segments from this section.
- Segment Points: From this section, the admin can choose the number of points, that he wants the customers to earn.
- Segment Font Size: The admins can select the font size for the name of the segments that will appear on the win-wheel.
- Segment Color: The colors of these segments can also be changed as per the requirements of your store.
(NOTE: The minimum number of segments that the admin will have to select is 6, and the maximum number of segments that he can add in the wheel is 12)


