1.Overview
- Add Products: The Admin is capable of adding products of his desire to the manual subscription.
- Select Parent Orders: The admin can select the parent orders to fetch the payment details made by Stripe or Paypal.
- Set Intervals: Admin can manually set subscription interval and subscription expiry interval.
- Set Subscription Actions: The Admin can choose the action that will be done after the manual subscription is created and assigned to users. For Example: (Send Email invoice to Customer, Resend New Order Notification, etc.)
- Auto fetch the Billing Details: The Billing details will be auto-fetched when the customer is selected.
- Subscription Notes: The admin can add a private or customer’s note on the manual subscription order.
2.Download and Install
Install the Subscription for WooCommerce Pro by WP Swings.
- Purchase the plugin and download it.
- Log in to your WooCommerce store’s admin panel.
- Navigate to “Plugins” > “Add New” in the WordPress dashboard.
- Click the “Upload Plugin” button and upload the plugin file.
- After uploading, click “Install Now” and then “Activate“
3.1.General
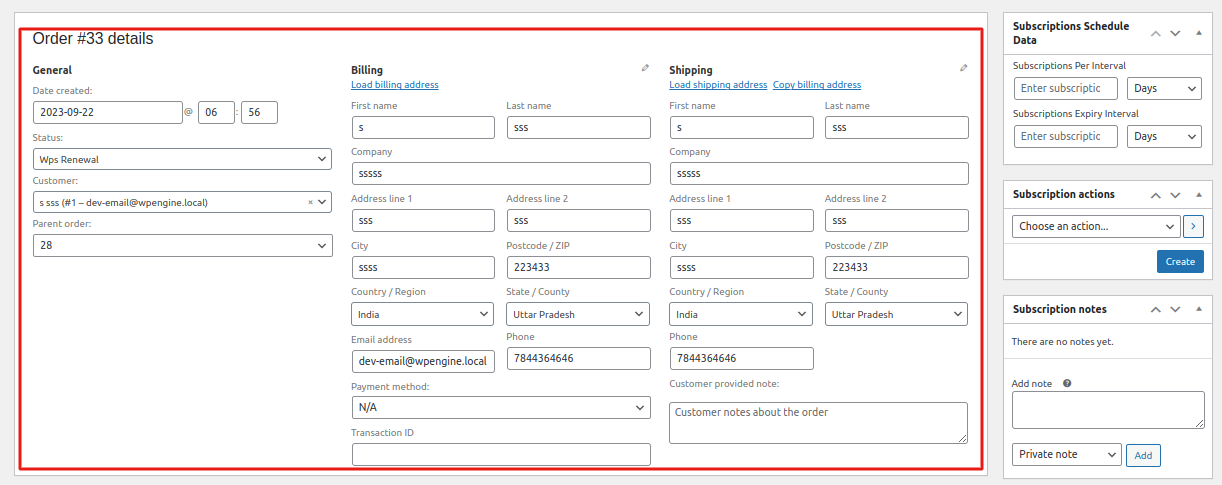
Now, Let’s talk about the General Section in Order Details
Date Created: Here is the subscription creation date which will be autofilled.
Status: Choose Wps Renewal as Status.
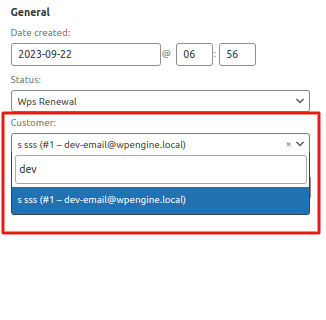
Customer: Here you can select the customer to whom you want to assign this subscription.
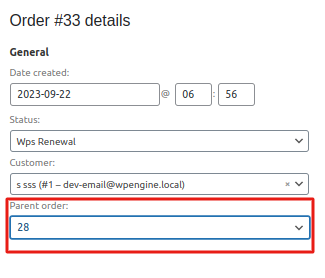
Parent Order: After Choosing your Customer all the orders associated with that customer (Paid by Paypal, Stripe, Wallet, or any other offline payment methods supported by WooCommerce) will be automatically fetched here.
Note: Having a Parent Order is required.
The customer will be changed only if both of the following conditions are met:
- The order status must be Completed or Processing.
- The payment gateway must be either Stripe or PayPal Standard.
3.2.Billing & Shipping
Let’s take a look at the billing and shipping section.
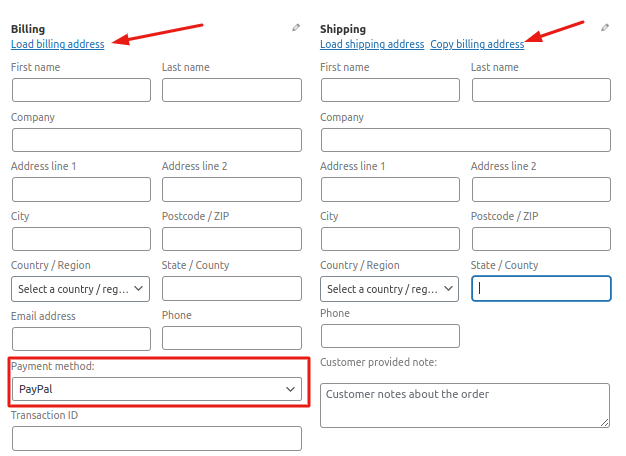
Now you can either fill in the billing and shipping details manually or You can click on “Load Billing Address” to auto-fetch the billing details from the parent order.
The same goes for the shipping. You can manually fill in the shipping address or you can click on “Load Shipping Address” to auto-fetch the shipping details from the parent order.
You can also copy the billing address to the shipping address by clicking on “Copy Billing Address”
3.3.Add items and Apply Coupons
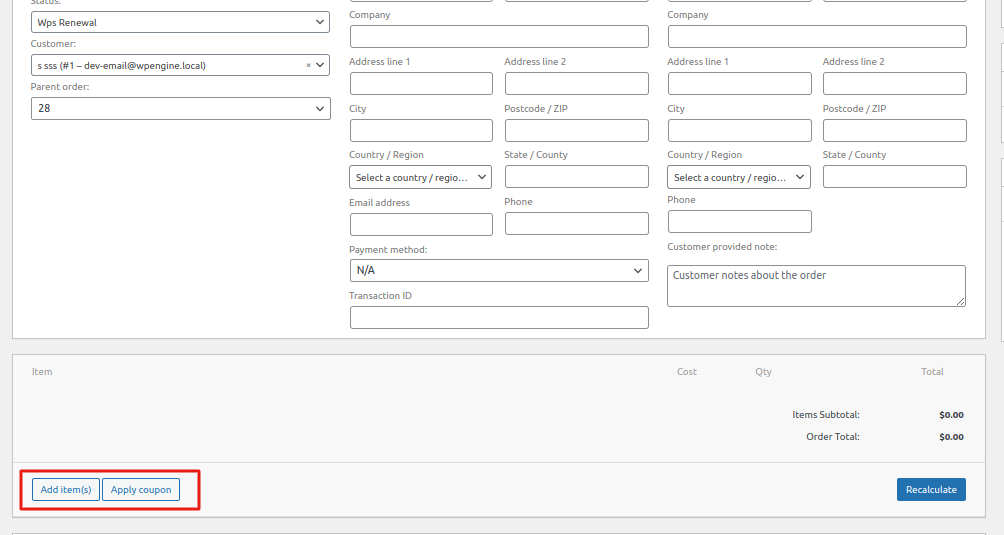
Proceeding further, you can also add items (Products, Additional fees, Shipping Charges) and coupons.
To add an item click on “Add Items”
From here you can add items like Products, Additional fees, and Shipping charges.
Click on Add Product to choose your product and its quantity.
Similarly, you can add Shipping charges and Additional fees.
3.4.Other Actions
Now let’s move to the sidebar.
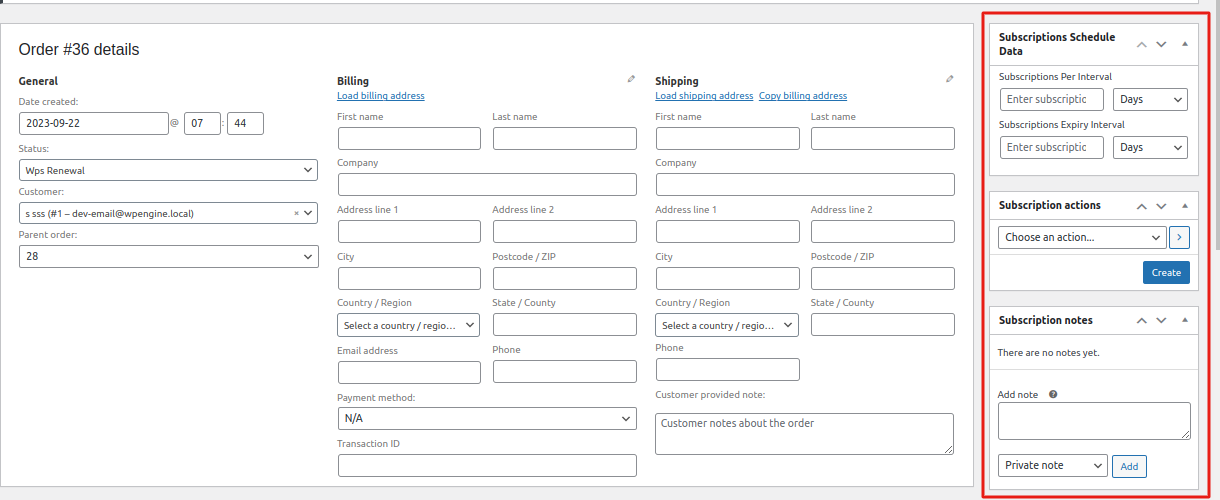
Subscription Schedule Data: Here you can set Subscription Per Interval and Subscription Expiry Interval.
Subscription Actions: Here you can choose from the actions to be done after the subscription is created like emailing invoice/order details to the customer, Resend New Order Notification, or Regenerate Download Permission.
Subscription Notes: Here you can add additional notes to the subscription.
After adding the required details click on the Create button to create the subscription.
3.5.Subscription Table and Renewal
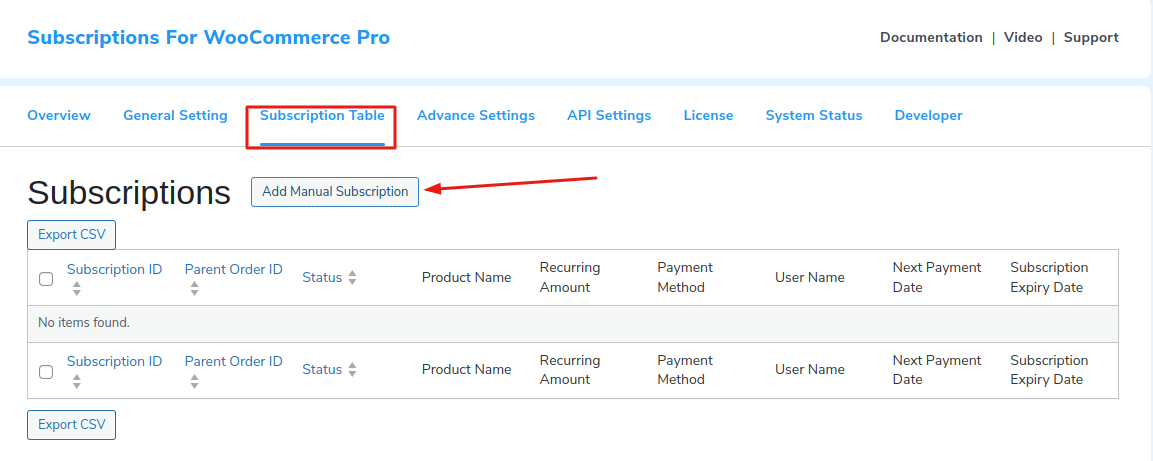
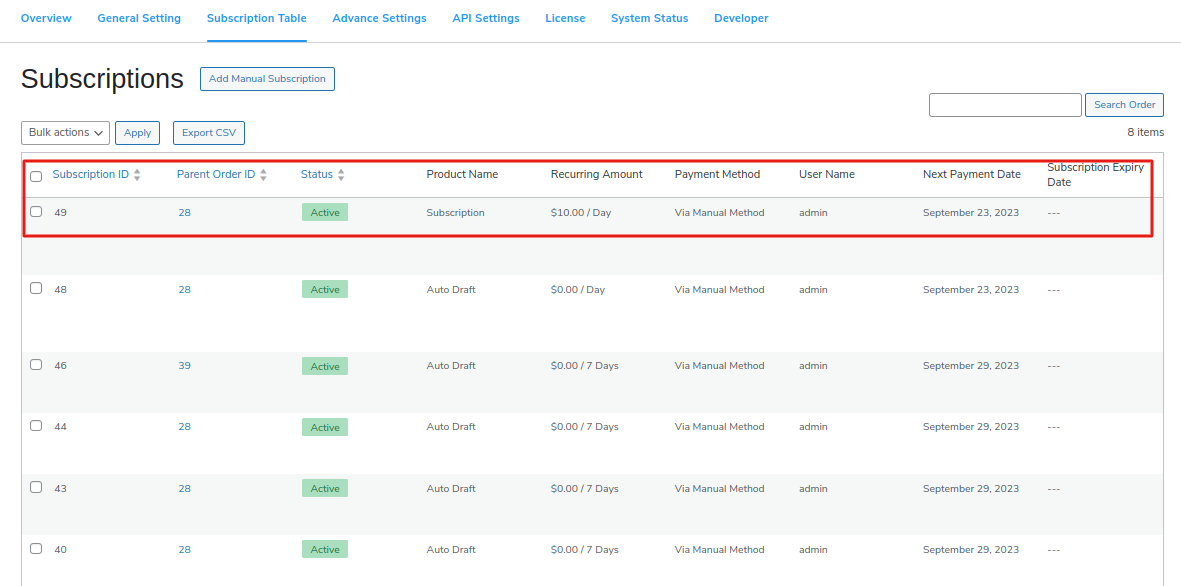
You can see all the subscriptions in the subscription table. Subscriptions that are created by admin manually show as “Via Manual Method” under the Payment Method column.
From there you can manage and change the order status of your recurring subscription orders.
For further details and comprehensive guidance, refer to the plugin’s documentation to ensure a smooth implementation of Subscription for WooCommerce Pro.
