
1.Overview
Benefits:
- Manage the stock of tickets as admin.
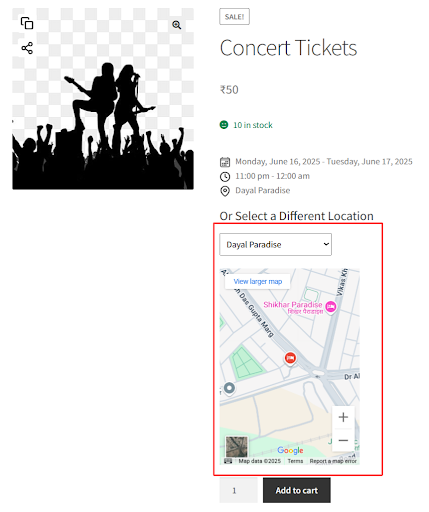
- Show the event location to customers at the front end.
- Send the tickets as PDFs to customers in an email.
- Manually add customers to WordPress events.
- Track the check-in status of attendees by manually entering the ticket number.
- Allow the customers to print the tickets from the My Account page for offline use.
- Merchants have Multiple Layouts Options to choose from, for their PDF Tickets for an event.
- Customers can transfer their tickets to a different attendee if they aren’t attending your event.
- Customers can see the live location of your events on the product page itself.
- You can easily manage the stocks of your tickets with the robust WordPress event management plugin.
- WooCommerce Event Ticket Manager Pro has been integrated with Twilio and Google Maps to add even more efficient functionalities.
- Using the WordPress calendar plugin, sharing on Facebook features can help you get more traffic by sharing.
2.Installation
We have mentioned the installation process for both the Free and Premium Versions. The customers can refer to the one that is relevant to them.
It is important to note that before activating the plugin Event Tickets Manager For WooCommerce Pro, you should have the Event Tickets Manager For WooCommerce – WordPress plugin installed, as the plugin will not function without it.
So, if you don’t already have it, you can download it directly from here:
2.1 Free Version
- Automatic Installation
Trace the following steps for the automatic installation of the WordPress event calendar plugin:
- Open the dashboard of your WordPress website and navigate to the sidebar.
- Visit Plugins → Add New.
- Now on the search bar type the name of the plugin – “Event Tickets Manager for WooCommerce”.
- From the search results press the Install Now button beside our plugin.
Once you find ‘Event Tickets Manager for WooCommerce’ by WP Swings, you can view the details about it such as the rating and description. One can install it, simply by clicking “Install Now”.
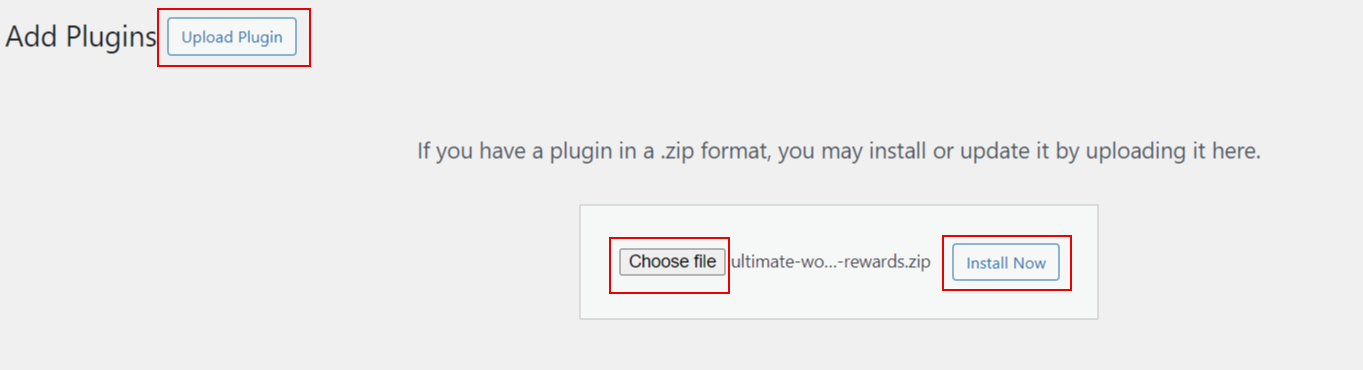
- Manual Installation
Here are some simple steps for the manual installation of the events calendar plugin:
- Download the plugin from WordPress.org.
- Once the plugin is downloaded, upload the .zip file of the plugin.
- Now activate the plugin by going to Plugin → Installed Plugin and pressing the Activate button below the plugin.
3.Premium Version
-
Automatic Installation
Automatic installation is the easiest option as WordPress handles the file transfers itself and you don’t need to leave your web browser.
The steps are as follows :
- Download the zip folder of the plugin Event Tickets Manager for WooCommerce Pro.
- Once downloaded, install the Event Tickets Manager for WooCommerce Pro plugin by browsing and activating it.
-
Manual Installation
The manual installation of the WooCommerce event tickets manager plugin is another option. To install the plugin to your WordPress environment.
The manual installation method involves downloading our Event Tickets Manager for WooCommerce Pro Extension and uploading it to your web server via your favorite FTP application.
The steps are as follows :
(i) Kindly, upload the “event-tickets-manager-for-woocommerce-pro” folder to the /wp-content/plugins/ directory.
(ii) Activate the Event Tickets Manager for WooCommerce Pro
plugin through the ‘Plugins’ menu in WordPress.
4.License Activation
To work correctly, the plugin must be installed by following the mentioned steps.
However, suppose you have purchased the premium version of the plugin and you want the benefit from automatic updates or access to the support platform to receive help from our staff. In that case, you need to activate the plugin. Also, after Purchasing the premium version navigate to My Account > Orders > Your Order. There you’ll find the License Key. The License Key is also sent to you on your mail ID.
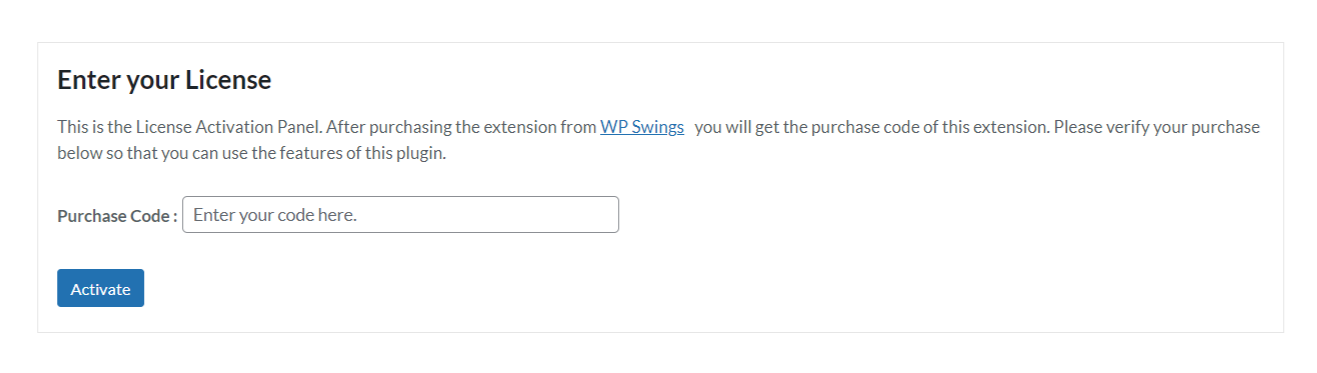 To do so, you have to navigate to the “License” tab, here you can enter the “License Code”, and click on the “Activate” button. Customers are supposed to receive these in their mail when they purchase the premium plugin.
5.General Setting
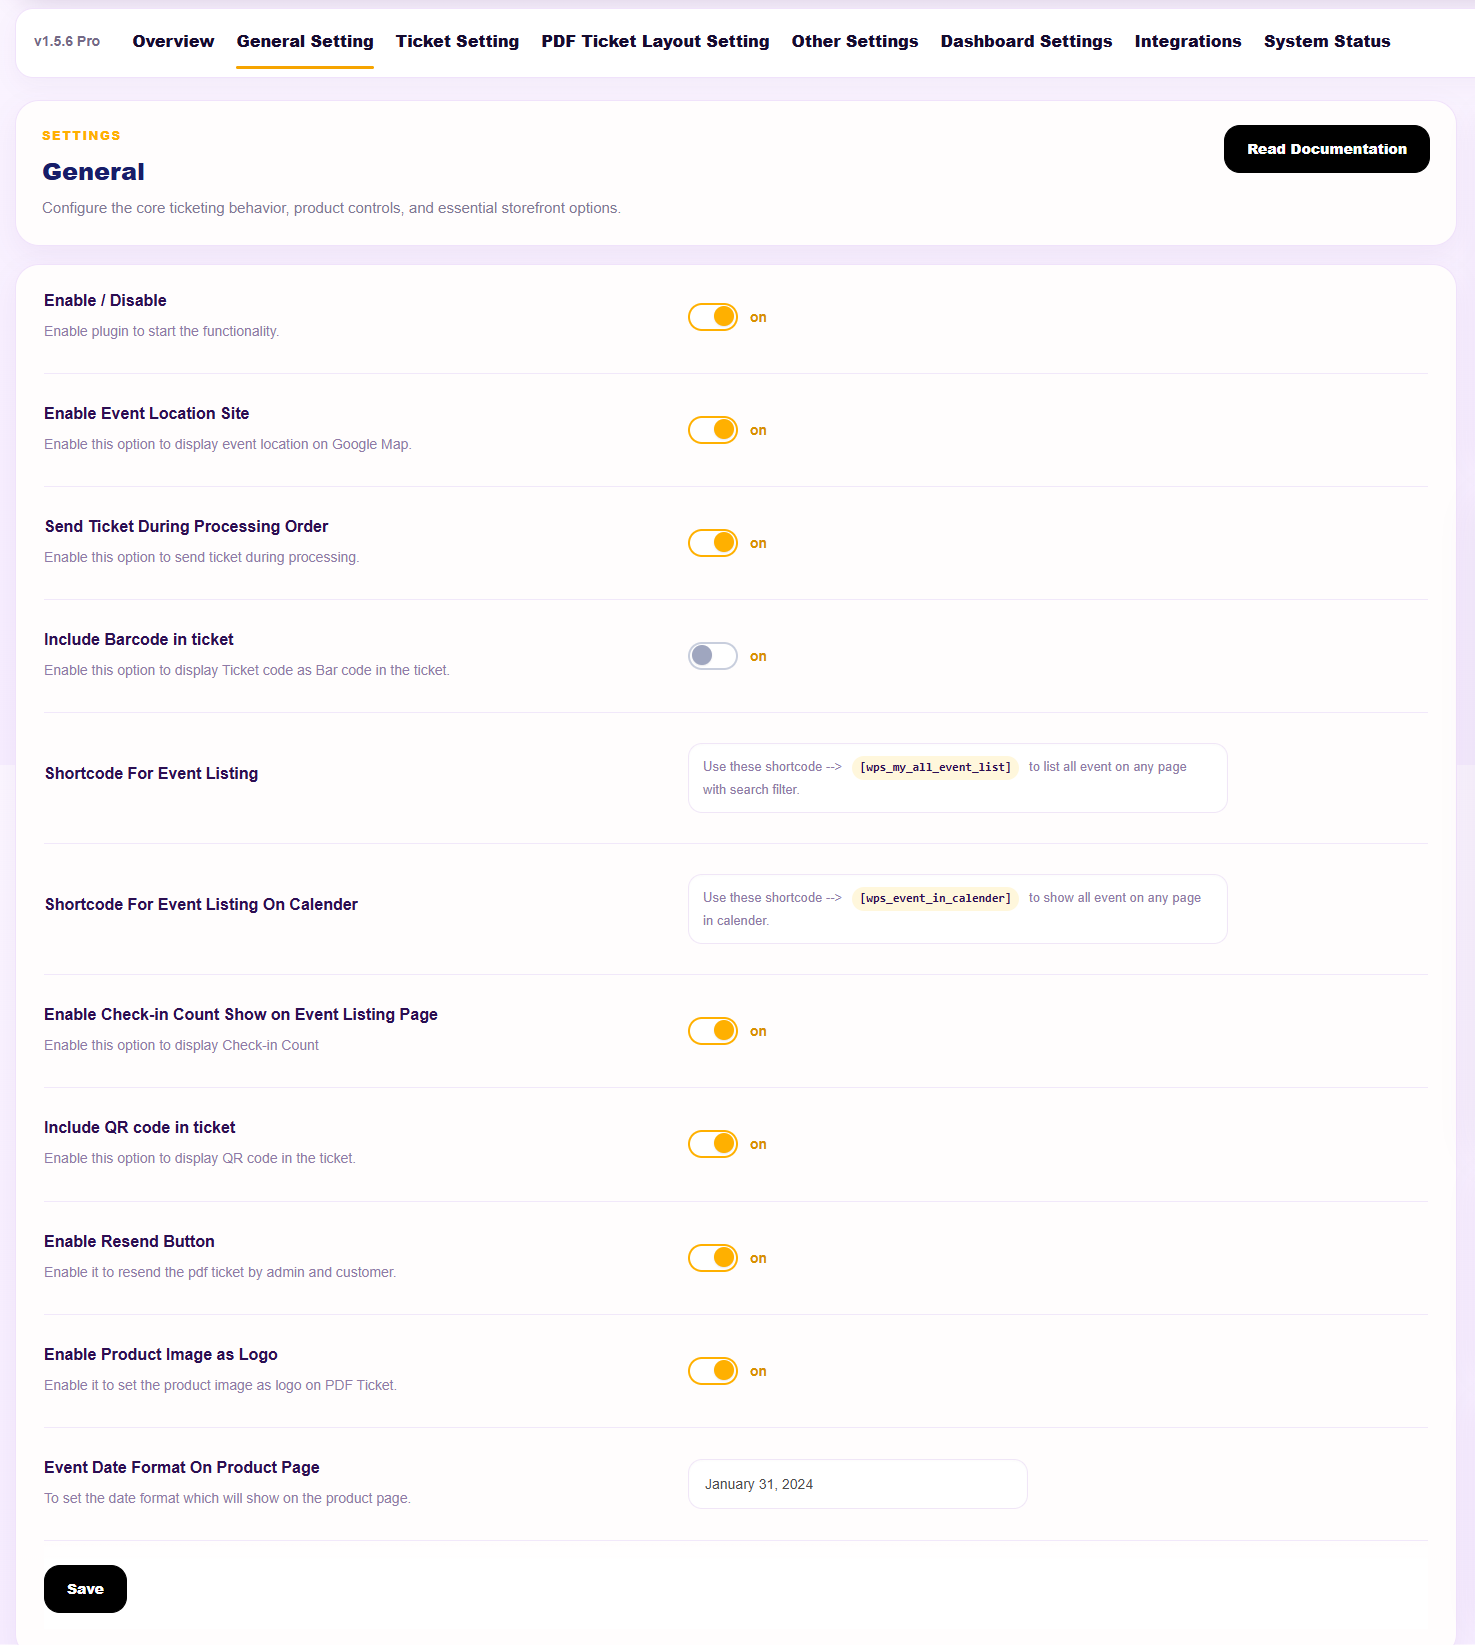
The General Settings tab of the events calendar plugin has configurations that influence the overall functionality of the plugin.
Here are the options that you will find under the General Setting tab…
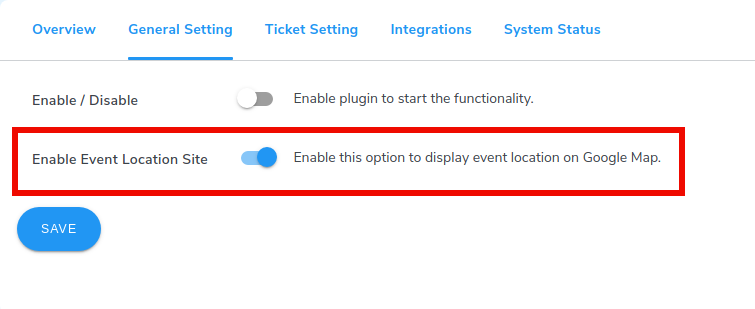
a) Enable / Disable:
Press the slider switch beside Enable / Disable to enable the plugin for your WooCommerce store.
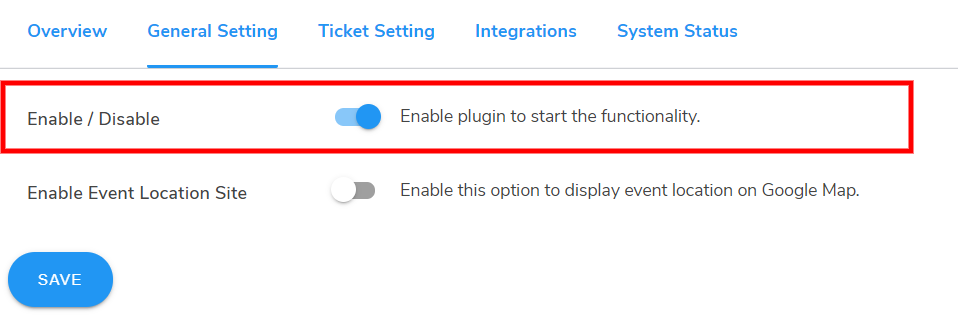
b) Enable Event Location Site:
Press the slider switch beside Enable Event Location Site to display the event location on the Google Map to your customers.
Frontend Representation:

c) Send Tickets During Processing Order:
Enable the feature, and you will be able to send the tickets while your order is in process.
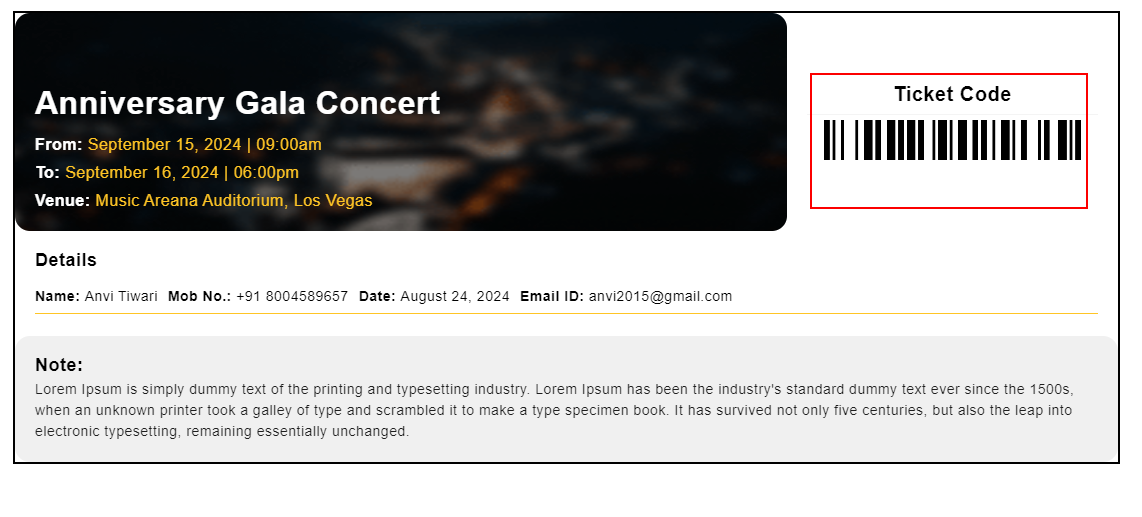
d) Include Barcode In Ticket:
The admin can show the unique ticket code can now be shown in the form of a scannable barcode. This helps the admins prevent any fraudulent activities.
Frontend Representation:
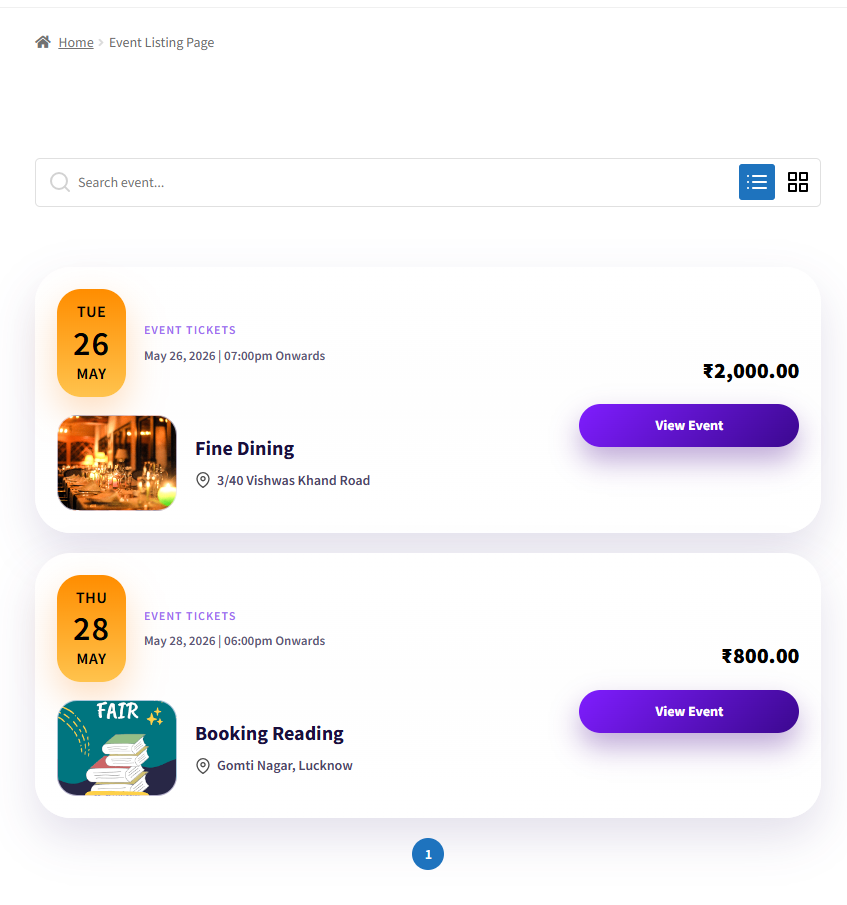
e) Shortcode for Event Listing:
The admin can use the shortcode “ [wps_all_event_list]” to show the list of events on any page they want to display with a search filter.
Frontend Representation:
Event Listing Page (List View)
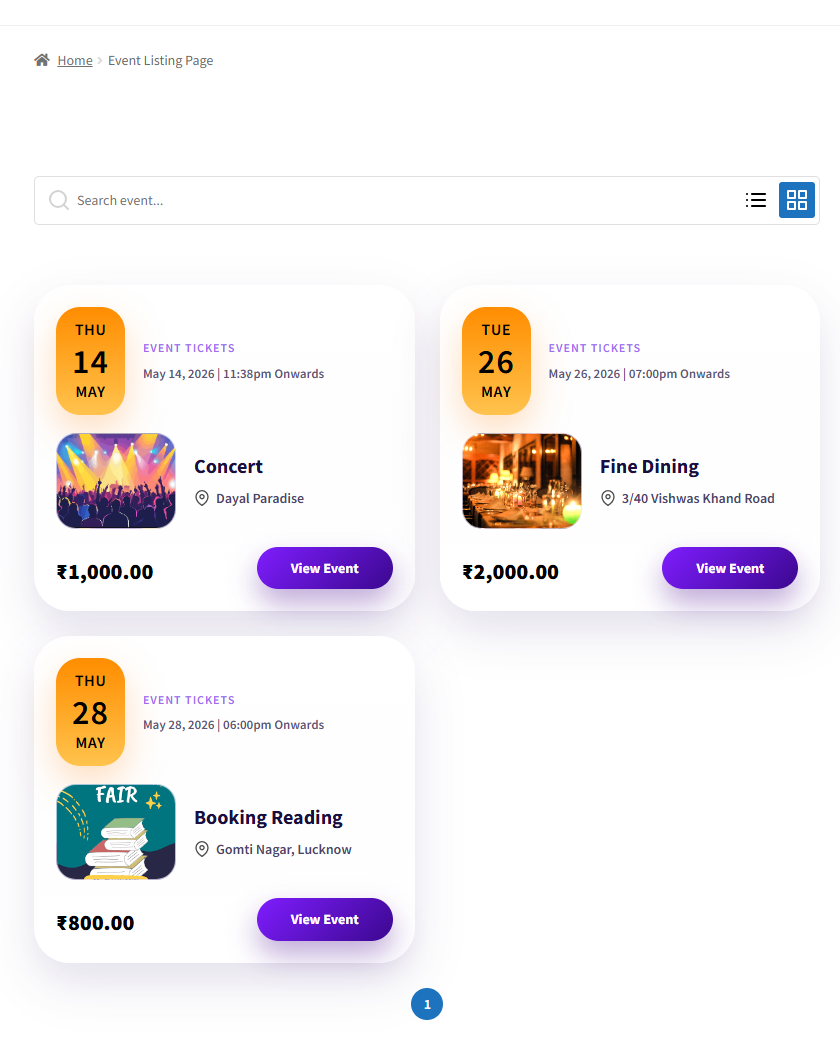
Event Listing Page (Cards View)
Feature Enhancement: Admins can display the total number of attendees who have checked in for each event, both on the event listing page (frontend) and within the admin dashboard (backend), using the “event” filter.
Backend for the admins –

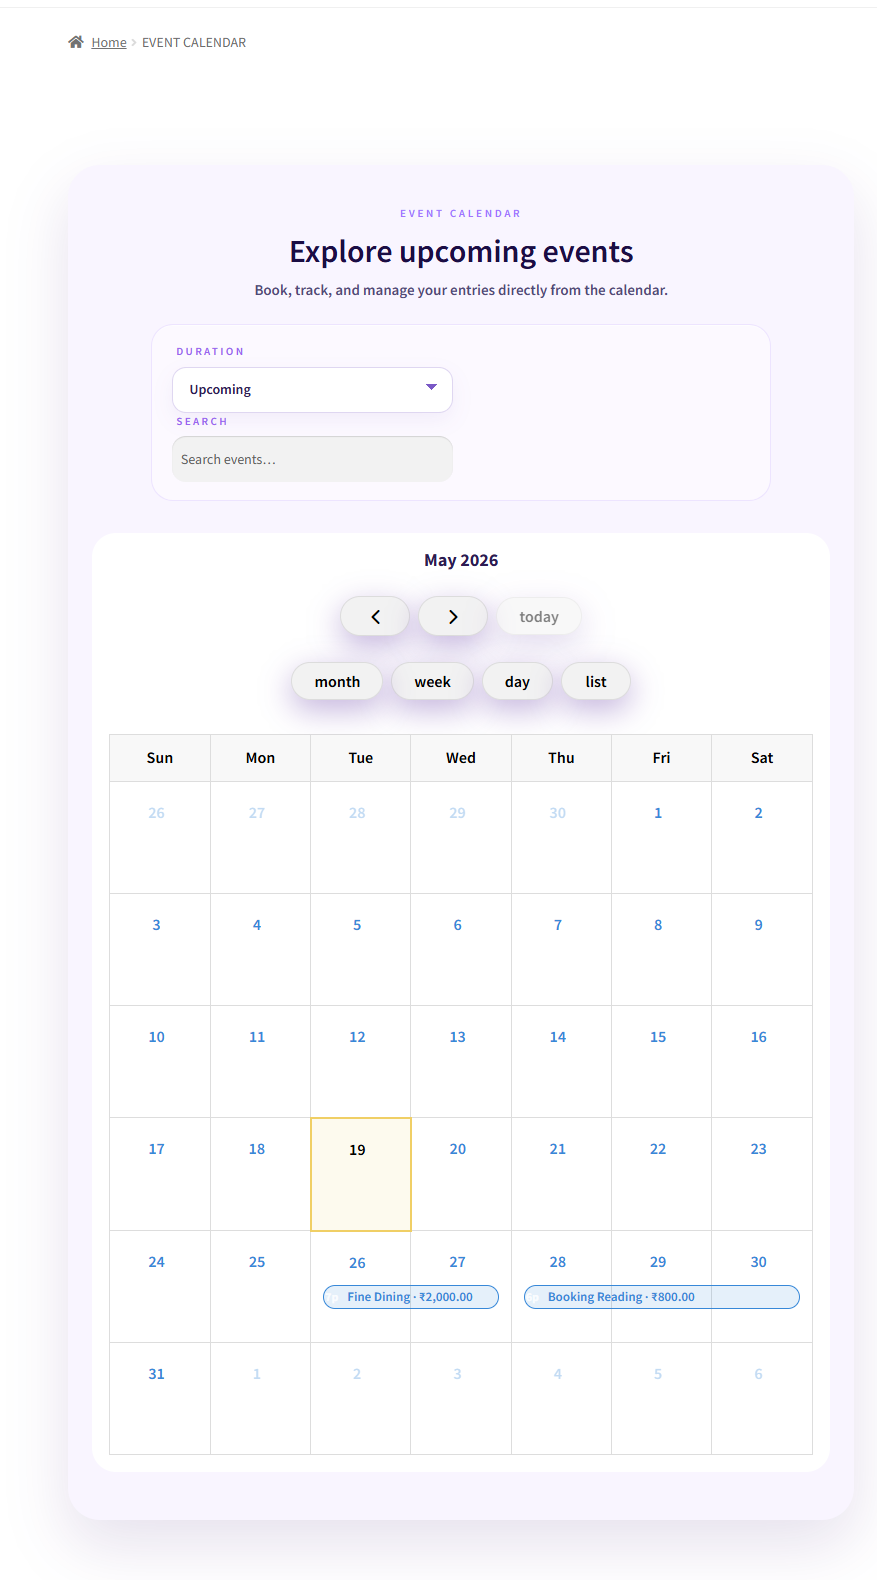
f) Shortcode for Event Listing on Calendar:
The admin can use the shortcode “[wps_event_in_calendar]” to display the event on any page in the calendar.
Frontend For Event Calendar-
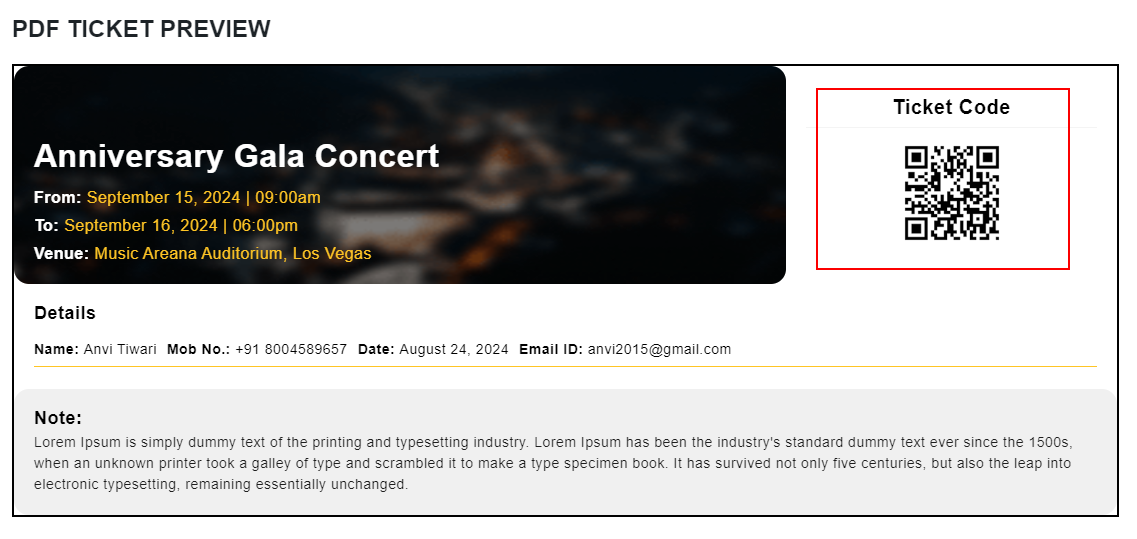
g) Include QR Code in Ticket:
Merchants can enable this setting of the events calendar plugin to include QR Codes in their customers’ tickets.
Frontend Representation:
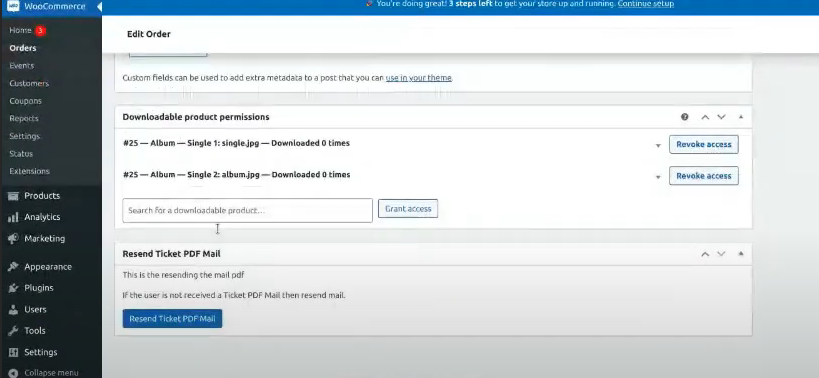
h) Enable Resend Button:Premium
This admin can utilize this feature of the events calendar plugin, to exercise the opportunity of resending the PDF tickets for an event. After enabling this setting, the admin and the customer can re-send the PDF if they are unsure about sending it the first time.
For the admin,
The admin can navigate to the order section under WooCommerce, where all the orders are listed. Click on the existing order, and scroll down on the order page. Here you will see the “Resend Ticket PDF Mail” section. You can click on the “ Resend Ticket PDF Mail”.
Once you’ve configured the general settings of the plugin click the SAVE button at the bottom before leaving the tab.
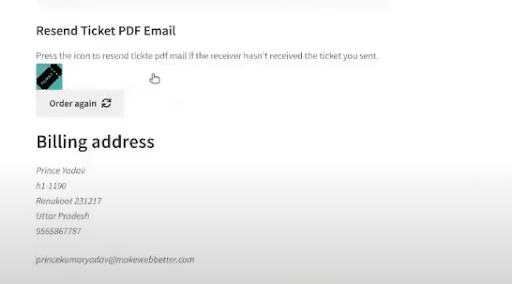
For the customers,
The customers can navigate through “My Account” > “Orders”. Here they will see all their current orders. Under the “Actions” section, click on “View More”.
They will now see all the details related to the order. The customers will see a section called “Resend Email Ticket PDF”, where they will see this message “Press the icon to resend ticket pdf mail if the receiver hasn’t received the tickets” for an event that you have sent. Just click on the icon, to resend the ticket.
i) Enable Product Image As A Logo:Premium
Admins now have the option to showcase the product image as a logo on the event tickets they sell.
j) Event Date Format On Product Page:Premium
This setting enables the admins to change the formatting of the dates of the events you are hosting on your website. There are different formatting options to choose from, whichever sits well with the requirements of your eCommerce website.
6.Ticket Setting
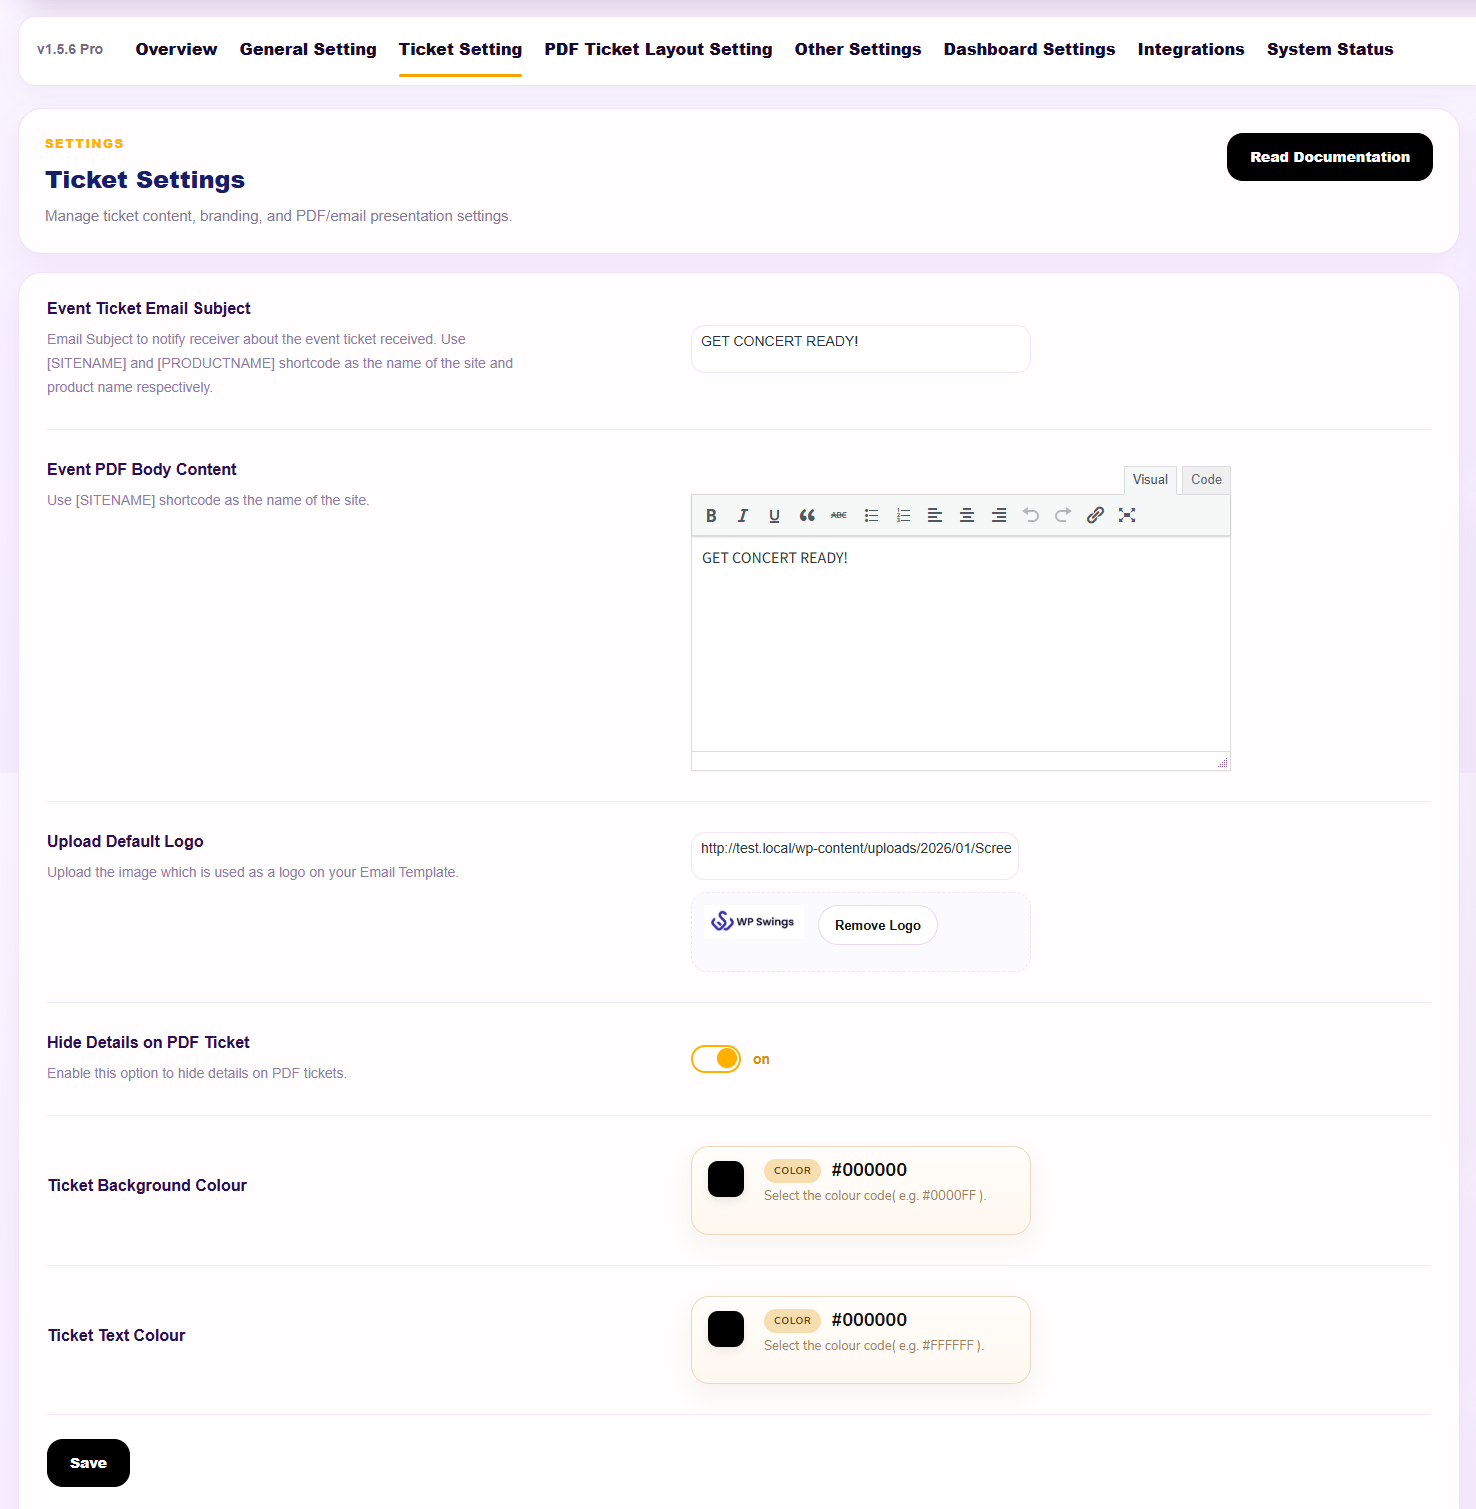
From the Ticket Setting tab, you can edit the content of the email and SMS sent to your customers, the events calendar plugin has made the configuration very seamless. From this tab, you can manage the following configurations:
a) Event Ticket Email Subject:Premium
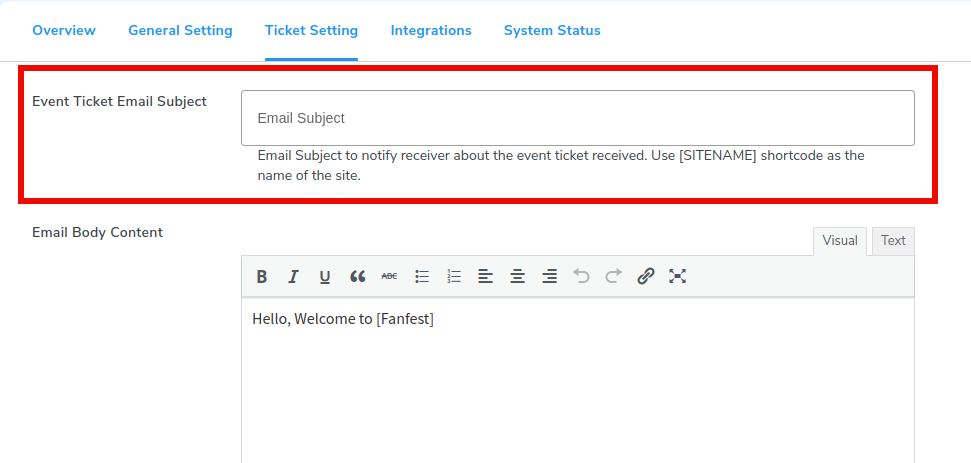
Enter the subject of the email that is sent to your customers when they buy a ticket to the event. Use the [SITENAME] shortcode for the name of your site, [PRODUCTNAME] shortcode for the name of your event product.
b) Email Body Content:Premium
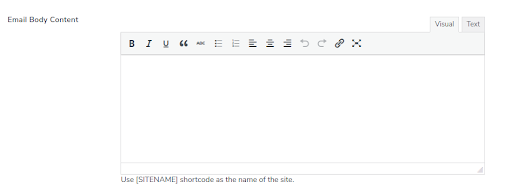
The text field beside Email Body Content is for the body of the mail sent to a customer who has brought the ticket to your event. Use the [SITENAME] shortcode for the name of your site.
c) Upload Default Logo:Premium
Upload a default image from the Media Library that will be displayed in the email body and the ticket pdf in the email attachment.
![]()
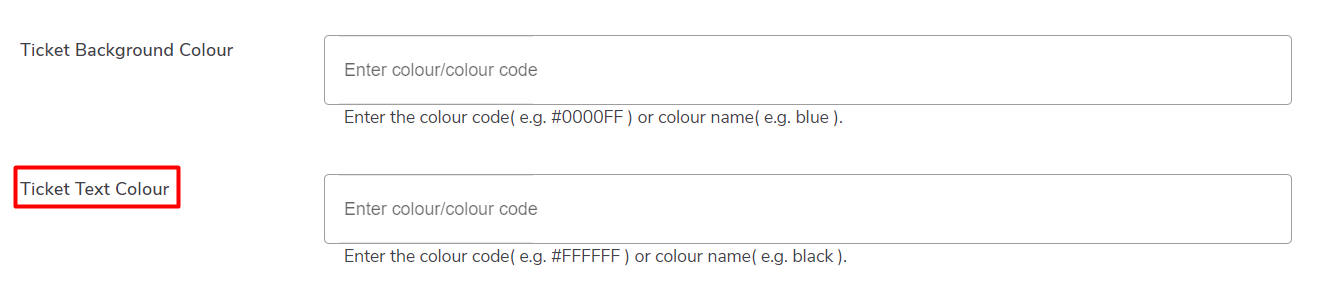
d) Ticket Background Color:Premium
The merchant can use the events calendar plugin, and can alter the background color of the ticket to give it a more interesting appearance.
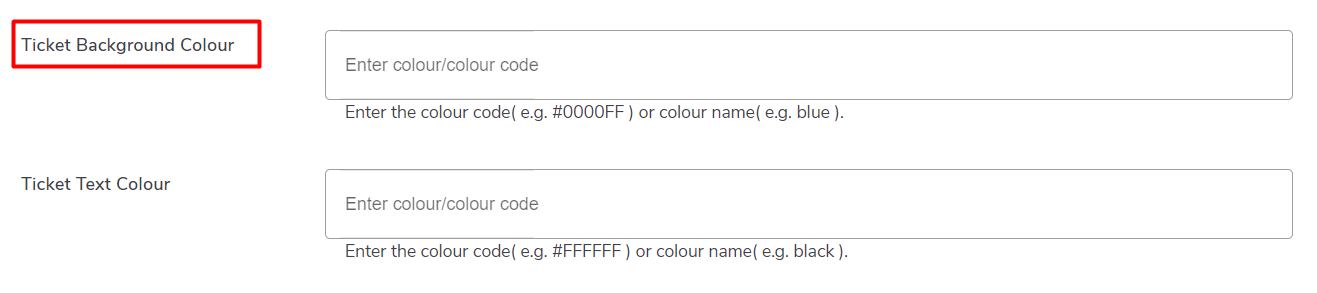
e) Ticket Text Color:Premium
The store owner can alter the font color on the ticket to give it a more vibrant and appealing appearance.
f) Enter Content To Send In SMS With Ticket:Premium
The merchant can enter the content of the SMS that will be sent to the customers after they purchase the ticket.
Placeholders: Use the following placeholders to show relevant information in your SMS –
- For adding the event’s start and end date and time use the placeholder {event-time}.
- To display the event location use the {venue}.
- For event name use {event-name}
- To fetch customer name
g) Placeholders:Premium
Use the following placeholders to show relevant information in your SMS –
For adding the event’s start and end date and time use the placeholder {event-time}.
To display the event location use the {venue}.
For event name use {event-name}
To fetch customer name {customer} placeholders respectively.
For ticket number use {ticket}.
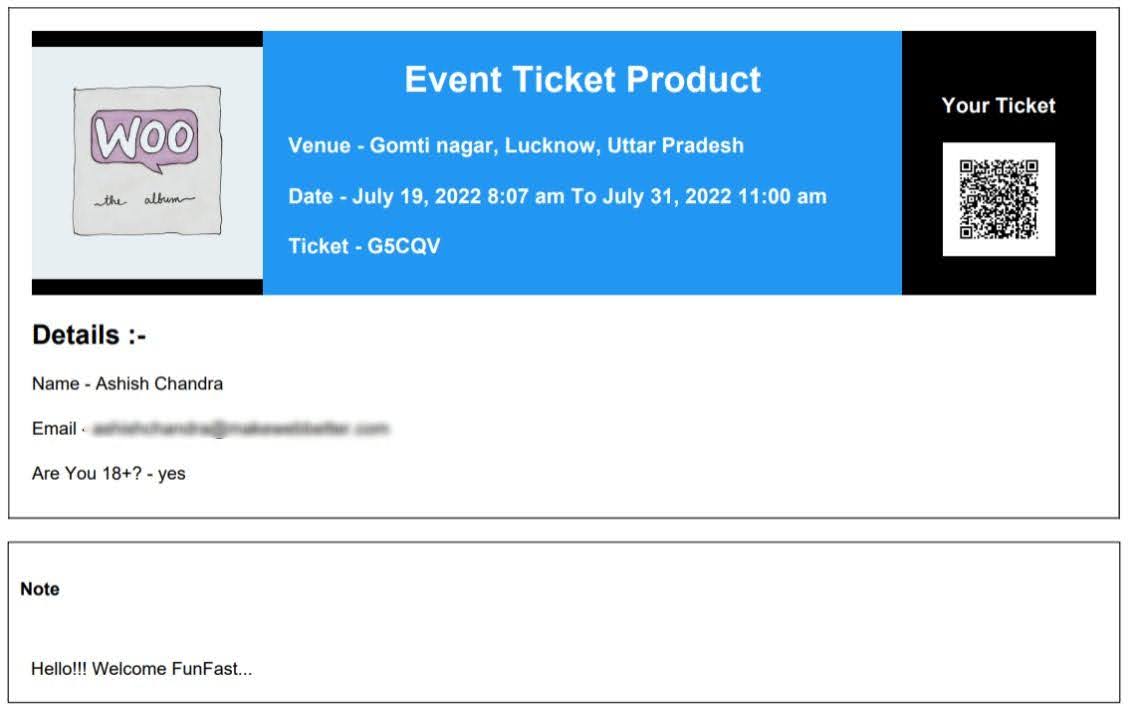
Note: Now clients can directly download the event tickets in PDF format from the “My Account” section of the product page under the “My Event” tab by clicking “View.”
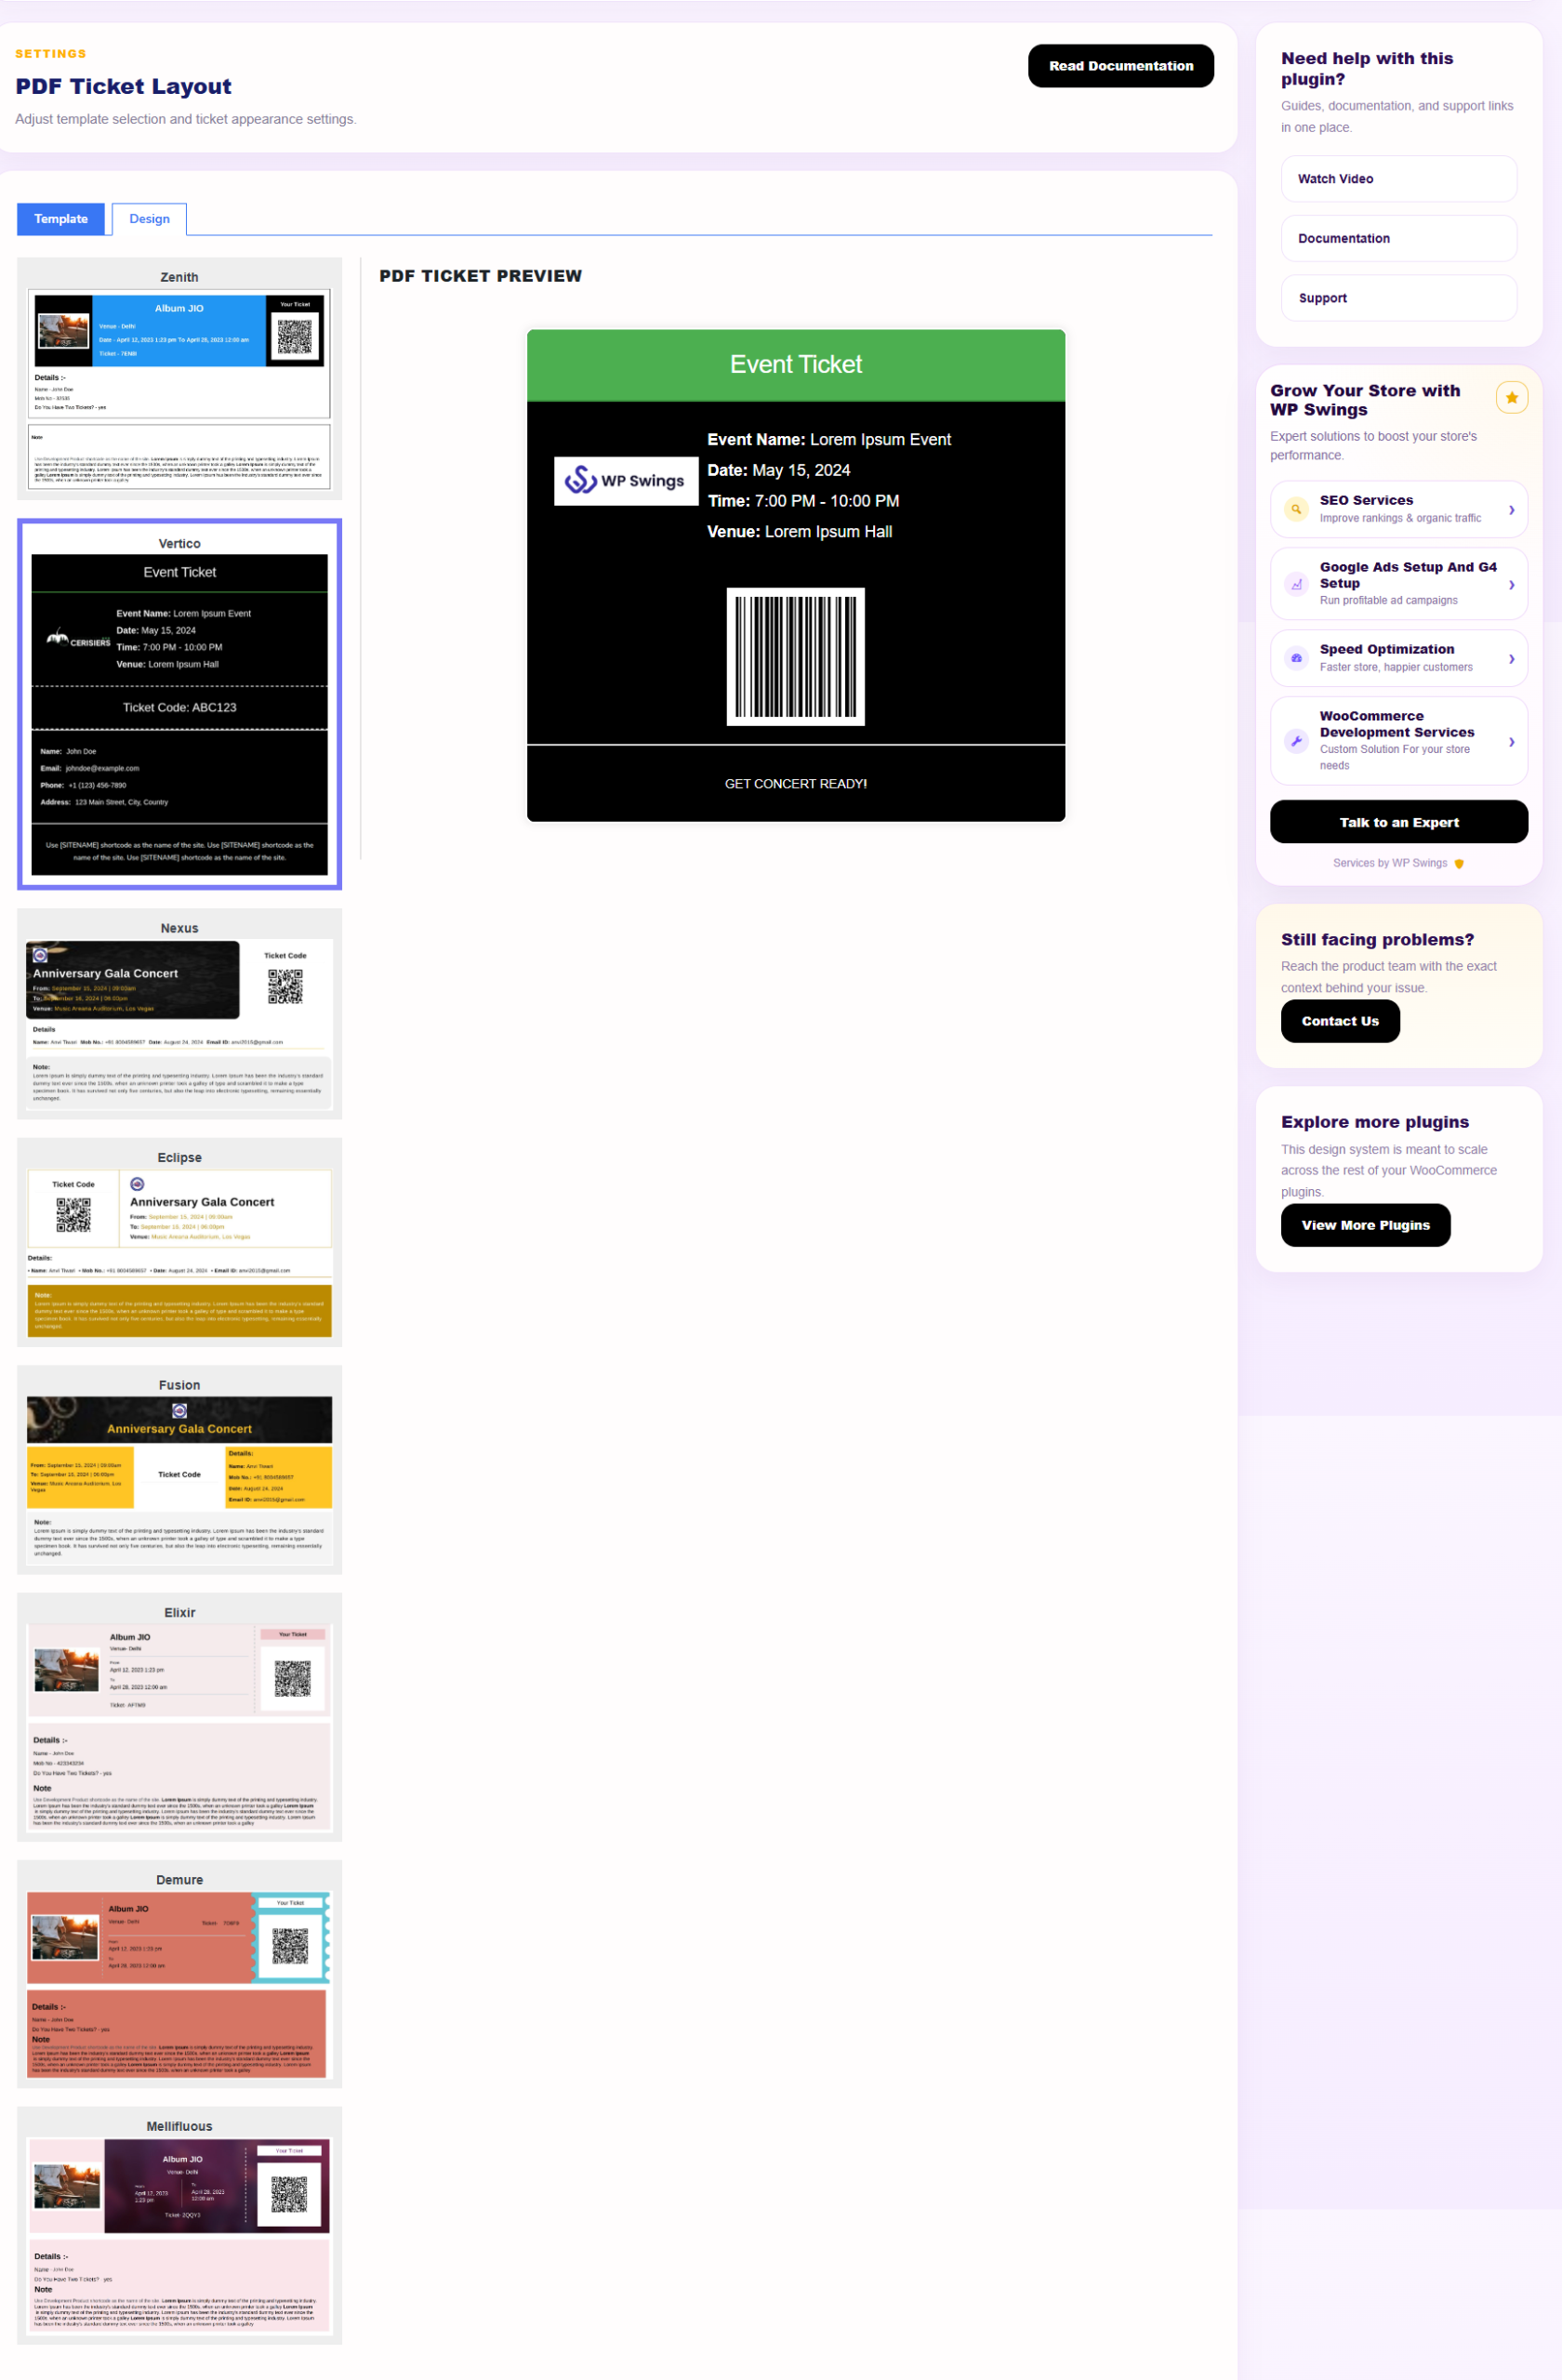
7.PDF Ticket Layout Setting
The events calendar plugin features an exciting option to choose from multiple layouts for your ticket PDFs. Not only this, admins can now fully customize the available layout options.
8.1 Go to the PDF Ticket Layout Setting tab:

8.2 Choose Your Desired Layout:
There is only one layout available in the free version.
More LayoutsPremium
Choose the layout tab and browse through the multiple layouts you can choose from according to your event preference.
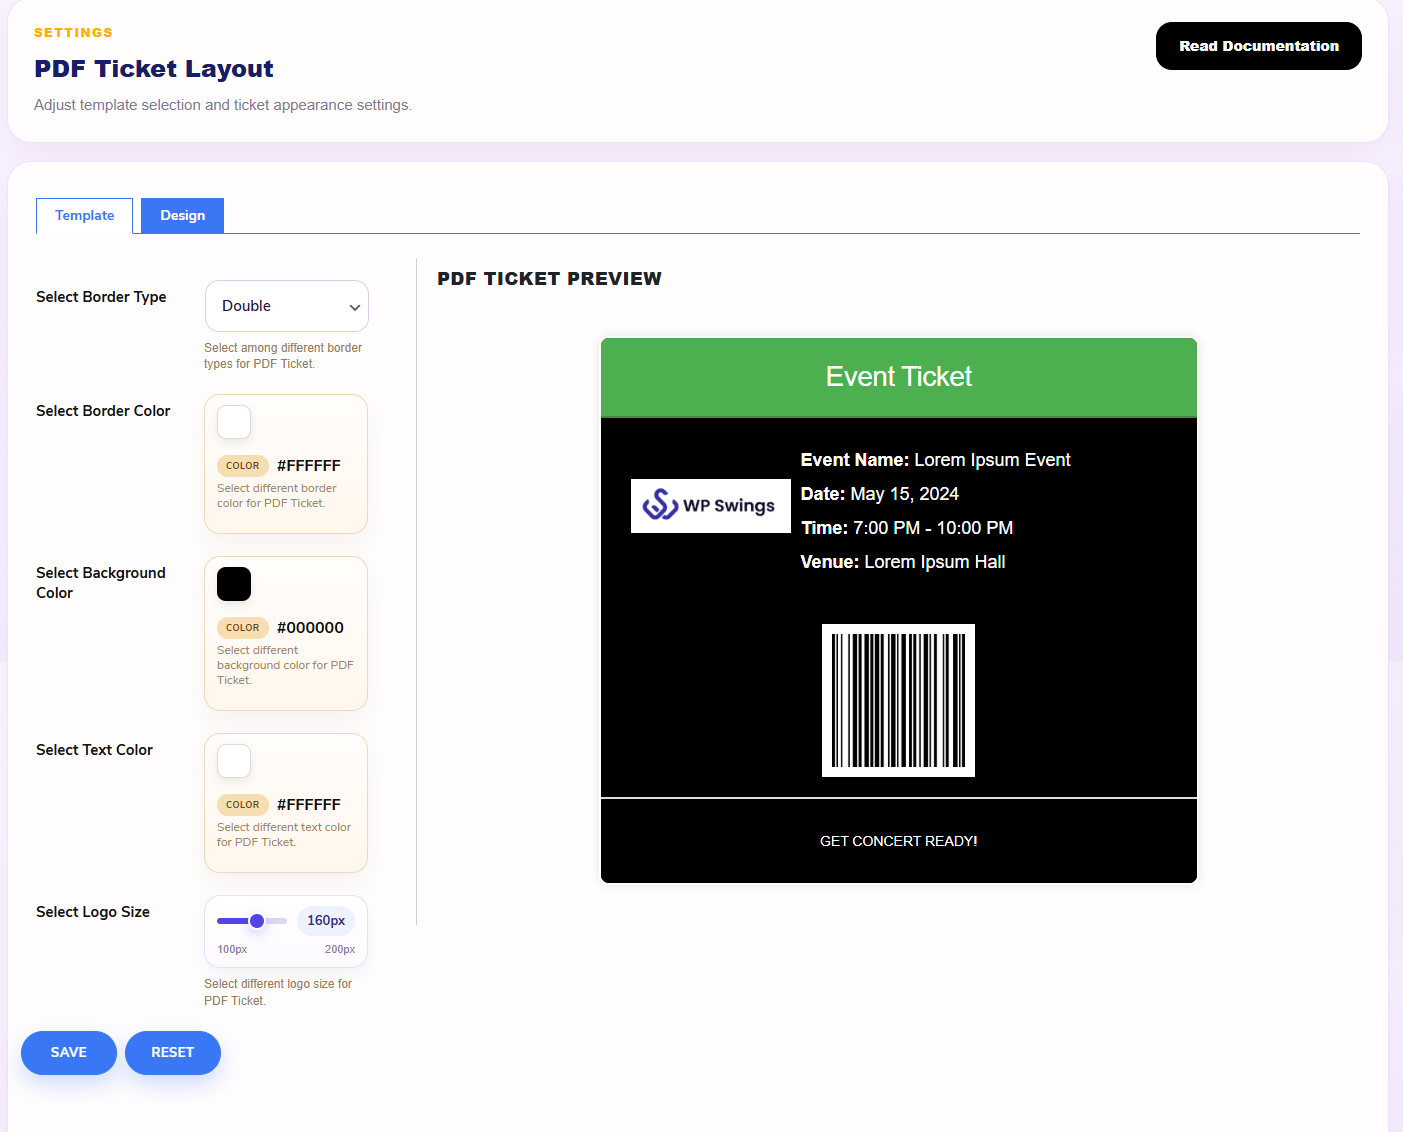
8.3 Customize the Layouts
The events calendar plugin lets the admin customize the layout as per his preference. The admin can the layout — the border type & color, Background color, Text color, logo size, and QR size.
8.Other Settings
Admins can use this tab to enable the “Subscribe Checkbox” on the order page.
This feature lets admins inform their customers about upcoming events by sending them email notifications.
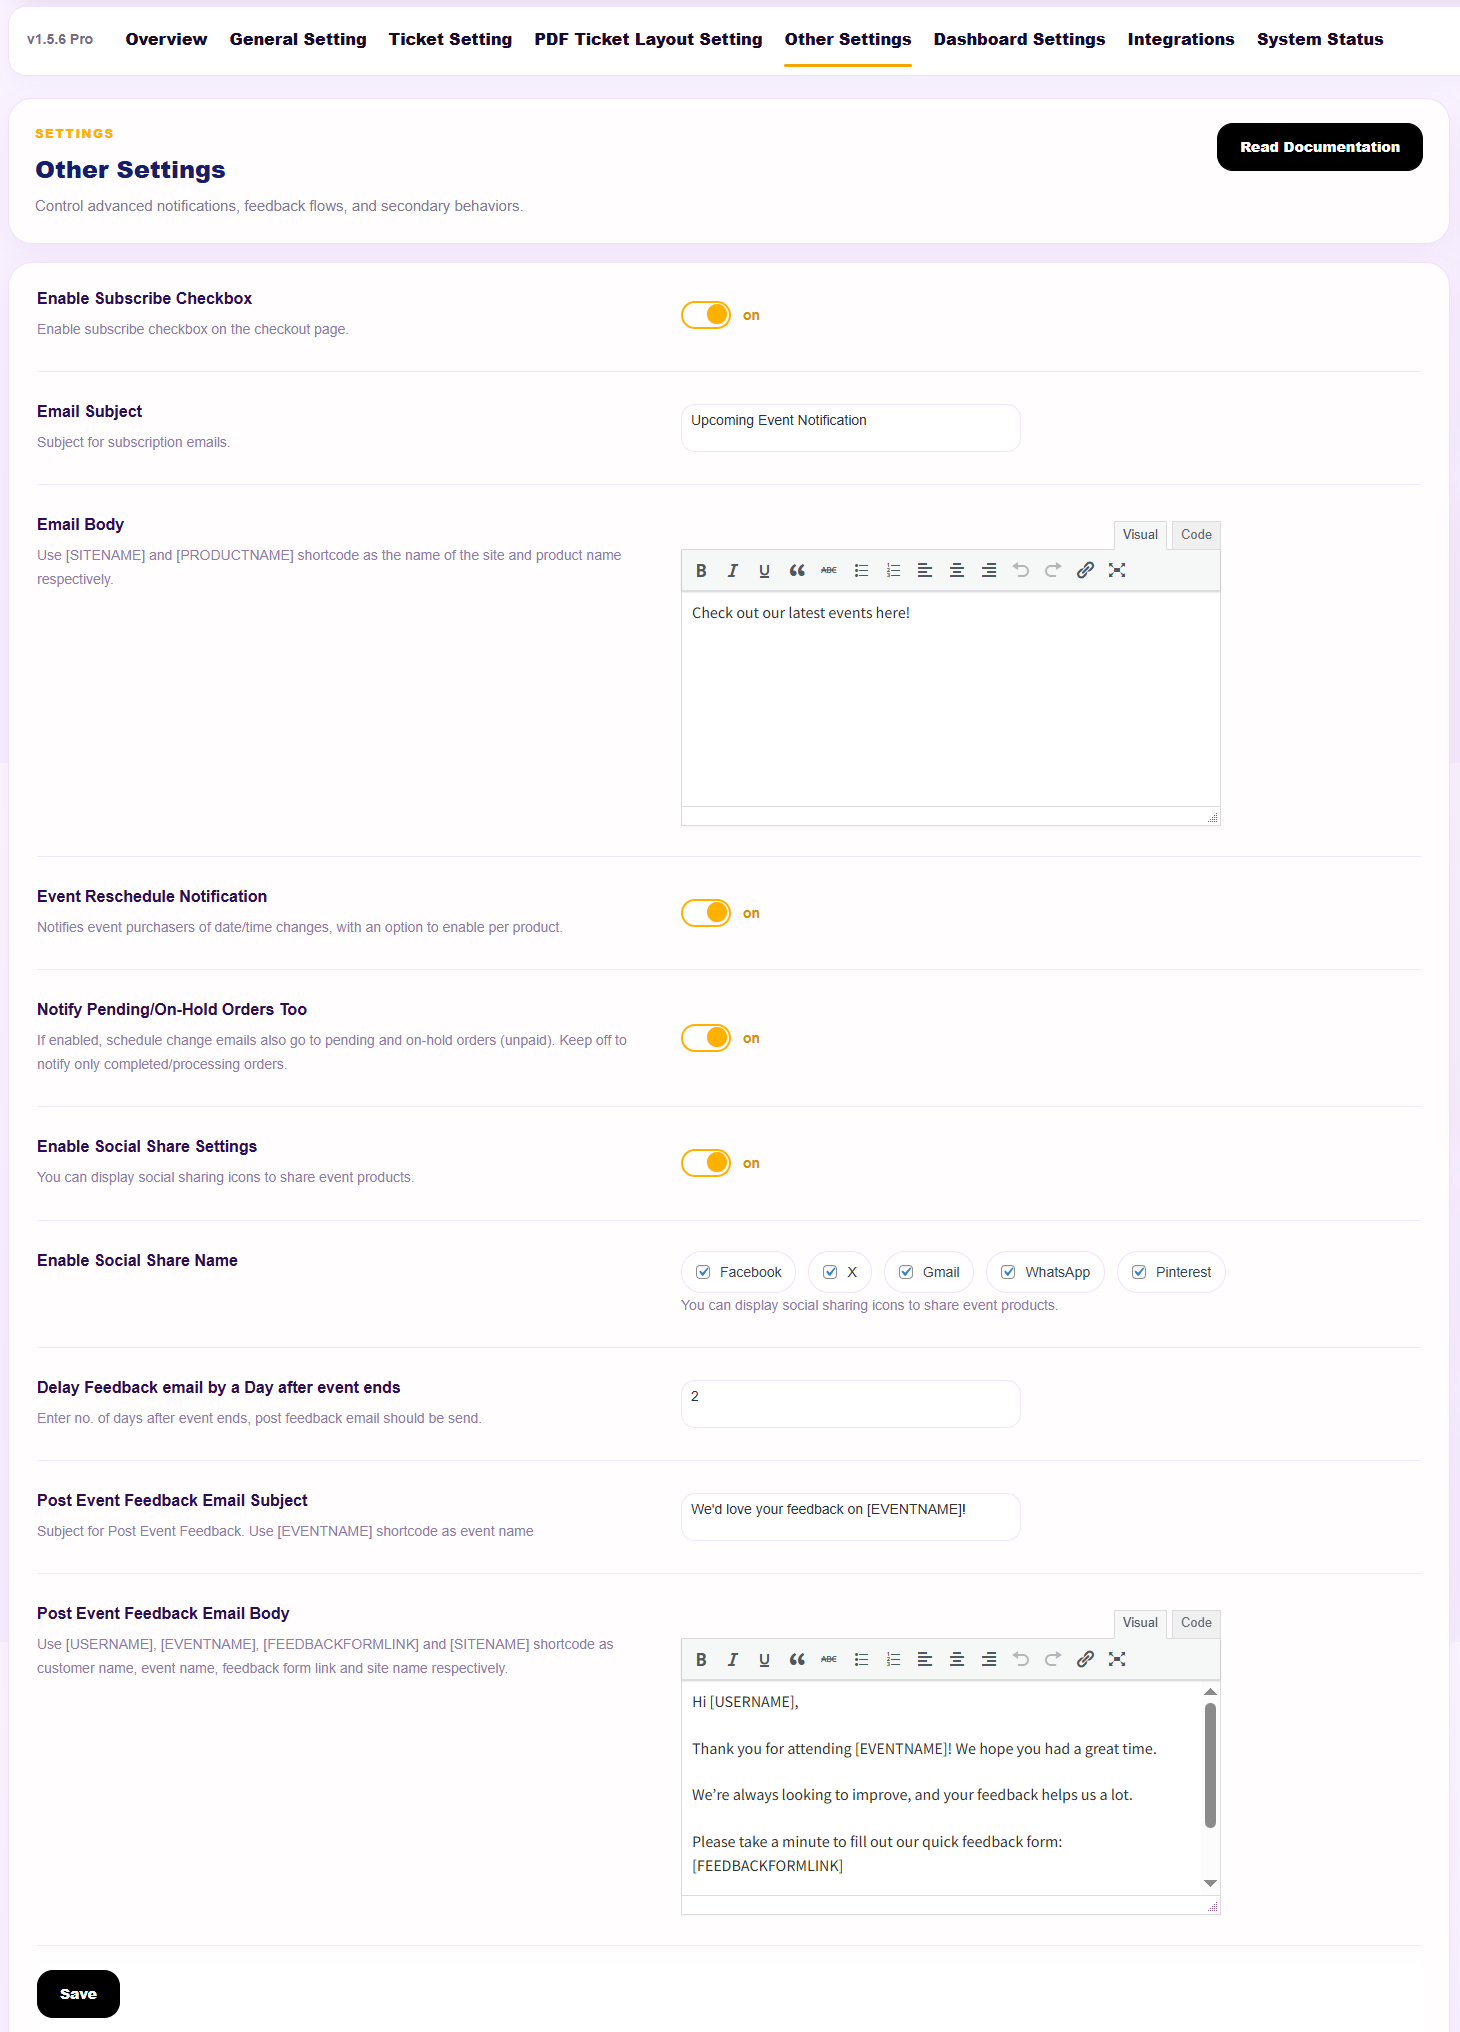
Email Subject: Utilize this setting to set an “Email Subject” that your customers will receive in their inbox. You can also use the default “Upcoming Event Notification” subject as well, or modify this as per your liking.
Email Body: This is where admins can get creative. Use this space to draft an interesting and engaging email body. Confused? You can also go with the default—“Check out our latest events here.” Admins can also use shortcodes like [SITENAME], and [PRODUCTNAME], just replacing the name of the site and product, respectively.
Wait there is more. Scroll down to Point 9 (Product Settings) < Sub Point 9.6. to enable this setting for each event product.
Frontend Representation of this functionality in action –
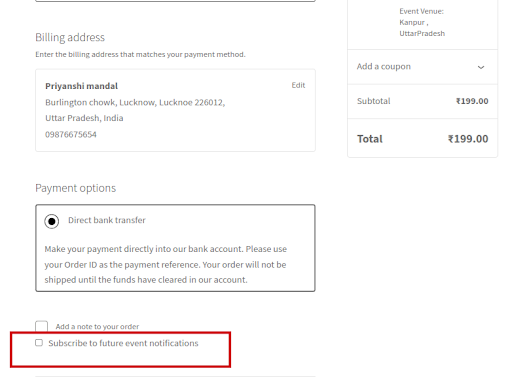
Enable Subscribe Checkbox: Admins can enable this setting, for this functionality to work seamlessly.
Email Subject: Utilise this setting to set an “Email Subject” that your customers will receive in their inbox. You can also use the default “Upcoming Event Notification” as well, or modify this as per your liking.
Email Body: This is where admins can get creative. Use this space to draft an email body that is interesting and engaging. Confused? You can also opt for the default: “Check out our latest events here!” Admins can also use shortcodes like [STARTDATE], [SITENAME], and [PRODUCTNAME], simply replacing the details as needed.
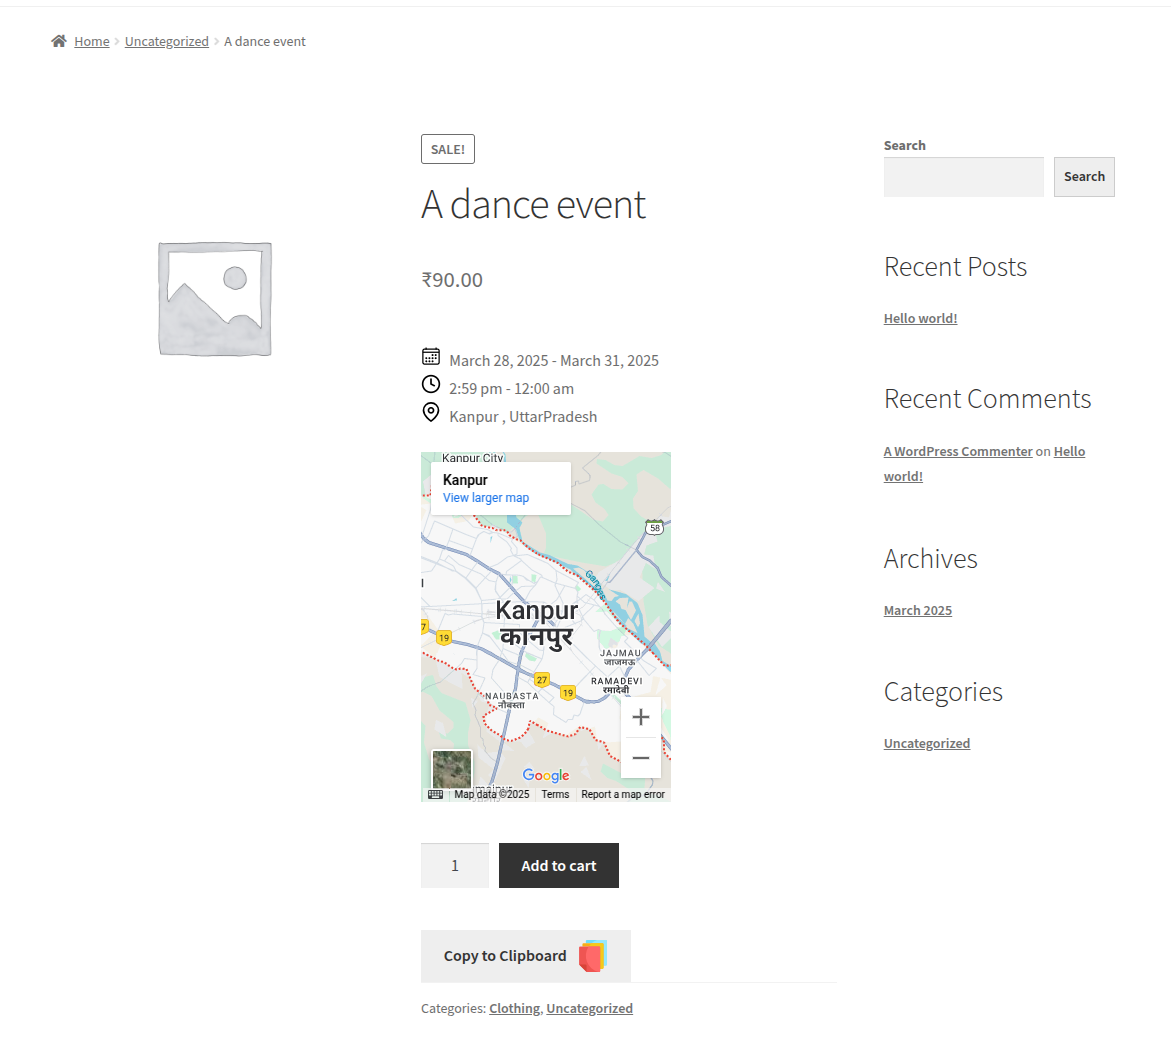
Copy To Clipboard: The admins can showcase the “share to clipboard” button, where customers can share the event products by sharing the link.
Frontend Representation –
Reminder Sent Before Event: The events calendar plugin, lets you select or enter manually the no. of days before you want to send the email reminder to your customers about the event to notify them that the event will start.
Reminder Email Subject: Utilize this setting to set an “Email Subject” that your customers will receive in their inbox. You can also use the default “Reminder for upcoming events” as well, or modify this as per your liking.
Reminder Email Body: This is where admins can get creative. Use this space to draft an email body that is interesting and engaging. Confused? You can also go with the default – “Hello, this is a short reminder for which starts from [STARTDATE]. Enjoy your day!” Admins can also use shortcodes like [STARTDATE], [SITENAME], and [PRODUCTNAME], just replace the details respectively.
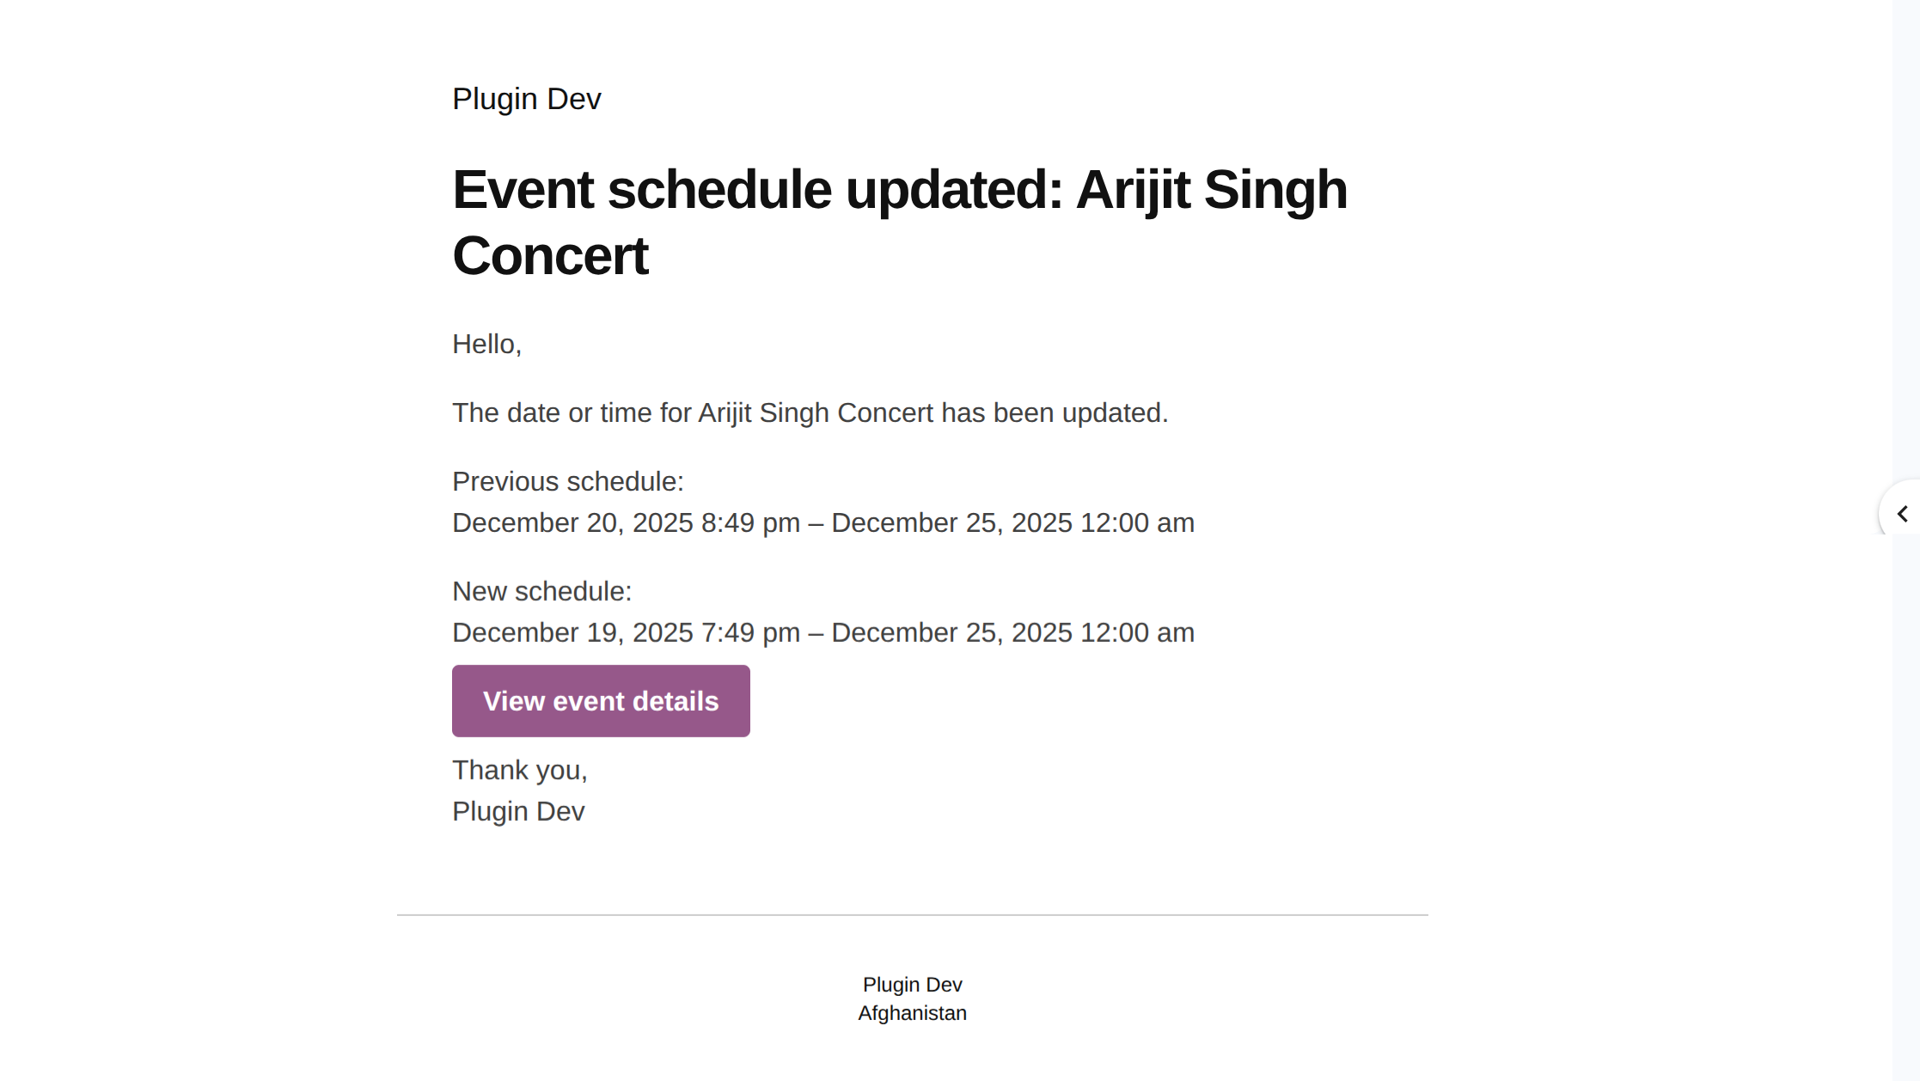
Event Reschedule Notification: Store owners can configure this setting to notify event purchasers if there is a date/time change for the event. They can also set this setting “per product”. Navigate to Point 9.
Frontend Representation of the mail customers will receive,
Notify Pending/On-Hold Orders Too: Store owners can turn this setting on if they want to notify customers even before payment is completed or to keep it off if they want notifications to go only to customers with paid or fulfilled orders.
Enable Social Share Settings: The admins can enable this setting to allow their customers to share the event products on social media platforms.
Enable Social Share Name: Select the social media platforms, that you want to list on your website i.e. Facebook, Twitter, Gmail, Pinterest, and WhatsApp.
Frontend Representation Of This Feature –
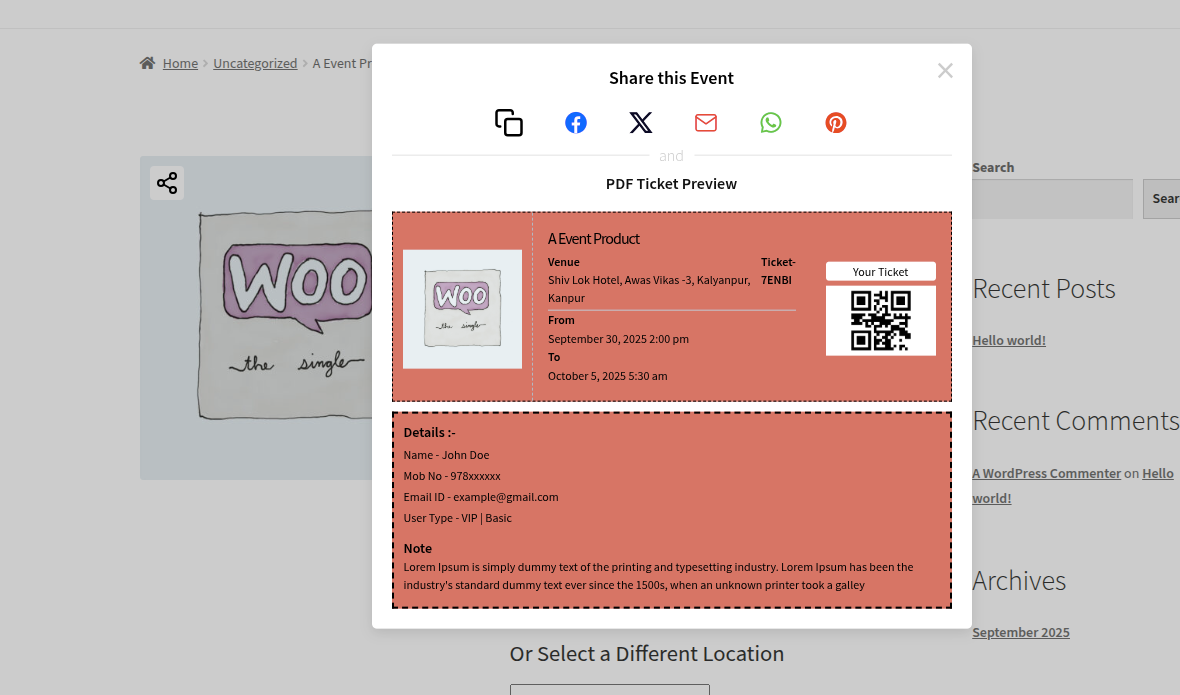
Click on “Save As” for this to work seamlessly.
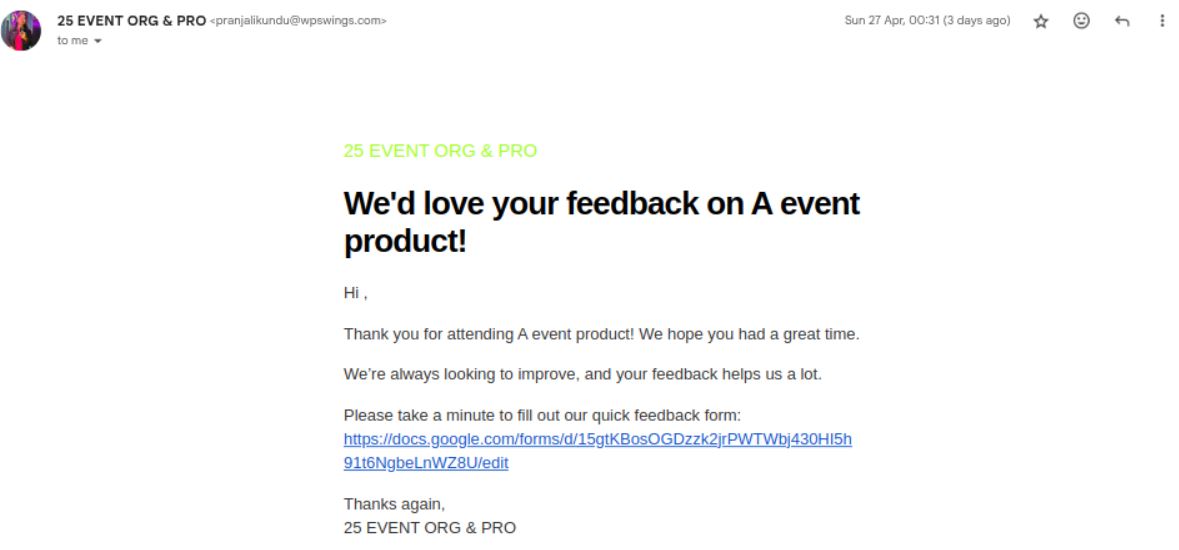
- Delay feedback email by a day after the event ends: Admins can enter the number of days after which the post-event feedback.
- Post-event feedback email subject: Please specify the subject of the feedback email that the customers will receive. Use the shortcode [EVENTNAME], to curate the name of the event for which you want the feedback.
- Post-event feedback email: This is where admins can get creative. Use this space to draft an email body that is interesting and engaging. Confused? You can also go with the default – “Hello [USERNAME]! Thank you for attending [EVENTNAME]. We hope you had a great time. We’re always looking to improve, and your feedback help us alot. Please take time to fill up our quick feedback form: [FEEDBACKFORMLINK].
Frontend Representation:
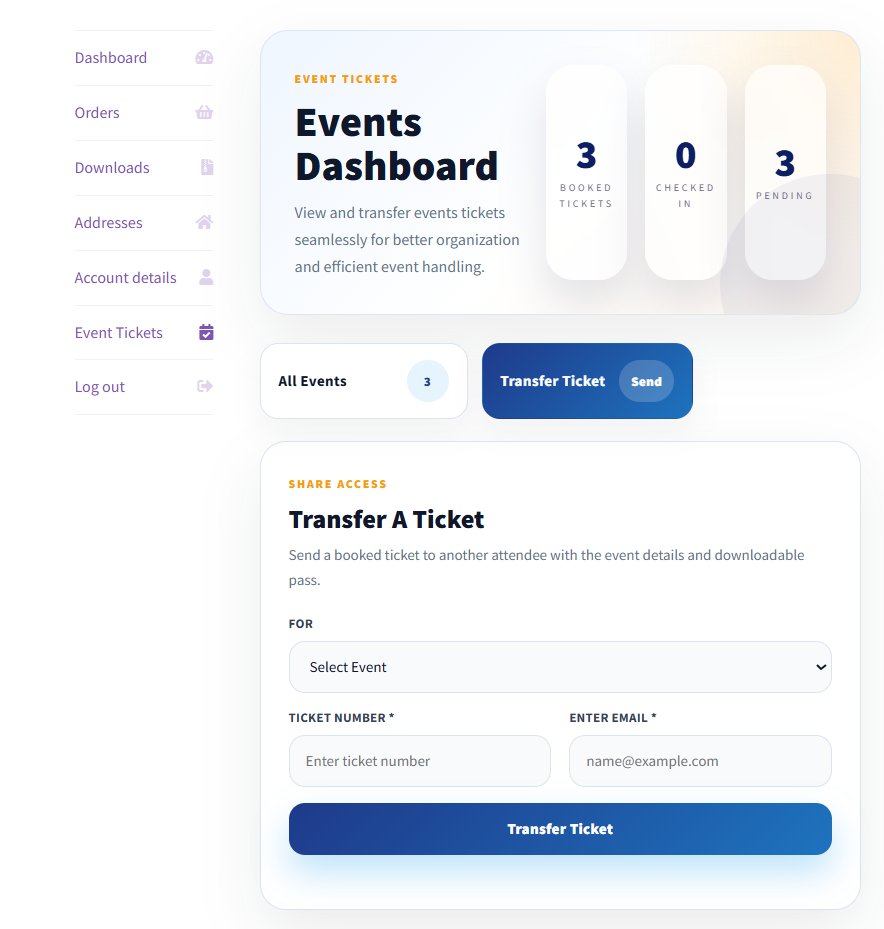
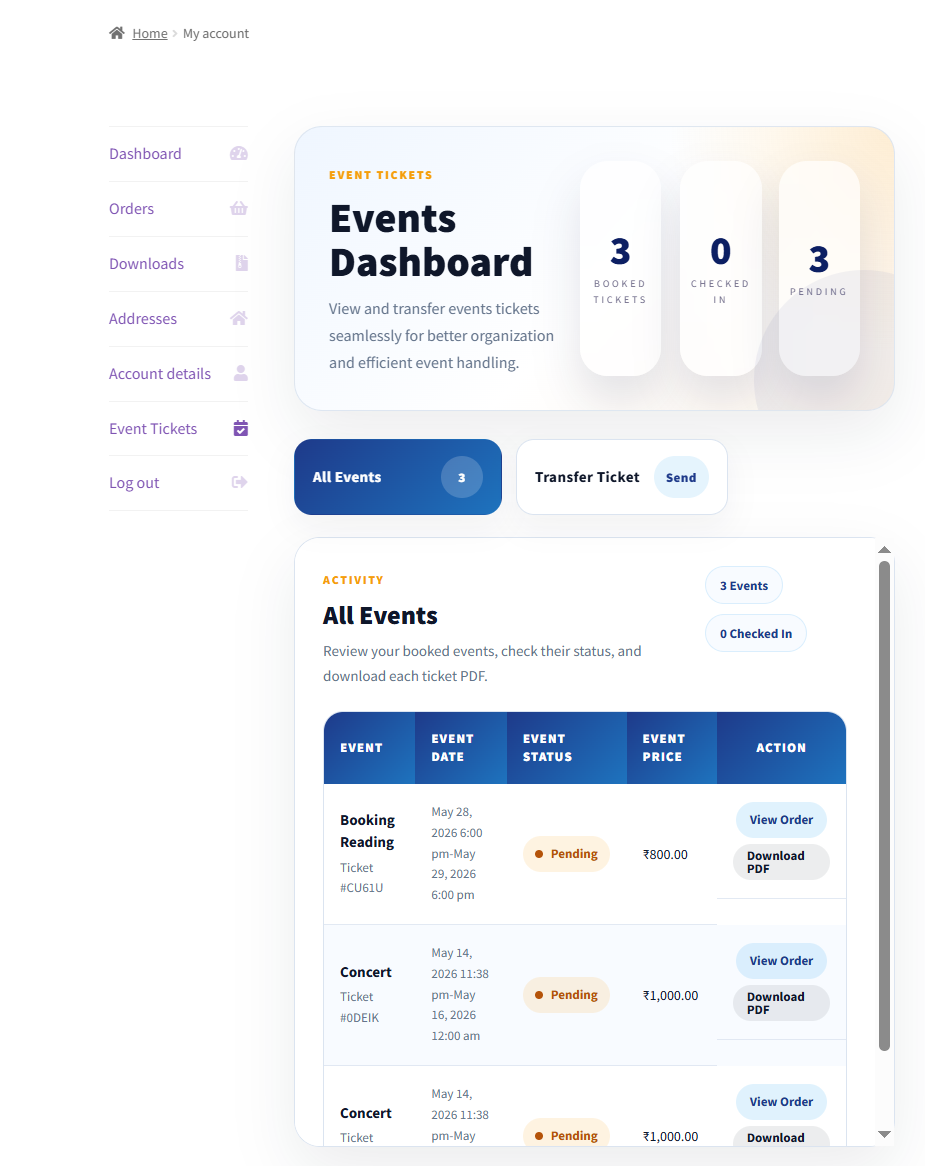
9.Dashboard Settings
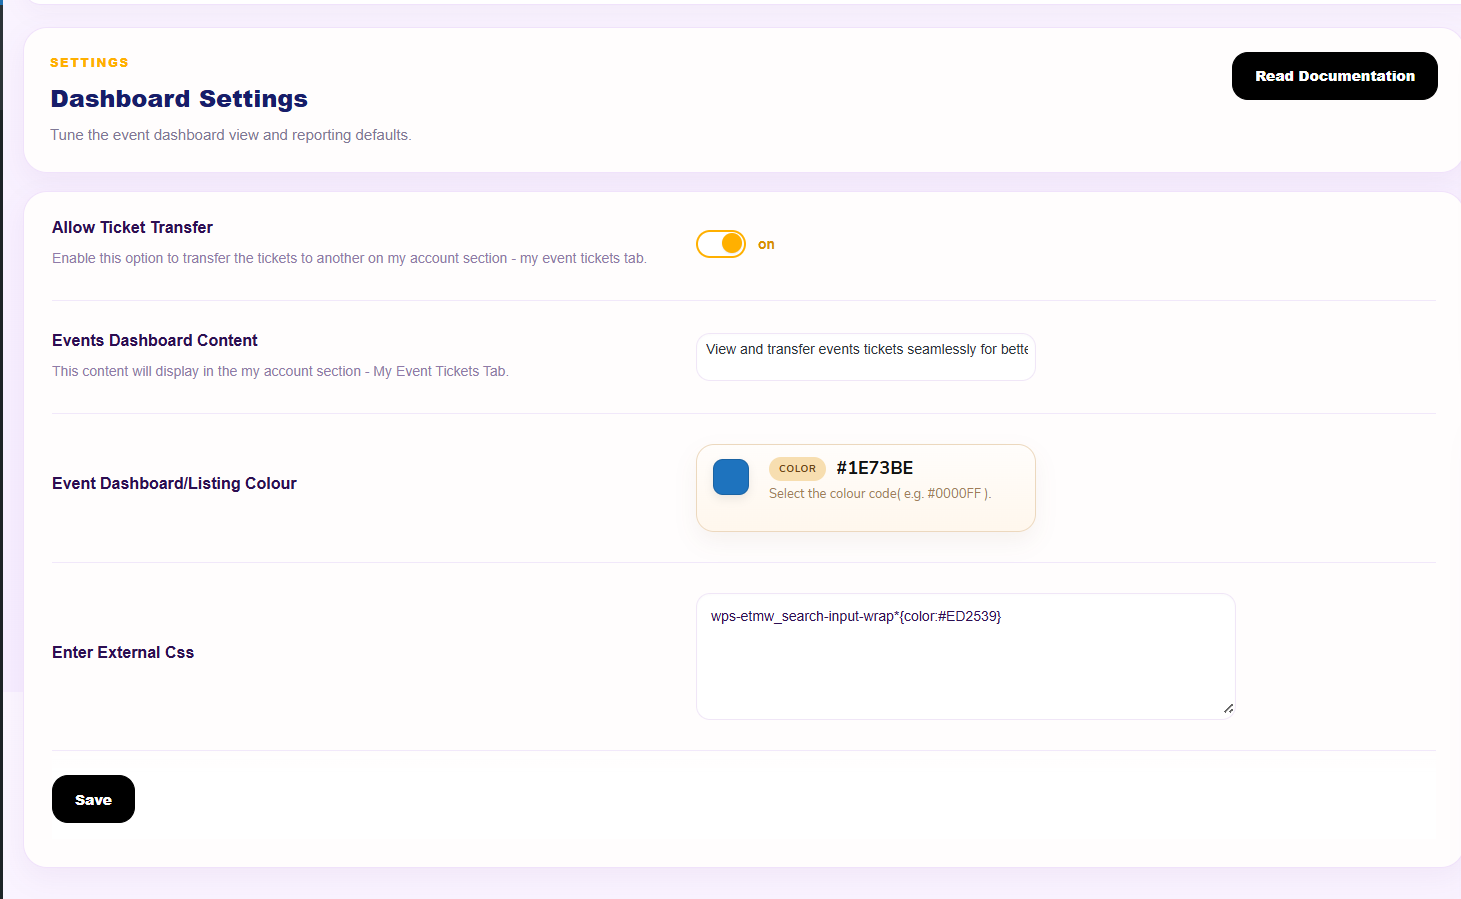
Allow Ticket Transfer: Enable this feature if customers want to share their tickets. The customers can easily transfer the ticket by navigating to “My Account” > “Event Tickets”. Then transfer the tickets by mentioning the event name, the ticket number, and the email address of the person, whom you want to transfer the ticket.
Frontend Representation –
Events Dashboard Content:
Admins can utilize this setting to modify or change the content that will be displayed on the frontend.
Event Dashboard Color / Listing Colour:
The color of the events dashboard can also be changed as per the requirements of your event hosting platform. The admin can also change the color for the event listing page to match the color of the event dashboard. This will help you maintain the uniformity across your online event store.
Frontend Representation-
Enter External CSS:
The admin can utilize this space to add an external CSS to meet the requirements of their business. This allows store owners the ability to customize the appearance of event tickets, event pages, and templates without editing the plugin files or using inline styles.
For example, we have changed the button text color to blue here.

10.Integrations
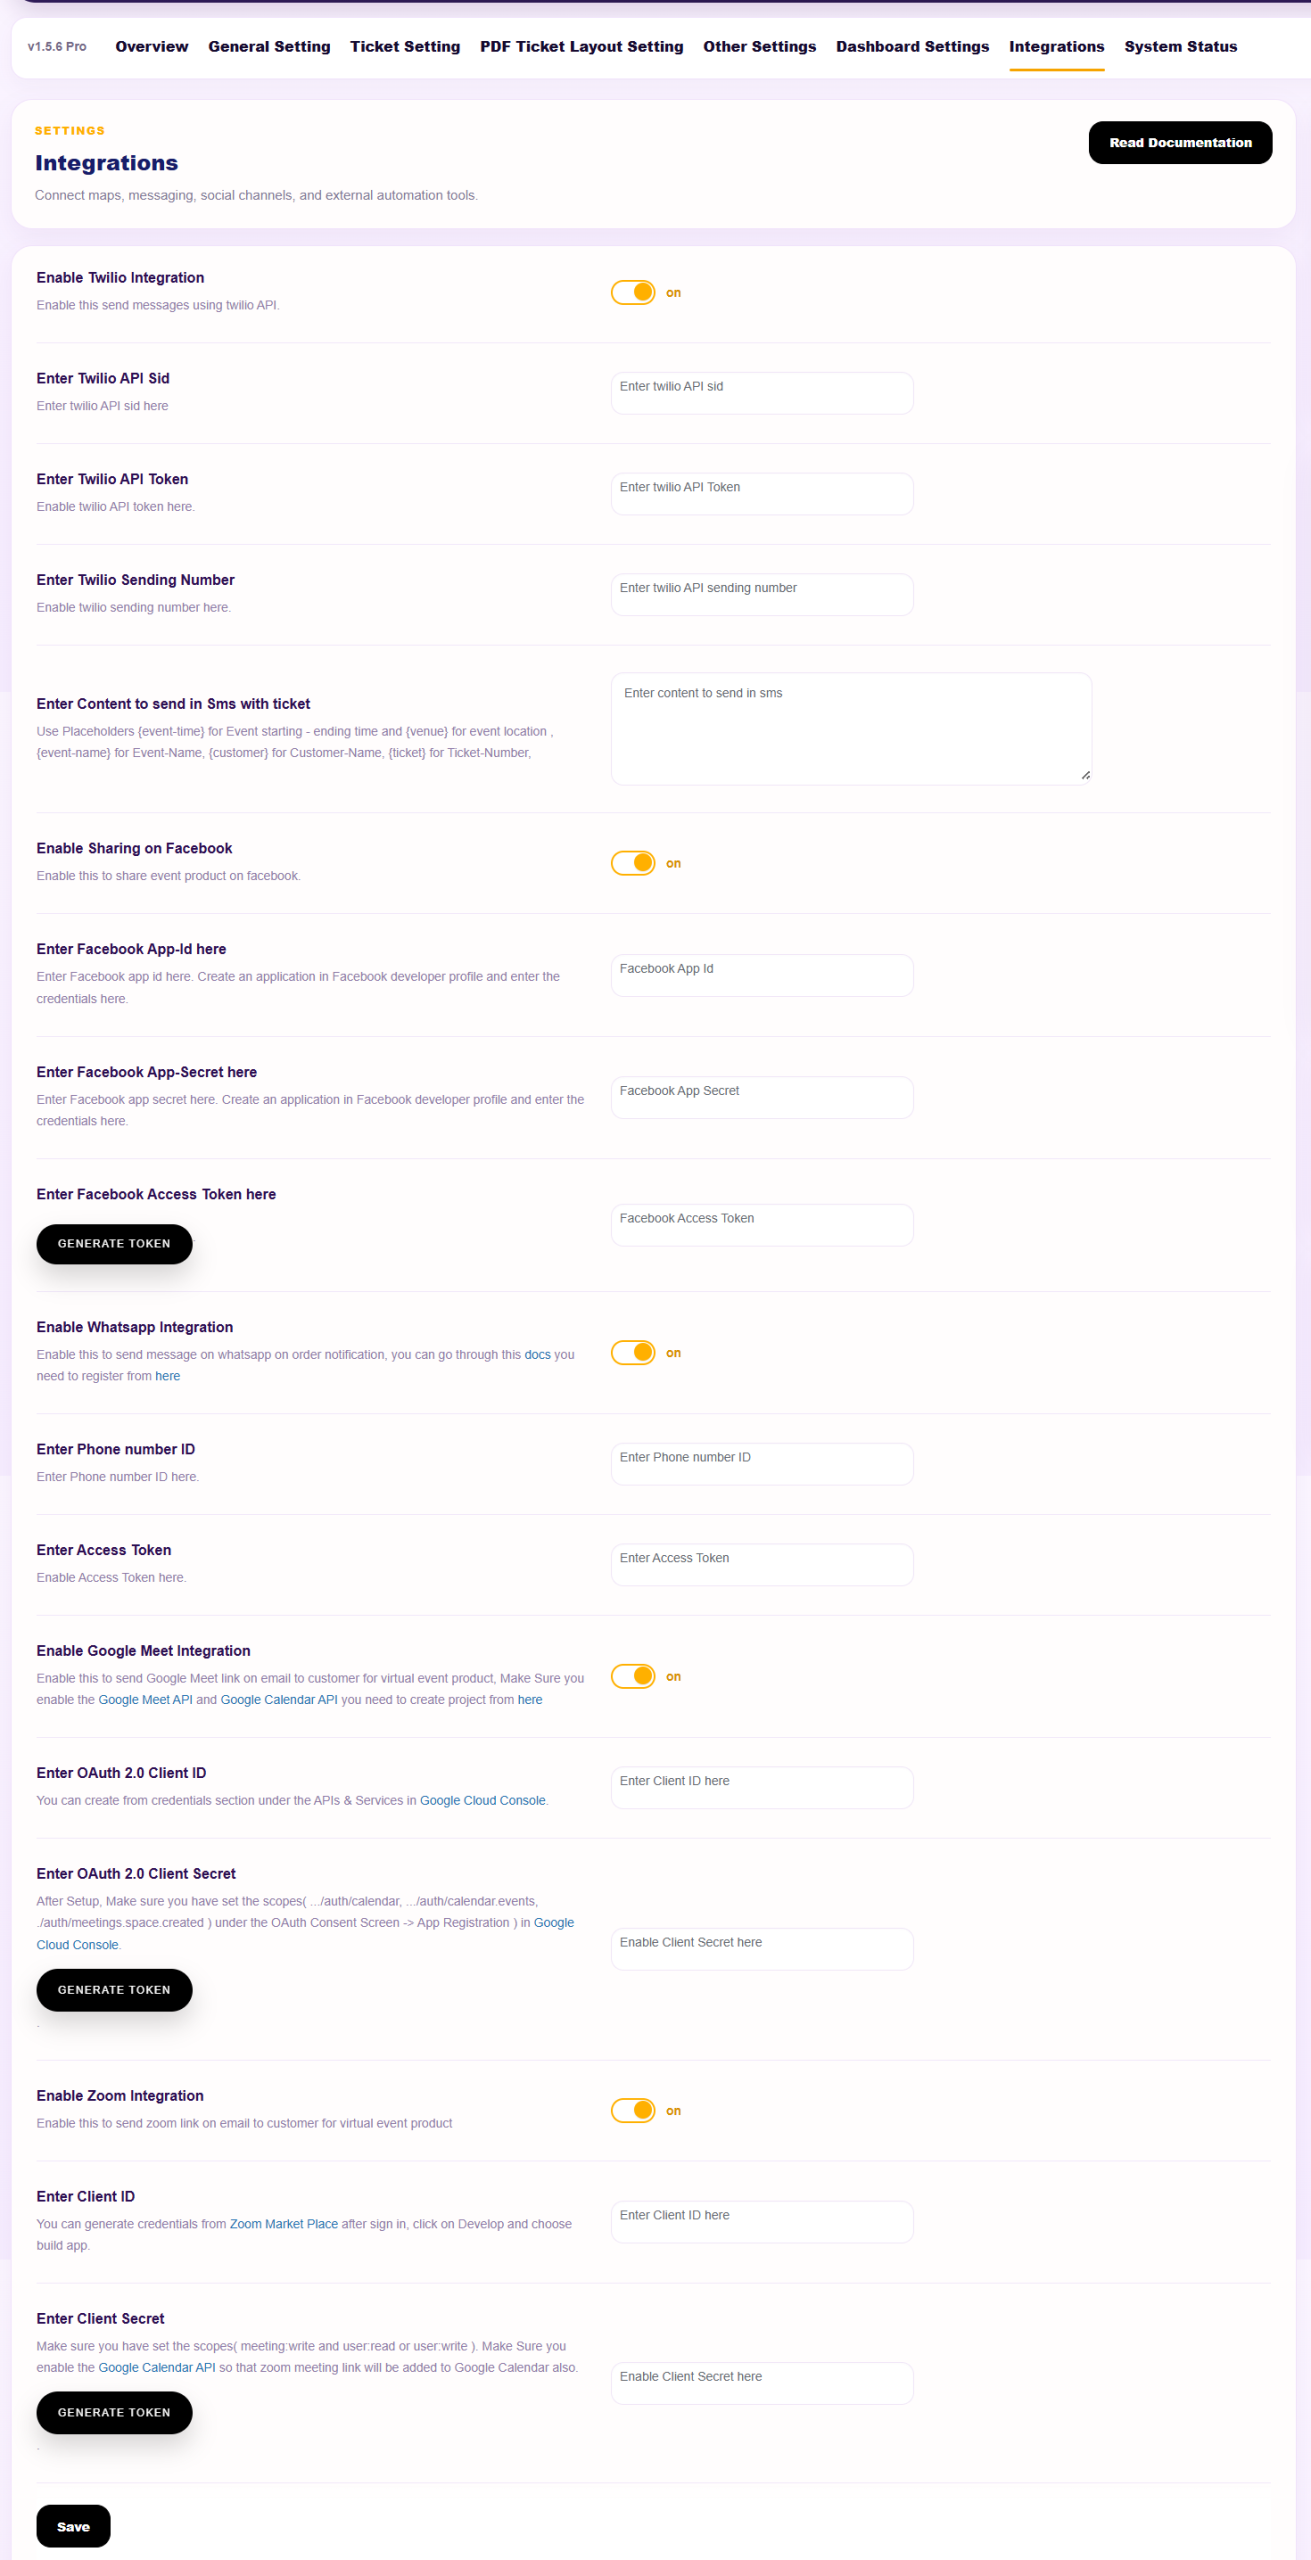
To enhance the functionality of our events calendar plugin we’ve integrated it with some esteemed services. You can configure it from the Integrations tab of the plugin. These are options you’ll find under the tab:
7.1 Google API KeyPremium
For enabling the Google maps on the product page:
- Generate an API key. (Check out this documentation on Google Maps API key.
- Now enter the generated API key in the text box beside the Google API Key option.
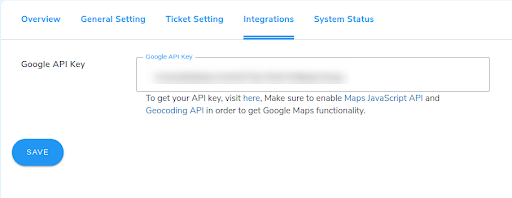
Note: Make sure you’ve enabled the Maps JavaScript API and Geocoding API.
7.2 Twilio IntegrationPremium
Event Tickets Manager For WooCommerce Pro is Twilio allows the event hosts to send SMS alerts to their attendees.
Follow these steps for implementing the Twilio services:
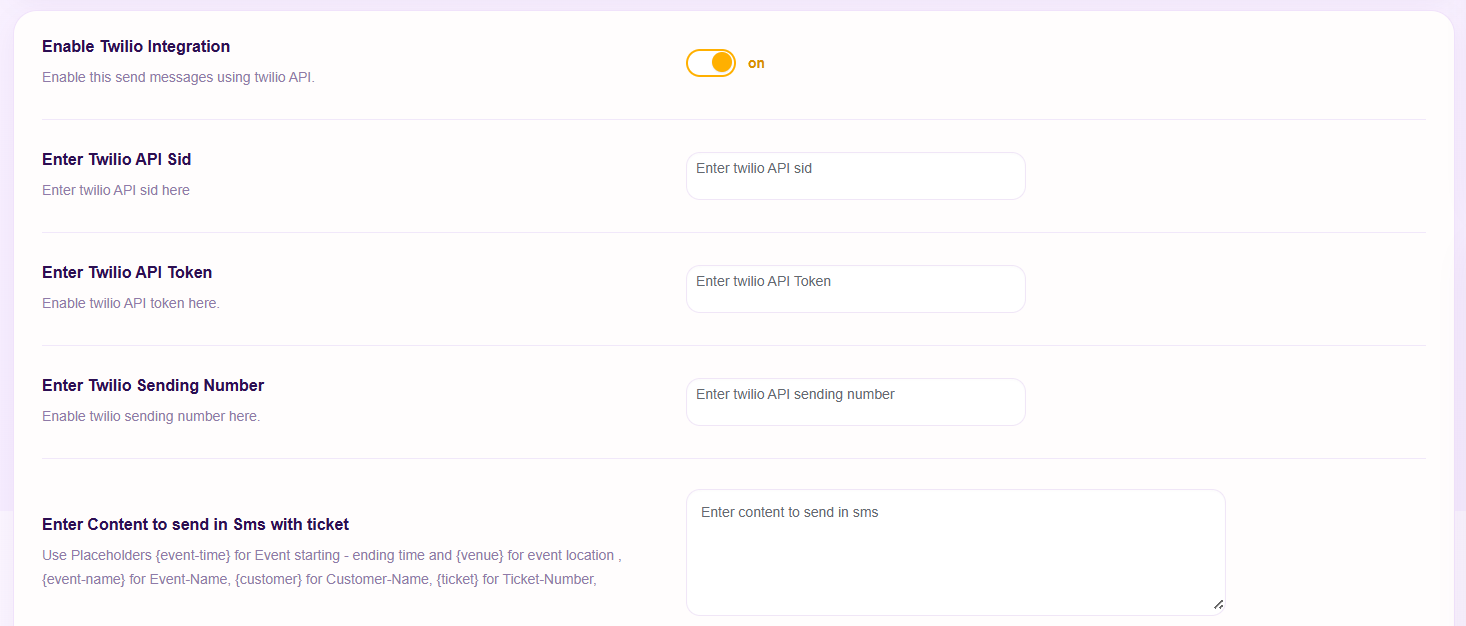
a) Enable Twilio Integration: Press the toggle switch next to this option to enable the Twilio Integration.
b) Enter Twilio API SID: Enter the API SID in the text field next to the Enter Twilio API SID option.
c) Enter Twilio API Token: Next, enter the Twilio API Token next to this option.
d) Enter Twilio Sending Number: Enter the phone number from which you want to message your customers.
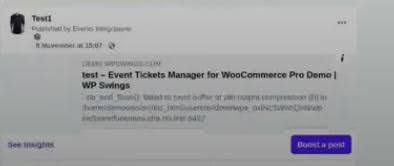
7.3 Sharing On FacebookPremium
Event Tickets Manager For WooCommerce Pro came up with the Facebook Sharing of Event feature where you can share your events on Facebook to get traffic.
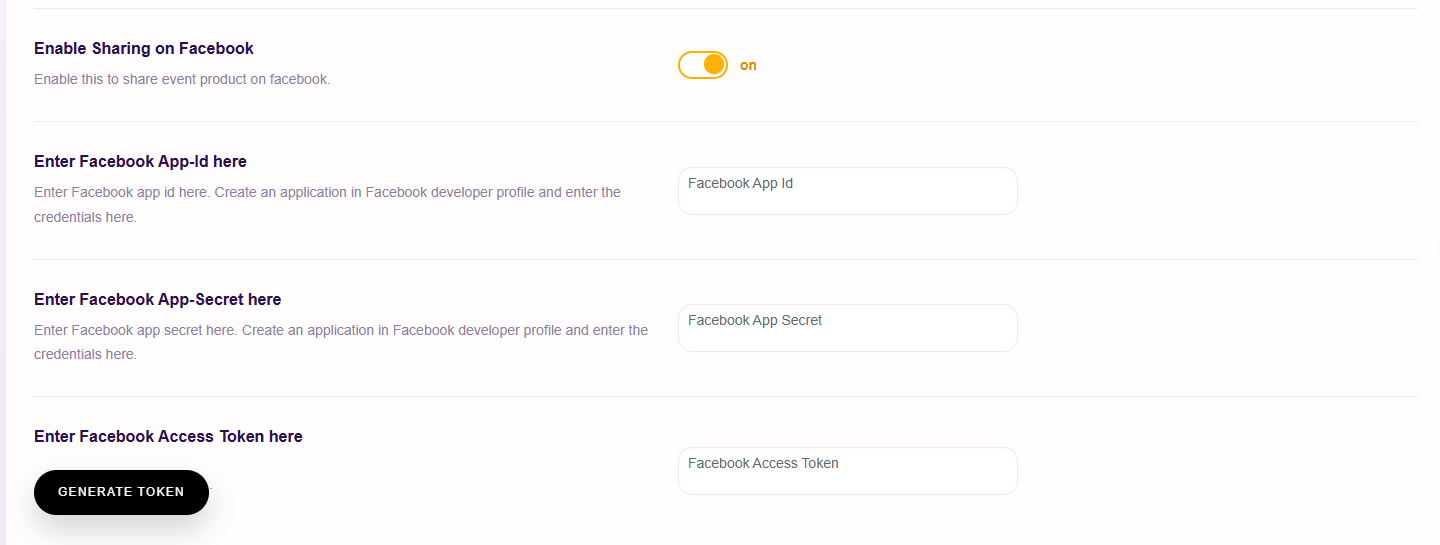
a) Enable Sharing on Facebook: Press the toggle switch next to this option to enable Sharing on Facebook.
b) Enter Facebook APP ID Here: Enter the Facebook App ID in the text field and then Create an application in the Facebook developer profile.
c) Enter Facebook APP Secret Here: Enter Facebook App Secret here. Create an application in your Facebook developer profile and enter the credentials here.
d) Enter Facebook Access Token Here: After successfully creating the APP and entering the APP ID and APP Secret, the admin will click on the “Generate Token” button, present in the backend settings.

After clicking on the button, he will be redirected to Facebook’s Developer Page. Before generating the token, it is important to ensure that the right “Meta App” is selected and the User is selected in the next option, from the given drop-down options.
Next comes selecting the permissions, the following are the permissions that you have to select in order for this integration to work seamlessly with our WooCommerce events plugin and other integrations as well – pages_show_list, pages_messaging, whatsapp_business_management
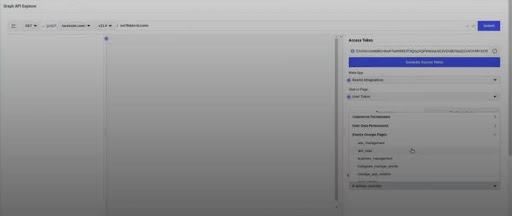
Pages_read_engagement, pages_manage_posts, whatsapp_business_messaging. After selecting the mentioned permissions from the drop-down, click on the “generate token” button to reconnect your Facebook account with the selected permissions.
Now, simply copy the generated token and paste it into the space provided in the backend settings.
NOTE: Whenever the administrator has added or removed any permissions, he will generate the token again to reconnect the account with those permissions.
After successfully following all the steps, you have now integrated Facebook sharing into your website. After successfully integrating Facebook sharing into your website, please refer to Point- 8 (Product Settings) and scroll down to Point – 8.6, to get an in-depth understanding of the steps that follow after the integration.
7.4 WhatsApp IntegrationPremium
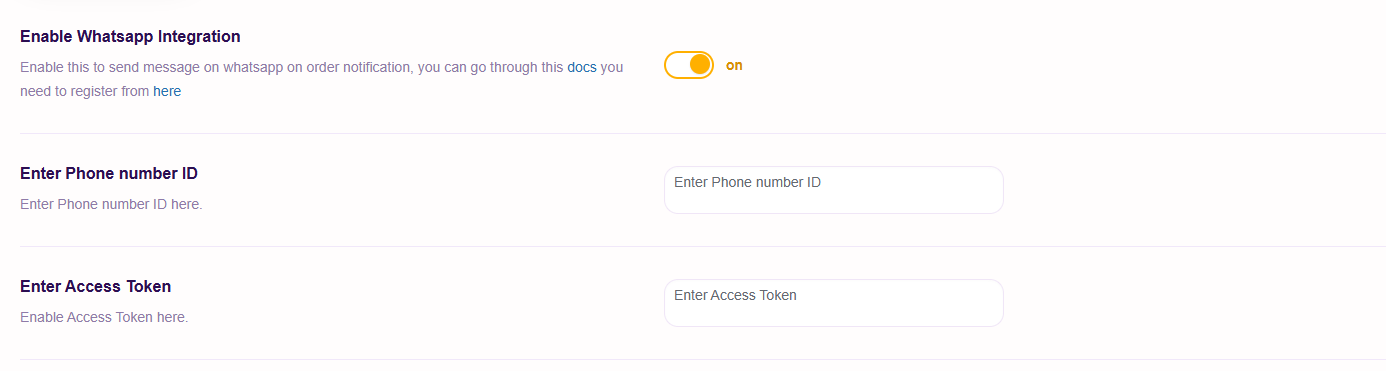
- Enable Whatsapp Integration: Marketers can enable this setting, to utilize the functionality of this integration.
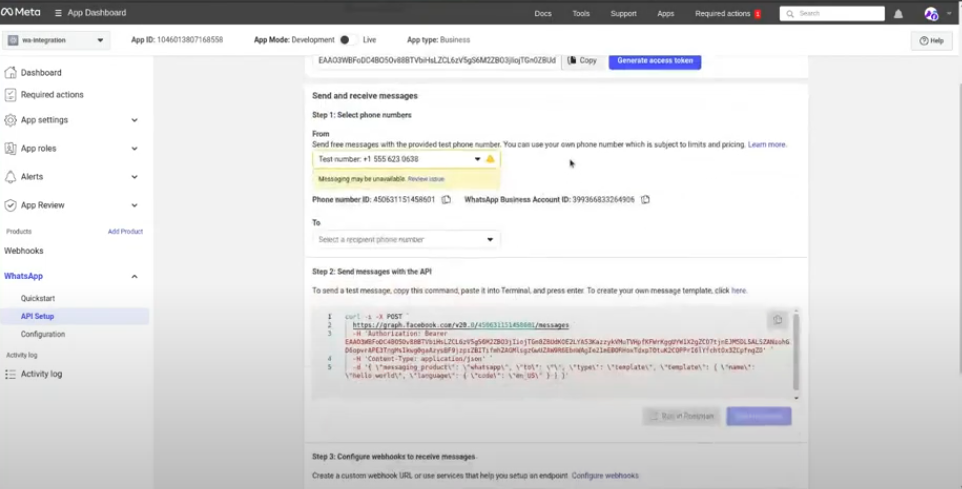
- Enter Phone Number ID: Admins can click on the provided link to understand the in-depth information about this integration. They will first have to register as a Meta Developer. There is a default number provided by Meta, but the admins can also use their business profile to send messages.
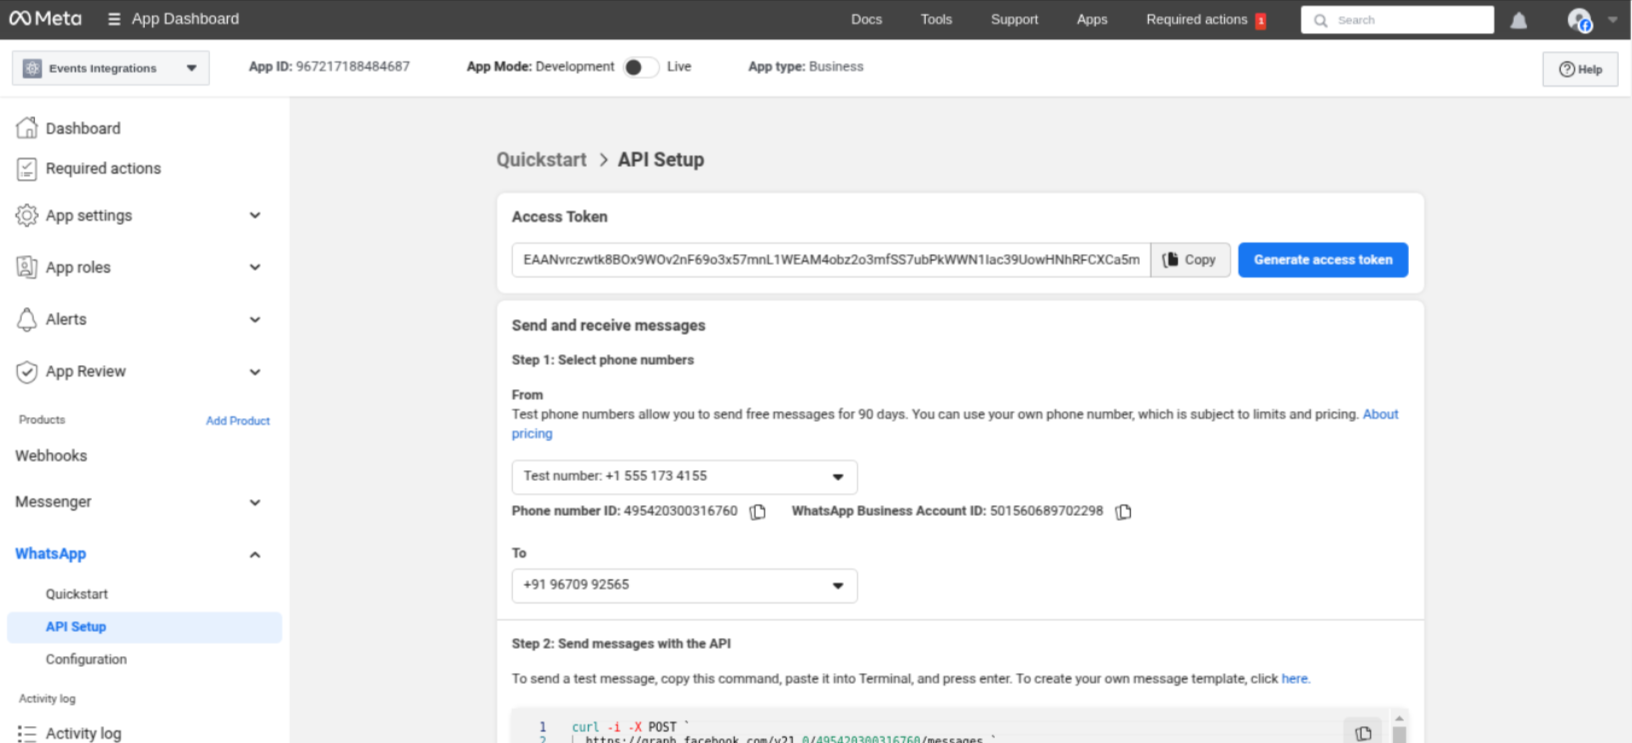
- Enter Access Token: Once, the admin registers himself as a Meta developer, they will be provided with the Access token, that he needs to enter to enjoy the benefits of this functionality.
 Now, click on “Save”. After successfully following all the steps, you have now integrated WhatsApp Integration into your website. The event order details can now be sent to your customer’s billing phone number.
Here is how the admin dashboard will look once you successfully register,
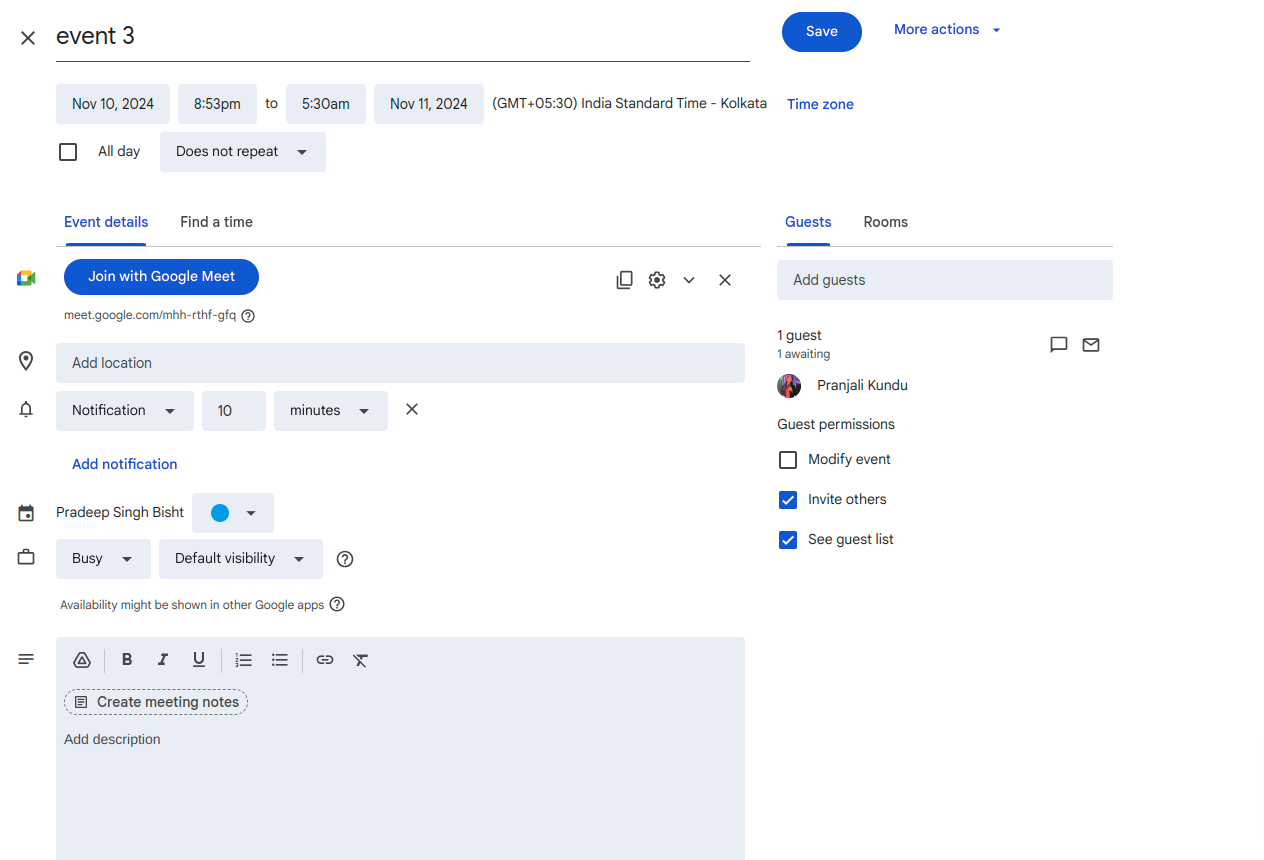
7.5 Google Meet Integration
The event tickets plugin is integrated with Google Meet for Event Products. This enables the admins to add the functionality of the customers/participants being able to attend online events through the G-Meet link.
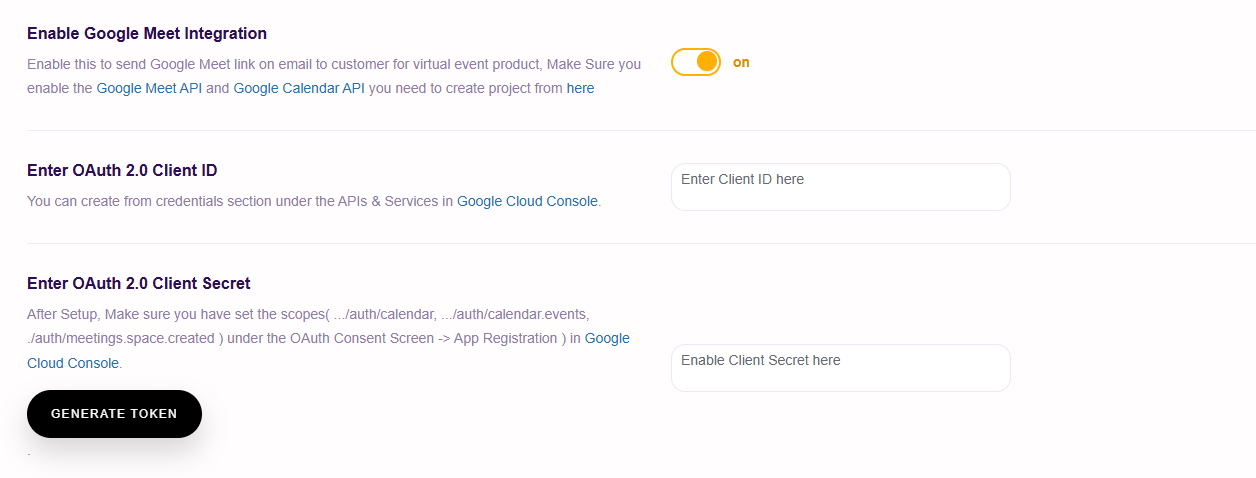
- Enable Google Meet Integration: It is important to enable this integration before proceeding with any other integration functionalities.Click on the mentioned link, which will take the admin to the “Google Console’s” page. Here, in the search bar type – “Google Meet Rest API” and enable the Google Meet Rest API. Utilize a similar process to enable the “Google Calendar API”. After doing so, admins will “create a project” by clicking on the link provided in the description of the settings.
- Enter OAuth 2.0 Client ID: After successfully creating a project, click on the link provided in the description of this setting. The admin will be redirected to the “APIs and Services” page.Frontend Demonstration Of the Page –
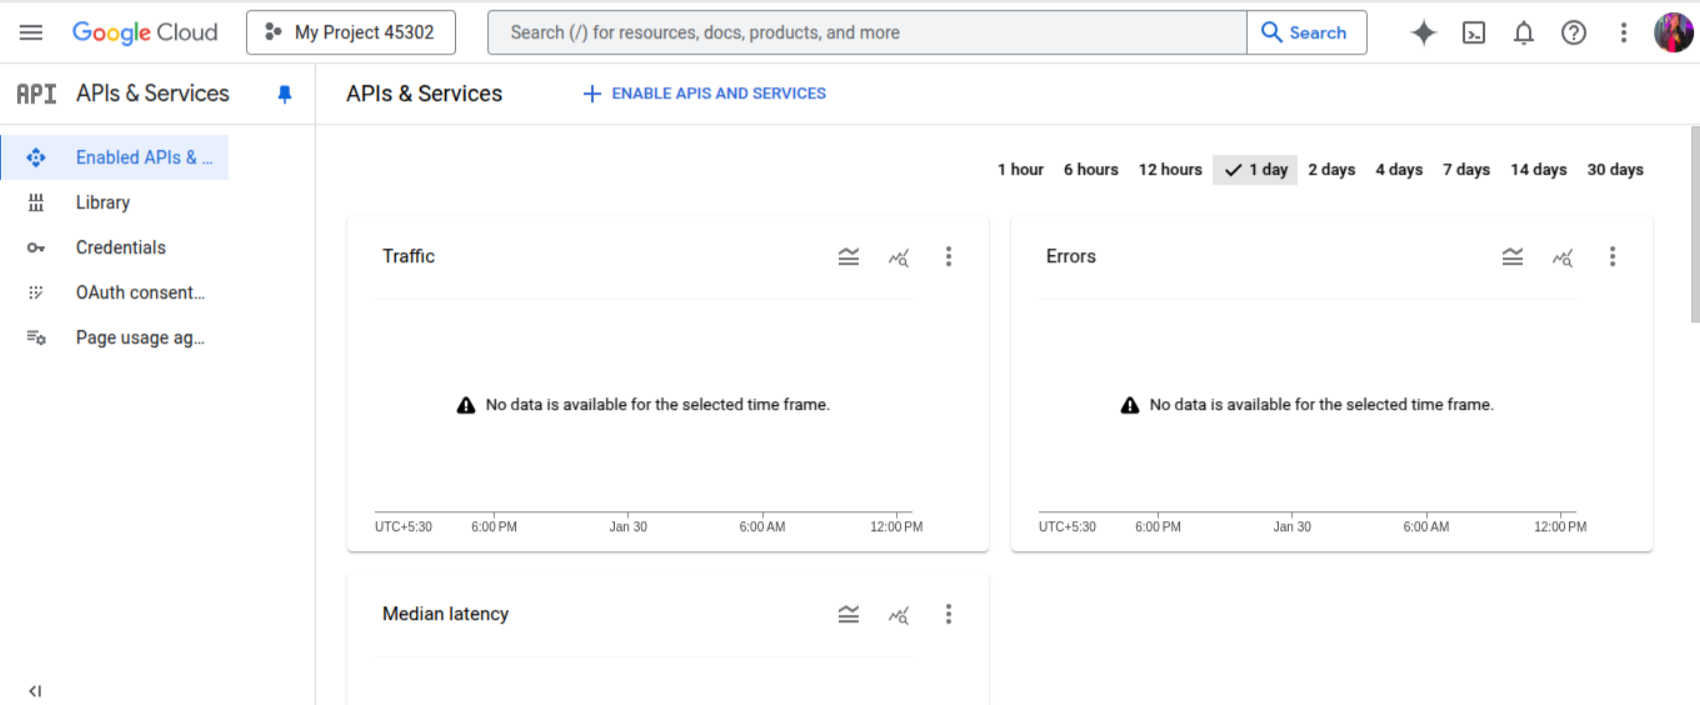
All the enabled APIs will be listed in this section of the console. Now, the admin will click on the credentials tab. After doing so, click on the “Create credentials” option.

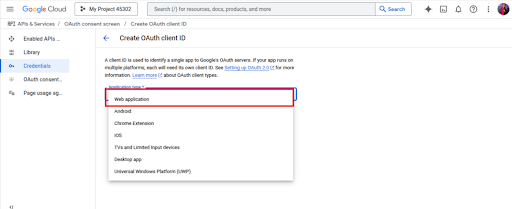
Click on the “OAuth Client ID” option. Here, click on the “Web Application” option, from the drop list.
After clicking on the “web application” option. Click on the “add URL” icon, under the “Authorized JavaScript origins”.
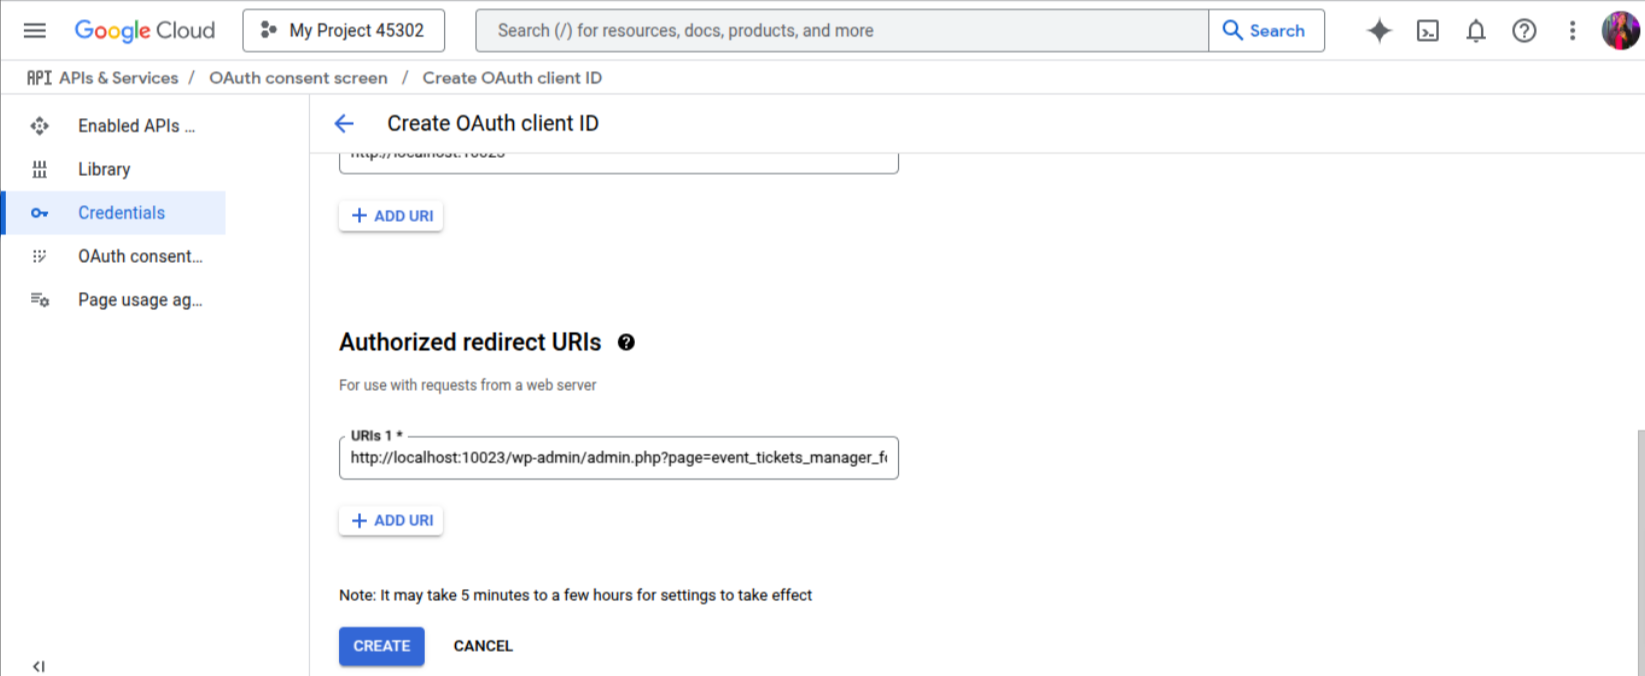
The admins can utilize this section to put the URL of their website. For the “authorized redirected URL” section, the admin can put the URL where he wishes to redirect the customers after the Google Meet session is over. After all the information is filled. Click on the “save” button. After doing so, the admins will get access to the client ID and secret key.
As shown in the screenshot.

Now enter this ID and secret key in the backend settings.
- Enter OAuth 2.0 Client Secret: Utilize this space to enter the generated client secret key.
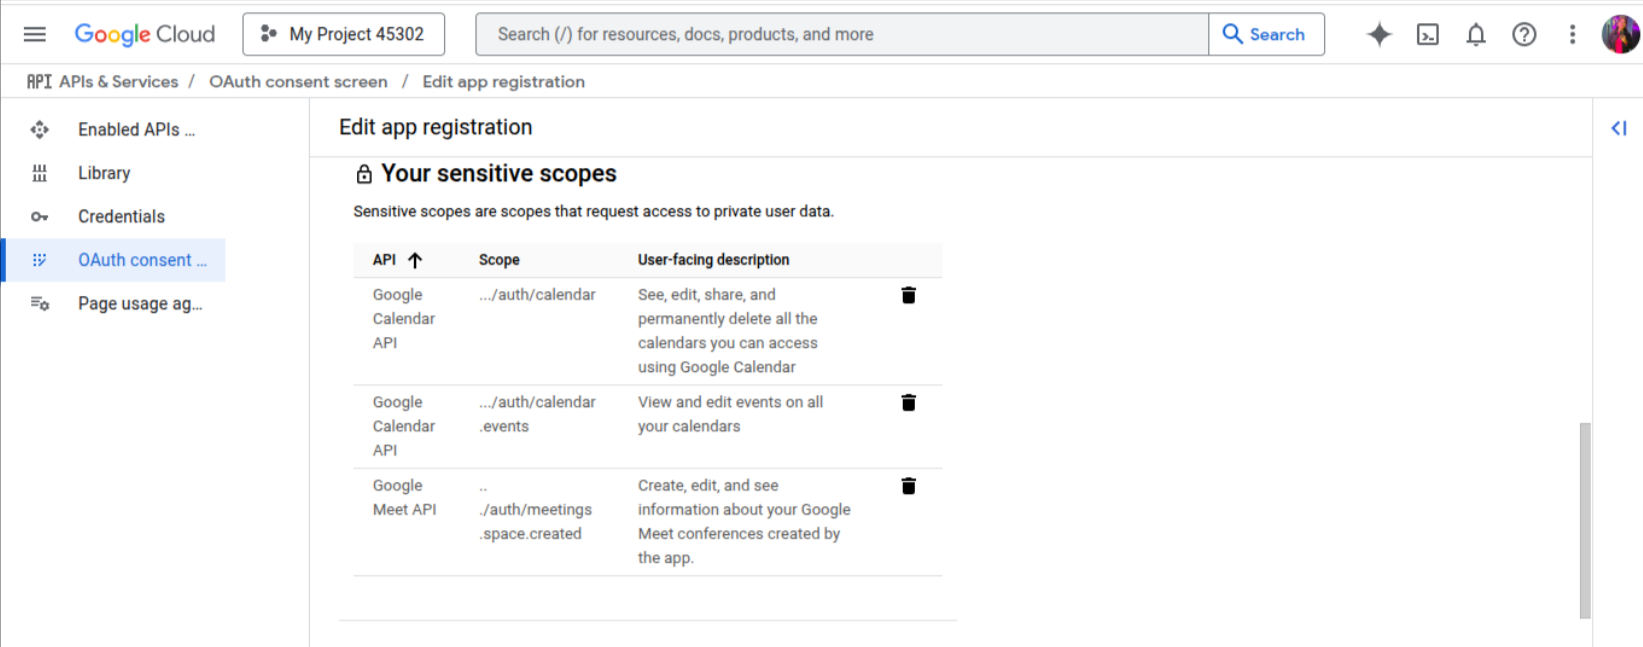
After successfully, completing this process the admin will also have to set the scope. The scopes that need to be set are – (…auth/calendar/, …auth/calender.events, …/auth/meetings.space.created).
Go to – O-Auth Consent Screens Tab.

The admins will have to “Create an APP”. After putting in all the required information i.e. name of the APP, the email ID of the admin, APP logo. Then, click on “Save and Continue”.
The second step is to “Create Scope”, the admin will click on the “add or remove scopes” button. After doing so, click on all the mentioned scopes that need to be set.
Click on “Save and Continue”. After successfully following all the steps, you have now integrated Google Meet into your website. Now, just click on the “generate token” button present in the backend settings, and admins will be redirected to a pop-up screen. Click on the “Allow” button to successfully activate this integration on your website.
After successfully integrating G-Meet into your website, please refer to Point- 8 (Product Settings) and scroll down to Point – 8.6, to get an in-depth understanding of the steps that follow after the integration.
7.5 Zoom Integration
The event tickets plugin is integrated with Zoom for Event Products. This enables the admins to add the functionality of the customers/participants being able to attend online events through the Zoom link.

Enable Zoom Integration: It is important to enable this integration before proceeding with any other integration functionalities.
Enter Client ID: To generate the client ID, click on the mentioned link, which will take the admin to the “Zoom Marketplace’s” page. After signing in successfully, the admin will click on “Develop”, then click “Build App”.
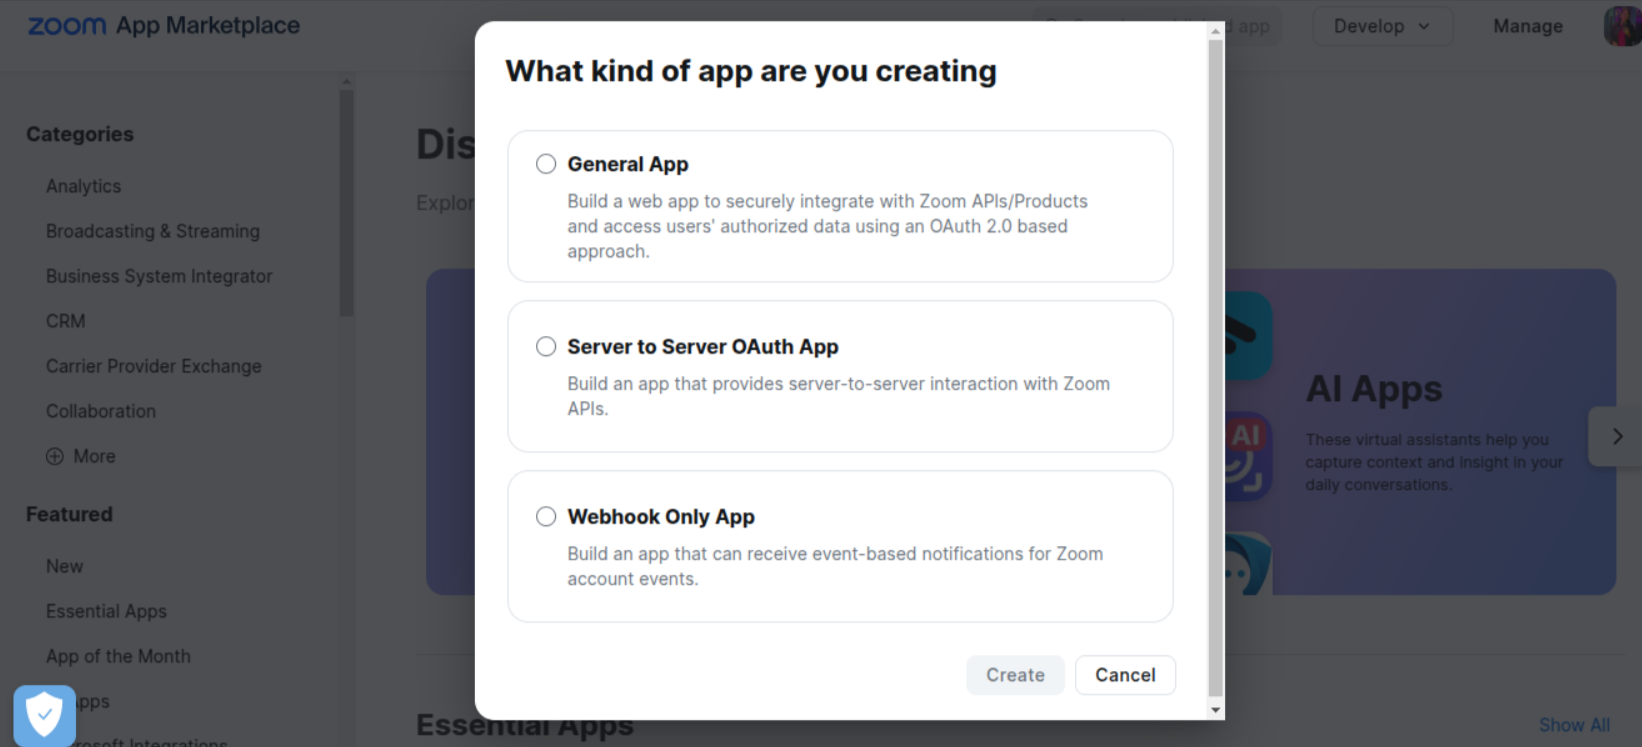
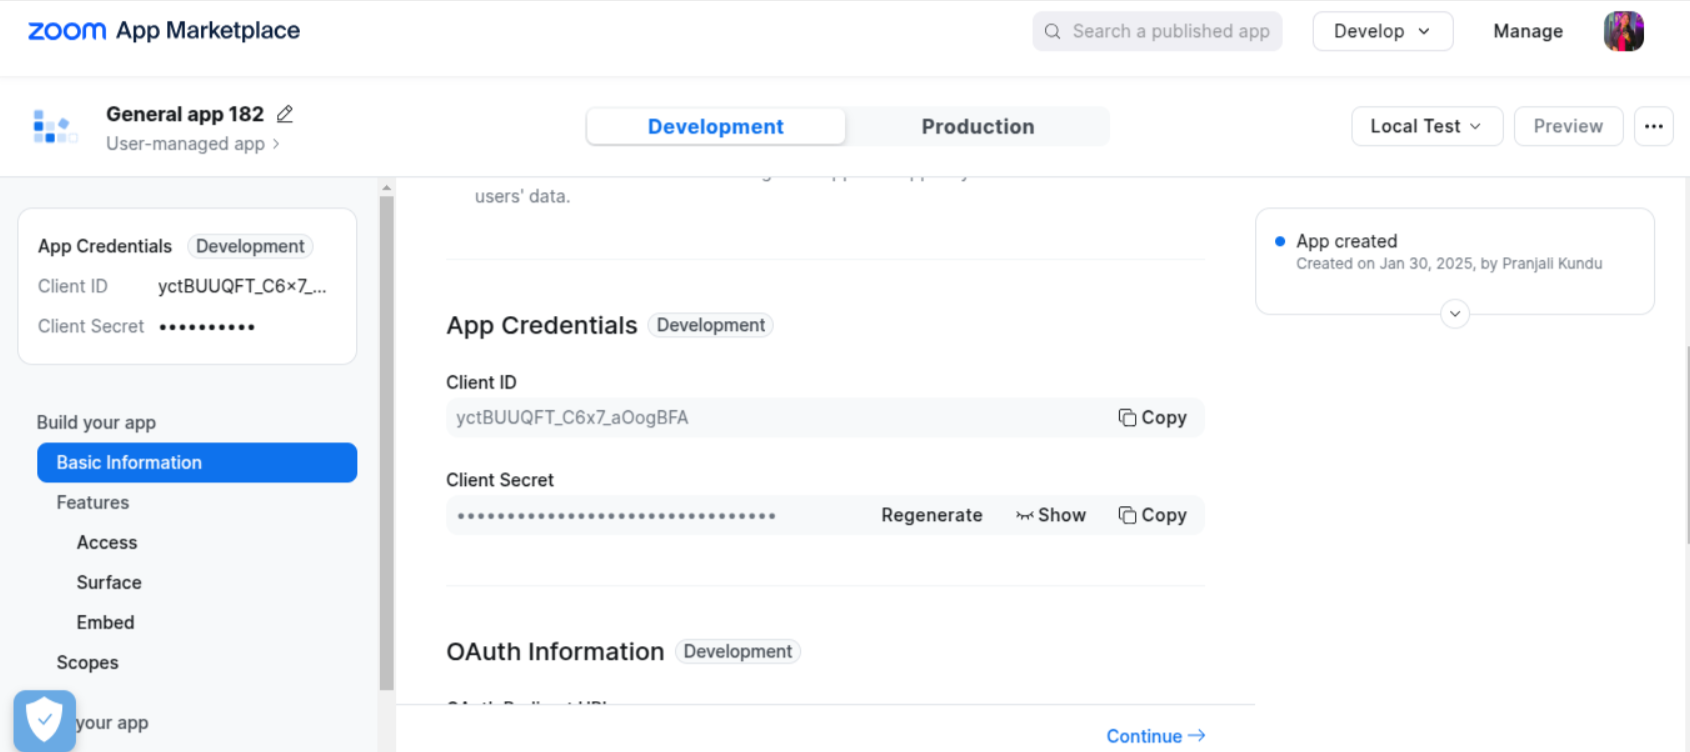
After doing so, create a “General App”. After creating the general app, the client will be redirected to the dashboard. Where you can find the client ID, and other required information.
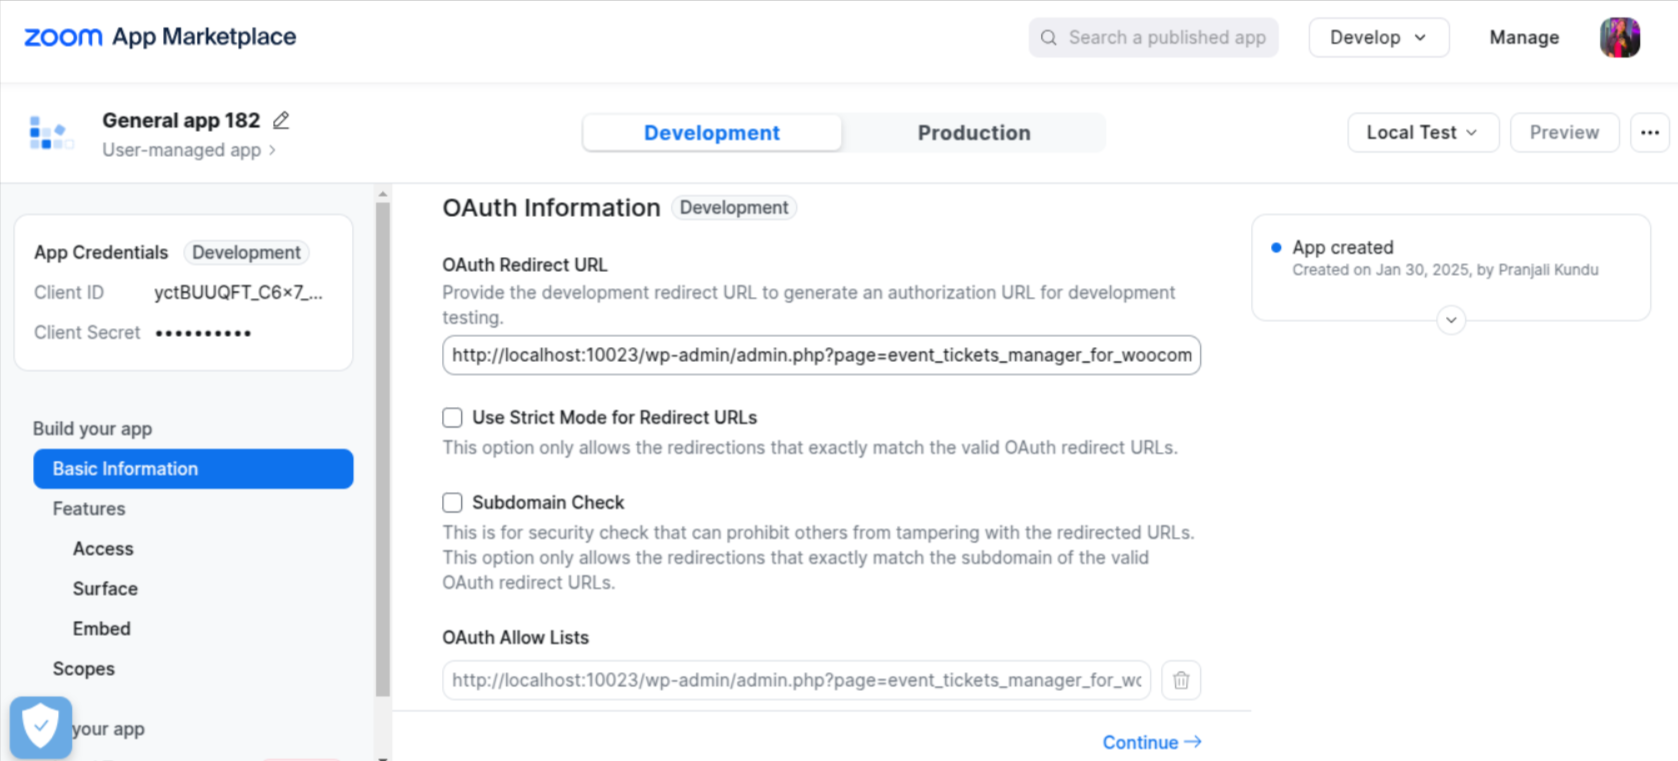
After doing so, the admins can utilize the next section to put the URL of their website. For the “authorized redirected URL” section, the admin can put the URL where he wishes to redirect the customers after the Zoom session is over. As shown in the screenshot.
Client Secret: Utilize this space to enter the generated client secret key.
After successfully, completing this process the admin will also have to set the scope. The scopes that need to be set are – (meeting:write and user: read or user:write).
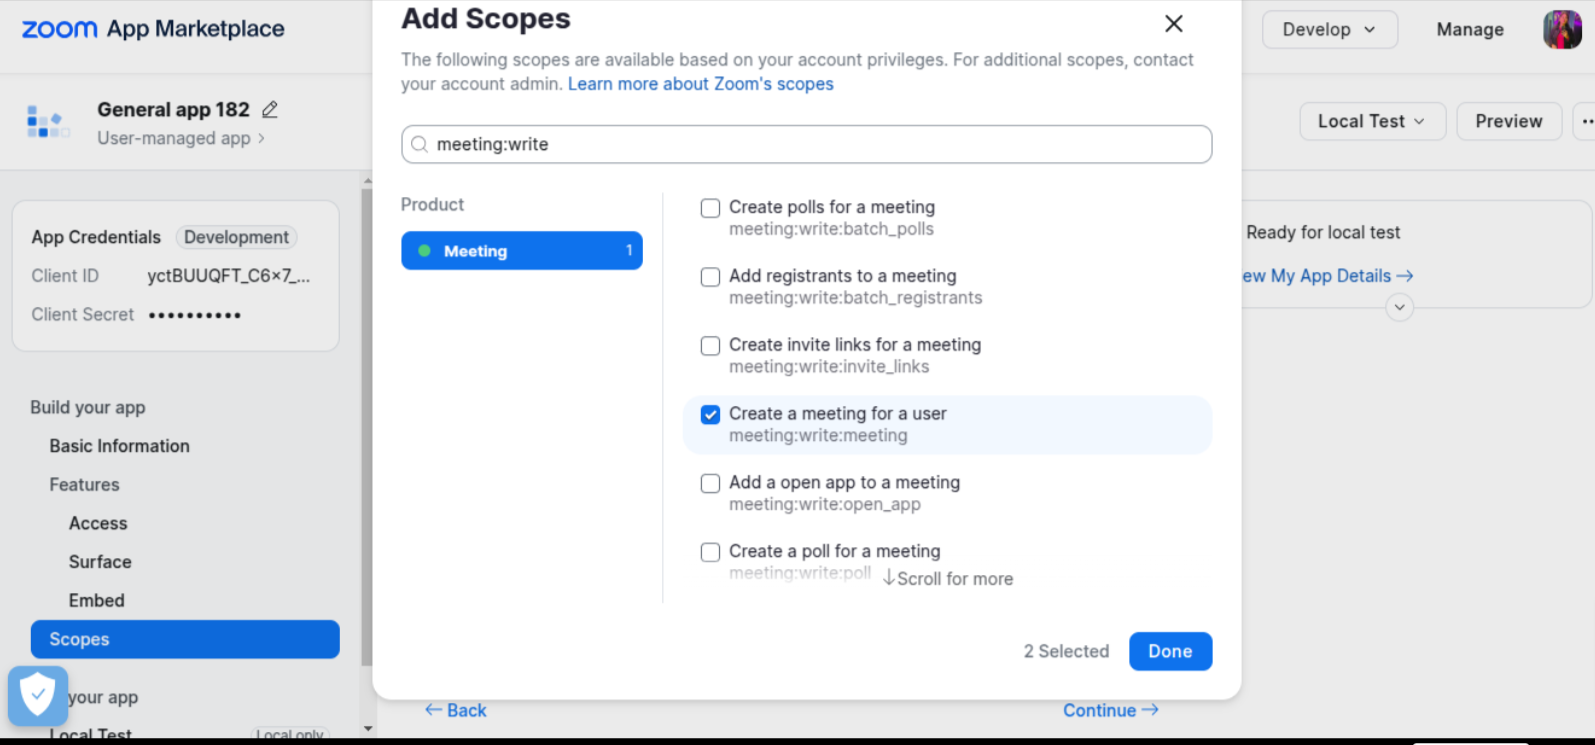
The second step is to “Create Scope”, the admin will click on the “add or remove scopes” button. After doing so, click on all the mentioned scopes that need to be set.
The admin should also ensure that if he wants to showcase the created Zoom links in the Google Calendar, then he’ll have to make sure to enable the Google Calendar API.
After successfully integrating Zoom into your website, please refer to Point- 9 (Product Settings) and scroll down to Point – 9.6, to get an in-depth understanding of the steps that follow after the integration.
11.Product Settings
11.1 Add New Product
Under this heading, we’ll see how to add events to your WooCommerce store. The events are added as WooCommerce products. You have to navigate the following steps to add your events:
Visit Products → Add New
Enter the title of the product.
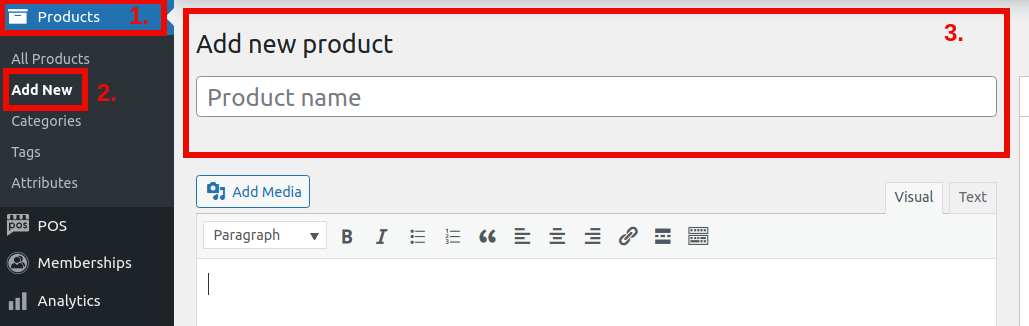
Now scroll down the product data box and select Events as the product type from the dropdown menu.
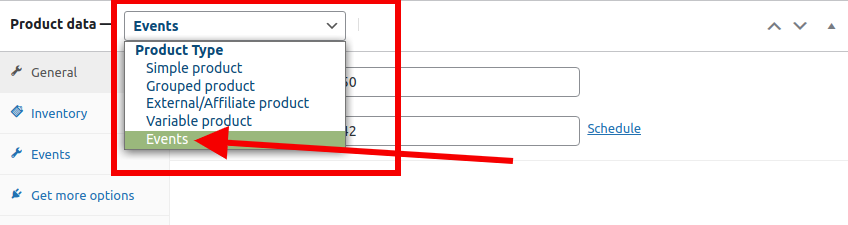
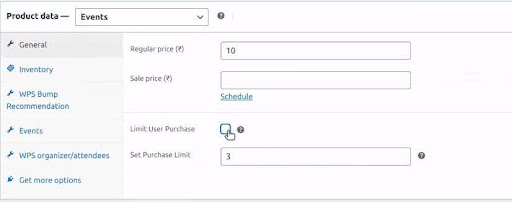
11.2 General Settings
Input the price of your WooCommerce events under the general settings.
You have to enter the following information:
- Regular Price: The price at which the event is usually sold on your website.
- Sale Price: The price at which you want to sell your event tickets.
- Limit User Purchase: The admin can enable this setting if he wants to limit the user purchase of any order.
- Set Purchase Limit: Enter the number of quantities that the user can purchase per order.
Next, press the Schedule button to specify the sale price of the events.
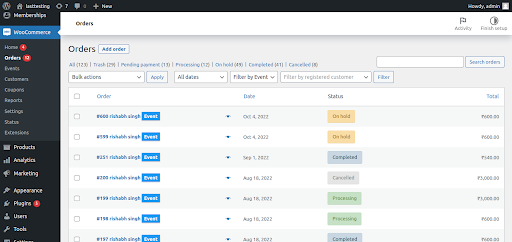
11.2 Event Filter In Order Table
Now as a merchant, you can filter all events related to order in the order table.
For filtering event-related orders as products follow these steps:
- Visit Products → Choose Filter
- Select Filter by Event
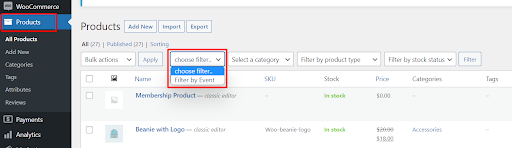 After clicking on Filter by Event, all the products related to the event will be displayed in the table.
 11.3 Bulk Import Event Order Attendees
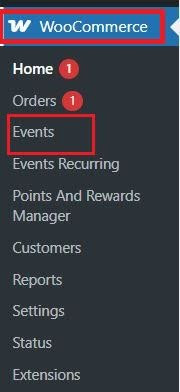
To access these settings, navigate to “WooCommerce” > “Events” tab,
By utilizing the bulk upload, the details of attendees’ order tickets by simply clicking on the “import data” button. Here, they’ll have to upload the CSV file in the mentioned format.
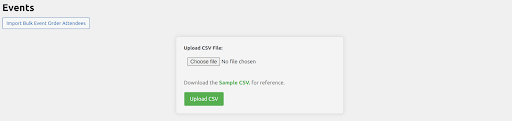
By doing so, the admin is in a position to bulk upload all the attendees’ order tickets.
Once you’ve created a new product, it’s time to add some details to your event products.
Here are the configurations that you’ve got to manage:
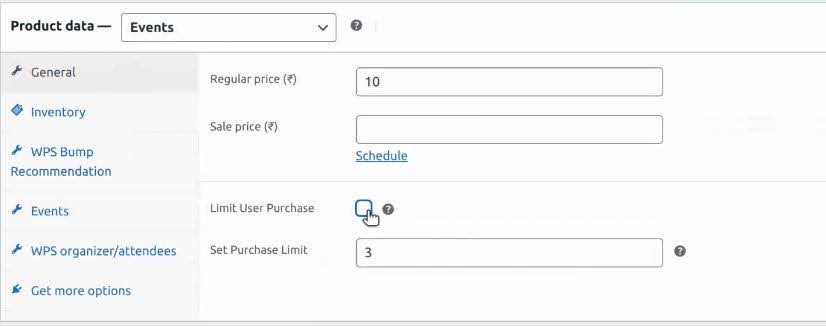
11.4. General Settings
Input the price of your WooCommerce events under the general settings.
You have to enter the following information:
- Regular Price: The price at which the event is usually sold on your website.
- Sale Price: The price at which you want to sell your event tickets.
- Limit User Purchase: The admin can enable this setting if he wants to limit the user purchase of any order.
- Set Purchase Limit: Enter the number of quantities that the user can purchase per order.
 Next, press the Schedule button to specify the sale price of the events.
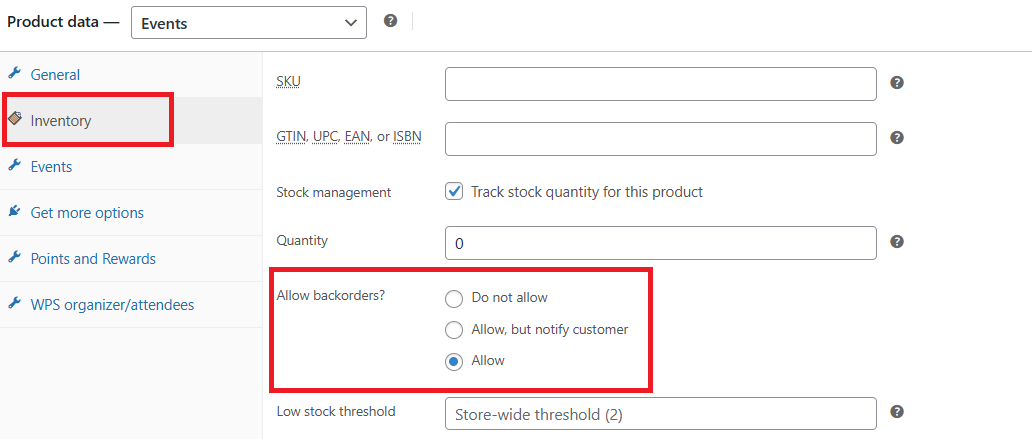
 11.5. Inventory
The inventory management for event product types is the same as any other WooCommerce product type.
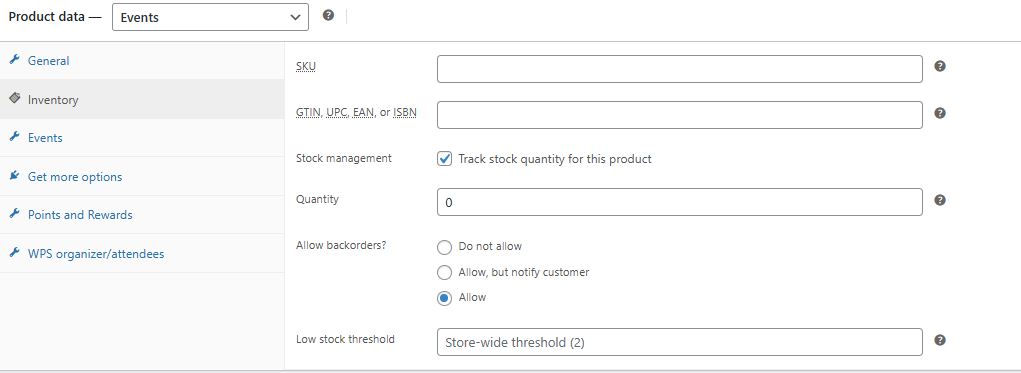
Here are the steps you can follow:
- Enable the Manage stock, Option by clicking on the checkbox.
- Now besides the Stock Quantity option, enter the number of available tickets to your event.
- Allow Backorders, your customers can purchase an item even if it’s temporarily out of stock.
11.6. Events
Next from the Events tab of the product data box, you can configure the following:
Note: If you have published an event, and that event has expired, it will be directly deleted.
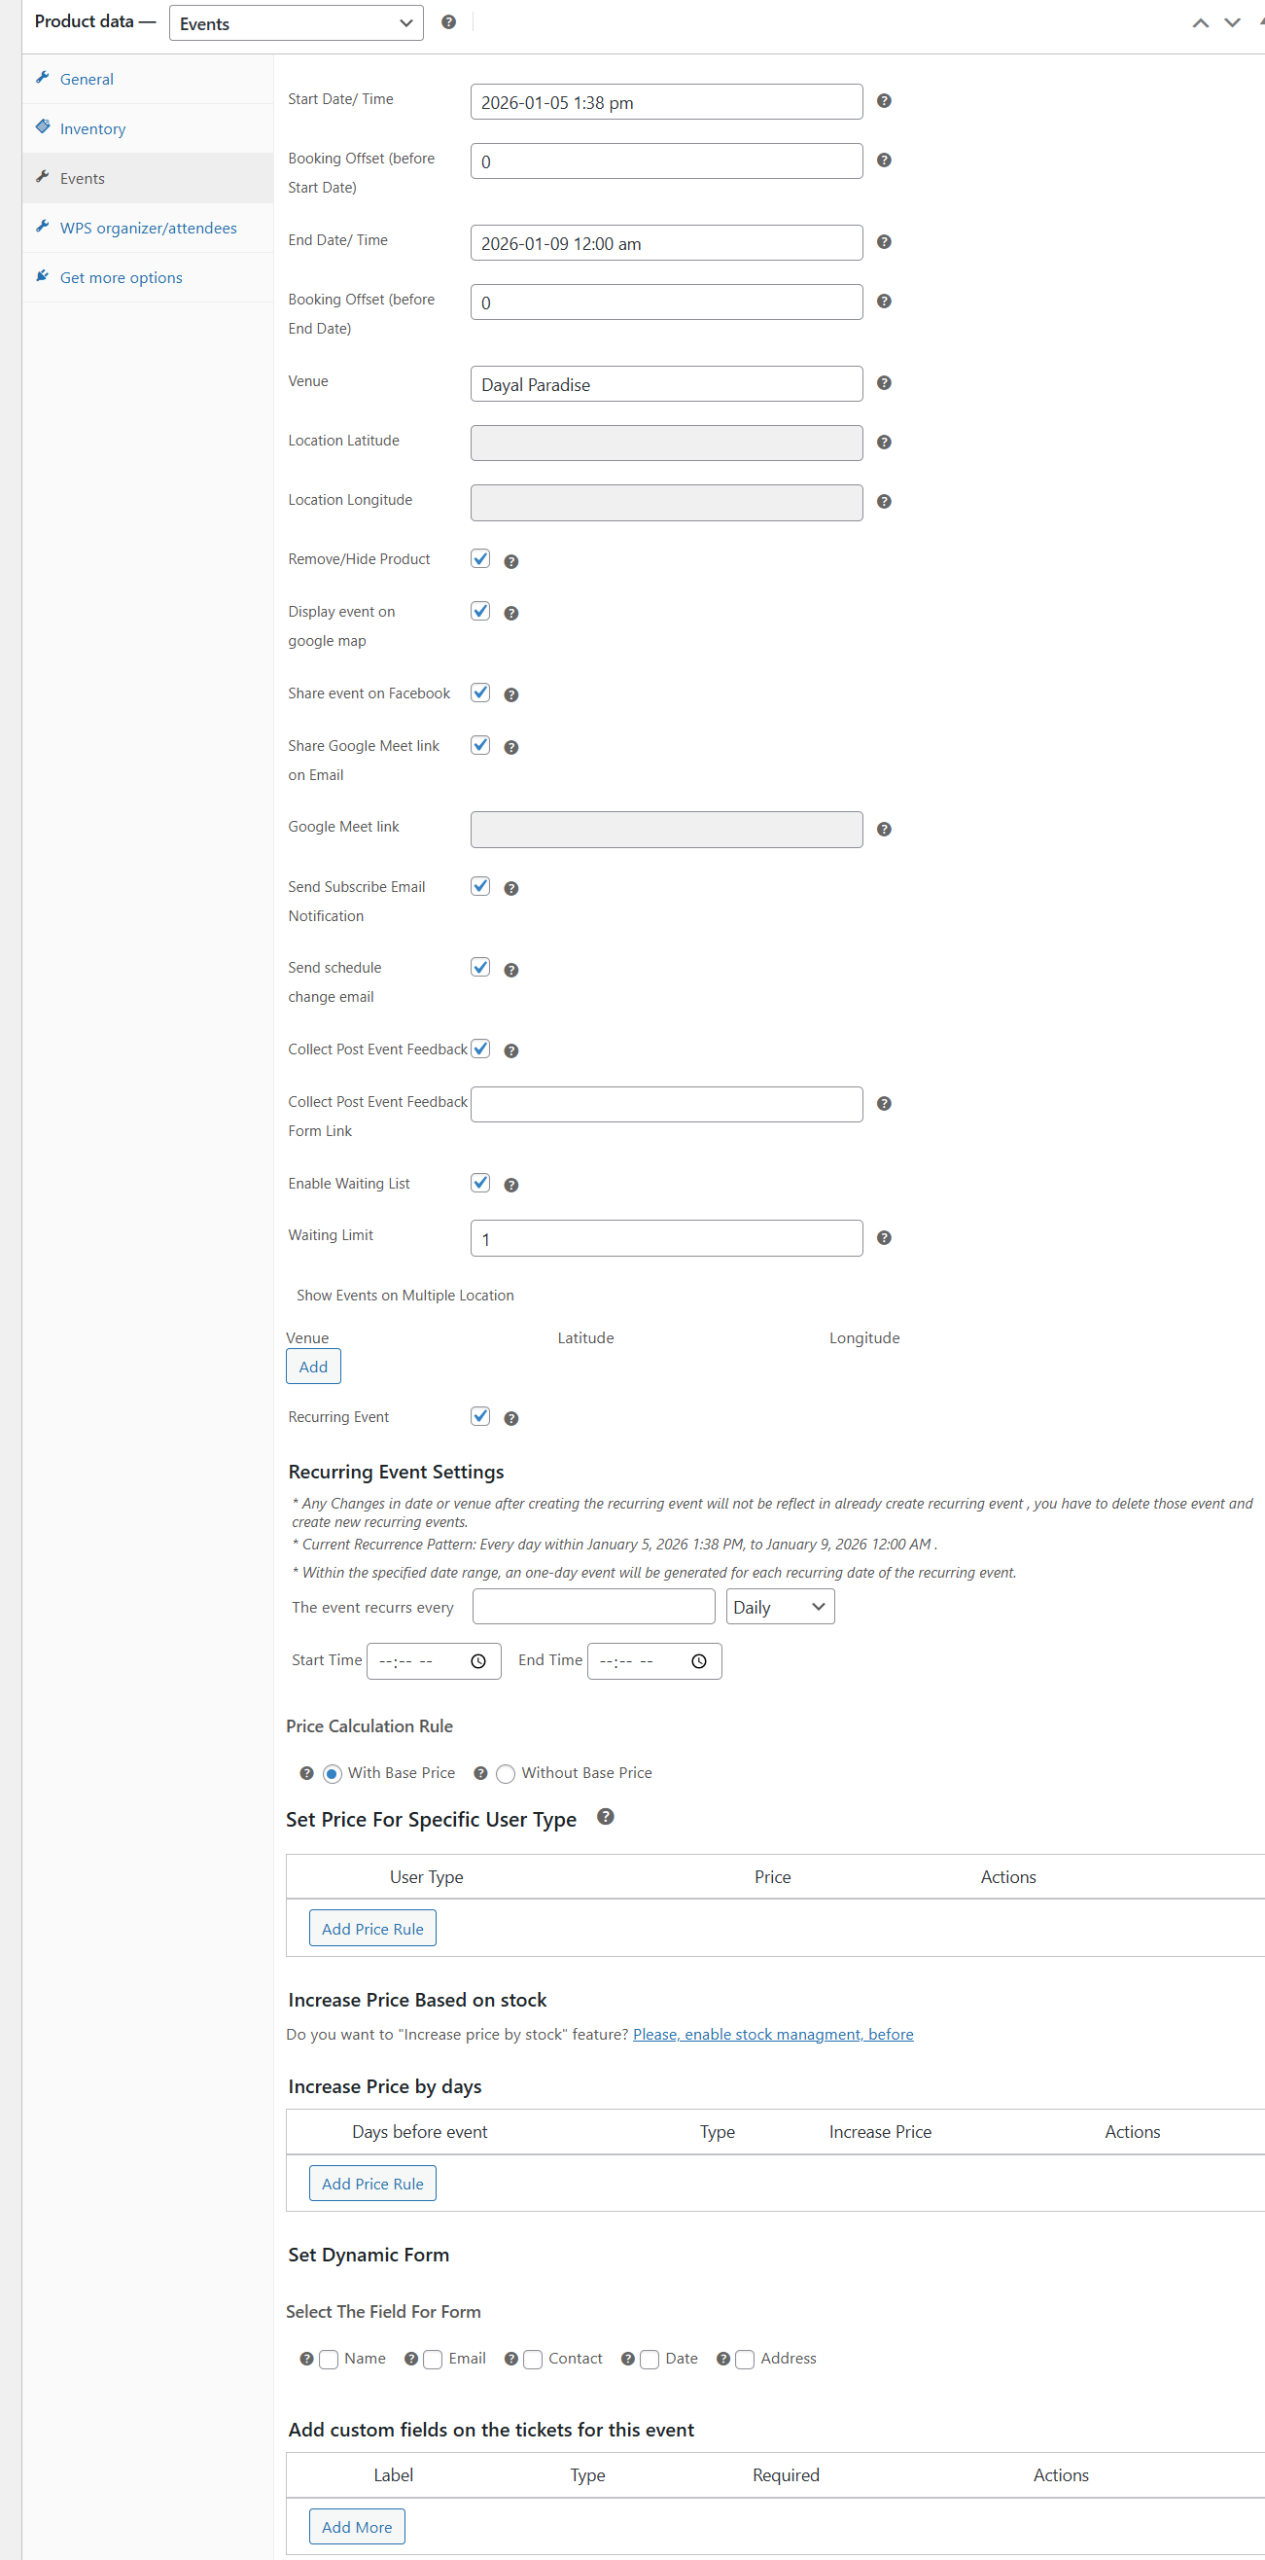
- Start Date/ Time: Fill in the start date and time of the event.
- End Date/ Time: Fill in the date and time when the event ends.
- Venue: Enter the accurate address of the event to get the best Google map results.
- Remove/Hide Product: Click the checkbox and you will be able to remove/hide the product or event on expiration.
- Display Event On Google Maps: Click this checkbox if you want to display the location of your event on Google Maps on the product page.
work on that particular event product, that is to display the location of your event on Google Maps on the product page.
Frontend Representation –
- Disable Shipping Charges:Premium
Click on the checkbox if you want to disable the shipping charges for a particular product page.
- Share Event On Facebook:Premium
Click this checkbox if you want to share your event on Facebook on the product page.
- Share Google Meet Link Via email: After successfully integrating the website, click on the “enable” setting to make this functionality work on that particular event product. After enabling this functionality, kindly update that particular product, for it to work seamlessly. After the customer, successfully purchases the event product, he will receive the Google Meet link on their email ID and the event will also added to their Google Calendar.
Frontend Demonstration –
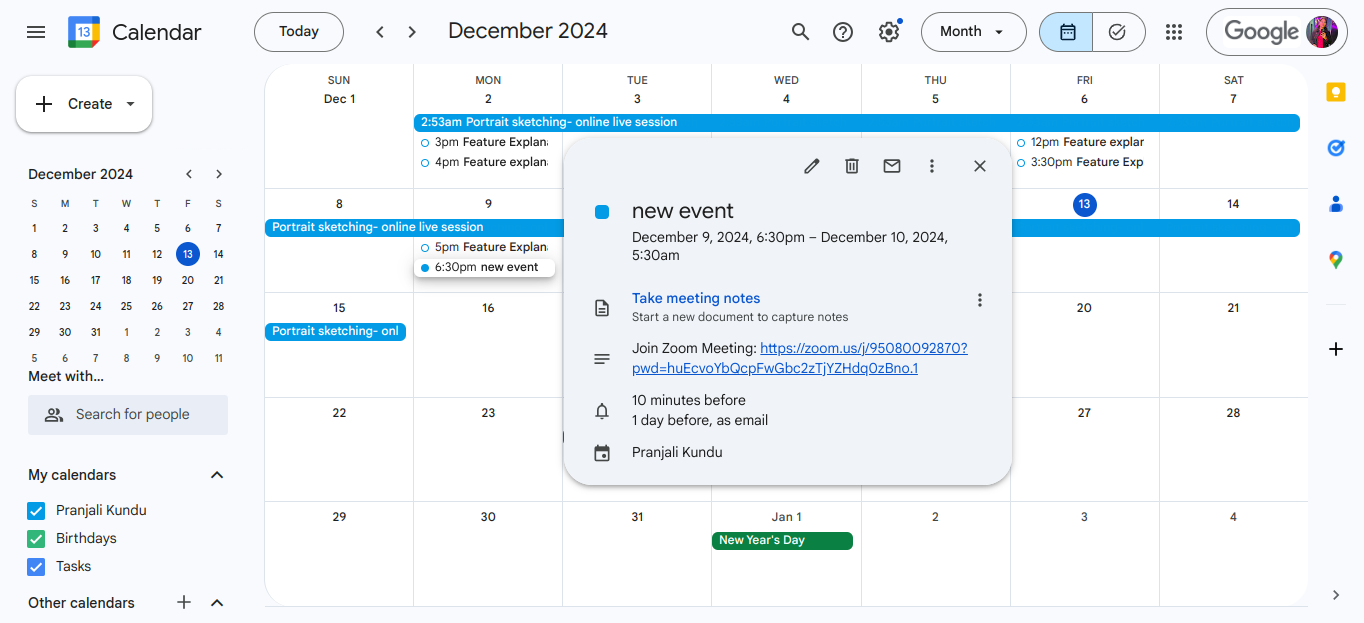
Share Zoom Link On Email: After successfully integrating the website, click on the “enable” setting to make this functionality work on that particular event product. After enabling this functionality, kindly update that particular product, for it to work seamlessly. To understand how to integrate your website with Zoom, navigate to Point 5.6 (Integration Tab).
After the customer, successfully purchases the event product, he will receive the Zoom link on their email ID and the event will also added to their Google Calendar.
Frontend Demonstration –
- Event Recurring Settings
Check this box if you want to add the recurring settings to your existing events. After clicking on the checkbox this setting you will automatically see these settings.
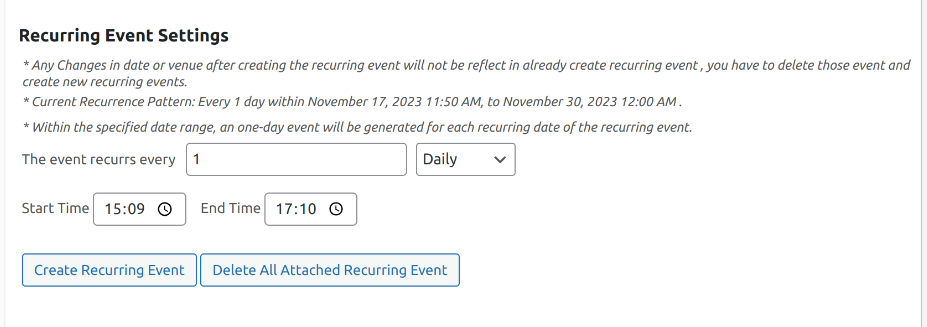
Here the admin is asked to select the number of days when you want the event to recur. They can also select whether they want the event to recur on a daily, weekly, or monthly basis. You are also given the option to either delete the attached recurring event or create a new recurring event. The admin also gets to select the time slot for the recurring events. He can put the start time and the end time as per the requirements.
Note: The free version of the events plugin lets the admins set the recurring settings for a particular event daily. If you want your events to recur on a weekly and monthly basis, you should have the premium version.
It is also interesting to note that these recurring events will only recur within the specific date range that you have already selected for the parent event.
The enhancement, allows the admins can use the “Event Parent” filter, to see all the recurring events under that particular event, and merchants can also view/edit any recurring events utilizing the filter.

- Price Calculation:
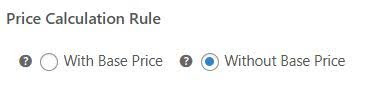
The admin can utilise this setting to set price by using two rules –
-> With Base Price – Show the price by adding the set price with regular / sale price of the event product.
-> Without Base Price – Show the price without adding the set price with regular/sale price of the event product.
- Send Subscribe Email Notification: Turn this setting if you want customers to receive updates about any particular event via email. (NOTE: If you want to globally set the settings for all products, refer to point 6).
- Send Schedule Change Email: Merchants can keep customers informed about date changes for a specific event. They will receive a notification via the email address shared while placing the order for the event. (NOTE: If you want to globally set the settings for all products, refer to point 6)
Collect Post-event Feedback:Premium
Admins can enable this setting if they want to collect feedback relating to that particular event.
Collect Post-event Feedback Form Link:Premium
Copy the Google form’s link and paste it in the space given for the feature to work properly.
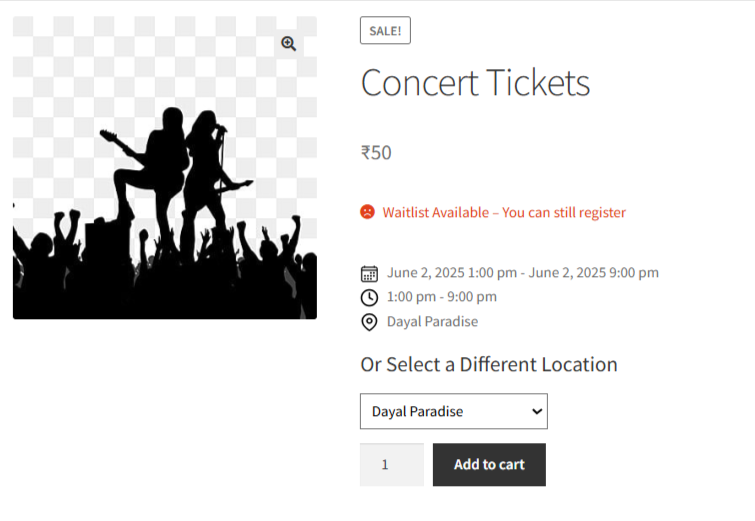
Enable Waiting List:

Utilize this setting if you want to enable the waiting list functionality, where the waitlist tickets are automatically booked upon the cancellation of a ticket for the same event.
Note: The admin should enable the “ Allow backorder” functionality to make the waitlist feature work seamlessly. The backorder functionality allows customers to purchase an item even if it’s temporarily out of stock.
Waiting Limit:
Here, the admin can specify the number of customers that they want to allow in the waitlist for the event.
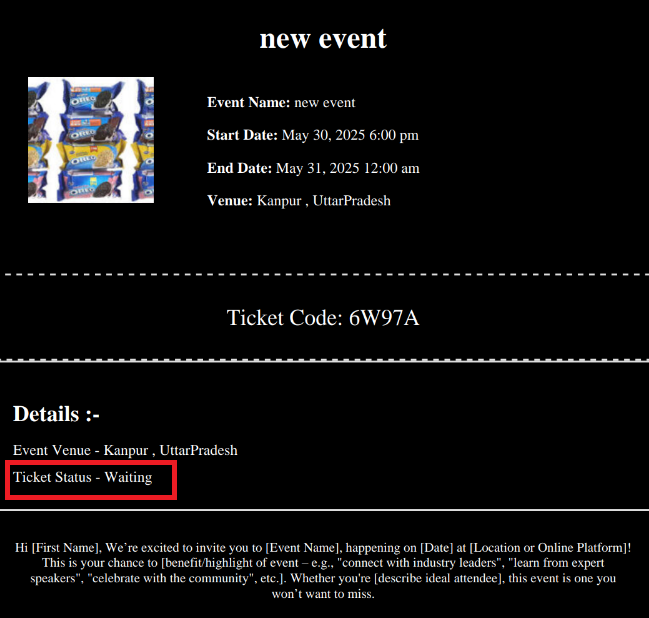
Frontend Representation (for the customers) –
After placing an order for the waitlist ticket for an event, customers will receive this PDF ticket via email. This PDF ticket will show the ticket status as “waiting”.
Once their waiting list ticket is confirmed, customers will receive this email –

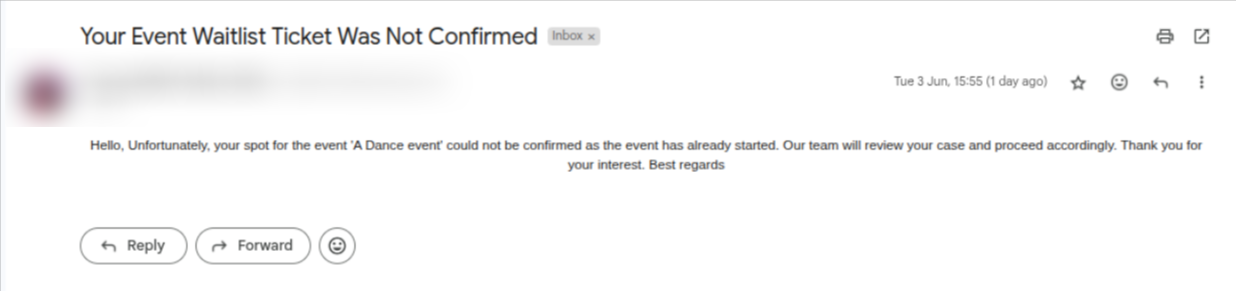
If the event has already started and the waiting list ticket for the event is still not confirmed, customers will receive this email (Note: in this scenario, the customer will get a full refund for the purchase of the waiting list ticket) –
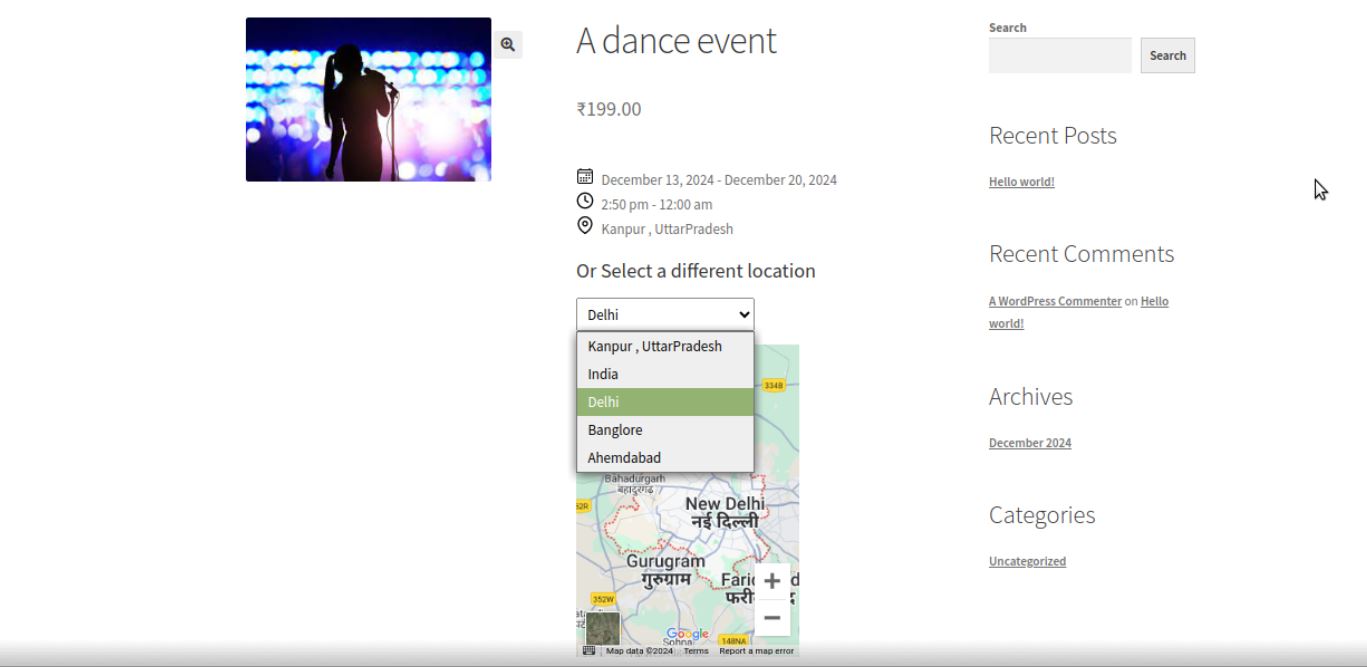
Show Events On Multiple Locations: Admins can now add multiple locations for a single event product by adding different venues.
Frontend Representation –
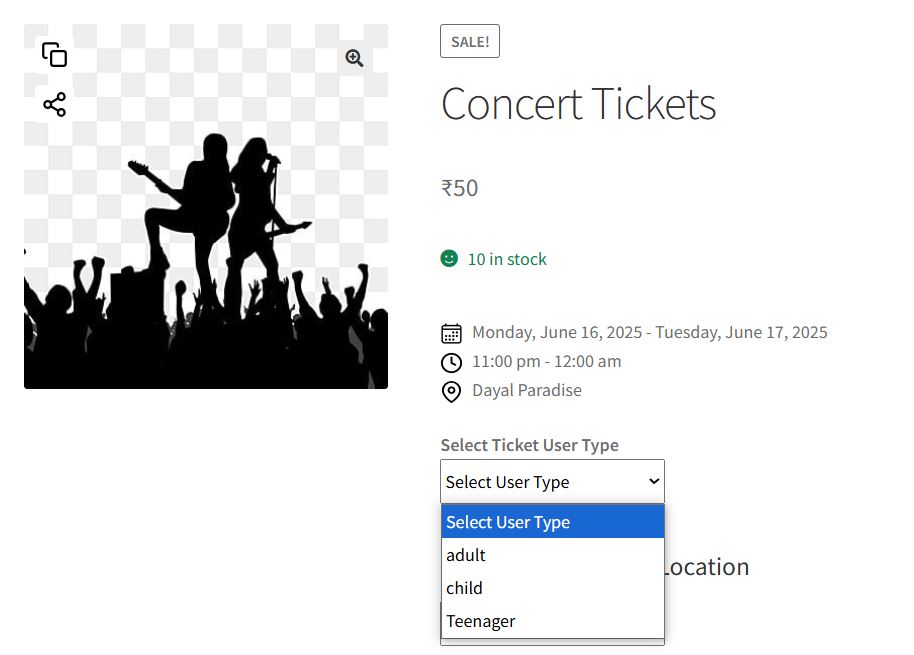
- Set Price for Specific User Type
Create the user type, set the price accordingly, and update. Now you are ready to use this feature.
We have enhanced the feature, allowing merchants to decide whether they want to add or remove the base price for specific user types. After the enhancement, customers can easily purchase tickets for different user types simultaneously.
Note: The free version of the WooCommerce events plugin only lets you add two user types.
Frontend Representation –

- Increase Price Based On Stock:Premium
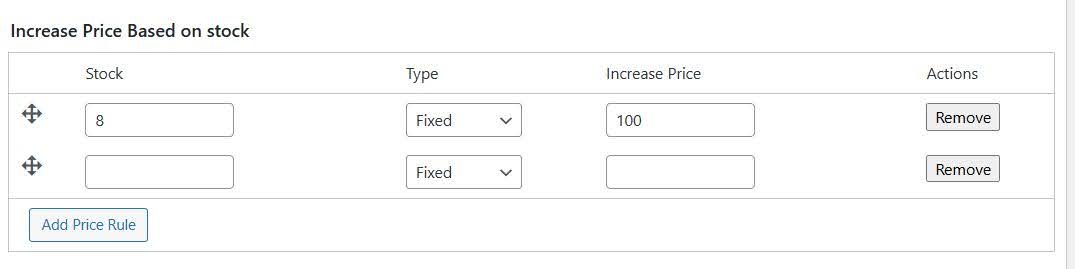
Fill in the stock, select the type, and fill in the amount you want to increase.
- Increase Price by Days:Premium
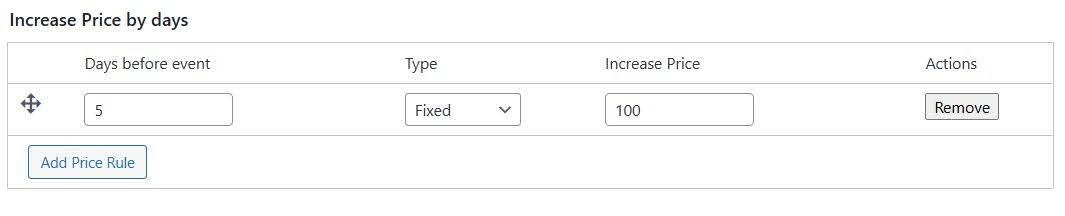
Fill in the Days before the event, select the type, and fill in the amount you want to increase.
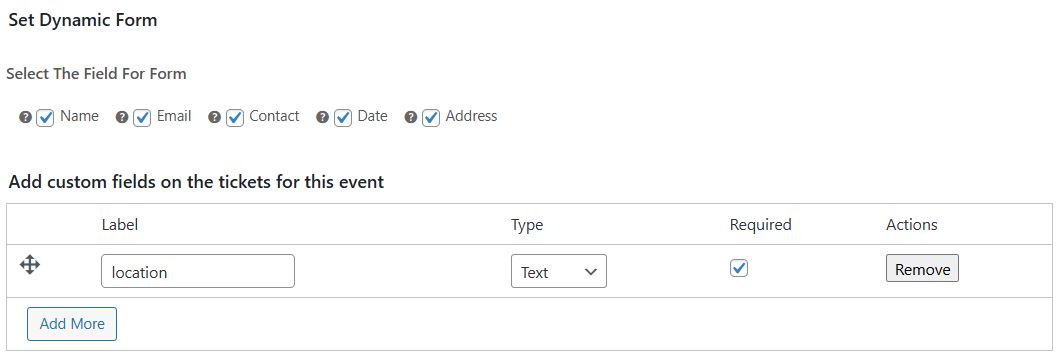
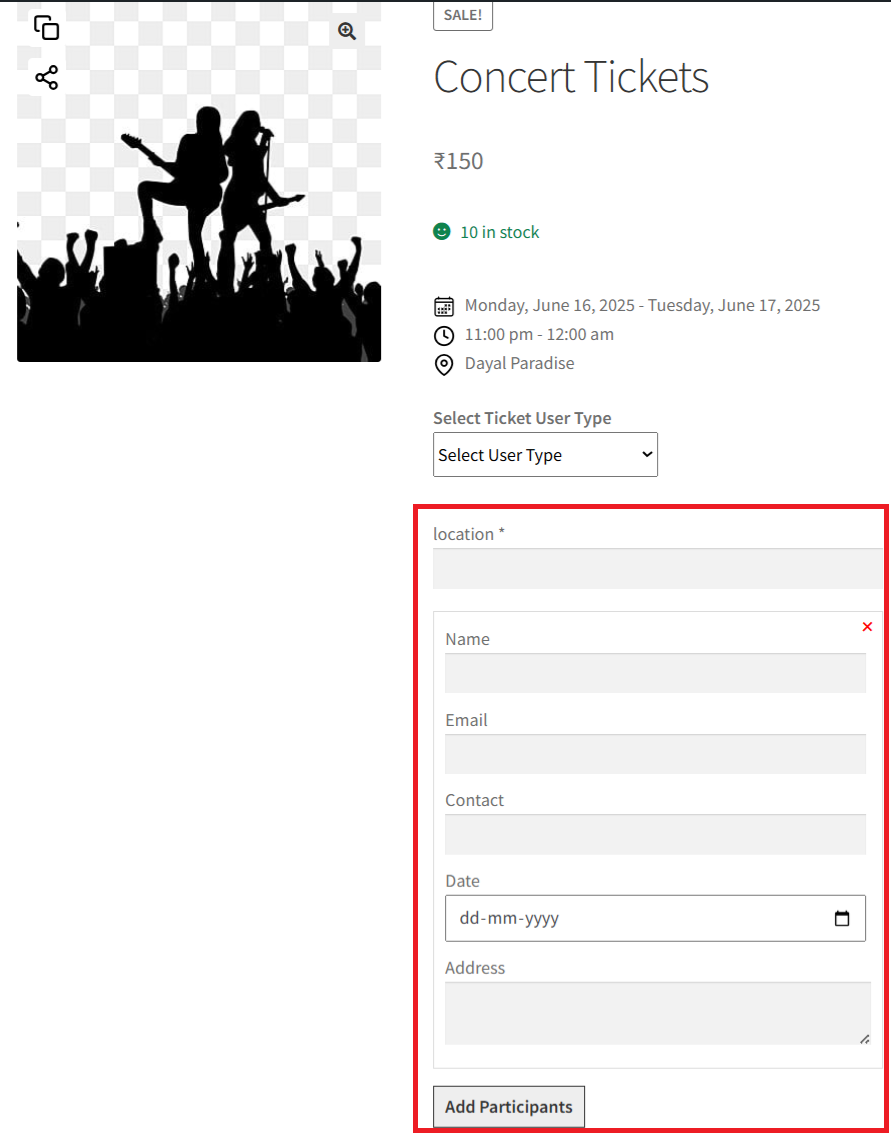
- Set Dynamic Form:Premium
With this feature of the WooCommerce events plugin, the merchants can provide the customers with a dynamic form, while they are purchasing a ticket. There are several sections like Name, Email, Contact, Date & Address. The admin can also add or subtract these categories as per the requirements. The customer can dynamically create these for each participant.
Customers are free to add custom fields on the tickets for different events. Like you can see we have add the “location” field for this event product.
Frontend,
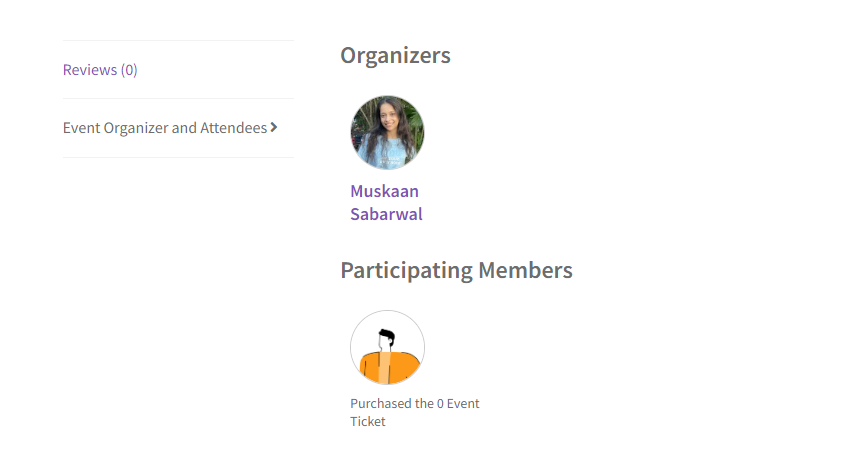
11.7. WPS Organizer/AttendeesPremium
Next from the WPS Organizer/Attendees tab of the product data box, you can configure the following:
Frontend Representation:
- Event Product Tab Name: The admins can customize the name of the tab using this setting
- Display Attendee/Organizer Tab: The admin can toggle between these settings to enable/disable the attendee/organizer tab from the events page
- Display Organizer Tab: Admins can enable this feature if they want to show the organizer, similarly disable it if they just want to show the attendees tab.
- Select The Organizer: The admin can choose the event organizers from this section.
12.Check-In Using A QR Code
The Event Tickets plugin makes it simple for consumers to check in by QR code scan. Scan the created QR Code on the event ticket sent to you through email in pdf format and click the link produced from the QR Code to be routed to the Event’s check-in website.
On QR Scan you will get three different messages on different conditions.
1. If you have already checked in manually by entering your credentials, you will get a message “You are already checked in” on the QR scan.
2. If QR Scan checks you in you will get a message “You are checked in successfully”.
3. If you are trying to check in early before the event starts you will get a message “Event has not started yet”.
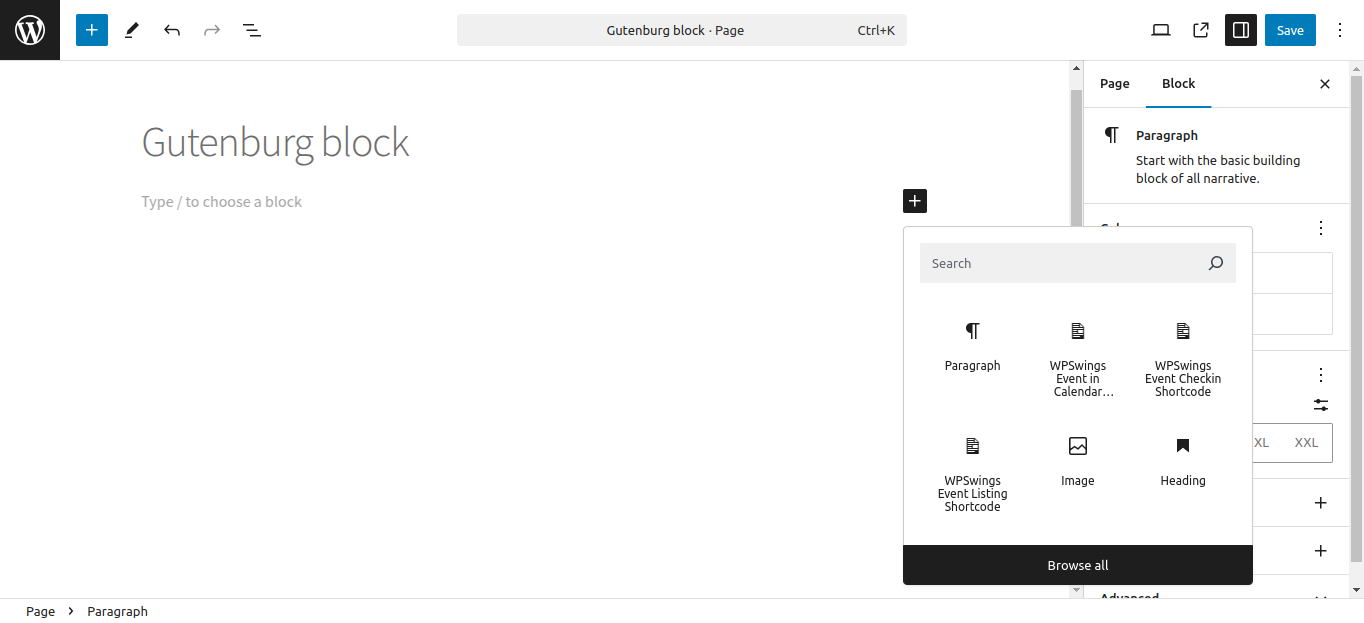
13.Gutenberg Block
Compatibility with Gutenberg Block allows the merchants to seamlessly utilize the shortcodes to add different elements to different pages.
Frontend Representation –

14.Compatibilities
14.1.Gutenberg Block
Compatibility with Gutenberg Block allows the merchants to seamlessly utilize the shortcodes to add different elements to different pages.
Frontend Representation –
14.2.WPML Compatibility
The Event Tickets Manager For WooCommerce is made compatible with the WordPress Multilingual (WPML) plugin for localization of the event manager plugin’s strings.
For translating the plugin the first step is to extract all the strings of the plugin and it can be done with the help of the following steps:
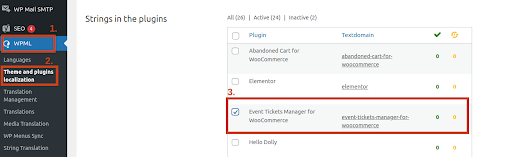
- From your, WordPress Admin Panel visit WPML → Themes and Plugins Localization.
- Now scroll down to the Strings in the plugins section.
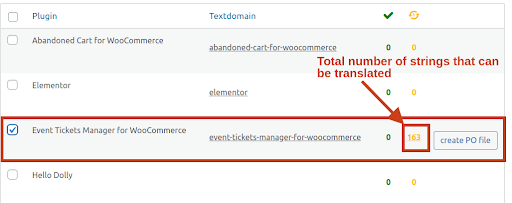
- Lastly, select the Events Ticket Manager For WooCommerce plugin from the list of plugins.
To translate the strings into the language of your choice press the Translate Strings button present next to the plugin.
You’ll be redirected to a page where all the strings of the plugin are listed and you can translate each string from here.
Upon visiting this page you can manually select a string for translation by clicking on the “+” button next to each string in a row.
A popup will occur in which you can write the translation of the string.
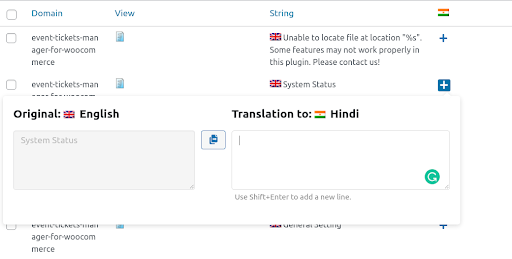
Once you’ve written the translation it will be automatically saved and when the customer chooses a different language they’ll see the translated version of the string.
14.3.Multisite Compatibility
The Multisite Compatibility feature allows users to manage multiple websites of similar nature from a single dashboard. With this compatibility, you can install the events calendar plugin on sites within your multisite network.
14.4.Direct Checkout for WooCommerce
WordPress Calendar Plugin is now Compatible with Direct Checkout for WooCommerce, which simplifies the checkout process. With Direct Checkout, the admins can easily convert into a one-click process & customer decision to direct sale.
14.5.Wallet For WooCommerce Pro
The WooCommerce events plugin is now compatible with Wallet system for WooCommerce Pro, this enables users to utilize the wallet plugin’s, negative wallet amount support wherein the users are allowed to continue shopping even if they don’t have enough funds.
14.6. Compatibility With Gift Cards For WooCommerce
The WooCommerce Event Tickets plugin is compatible with Ultimate Gift Cards for WooCommerce and Gift Cards For WooCommerce Pro. After this compatibility, both plugins can work seamlessly at the backend of a WooCommerce environment
15.Feedback and Suggestions
Don’t see a feature in the Event Tickets Manager for WooCommerce plugin that you think would be useful?
We’d love to hear it: Reach out to our Support query and we’ll consider adding it in a future release.
16.FAQ's
Can We Display the Event Location on the tickets and Product Page?
Yes, the Events tickets Manager For WooCommerce Provides the Exact location of events to the user on the Product page and tickets as the plugin is Integrated with Google Maps.
Does the Event Ticket Manager Provide a Report for the Performance of Events?
The Event Manager Plugin gives the store owner an In-depth view of How the Events are Performing. You can view the Performance of your products as :
- Event wise
- Attendee wise
Can The Customer Download Tickets for offline use?
Yes, With the help of the Event tickets manager plugin customers can download the tickets in PDF format. Also when the customer purchases an event the downloadable PDF file is mailed to the customer.
How many Payment Gateways do the Event Tickets Manager For WooCommerce plugin supports?
The event ticket manager supports all the WooCommerce payment gateway for Example PayPal, COD, Stripe, Direct bank transfer, Check payment.
Can we Translate the Plugin Text and String into other languages in Event tickets Plugin?
YES, Since the Event tickets Manager supports WPML you can translate the strings and text of our extension into other languages.
Can the Admin Export the List of attendees as a CSV file or PDF format in Event Manager plugin?
Yes, we have this feature in the Ticket manager Plugin that allows the admin to export the list of attendees in CSV or a pdf format.
Do WooCommerce Events Manager also Provide online Paid Events.
No, Presently we only provide offline event bookings where we have provided a page where owners people will enter the ticket number manually.
From where customers Can view and Download their tickets?
Customers can download and view their tickets from my account page.
How are the Tickets sent to the Customer?
Tickets will be sent to the customer via email with the pdf attachment.
Can Admin add the attendees manually for the event?
Yes, we have this feature in the Event Ticket Manager Plugin where Admin can add the attendees manually.
How Can We Create an Event as a Product Type?
Yes, you can create events as a product type. For this please enable our plugin then go to the dashboard >> Product >> select add new. Now from the drop-down menu beside Product Data select Event.