1.Set Up Google Calendar With Bookings For WooCommerce Pro
Overview
Streamlining online bookings can be a hassle. Managing bookings of more than 150 participants, marking dates on the calendar to avoid conflicts and confusion, working countless nights preparing for the next booking, and many more steps go into executing one successful booking. But, the problem arises when there are more than 200 bookings in one month. But we have just what you’re looking for, how about an automated calendar that will help you stay up-to-date with all the processed bookings? The new Google Calendar Sync functionality is responsible for doing this. Just utilise this feature of the WooCommerce Bookings plugin, and automate all your bookings. We will explain everything that you need to know in this article.2.Installation
We have mentioned the installation process for both the Free and Premium Versions. The customers can refer to the one that is relevant to them.
It is important to note that before activating the plugin – Bookings For WooCommerce Pro, you should have the Bookings for WooCommerce – WordPress plugin installed, as the plugin will not function without it.
So, if you don’t already have it, you can download it directly from here:
NOTE: The mentioned feature is only available in the Premium version of the WooCommerce Bookings Plugin.
2.1.Free Version
Automatic Installation
When it comes to automatic installation, WordPress is the most user-friendly.
To do so, all you have to accomplish is-
Utilize your username and password and log in to your WordPress admin area. Then navigate to Plugins > Add New inside the leftmost column of your dashboard. At the top of the front page, click the Upload Plugin option.
Choose the Bookings for WooCommerce-based .zip file from the Add New Plugin option, then push Install Now. Activate the WooCommerce booking plugin once it has been properly configured, to make the plugin features in action.
Manual Installation
Another way to install the WooCommerce appointments plugin in your WordPress environment is to use the manual installation option. Manual installation involves downloading and uploading the Bookings for WooCommerce plugin to the web server using their preferred FTP client.
- Upload the Bookings for WooCommerce folder to the /WP-content/plugins/directory.
- Navigate to the Plugins menu in WordPress to activate the plugin.
- That is all there is to it.
2.2.Premium Version
Automatic Installation
Automatic installation is the easiest option handled by WordPress.
- Download the Bookings For WooCommerce Pro plugin.
- Log in to your WordPress Dashboard.
- Navigate to the sidebar, and click on Plugins.
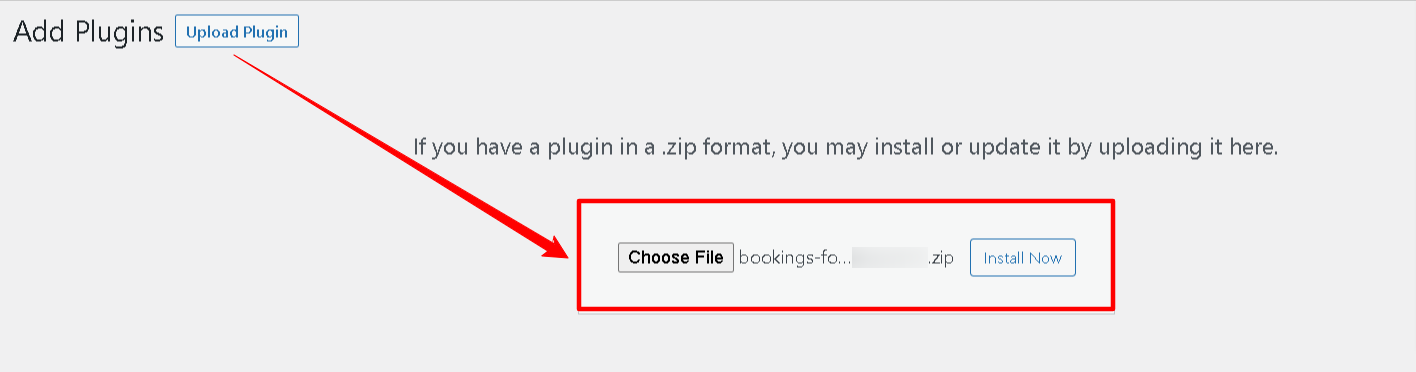
- Click on Add New and then click on Upload Plugins.
- Hit the Browse button choose your downloaded plugin’s .zip file, and click on Install Now.
- Once installed, Activate the Bookings plugin.
Manual Installation
Download the Bookings for WooCommerce PRO plugin from the respective website product page.
Login to your WordPress dashboard.
Navigate to the Plugins > Add New page and hit the Upload Plugin button.
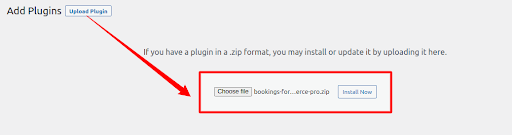
Upload the .zip file of the plugin and hit the Install button.
Finally, activate this plugin from the Plugins > Installed Plugins page and hit the Activate button to continue.
2.3.License
The very last tab in the Bookings for WooCommerce PRO plugin is License. This tab is an activation panel for your plugin license.
To accept WooCommerce booking requests from your customers, activate your plugin license before setting up your plugin backend.
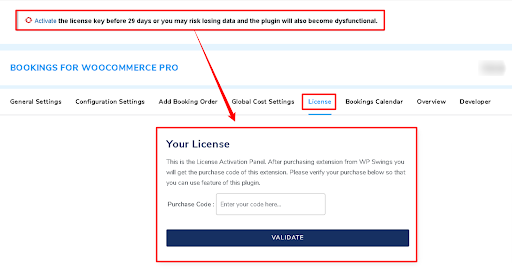
There isn’t any special setting available here, just one that is license activation. You receive an activation code as soon as you purchase the PRO plugin from the site.
After Purchasing the premium version navigate to My Account > Orders > Your Order. There you’ll find the License Key. The License Key is also sent to you on your mail ID.
Please confirm your purchase code by copy-pasting it in the given Enter Purchase Code text field and hitting the Validate button, so that you can utilize the plugin’s features conveniently even after the 30 days of plugin activation.
Note: Even if the license is not activated, you can use the Bookings for WooCommerce PRO plugin capabilities for 30 days. After that, the PRO plugin features would be automatically disabled, and you might end up losing your customer’s booking data, therefore it is a must to activate the license before the trial period ends.
3.How To Integrate Your Bookings With The Google Calendar?
Proceed with the following steps to successfully integrate Google Calendar with bookings.
These are some of the backend settings that the admin must enable for Google Calendar to work seamlessly.
You will find the following settings in the General Settings of the booking plugin.
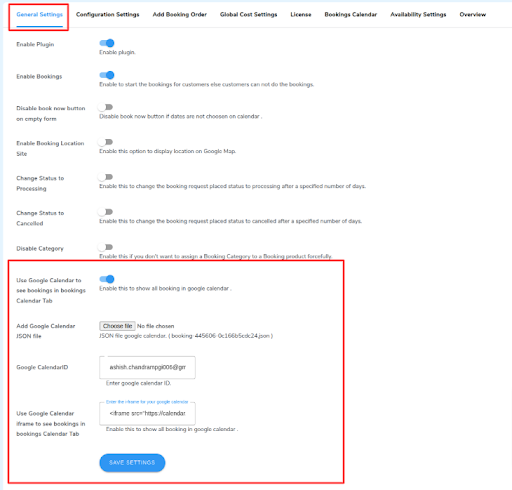
3.1.Use Google Calendar To See Bookings In Bookings Calendar Tab
Enable this setting, to utilize the functionality of this integration. Click on this link, this will take you to the Google Console’s page where you can “Create A New Project”.
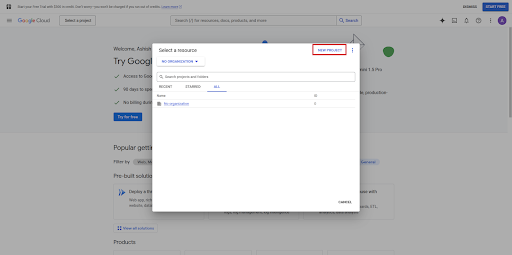
While creating a new project, you must enter the project’s name, fill in other required fields, and Click “Create”.
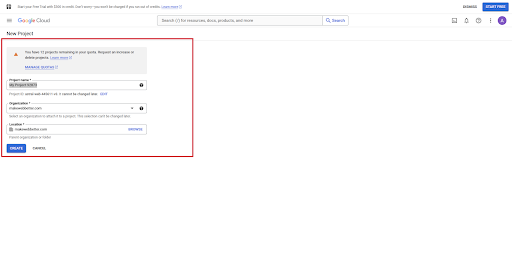
After successfully creating a new project.
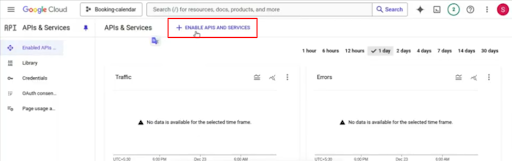
Navigate to “API & Services”.
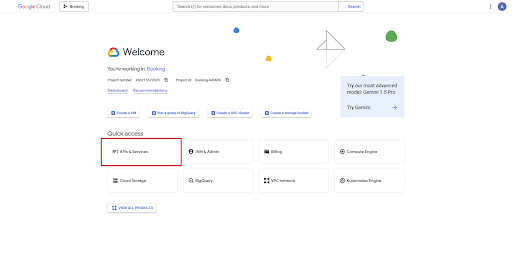
Now you will be redirected to the dashboard of the project that you have just created.
Here you must enable certain APIs, by clicking on the “enable API” option as shown below –
Here you will enable the “Google Calendar API”. Simply search “Google Calendar API” in the search bar.
As Shown below –
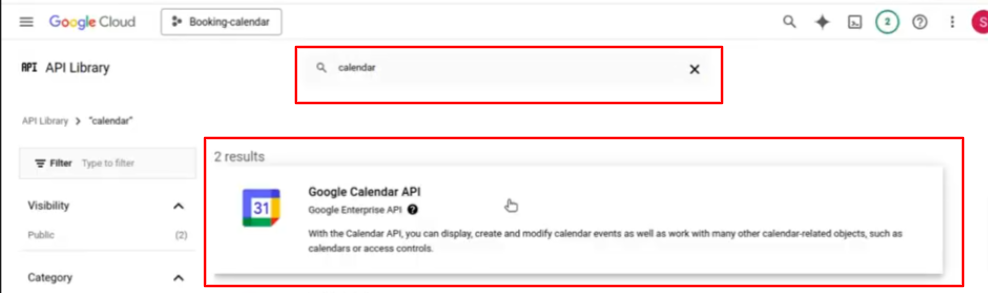
After successfully enabling the API, we can move to the next step.
The admin will have to create the “Credentials”. To do so, just navigate back to the dashboard of the project that you just created. And, navigate to the “credentials tab”.
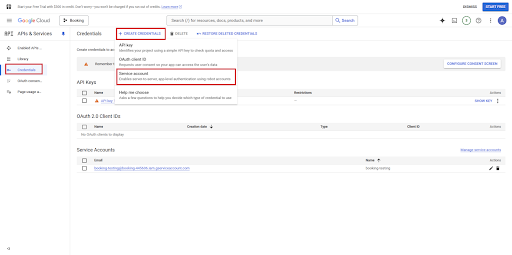
After selecting the “Service Account”. You must enter all the required details, as shown below –
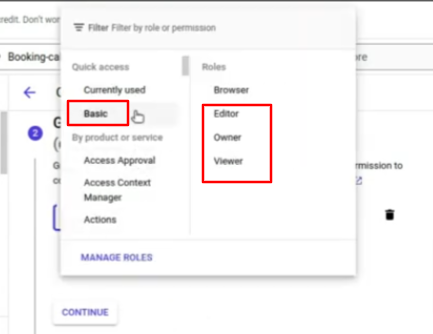
After putting in the relevant information against each field, the admins can move to the second select step i.e. defining the user roles.
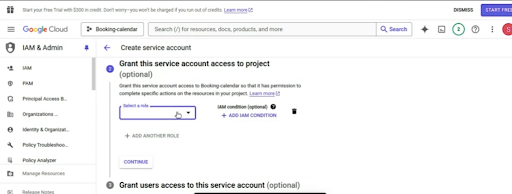
You must choose three user roles (Editor, Viewer & Owner). You can do so by using the drop-down as shown below –
After saving all the details you, entered, you have successfully created your account.
3.2.Add Google Calendar JSON File
Open the created account and go to the Keys section.
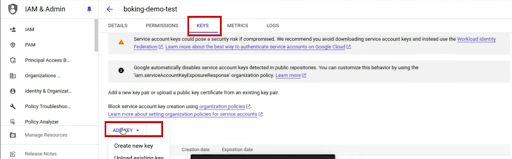
Add Key > Create new key > JSON file.
Click on Create. As shown below –
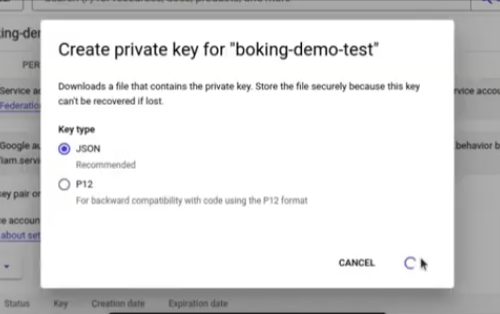
After doing so the “JSON File” will be downloaded into the “downloads” folder of your system.
Now the admin will upload the downloaded file in the backend settings.
 Let’s proceed with creating the Google Calendar ID.
3.3.Google Calendar ID
To get your Google Calendar ID, follow these steps –
Open Your Google Calendar In A New Tab
Choose the Calendar of your Choice
Navigate to “ Integrate Calendar”
Here you will find the “Calendar ID”.
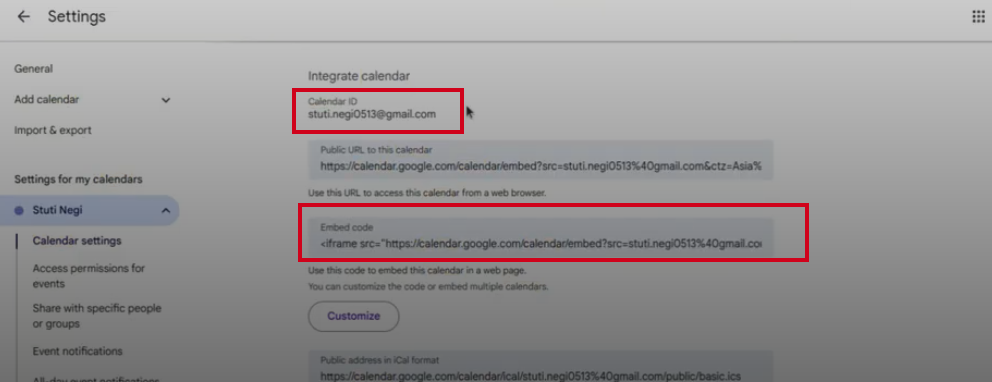 Enter this ID over the backend settings.

3.4.Use the Google Calendar iframe To See Bookings In the Booking Calendar Tab
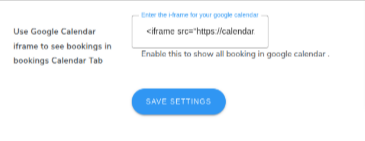
The admins will just have to copy the embedded code and paste it into the given space.

Now simply click on “Save” to save all the relevant details.
But wait, there is a last step. Open the created JSON file, and pull the client email ID from there, as shown below –
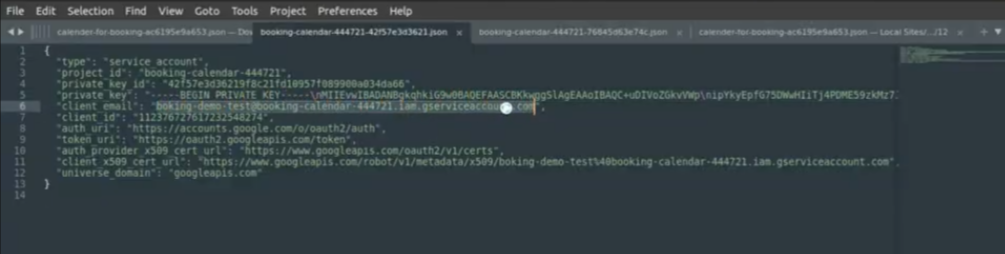 Now, just simply update the client’s ID to permit them to view the Google Calendar in the Calendar’s tab.
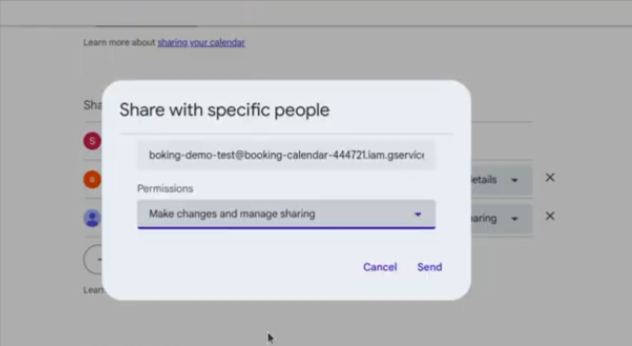
After successfully, pulling the client’s ID, and updating the permissions to “make changes and manage to share”.The permission must also be given to the site admin email ID.
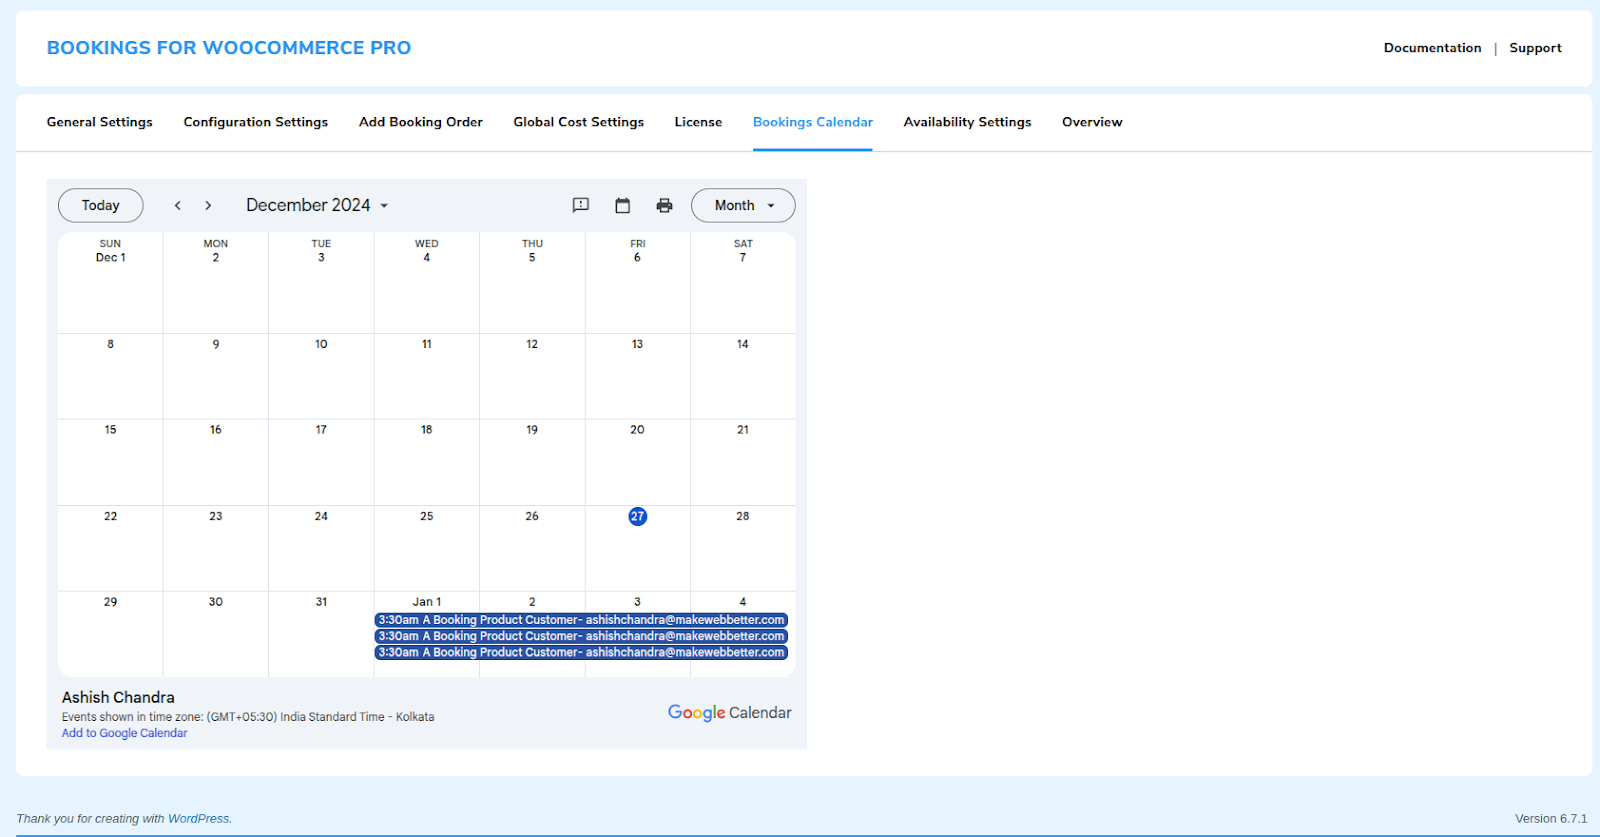
You’ll now see the Google Calendar in the Bookings Calendar tab.
All bookings processed by you (the admin) will be displayed in the Google Calendar under the Bookings Calendar tab.
4.Frontend Representation
After completing all the mentioned steps successfully, you will set up Google Calendar with WooCommerce Bookings plugin.
This is how it will look –