

1.Overview
- Flexible Membership Plans: Create multiple membership tiers such as Gold, Silver, or Diamond, and configure access durations, user roles, and enrollment methods to match your business model.
- Advanced Access Control: Restrict products, pages, posts, and other content based on membership plans, ensuring that exclusive resources are available only to eligible members.
- Multiple Membership Grant Methods: Automatically grant memberships through product purchases, active subscriptions, or user registration, making it easy to onboard and manage members.
- Content Dripping & Scheduling: Deliver content gradually by releasing it after a specified number of days or on scheduled dates, helping increase member engagement and retention over time.
- Centralized Member Management: Easily view, manage, assign, cancel, or remove memberships from a dedicated members dashboard, giving you complete control over your membership program.
2.Download and Install
Install the Subscription for WooCommerce Pro by WP Swings.
- Purchase the plugin and download it.
- Log in to your WooCommerce store’s admin panel.
- Navigate to “Plugins” > “Add New” in the WordPress dashboard.
- Click the “Upload Plugin” button and upload the plugin file.
After uploading, click “Install Now” and then “Activate“
3. Manage Memberships
To start using the Membership feature, navigate to Memberships from the plugin menu. In this section, you will find four tabs that help you create and manage membership plans.
Let’s explore each tab and its functionality in detail.
3.1.Membership Plans
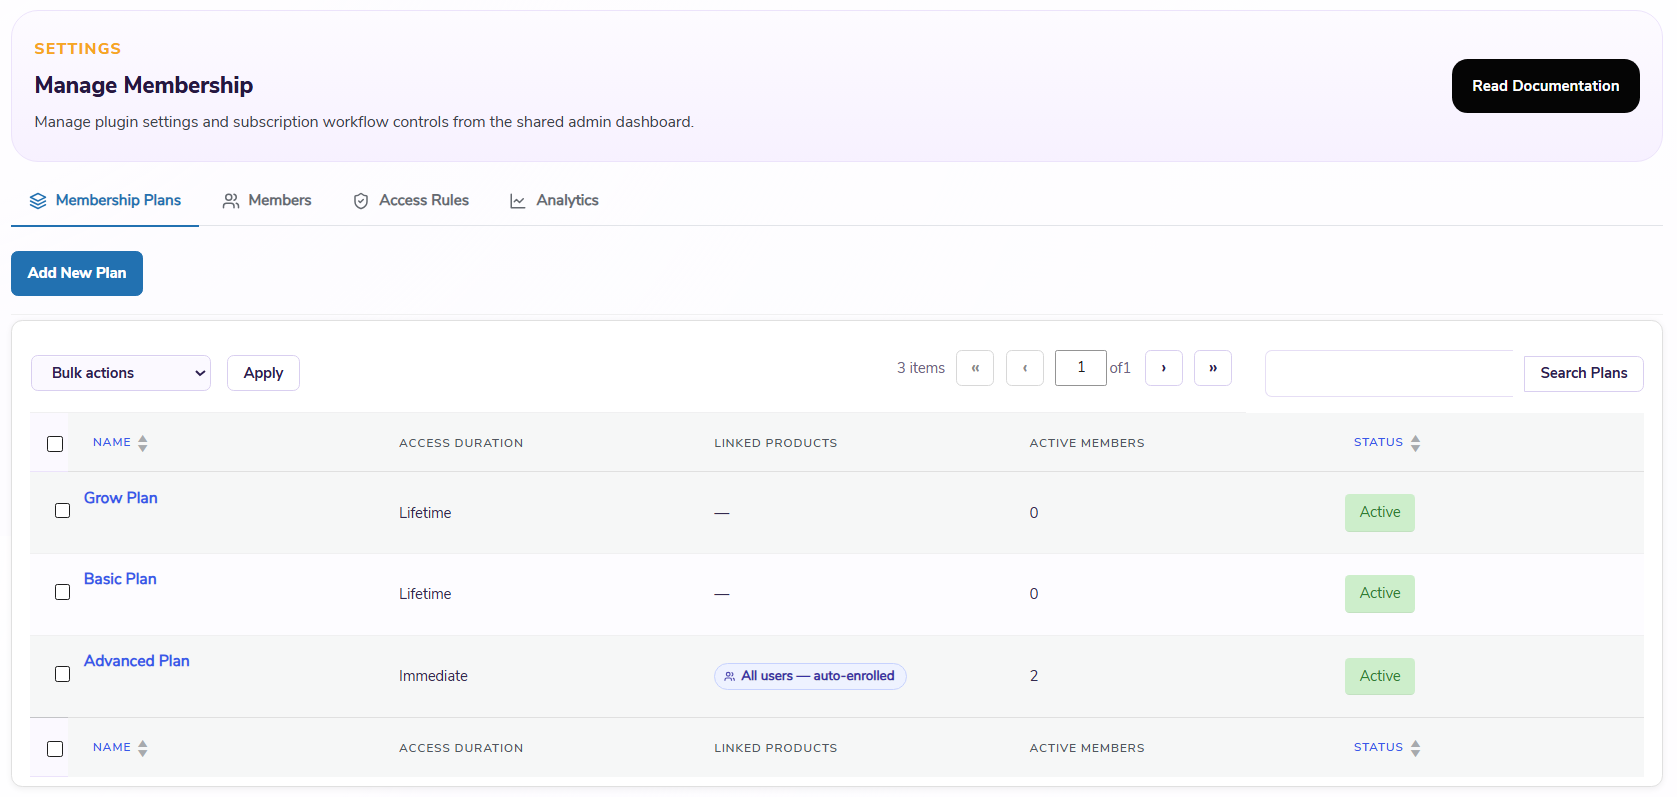
The Membership Plans tab displays all the membership plans you have created, along with important details such as their status, linked products, and associated settings.
Creating a New Membership Plan
To create a new membership plan, click Add New Plan.
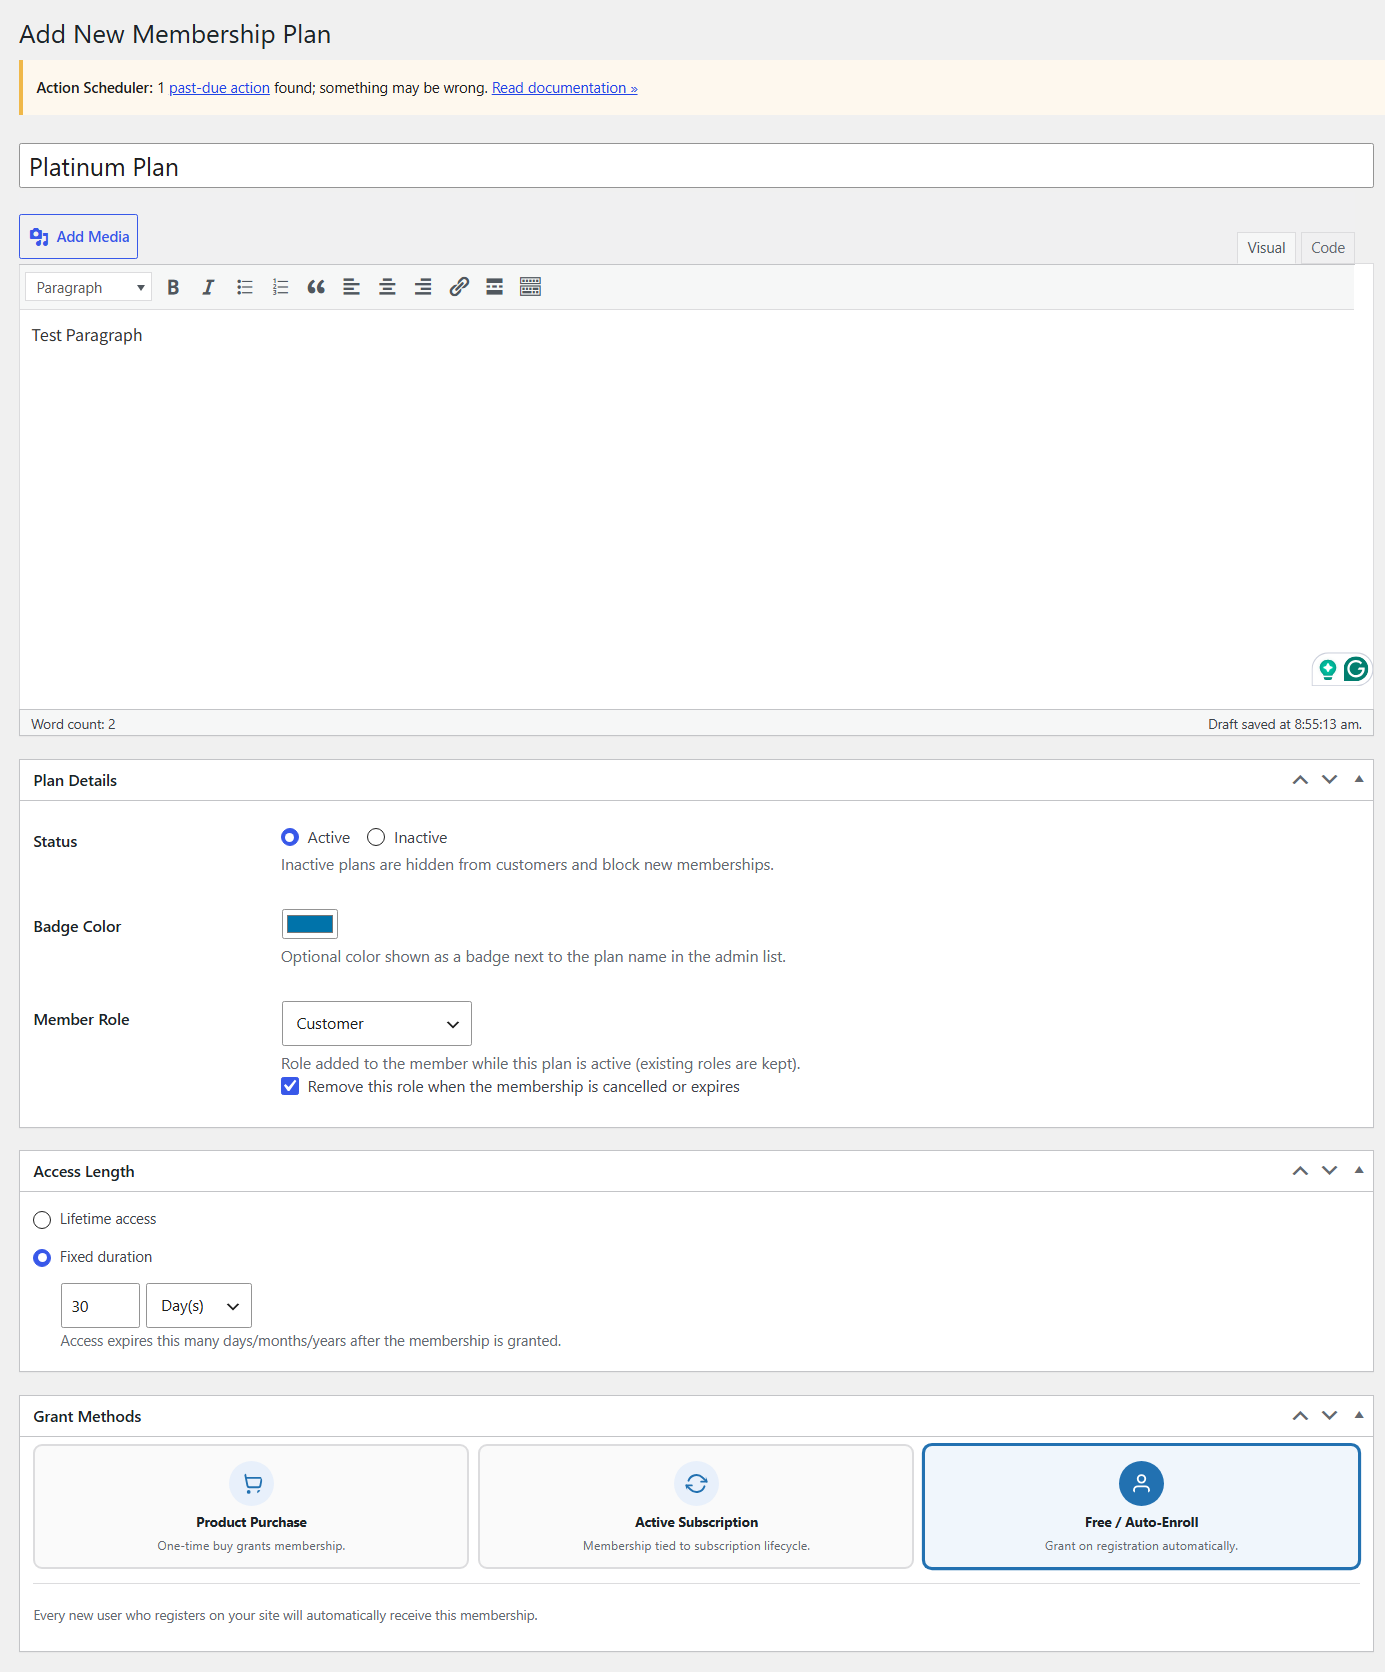
In the plan creation screen, configure the following settings:
Basic Details
- Plan Name: Enter a name for your membership plan, such as Gold, Silver, or Diamond.
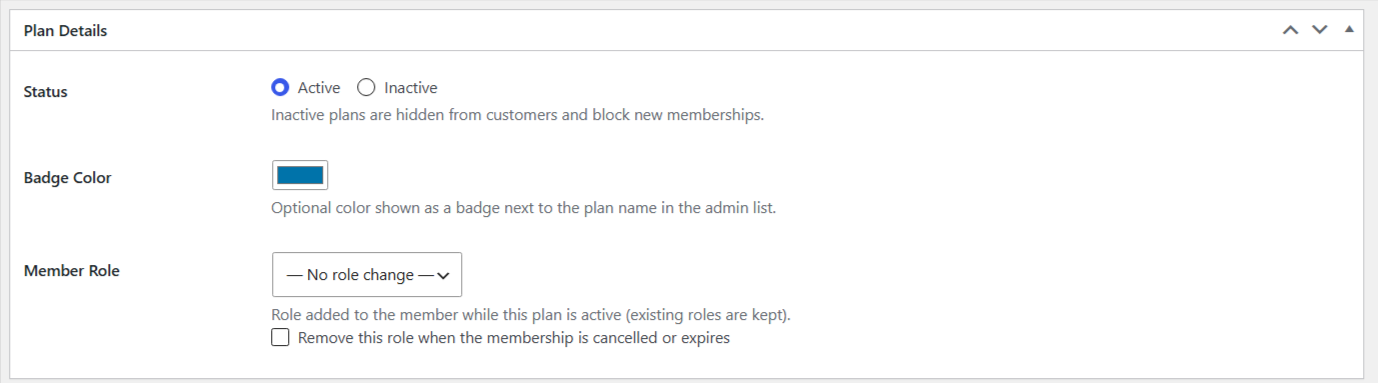
- Status: Choose whether the membership plan should be Active or Inactive.
- Badge Color: Select a badge color that will be displayed on membership-exclusive products, helping customers easily identify them.
- Member Role: Assign a user role that will automatically be granted to customers when they purchase or gain access to the membership.
Access Duration
In the Access Length section, define how long users can access the membership:

- Lifetime Access: Membership remains active indefinitely.
- Fixed Duration: Membership remains active for a specified period.
Grant Methods
The Grant Methods section determines how customers can obtain membership access. You can grant membership through one or more of the following methods:
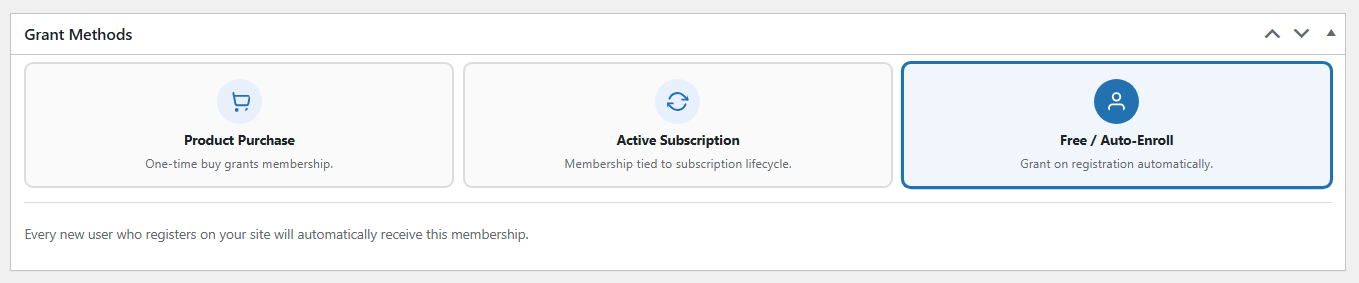
- Product Purchase: Users receive membership after purchasing a designated product.
- Active Subscription: Users gain membership access while their subscription remains active.
- User Registration: Membership is automatically granted when a user registers on your website.
Once all settings have been configured, save the plan to make it available for your customers.
3.2.Members
The Members tab provides a centralized view of all users who are enrolled in membership plans. Here, you can monitor and manage member activity, membership status, and access details.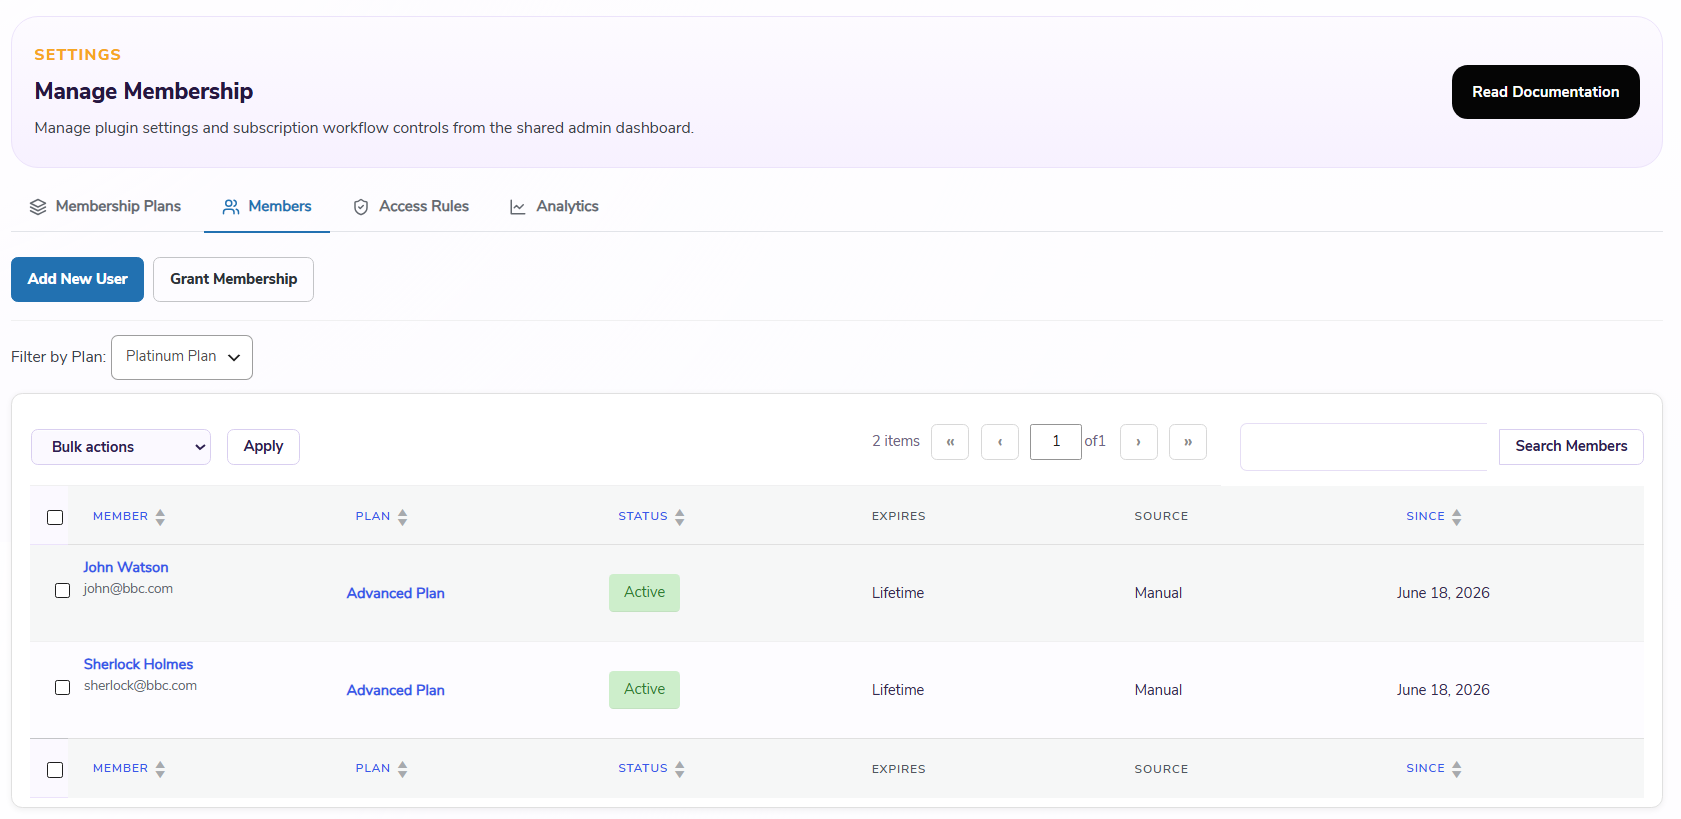
3.3.Member Overview
The members table displays important information for each member, including:
- Member name and account details
- Assigned membership plan
- Membership status
- Start date
- Expiry date (if applicable)
- Other relevant membership information
3.4.Adding New Members
You can add members directly from this tab by:
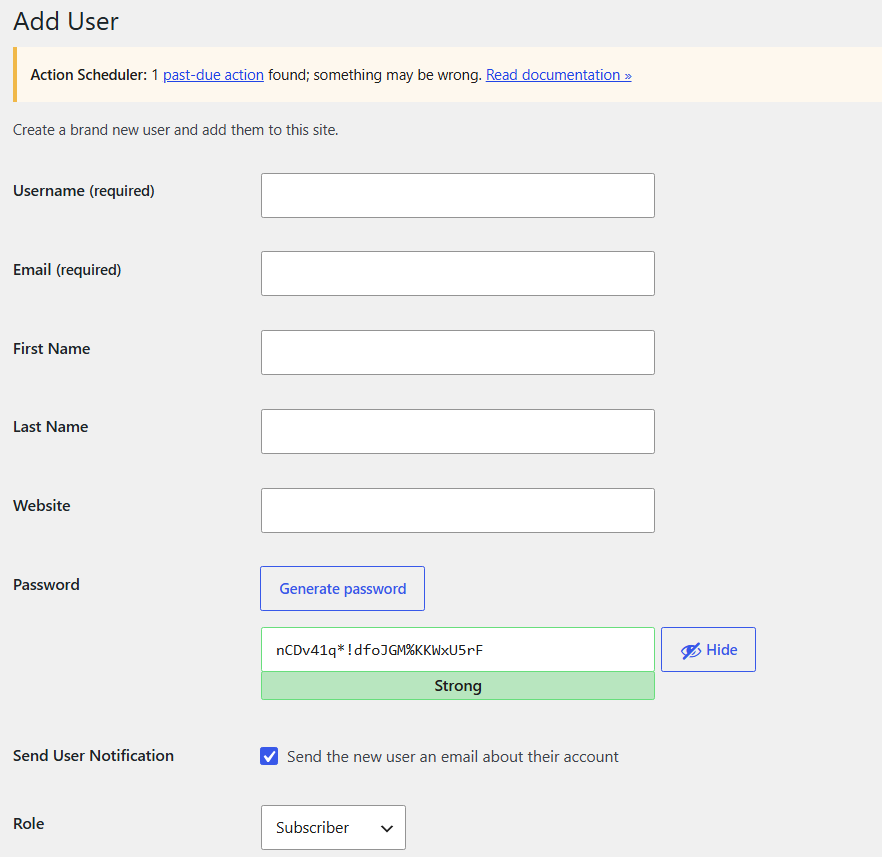
- Creating a new user account and assigning a membership plan.
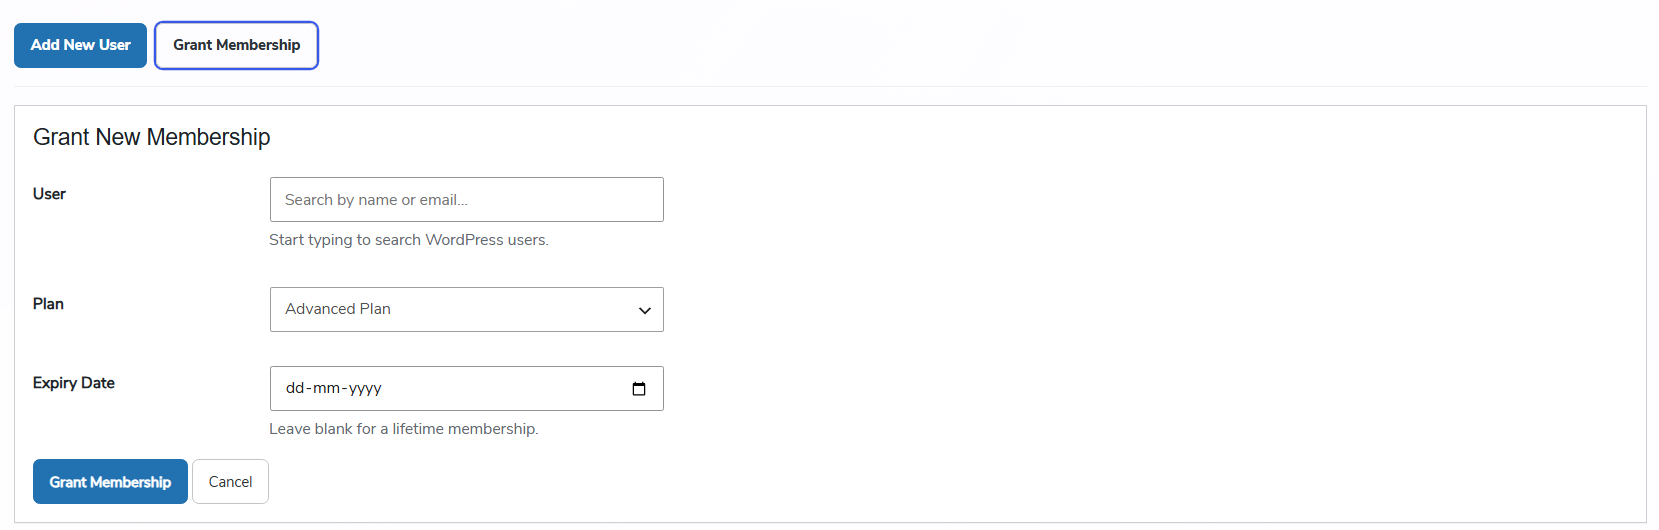
- Granting a membership plan to an existing user without requiring a separate purchase or registration process.
3.5.Managing Memberships
The Members tab also allows you to manage memberships efficiently from a single location. You can:
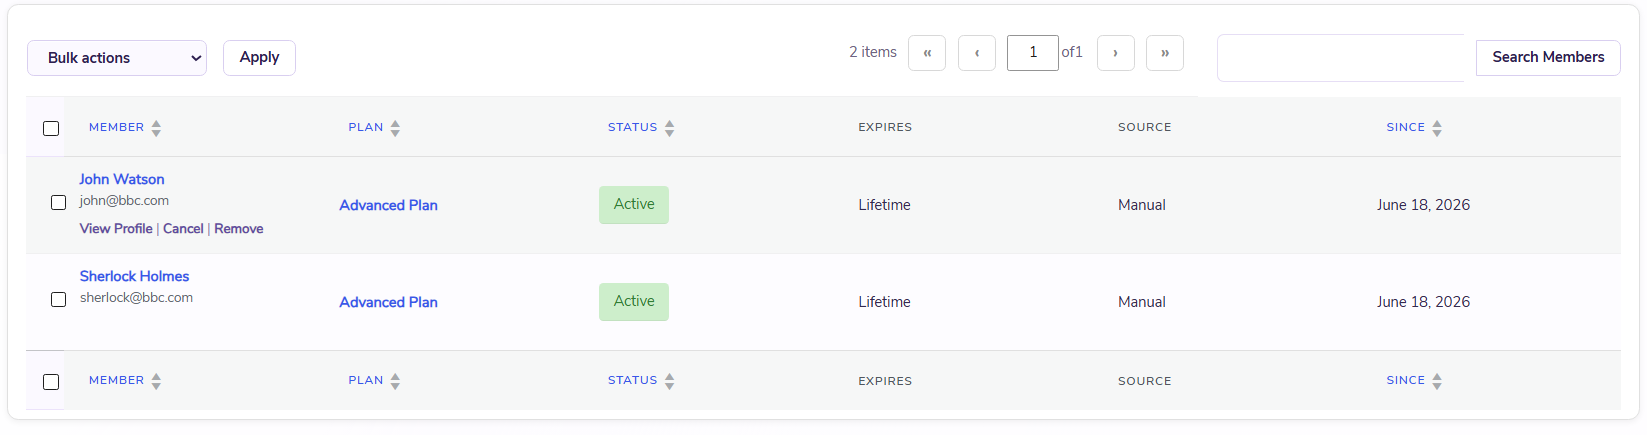
- Cancel an active membership.
- Remove a user’s membership access entirely.
This makes it easy to administer memberships and maintain accurate member records without navigating to multiple sections of your store.
4.Access Rules
Access Rules tab allows you to control who can view or purchase specific content and products on your website.
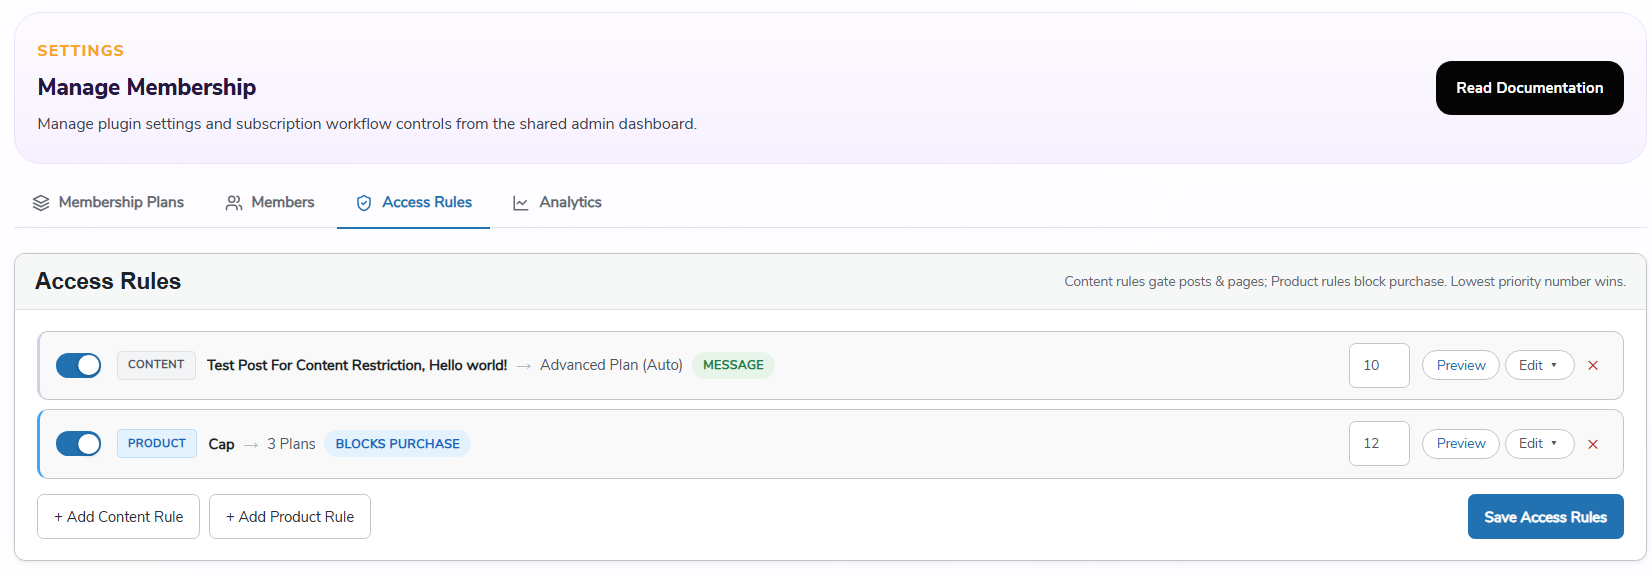
Using access rules, you can create exclusive experiences for members by restricting products, pages, posts, or other content types based on membership plans.
There are two types of access rules available:
- Product Access Rules
- Content Access Rules
4.1.Product Access Rules
Product Access Rules allow you to restrict the purchase or visibility of products based on membership plans.
Creating a Product Access Rule
1. Select Add New Rule and choose Product Restriction.
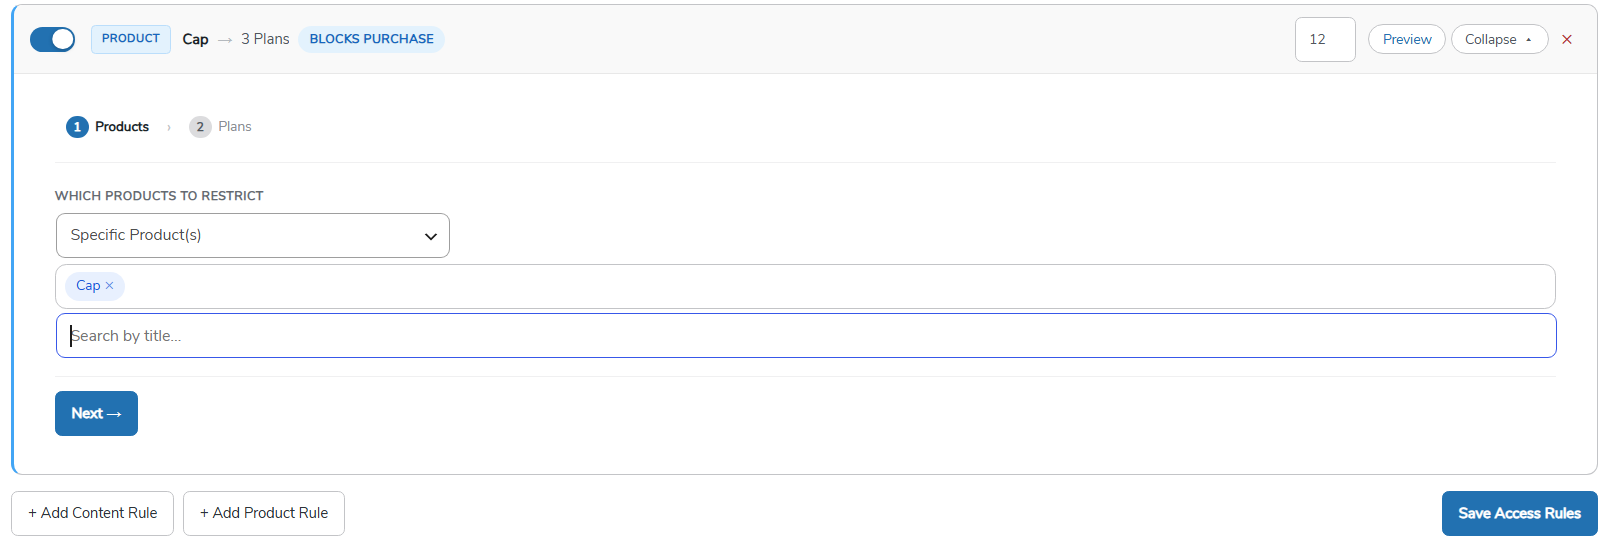
2. Select the products you want to restrict. You can apply restrictions to:
- All products
- Specific products
- Products within selected categories
- Products with specific tags
3. Click Next to configure membership access.
4. Select the membership plan(s) that will grant access to the restricted products.
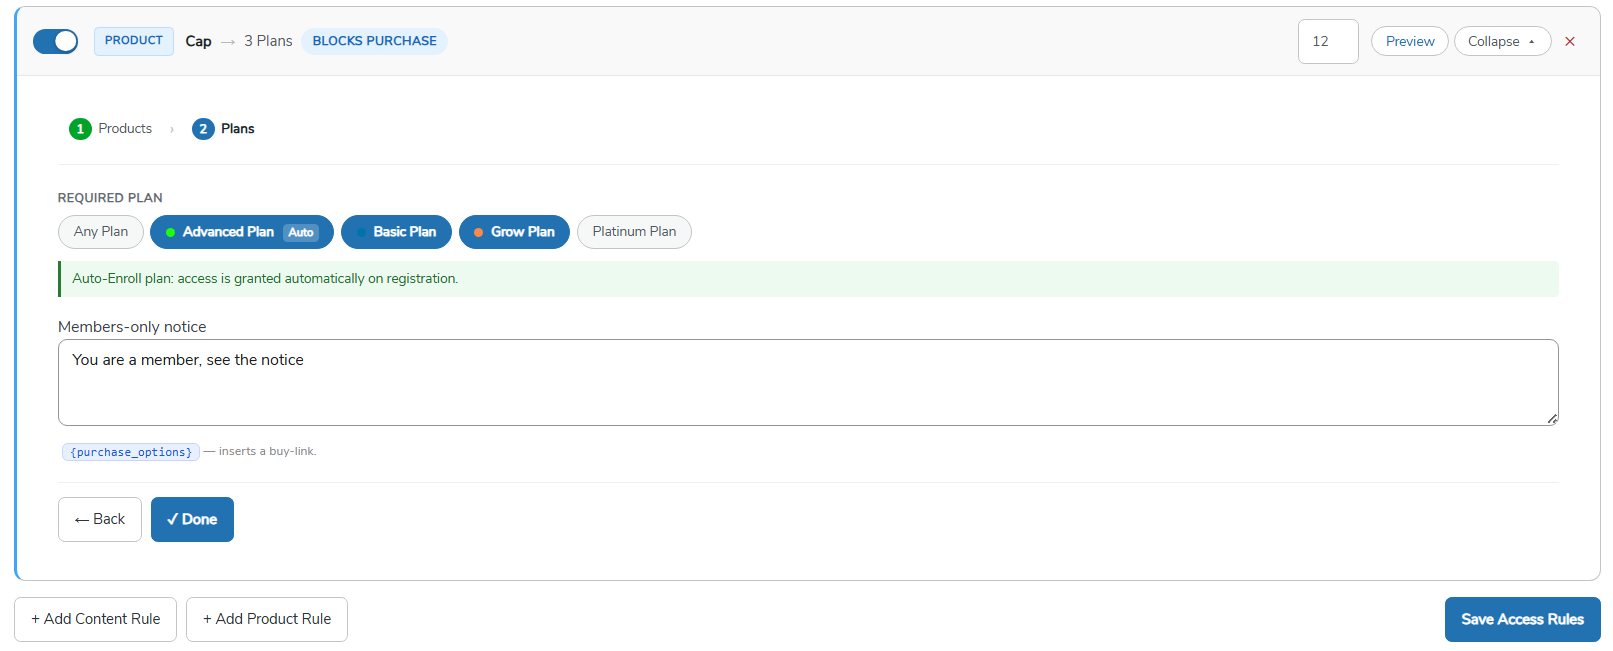
5. Enter a custom notice message that will be displayed to non-members when they attempt to access or purchase the restricted product.
6. Click Done to save the rule.
Once configured, only users with the selected membership plans will be able to access the restricted products.
4.2.Content Access Rules
Content Access Rules enable you to restrict website content such as posts, pages, and taxonomy terms to specific membership plans.
Creating a Content Access Rule
- Select Add New Rule and choose Content Restriction.
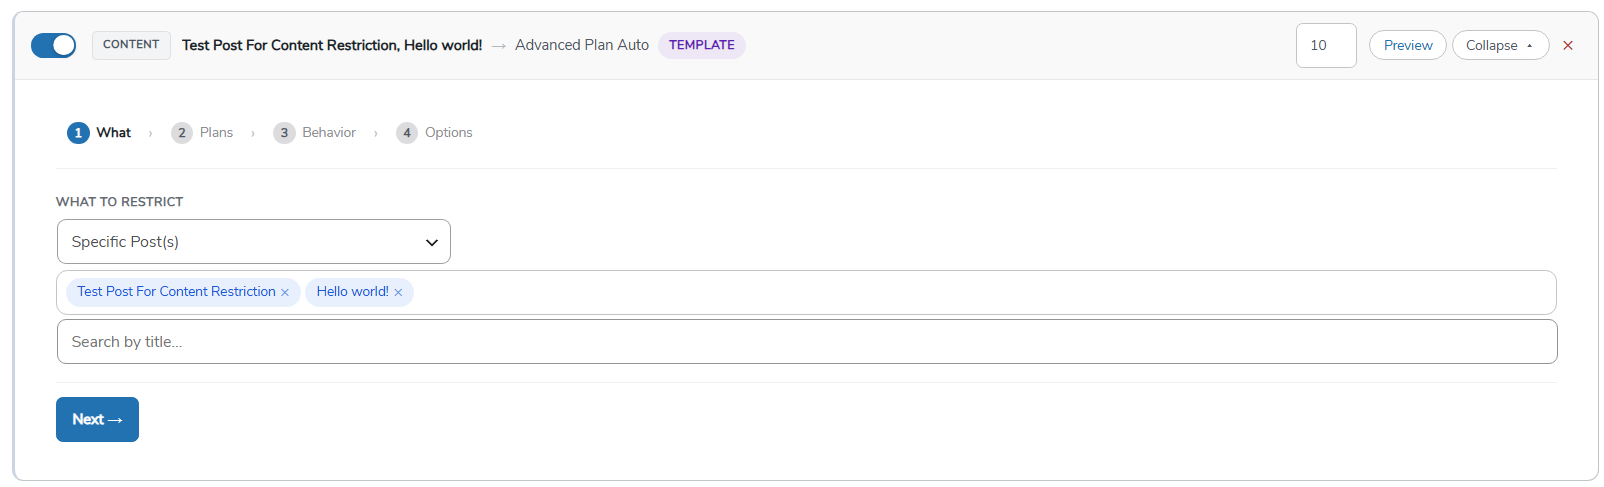
- Choose the content you want to restrict, such as:
- Posts
- Pages
- Taxonomy terms
- Other supported content types
- Click Next and select the membership plan(s) required to access the content.
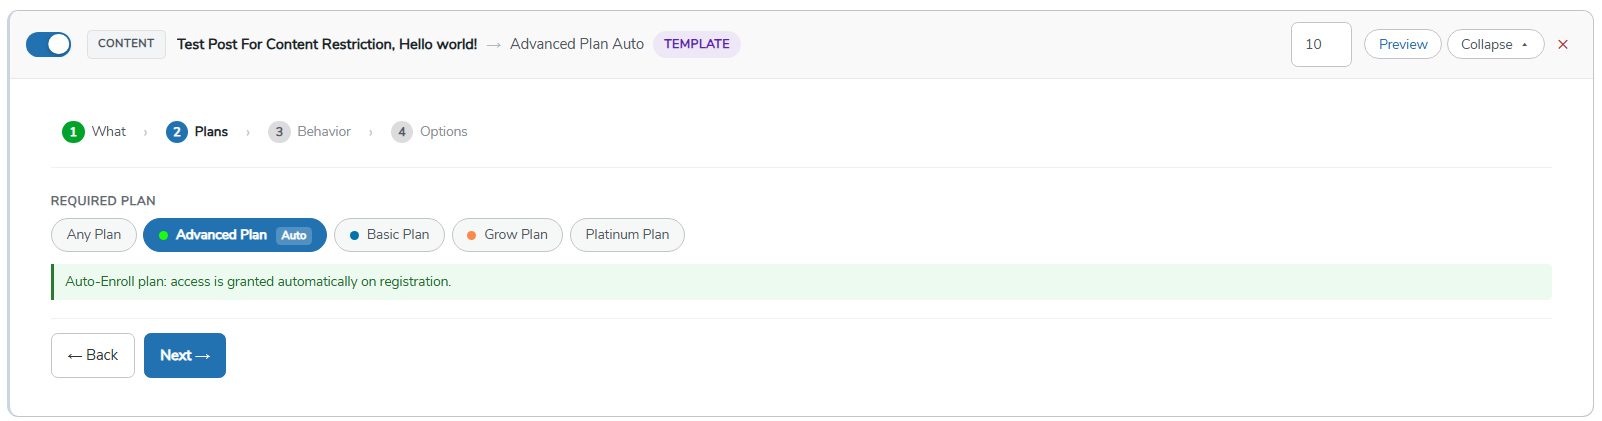
Restriction Behavior
In the Behavior section, define what users will see when they attempt to access restricted content.
You can choose from the following options:
- Display a Custom Message
Show a notice such as:
“This content is available to members only. Please enroll in a membership plan to gain access.”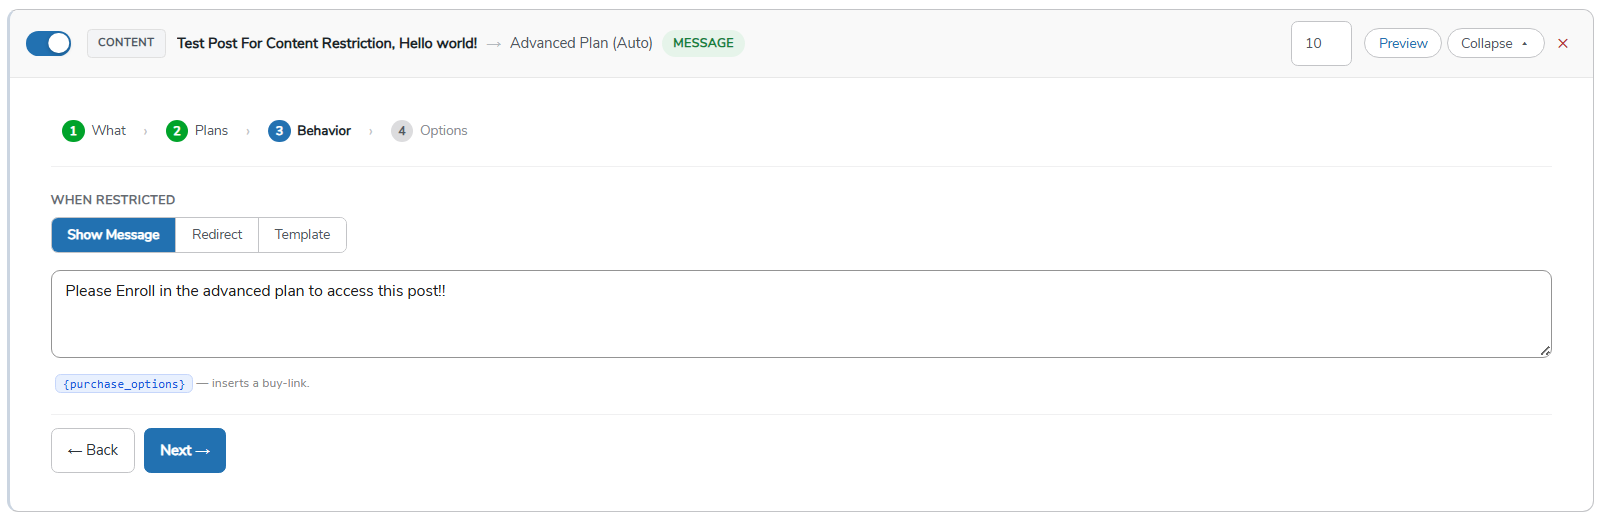
- Redirect Users
Redirect non-members to another page, such as a membership signup or pricing page.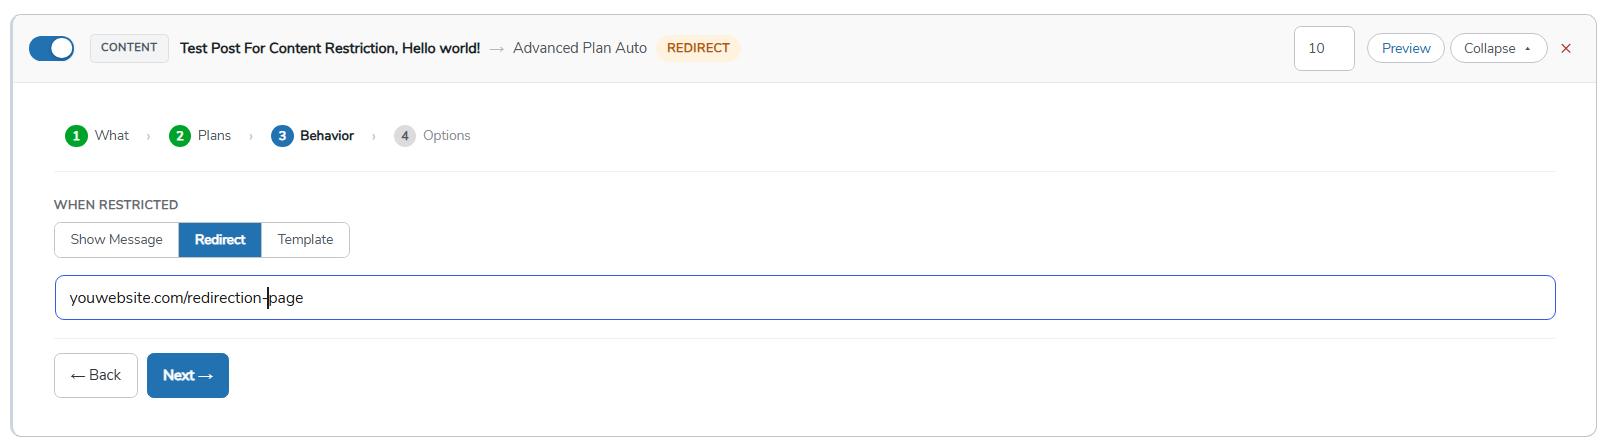
- Content Teaser Template (Pro)
Display a preview of the restricted content by showing the first specified number of words, encouraging users to purchase a membership to read the full content.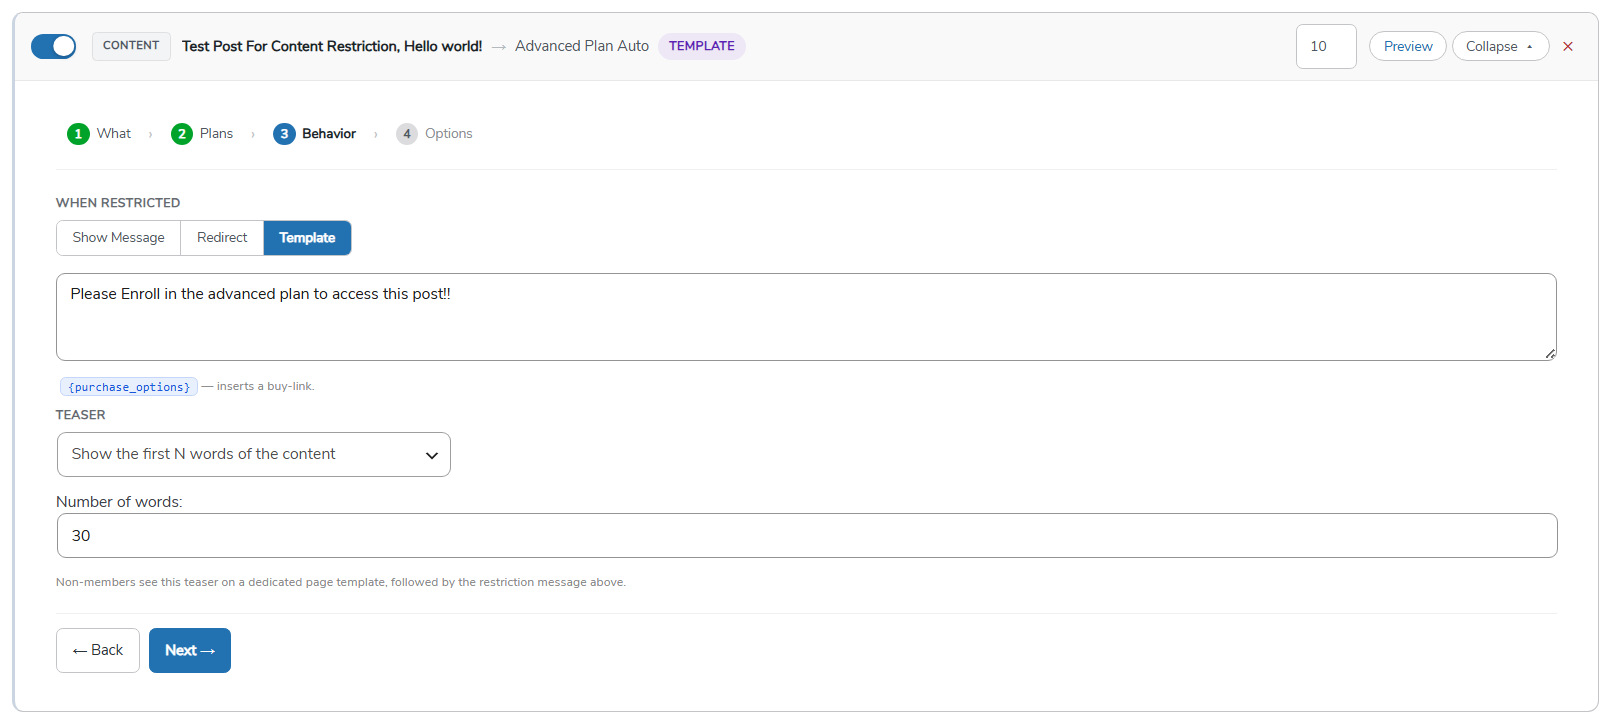
Click Next after configuring the desired behavior.
Additional Options
The next section provides several advanced settings, including: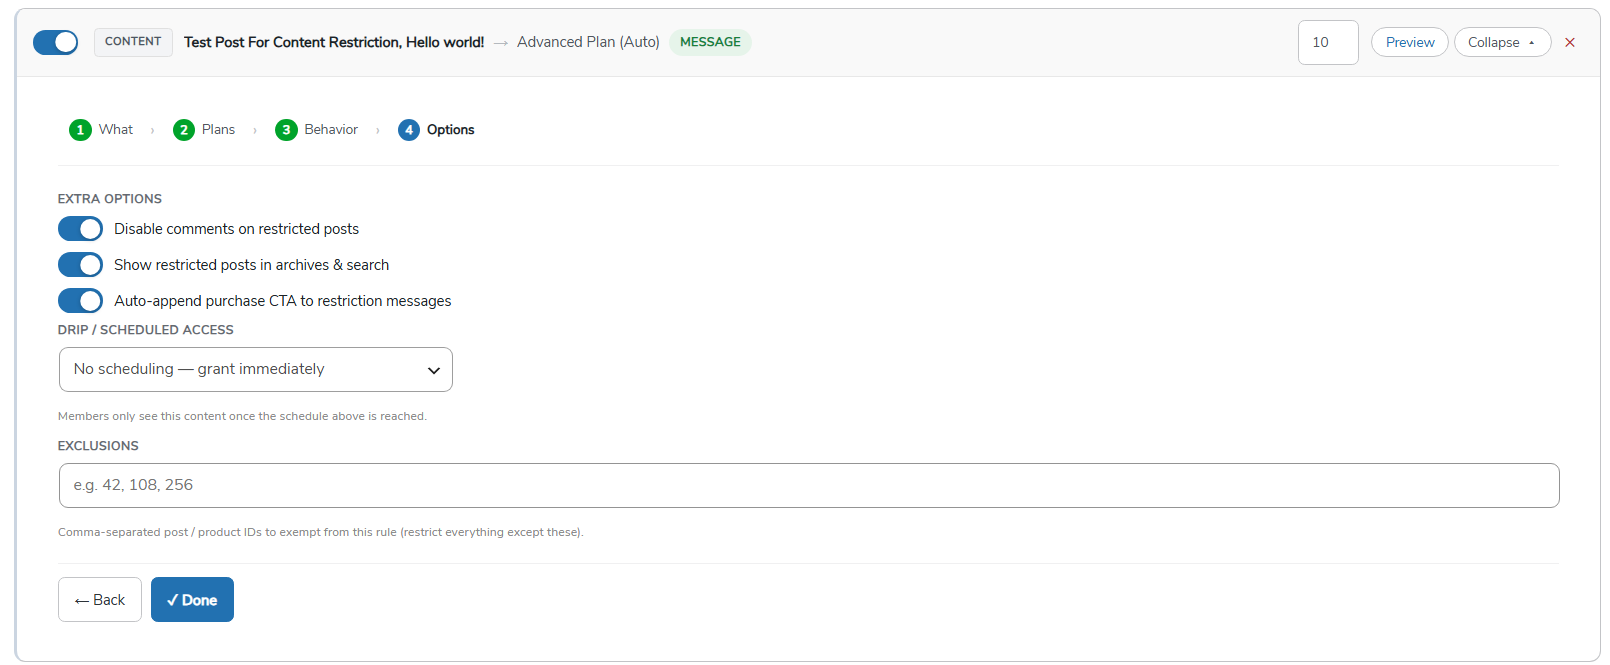
- Disable Comments on restricted posts.
- Show Restricted Content in Search Results.
- Automatically Append a Purchase CTA (Call-to-Action) to restricted pages and posts.
These options help you customize how restricted content is presented throughout your website.
Drip / Scheduled Access
You can also configure Drip Content or Scheduled Access rules.
This feature allows content to become available:
- After a specified number of days following a membership purchase.
- On a specific calendar date.
Drip scheduling is useful for course content, training programs, membership series, and other content released over time.
Exclusions
If required, you can exclude specific posts, pages, or content items from a restriction rule by using the Exclusions option. Excluded content will remain accessible even when the rule is active.
Once all settings have been configured, click Done to save the access rule. The selected restrictions will be applied immediately according to the configured membership plans and settings.
5.Analytics
Next tab gives you a detailed analysis of your membership stats, such as how many current members you have, how many of them are active, cancellation and revenue details.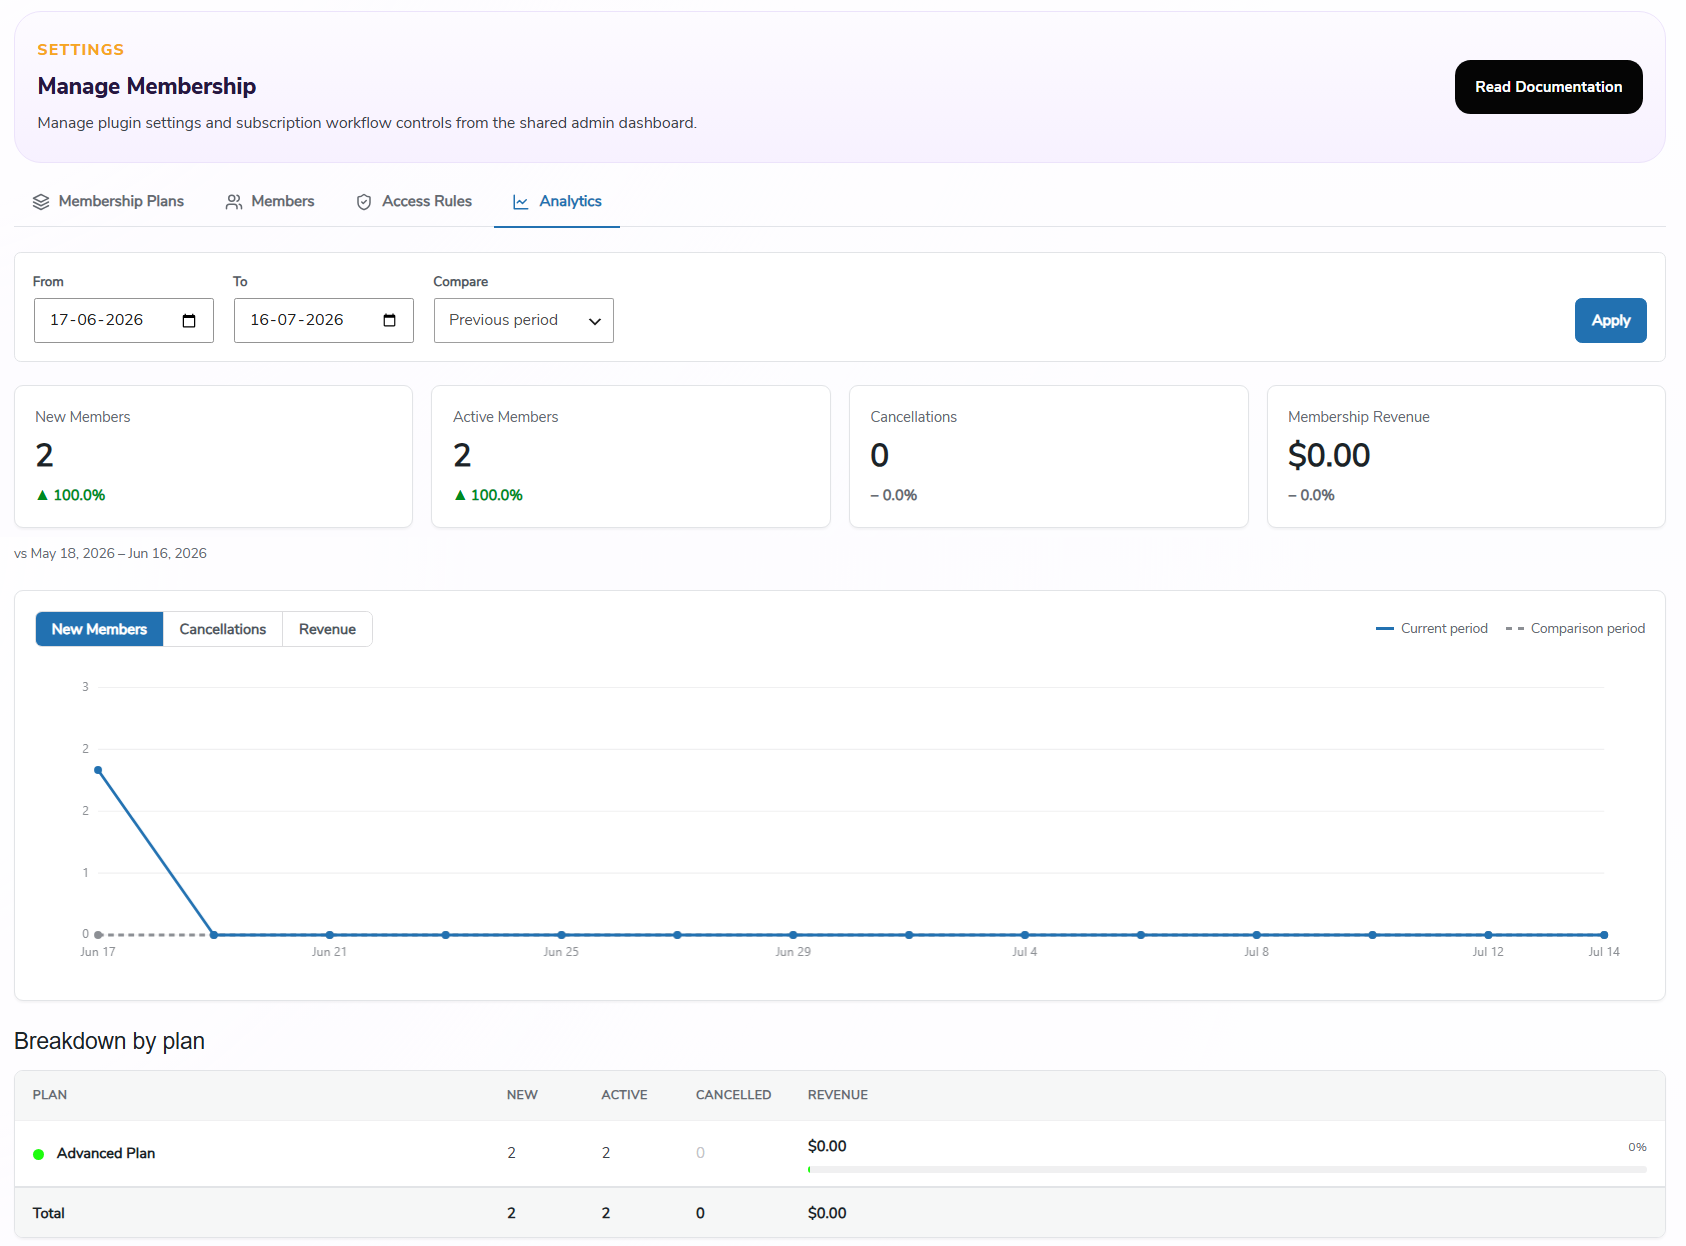
Plus, you can also filter this data by date range and compare it to the previous period; you also get a detailed breakdown plan-wise.
