1.Overview
Enhance member engagement and retention with Membership for WooCommerce Pro by sending exclusive offers and updates directly through WhatsApp! This feature allows admins to notify members about special deals, discounts, and important updates based on their membership level.
Seamless WhatsApp Integration: Easily configure WhatsApp notifications using your Access Token, Phone ID, and Template for a smooth setup.
Personalized Messaging: Send targeted and customized messages to members of different membership levels in just a few clicks.
Opt-In/Opt-Out Control: Members have the flexibility to enable or disable WhatsApp notifications as per their preferences.
Automated & Instant Notifications: Keep members informed in real-time with exclusive offers and updates to boost engagement.
Here’s a step-by-step guide on how to set up WhatsApp notifications for Membership for Woocommerce
2.Download and Install
Install the Membership for WooCommerce Pro by WP Swings.
- Purchase the plugin and download it.
- Log in to your WooCommerce store’s admin panel.
- Navigate to “Plugins” > “Add New” in the WordPress dashboard.
- Click the “Upload Plugin” button and upload the plugin file.
- After uploading, click “Install Now” and then “Activate”
3.Offer Notifications Setup
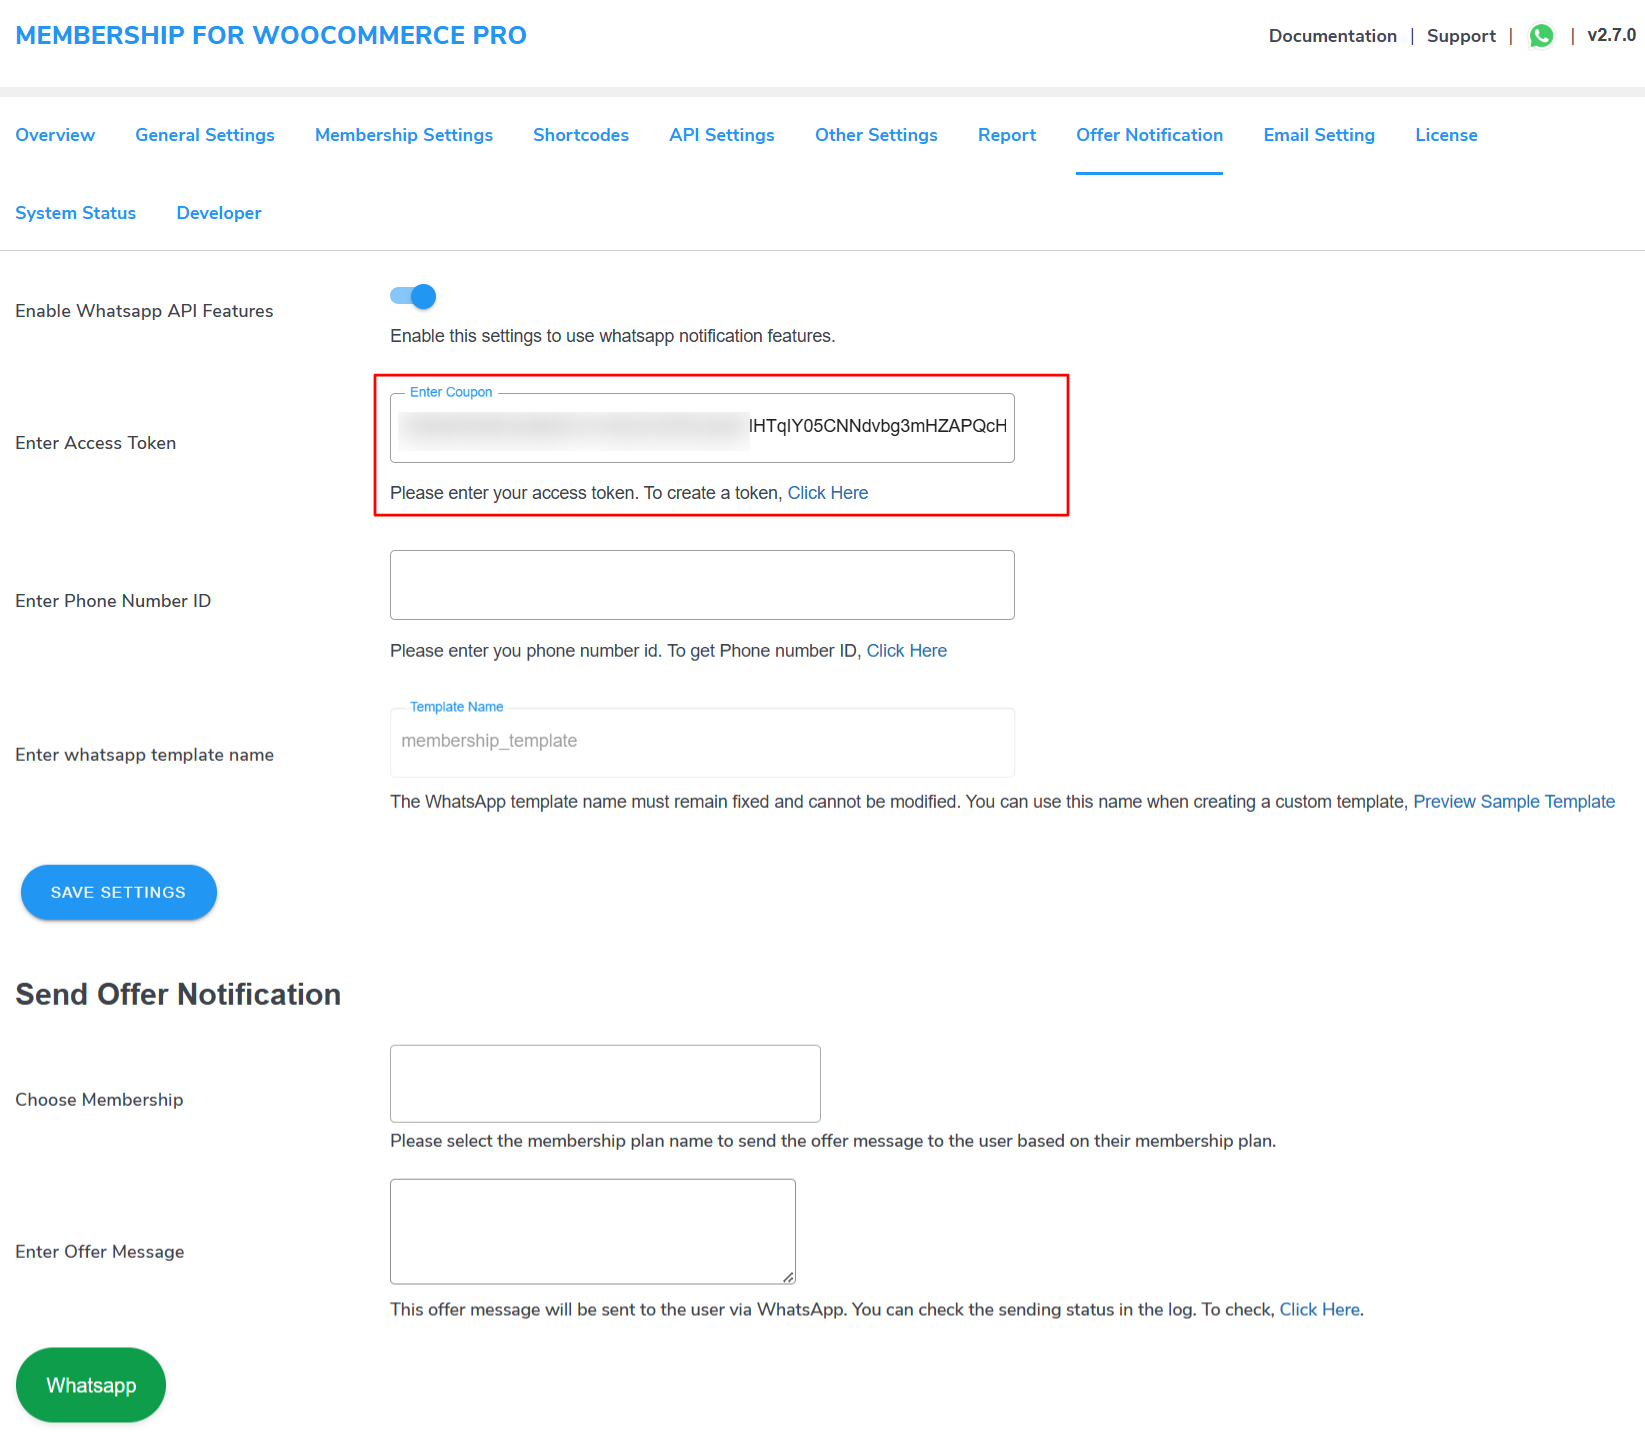
To start sending offer notifications via WhatsApp, navigate to the “Offer Notification” section in the Membership for WooCommerce plugin.
Here, you will find an option to enable WhatsApp API features. Simply toggle this setting to activate WhatsApp notifications for your member.
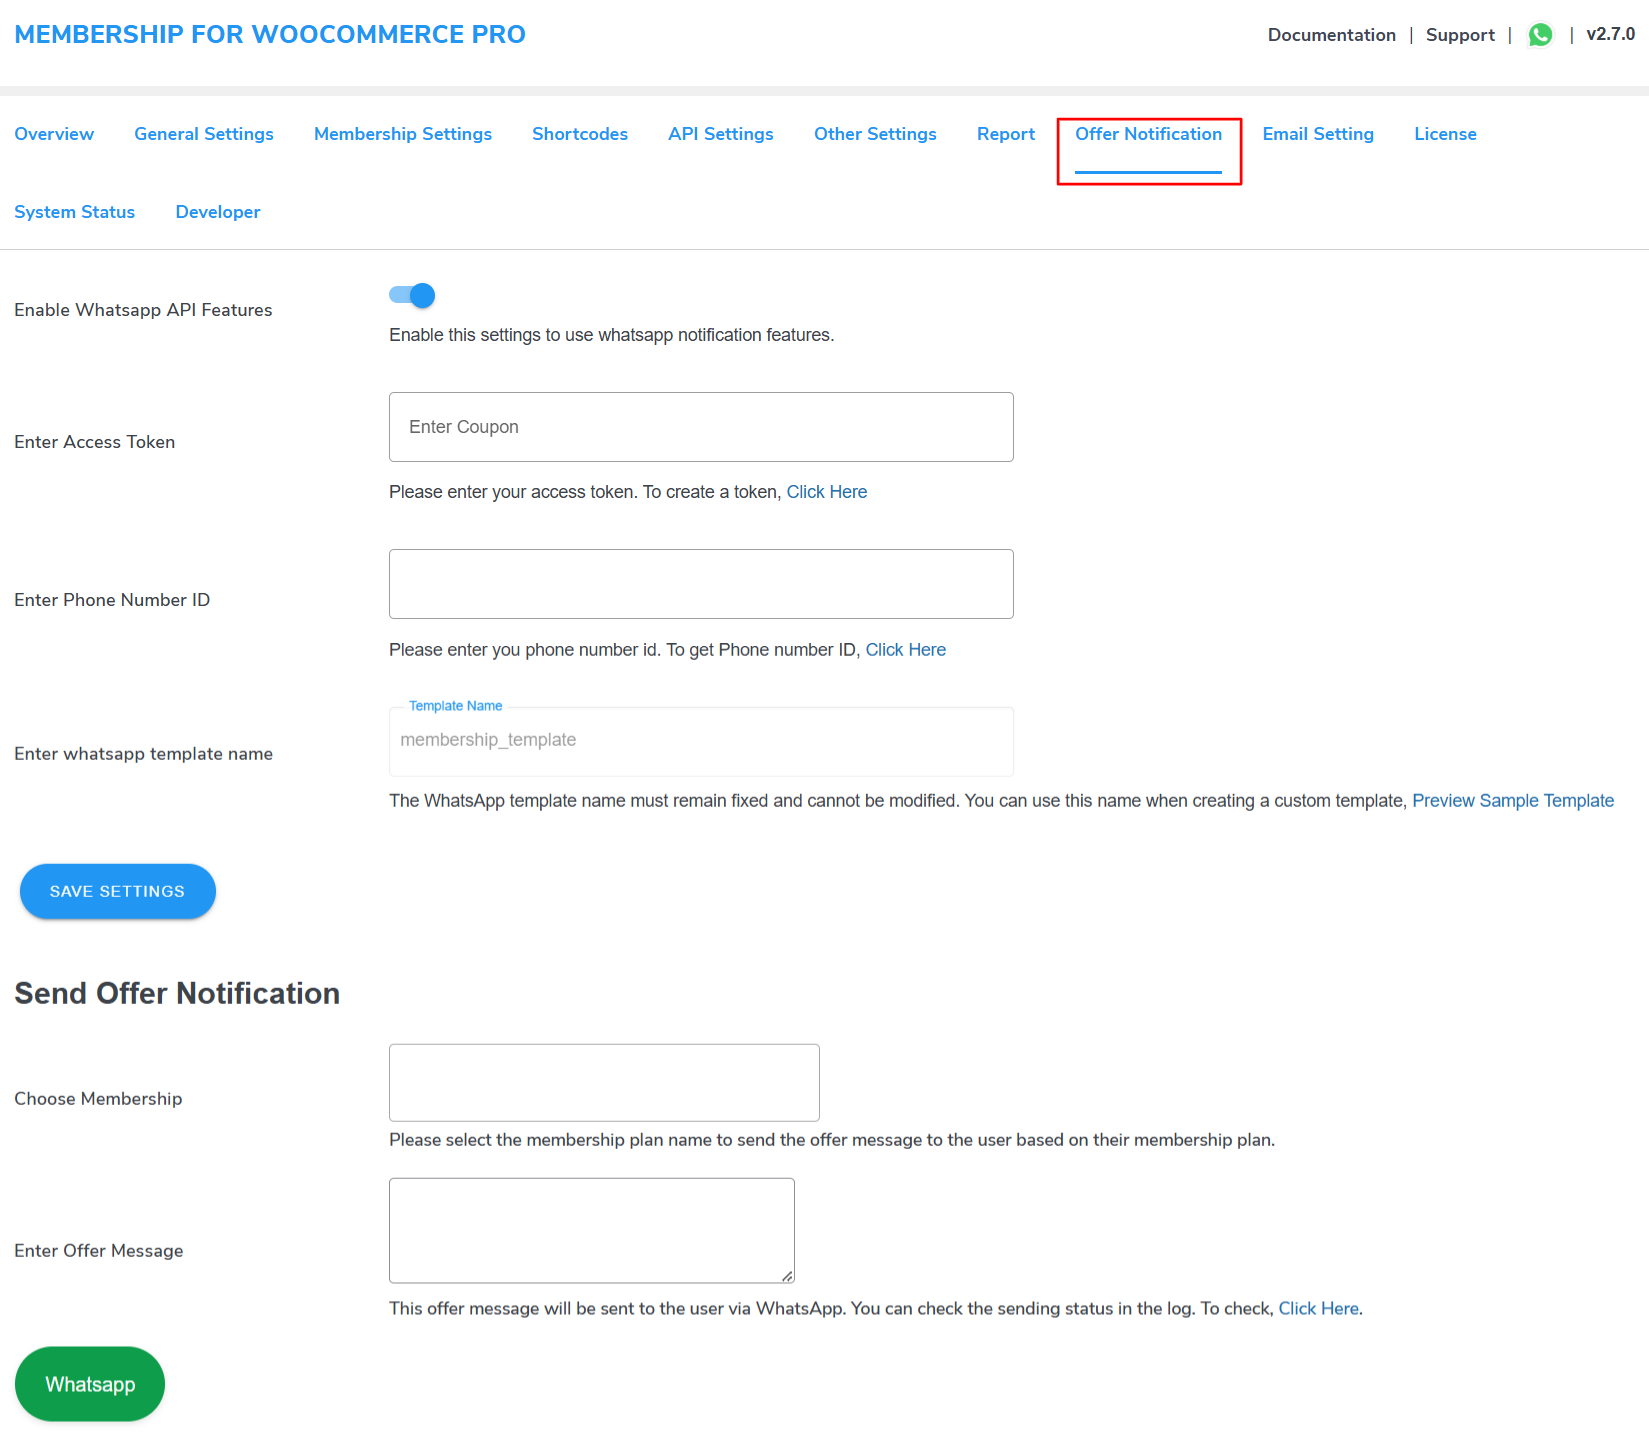
Enter Access Token: Next, you need to enter your Access Token to integrate WhatsApp with your membership site. This token can be obtained from the Facebook Developer Dashboard after creating an account.
Let’s see how to do it….
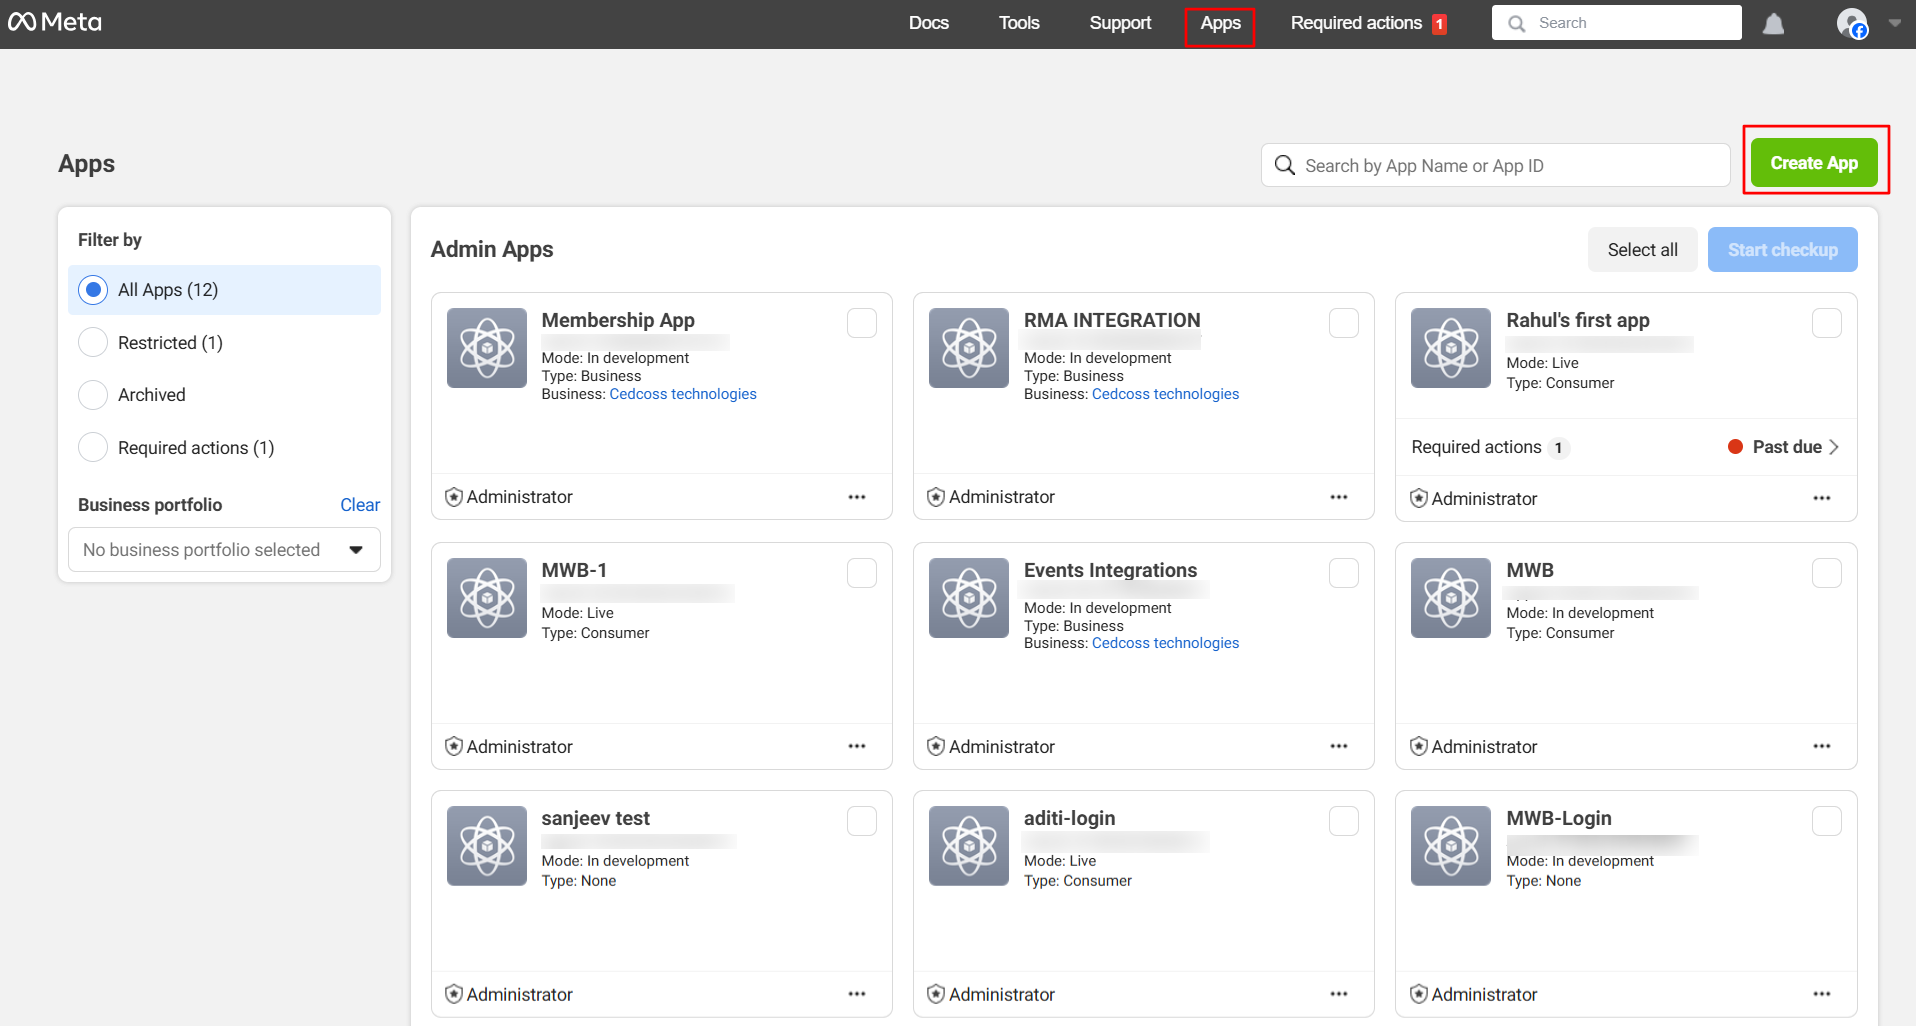
After creating your account on the Facebook Developer Dashboard, navigate to the Apps section from the top bar and create a new app.

Fill out the required fields in the multi-step form based on your needs.
Once completed, your new application will be set up, and you will be redirected to the application dashboard.
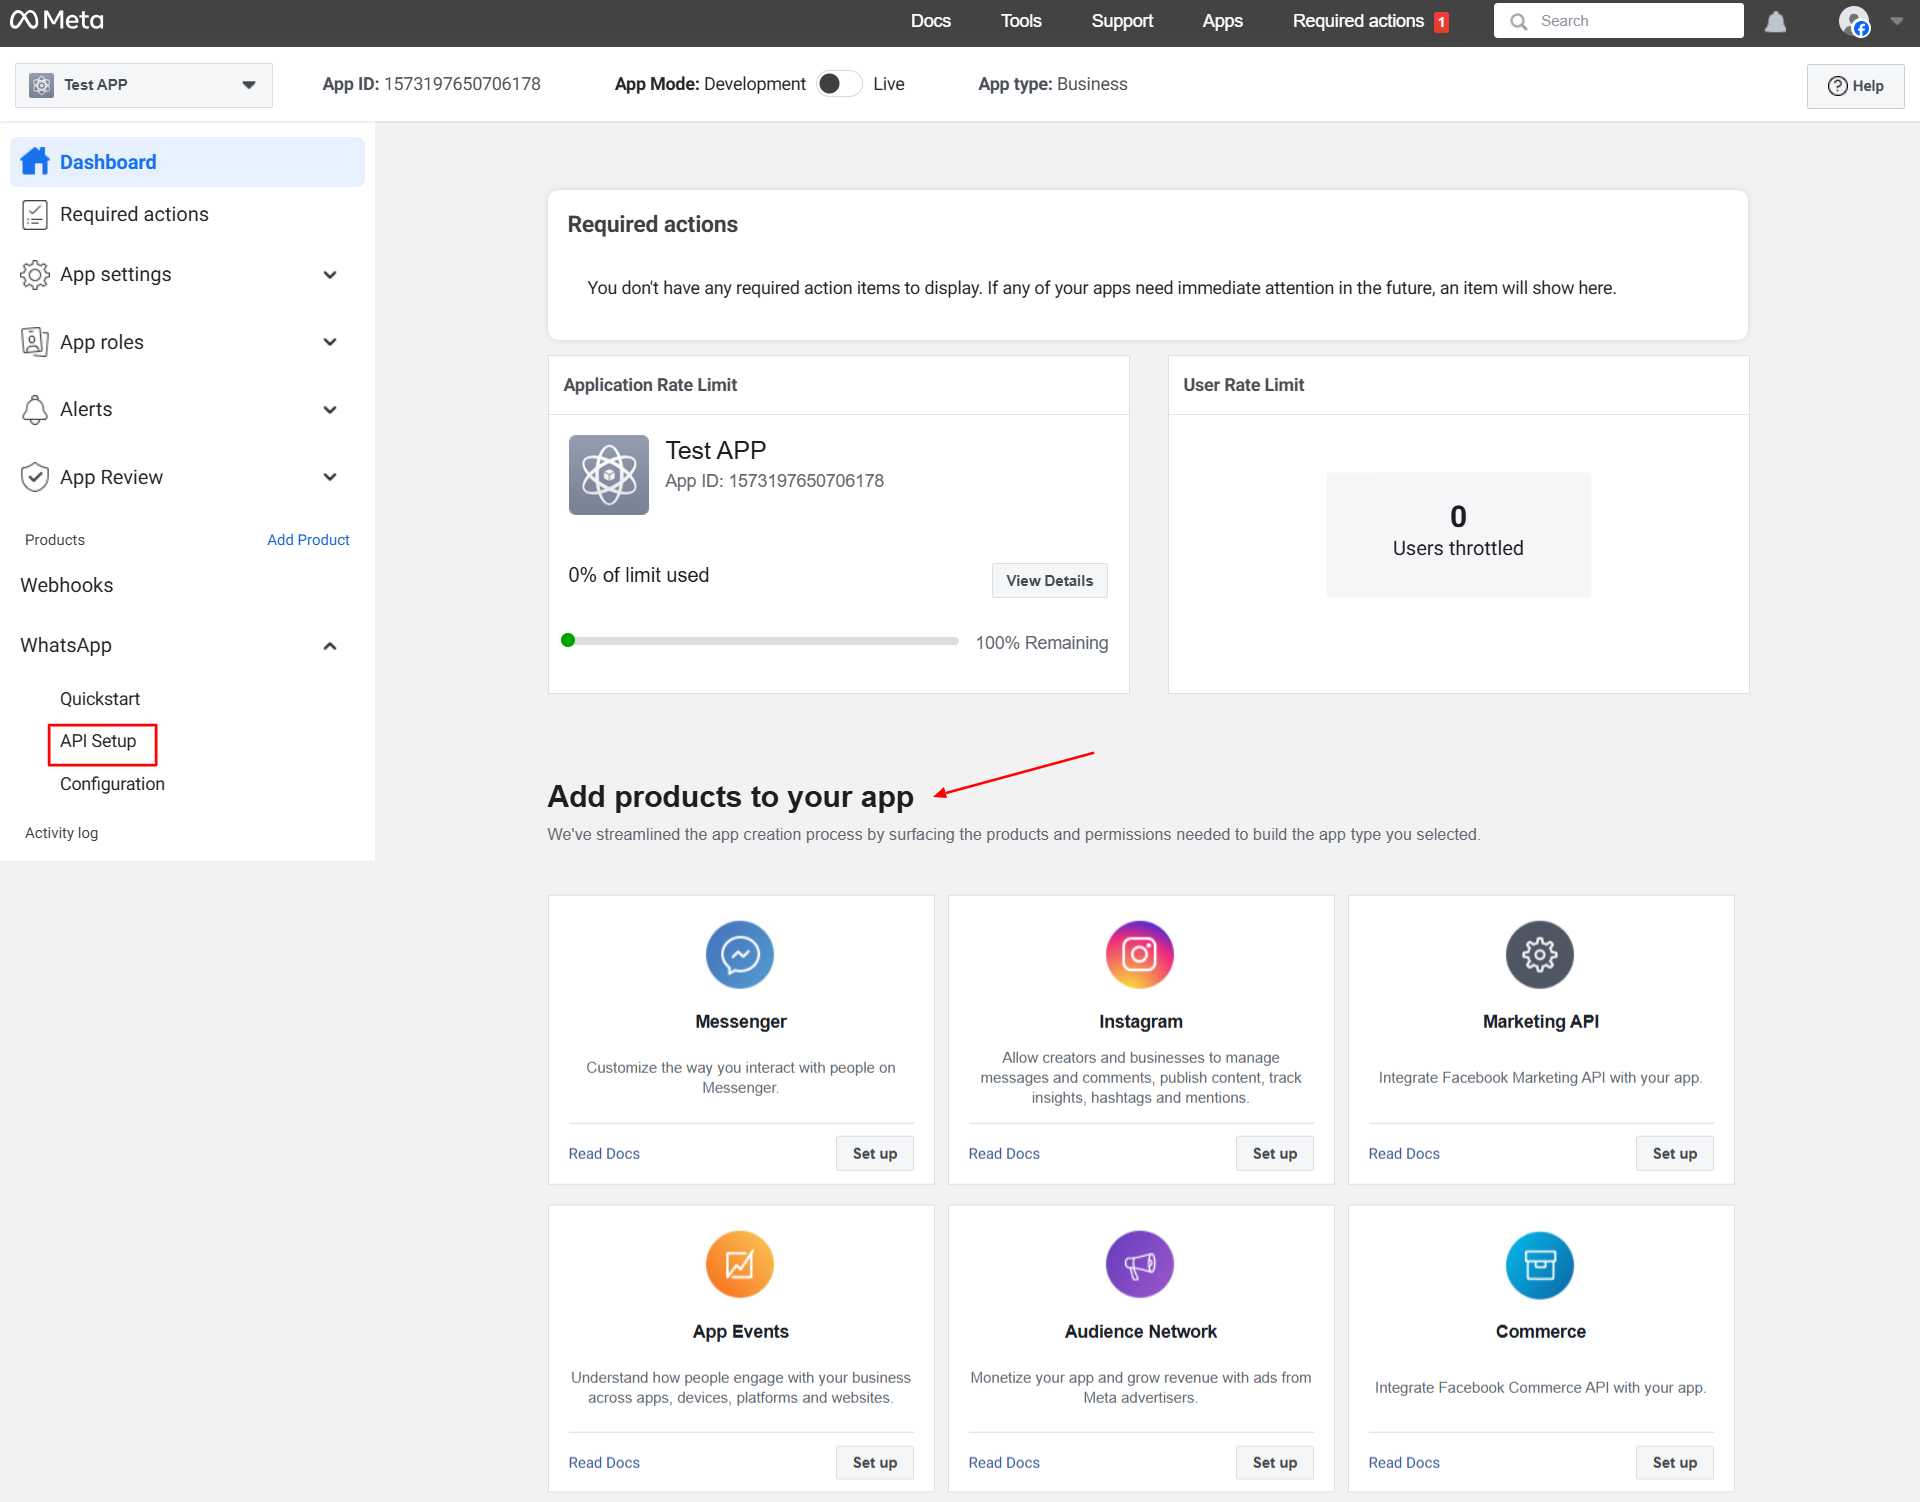
On the left sidebar, locate the WhatsApp section and click on API Setup. If you don’t see the WhatsApp option, you can easily add it from the Product section below with a single click.
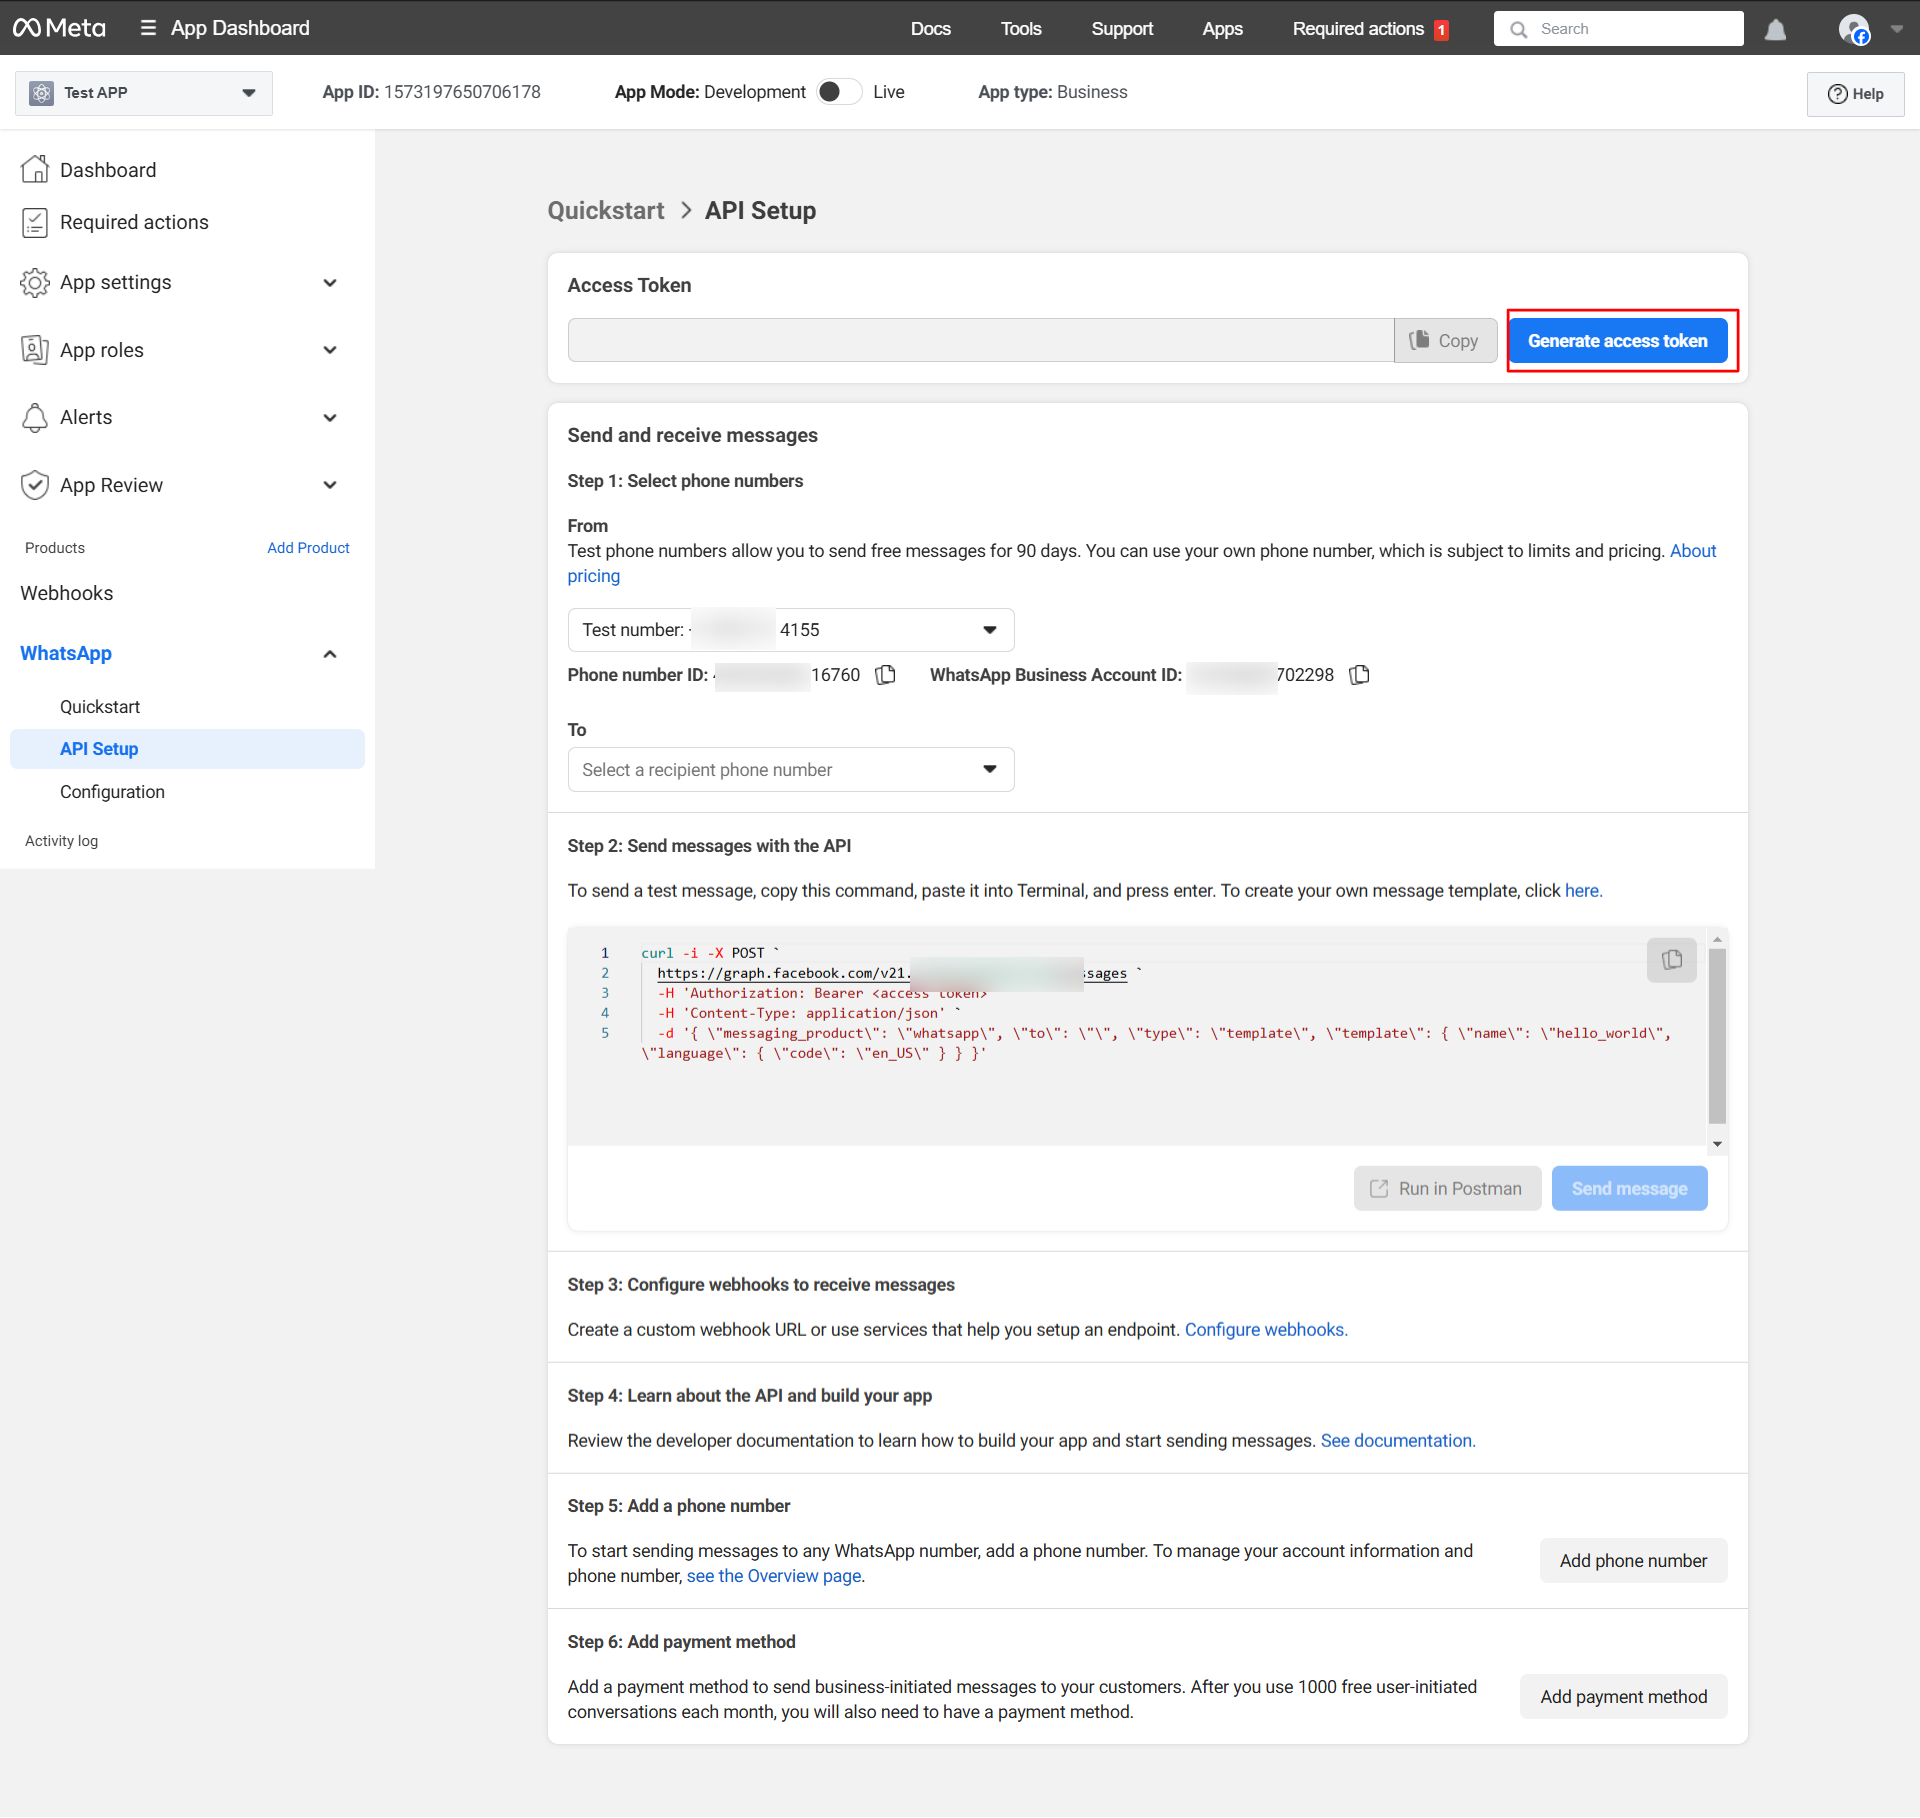
Inside the API Setup section, click on the Generate Access Token button. A pop-up window will appear, prompting authentication. Once authenticated, your Access Token will be generated and ready for use.
Once you have generated your Access Token, copy it and paste it into the Enter Access Token field in the plugin.
Next, locate your Phone ID in the developer dashboard. As shown in the screenshot below (with some details blurred for security purposes).
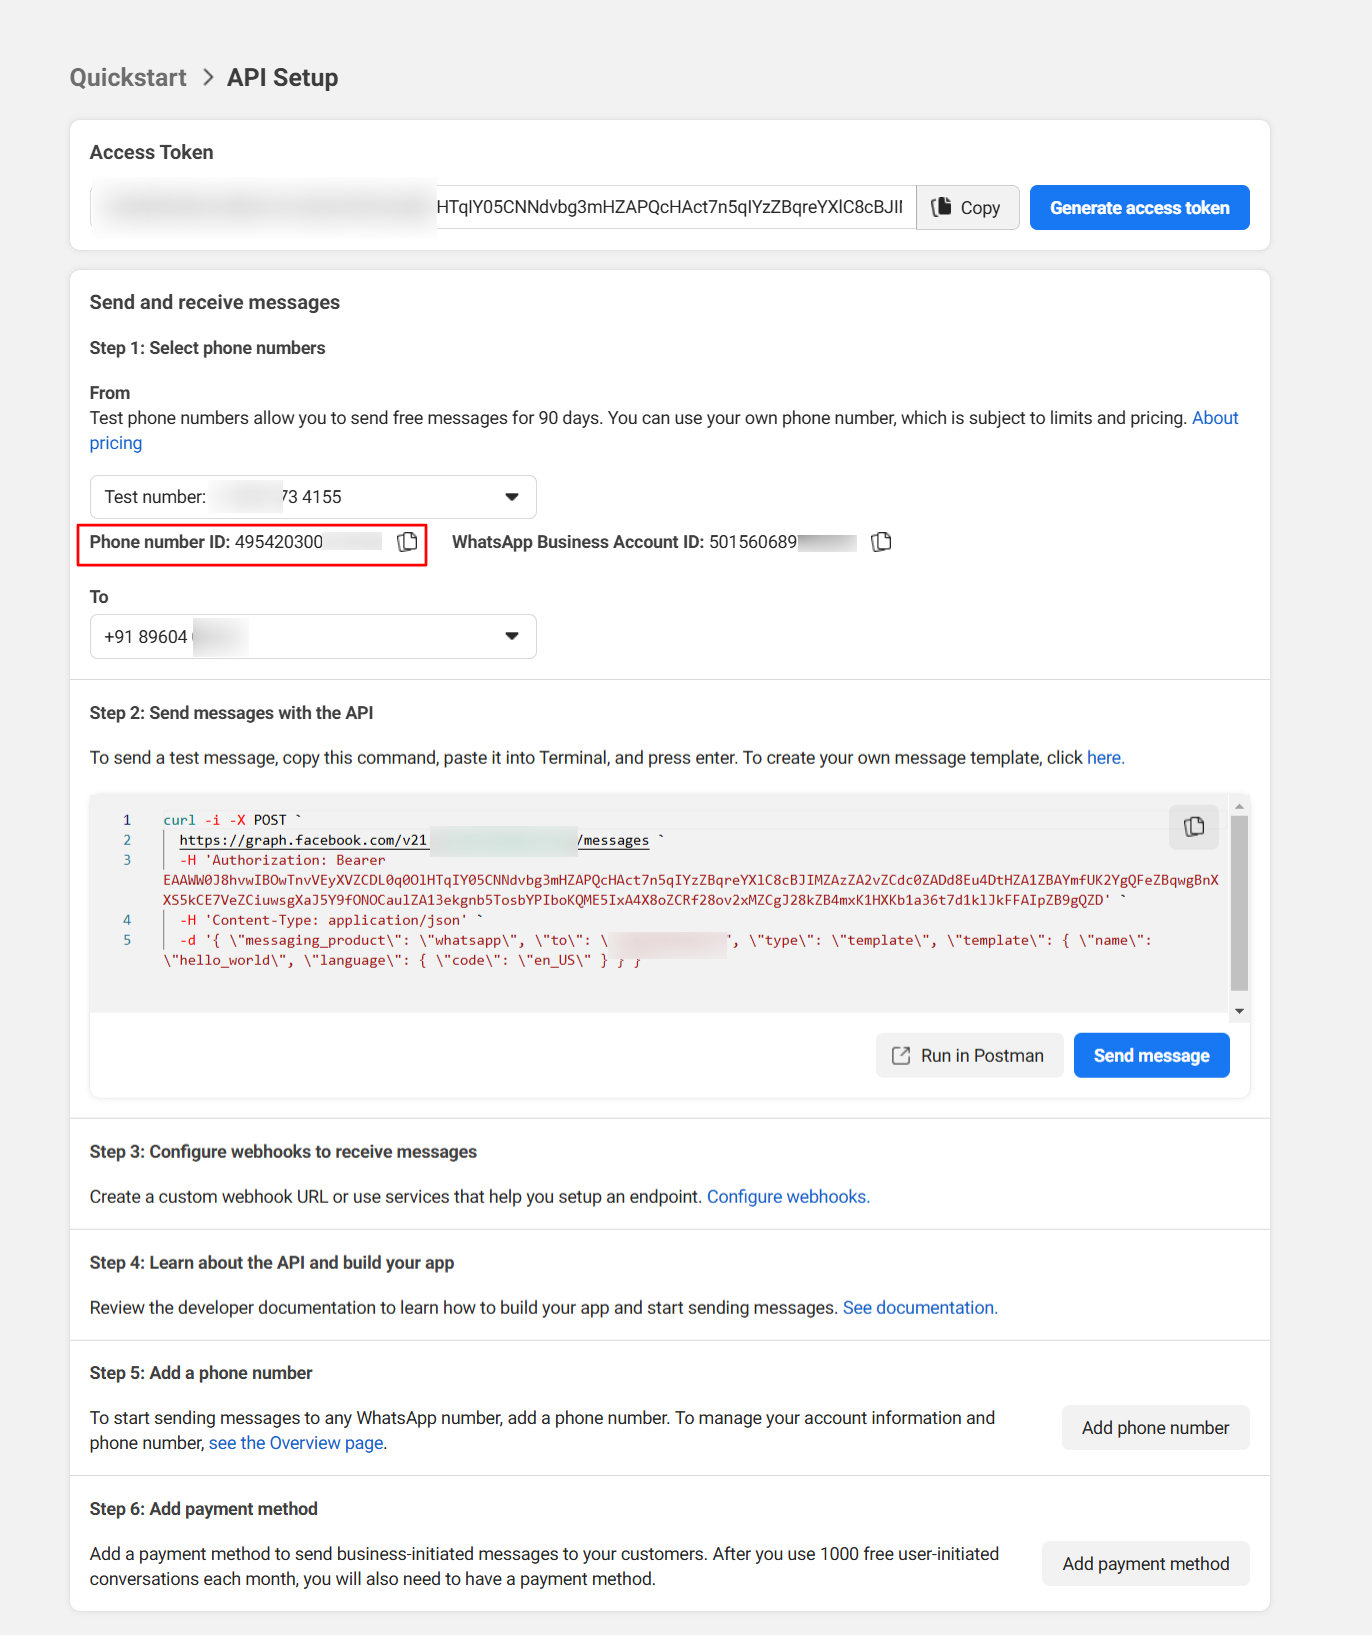
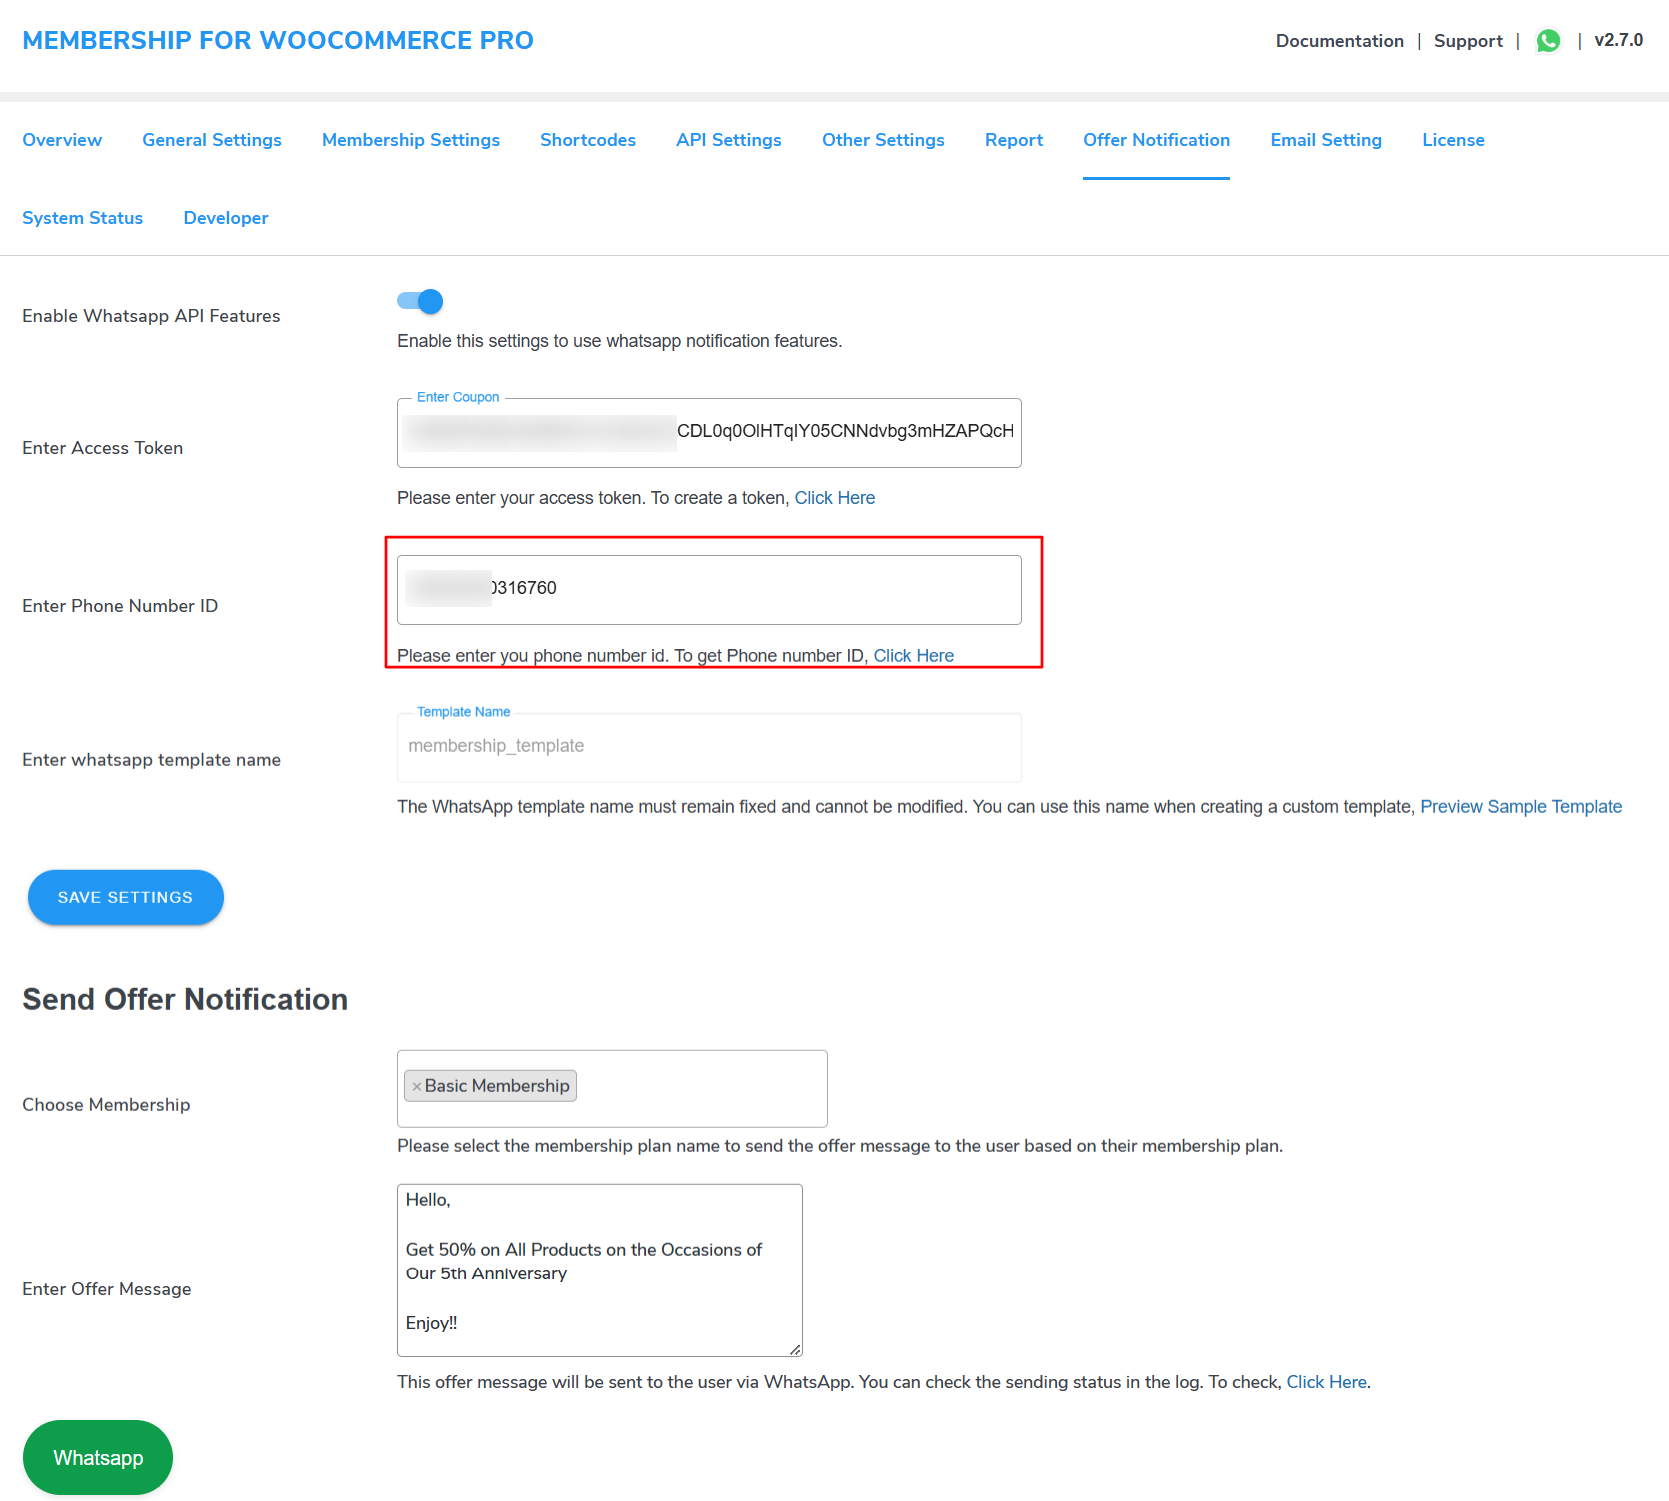
Copy the Phone ID and paste it into the Phone ID section of the plugin.
After completing these steps, the next step is to send a test message to verify that your WhatsApp configuration is working correctly. This will ensure that the integration is set up properly and ready for use.
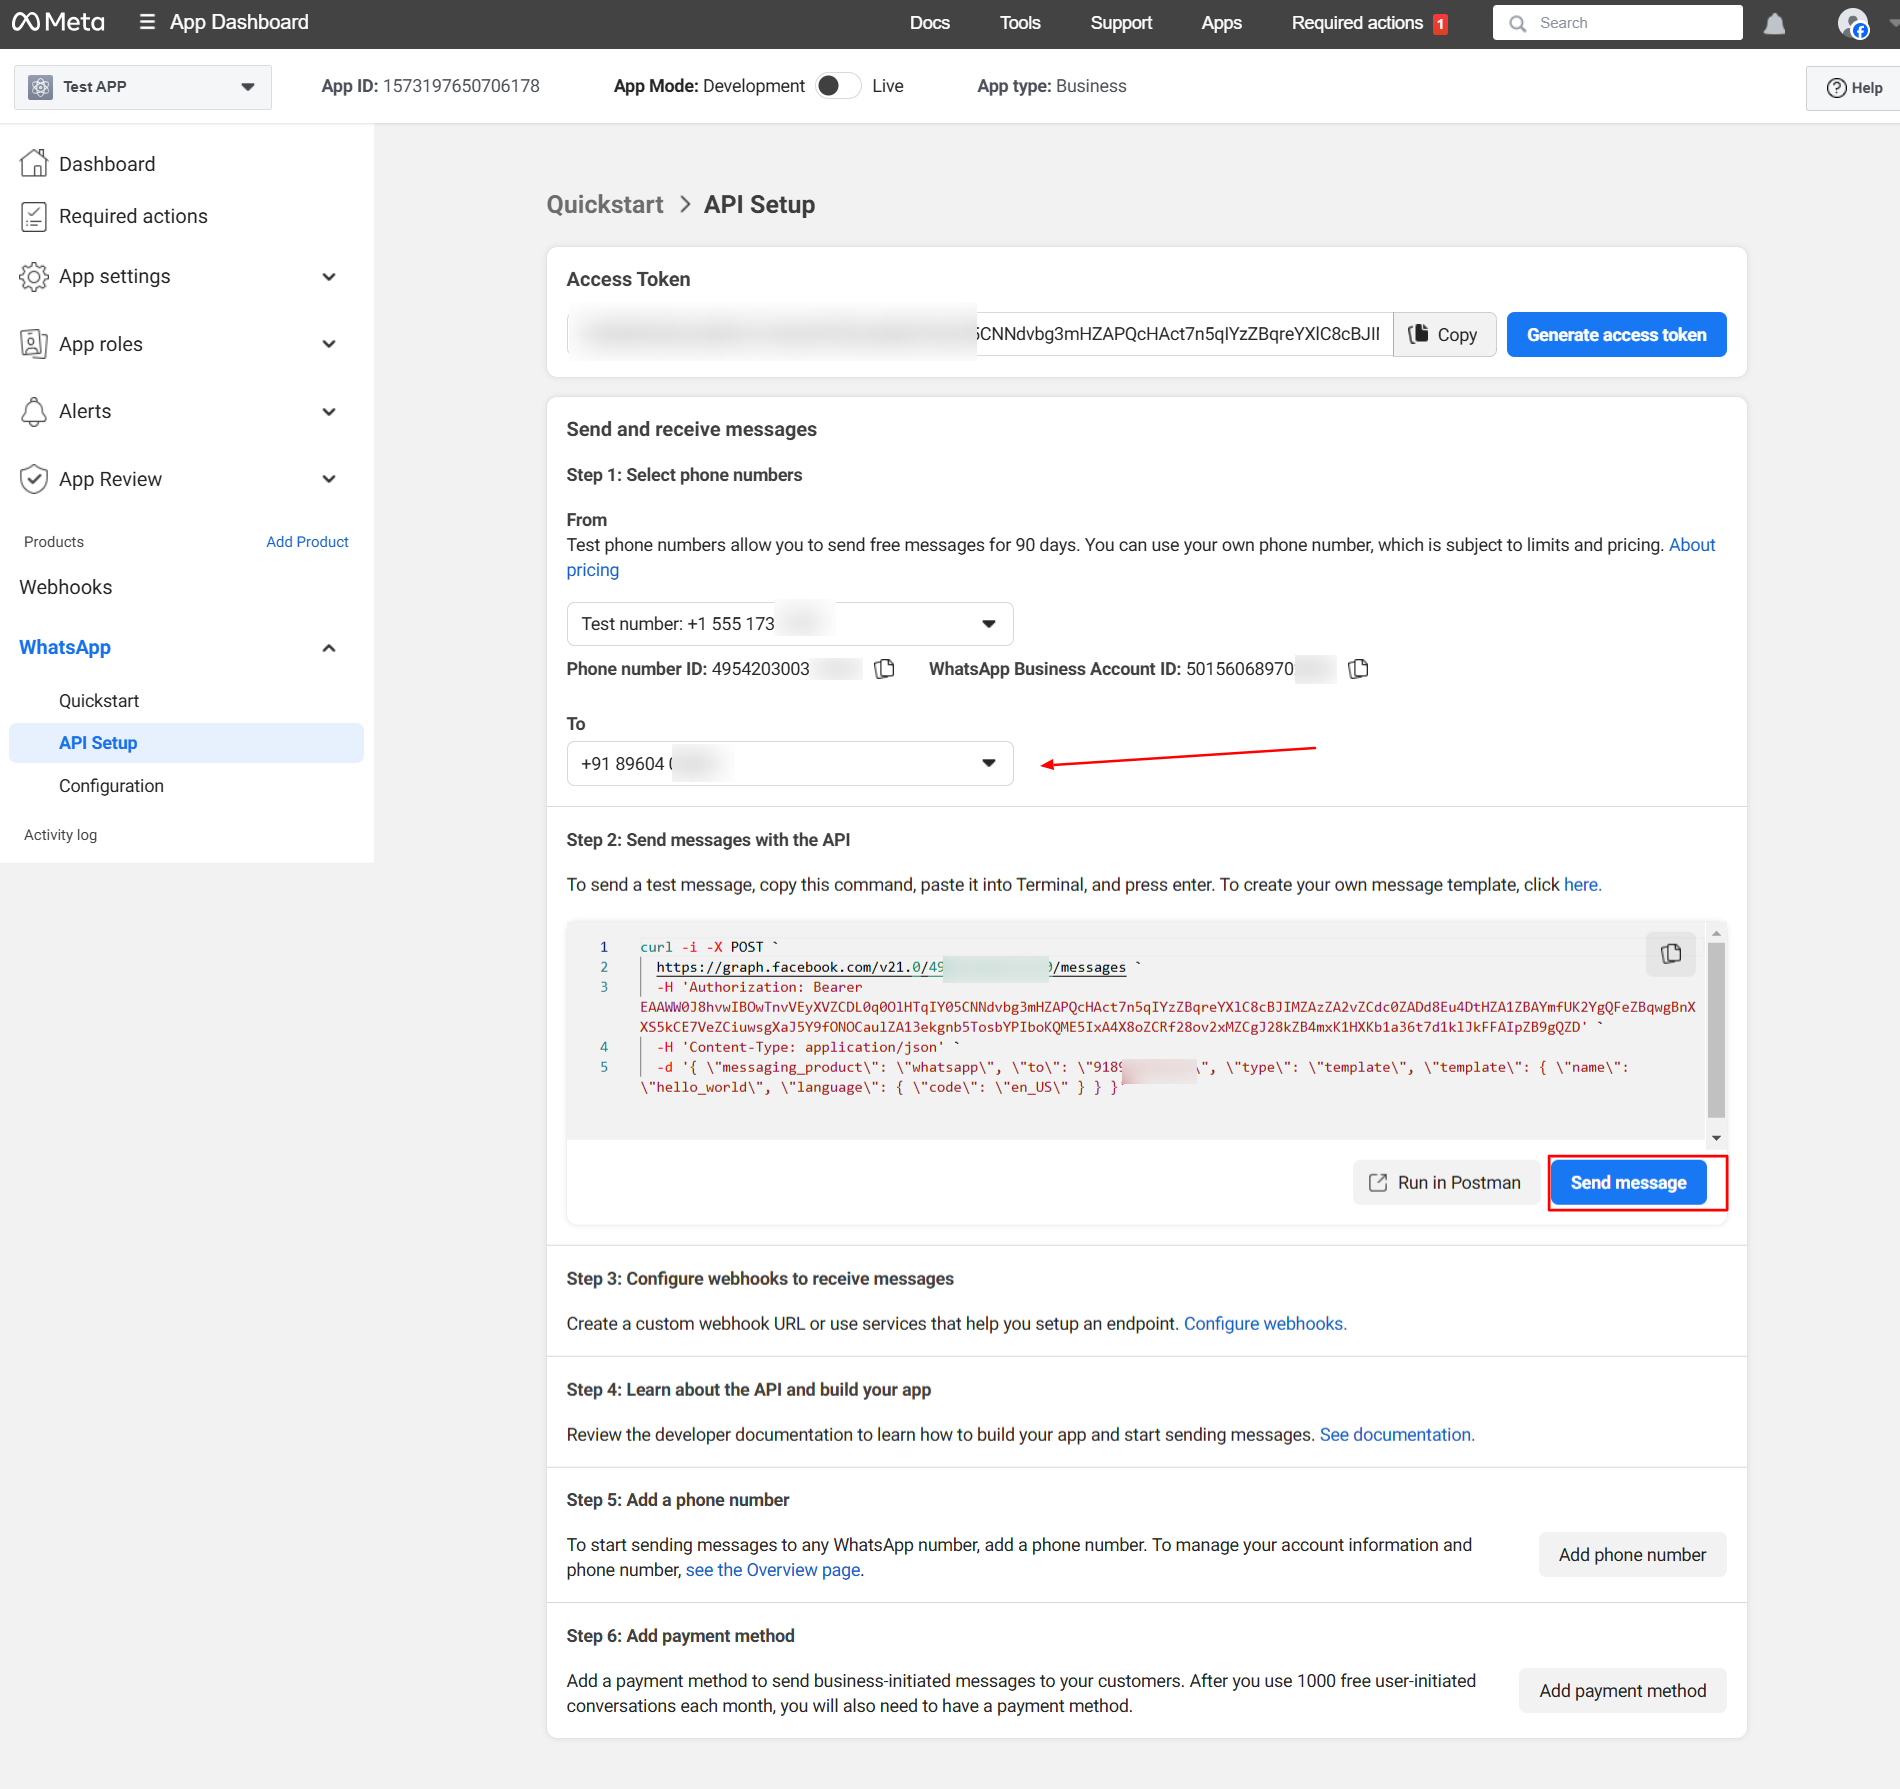
To verify your WhatsApp integration, enter the recipient’s phone number in the “To” section of the plugin. Then, click on the “Send Message” button.
If the configuration is correct, a message will be successfully sent to the recipient using the default template.
The next step is to create a WhatsApp Template for sending customized messages to your members. The template name must be set as “membership_template” and cannot be changed.
You can use this fixed name when designing a custom template to personalize your messages.
To create a WhatsApp template, follow these steps:
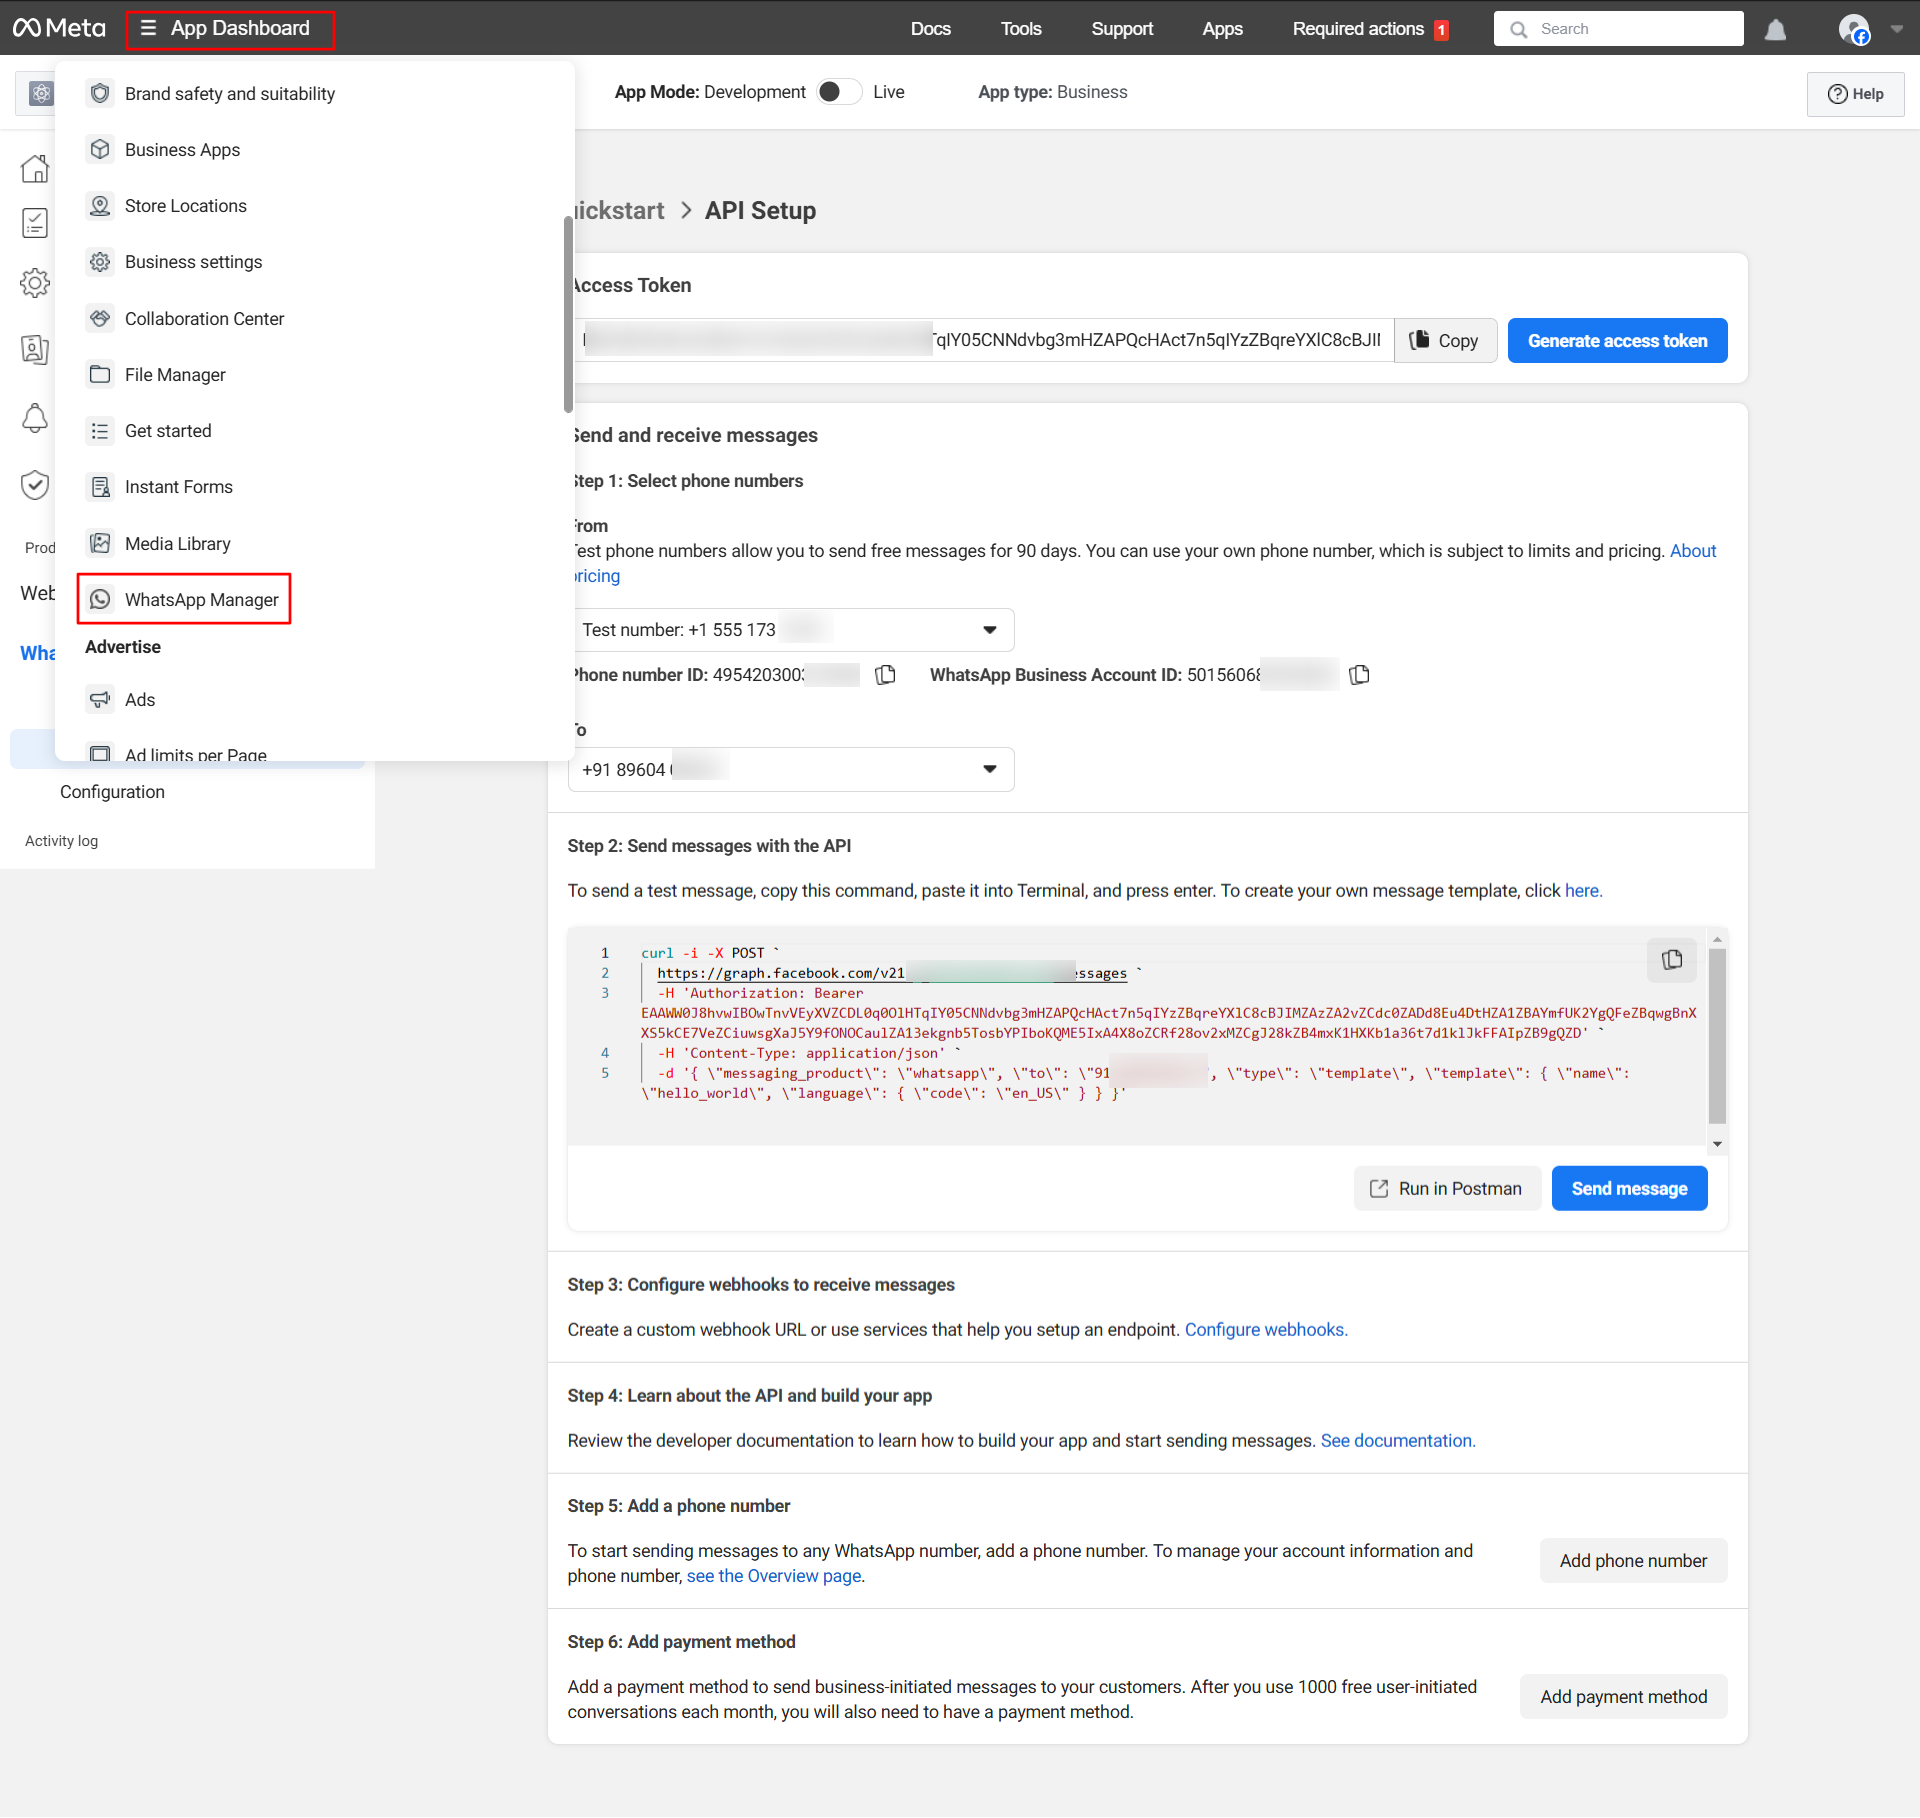
- Access WhatsApp Manager
- Navigate to the App Dashboard from the top left corner.
- Under the dashboard, click on WhatsApp Manager.
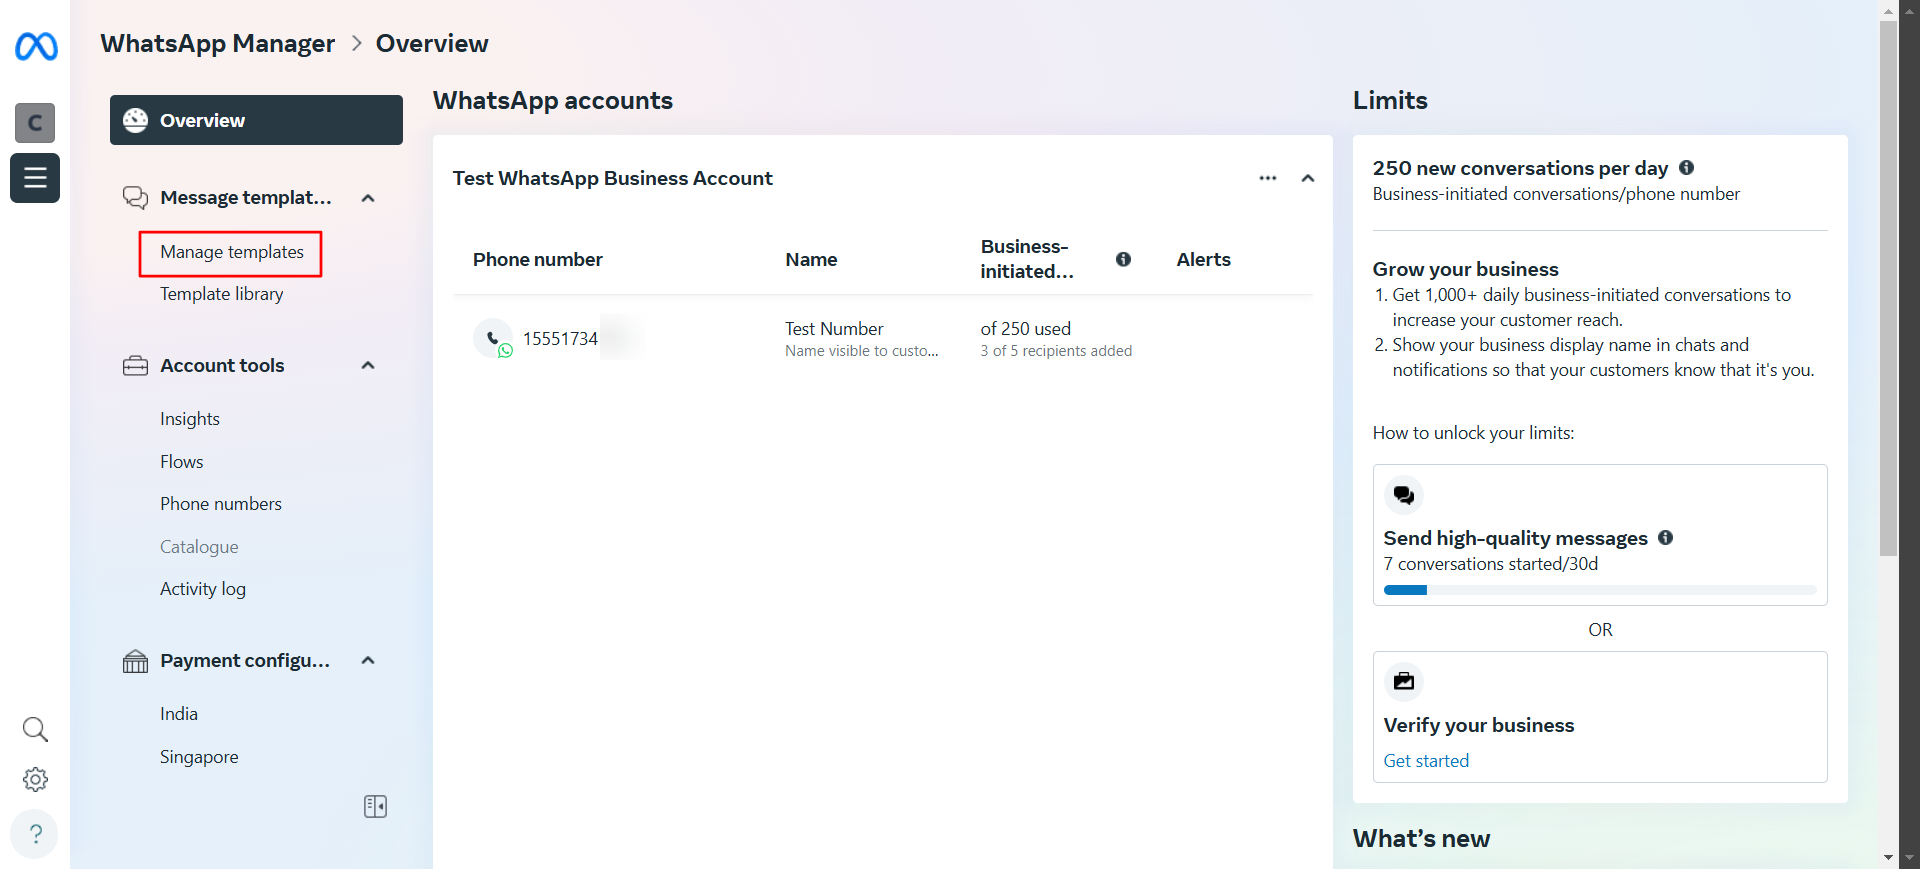
- Manage Templates
- In the WhatsApp Manager, click on Manage Templates to view a list of previously created templates (if any exist).
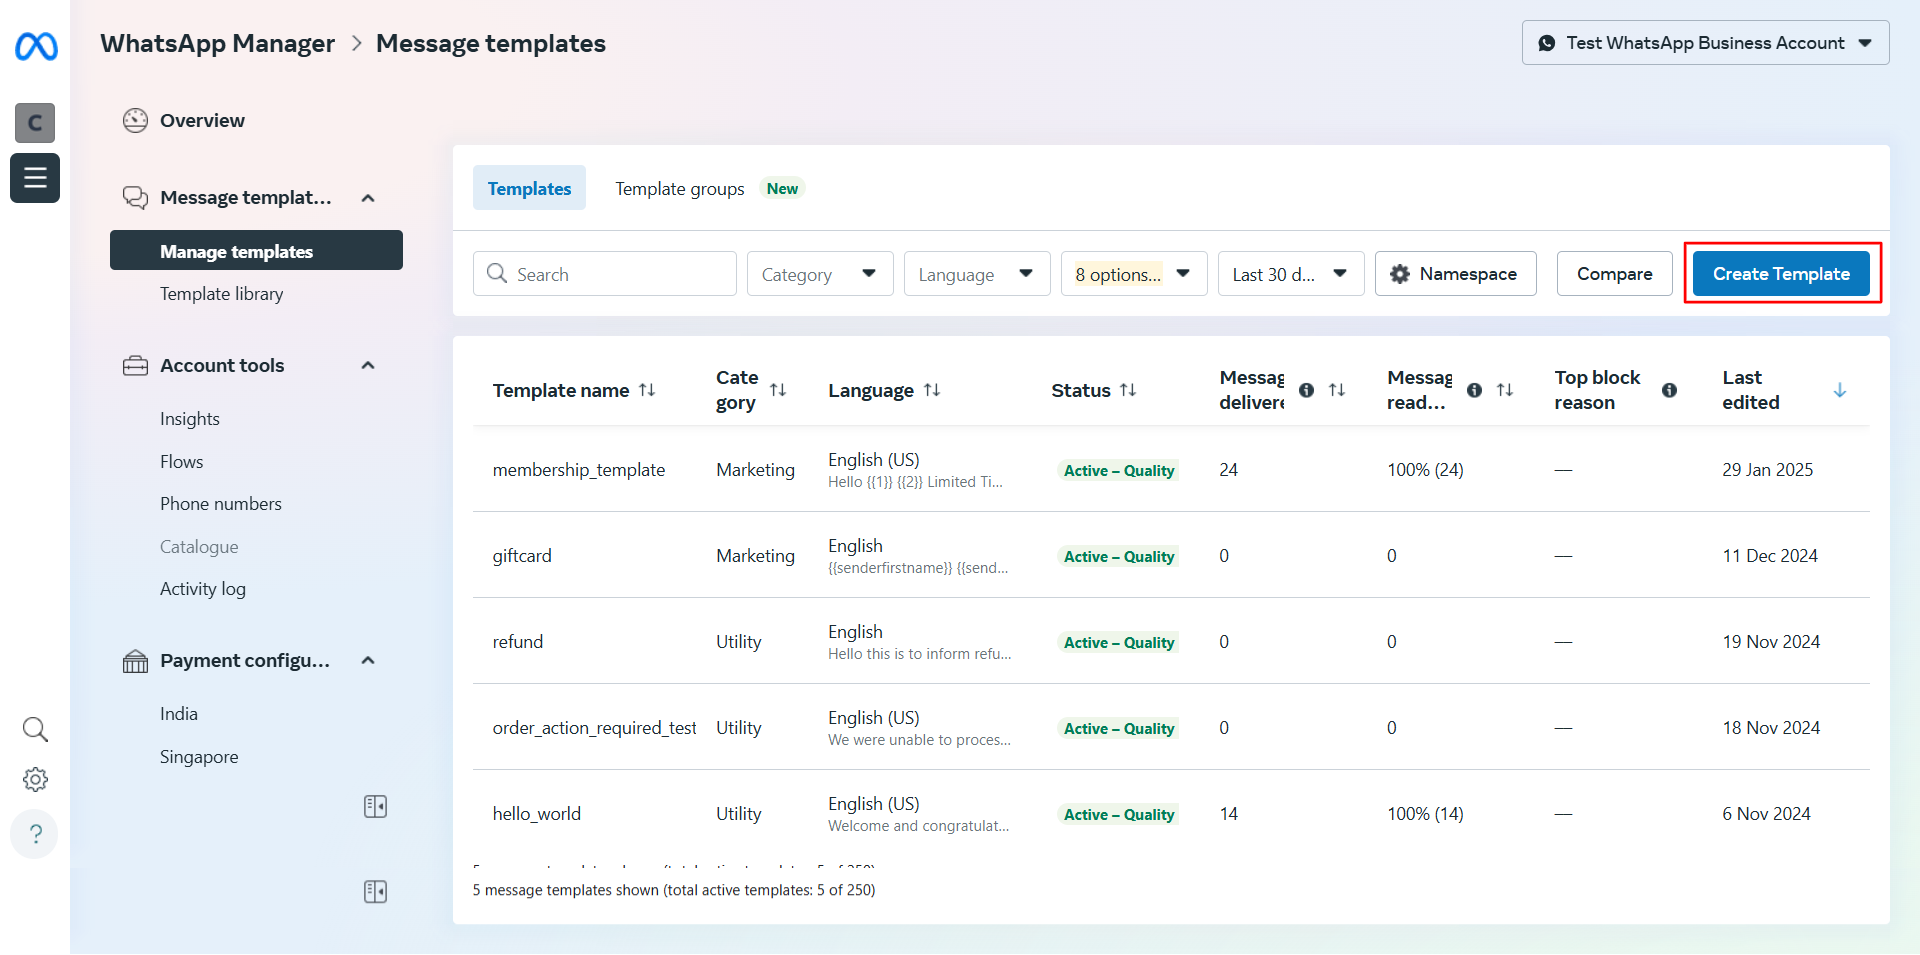
- Create a New Template
- Click on the Create Template button.
- Ensure that the template name is set as “membership_template”, as this name is fixed and cannot be modified.
In the screenshot below, you can see an example of a WhatsApp template.
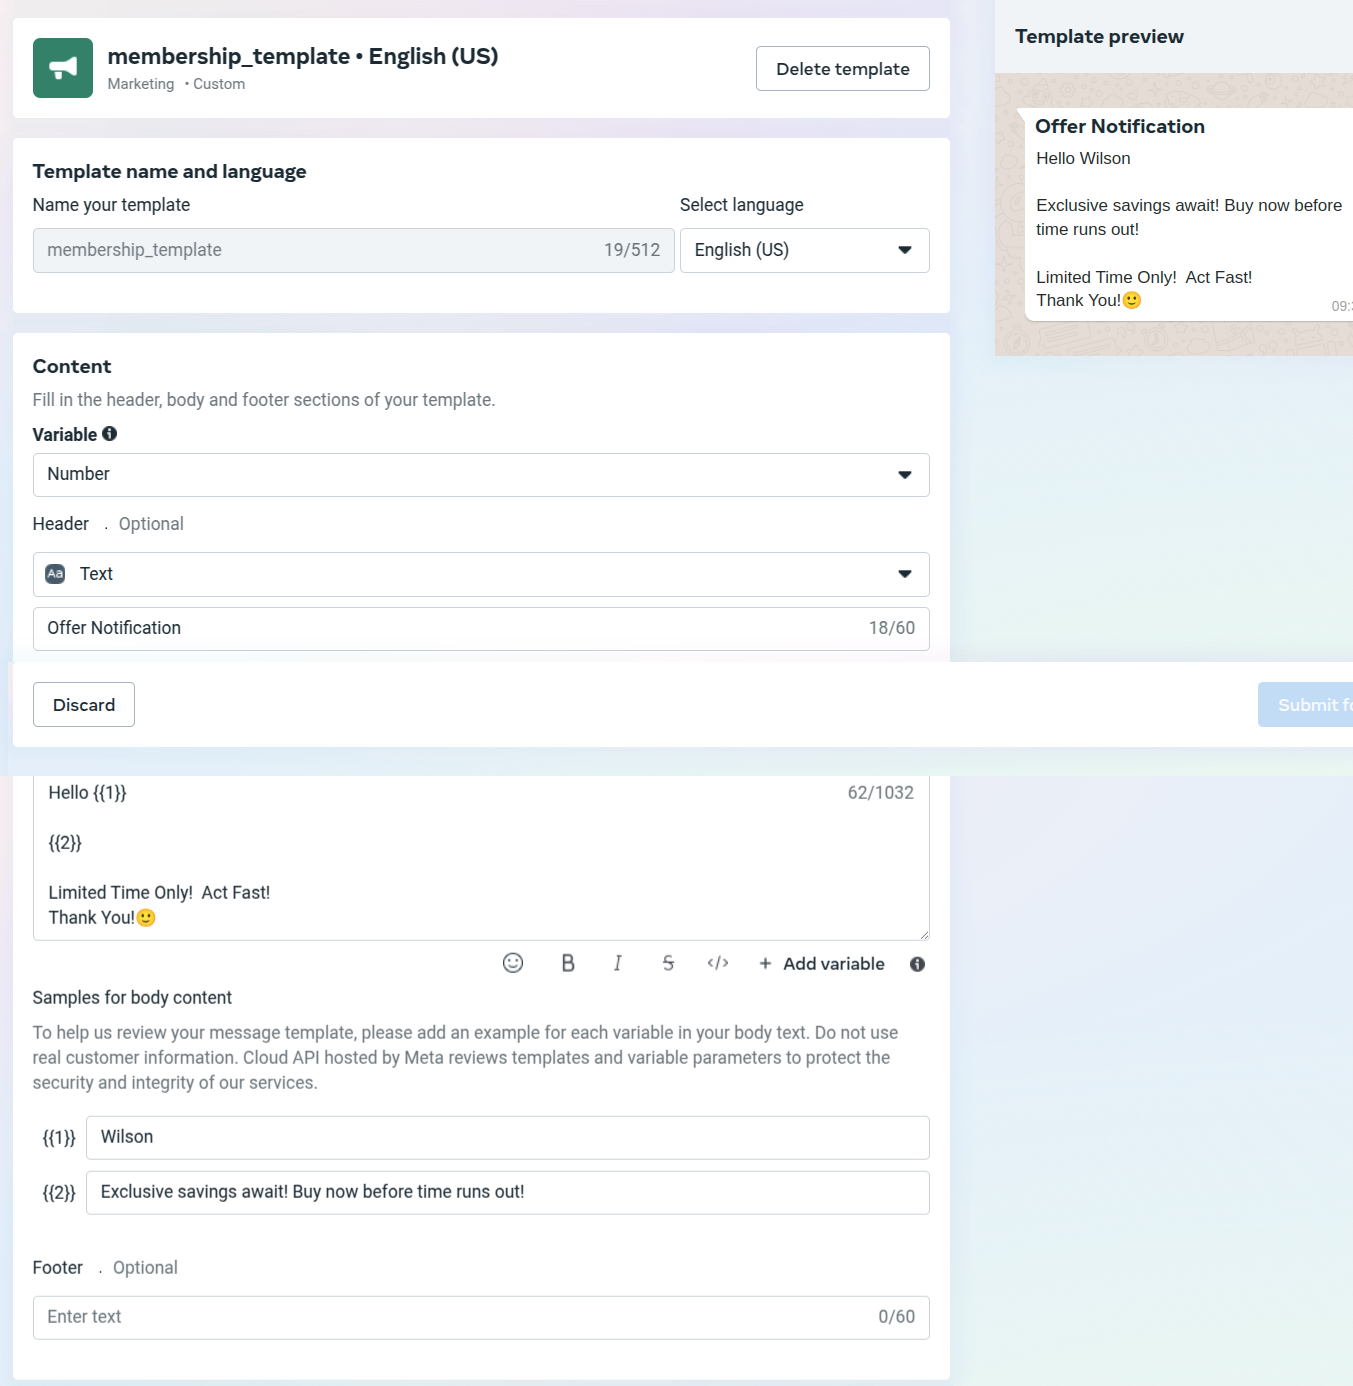
While creating your template, you can define the subject and body content, using placeholders for dynamic data.
- {{1}} will be replaced with the customer’s name.
- {{2}} will be replaced with the body content of the message.
- You can add additional placeholders for any other details you want to personalize.
Once you’ve customized your template, click the Submit for Review button in the top right corner. The Facebook review team typically takes around 24 hours to approve the template.
Once approved, your template will be active and ready to use.
Now you are ready to send offer notifications to your members.
To send offer notifications to your members, navigate to the plugins setting and on the Offer notifications tab.
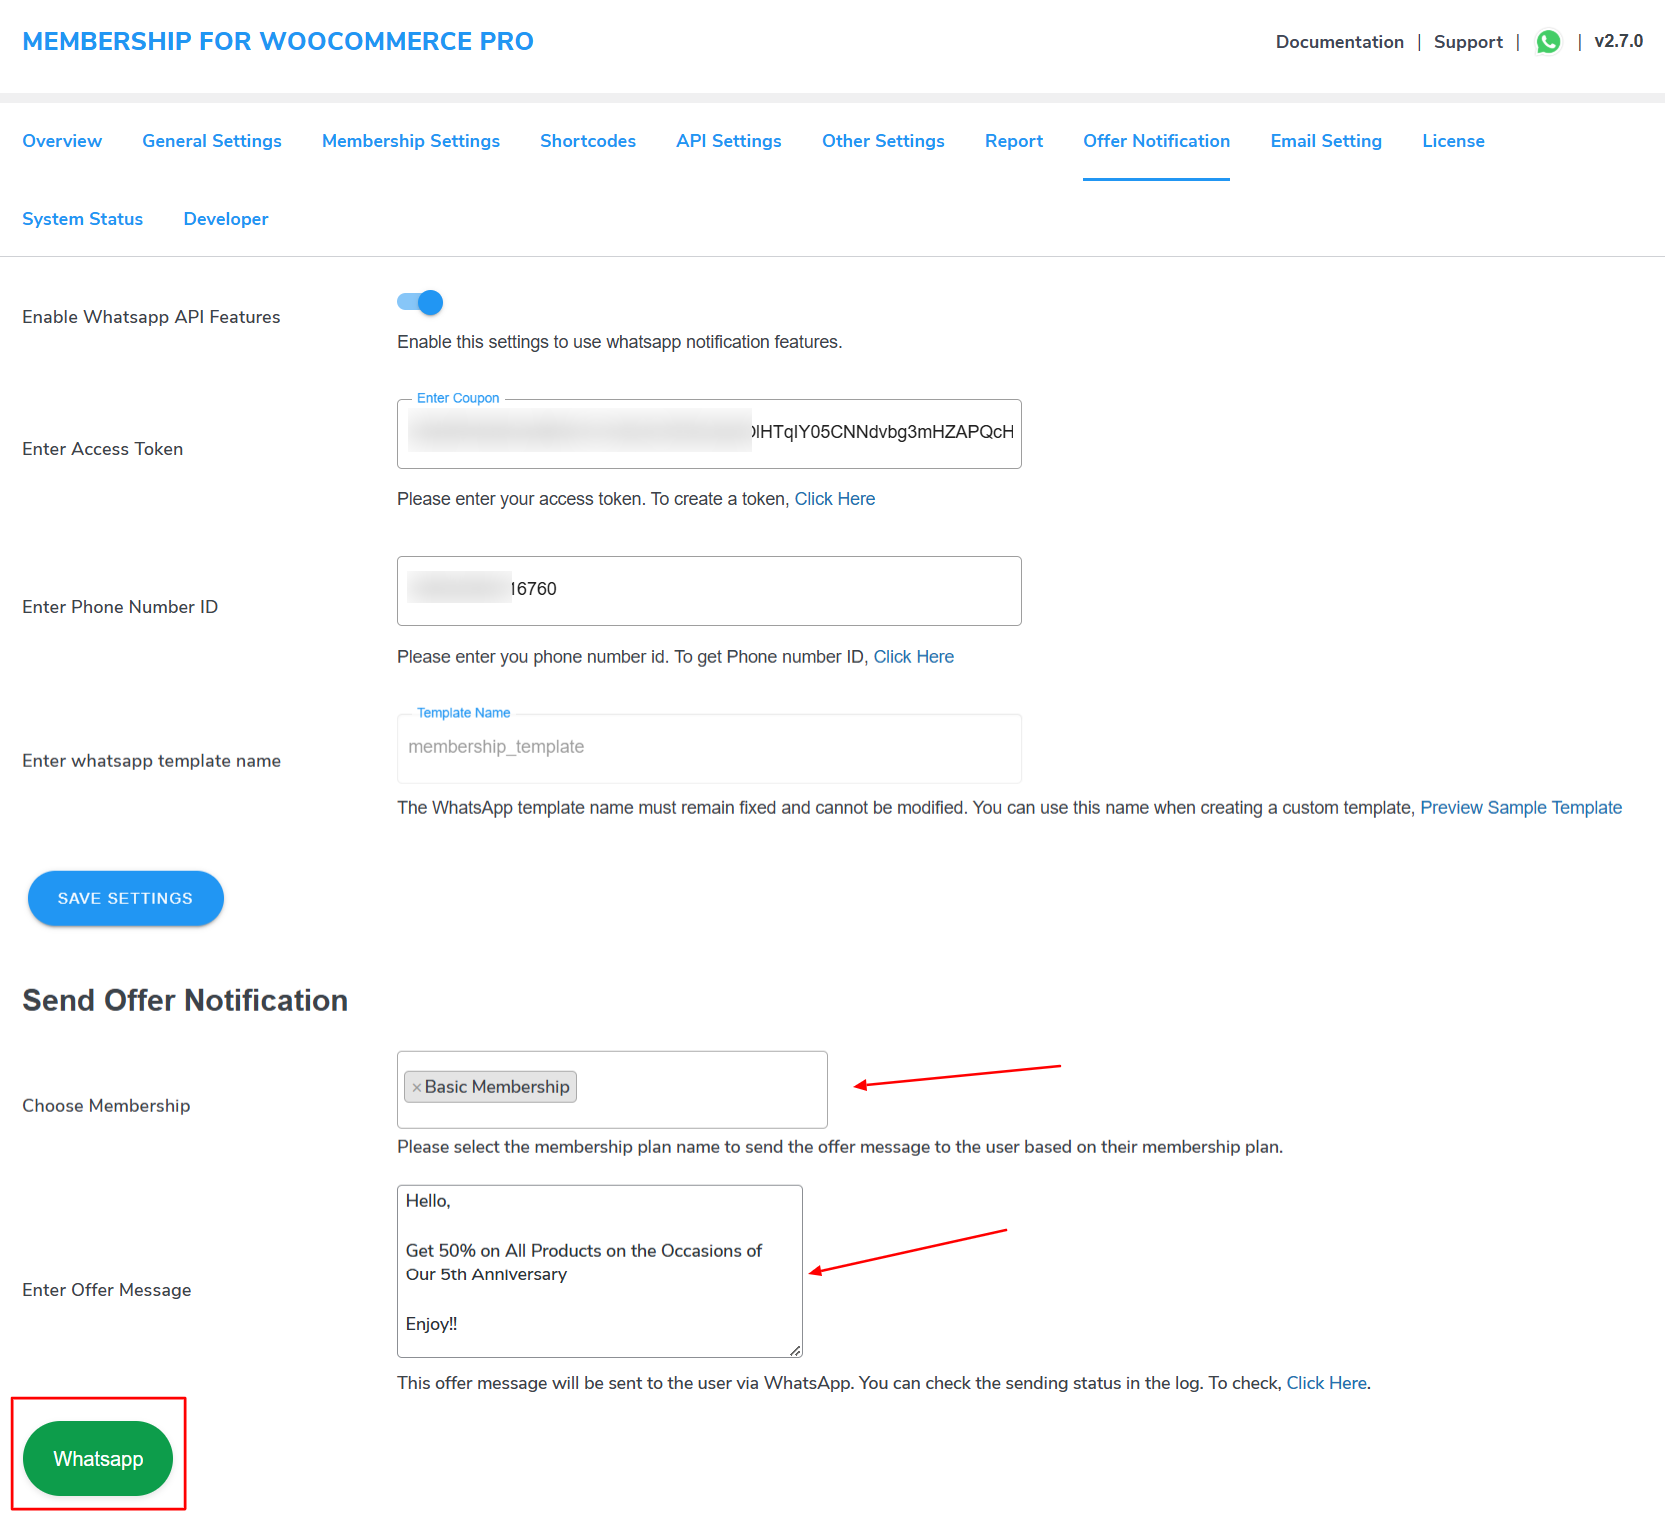
Choose Membership: Choose the membership plan to which you want to send the notification. All users enrolled in this plan who have their phone number registered on the website will receive the message.
Enter Offer Message: Enter the Offer message, You can customize the message as per your promotional requirements. For example, if you’re offering a 50% discount on your website’s 5th anniversary, you can craft a message that highlights this special offer to engage your members effectively.
Once your message is ready, click on the WhatsApp button to send it. The plugin allows you to track the status of sent messages through the log section, ensuring you can monitor delivery and engagement
For further details and comprehensive guidance on the plugin, refer to the main plugin’s documentation to ensure a smooth implementation of Membership for WooCommerce Pro.
If you have any other queries connect to our Support team