1. Overview
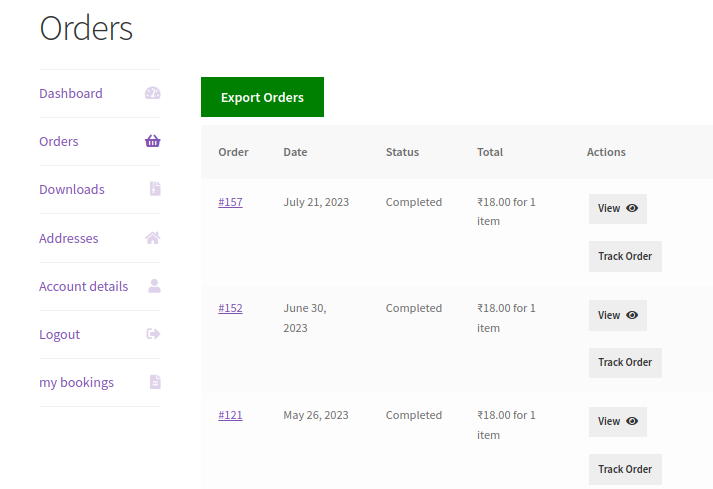
- Order Tracker Button: In the My Account -> Orders section/
- Display icons instead of text for order statuses in the order table.
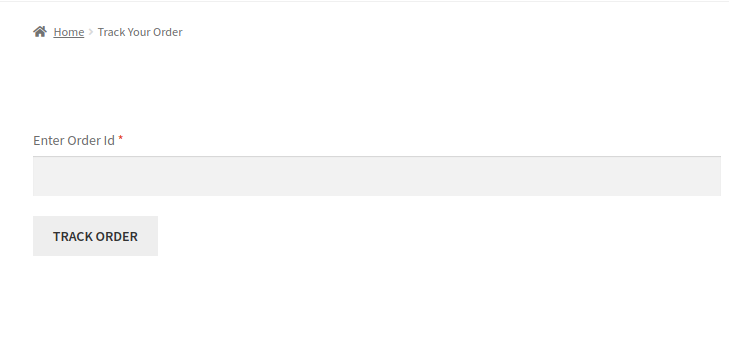
- Allow tracking orders using the order ID only.
- Support for third-party tracking services like FedEx, USPS, Canada Post, etc.
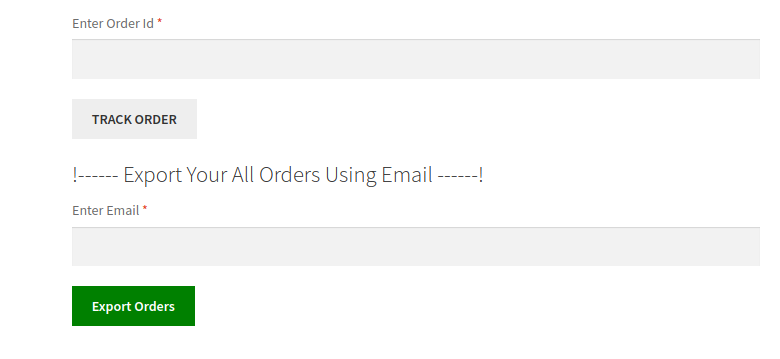
- Ability to export orders as CSV files.
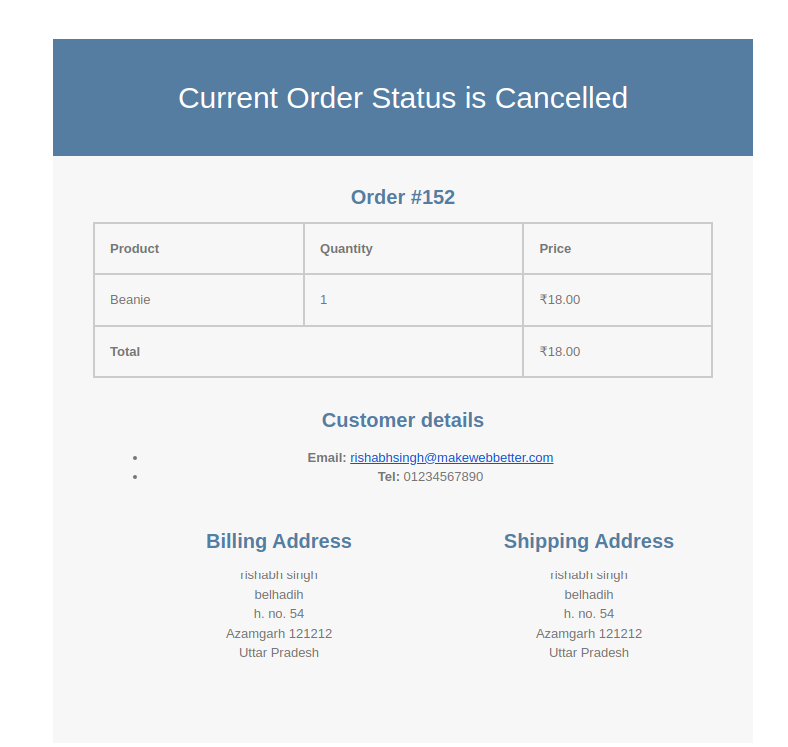
- Send email notifications for order status updates.
- Provide tracking information with Google Maps integration.
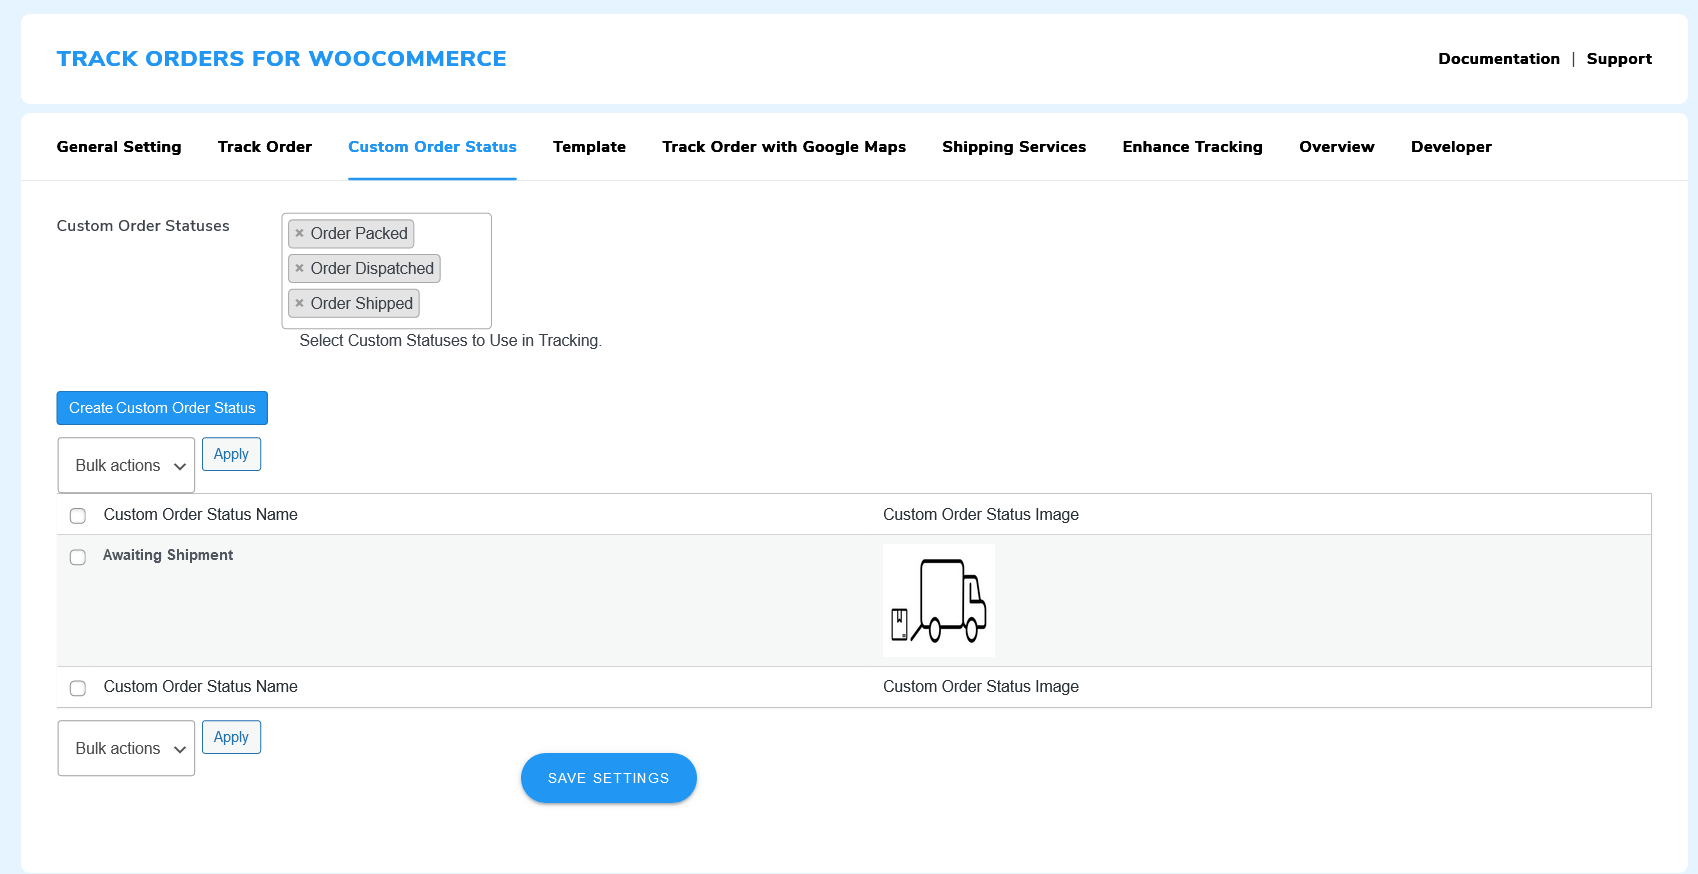
- Custom Order Status: Allow users to create and use their own custom order statuses.
- Four new tracking templates for different visual options.
- Shortcodes to create an Order Tracking page and a Tracking Form.
- Popup box for customers to easily track their orders.
- Integration with the 17track.net tracking service.
- Custom order status options for bulk actions.
- Multiple shipping services using company names and URLs.
- Notify customers with payment links for pending payment orders.
3.Installation
Automatic Installation
Automatic installation is the easiest option as WordPress handles the file transfer itself. You don’t need to leave your web browser.
Admins can perform the automatic installation by following a few simple steps:
- After opening the Dashboard of your WordPress website, go to the Admin Panel. Navigate to the Plugins menu. Click on the Add New option.
- Click on the Upload Plugin button.
- Click on the Browse button. Navigate to the downloaded Track Order for WooCommerce Pro zip file.
- Simply install it by clicking Install Now.
Manual Installation
- Upload the Track Orders for WooCommerce folder to the /wp-content/plugins/directory.
- Activate the plugin through the ‘Plugins’ menu in WordPress.
Note:
Before activating the Track Orders for WooCommerce Pro, you should have the Track Orders for WooCommerce – WordPress plugin else the plugin will not function.
So, if you don’t already have it, you can download it directly from here: Download Zip
4.How Customers Can Track Order
Customers have to navigate to the My Account > Order Section and click on the Track Orders button to view the shipping progress.
The Track Orders has two sections; one for showing order details and another shows tracking progress.
5.General Settings
Enable Plugin: Click on this toggle button to access all features of the Order Tracking WooCommerce plugin.
Enable Order Tracking using Order ID Only: Guest users have to enter their email and order ID to track their orders by default. However, you can allow WooCommerce tracking only using order ID. This hassle-free tracking process is a guaranteed way to improve user experience.
Enable Logged-in Users to Export Orders: If you enable this toggle button, logged-in users can export their orders directly from the “Orders” tab located in the “My Account” section. As a result, customers can review their order details at any time.
Enable Guest Users to Export Orders: You can allow guest users to export their orders from the guest tracking page. Non-registered users who want to obtain their order data benefit greatly from this feature.
Enable the Use of an Icon for Order Status: Click on this toggle to show icons in place of order statuses in the order table, giving a more attractive and clear portrayal.
Enable Email Notification Feature: Enable this setting to automate sending email notifications to customers for order status updates. These WooCommerce Tracking notifications keep customers in the loop throughout the order fulfillment process.
6.Track Order Setting
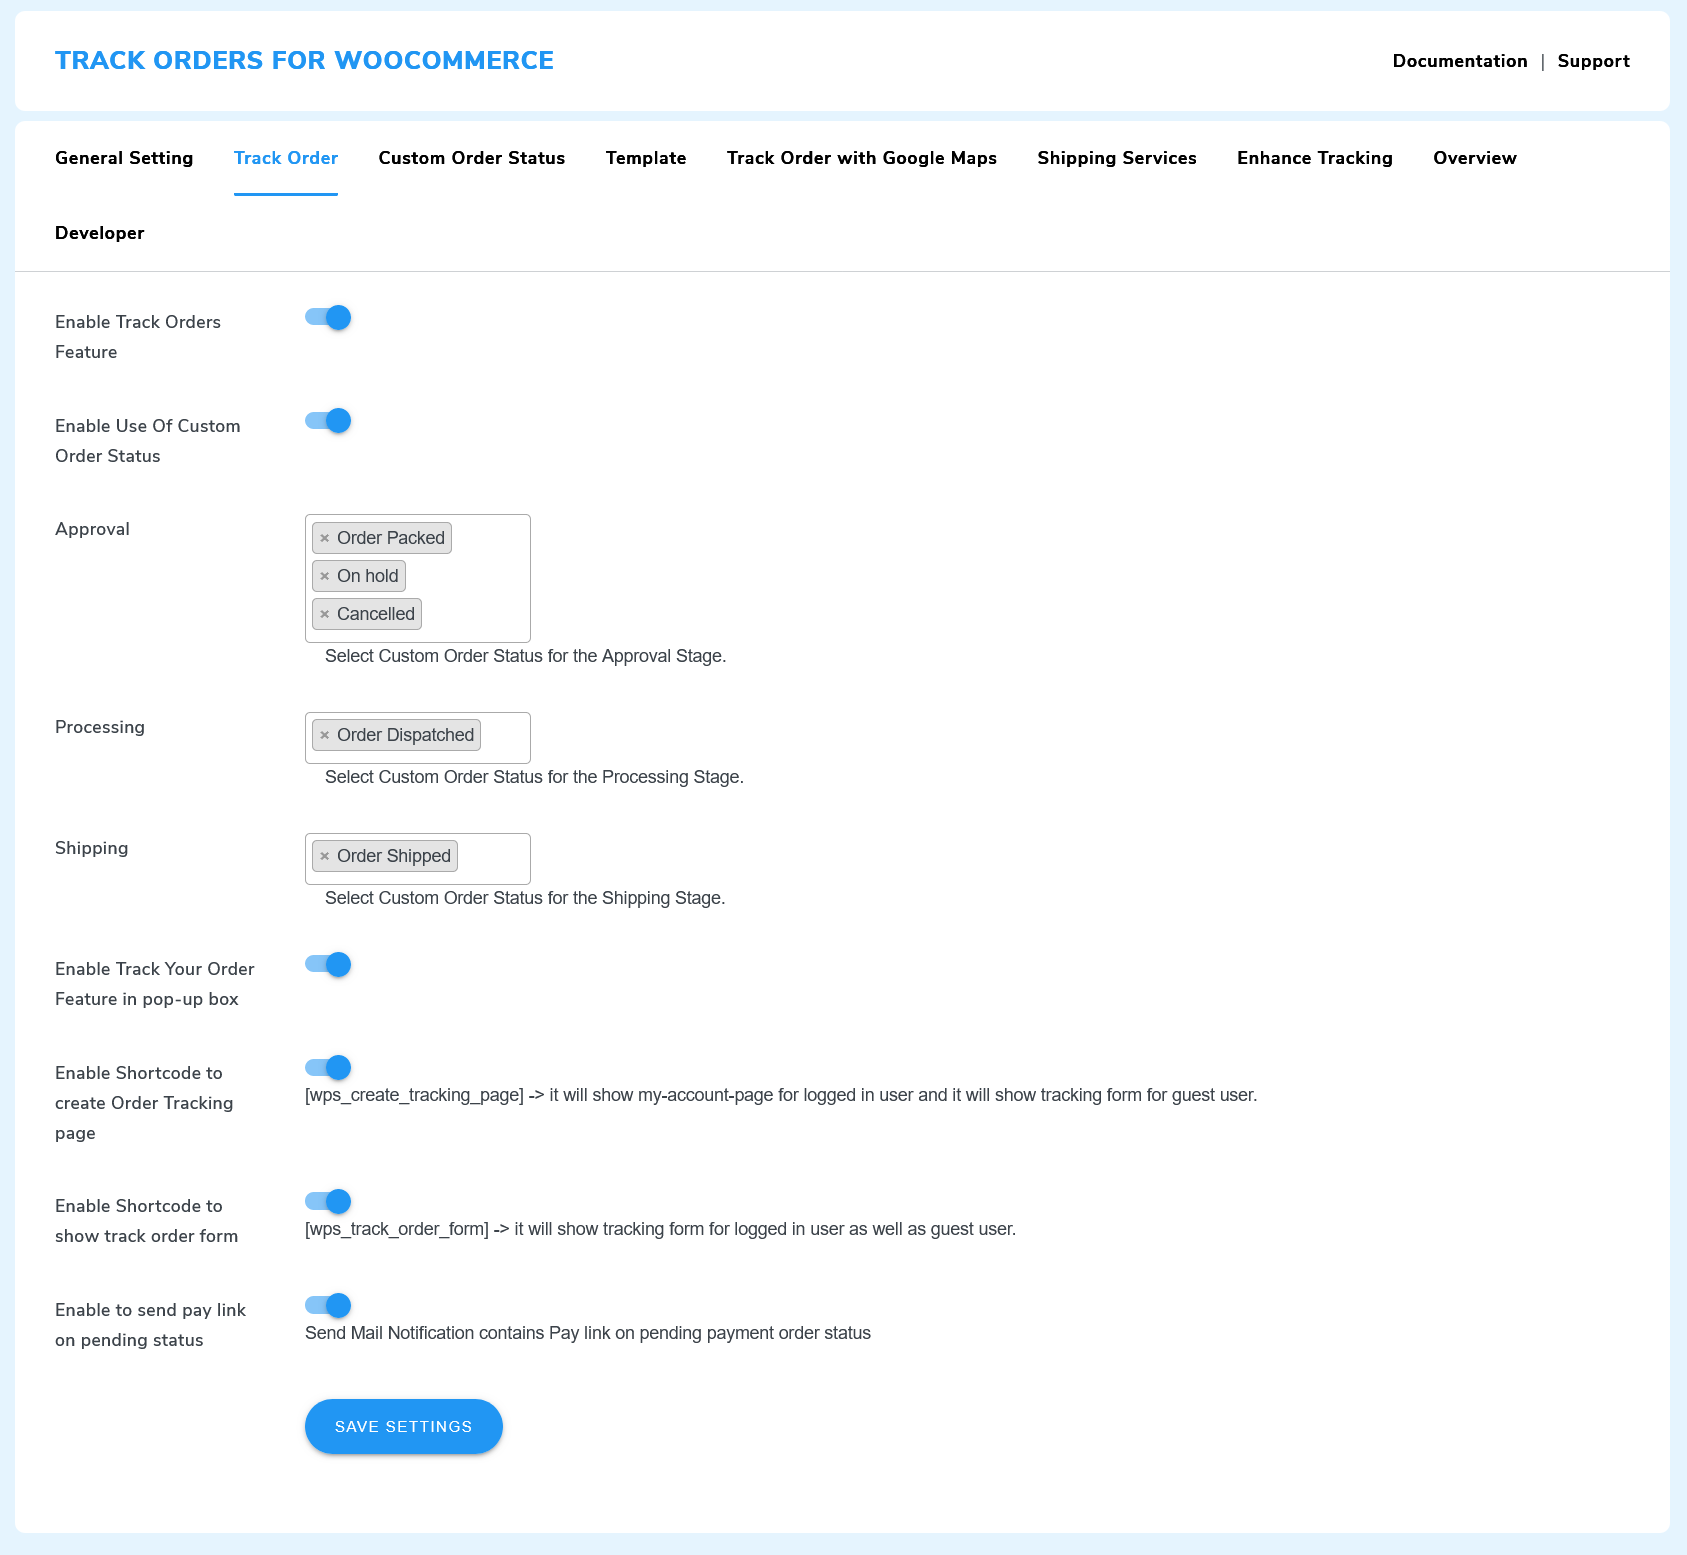
In the Track Order Section, the admin can enable the order tracking, and select and create custom order status if required.
Enable Track Orders Feature: Click on this toggle to enable the WooCommerce order tracking for users.
Enable the Use Of Custom Order Status: Enable this toggle to add custom order statutes for various stages of the WooCommerce delivery process.
There are three order statuses:
1. Approval Stage: During this phase, the administrator designates an order status that signifies the order is pending approval.
2. Processing Stage: In the “Processing” step, you have the option to choose an order status that indicates the order is currently being prepared for shipping, offering customers reassurance about the progress.
3. Shipping Stage: When the order reaches the “Shipping” stage, you can opt for the appropriate order status to show that the order is now in transit for delivery.
Click on the corresponding drop-down and select the order statuses for each stage.
Click on the Save Settings button.
Set relevant order statuses for every stage to elevate the WooCommerce shipping tracking experience for your customers.
Enable Track Your Order Popup: Activate the “Track Your Order” functionality within a pop-up box. This allows customers to conveniently monitor the progress and status of their orders by clicking on a designated feature in the pop-up interface.
Customers can interact with this popup by using the track order button located in the Orders tab of the My Account section.
Enable Short Code To Create WooCommerce Order Tracking Page: By utilizing the shortcode [wps_create_tracking_page], you can add an Order Tracking page anywhere on your WooCommerce store.
It fulfills two objectives: for logged-in users, it will display their “My Account” page; for guests, it will showcase a tracking form. These track-order shortcodes ensure a seamless experience for both types of users.
Enable Shortcode To Show Track Order Form: Use this shortcode [wps_track_order_form] to implement a Track Order Form anywhere on your site. This versatile feature will show the tracking form for both logged-in users and guest users.
Enable to Send Pay Link on Pending Status: Enable the toggle button to automatically send a payment link when an order is in a “Pending” status. This email notification will include a link that allows customers to proceed with payment for orders that are awaiting payment confirmation.
Lastly, save your settings to finalize your changes. Our WooCommerce tracking plugin helps you simplify your order delivery steps, improving customer satisfaction with proper product tracking.
7.Create Custom Order Status
You can introduce sub-stages relevant to your order delivery process in our WordPress Tracking Plugin.
Reminder: The order fulfillment process is broken down into segments, such as approval, processing, and shipping. Order statuses, on the other hand, show the specific developments made throughout each of these order-processing steps.
To create custom WooCommerce shipping status, follow these steps:
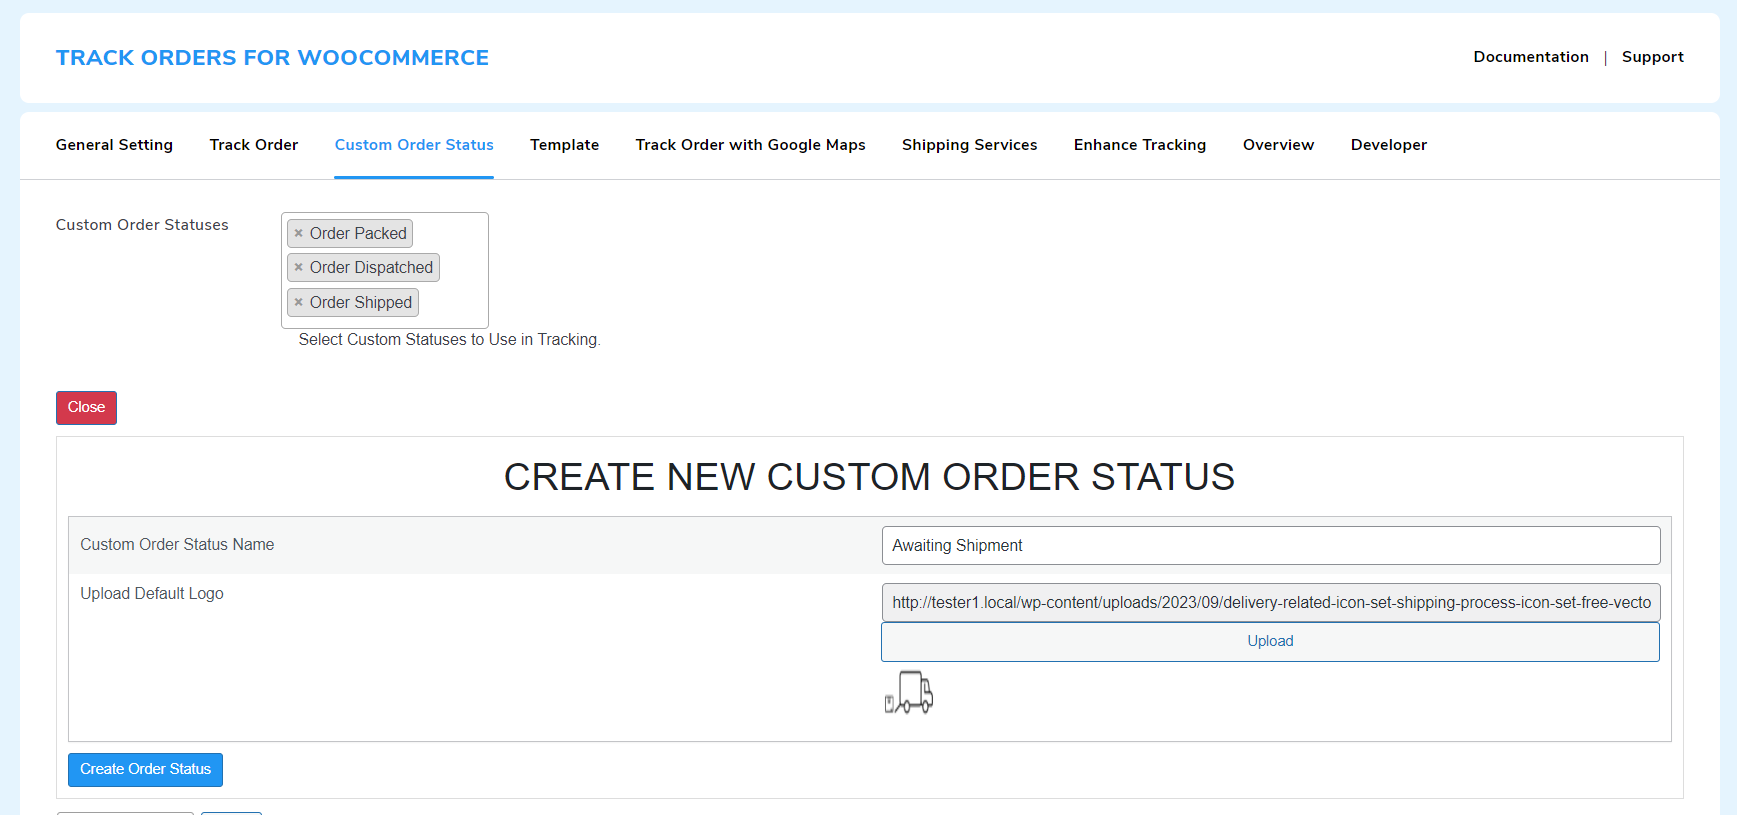
- Click on the Create Order Status button.
- Insert an order status name and default image of the order status.
- Click the Save Settings button.
To add your created Custom Order Statuses:
- Click on the Custom Order Statuses dropdown.
- Type or scroll down and select the order status you want.
- Finally, click on the Save Settings button.
8.WooCommerce Shipping Templates
The Track Orders for WooCommerce plugin offers four distinct templates that are both gamified and interactive to provide the best shipping tracking experience to guests and customers.
To apply a template, just click the Activate button. If you’re curious about the appearance of the WooCommerce track and trace templates, you can simply press the Preview button.
9.Track Orders With Google Maps
The Track Order With Google Maps feature is a reliable addition to your product tracking service as it enables customers to monitor their orders in real time through seamless integration with the Google Maps API.
Important Tip: Keep your Google Maps API Key secure and avoid sharing it publicly.
Enabling Google Maps for Order Tracking: Activate the toggle to enable integration between WooCommerce Order Tracker and Google Maps.
Enter Google Maps API Key: Use a valid Google Maps API Key. If not, follow Google’s instructions to generate one.
Enter Order Production House Address: Type the location of your order’s production facility, which will serve as the starting point for tracking the order’s journey.
Enter the Addresses of Order Transit Locations: As your order moves through various places, you can include each address to monitor its journey precisely.
Click on the “ADD ADDRESS” button and enter the address of the transit location one by one.
Finally, click the Save Settings button.
Customers can track their orders from the Order section on the My Account Page.
10.1.Track Orders With FedEx
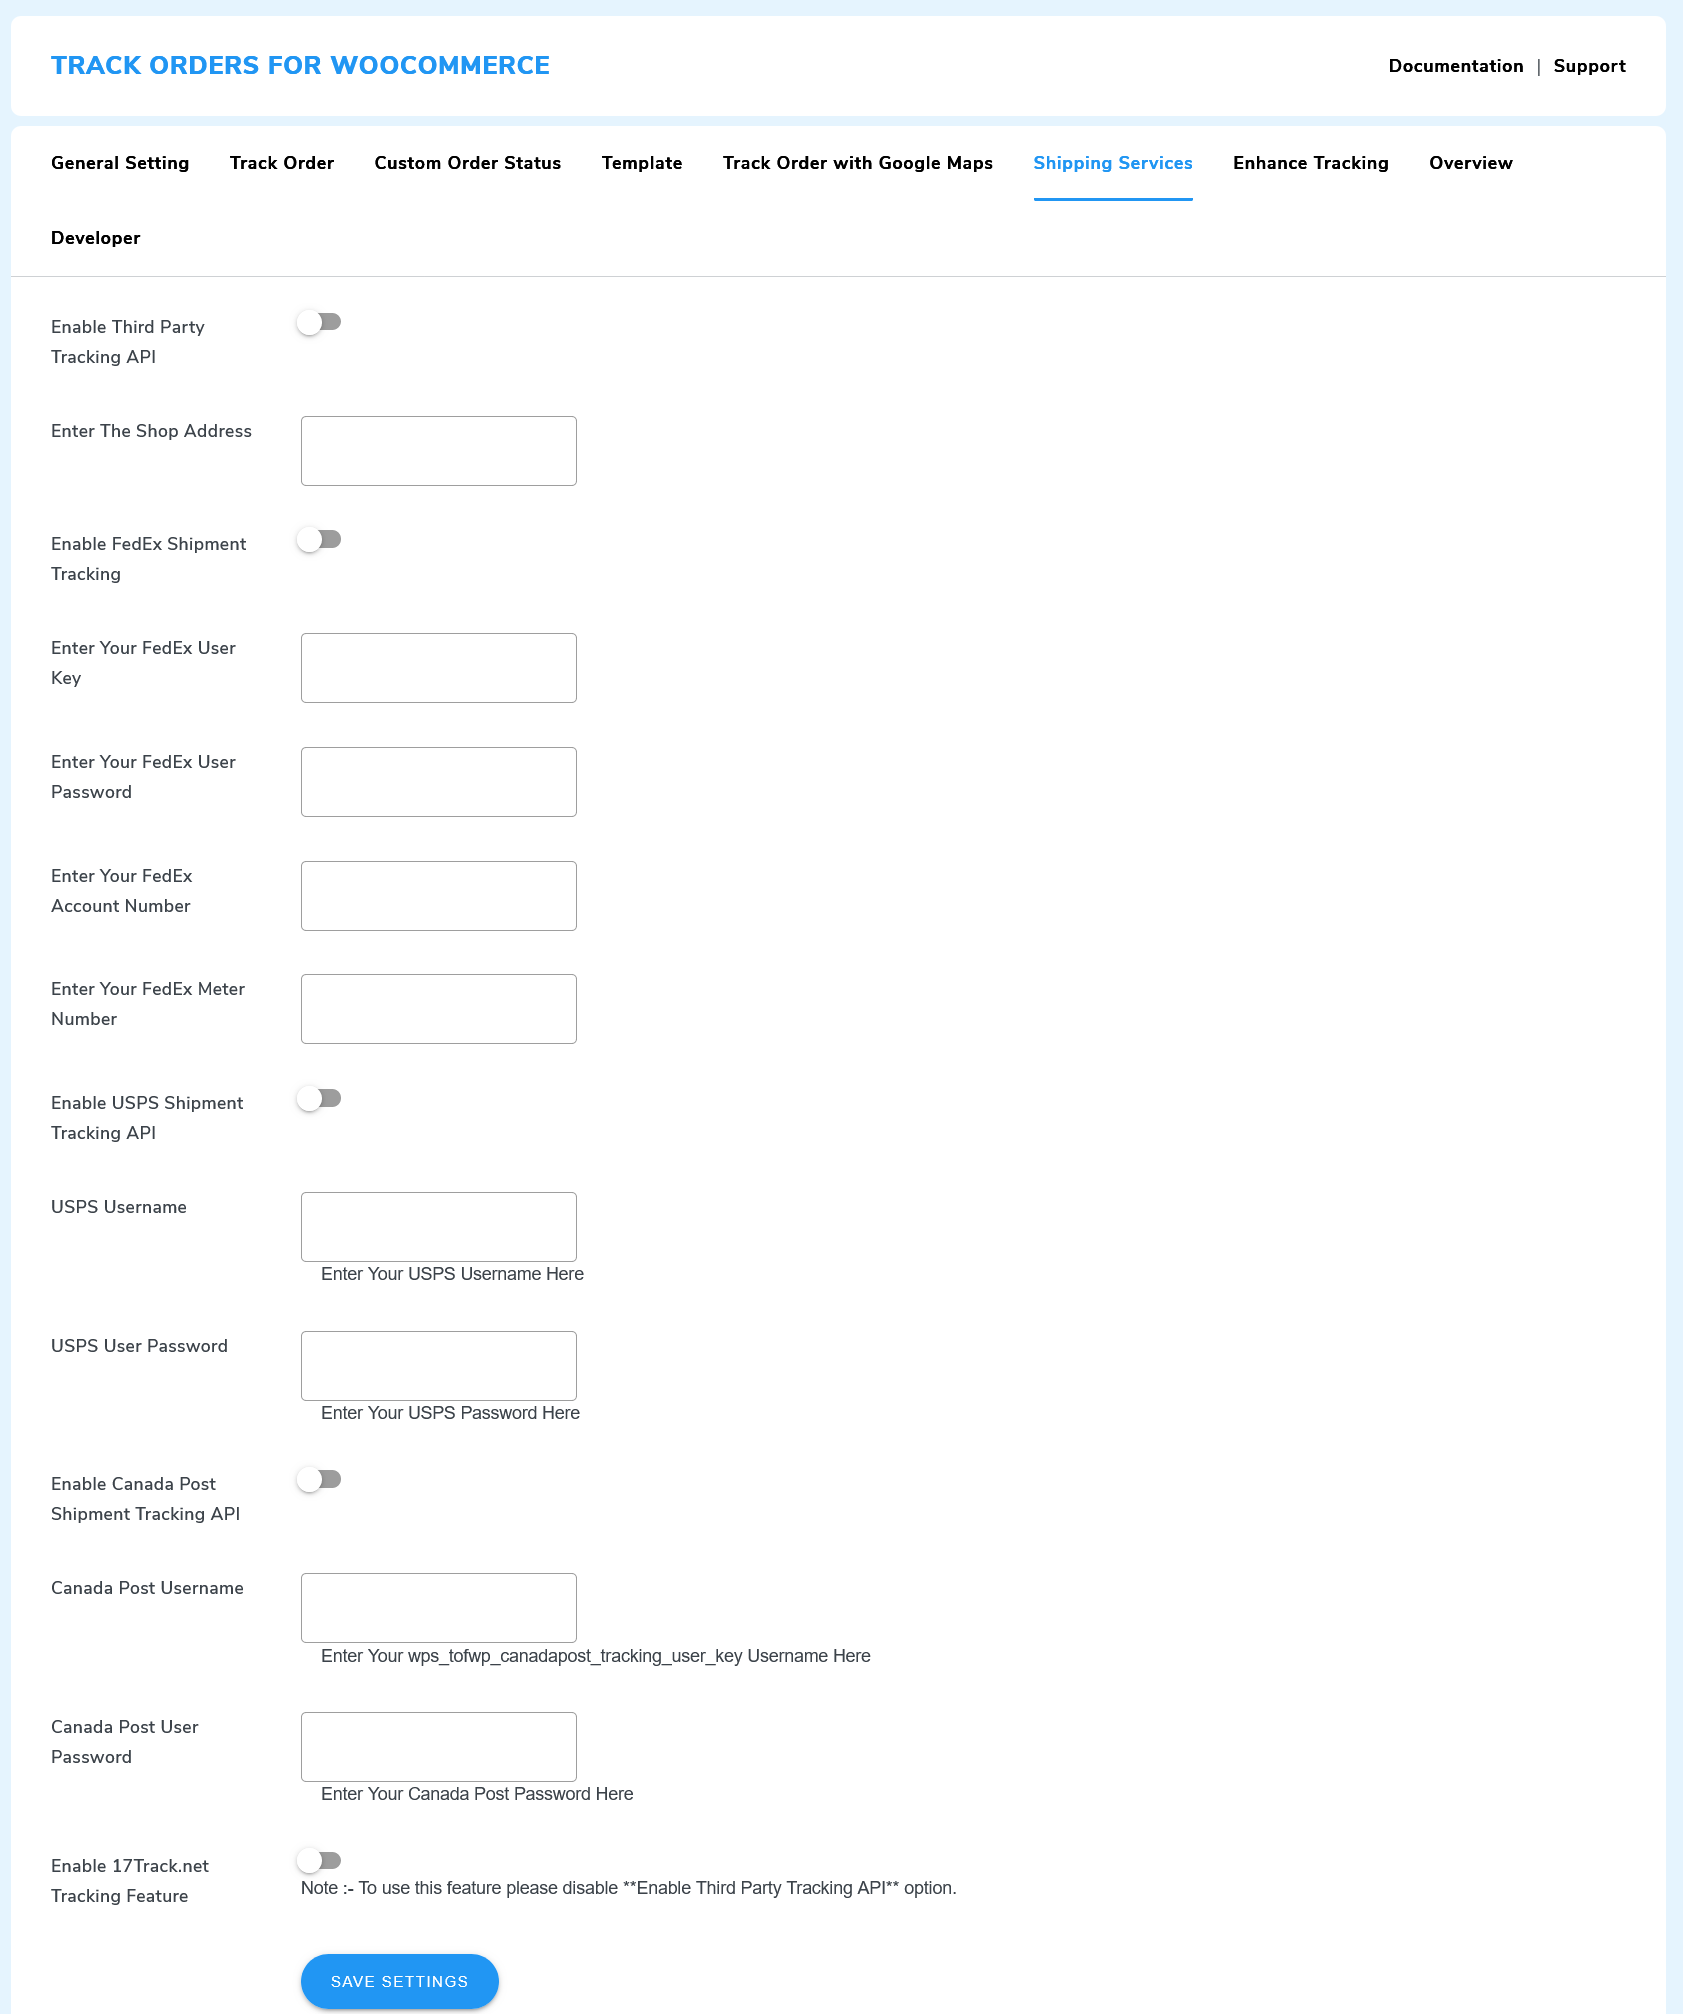
Enable Third-Party Tracking API: Active thirty-party tracking by enabling the toggle.
Enter the Shop Address: Put in the physical address of the location from which your shipment will depart.
Enable FedEx Shipment Tracking: Enable the toggle to use FedEx Shipment Tracking API.
Enter Your FedEx User Key: Provide your FedEx User Key in the specified field. To get the key, you need to have a FedEx developer account.
Enter Your FedEx User Password: Fill in the password of your FedEx developer account.
Provide Your FedEx Account Number. Enter the unique account number assigned to your FedEx account.
Enter your FedEx Meter Number: FedEx uses the meter number to permit your shipping meter and pull your negotiated shipping rates.
Customers will discover a tracking link or choice in their order confirmation email or within their user account. By selecting the tracking link, customers can access the current status and whereabouts of their FedEx shipment in real-time.
10.2.WooCommerce Order Tracking With USPS
Enable USPS Shipment Tracking API: Enable this option will authorize the use of USPS APIs for WooCommerce shipment tracking.
USPS Username: Enter your name associated with the USPS account.
USPS User Password: Enter your USPS account password.
Afterward, you can successfully connect your Order tracker for WooCommerce with the US Postal Service.
10.3.Shipment Tracking With Canada Post
Enable Canada Post Shipment Tracking API: Enable shipment tracking with Canada Post API.
Canada Post Username and Password: Enter the username and password of your Canada Post Account, allowing an effortless shipping tracking system.
Enable 17track.net: Enable the toggle button to allow users to locate their WooCommerce orders using 17track.net.
Finally, click on the Save Settings button to implement the changes.
11.Enhance Tracking
The Enhance Tracking tab contains options for multiple shipment tracking companies. Moreover, it allows you to introduce as many order-tracking options for your customers as you want.
Enhance Tracking: Click on the toggle button to allow advanced tracking options.
Select the Shipping Companies You Want: The available options for shipping companies include DHL, USPS, UPS, IMEX, InTrac, and more.
To select a tracking provider, simply click their checkbox.
Add a Shipment Tracking Company: Enter the name of the shipping company and their tracking page URL and click on the add button to add a new shipment tracking provider.
Lastly, save your changes.
12.WooCommerce Order Tracker Theme Compatible
Our Order Tracking plugin is compatible with a wide range of WordPress themes, making it suitable for any type of website.
- Flatsome – Multi-Purpose Responsive WooCommerce Theme
- Visual Composer – Free WordPress Website Builder
- Elementor – Create, Manage, and Host your Website
- WC Vendors – A Modern WordPress Theme
- DIVI Theme – The Ultimate WordPress Theme
Want some other theme compatibility? Contact Us
