
1.Overview
Key Features of Membership For WooCommerce
- You can Import all users in members together.
- Form Shortcode for direct purchase.
- You get the Dynamic CSS of Become Member Button
- Complete WooCommerce membership account details for users and logs for the admin
- Unlimited number of membership plan creation
- Select membership products to include in membership plans Combine multiple membership plan benefits into one plan
- Control access to membership pages
- Select access to membership products and posts on your eCommerce store
- Override membership plan access for members Better membership reports for admin
- Create a user after membership payment is complete Membership sorting by date membership plan was created Send out emails for various membership plan actions
- Bulk actions to edit memberships and move them to trash The membership Plan tab shows all existing membership plans on your WooCommerce store
- The membership plugin gives you a report of how many active members there are and when they were active.
- Create a user and send credentials in the mail if the guest user buys a membership plan.
- For guest users, this feature gives you the choice of logging in on thank you page.
- Customers can now cancel their membership plans anytime.
- You can change the text of the Buy Now Button to Dynamic Text.
- Customers can avail of the membership plan on Individual products.
- To show the membership plans in the column use the Membership Plan template shortcode.
- Comments are restricted to your protected content.
2.How to Download The Membership Plugin?
To download the premium Membership plugin that you purchased please follow the below steps:-
- Go To WP Swings My Account Page.
- Visit Orders Section
There you will get a License code and a Premium purchased plugin zip file Download and use it on your website by activating it
Note: You need to have both Free and Pro plugins in order to use them smoothly
3.Installation
Let’s See how you can download and install both the free and pro version of the Membership plugin.
3.1.Membership WooCommerce Free Plugin Installation
Automatic Installation:
Automatic installation is the easiest option handled by WordPress.
Follow these steps for the installation:
1) Go to the Admin panel navigate to the sidebar click on the ‘Plugins’ menu > ‘Add New’.
2) On the ‘Add Plugins’ page go to the search bar and type ‘Membership for WooCommerce’.
Once you find ‘Membership for WooCommerce’ by WP Swings, you can view the details about it such as the points release, rating, and description. One can install it, simply by clicking “Install Now”

Manual Installation:
The manual installation of the plugin is another option to install the plugin in the seller’s WordPress environment.
The manual installation method involves downloading our ‘ WooCommerce Membership Extension’ and uploading it to the web server via their favorite FTP application.
The steps for manual installation are as follows:
1) Upload the ‘Membership for WooCommerce’ folder to the /WP-content/plugins/ directory.
2) Activate the WooCommerce Membership plugin through the ‘Plugins’ menu in WordPress.
**The best results can be viewed by using the “WooCommerce” standard theme (Storefront). Any third-party plugin might cause conflict with our plugin.**.
3.2.Membership for WooCommerce Pro plugin Installation
Automatic Installation:
Automatic installation is the easiest option as WordPress handles the file transfers itself and you don’t need to leave your web browser.
The steps are as follows :
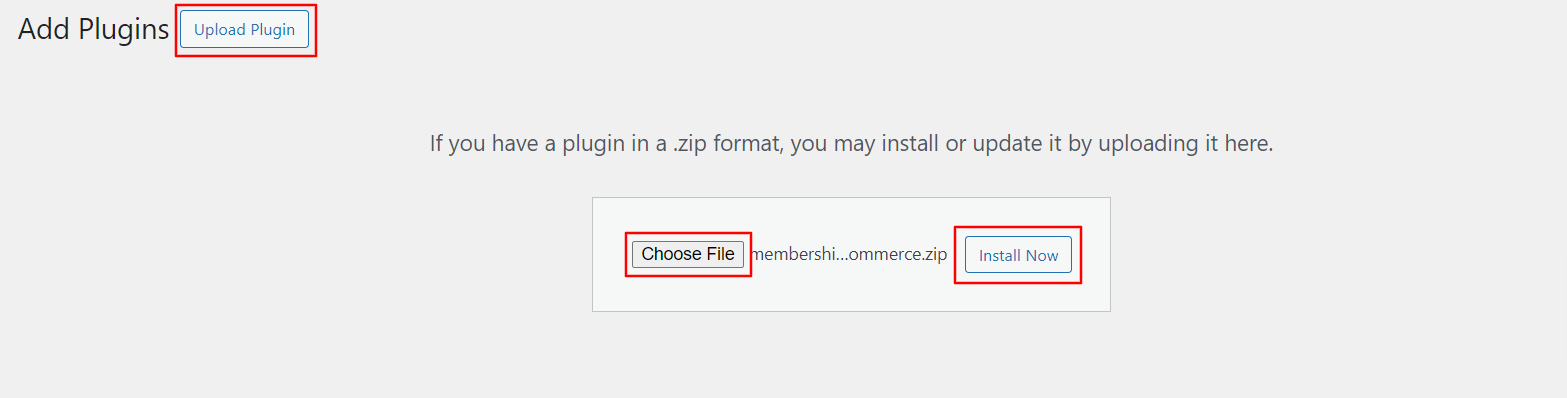
1) Download the zip folder of the plugin Membership for WooCommerce Pro from My Account > Orders > Click on view > Scroll down and download the plugin zip file
2) Once downloaded, install the Membership for WooCommerce Pro plugin by browsing and activating it.
Note: Visit the Login page to create your account before completing your purchase.
Manual Installation:
The manual installation of the WooCommerce Membership plugin is another option. To install the plugin to your WordPress environment.
The manual installation method involves downloading our Membership for WooCommerce Pro Extension and uploading it to your web server via your favorite FTP application.
The steps are as follows :
(i) Kindly, upload the Membership for WooCommerce Pro folder to the /wp-content/plugins/ directory.
(ii) Activate the Membership for WooCommerce Pro plugin through the WooCommerce Membership ‘Plugins’ menu in WordPress.
Note: Before activating the Membership For Woocommerce Pro, you should have the Membership For WooCommerce – WordPress plugin otherwise, the plugin will not function.
So, if you don’t already have it, you can download it directly from here:
3.3.License Activation
After Purchasing the premium version navigate to My Account > Orders > Your Order. There you’ll find the License Key.
If you want to benefit from all the premium features and automatic updates and access the support platform to receive help from our staff. In that case, it’s necessary to activate the license.
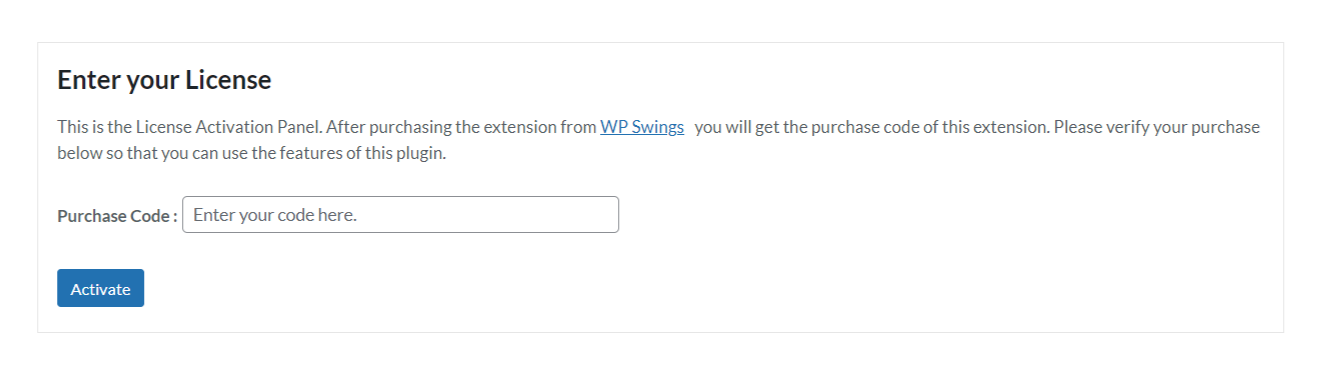
To do so, you have to navigate to the “License” tab, here you can enter the “License Key”, and click on the “Activate” button. Customers are supposed to receive these in their mail when they purchase the premium plugin.
You can also find the license activation code in the My Accounts > Order section.
4.Plugin Configuration Form
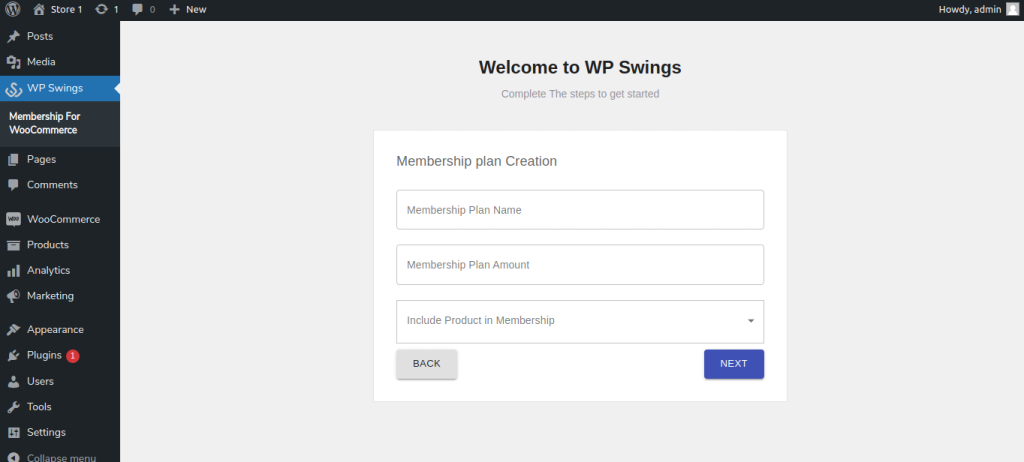
Initially on installing the Membership for WooCommerce plugin, the admin is guided through a multi-step setup. As soon as you activate the plugin and proceed towards Membership for WooCommerce from Dashboard, you’ll find a 3-step setup.
1. General Setting: Enable Membership Plan. Switch the toggle button. Press Next.
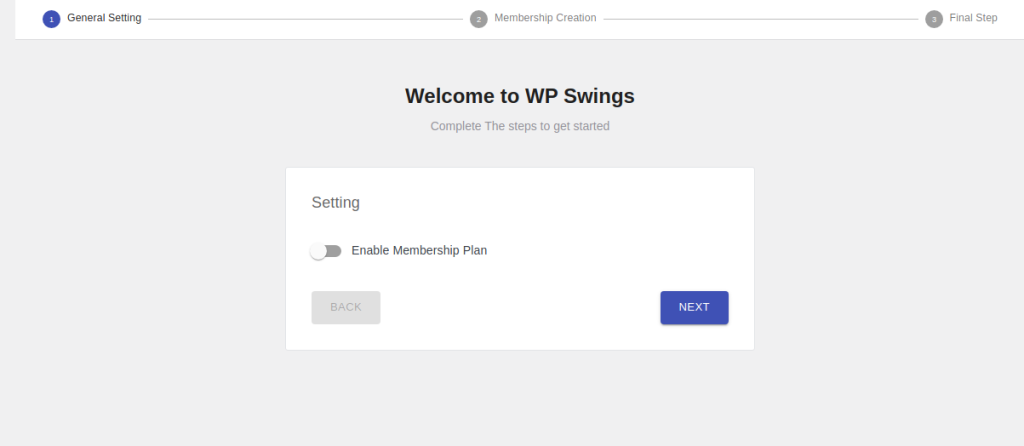
Note: “If you will not enable and skip this here than you will not get by default plan templates from plugin.”
2. Membership Creation: Mention the membership plan name, membership plan amount and include products in the membership plan. Press Next.
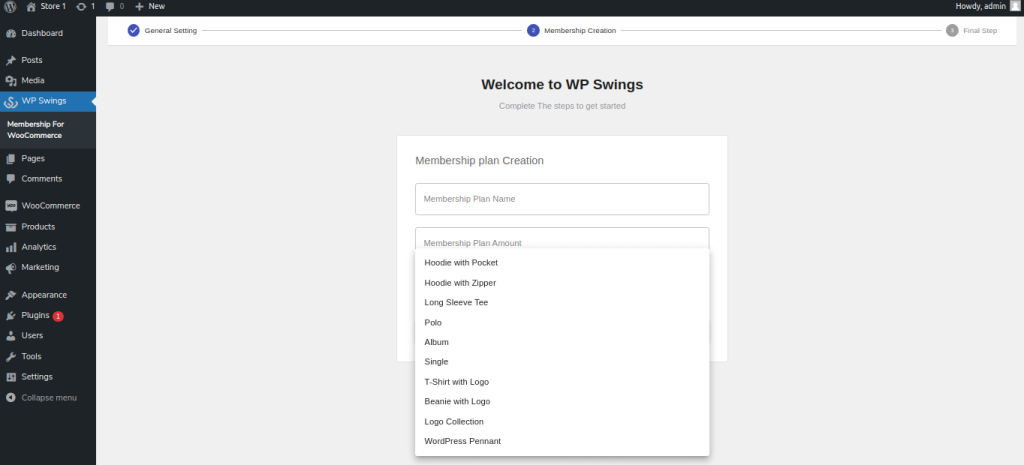
3. When you include membership products, some products of your store shall be listed. Choose from available products.
5.Membership Overview
If the admin wants an overview of the features of the Membership for WooCommerce Pro plugin, he can go through this space. It is for the understanding of the admin. It has the general outlines of the WooCommerce Membership Plugin.
Go to Dashboard >> WP Swings >> Membership for WooCommerce >> Overview
6.General Settings
For changing the general settings of the Membership plugin:
Go to Dashboard >> WP Swings >> Membership for WooCommerce >> General Settings
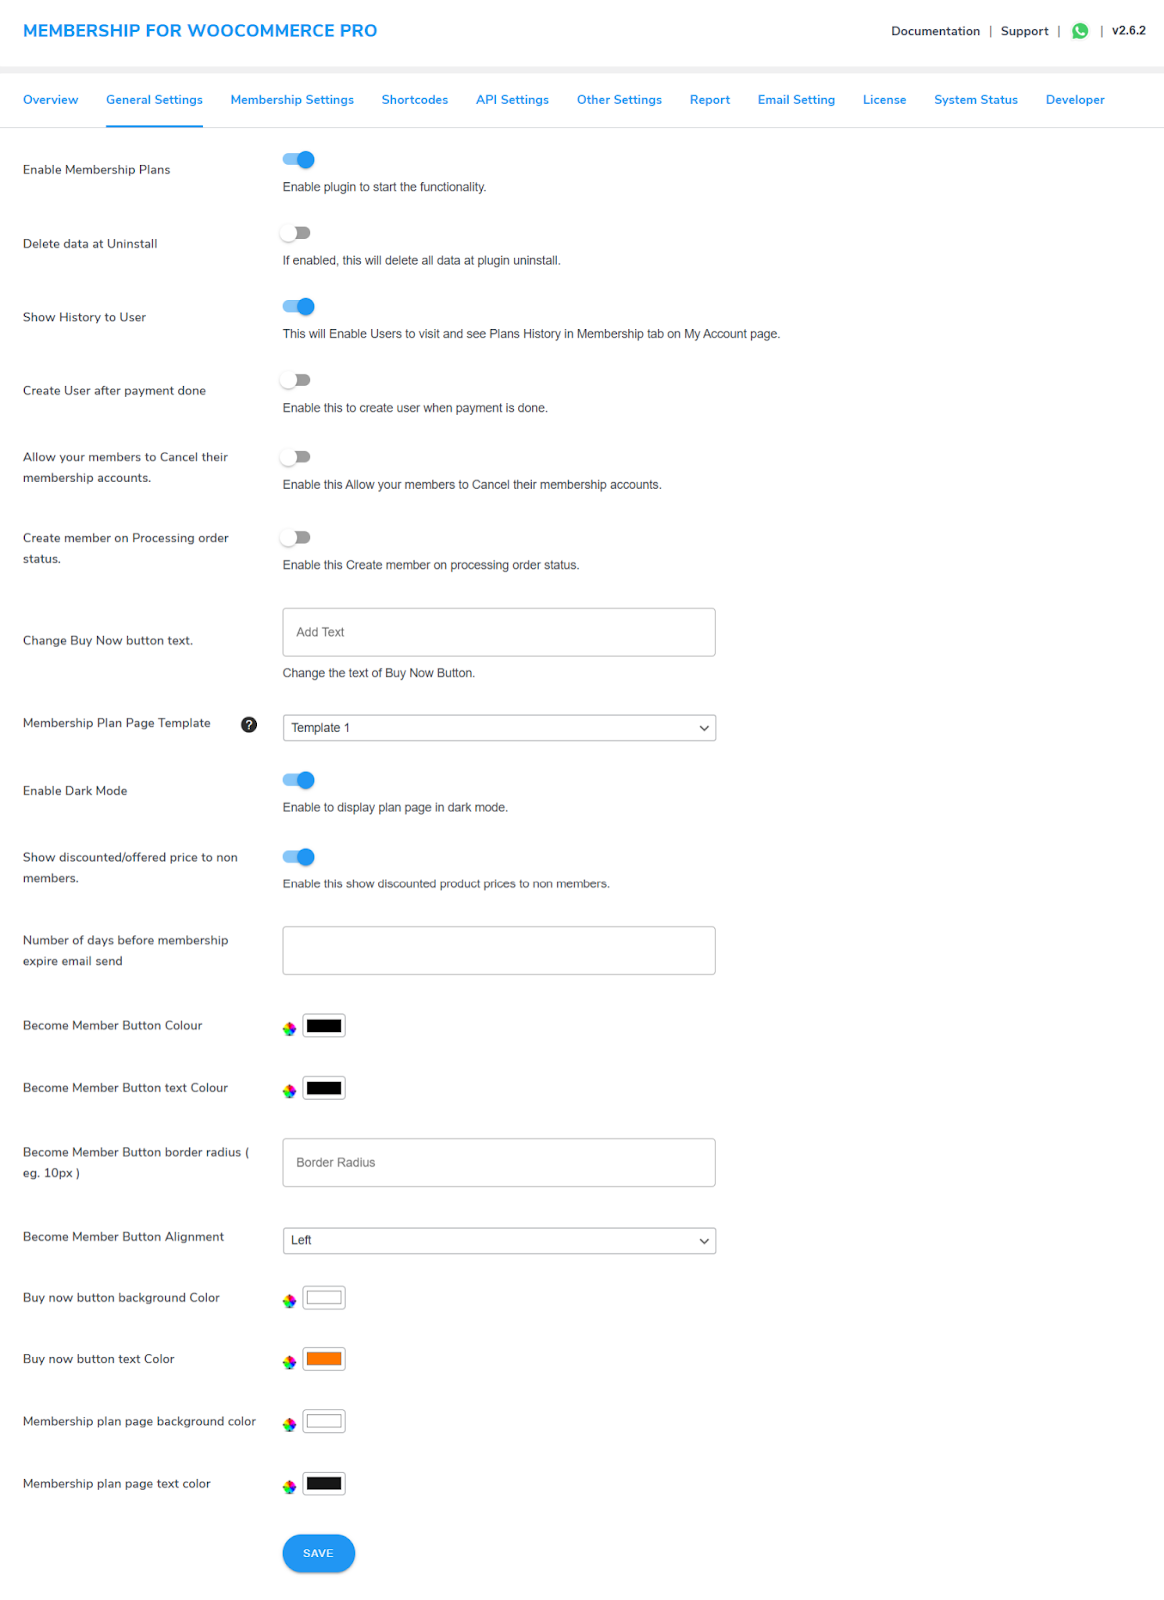
6.1) Enable Membership Plans: Toggle this button to enable the Membership Plans
6.2) Delete Data at Uninstall: Toggle this button to enable and automatically delete all the member details and membership data after uninstalling the plugin.
6.3) Show Membership History to User: Toggle this button to enable the visibility of the user’s history. This way, the user can visit and see their plan history in the membership tab on the “My Account Page.” By enabling this setting they can also see the newly added membership dashboard.

6.4) Create A User After Payment Done: Toggle this option to allow the creation of users after membership payment is completed.
No default user shall be created for membership buyers before payment is completed.
6.5) Allow Members to Cancel their Membership Accounts: Toggle this option to allow members to cancel their memberships at any time.
Once the member cancels the membership account, he will no longer be able to use the benefits of the plans.
6.6) Create Members on Processing Order Status: Toggle this option to create members on Processing Order Status.
This will make it easier for your customers to join your membership plans by allowing the creation of members in the processing order stage.
6.7) Change Buy Now Button Text: Here You can enter custom text to show Instead of “Buy Now”
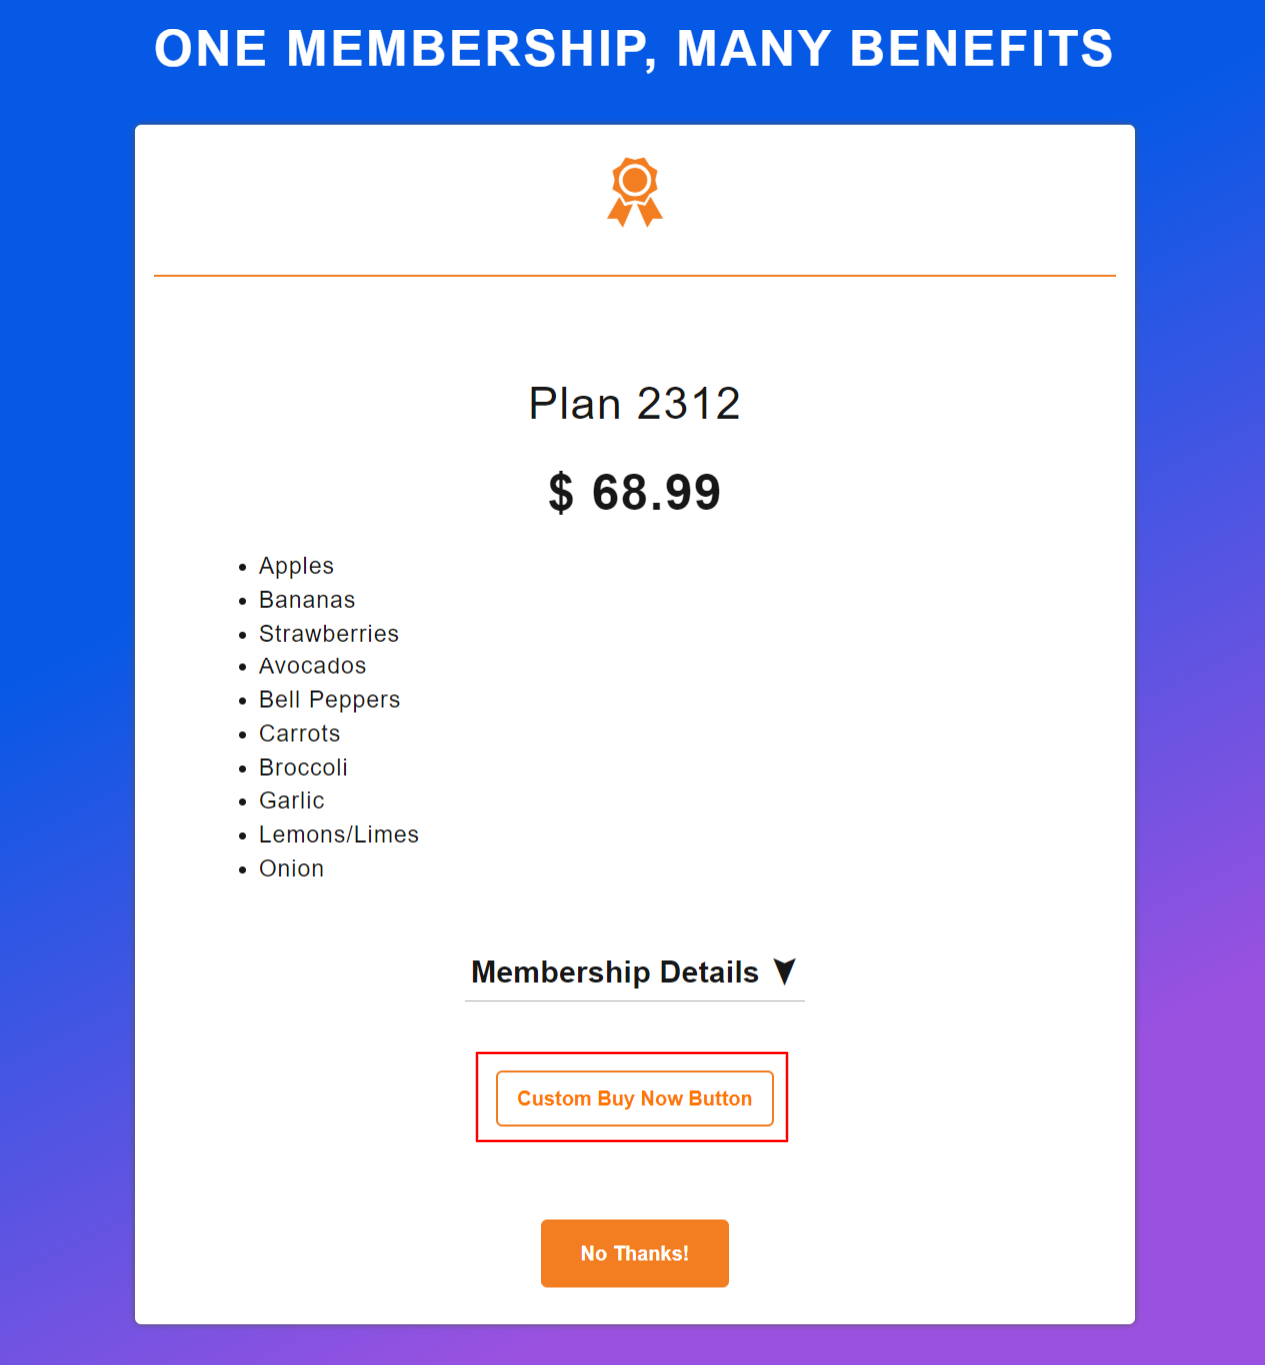
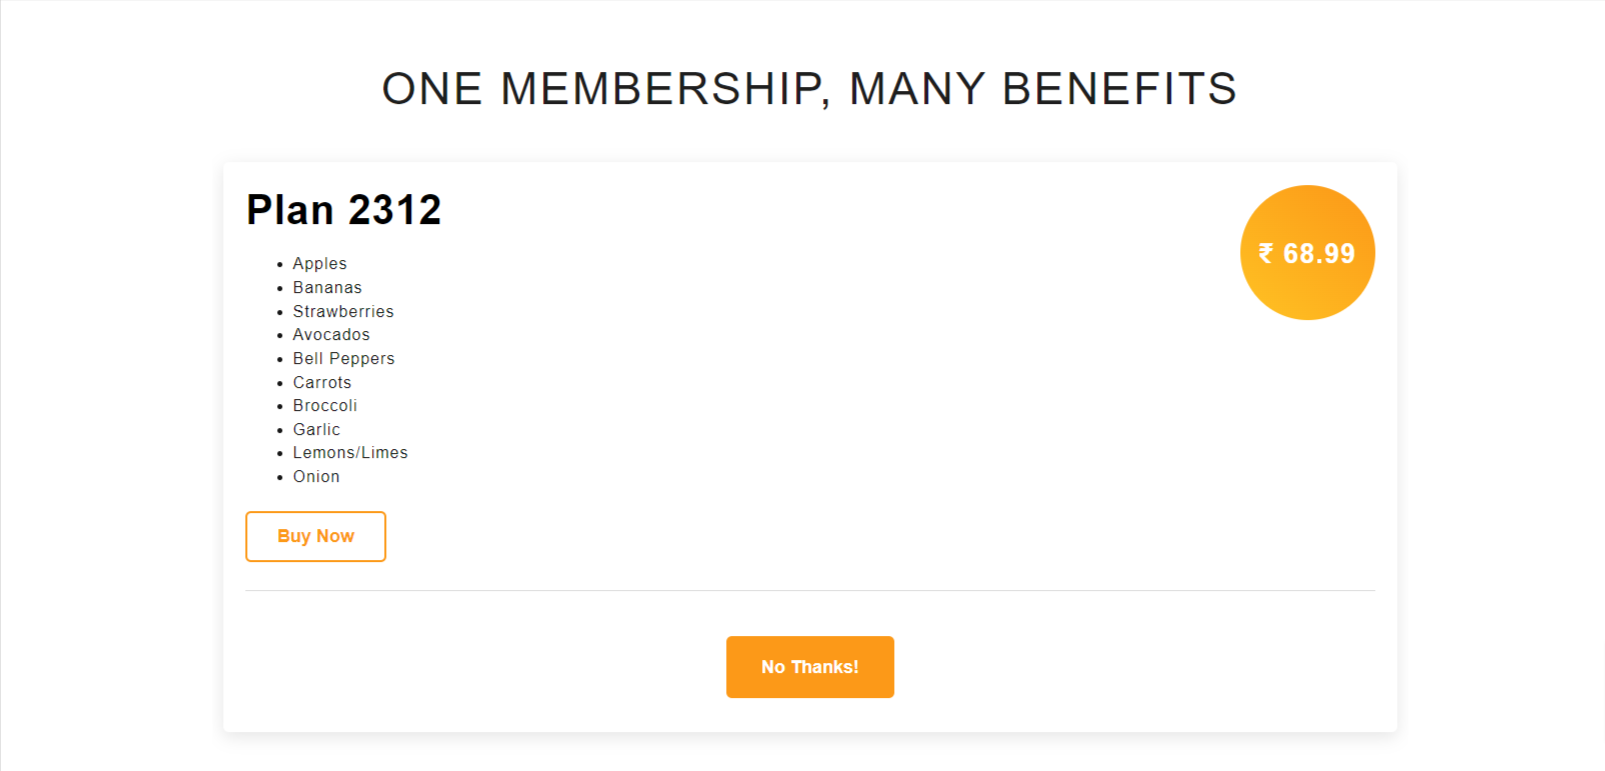
6.8) Membership Plan Page Template: You can choose templates as your preferences for the membership plan page, here is how they look like
Template 1

Template 2
6.9) Enable Dark Mode: Toggle this option to enable Dark Mode
The General tab settings in the premium version include all the features from the free version, plus the following additional features:
1. Show discounted prices to non-members : Premium Toggle this button to show discounted prices to non-members.

Here is how I’ll look on the frontend.
2. Number of days before membership expires email send : Premium Here you can enter the number of days before you want to start sending membership expiration notification emails to membership users.
3. Become Member Button Colour : Premium Here you can choose from multiple color options to choose “Become Member Button Color”
4. Become Member Button Text Colour : Premium Here you can choose from multiple color options to choose “Become Member Button Text Colour”
5. Become Member Button border-radius : Premium Here you can choose the radius for “Become Member Button” for example – 10px
6. Become Member Button Alignment : Premium Here you can choose the alignment of “Become Member Button”
7. Buy Now Button Background Color : Premium Here you can choose from multiple color options to choose “Buy Now Button Background Color”
8. Buy Now Button Text Colour : Premium Here you can choose from multiple color options to choose “Buy Now Button Text Colour”
9. Membership Plan Page Background Color : Premium Here you can choose from multiple color options to choose “Membership Plan Page Background Color”
10 .Membership Plan Page Text Color : Premium Here you can choose from multiple color options to choose “Membership Plan Page Text Color”
7.Membership Settings
Here You can Configure Multiple Membership Settings
7.1.Add Plan
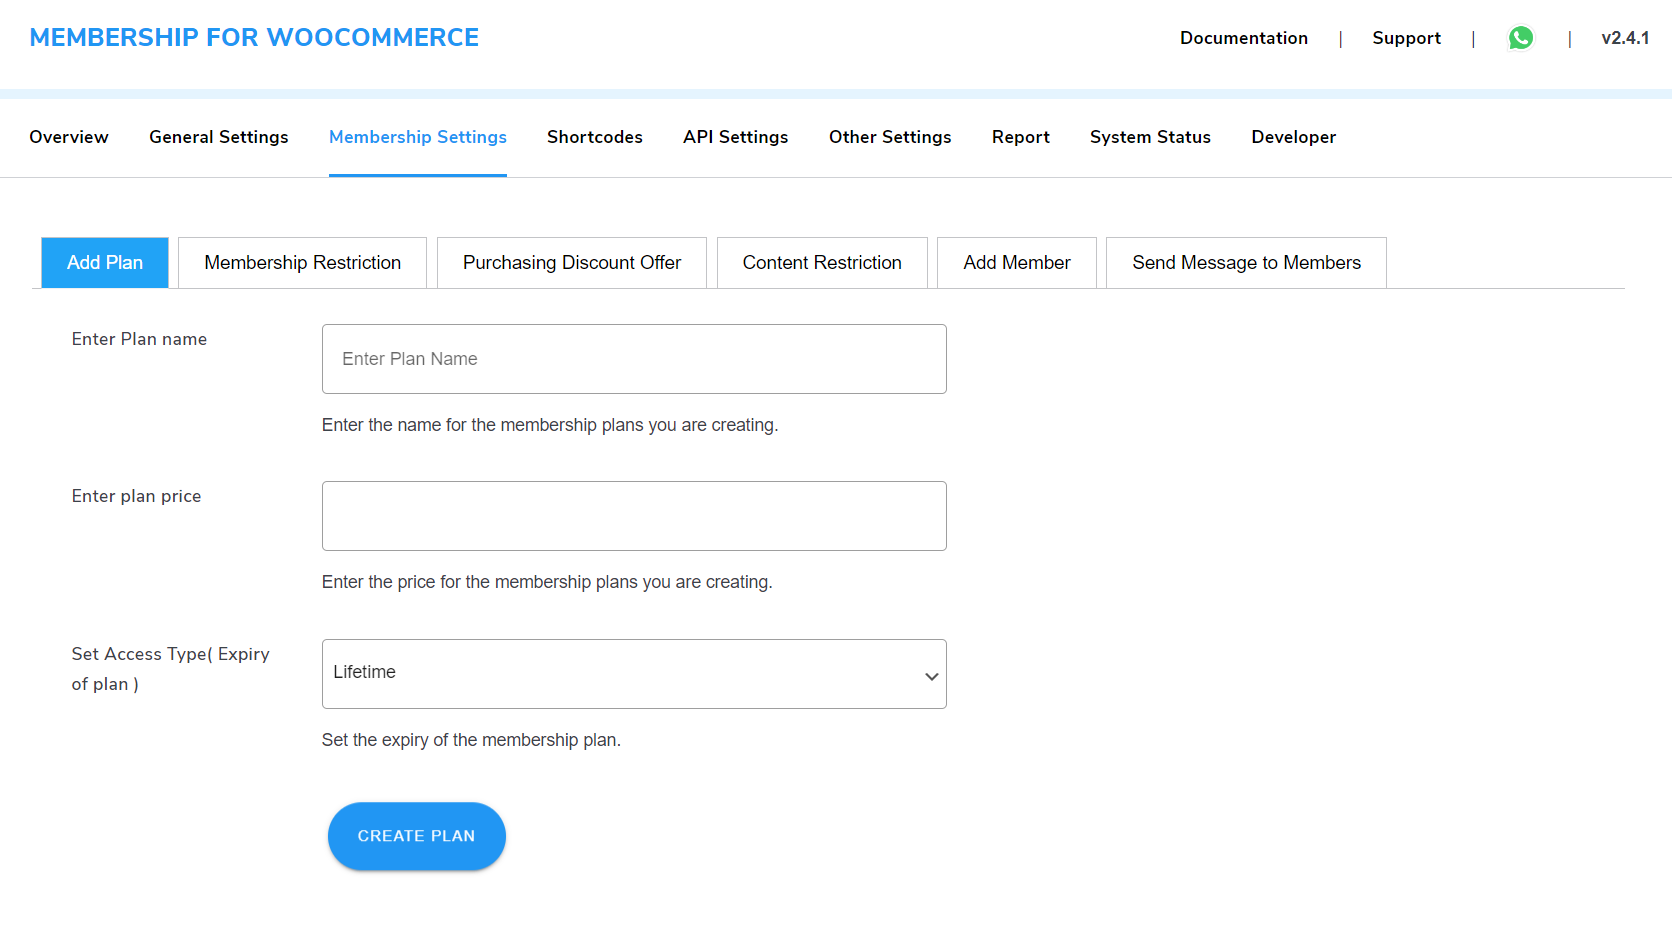
1. Enter Plan Name: Enter the name of the membership plans you are creating.
For example Bronze plan, Silver plan, and Gold plan.
2. Enter Plan Price: Enter the price for the membership plans you are creating.
3. Set Access Type (Expiry of Plan): Set the expiry of the membership plan. For example Limited, Lifetime. Click on “Create Plan.”
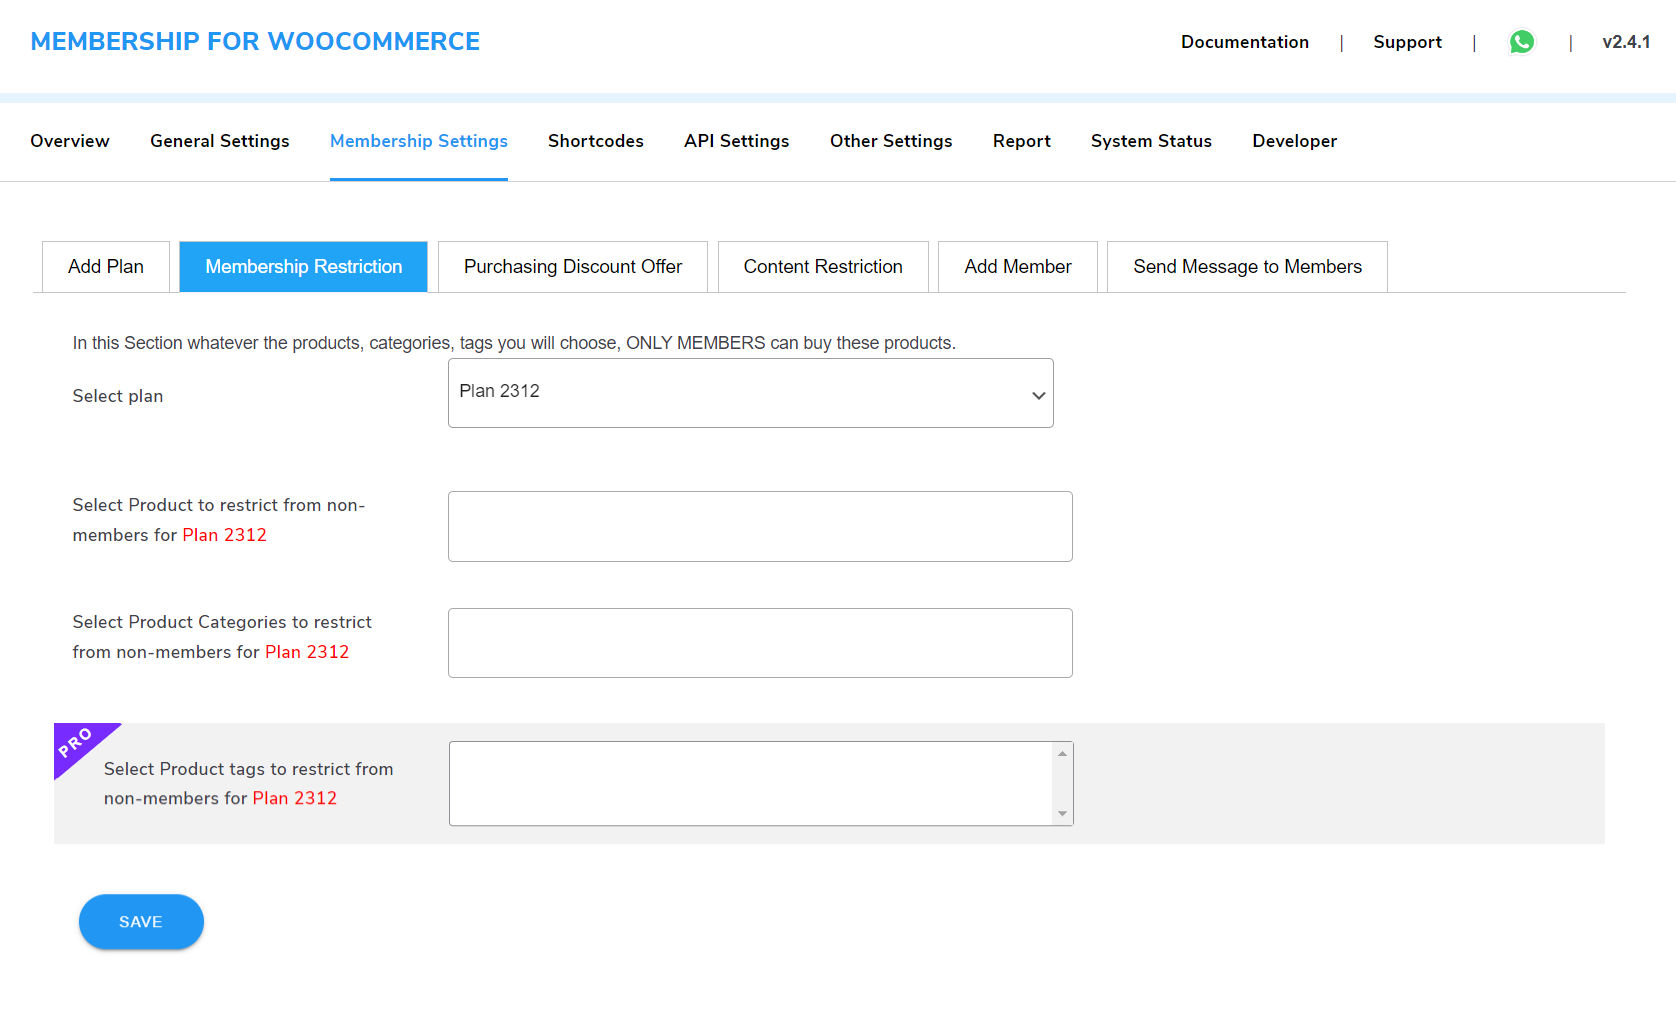
7.2.Membership Restriction
-
Select Plan: You can Select a Plan from your created list to restrict non-members.
-
Select Products: Here you can select the products to restrict non-members.
-
Select Product Categories: Here you can select product categories to restrict non-members.
-
Select Product Tags : Premium Here You can select product tags to restrict non-members.
Note: In this section, whatever the products, categories, or tags you will choose, ONLY MEMBERS can buy these products.
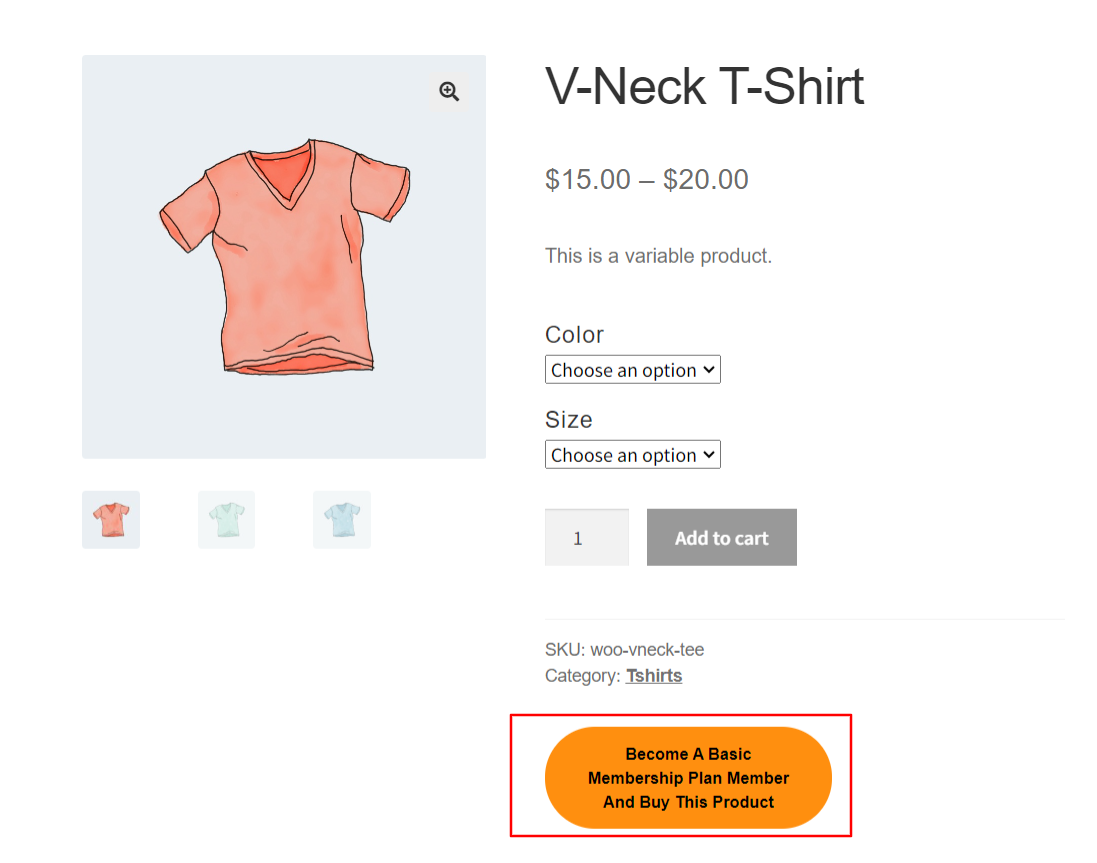
Frontend Representation – Non-Members:
7.3.Purchasing Discount Offer

- Select Plan : You can Select a Plan from your created list for restricted members.
- Select Products : Here you can select the products to offer a discount
- Select Product Categories : Here you can select product categories to offer discount
- Select Product Tags : Here You can select product tags to offer discount
- Select Discount Type : Here You can select Discount type. It can be a fixed amount or a percentage discount
- Enter Discount : Here you can enter the discount price
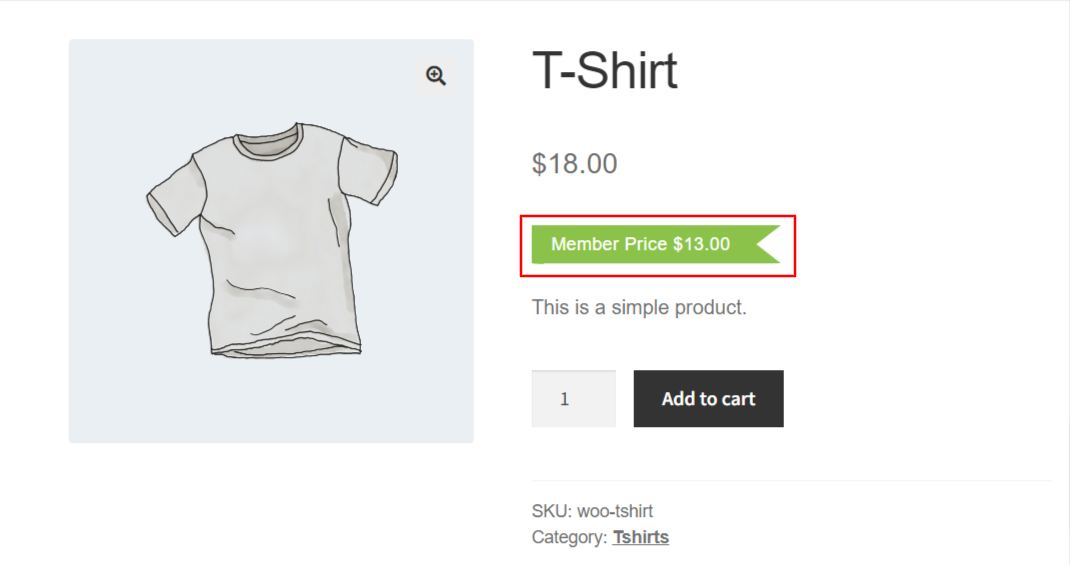
Here is how discounts will be shown to members on the product
7.4.Content Restriction
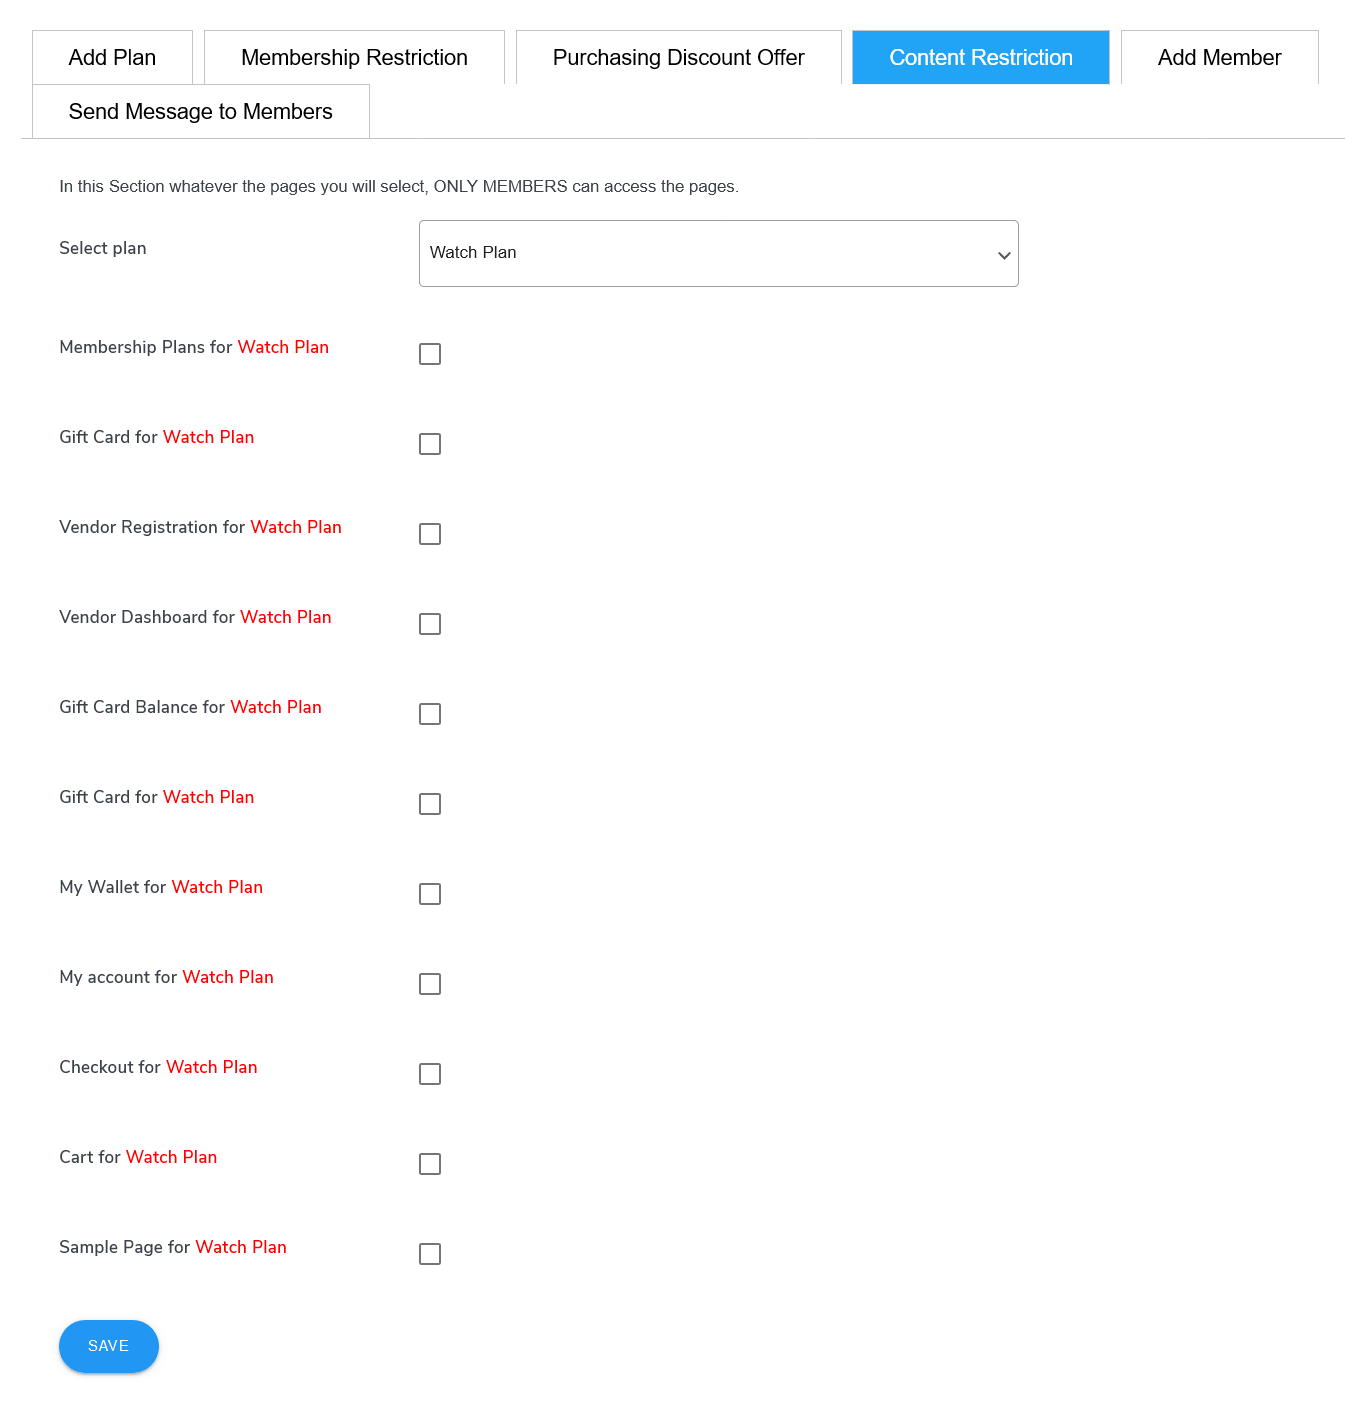
Select Plan: You can choose a plan from your created list for restricted content.
Note: In this section, whatever pages you select, ONLY MEMBERS can access them.
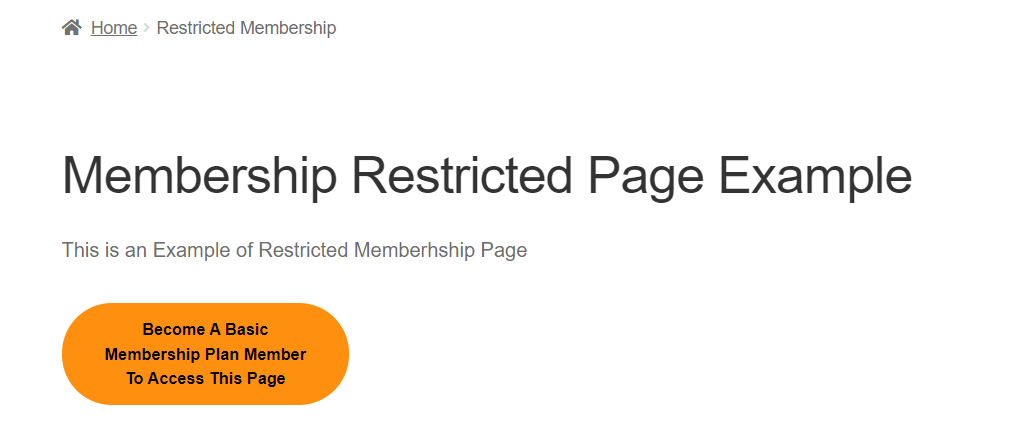
Frontend Example of Restricted Page:
7.5.Add Member

Add details of a member like-
1. Customer Name
2. Select Plan
3. Name
4. Email
5. Phone
6. Address
7.6.Send Message to Members
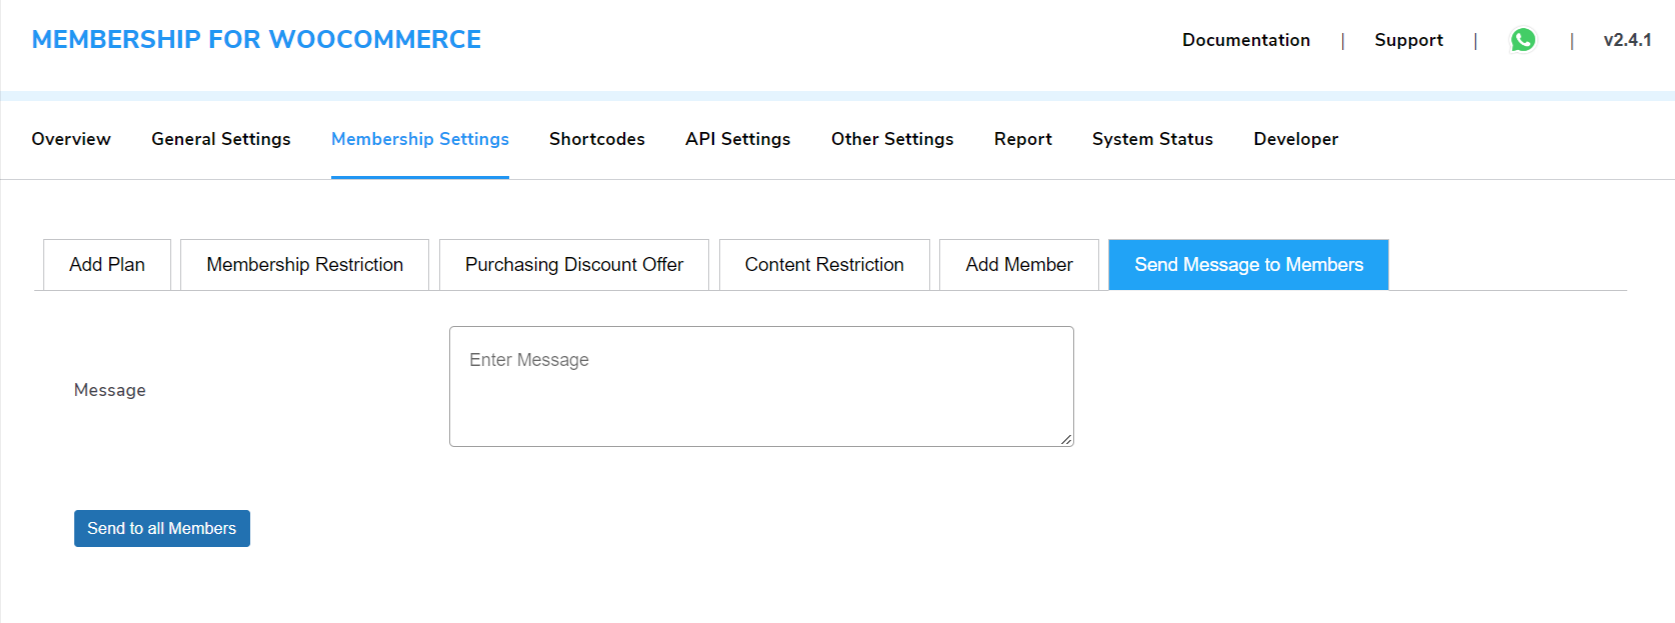
You send quick notifications to your members in bulk for fresh offers, membership upgrades, product launches, and more.
- Enter your email content in the message box.
- Click on the Send on Send to All Users button.
8.Membership Shortcodes
Admin can customize the single product page through the shortcodes that are provided in this space. These membership shortcodes are in action for:
- Membership Action Shortcodes
- Membership Plans Shortcodes
- Membership Registration Shortcodes
- Membership Template Shortcodes (PRO)

Admin has a variety of shortcodes that can be pasted on the product page and customized according to their requirements.
1. Membership Action Shortcodes
- Buy Now: This shortcode only returns the buy now button. Use it as [wps_membership_buy_now]
- No Thanks: This shortcode only returns the no thanks button. Use it as [wps_membership_no]
2. Membership Registration Shortcodes
- Membership Registration Form: This shortcode returns the registration form of the Membership plan. Use it as [wps_membership_registration_form].
3. Membership Plan Shortcodes
- Membership Plan Title: This shortcode returns the title of the Membership Plan. Use it as [wps_membership_title_name]
- Membership Plan Price: This shortcode returns the price of the Membership Plan. Use it as [wps_membership_price]
- Membership Plan Desc: This shortcode returns the description of the Membership Plan. Use it as [wps_membership_desc_data]
4. Membership Template Shortcodes Premium
- Membership Plan Template: This shortcode returns the template of the Membership Plan. Use it as [wps_membership_plan_template]
8.1.How to Create Membership Plans with Shortcodes?
Step 1: Go to Dashboard
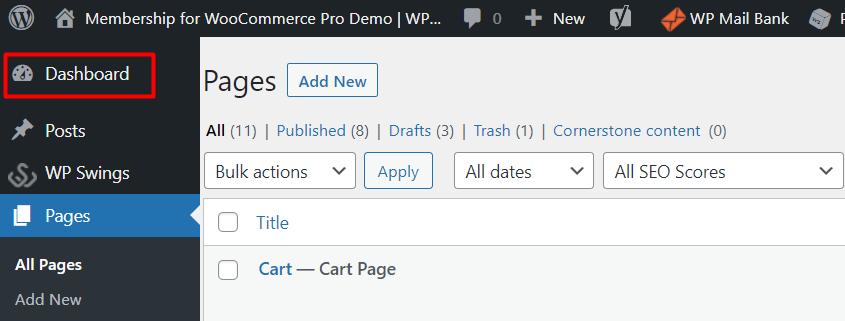
Step 2: Click on Pages
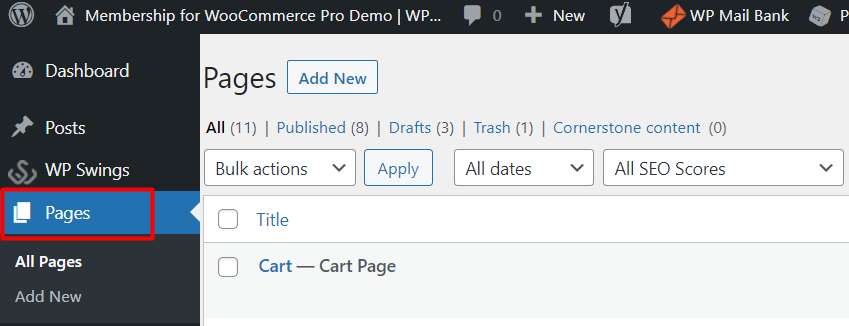
Step 3: Create a New Page or you can simply click on Add New
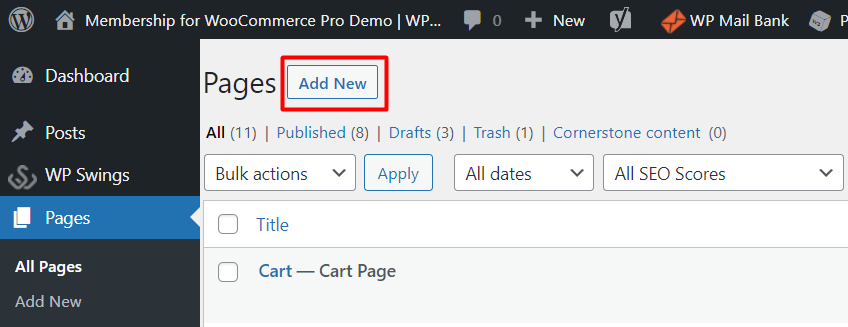
Step 4: Enter the Shortcodes according to your membership plans
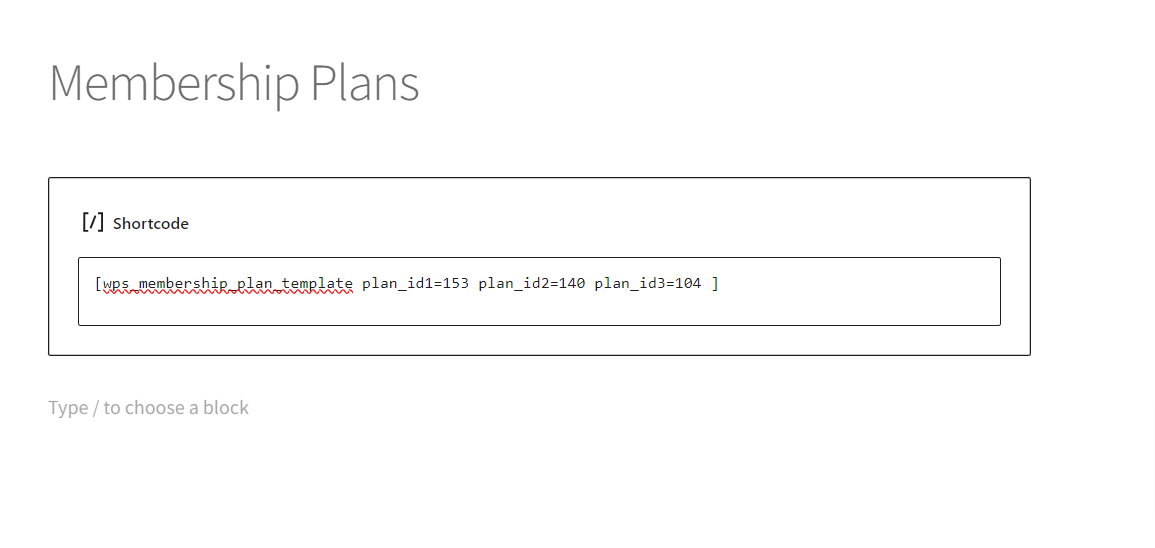
For Example, If your membership has three plans, what you can do is use the reference of the format mentioned below:
[wps_membership_plan_template plan_id1=153 plan_id2=140 plan_id3=104 ]
Check the plan IDs you want to enter in the shortcodes:
- Go to Membership > All Membership Plans
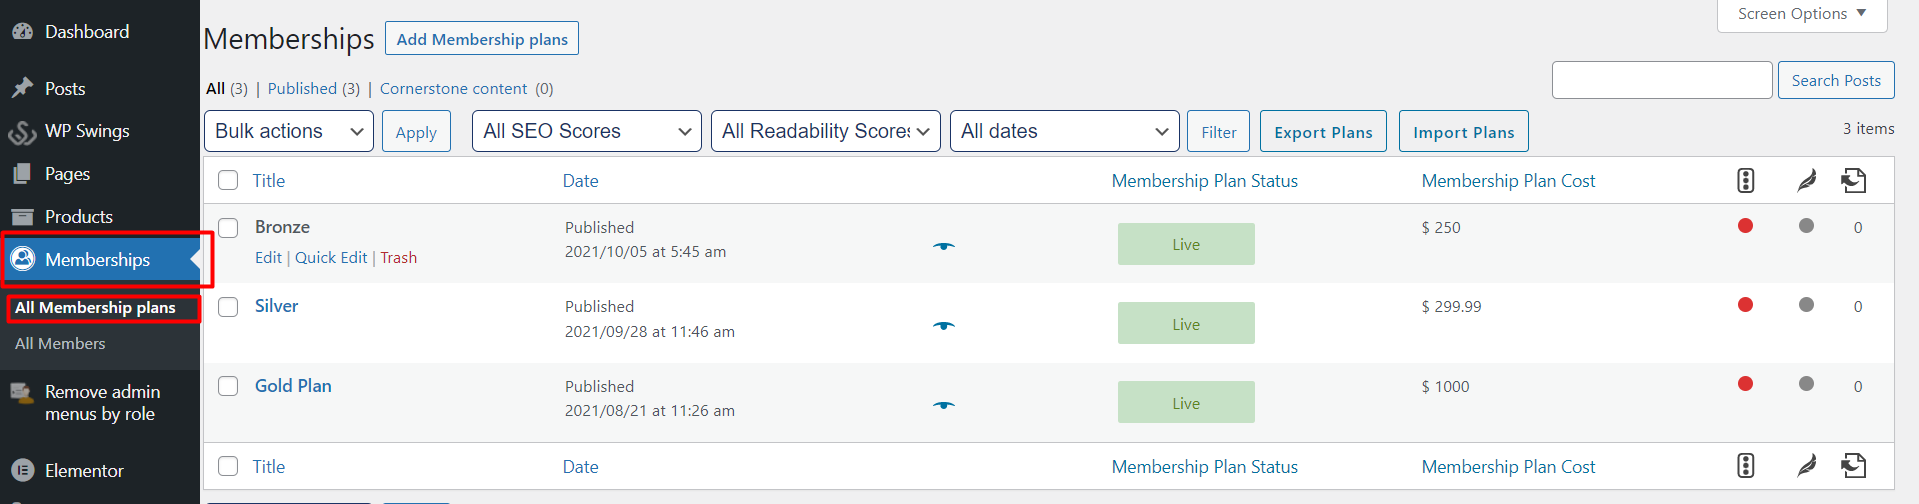
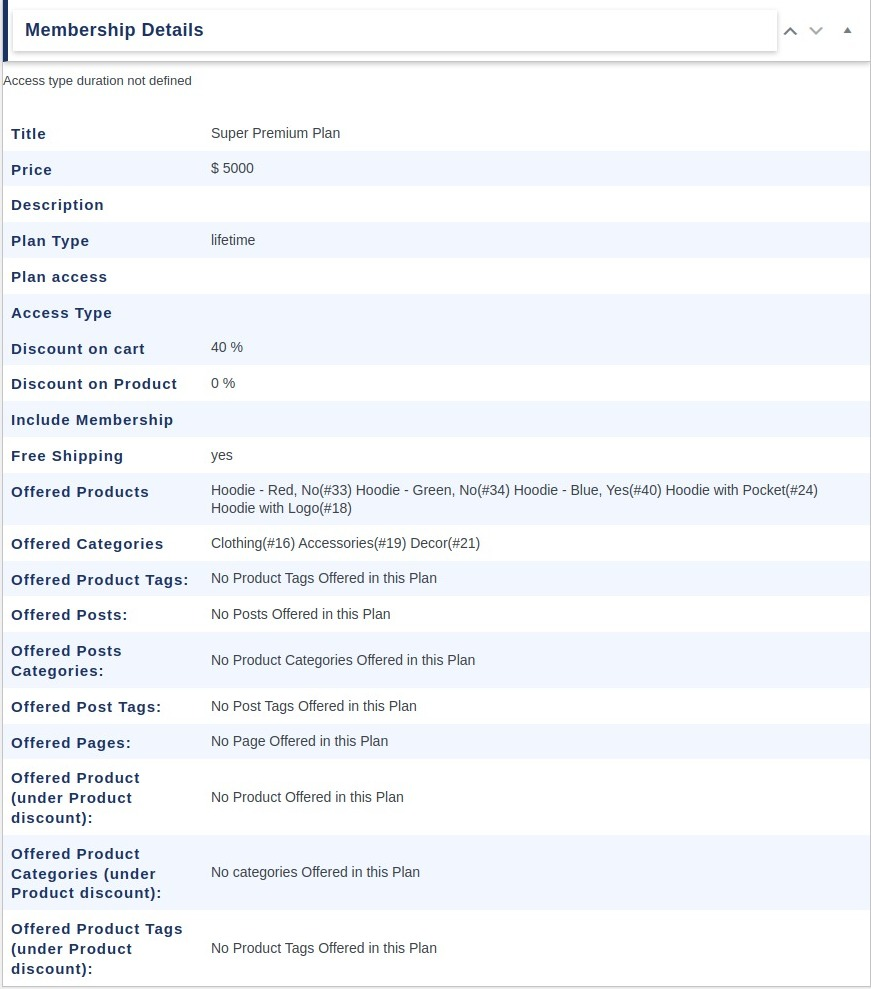
- Click on the Eye Icon to check the Plan Id
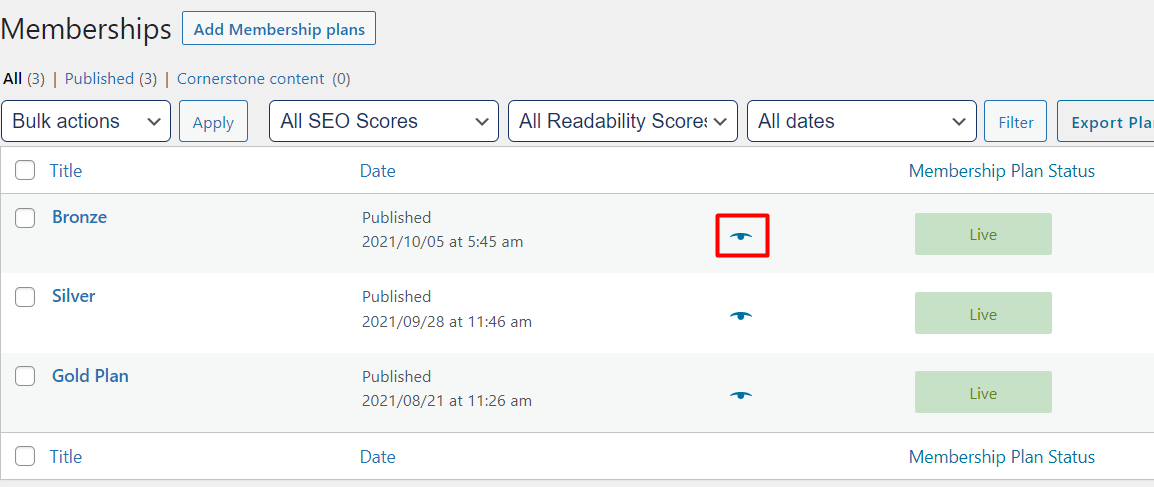
- After clicking on the icon, a window will pop up with the plan ID as well as other details. As shown in the image below:

From here you can get your Plan ID
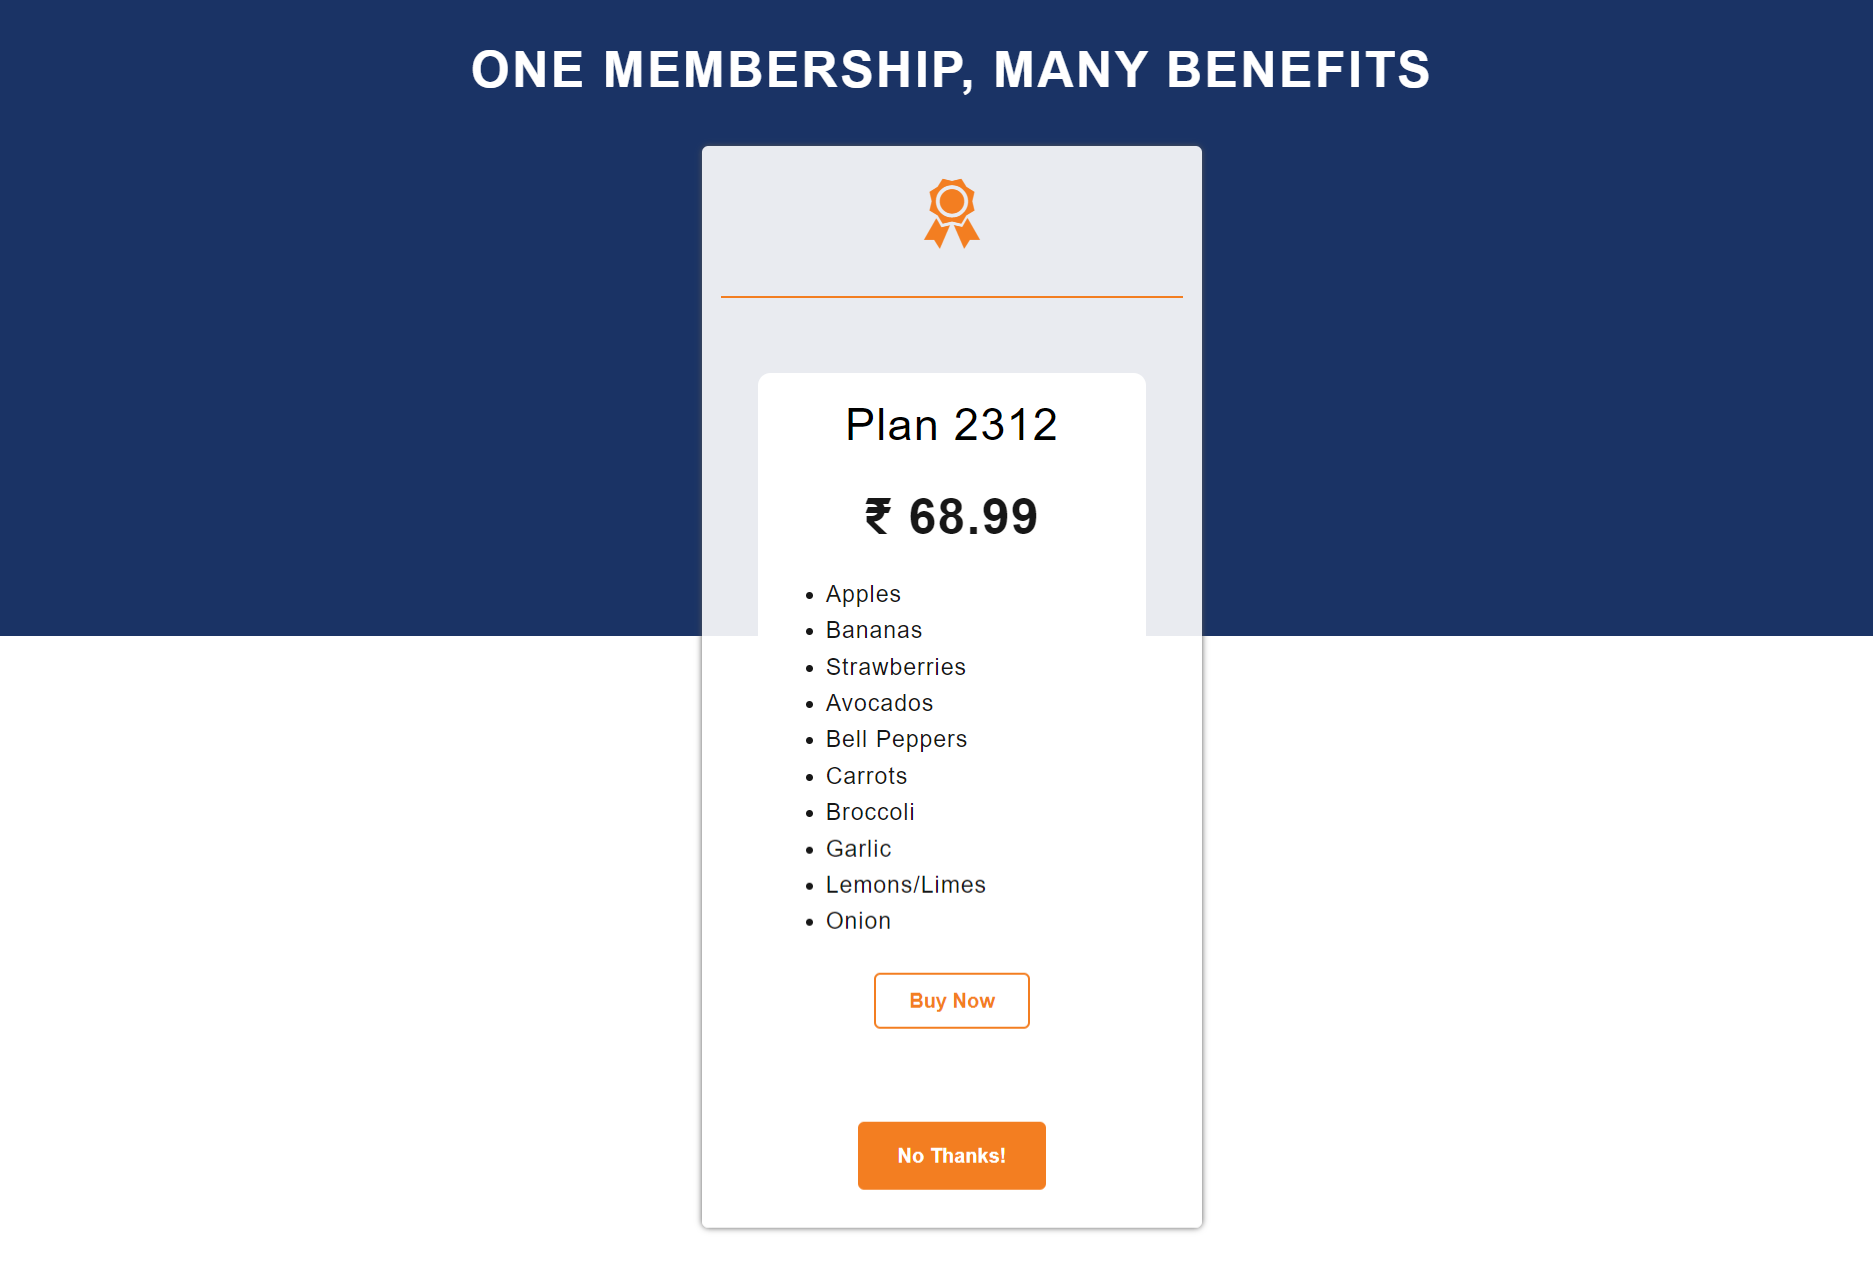
After using the shortcodes the format of plans will look like the given image below

9.API Settings
Membership APIs render details about active membership plans and purchased memberships by any user in any software system or application.
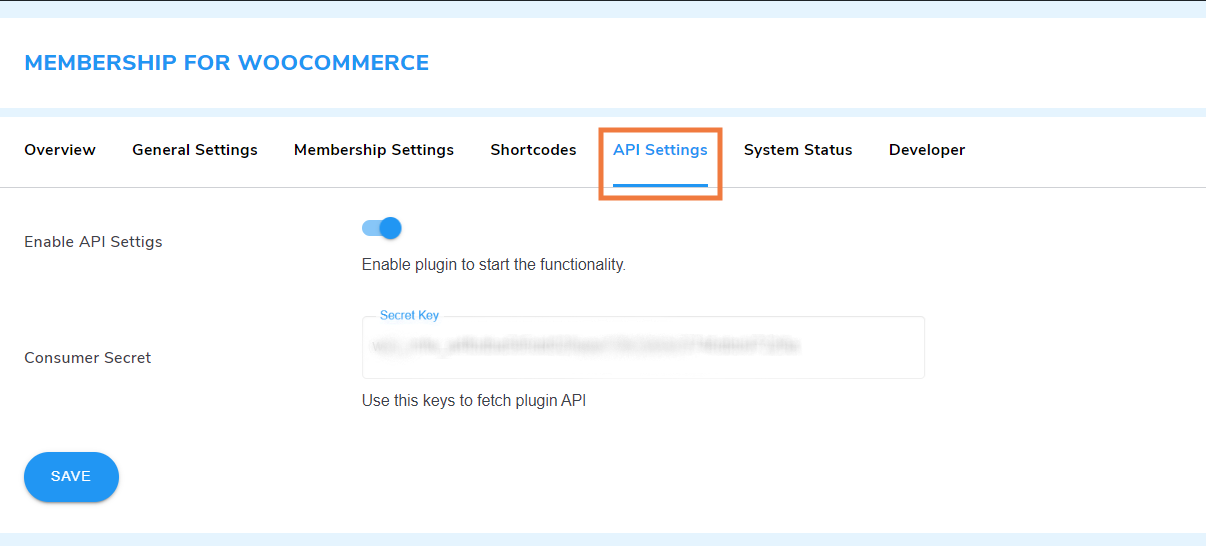
You can use API secret key with parameters to get the desired data.
Enable API Keys: Click on the toggle button to authorize membership API usage.
Consumer Secret Key: You can use this key to get plugin API. It will authenticate requests made to the membership plugin API.
9.1.Active Membership Plans API
To retrieve the specified data (Membership ID, Name, Type, Price, & Duration) from the provided API response using the consumer_secret key, we can use an HTTP GET request.
GET http://membership-development-site.local/wp-json/wps-mfw/get-user-membership?consumer_secret=<CONSUMER_SECRET>
JSON Response:
{
“status”: “success”,
“code”: “200”,
“data”: [
{
“membership_id”: 76,
“membership_name”: “Silver”,
“plan_price”: “15”,
“plan_validity”: “lifetime”,
“plan_duration”: “—“,
“membership_status”: “complete”
},
{
“membership_id”: 78,
“membership_name”: “Gold”,
“plan_price”: “20”,
“plan_validity”: “limited”,
“plan_duration”: “2 years”,
“membership_status”: “complete”
},
{
“membership_id”: 80,
“membership_name”: “Diamond”,
“plan_price”: “30”,
“plan_validity”: “lifetime”,
“plan_duration”: “—“,
“membership_status”: “complete”
}
]
}
9.2.Purchased Memberships By Any User API
This API response gives membership ID, name, price, validity, duration, & status.
The parameter for this API request should include user_id and consumer_secret.
HTTP Request:
GET http://membership-development-site.local/wp-json/wps-mfw/get-user-membership?user_id=<USER_ID>&consumer_secret=<CONSUMER_SECRET>
JSON response example:
{
“status”: “success”,
“code”: “200”,
“data”: [
{
“membership_id”: 76,
“membership_name”: “Silver”,
“plan_price”: “15”,
“plan_validity”: “lifetime”,
“plan_duration”: “—“,
“membership_status”: “complete”
},
{
“membership_id”: 78,
“membership_name”: “Gold”,
“plan_price”: “20”,
“plan_validity”: “limited”,
“plan_duration”: “2 years”,
“membership_status”: “complete”
},
{
“membership_id”: 80,
“membership_name”: “Diamond”,
“plan_price”: “30”,
“plan_validity”: “lifetime”,
“plan_duration”: “—“,
“membership_status”: “complete”
}
]
}
10.Other Settings
10.1.Redirect User Upon Registration
Admin can enable this setting to redirect Users upon registration on their desired page
- Enable Setting: Toggle this option to enable the setting.
- Choose the page for redirection: Here you can select the page where you want to redirect your users after the registration

10.2.Show Header and Footer on Membership Plan Page
Admin can enable this setting to show the header and footer on the membership plan page
- Display the header on the Membership page: Toggle this option to show header on the membership plan page
- Display the footer on the Membership page: Toggle this option to show footer on the membership plan page
Here is how it’ll look on the frontend
Before enabling the header and footer:
After Enabling header and footer:
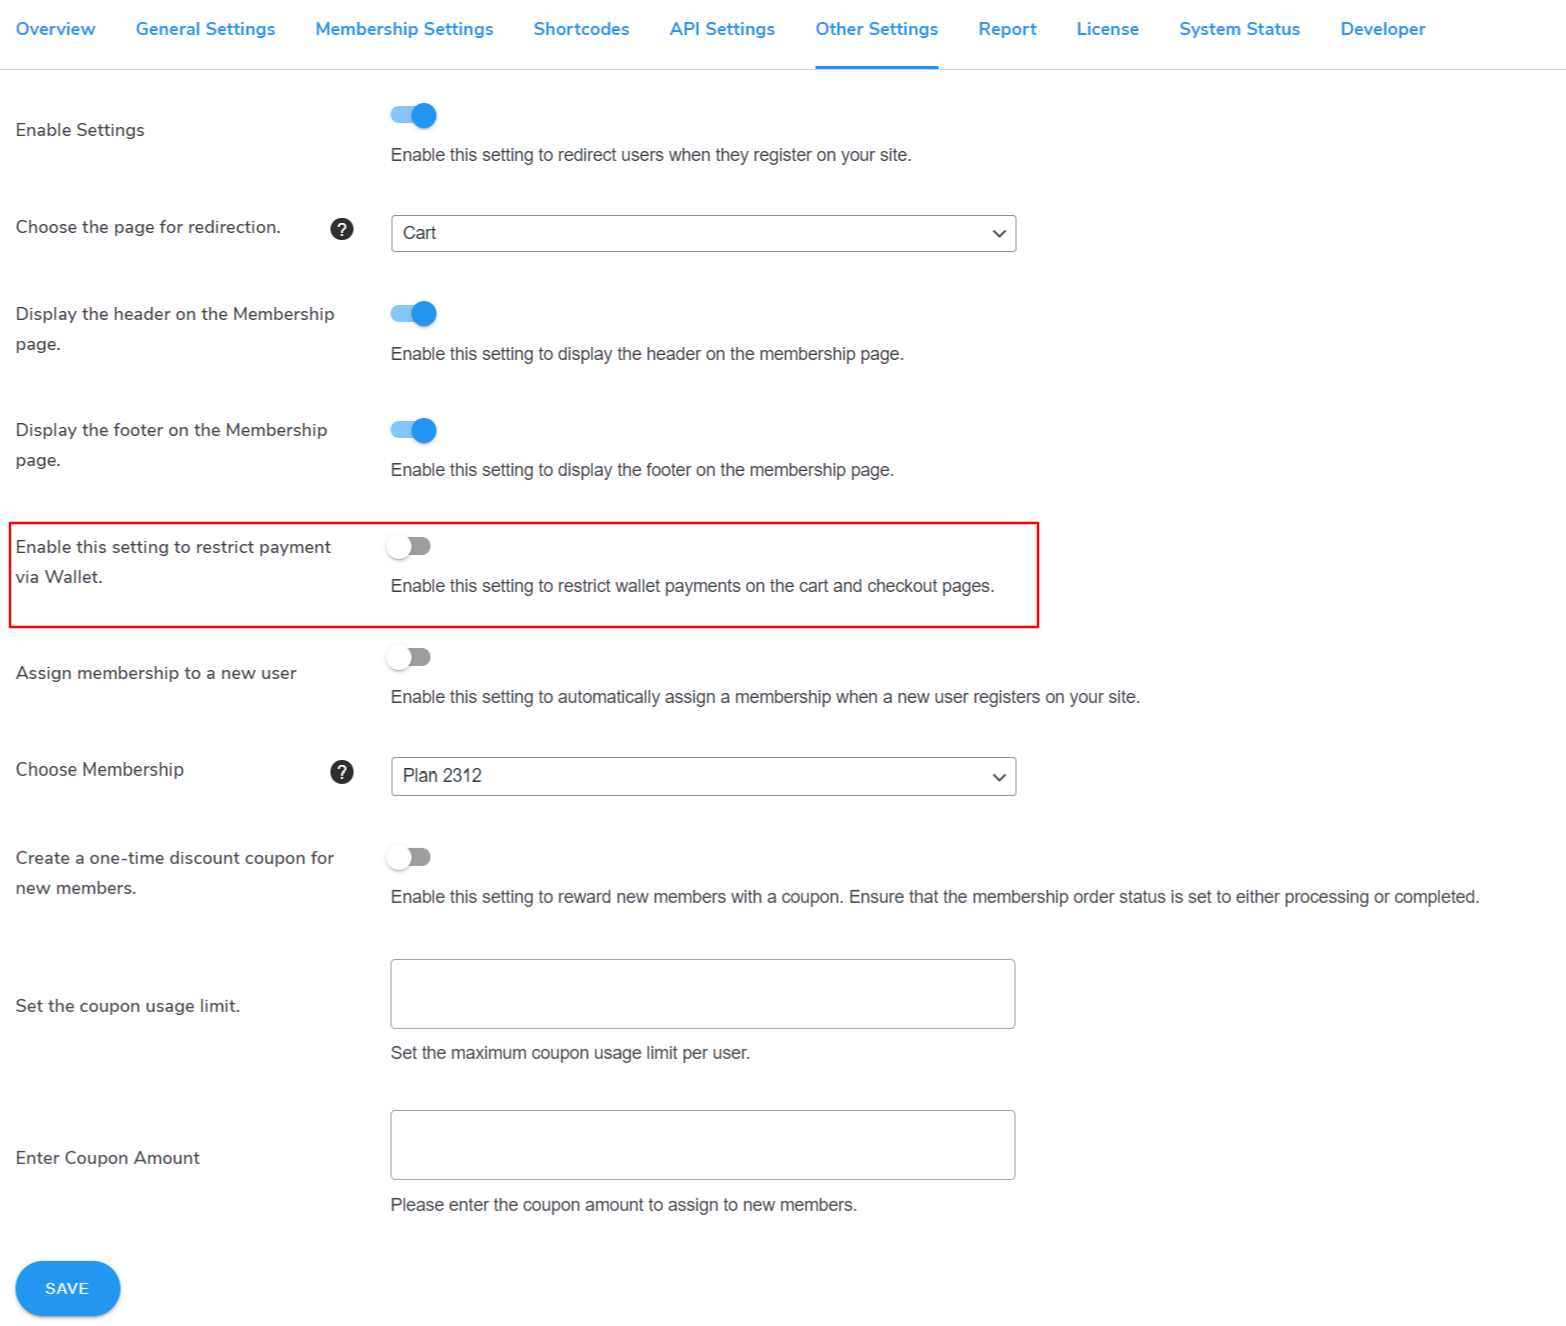
10.3.Restrict Payment Via Wallet
Enable This setting to restrict payments via wallet on the cart and checkout page, If this setting is enabled then users will not be able to maek payments using their wallet
Note: To use this feature it’s required to install Wallet System for WooCommerce Plugin.
10.4.Assign Membership upon Registration
Admin can enable this setting to assign a membership to new users upon registration
- Assign membership to a new user: Toggle this option to enable the setting to assign membership to new users upon registration
- Choose Membership: Here you can select from your created membership plans which you want to assign to new users.

Once a new user registers on your website, the selected membership plan will be auto-assigned to the user.
Example:
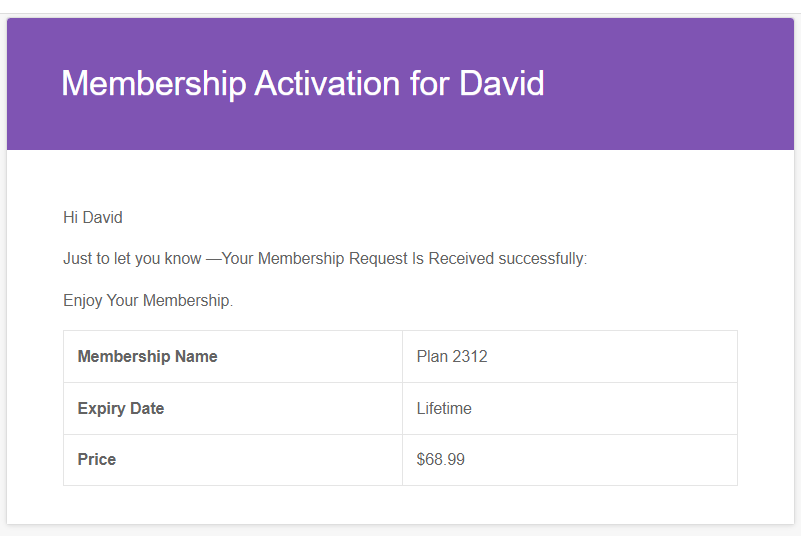
In the screenshot above, you’ll notice that a new user named David has registered on the website. The selected membership plan was automatically assigned to him, and he received this information at his registered email address.
10.5.One-time Discount Coupon For New Members
Admin can enable this setting to give one-time discount coupon for new members,
Here is how it works, when a new user logs into your website and purchases a membership, they will receive an email containing the specific membership coupon, allowing them to enjoy discounts on their chosen membership plan.
Now let’s see how to set it up.
Create a one-time discount coupon for new members
Toggle this option to enable the feature
Enter Coupon Amount
Here you can enter the coupon discount amount
Set the coupon usage limit Premium
This option allows you to Set the maximum coupon usage limit per user
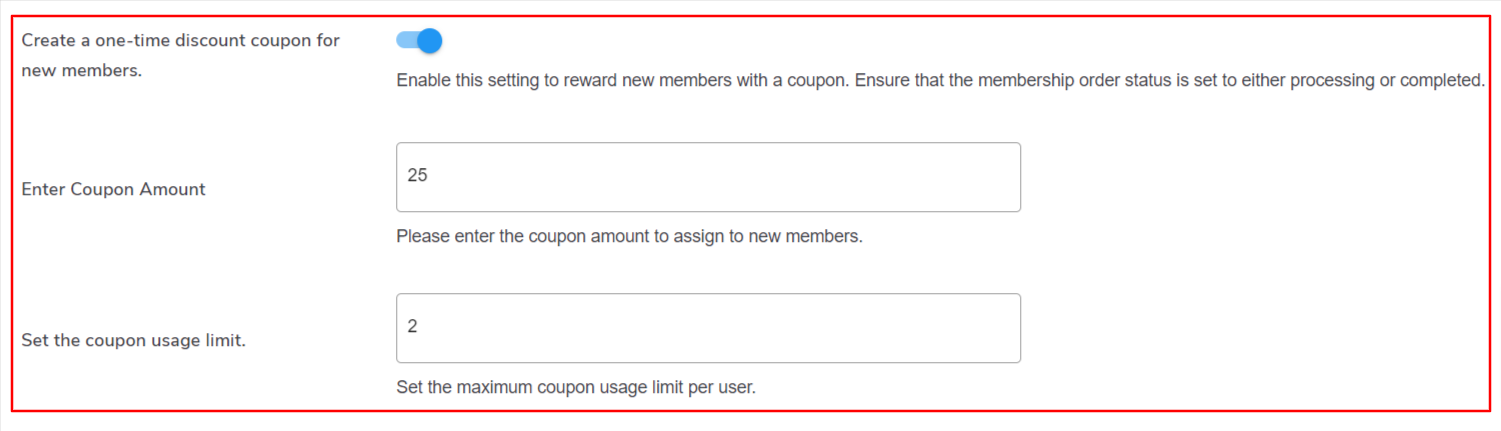
Note: To use this feature, please ensure that the membership order status is set to either processing or completed
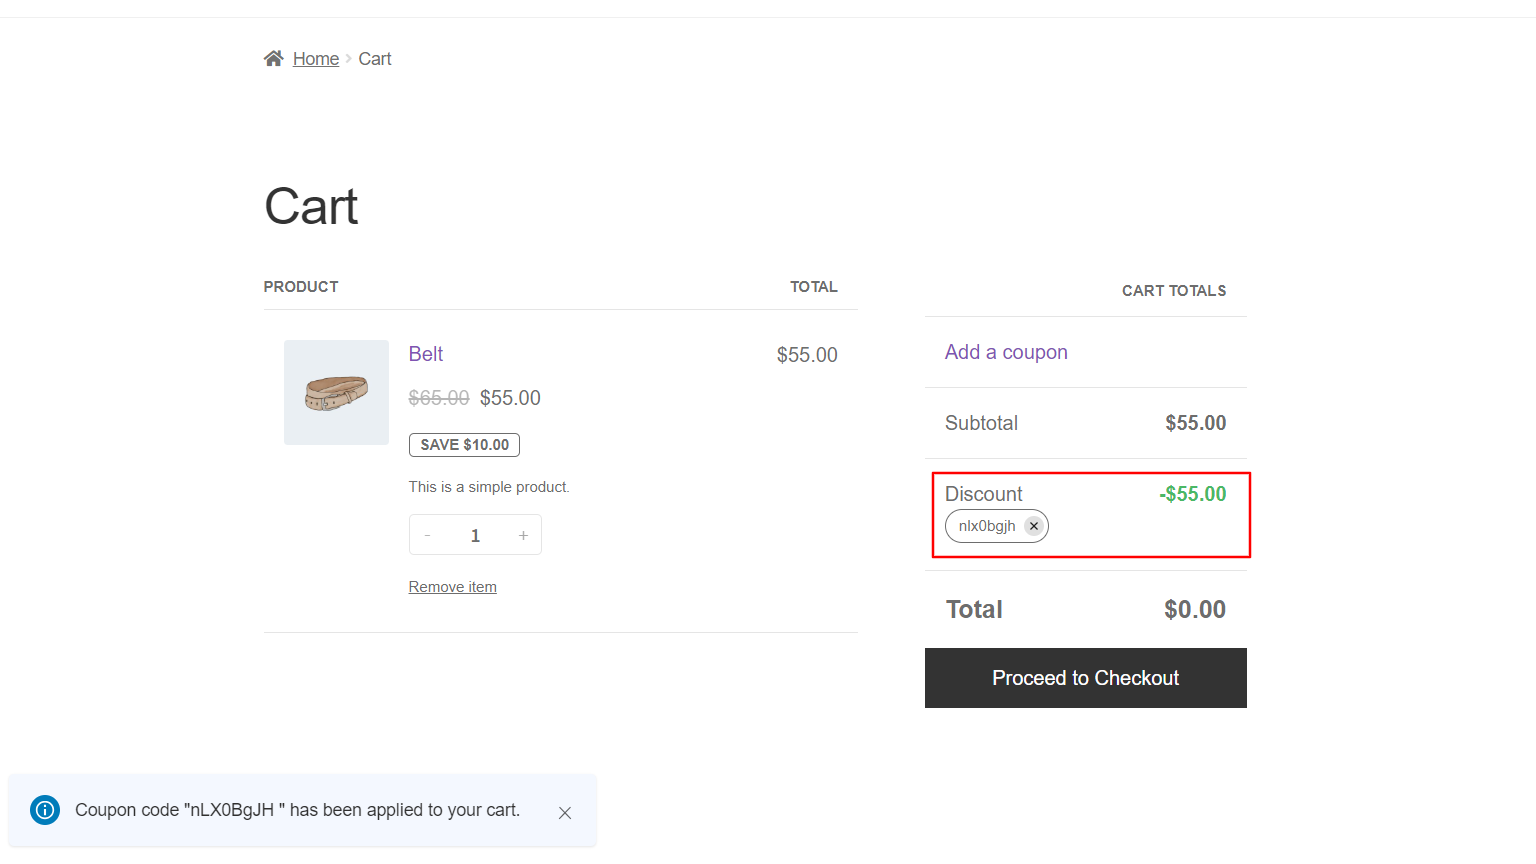
Frontend Representation:
As you can see in the screenshot below, once the user has obtained the coupon from their mail, they can use it for their favorite products and avail the discount.
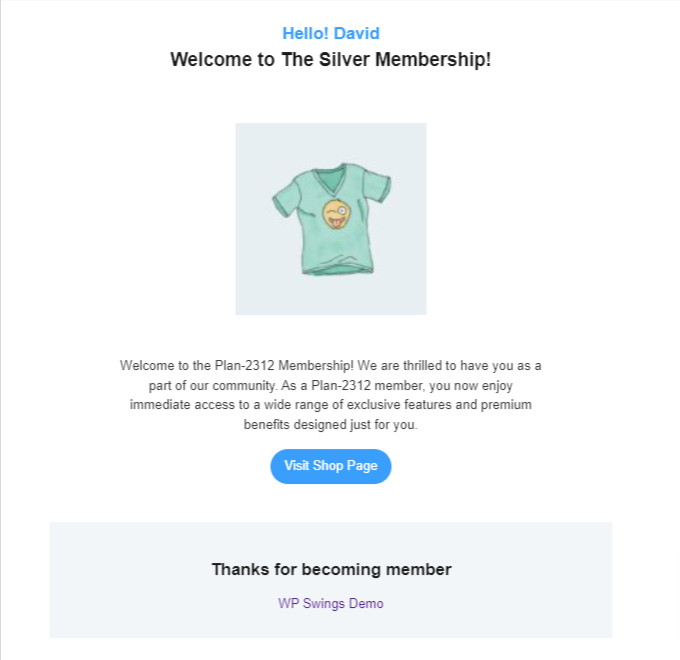
10.6.Send Welcome Email
Toggle the option to automatically send a welcome email whenever a new member enrolls in a membership plan.

Email Example:
10.7.Membership WhatsApp Integration
Membership for WooCommerce Pro allows you to send exclusive deals and updates to members at different levels. Simply configure the WhatsApp integration using your Access Token, Phone ID, and Template. Once set up, you can effortlessly send personalized messages to users on specific membership levels in just a few clicks. Members can also choose to receive or disable these notifications.
11.Create a Members Community
In our Membership plugin, we have added the most awaited feature, a members’ community. With this feature, your members can see other members within the same membership level and can directly communicate with them via text message.
This will help them create meaningful connections and collaborate with other members.
To enable this feature, navigate to the Layout Settings Tab, previously known as Other Settings
There, you will find the option to enable the community option
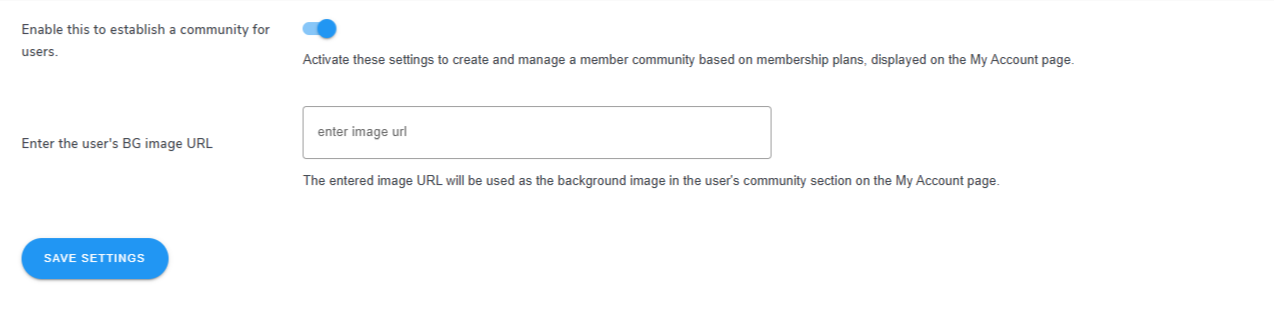
Below, you can add the URL of a background image to show on the background of the users as shown in the screenshot below.
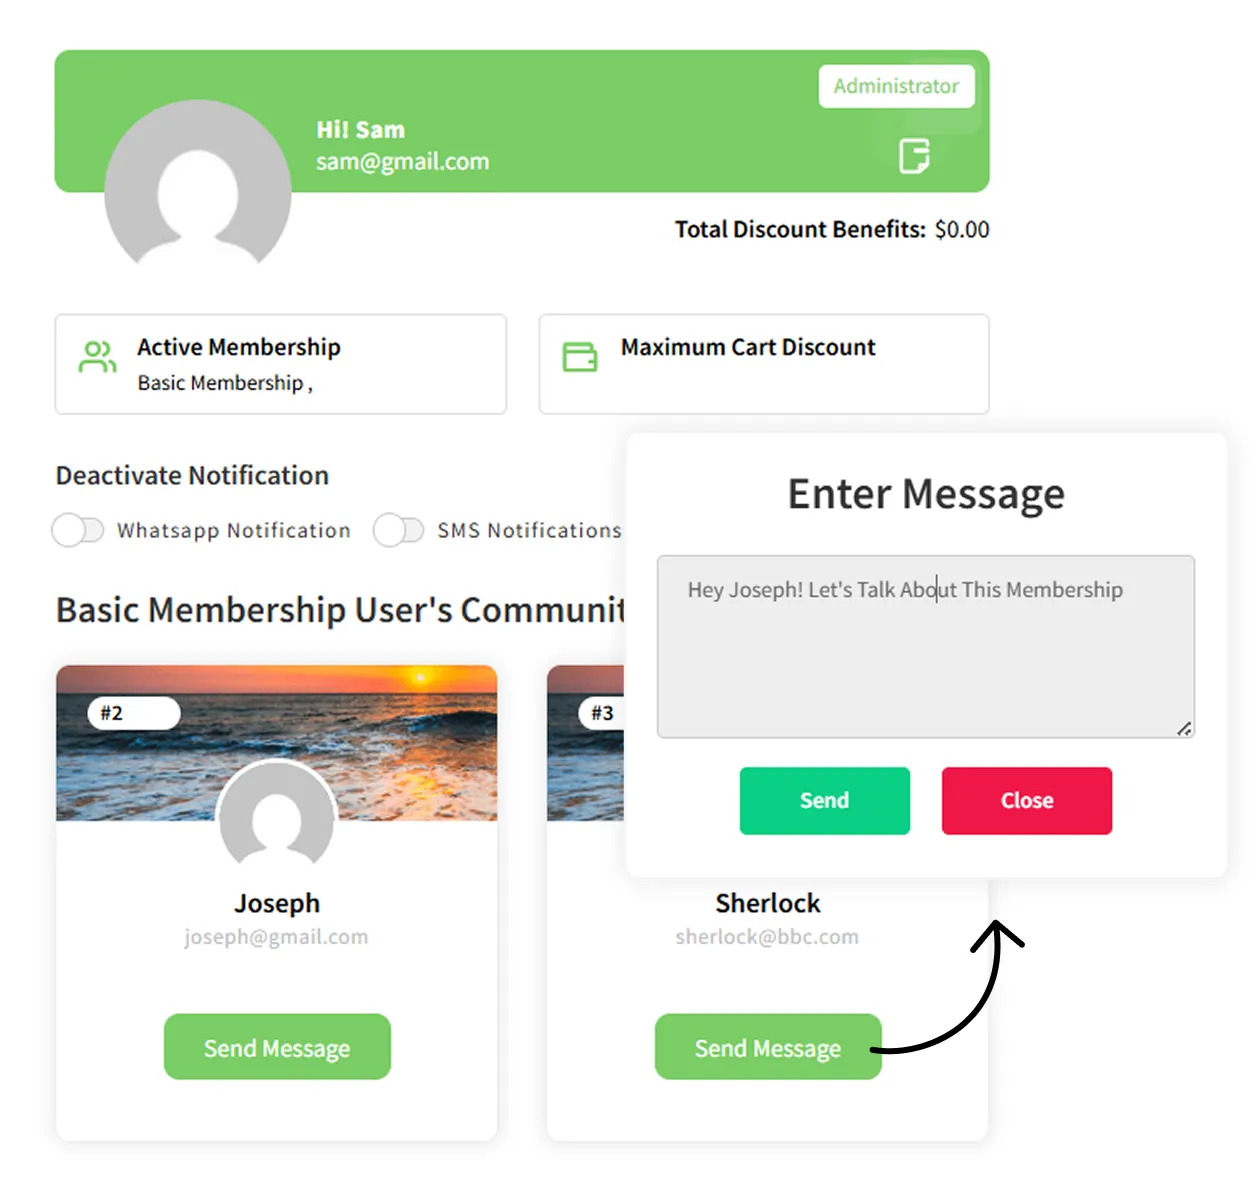
By default, the message option is not enabled, to allow your community members to send messages to each other, navigate to the Offer Notifications Tab and enable the “Allow SMS between community users”

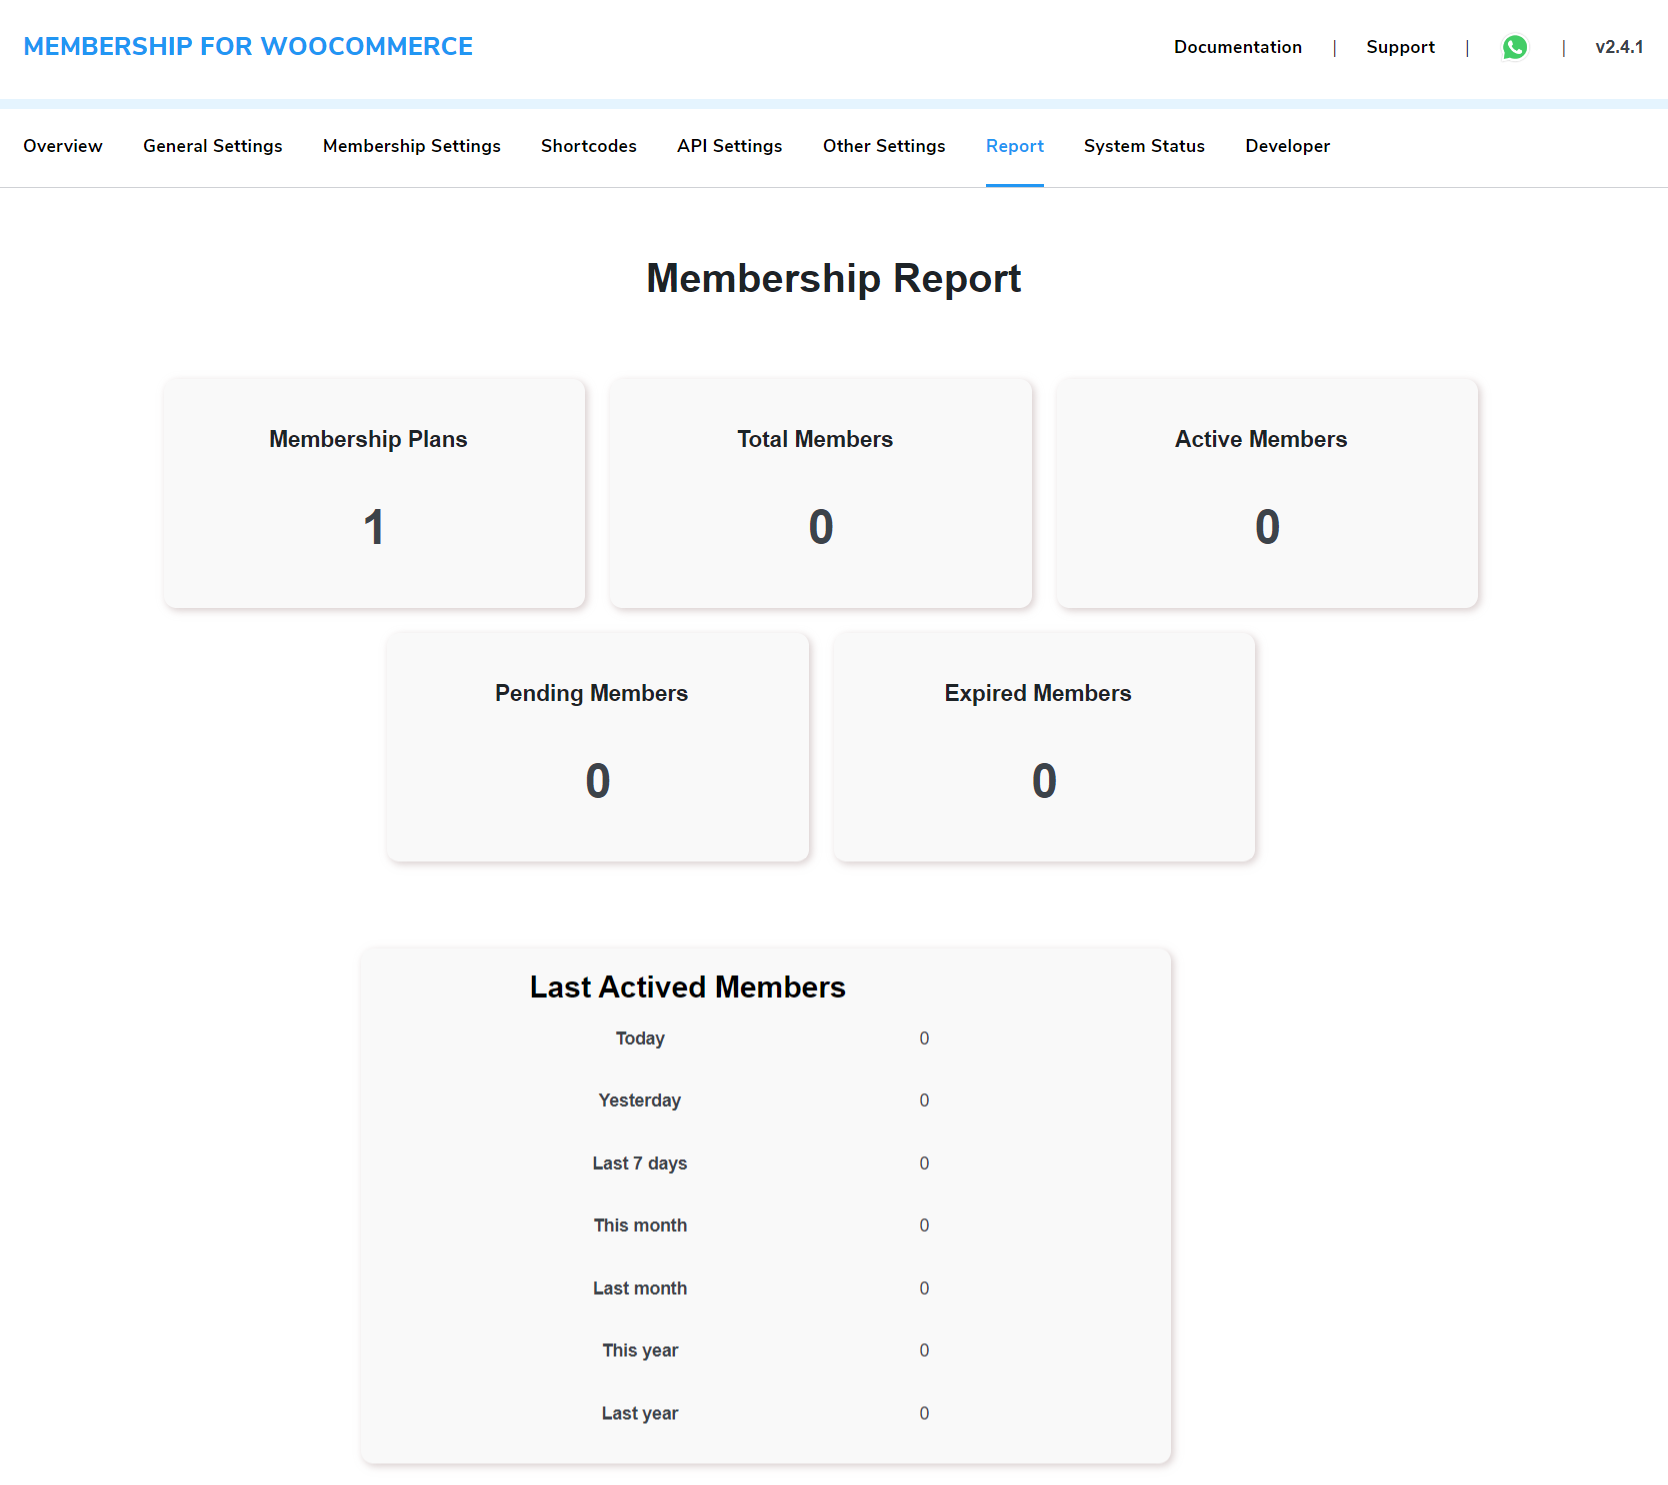
12.Membership Report
The membership report section mentions the following details for the admin to get an overview of the membership plans:
- Membership Plans: Total number of membership plans active on your WooCommerce store.
- Total Members: Total number of users who signed up for different membership plans
- Active Members: Total number of users who are actively using different membership plans.
- Pending Member: Total number of users who are on pending status for membership approval.
- Expired Members: Total number of ex-membership users whose membership privileges have been terminated.
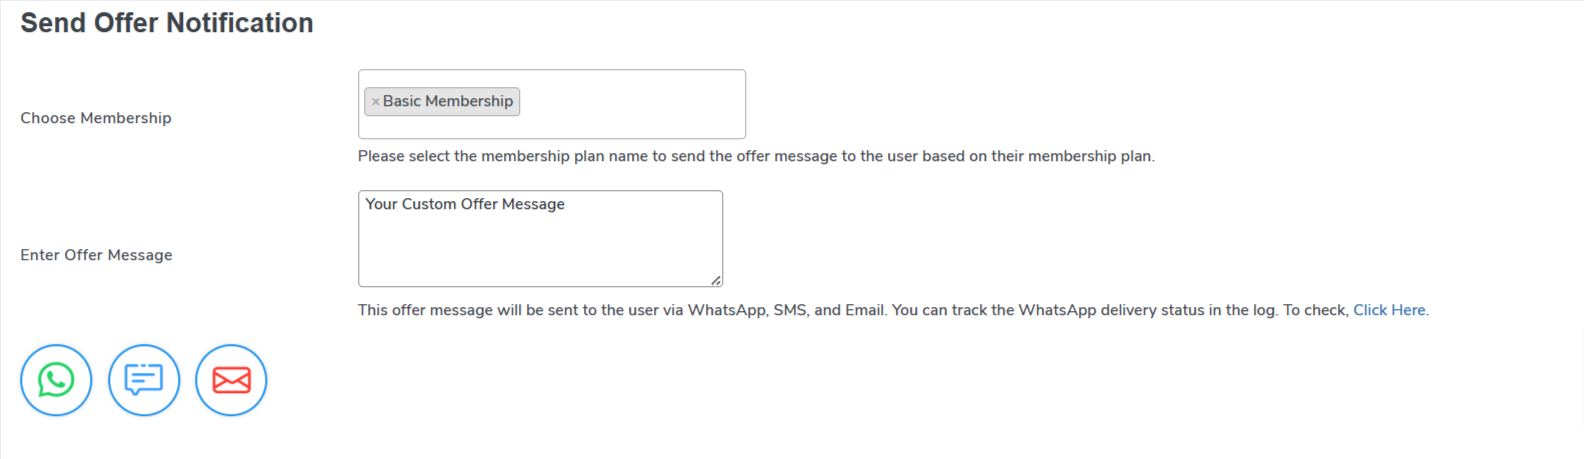
13.Offer Notification Via WhatsApp
With Membership plugin, you can easily send special offers and updates to your members via WhatsApp, tailored to different membership levels.
Simply set it up by adding your Access Token, Phone ID, and Message Template in the plugin settings. Once configured, you can send personalized messages to members on specific levels with just a few clicks.
Plus, members have the flexibility to turn these notifications on or off whenever they prefer.
We’ve prepared comprehensive documentation on this feature. Please review it for detailed instructions on setting up and using this feature effectively.
14.Sms Notification Via Twilio
SMS Integration feature in the Membership for WooCommerce plugin allows administrators to send SMS notifications to members of a selected membership plan.
To use this feature, you must first configure the SMS settings with Twilio credentials (Account SID, Auth Token, and Twilio Number).
Once set up, you can compose and send custom SMS messages to members.
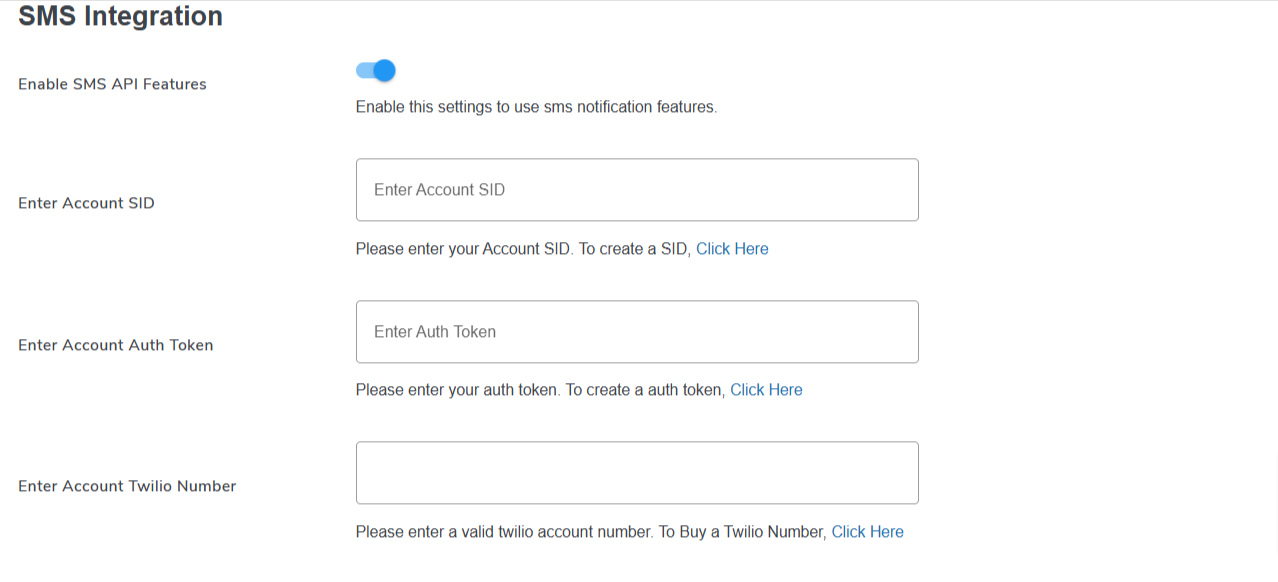
- Enable SMS API: Toggle This option to enable this functionality
- Enter Account SID: In this field, input your Twilio Account SID.
The Account SID is a unique identifier for your Twilio account. If you do not have an Account SID, Click Here to create one via the Twilio dashboard.
- Enter Account Auth Token: In this field, input your Twilio Auth Token.
The Auth Token authenticates your API requests. If you need to generate a new Auth Token, Click Here to create one through the Twilio dashboard.
- Enter Twilio Account Number: In this field, input a valid Twilio phone number associated with your account.
This number will be used to send SMS notifications. If you do not have a Twilio number, Click Here to purchase one via Twilio.
After entering the required credentials (Account SID, Auth Token, and Twilio Number), scroll to the bottom of the page and click the Save Changes button.
15.Google ReCaptcha Intgration
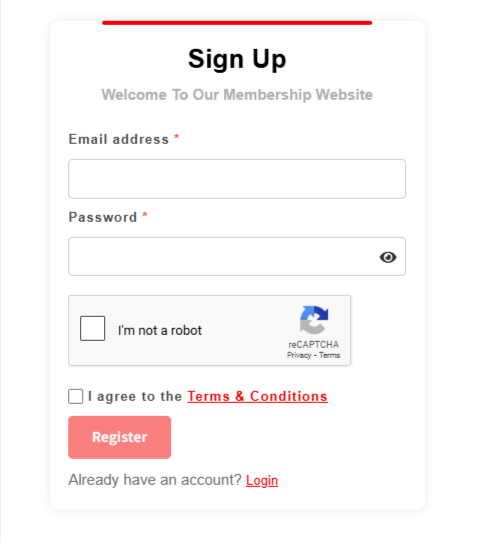
The Google reCAPTCHA integration feature helps protect your website from unwanted bot traffic by adding a verification layer to your login and signup pages. This ensures only genuine users can access your site, improving security and user experience.
Let’s see how to configure this feature…
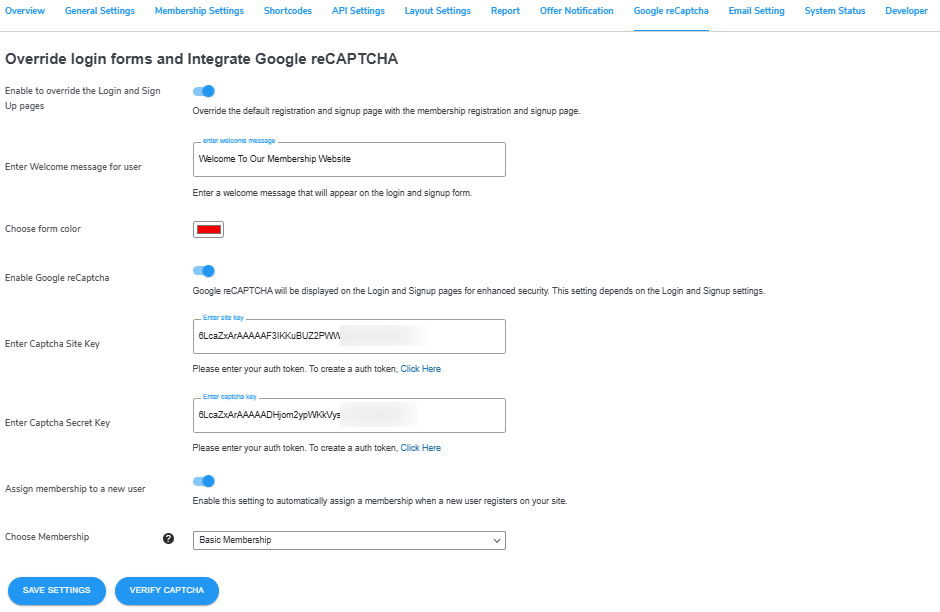
Enable to override the Login and Sign Up pages: Toggle this option to replace your existing login and signup pages with a new version that includes Google reCAPTCHA for added security.
Enter Welcome message for user: Customize the message that users will see when they visit the login or signup page. Use this space to greet them or share important info.
Choose form color: Personalize the appearance of your forms by selecting a color that matches your website’s theme.
Enable Google reCaptcha: Activate this toggle to display the reCAPTCHA verification on your login and signup pages, protecting them from bots and spam.
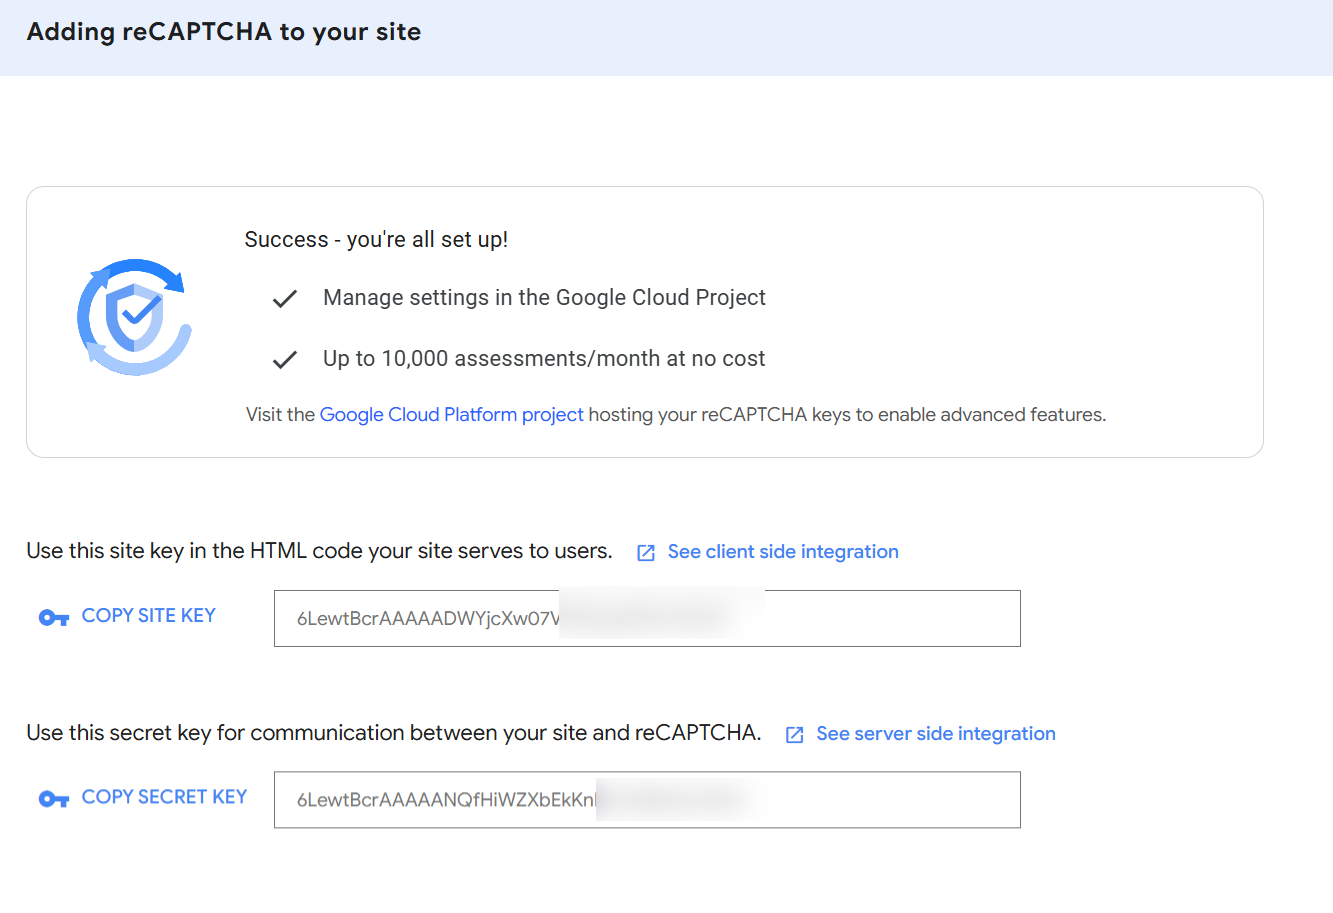
To integrate Google reCAPTCHA, you’ll need to generate a Site Key and Secret Key.
Let me guide you through it…

- Label: Enter your website name in the label field. This helps you identify the reCAPTCHA credentials later.
- reCAPTCHA Type: Choose “I’m not a robot” Checkbox under the Challenge (v2) option.
- Domain: Carefully enter your website domain. Make sure there are no typos—incorrect entries will cause the reCAPTCHA to fail.
- Project Name: Provide a name for your project
Submit: Click the Submit button to complete the setup
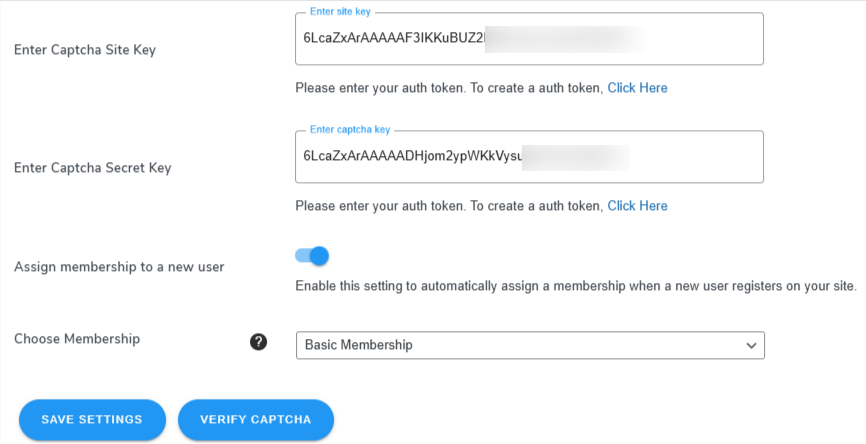
Assign Membership to New Users: Toggle this option if you’d like to automatically assign a membership to users upon registration. Then, select the appropriate membership plan from the dropdown.
Next step will be to verify your captcha to check if everything is working fine,

You should see a pop-up like the above screenshot, this means eveyrhitng is working fine. Finally, save the setting and navigate to frontend to see your configured login page with Google Recaptcha integration
16.Email Settings
This email settings tab enables you to customize your membership creation, expiration, and cancellation email for members.
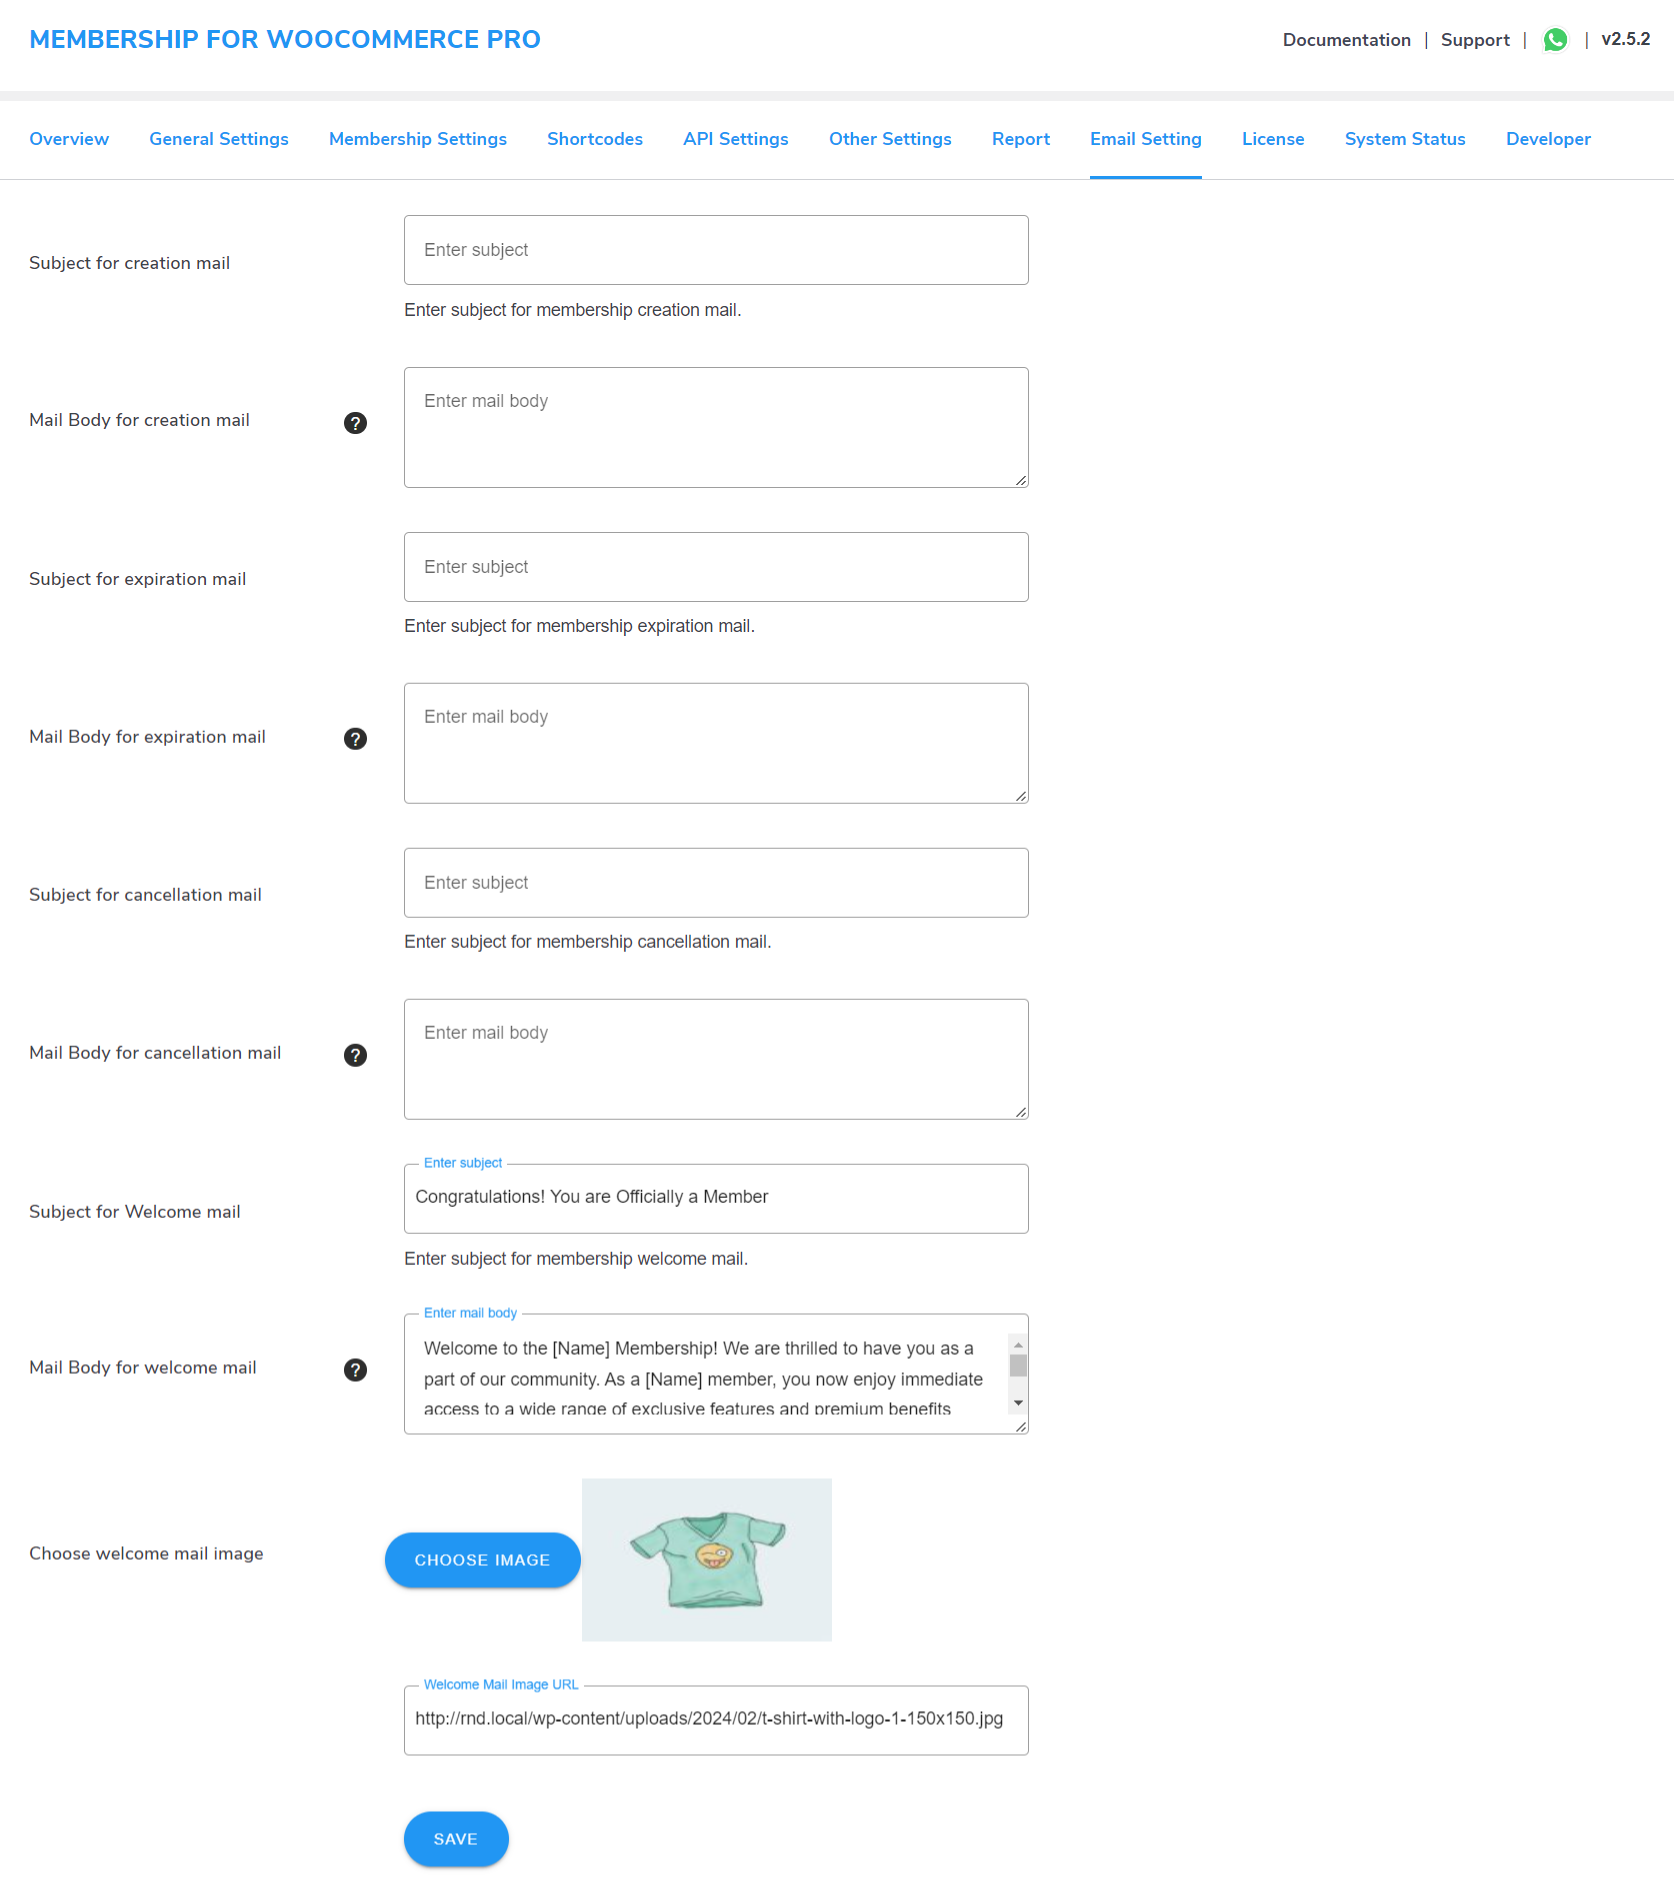
To do this, just enter the custom subject line and mail body content in the specified fields and click on Save Button.
- Subject for Creation Mail
- Mail Body for creation Mail
- Subject for Expiration Mail
- Mail Body for Expiration Mail
- Subject for Cancellation Mail
- Mail Body for Cancellation Mail
- Subject for Welcome mail
- Mail Body for welcome mail
- Choose the welcome mail image
Membership Activation Email Example:

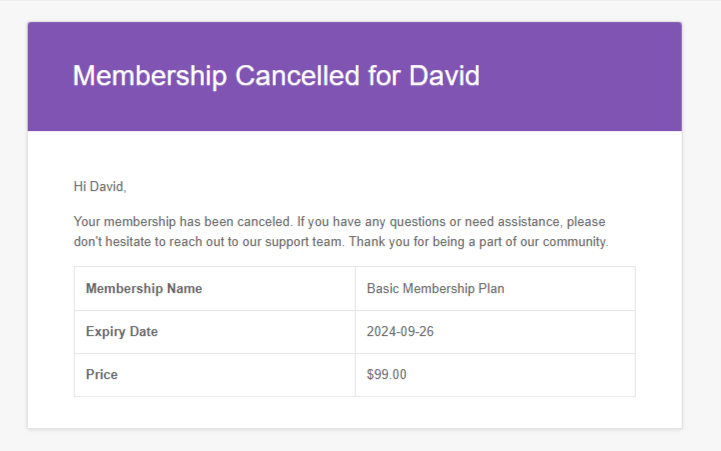
After saving the content, these subject lines and mail body contents will be sent to the members with respective emails. The best part is you can change them anytime.
Membership Cancellation Email Example:
Membership Welcome Email Example:

17.Product Settings
We’ll look at how to add membership plans to your WooCommerce store under this subject. As new WooCommerce items, the membership plans are added. To add your membership plans, go through the following steps:
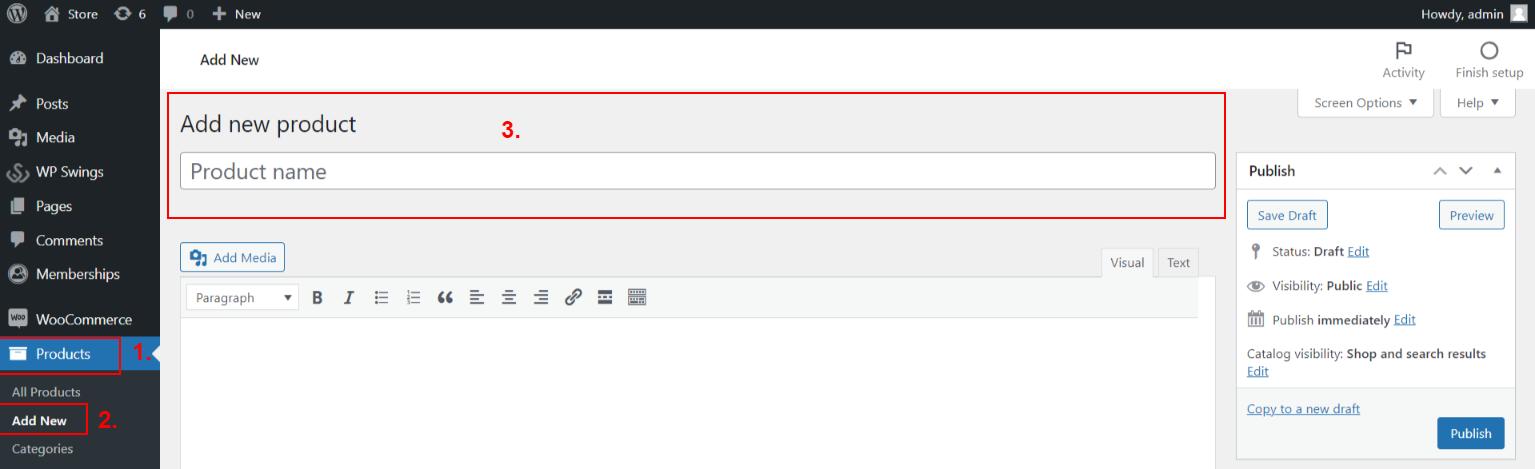
17.1.Product Data
Some settings have to be configured in the product data box for adding a membership as a product to your WooCommerce store.
Firstly, select Simple Product as the product type. Now follow the steps:
Input the price of your membership under the General Settings.
You have to enter the following information:
- Regular Price: The price at which the membership is usually sold on your website.
- Sale Price: The price at which you want to sell your membership.
[Video Here – https://docs.wpswings.com/wp-content/uploads/2022/06/video-explaination.mp4?_=1]
Press the Schedule button to set a membership plan on the sale price for a specific period of time.
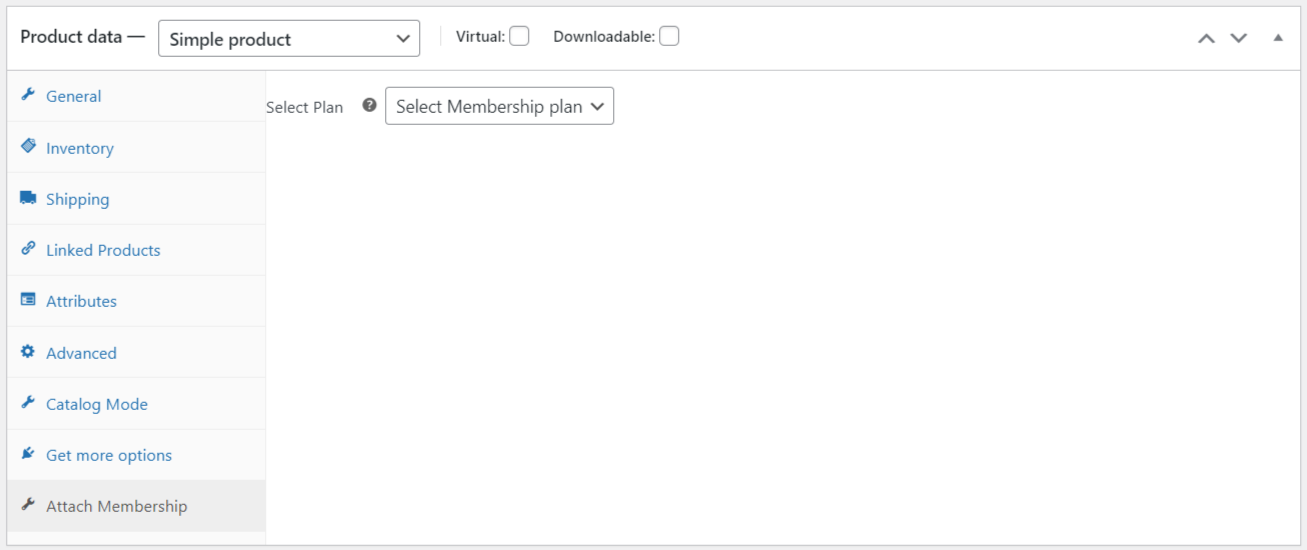
Here is how you can attach a membership plan:
Under the Attach Membership settings, you can configure the following:
- Select Plan: Select the individual product on which you want to Attach Membership.
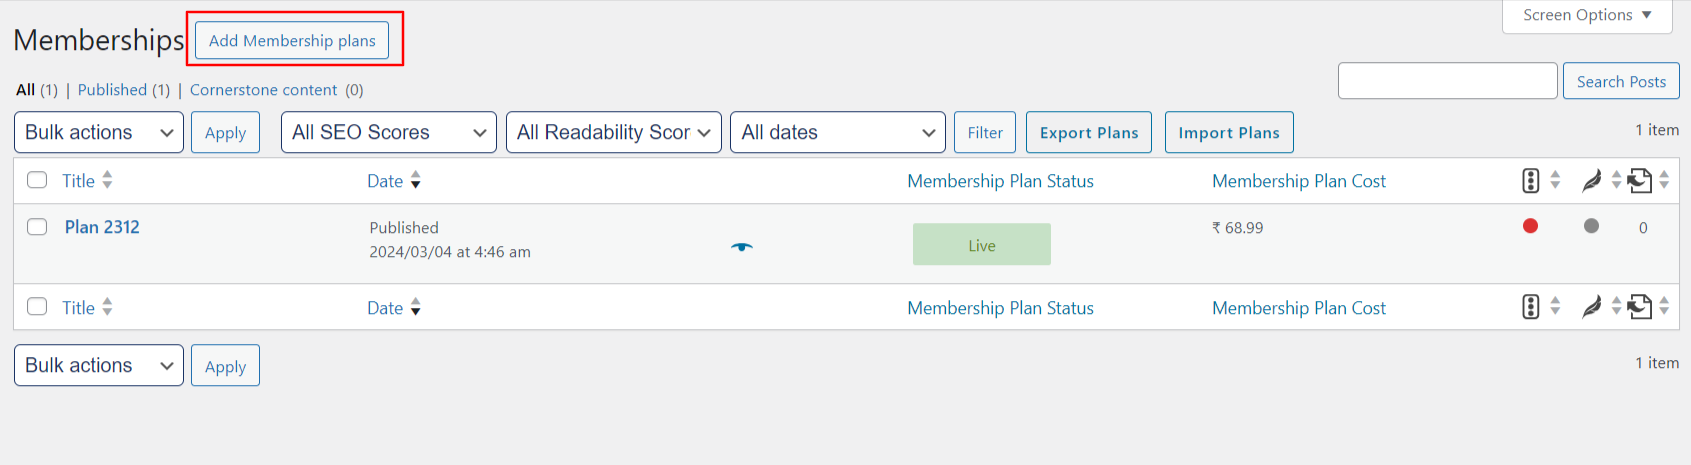
18.Create WooCommerce Membership Plans
Membership for WooCommerce enables the admin to create multiple membership plans on your eCommerce store and modify their details whenever required.
For creating a new membership plan:
Consequently, the admin needs to fill in these details for continuing to create the membership plans:
Title, Media & Description :
[Possible media here]
Mention the name of your plan here.
For example, Gold plan, Silver plan, Bronze plan, etc. Below this, you can describe your plan and also add media, just like you do on your regular WordPress website post.
18.1.Product Data
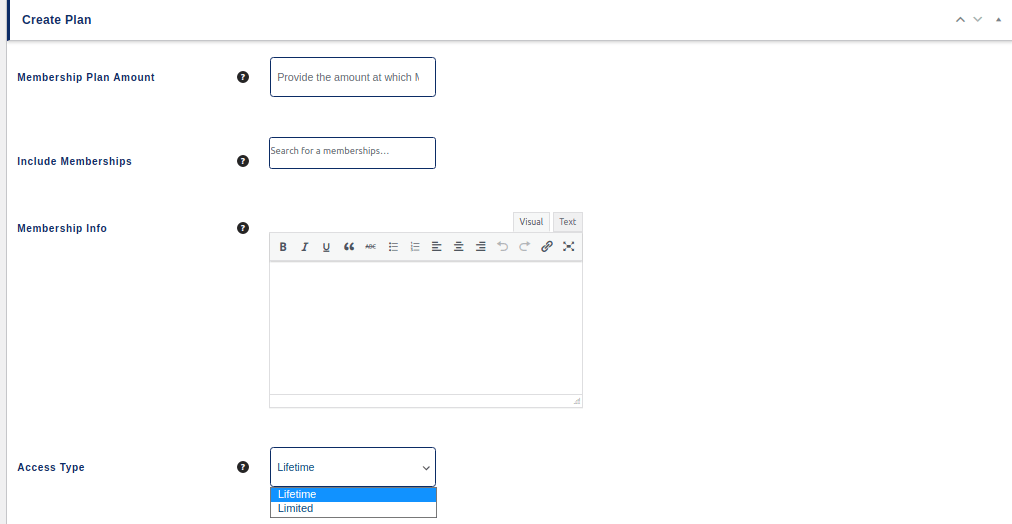
Under the Create Plan section, the following details need to be filled in:
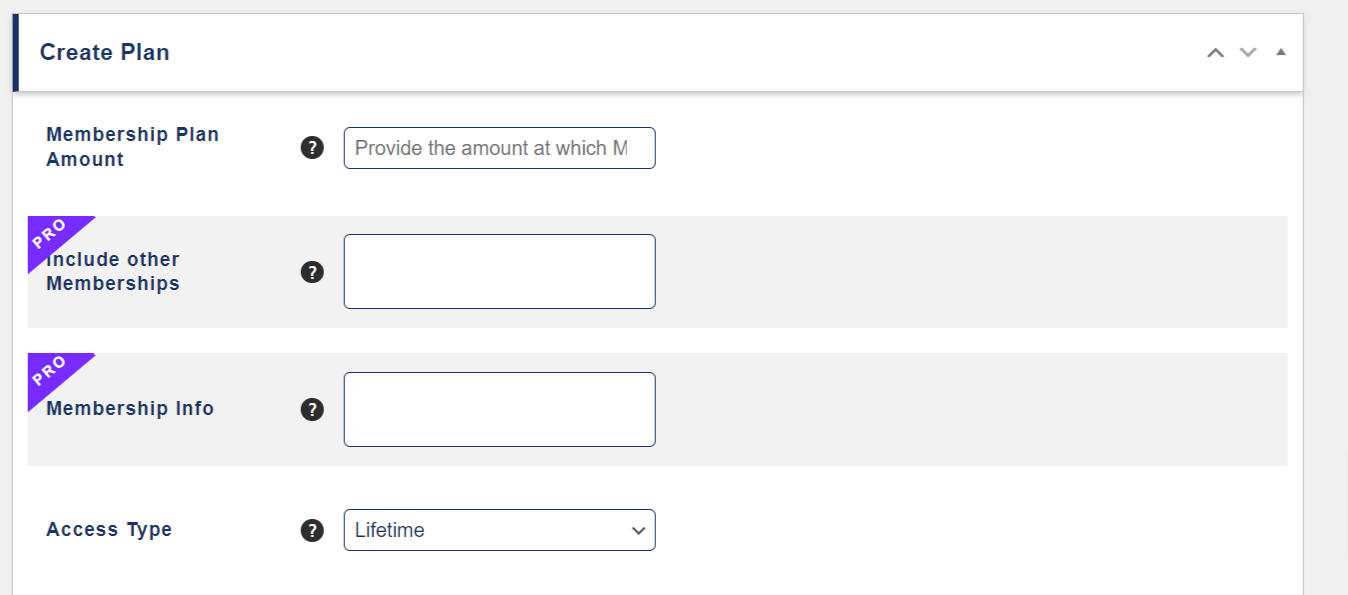
- Membership Plan Amount
It is the amount at which the admin wants to sell his memberships. Mention the membership cost here. - Include Memberships Premium
The admin can include multiple membership benefits in a single membership plan. Search and include the membership plans in the box provided. - Membership Info Premium
Any information related to the membership plan details can be added here. It could be any information that the admin wants to display for the users. Insert membership info in the box provided against the option. - Access Type
The admin can provide access to the members here. Select from Lifetime or Limited. In the limited option, there is a choice of days, weeks, months, and years.
For limited access types, the admin can select days, weeks, months, or years. Additionally, when the admin selects a limited access type, membership subscriptions are stimulated.
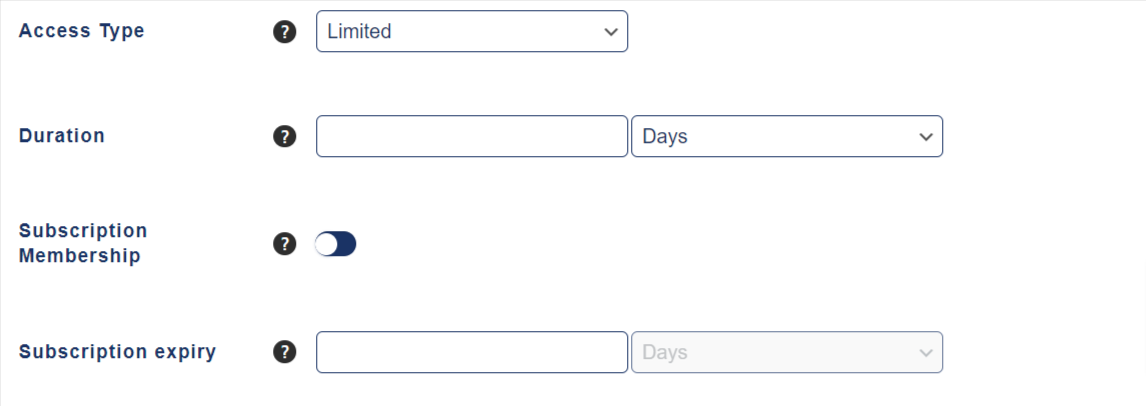
For Creating Membership Subscriptions
- Select limited access
- Select duration in days, weeks, months, or years.
- Enable Subscription membership
- Enter Subscription expiry
Note: To create a subscription-based membership, it’s necessary to install the Subscription for WooCommerce plugin.
18.2. Offer Section
Under the offer section, the following details need to be filled in regarding the membership plan offers:
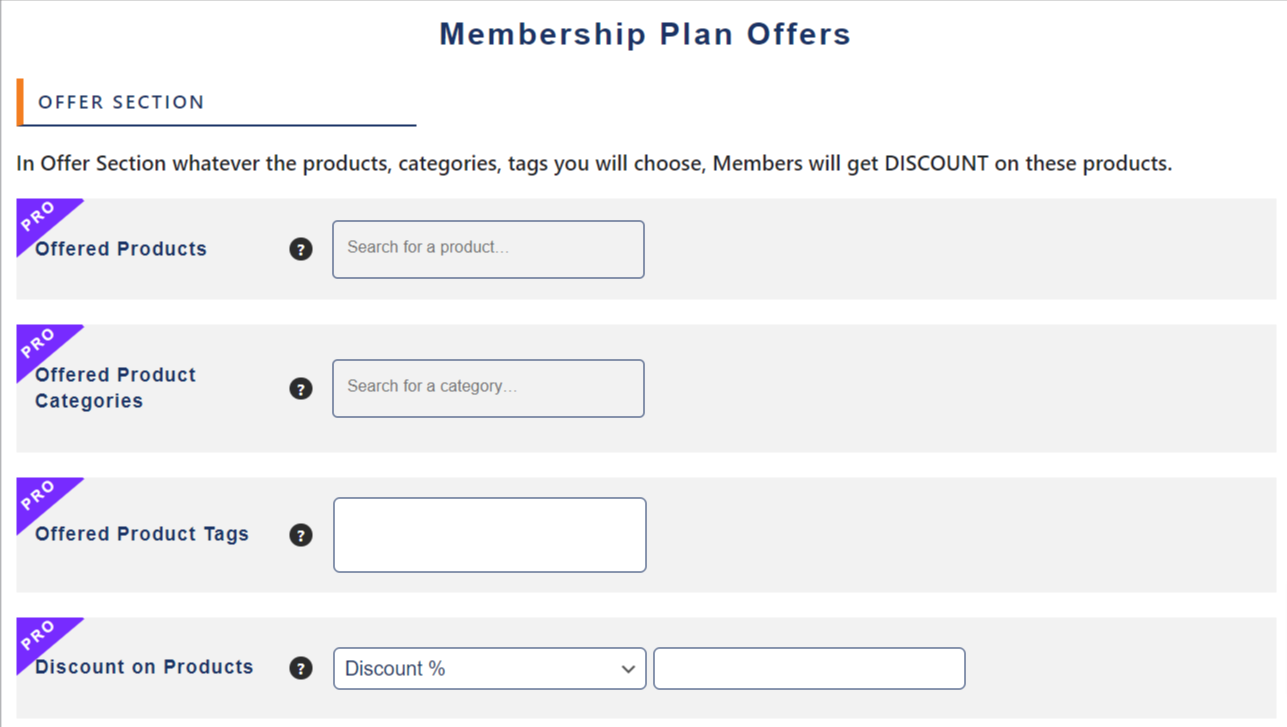
- Offered Products: Select the products you want to offer in the particular membership plans. The admin can add more than one product here.
- Offered Product Categories: Select the product categories if you want to offer them in the particular membership plan. The admin can add as many product categories as they want.
- Offered Product Tags: Select the product tags you want to add to the particular membership plan. The admin can select multiple tags.
- Discount On Products: The admin can apply a discount on the above-selected individual products, categories, and tags. Select an input percentage or fixed price discount.
18.3.Included Section
In the Include Section, whatever products, categories, or tags you select will be restricted to members only. This means that only members can purchase these products and access the designated pages.
Under the included section, admin needs to fill in and select the following details:
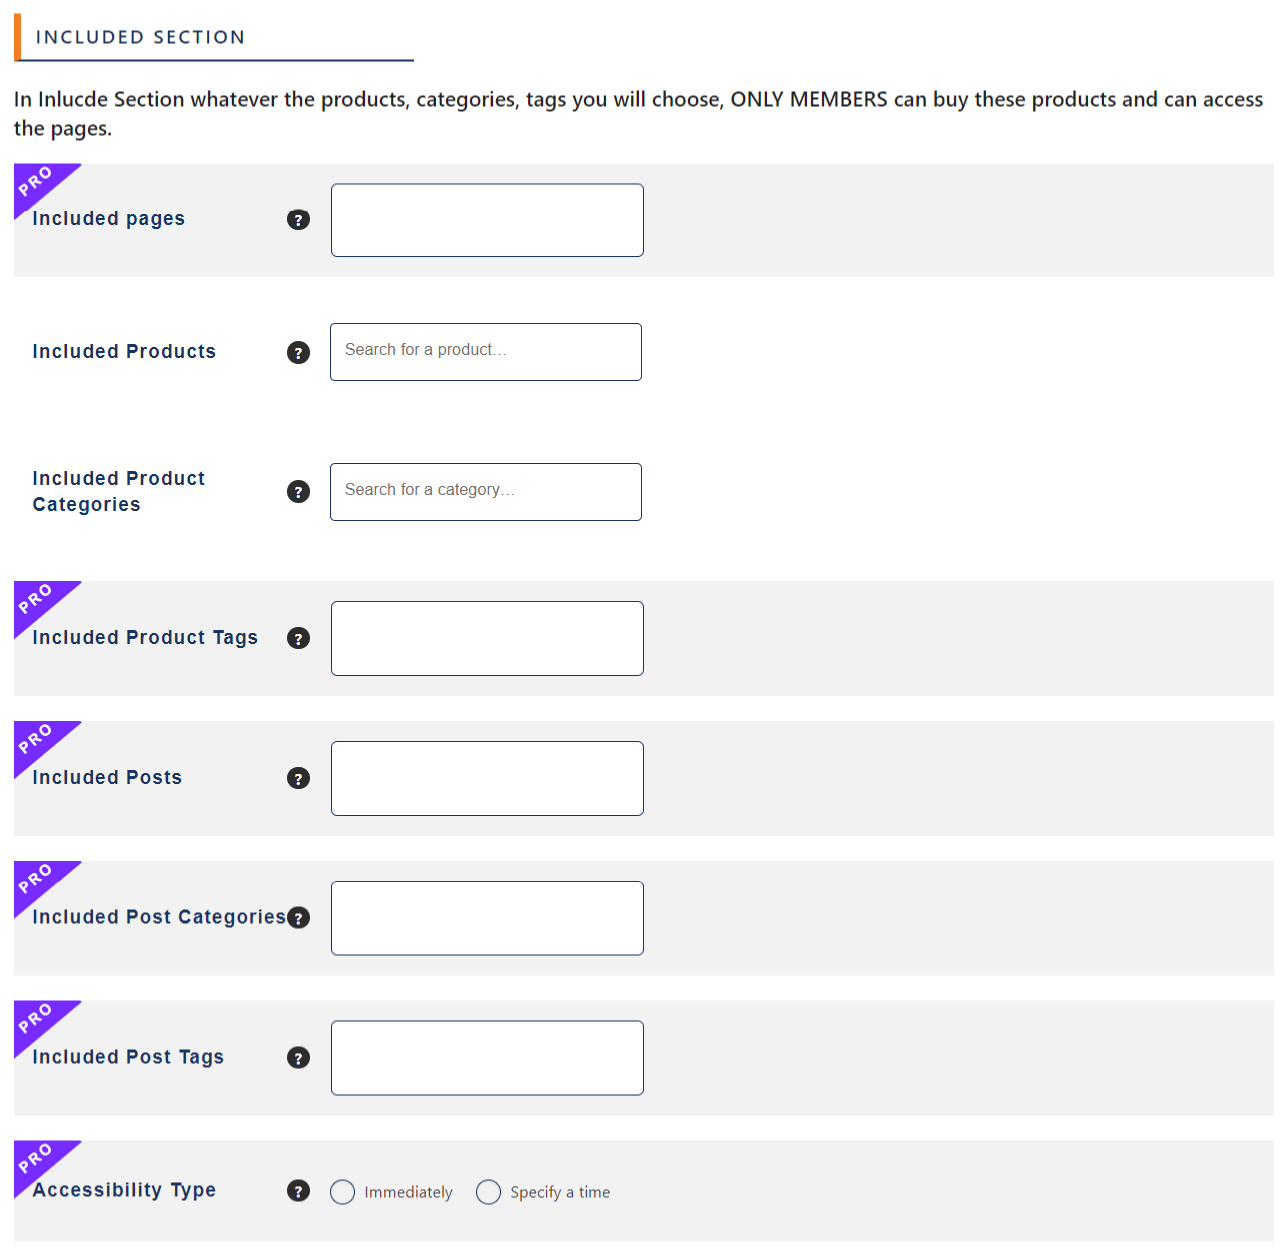
-
Included Pages: Premium Select the pages you want to provide access to content and comments of the page to your membership users.
-
Included Products: Select the products you want to include in the membership plan.
-
Included Product Categories: Select as many product categories for including in the membership plan.
-
Included Tags: Premium Enter the tags you want to include in the membership plans.
-
Included Posts: Premium The admin can also include posts in the membership plans. Select and add the posts here.
-
Include Posts Categories: Premium The admin can select among the available post categories and add them here for the members.
-
Included Post Tags: Premium All the post tags selected here will be available for the particular membership users.
-
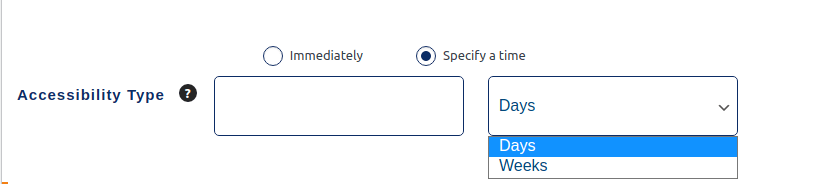
Accessibility Type: Premium The admin gets to provide accessibility of the membership plans either immediately or specify a time after which the membership plan benefits will be available for the users.
Admin can select from days and weeks when specifying time.
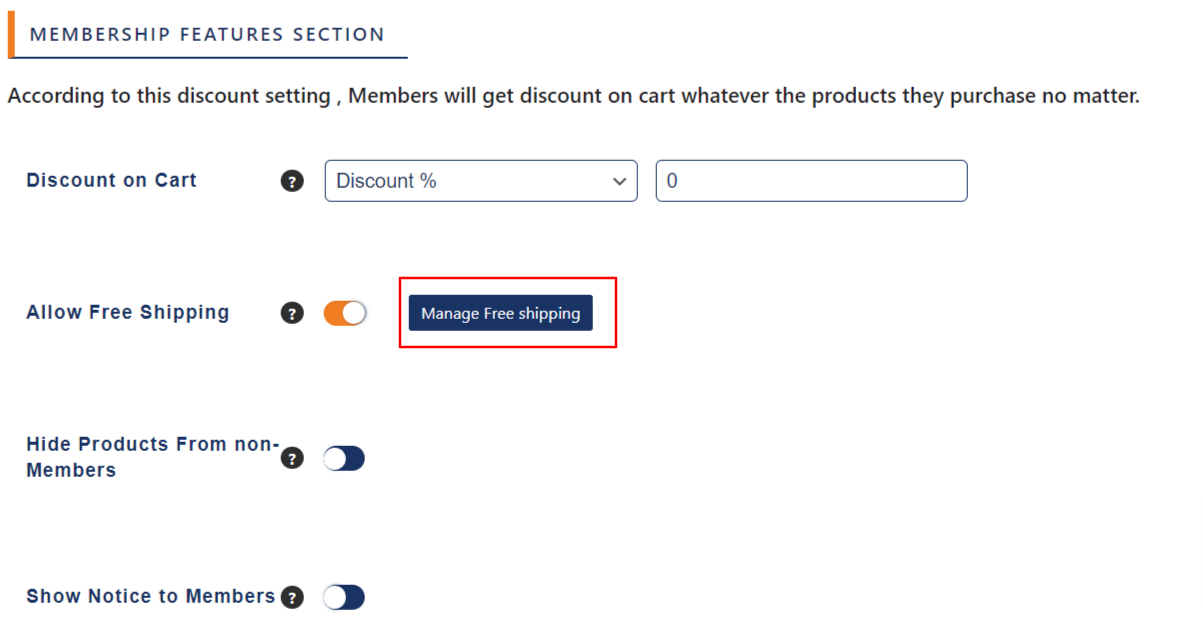
18.4.Membership Features Section
Under the membership features section, admin gets the following features:
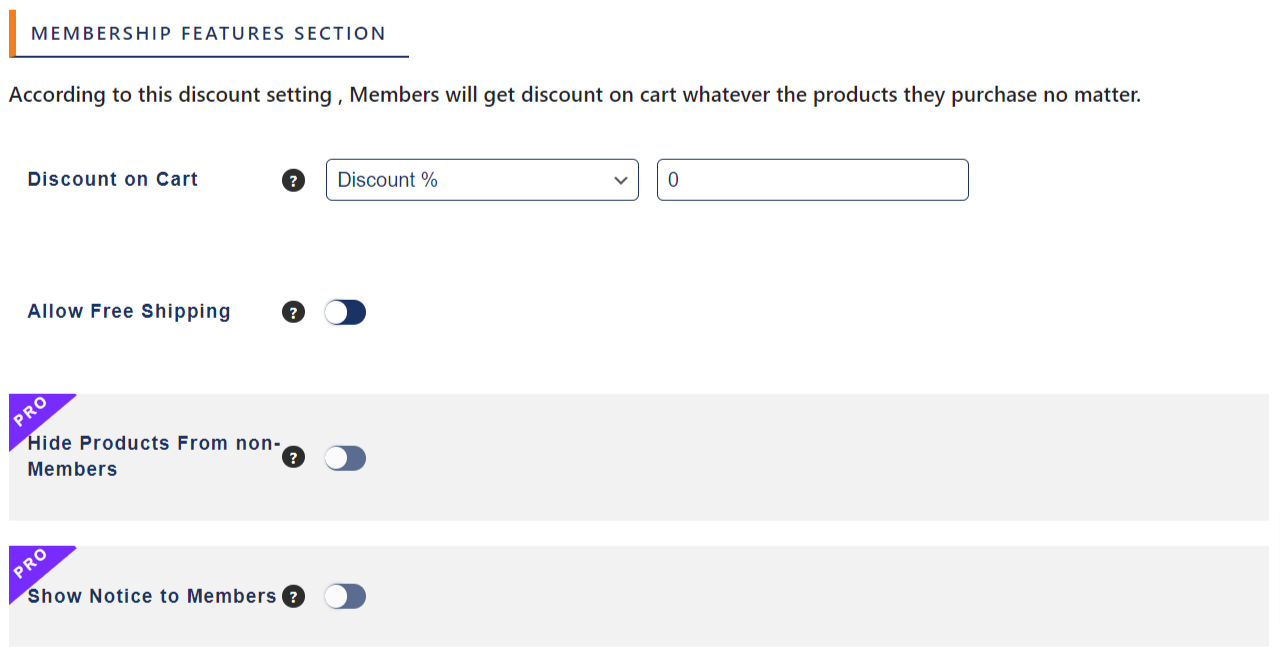
Discount On Cart: Admin can select the discount on the cart for the included products, categories, and tags section. Select from discount percentage and fixed price.
Allow Free Shipping: Admin can grant the free shipping privilege to the membership users. Slide in this option to enable free shipping for any specific membership plan.
Hide Products From Non-Members: Premium Slide this option to hide the exclusive offers and posts from the non-members. Only the members of this plan can access and view the deals available.
Show Notice To Members: Premium Admin can include a notice for membership users. It can be any detail regarding the current plan. Insert your message in the box provided.
After entering all the details, click on update to publish the membership plan.
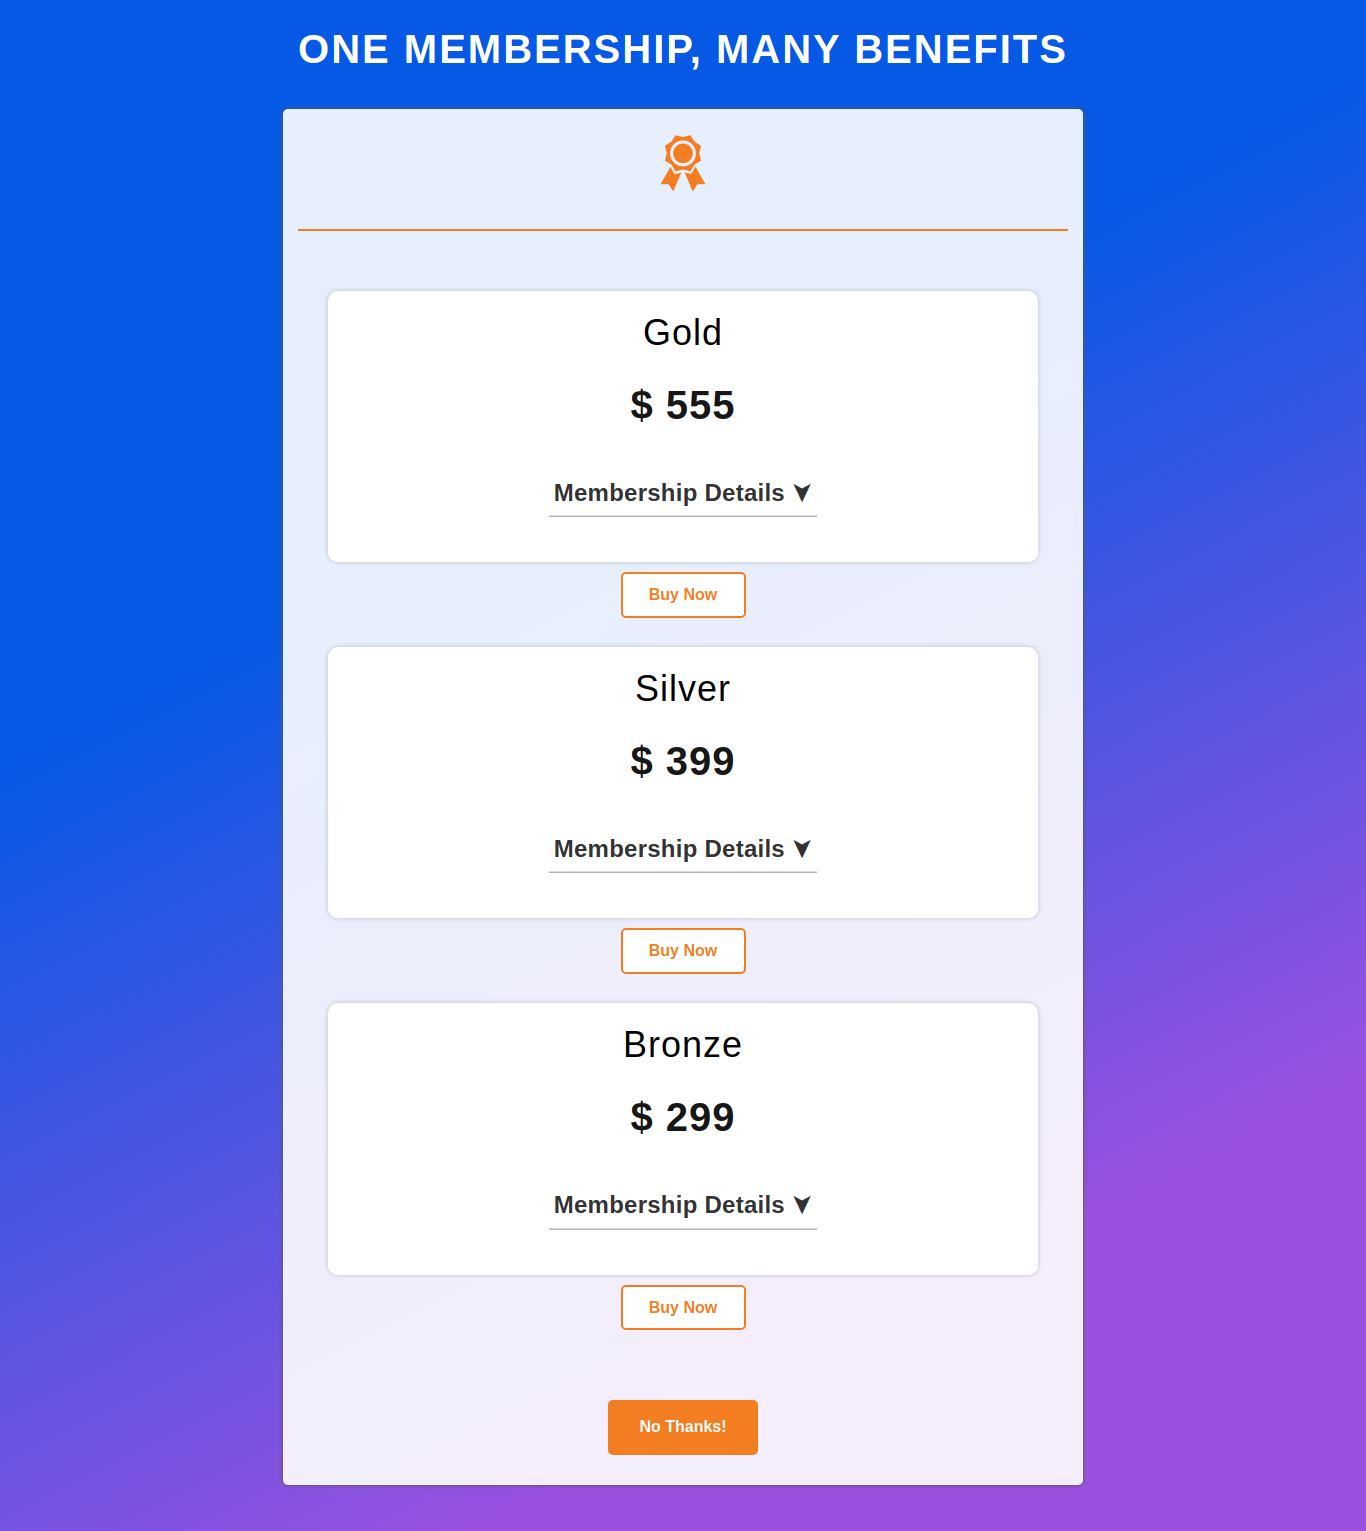
This way, the admin can successfully create and publish as many membership plans as desired.
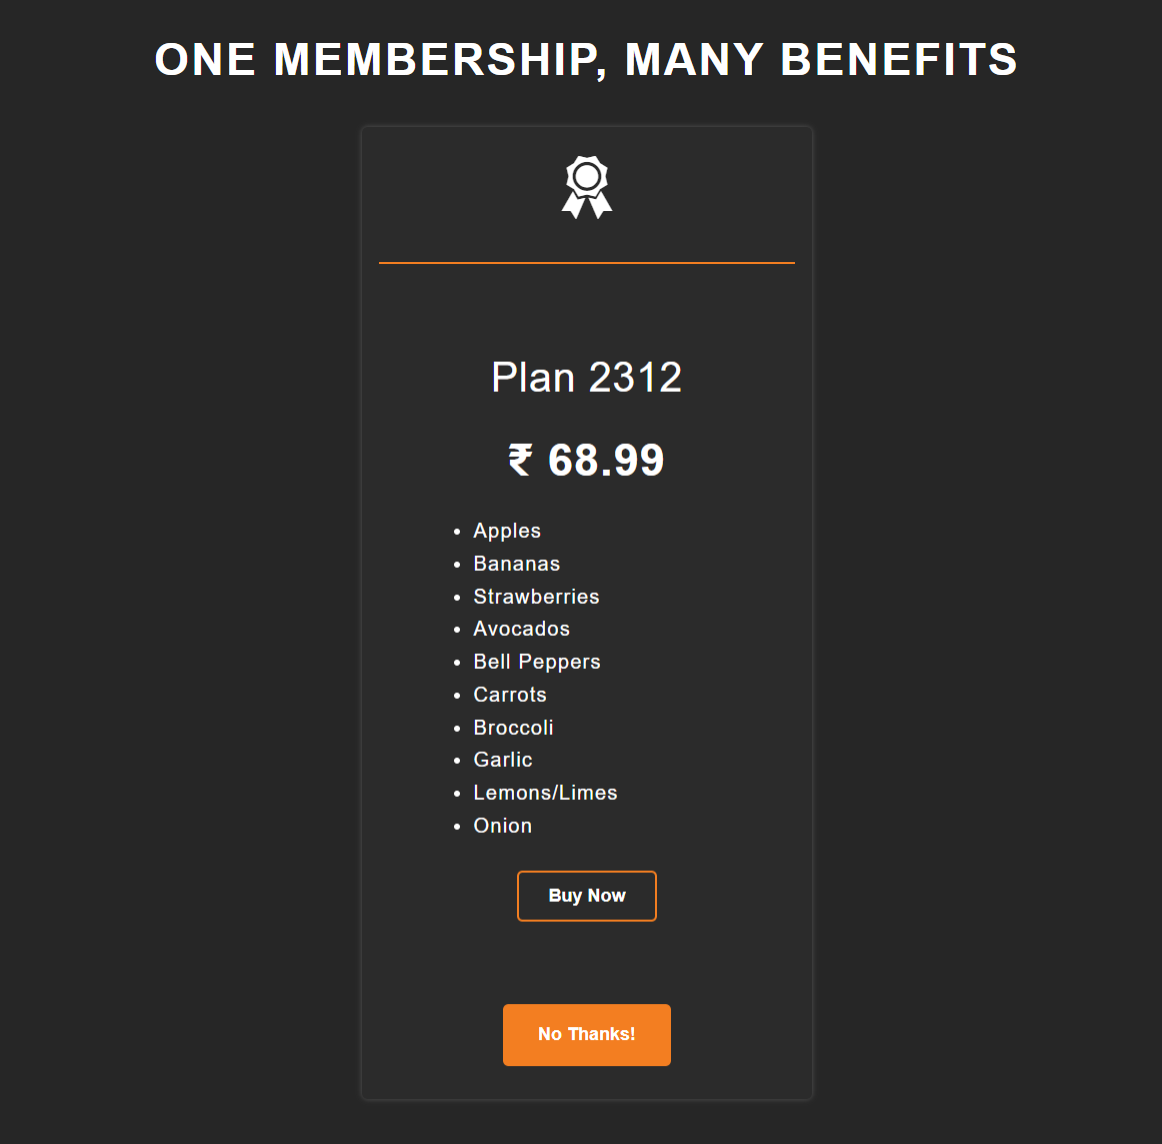
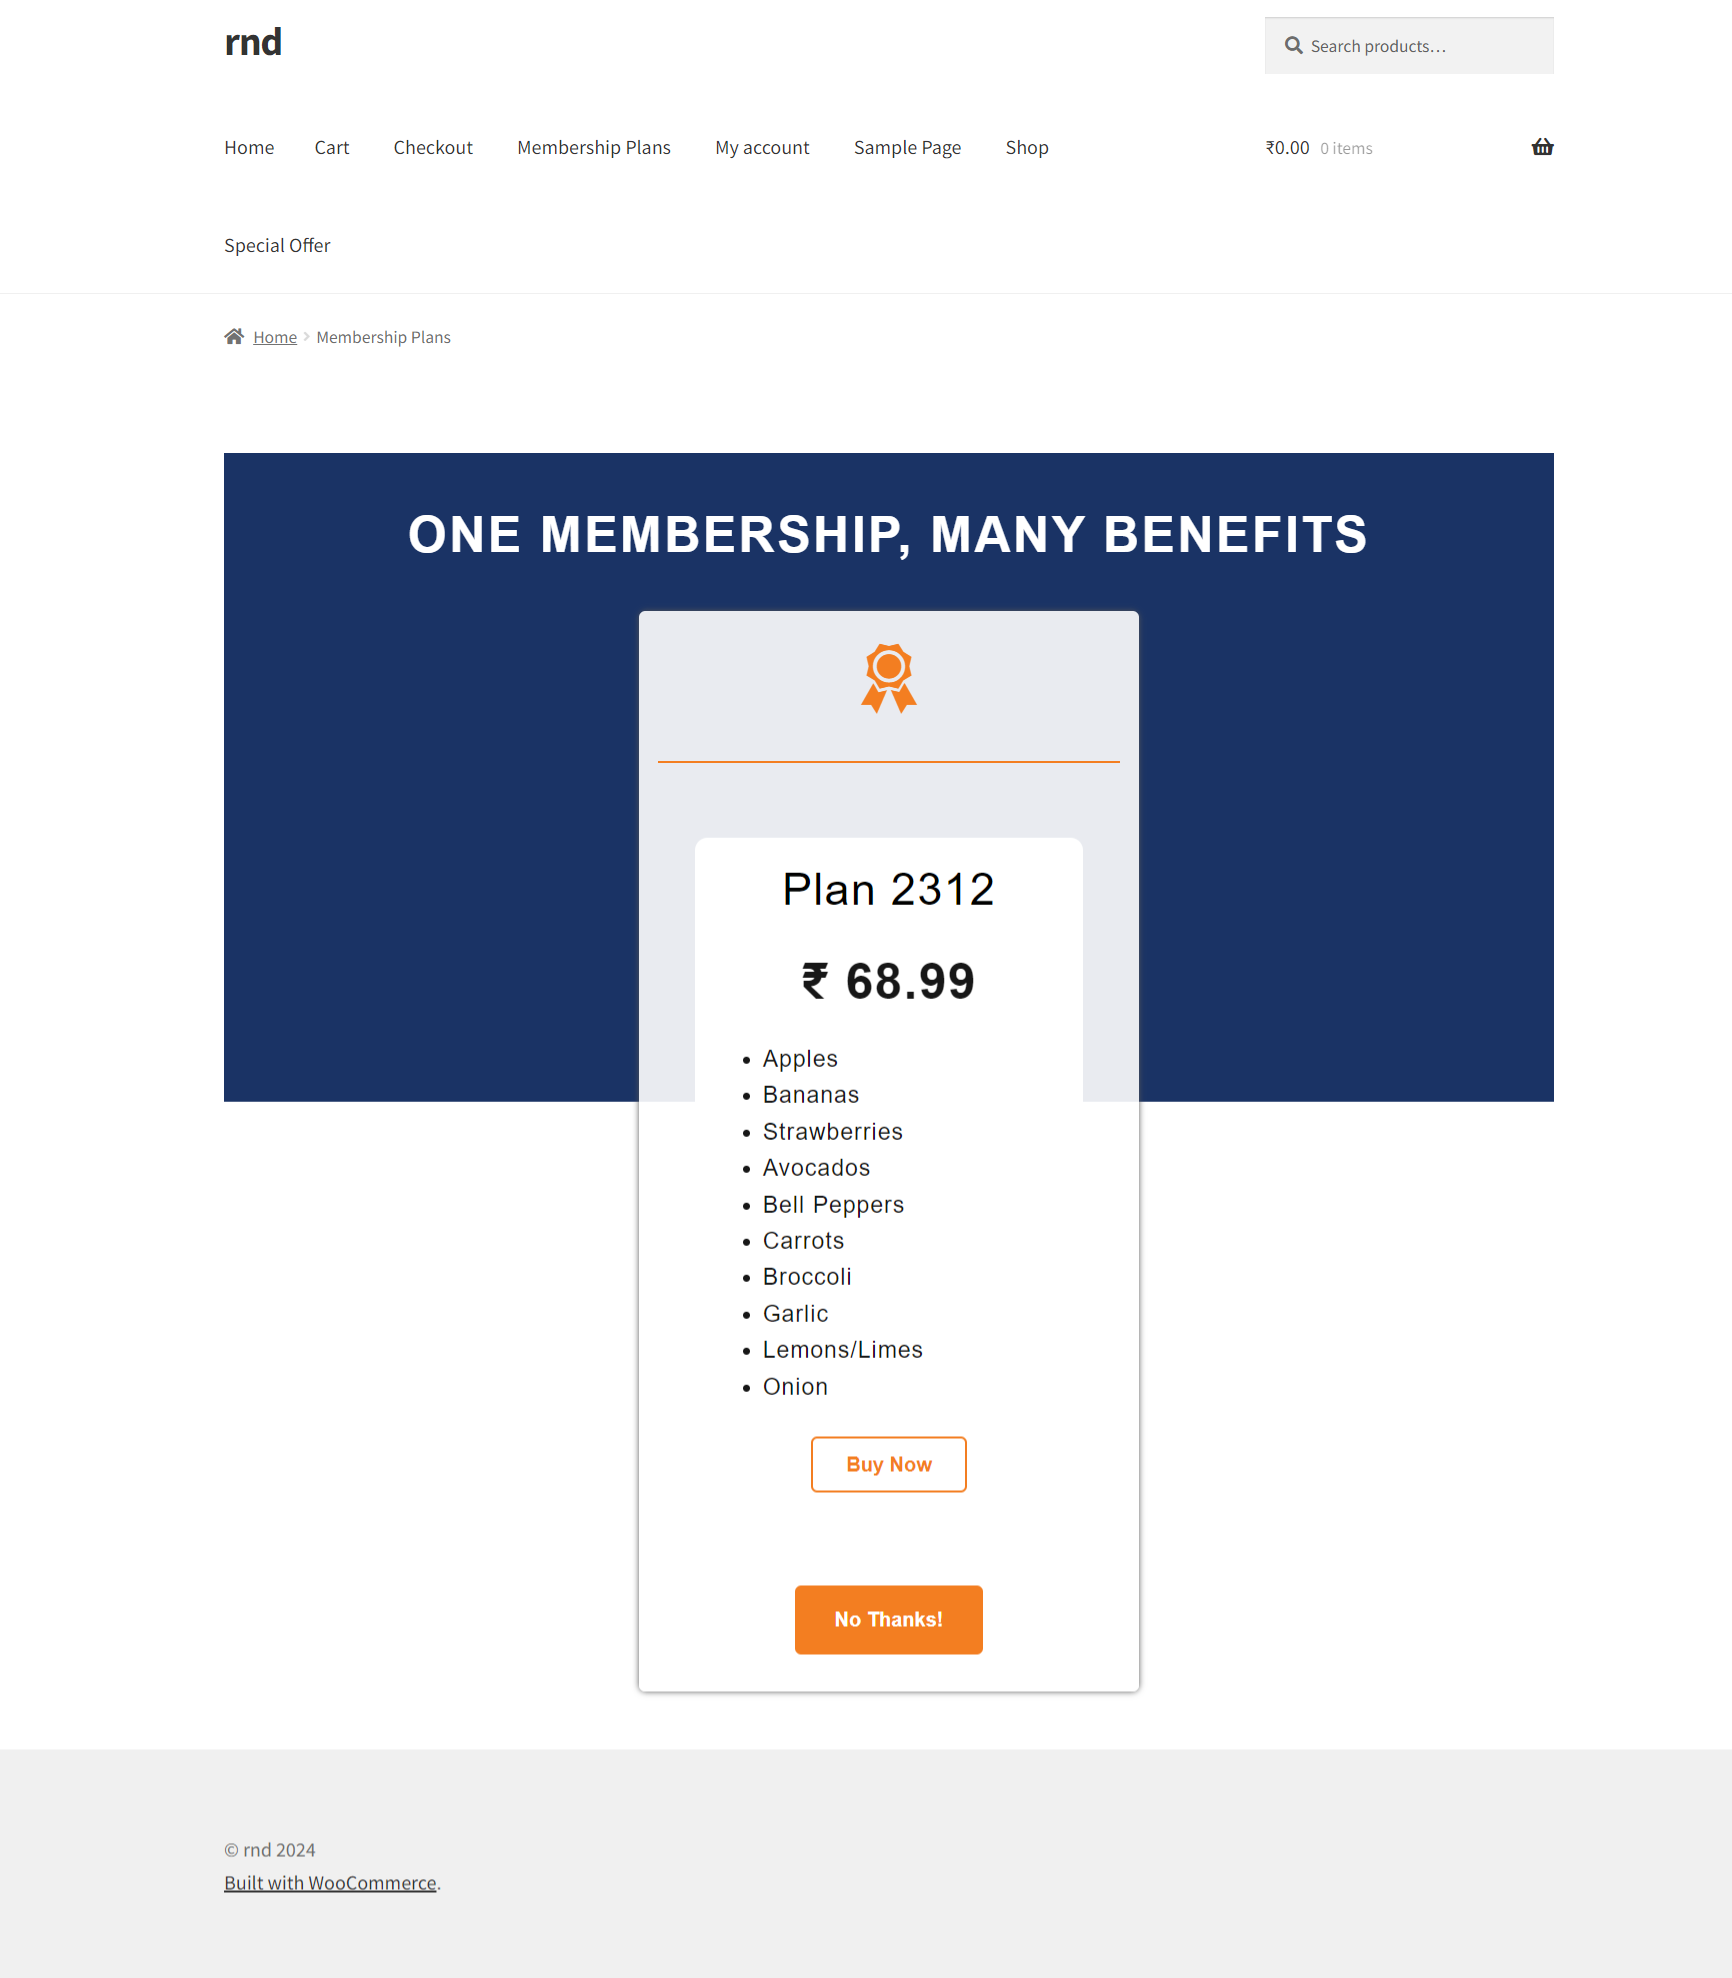
All membership plans will be displayed on the Membership Plans Page on your WooCommerce store in the following format, where users can purchase the plans directly.
18.5.Points and Rewards Section
Under the points and rewards section, you can assign points to user when a membership is purchased by the user.
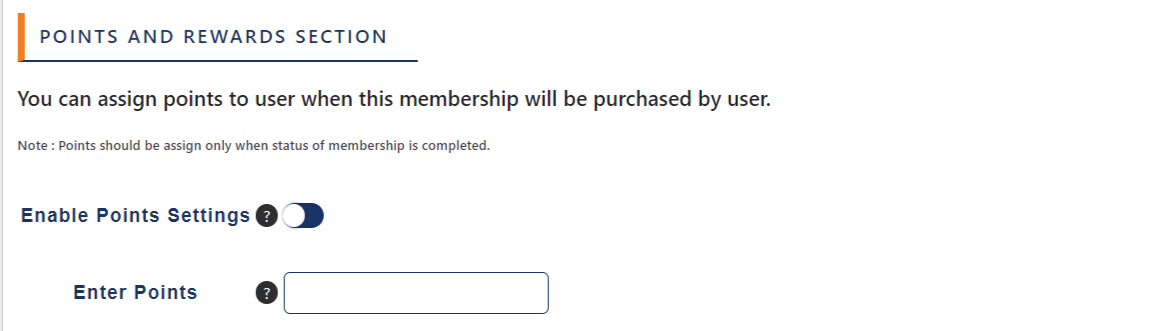
- Enable Points Settings: Toggle this to enable points setting
- Enter Points: Enter the Points amount
Points should be assigned only when the status of membership is completed.
Note: To use the assign points feature, it’s necessary to install the Points and Rewards For WooCommerce plugin.
18.6.Manage Free Shipping
After allowing the free shipping option, the admin can directly manage shipping from the membership features section through the following steps:
- Click Manage Free Shipping.
- Click on Add Shipping Method.
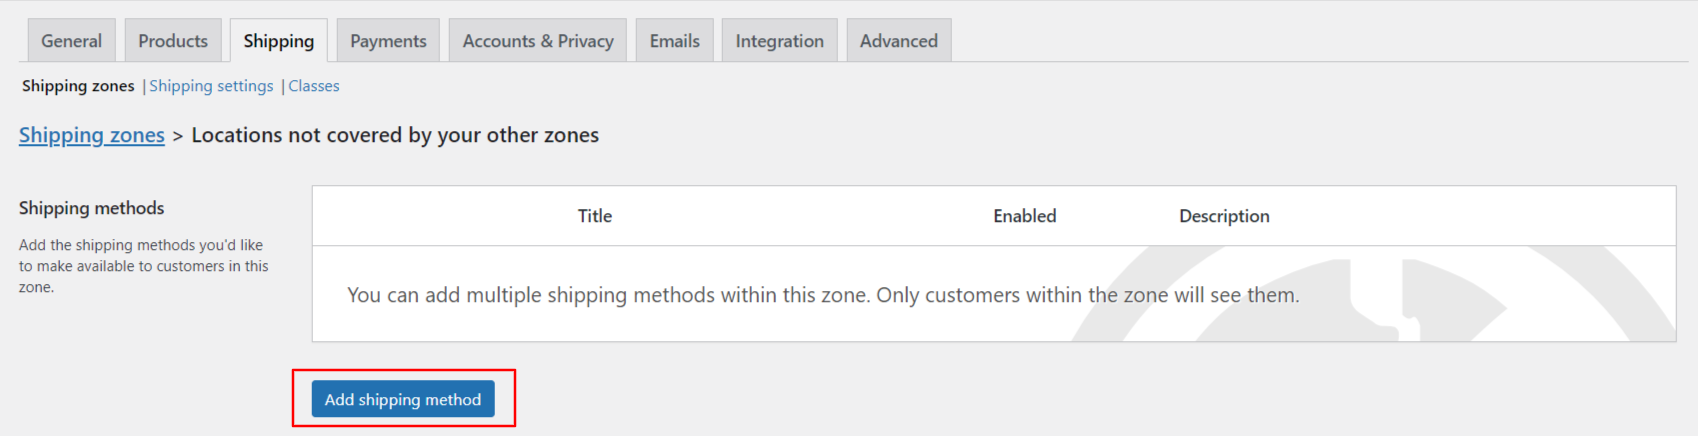
- Choose Membership Shipping
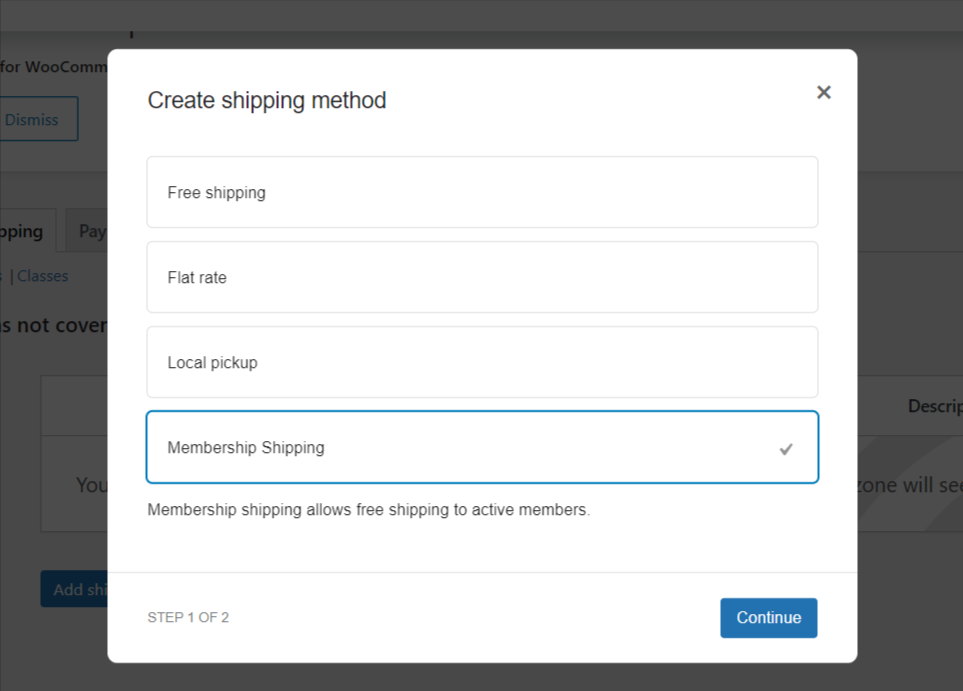
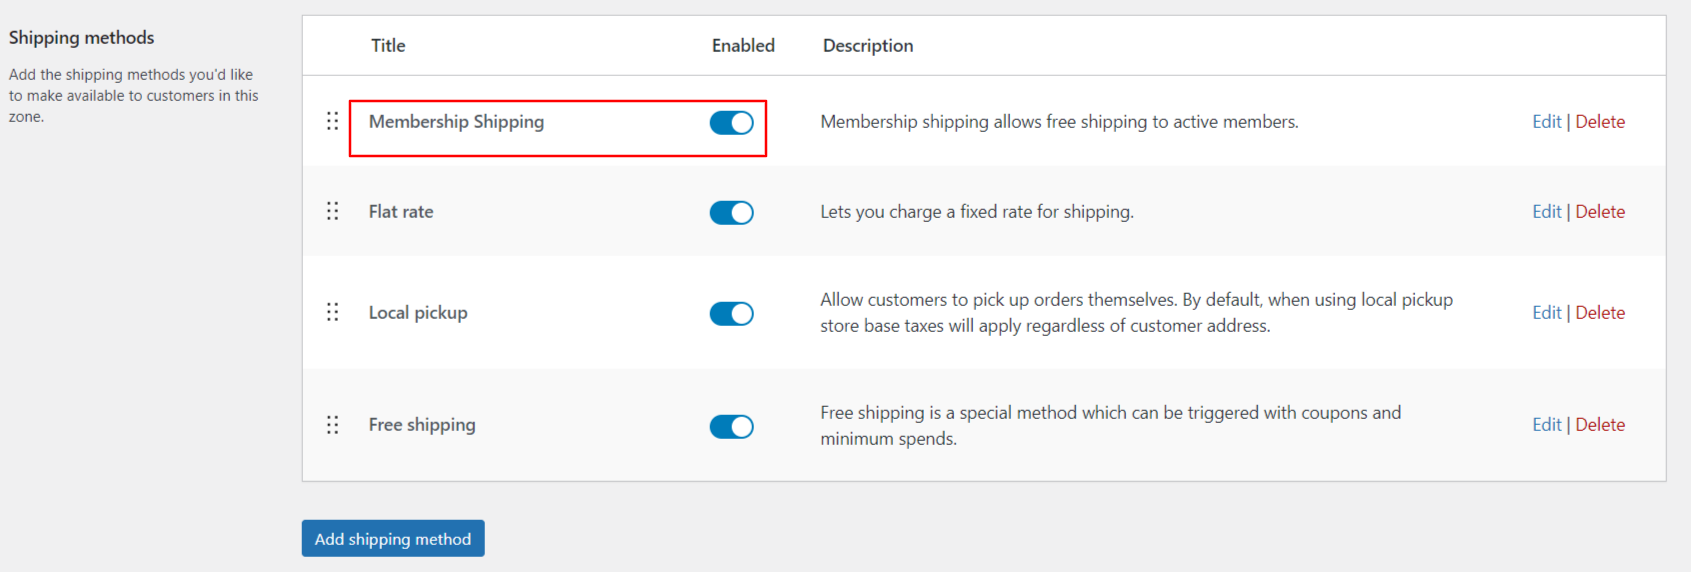
- Continue and Save Changes
- Now the shipping methods will also show membership shipping.
19.Edit Membership Plans
For editing any of the membership plans that you have already created,
- Go to Dashboard > Memberships > All Membership Plans
- Now select the plan you want to edit > Make the desired changes in the plans > Update the page.
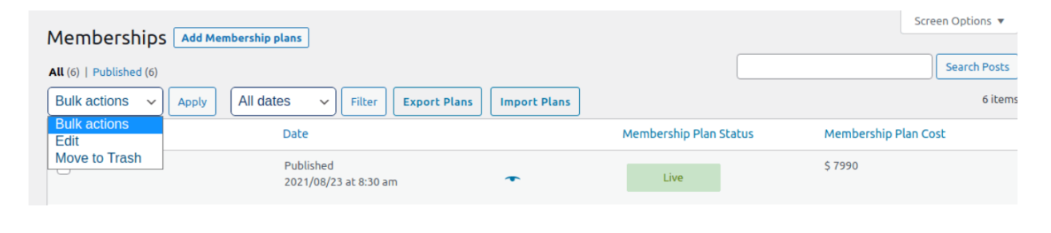
Bulk Actions
For bulk actions, Go to Dashboard > Memberships > Bulk Actions. The admin has two bulk action options:
- Edit membership plans
- Move membership plans to trash
Perform your desirable action, and proceed.
20.Import / Export Membership Plans
Membership for WooCommerce pro plugin allows the admin to import or export membership plans. For exporting membership plans:
Go to Dashboard > Memberships > All Membership Plans On the top, find and click the ‘Export Plans’ option.
This will export all your available membership plans into a simple CSV file that you can find in the downloads folder of your system.
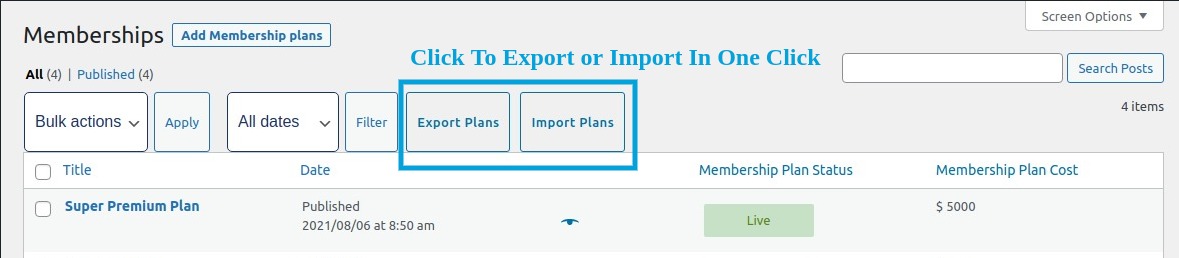
Go to Dashboard > Memberships > All Membership Plans On the top, find and click the ‘Import Plans’ option.
Select and upload the file and all your membership plans will be imported with details.
Please Note: While Importing Membership Plans: Admin can import the WooCommerce membership plans and successfully apply this import only if the CSV file products are available in the store. Otherwise, it will fail.
21.Add New Member
Admin can manually add members and assign details from the WordPress dashboard. To add a new member:
Go to Dashboard > Memberships > All Members > Add New
- Select a user from existing members or add a new one.
- Mention billing details like address, phone number, email & payment method.
- Select Plan from Membership Details section from the existing membership plans of your WooCommerce store.
- Update status to on-hold, completed, pending & canceled from the Member Actions box.
- Update post. And the member will be added manually.

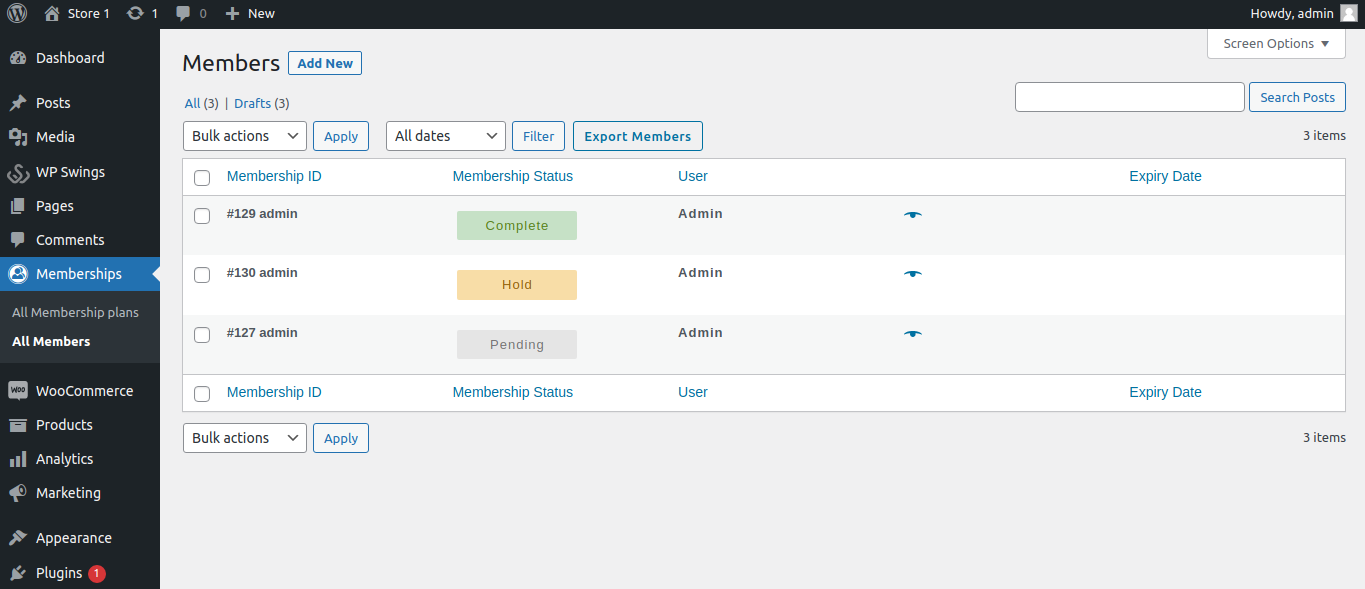
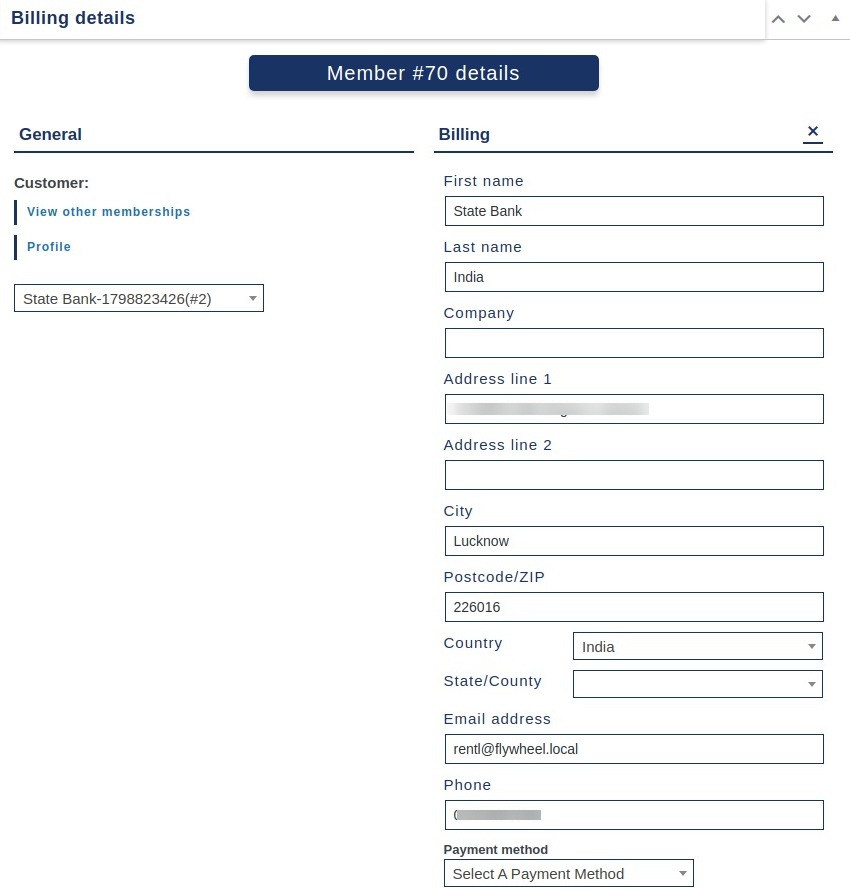
22.Edit Members Details
Under the All Members option, admin can edit the details of membership users. For that:
Go to Dashboard > Memberships > All Members > Edit (Any Member)
Under Edit member section admin can:
- Edit User profile.
- View other membership plans of the user.
3. Change billing details of the member.
4. Update the status of the users membership plan.
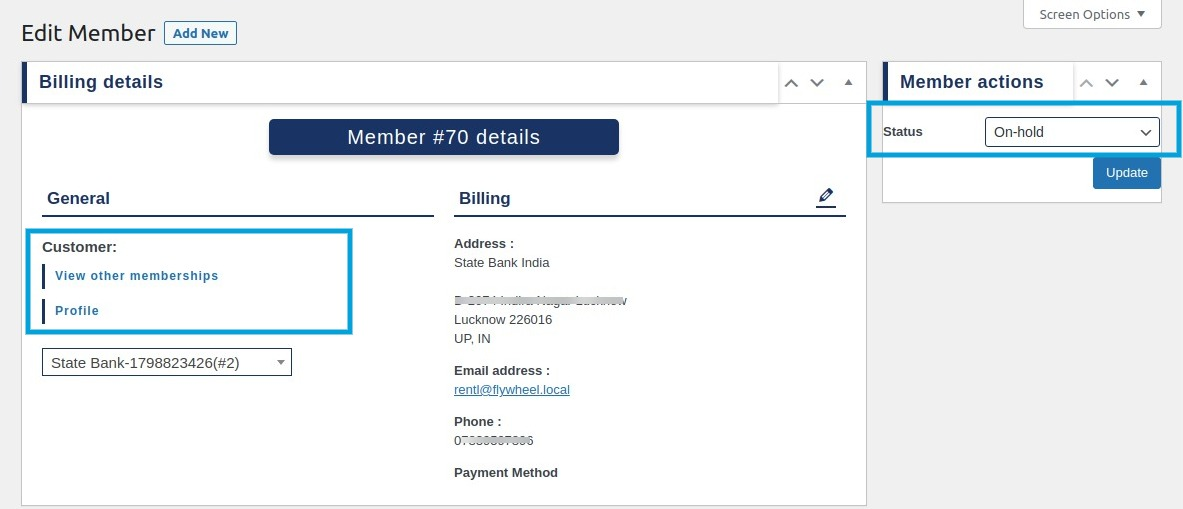
After making all these changes, the admin can update the page.
Additionally, members will not be assigned roles. Instead, there will be metadata saved and displayed in the user table as member type. You can see it from the admin panel.
Go to Users > All Users and see the member type.
23.Membership Emails
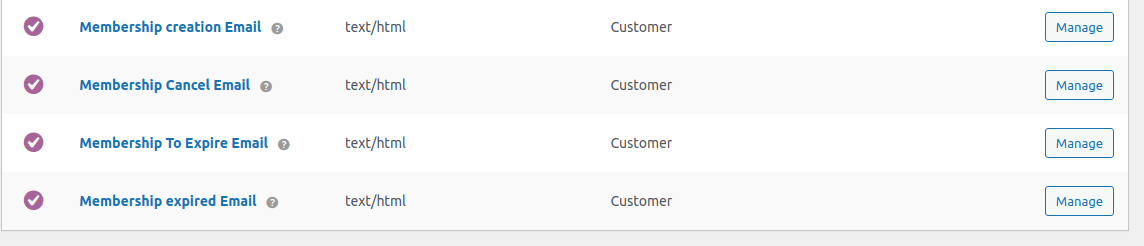
The Membership for WooCommerce pro plugin allows the admin to send emails to the members for the following actions:
- Membership plan creation emails
- Membership Cancel emails
- Membership To Expire Email
- Membership Expired email
As far as membership-related emails are concerned, for customizing these emails:
- Go to Dashboard > WooCommerce > Emails
- Navigate to membership action emails.
Select the membership action email where the admin can:
- Enable / Disable email notifications
- Edit the email heading
- Edit membership email subject
After editing emails, save changes. So, now you know how to work with the premium extension of the Membership for WooCommerce plugin. If you have any further queries, feel free to contact our support.
24.Login/Sign Up Option For A Guest User
In this feature we provide the option of login or signup for guest users. And also send login credentials through the mail.
Go to Store > Click on Membership Plans > Click on Buy Now
And will be redirected to Cart Page. Bottom of the page you will see the Proceed to Checkout button. Click on it and next page will appear of Checkout fill the details and place the order.
At the last on Thankyou page you will see the details of the orders with the Login / Sign Up First Button.
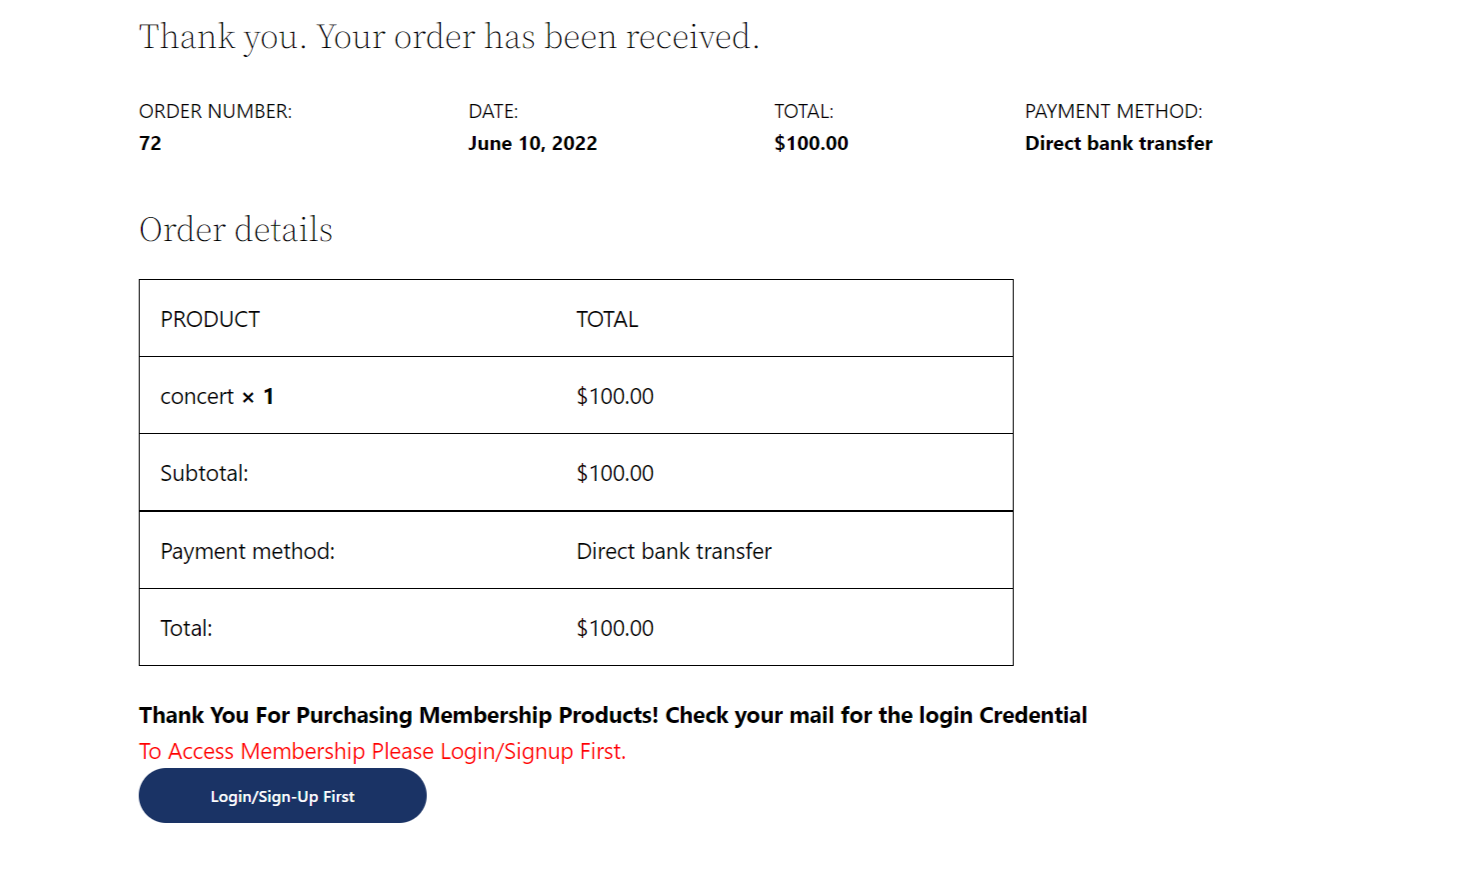
Note: If you didn’t get credentials, then either your email is already registered or your mail setup has an issue.
25.WPML Compatibility
The Membership for WooCommerce is compatible with the WordPress Multilingual (WPML) plugin for localization of the Membership for WooCommerce plugin’s strings.
In order to translate the Membership plugin, you need to extract all the plugins’ strings. Follow these steps:
1- Go to WordPress Dashboard > WPML > Themes Plugins Localization
2- Navigate to the ‘Strings in the plugins’ section
3- Select Membership for WooCommerce from the list of plugins
4- On the bottom of the page, Click ‘ Scan selected plugins for strings
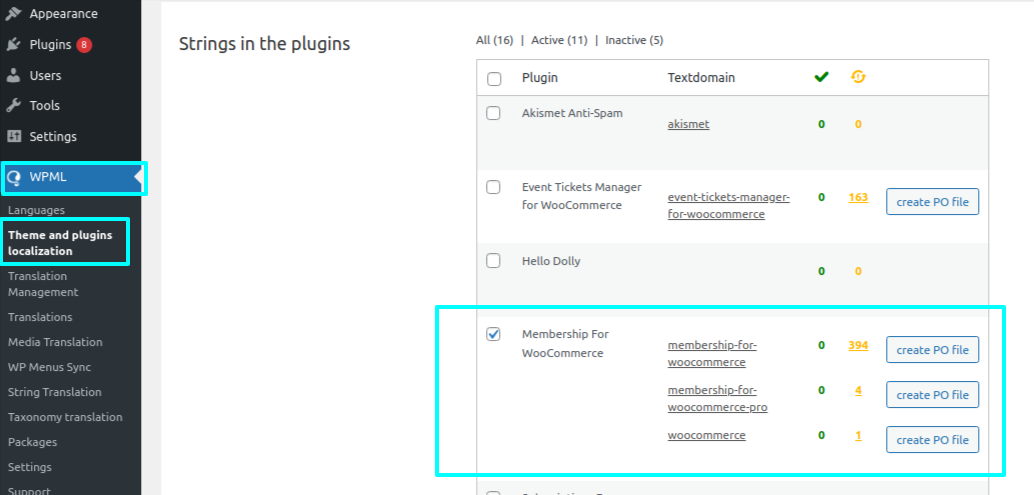
For translating the strings into a different language click the number of strings present next to the plugin.
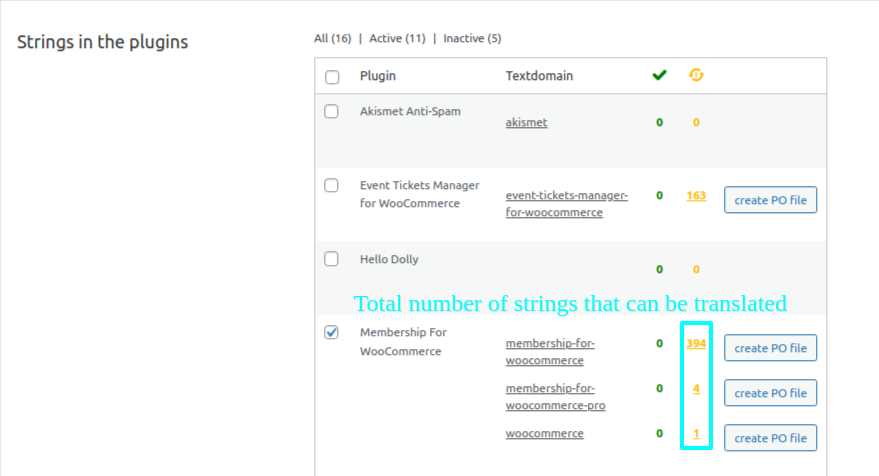
You’ll be redirected to a page where all the strings of the plugin are listed and you can translate each string from here.
On visiting this page you can manually select a string for translation by clicking on the “+” button next to each string in a row.
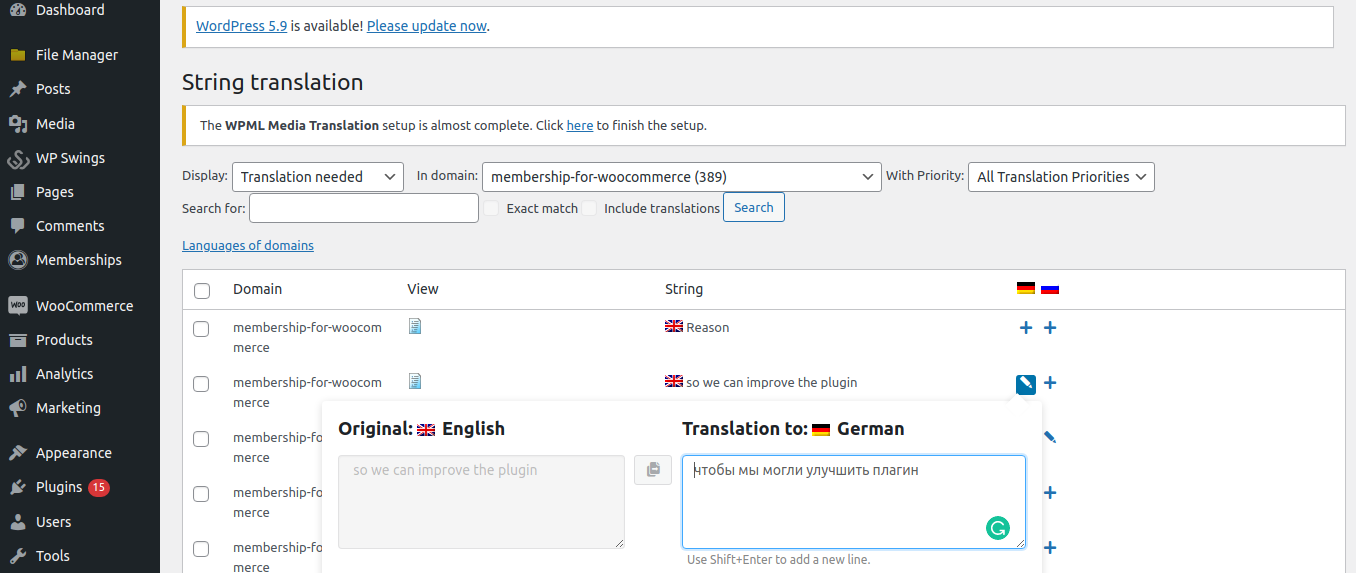
A popup will occur in which you can write the translation of the string.
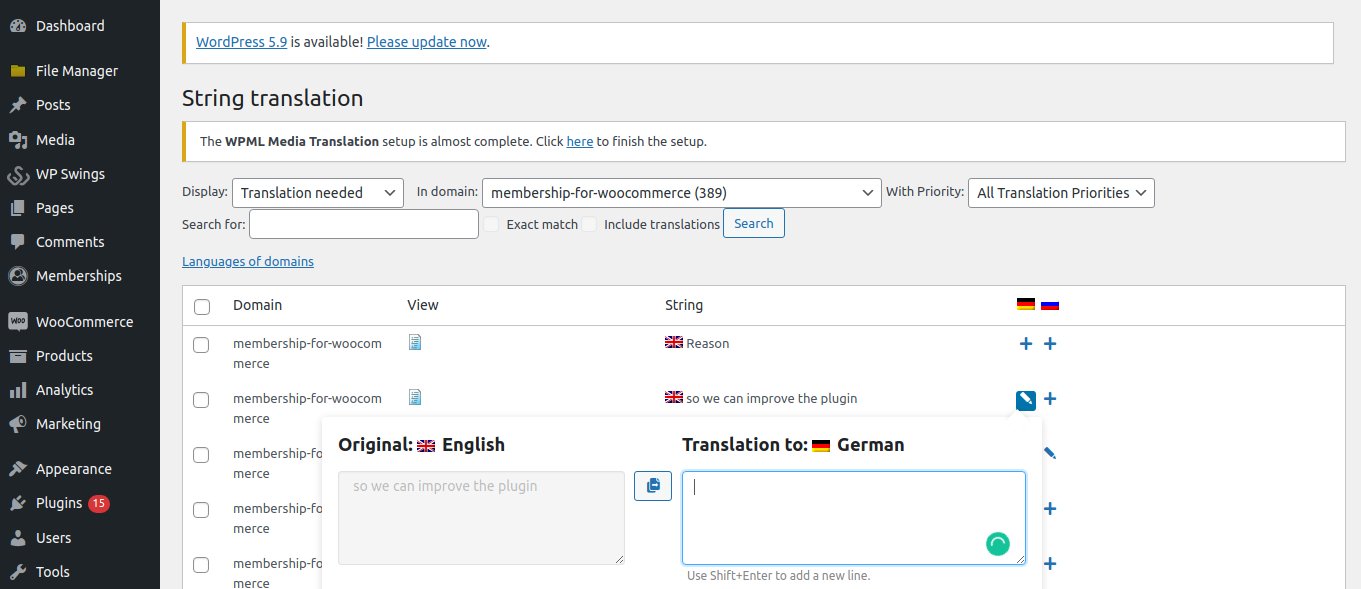
Once you’ve written the translation it will be automatically saved and when the customer chooses a different language they’ll see the translated version of the string.
26.Compatible With Wallet System For WooCommerce
Membership for WooCommerce is compatible with the Wallet System for WooCommerce allows the admin to accept membership payments via wallet. Users can easily add money to their digital wallet and use it to buy memberships hassle-free.
Users can choose the Wallet Payment option on the checkout page, and pay for the membership using their wallet amount.
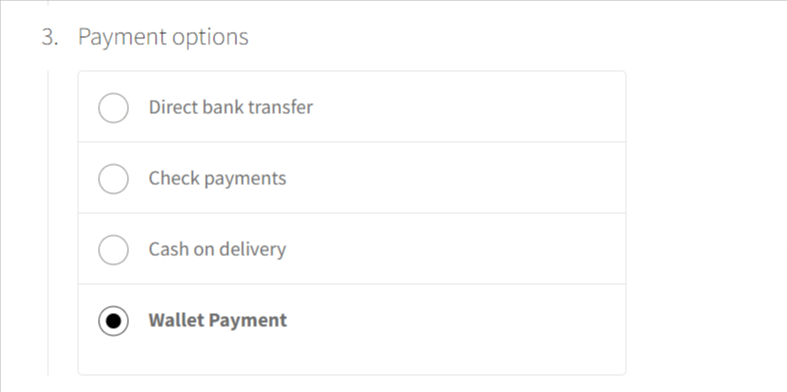
If you don’t want your users to pay via wallet system you can restrict it by navigating to the Others Settings Section and enabling the Enable this setting to restrict payment via Wallet option.
27.Compatible With Subscription For WooCommerce
The Membership for WooCommerce plugin is compatible with our Subscriptions for WooCommerce plugin, enabling you to sell membership plans and facilitate their renewal using payment gateways supported by the subscription plugin, including the WooCommerce wallet.
You can configure the subscription membership to include an expiry date and set up a free trial period. The free trial can be activated by requiring customers to pay an initial signup fee. After the trial period ends, the membership will automatically transition to standard billing and continue until the set expiry date or until canceled.

28.Compatible With Points and Rewards For WooCommerce
Membership for WooCommerce plugin is compatible with the Points and Rewards for WooCommerce plugin. Admin can customize the points settings while adding a membership plan. This compatibility allows the admin to assign points to users when they purchase a membership. These points can then be used by users for various purposes, including purchasing products and receiving discounts.

29.WooCommerce HPOS Compatibility
Membership for WooCommerce PRO is compatible with High Performance Order Storage (HPOS) Which uses WooCommerce CRUD design to store order data in custom tables to optimize order queries and ensure the smooth workflow of your WooCommerce store.
To Enable HPOS Follow these steps:
Firstly, make sure your WooCommerce version is updated with the latest 8.0. After that navigate to WooCommerce > Settings > Advanced > Features and choose the High Performance Order Storage option for orders.
For more information, refer to the WooCommerce HPOS Documentation
30.Feedback and Suggestions
Don’t see a feature in the Membership for WooCommerce plugin that you think would be useful?
We’d love to have your suggestions: Reach out to our Support query and we’ll consider adding it in a future release.
31.FAQs
Can I have free and recurring memberships at the same time?
Yes, you can have both memberships types in the premium version of the Membership for WooCommerce Plugin.
Can a person get a lifetime membership or limited membership?
We have an option to set the membership lifetime, you can set either of two.
Do you have a shortcode to display Membership Plan/price?
Yes, Membership for WooCommerce has the shortcode to display Membership plan, price and description.
Membership Plan Title → [wps_membership_title]
Membership Plan Price → [wps_membership_price]
Membership Plan Desc → [wps_membership_desc]
What should I do if this WooCommerce Membership plugin is not working on my online store?
You can first test for the common reasons and try to:
- Check for theme conflict. Test the plugin with the default WooCommerce theme.
- Check for plugin conflicts by deactivating plugins one by one to make sure which plugin is causing the error.
- If the problem still prevails, reach out to our support and give detailed information about your issue. We will contact you personally.
If user did not receive credentials after signup, what possible errors it can be?
If in case user didn't get credentials then only two issues can occur-
- Either your email is already registered on the site you are trying
- Your mail setup has an issue