1.Overview
Coupon Referral Program for WooCommerce is an extension that is mainly to install a WooCommerce referral program on your site and share discount coupons as a reward. The referral user will earn a discount coupon when they sign up on your store and the users will earn a discount coupon when the referred users place an order, this will help you increase customer loyalty.
2.How This Plugin Works
The Coupon Referral Program for WooCommerce creates a referral program on your online store. Rewarding the referrer and referring customers with online discount coupons. The ultimate referral plugin provides discount coupons on two actions:
- Signup Coupons
- Referral Purchase
- Signup Coupons: When new or referred customers complete the signup process in your store then they get a Signup discount coupon.
- Referral Coupons: Using the WooCommerce referral plugin, the referrer receives the referral discount coupon, when the referred user registers, places an order, and the order status is marked as completed.
For Example, Customer A shares the referral link with Customer B. When customer B registers via the referral link, customer B will get the signup discount coupon/points/code. After the registration, whenever customer B places an order and that order status is marked as completed then Customer A will get a referral discount coupon.
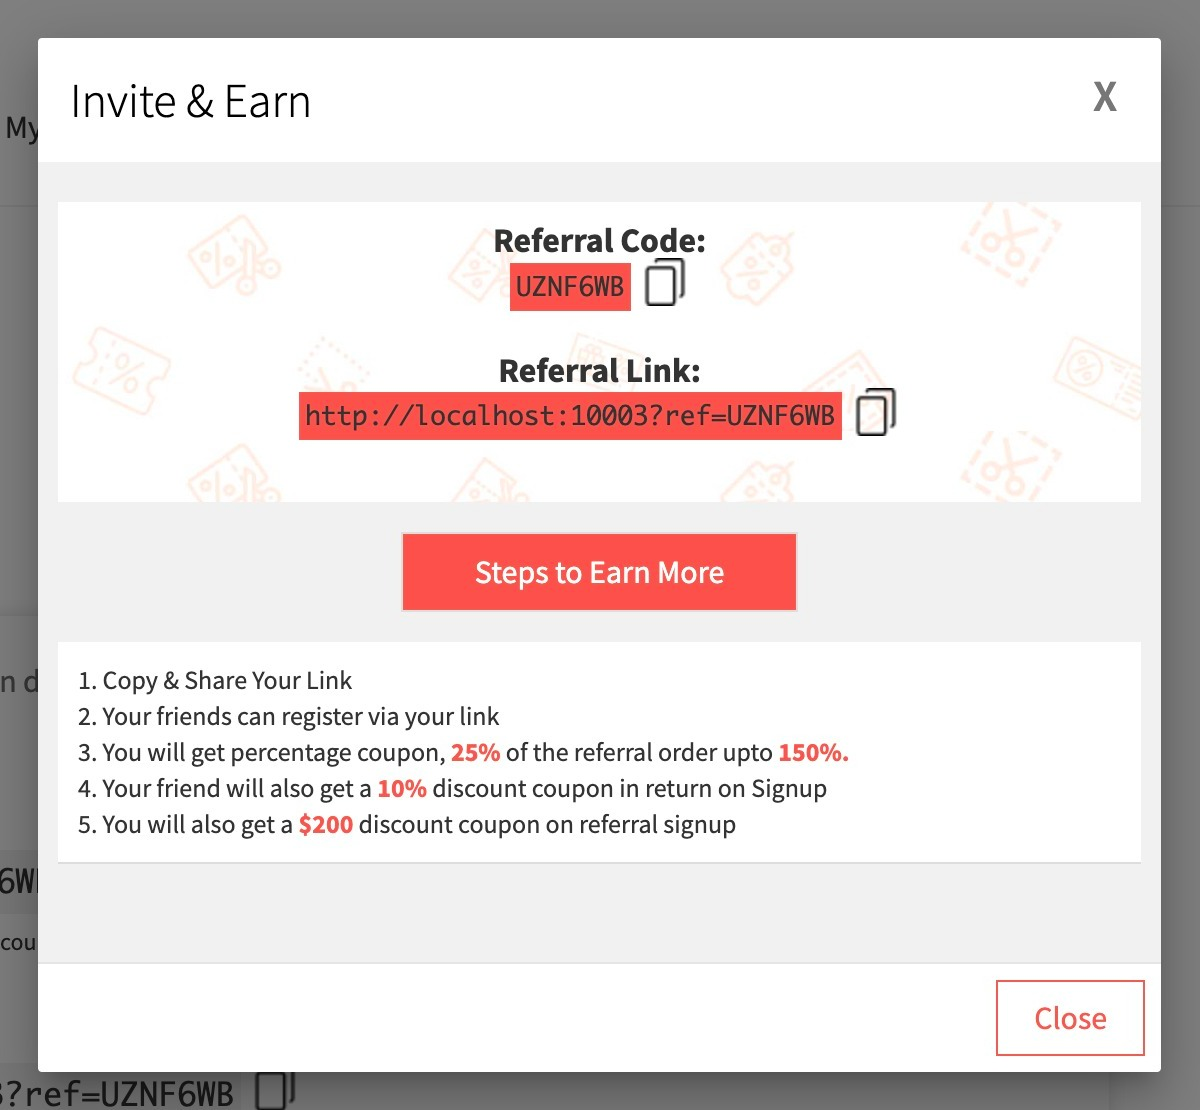
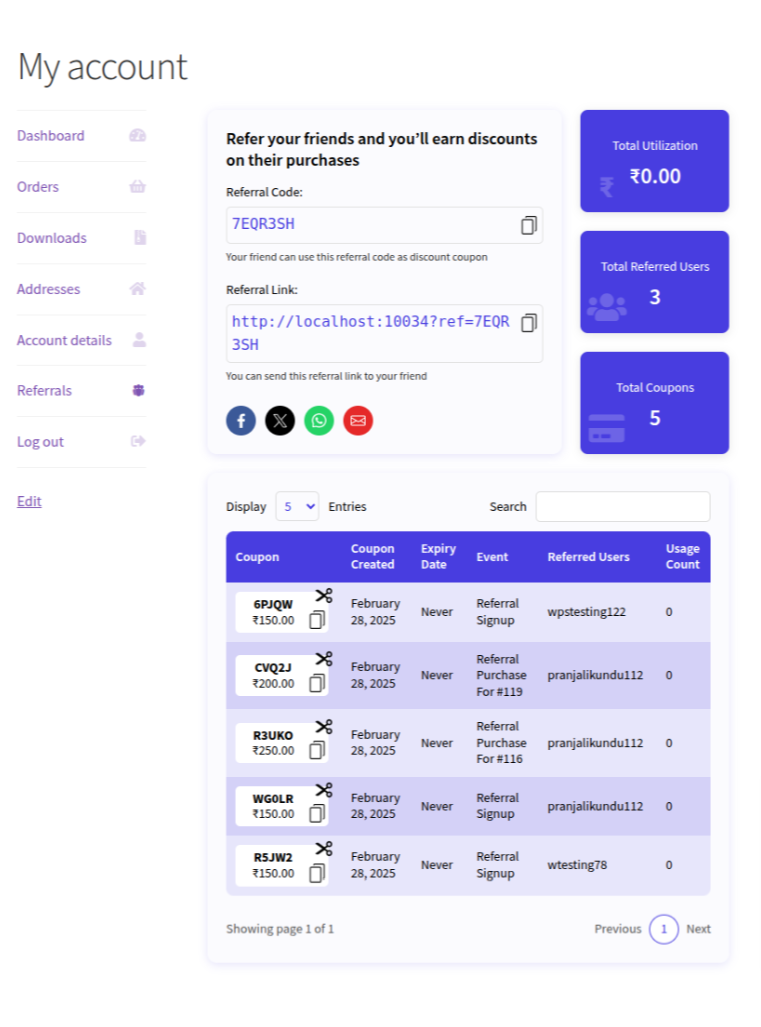
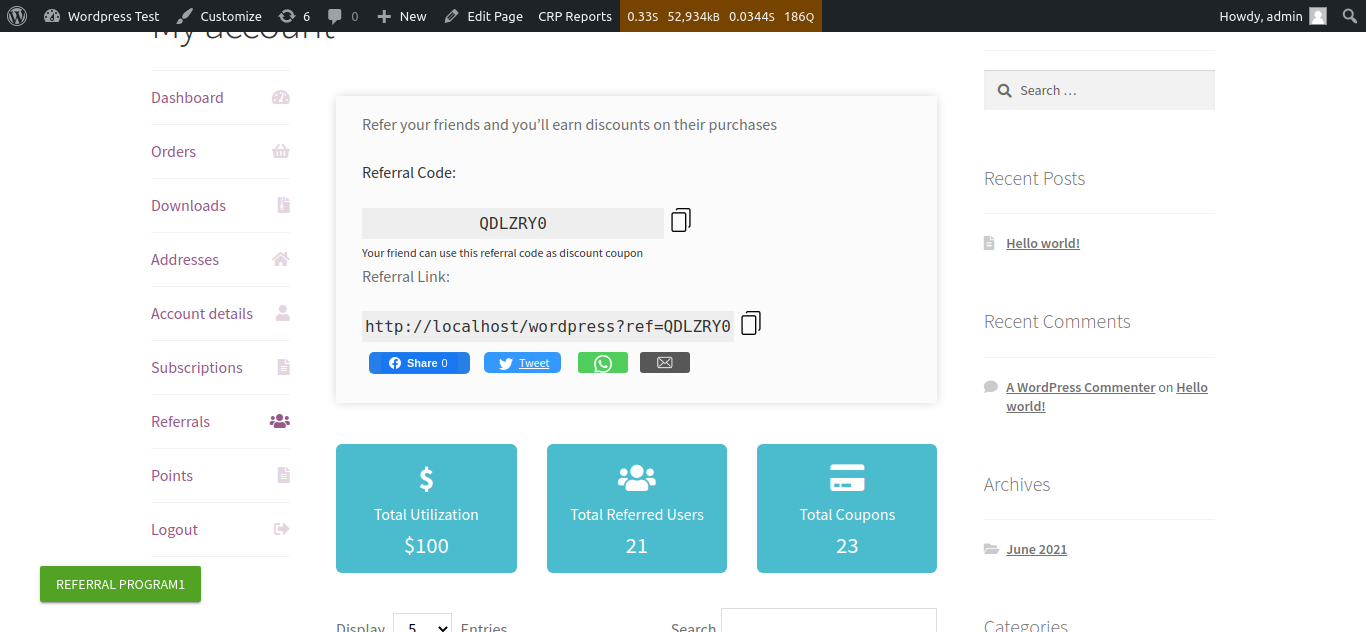
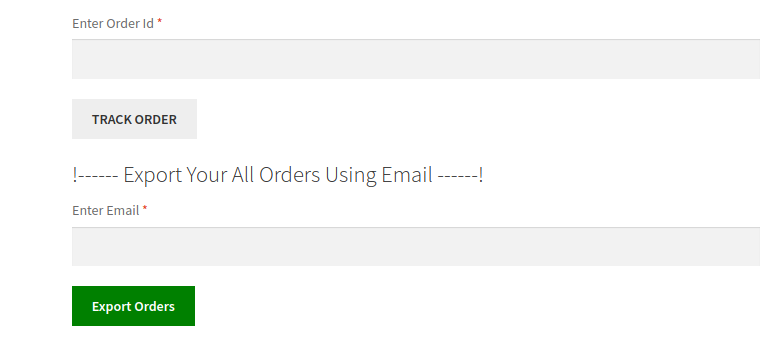
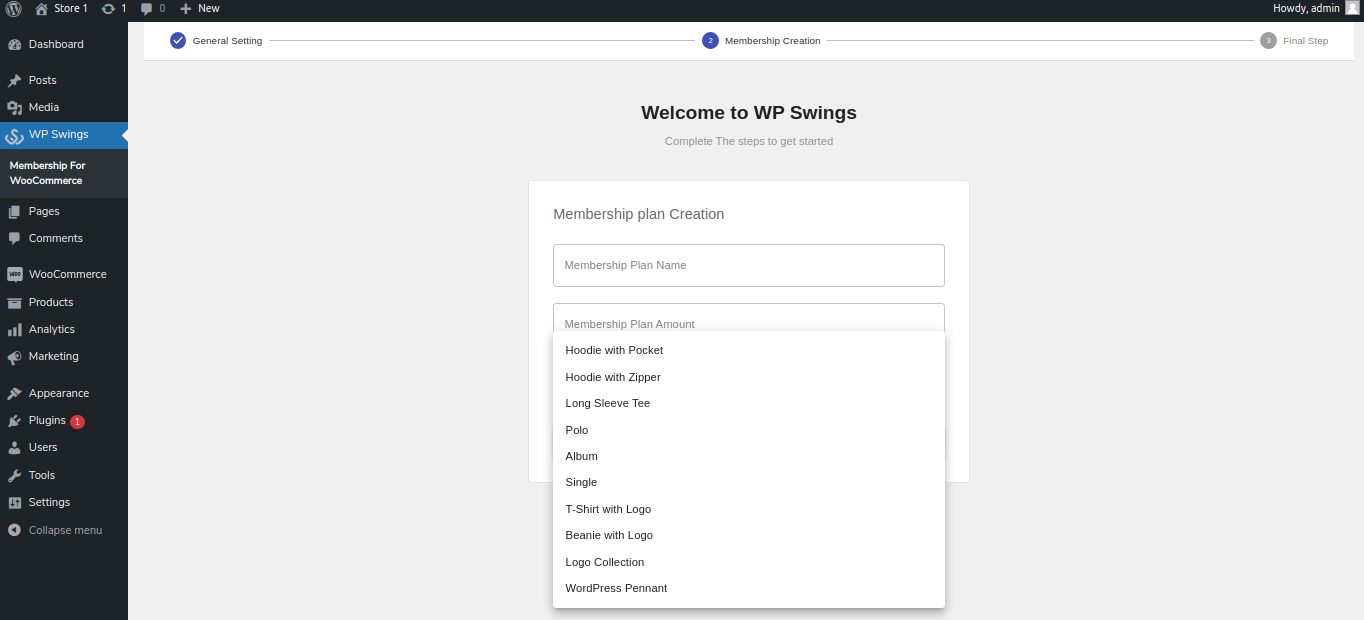
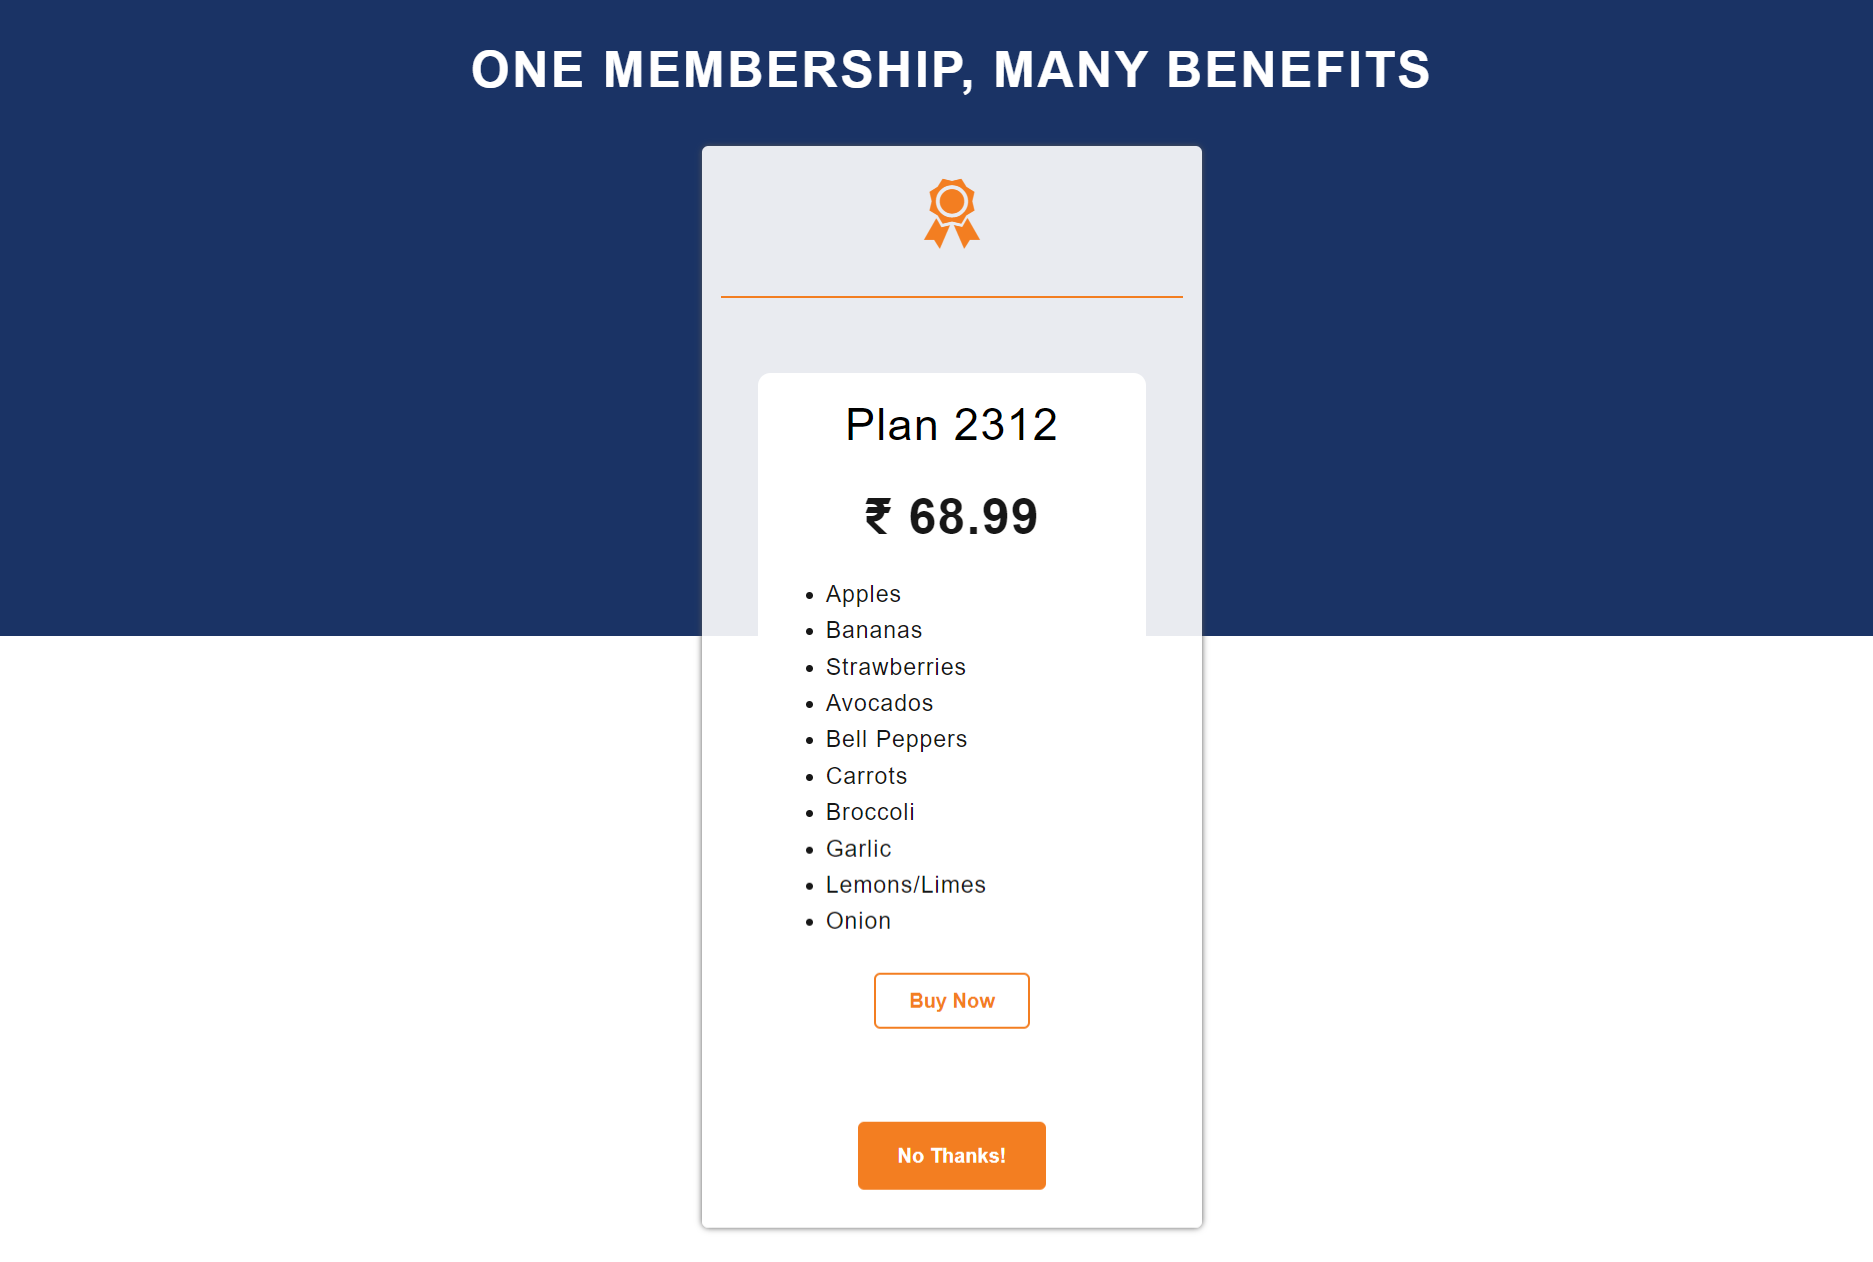
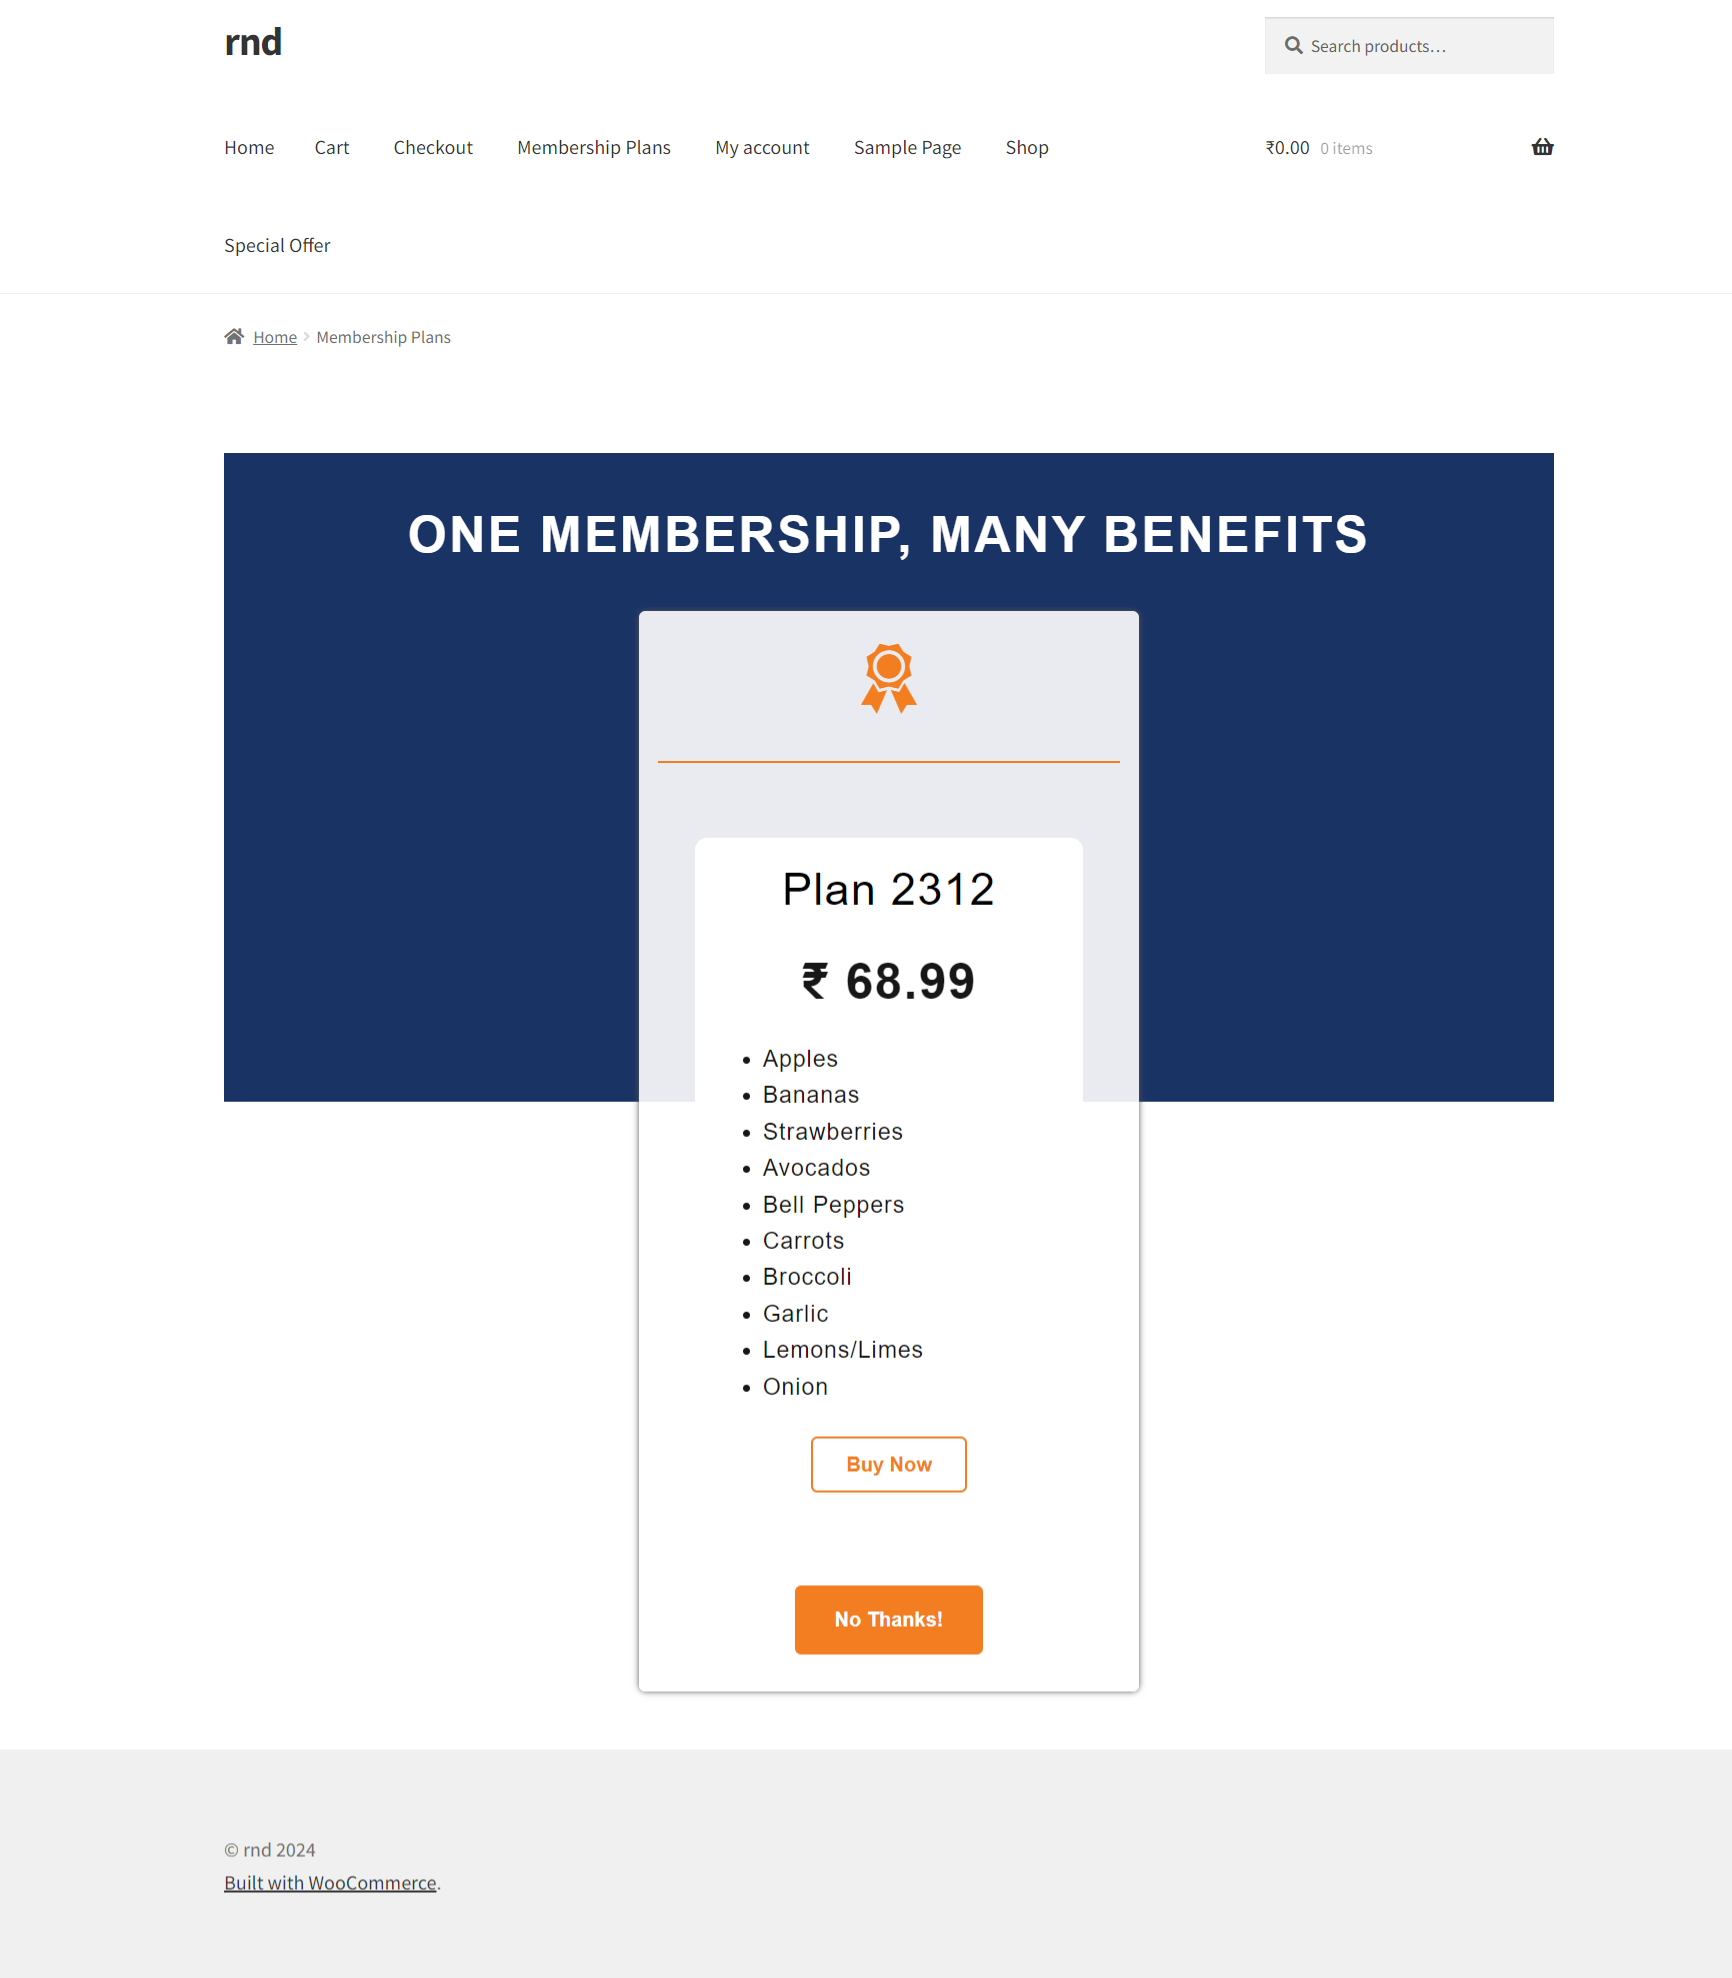
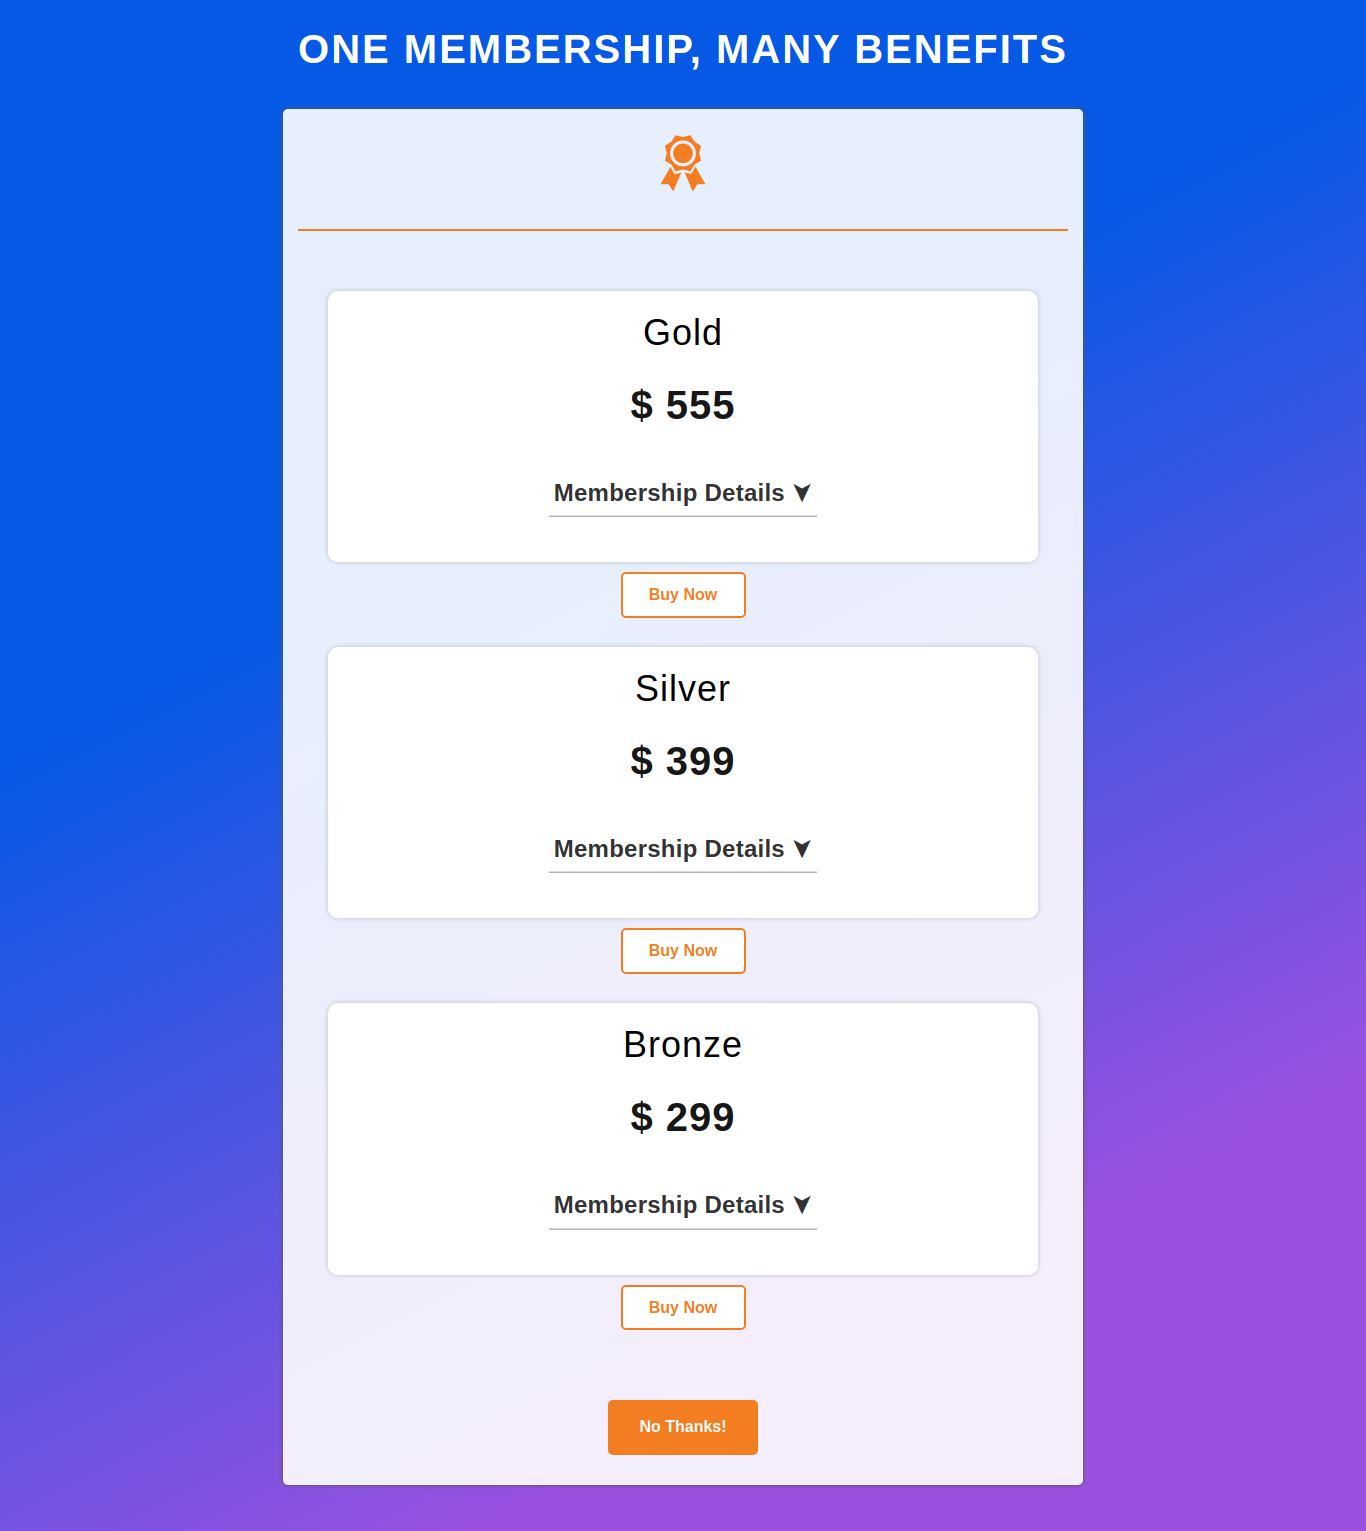
To use the WooCommerce referral program, customers have to click on the “Referral Program” button, they’ll see a screen similar to shown below:


3.Installation
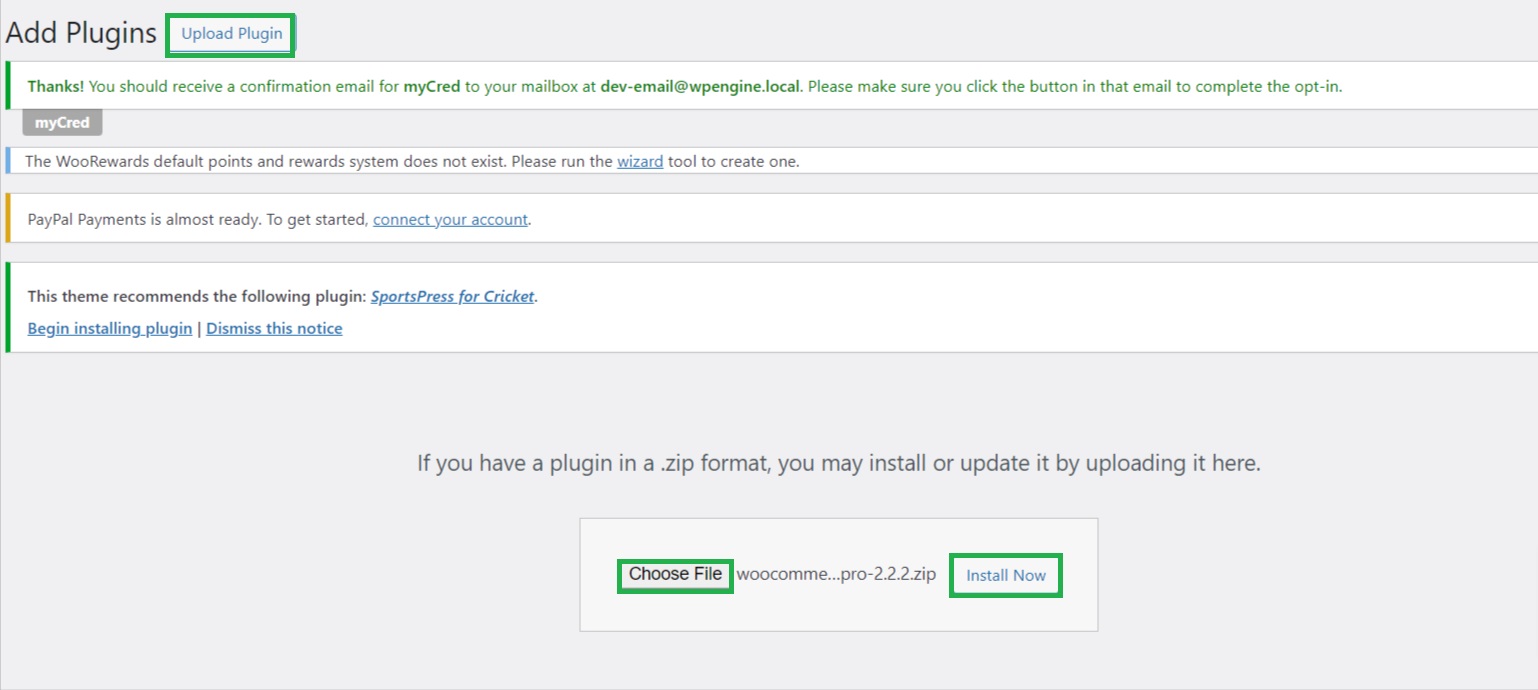
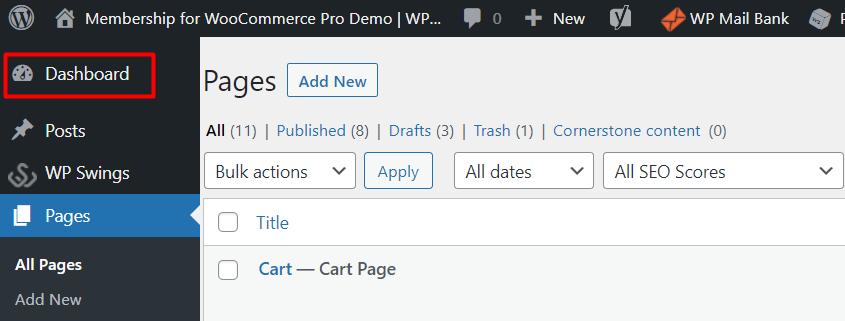
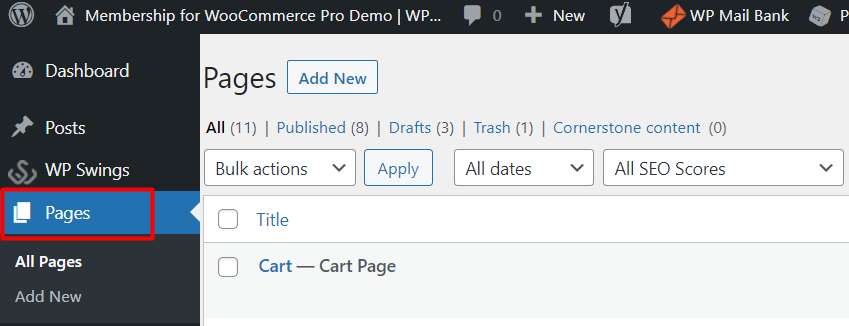
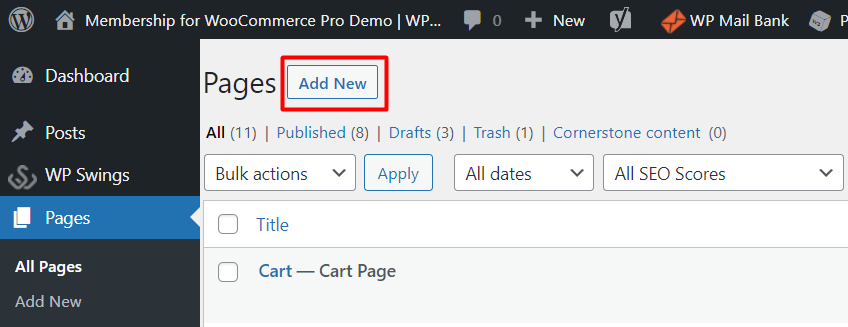
- Download the .zip file of the Coupon Referral Program from your WooCommerce Account.
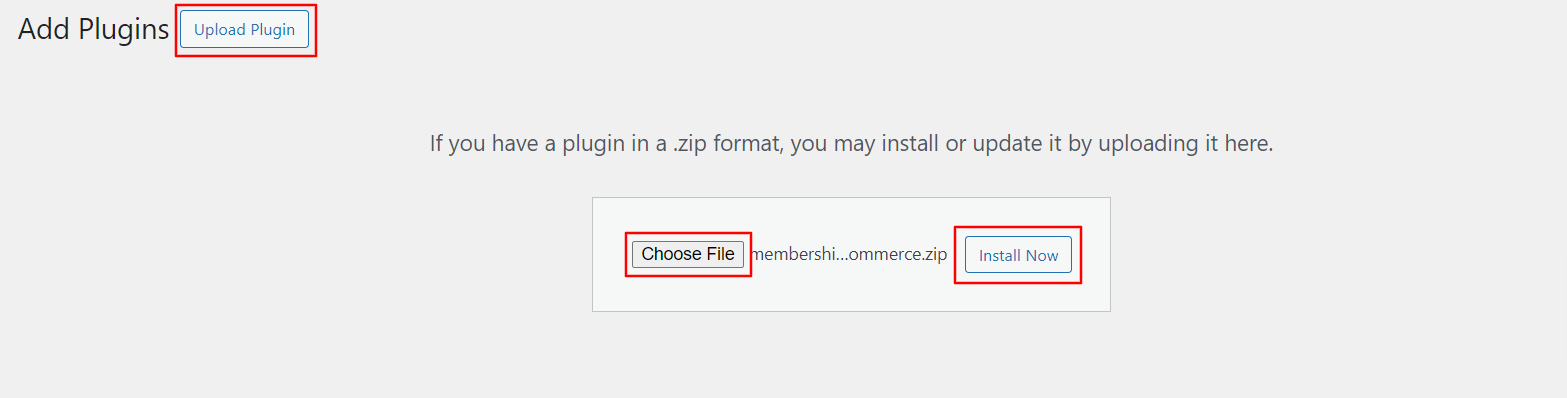
- Go to the WordPress Admin→ Plugins→ Add New and Upload Plugin with the file you downloaded with Choose File.
- Install Now and Activate the extension.
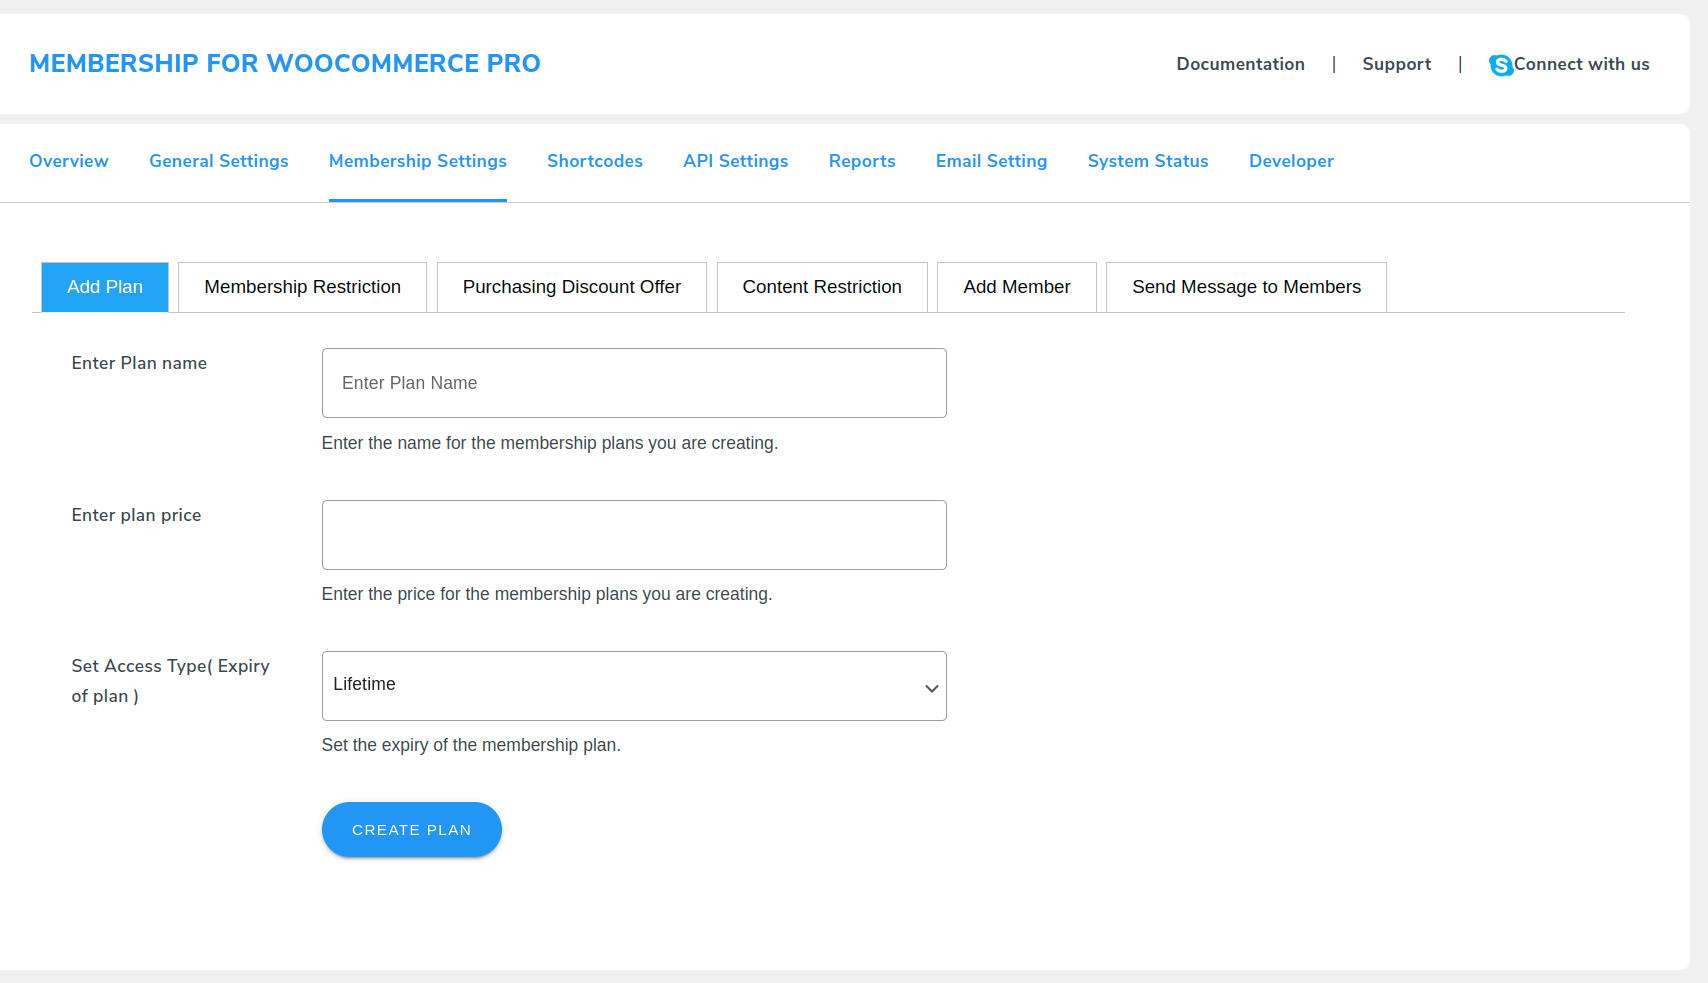
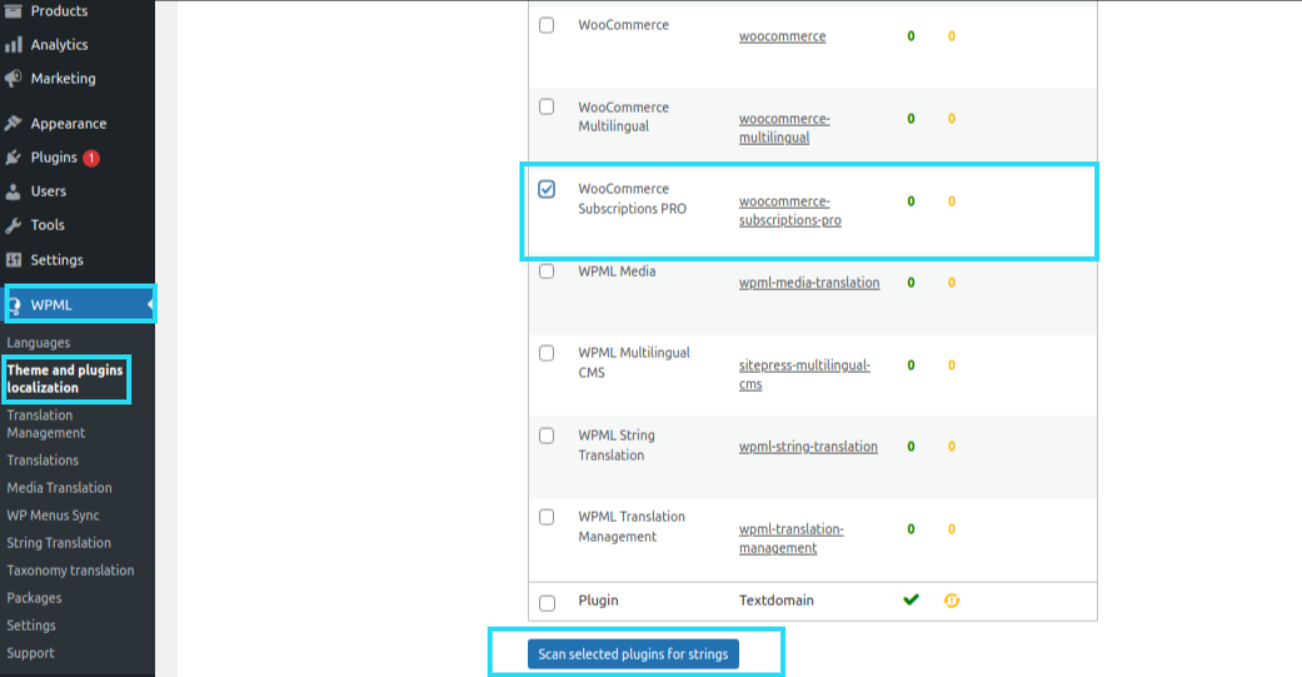
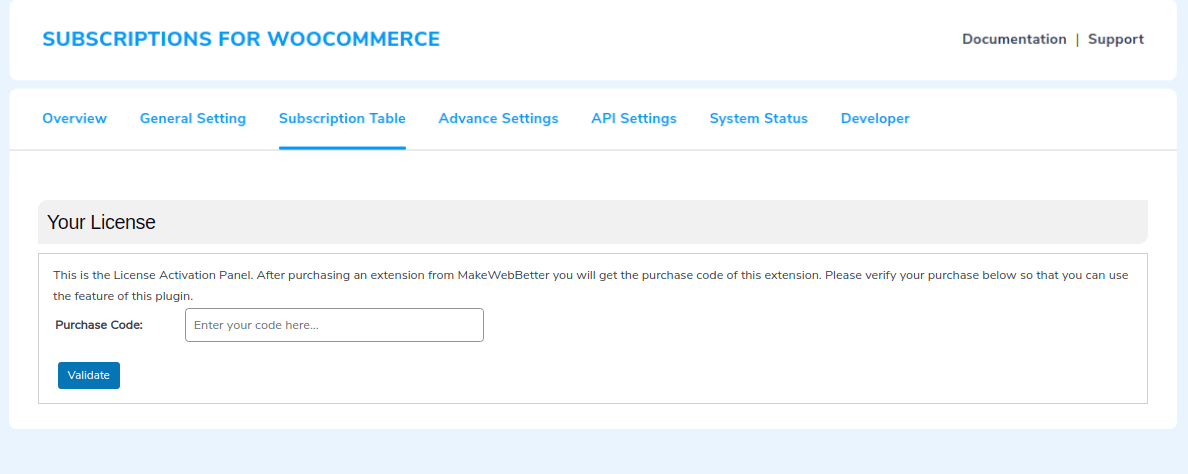
4.Configuration
To configure the WordPress Coupon plugin, click on WooCommerce→ Settings from the left-hand menu, then the top tab “Referrals”. You will see sub-sections there as General, Referral Configuration, Sign up Discount, Coupon Configuration, Display Configuration, Reports, Help, and Support.
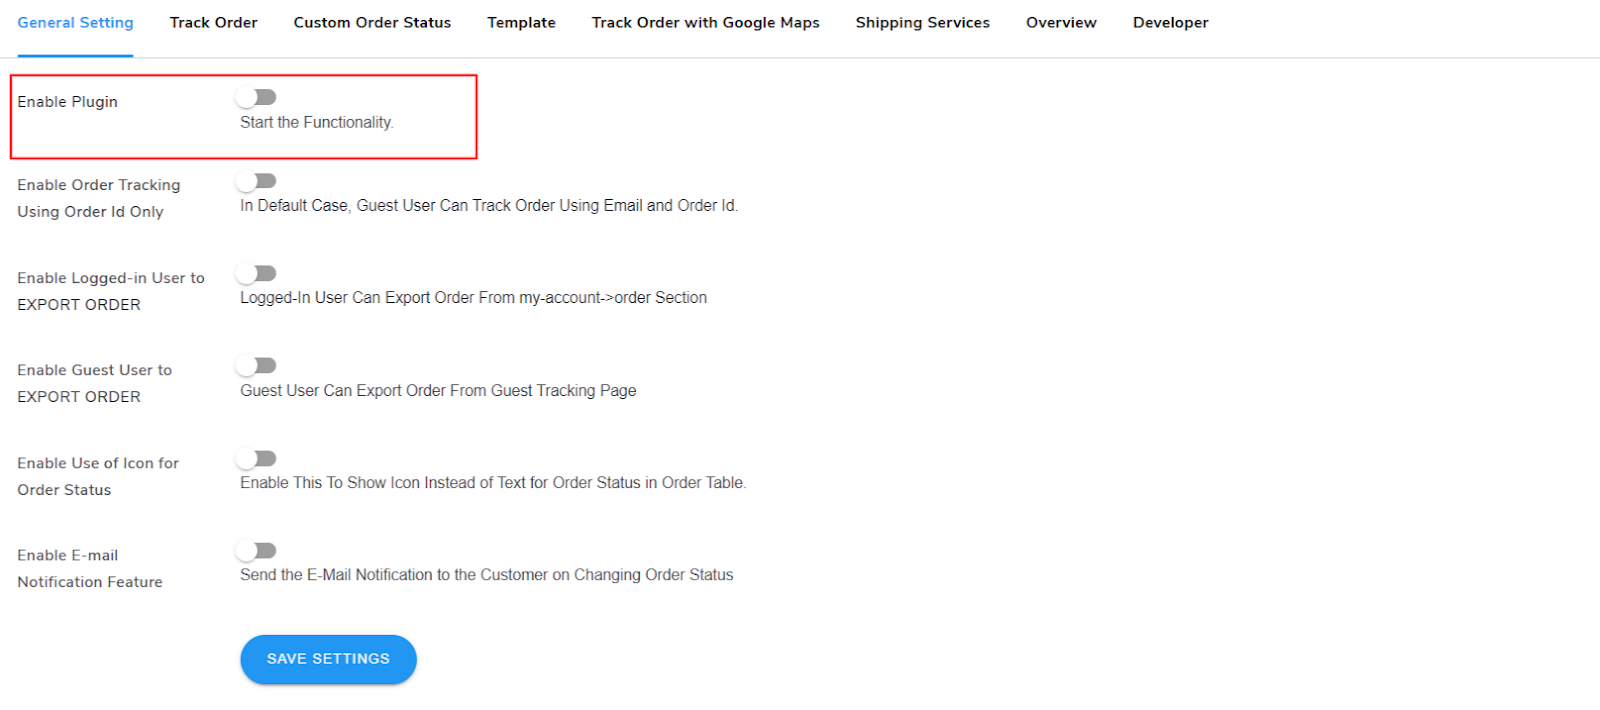
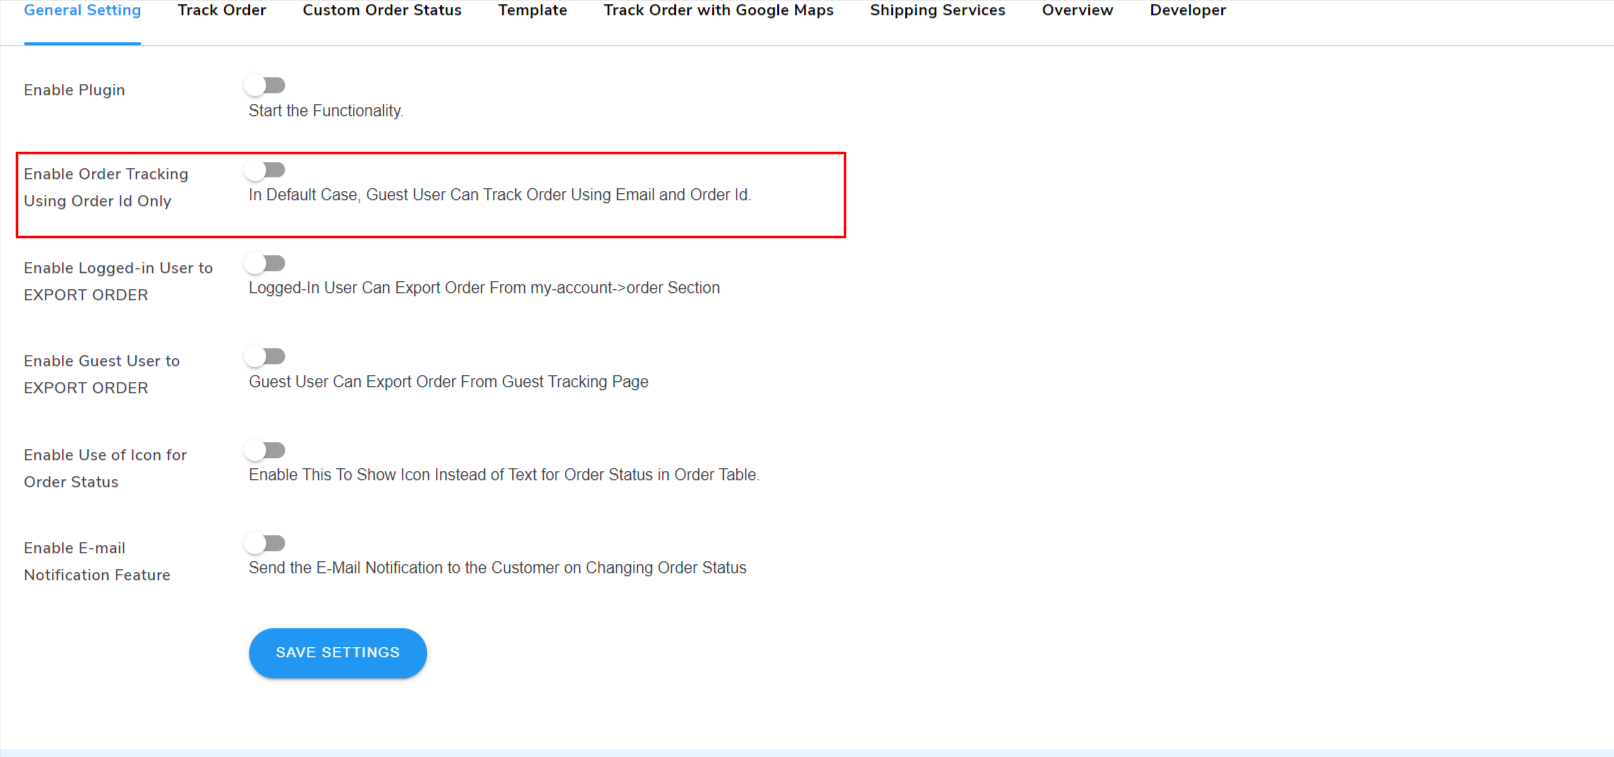
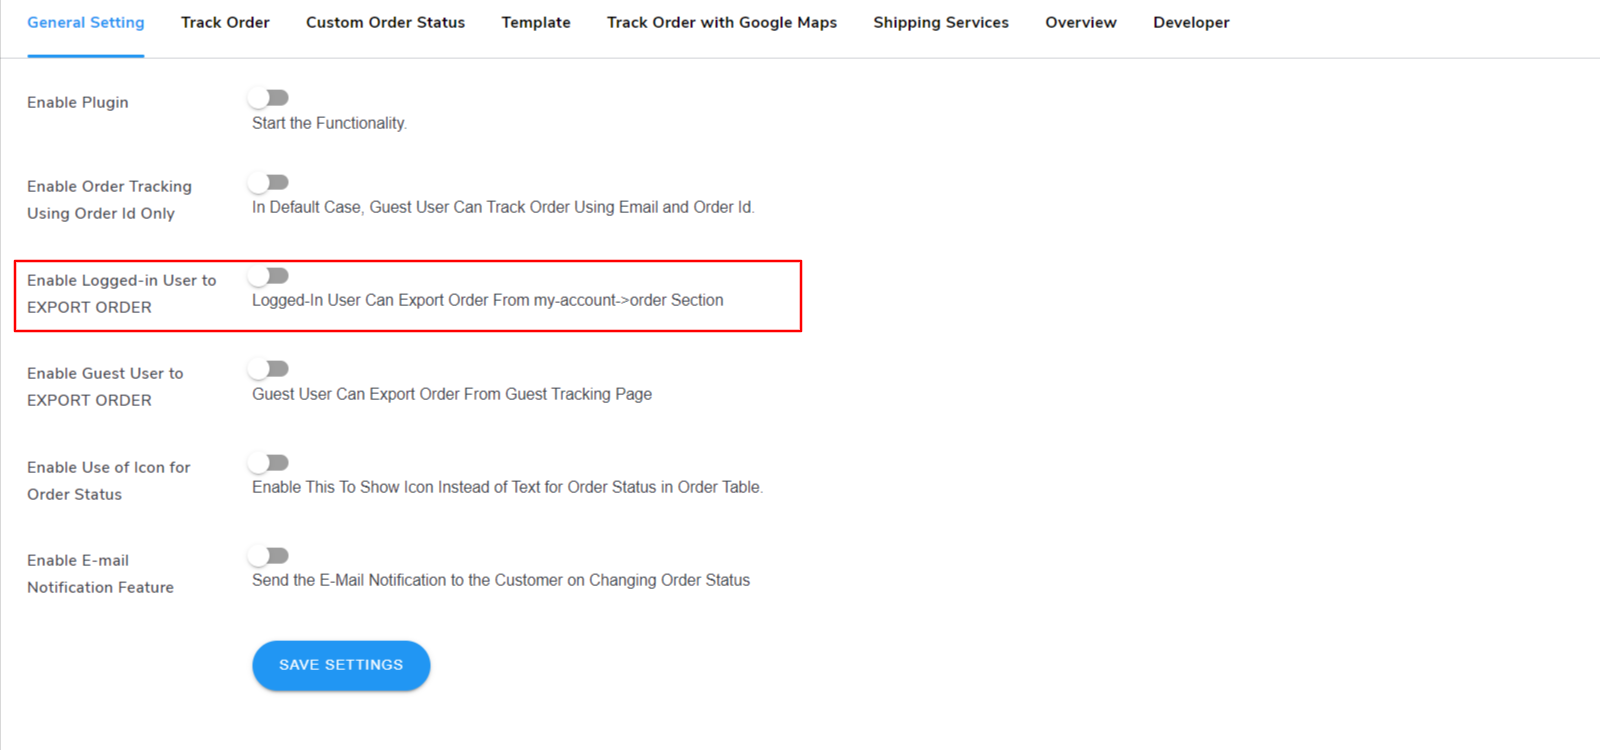
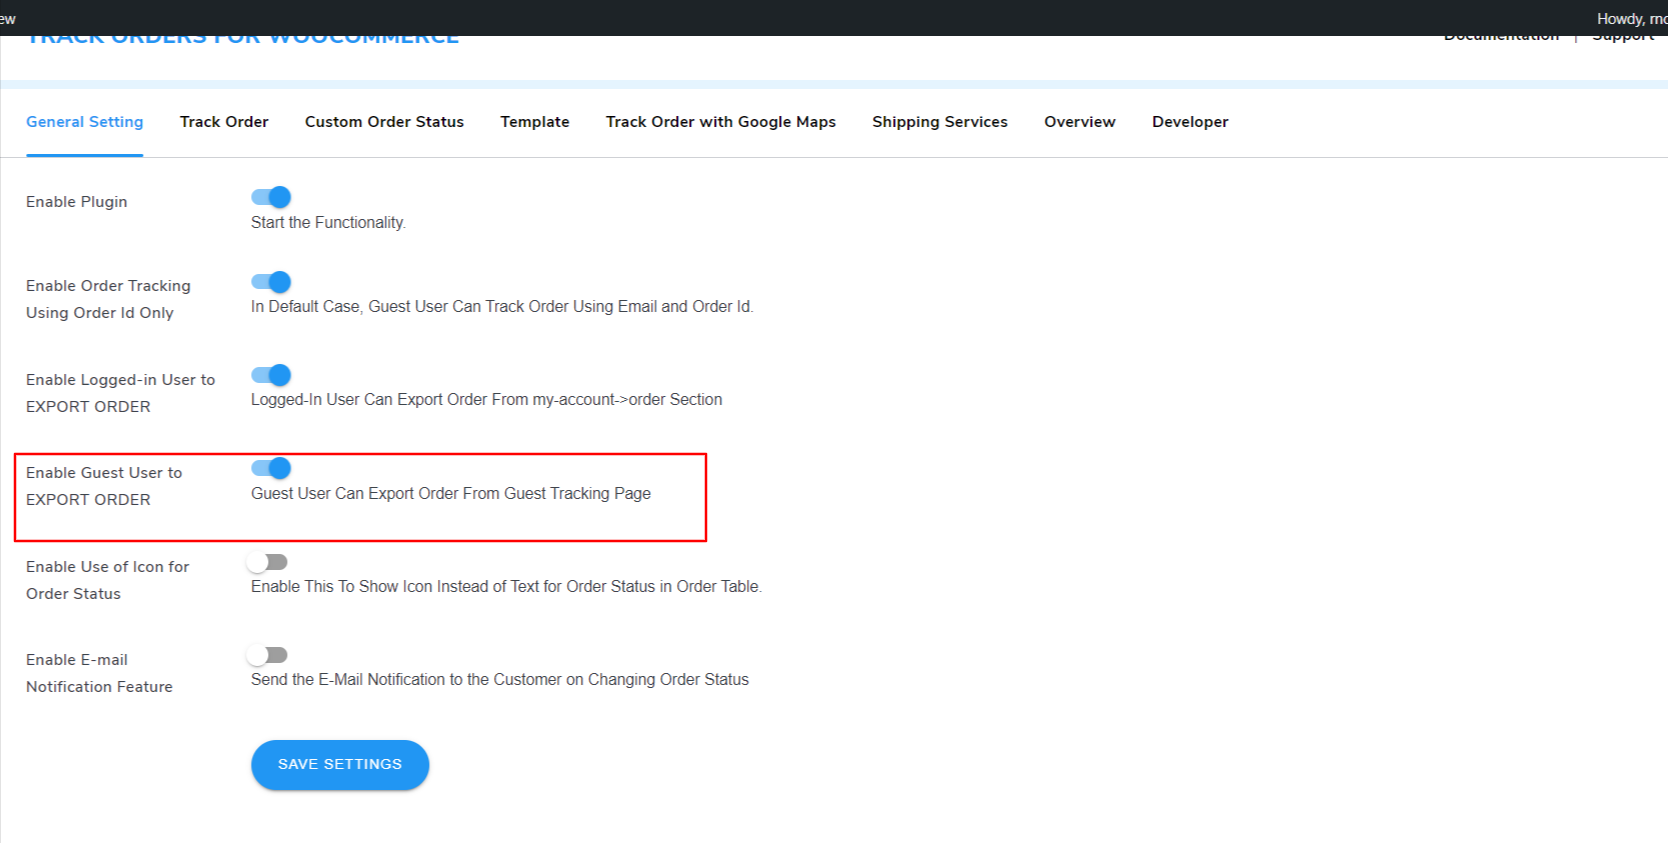
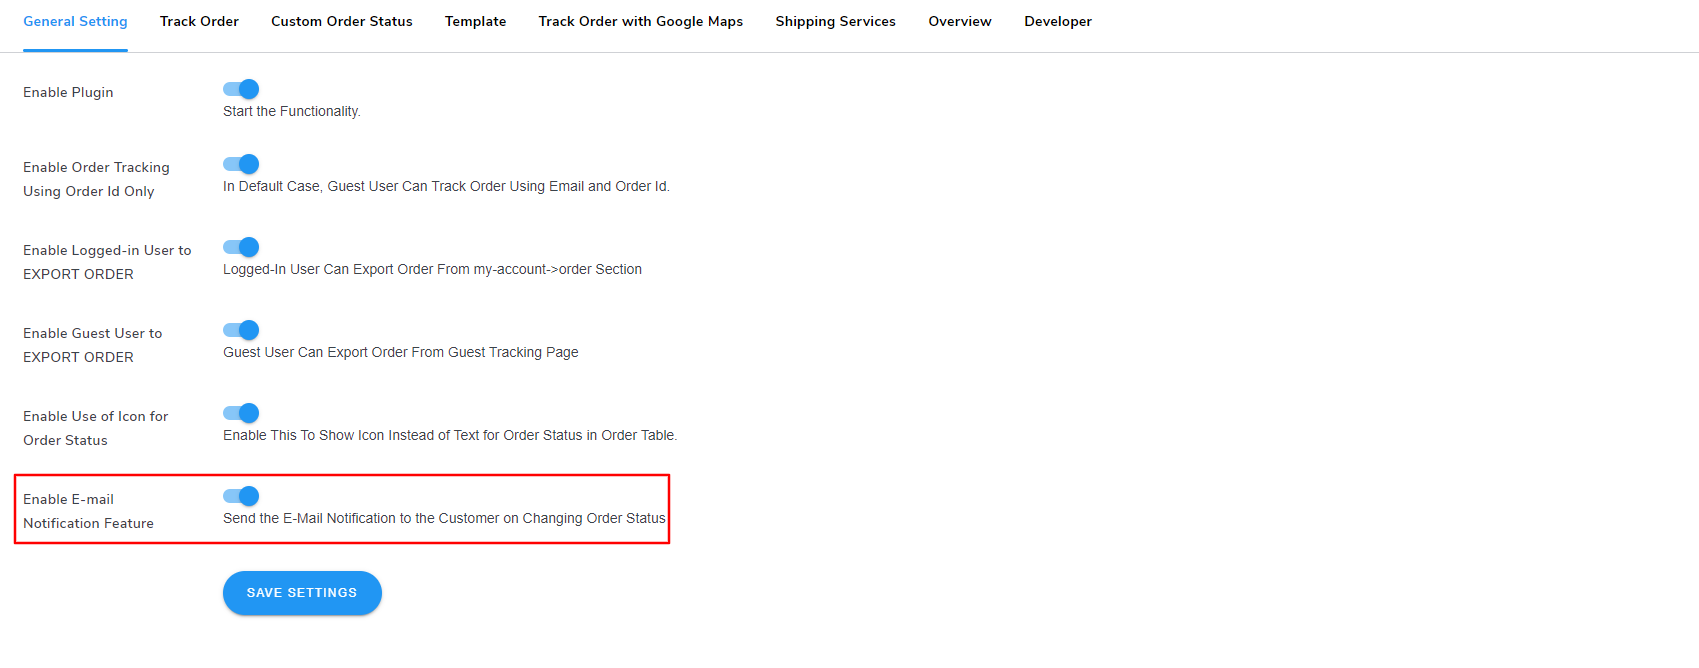
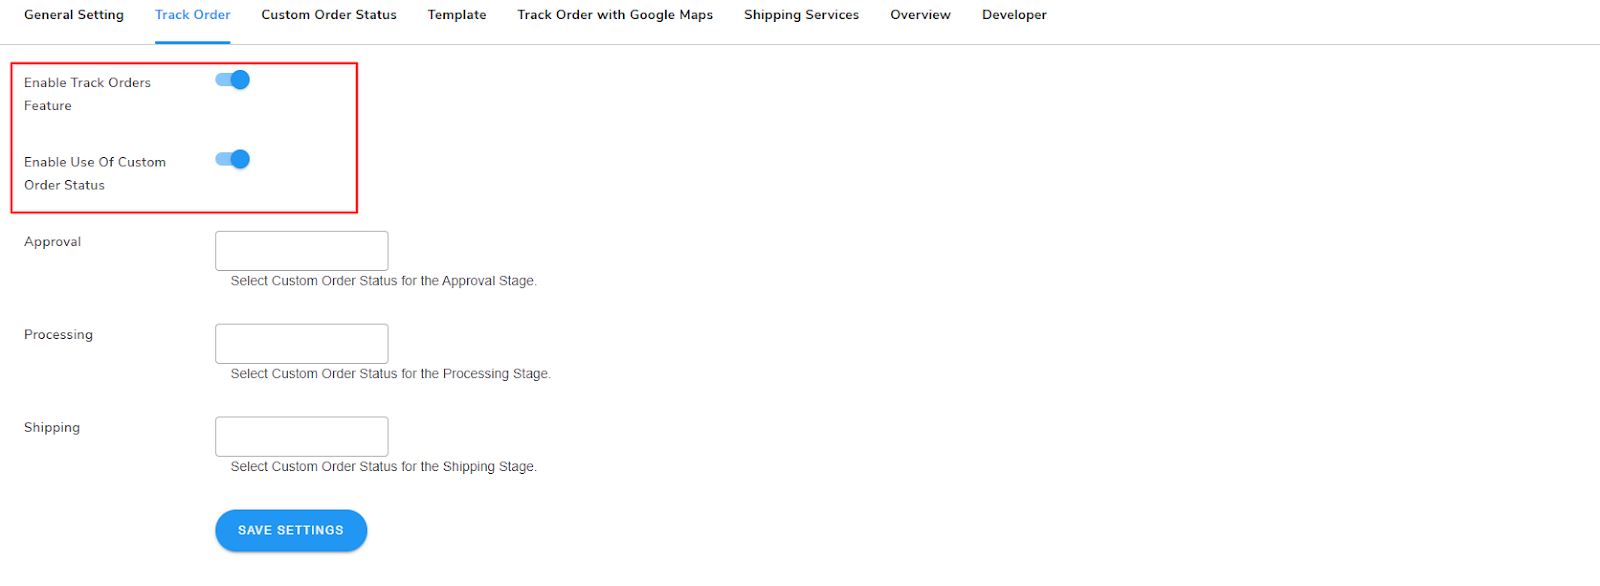
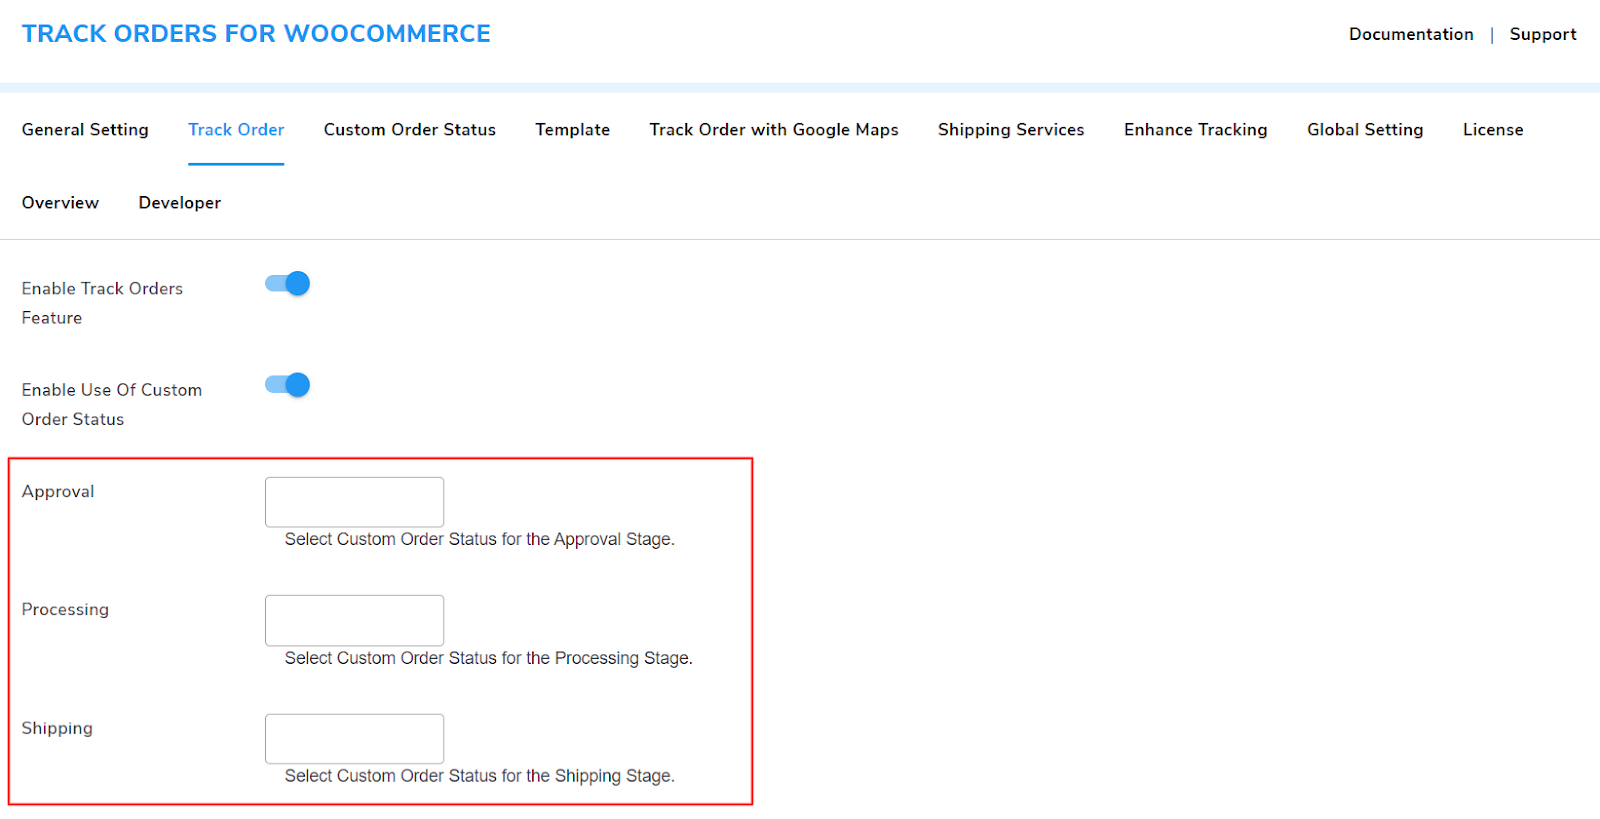
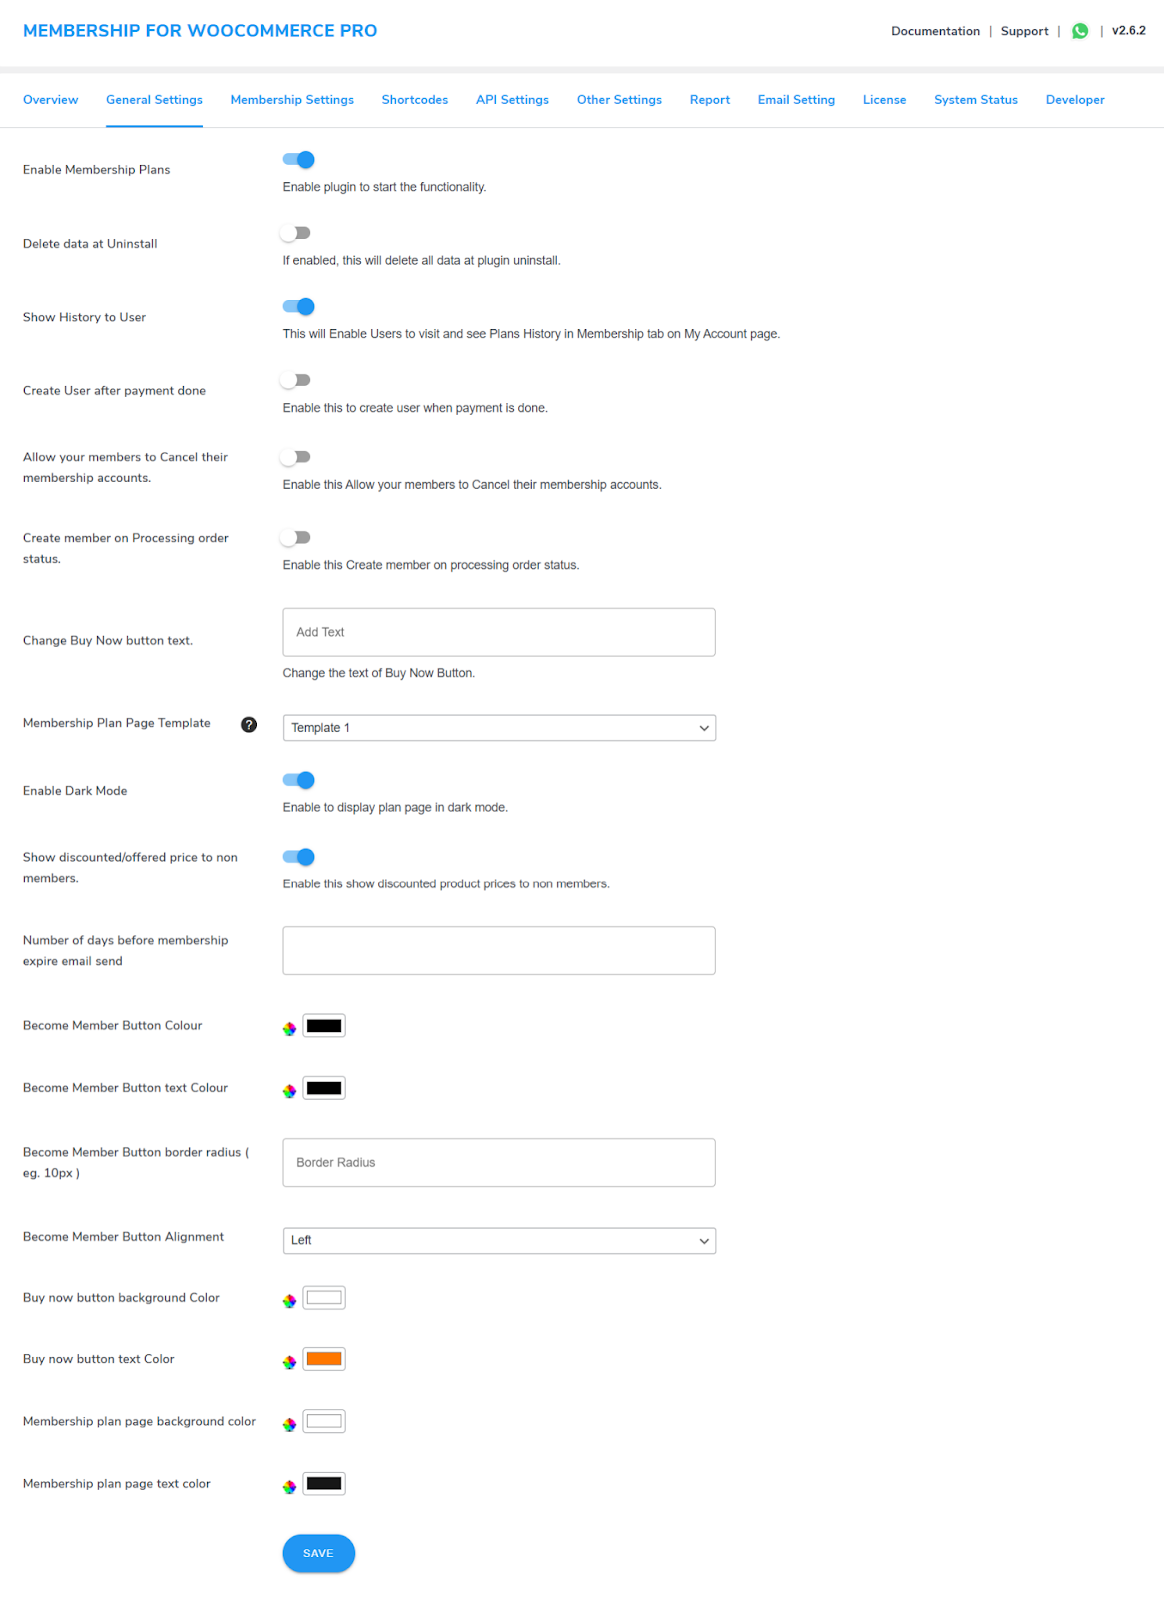
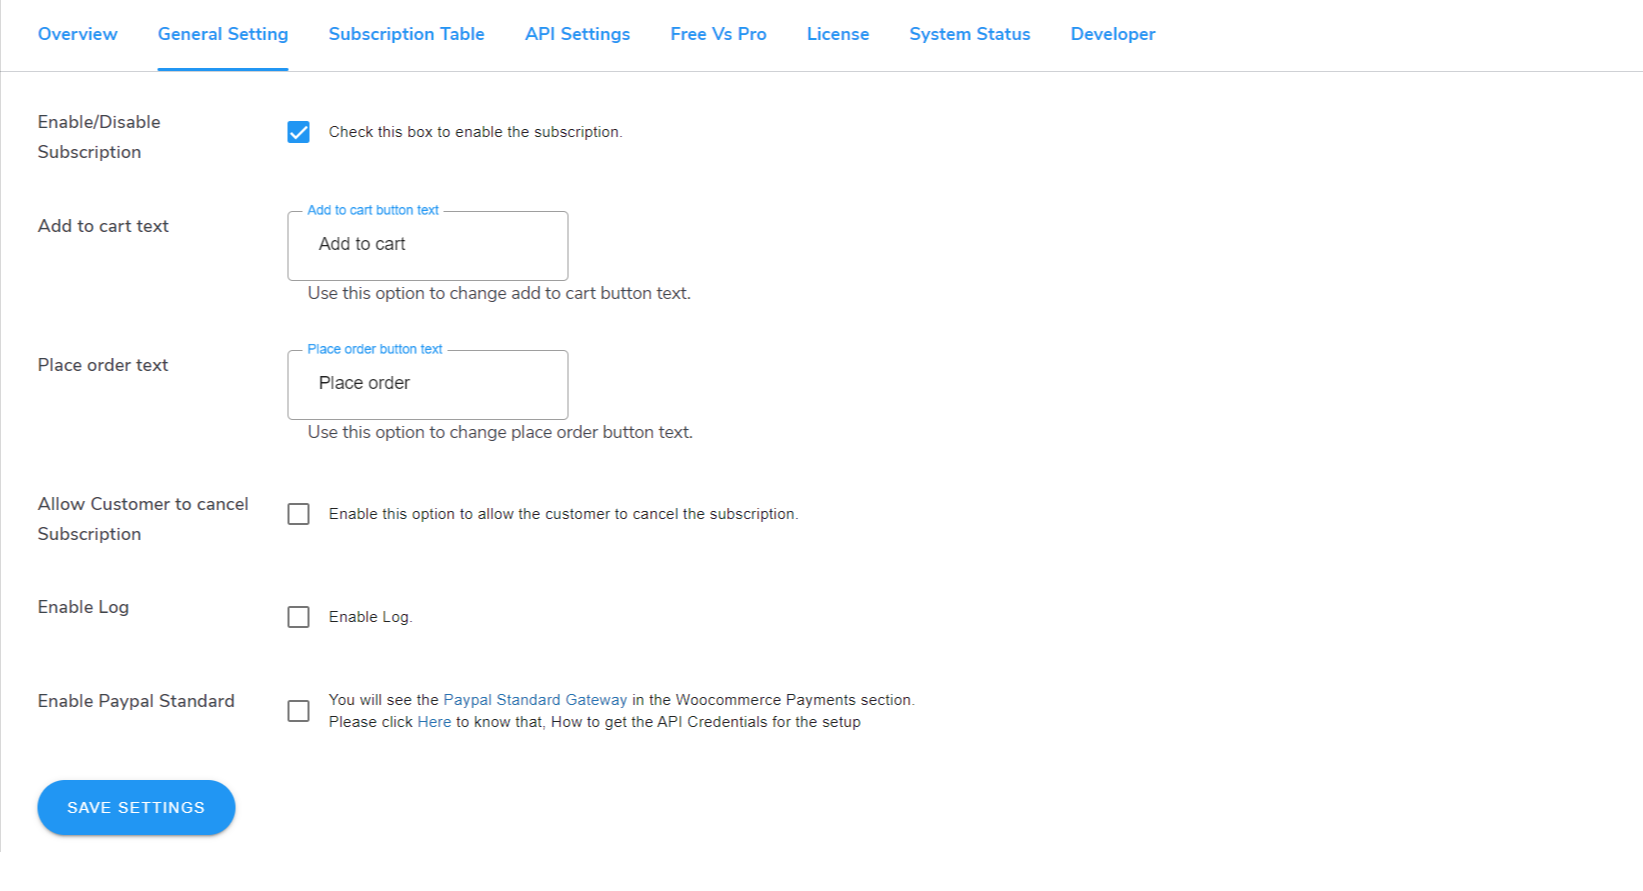
5.General Settings
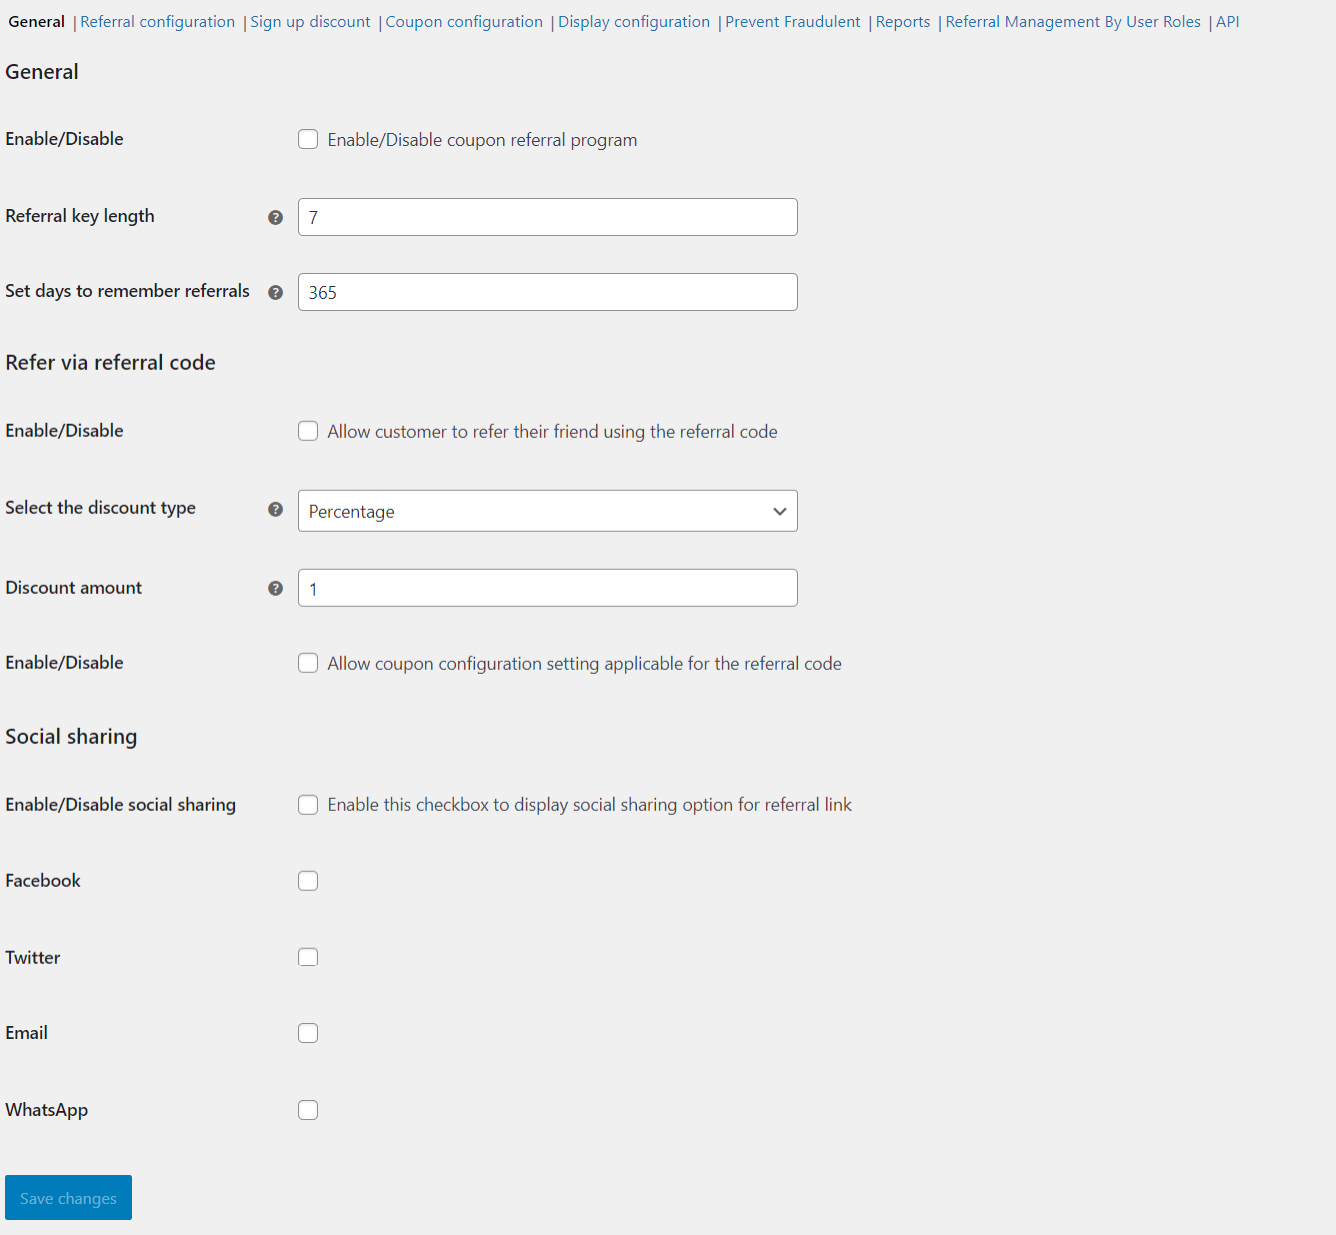
- Enable/Disable the Ultimate Referral Plugin: This checkbox must be enabled for using the features of this Coupon Referral Plugin extension.
- Referral Key Length: Enter the length of the Referral Key.
- Set Days to Remember Referrals: With this WordPress referral plugin you can enter the number of days after which the referral program will not recognize any referred users even after they visit your store via a referral link.
5.1.Refer Via Referral Code
- Enable/Disable: The customer referral program allows customers to refer a friend or their knowns with a WooCommerce referral coupon code. Also, you can find the referral coupon code on the product page as well.
- Select The Discount Type: Choose the referral discount value type as Fixed or Percentage.
- Discount Amount: Admin can set a discount value for the referral code.
- Enable/Disable Coupon Configuration: The WooCommerce referral plugin lets the admin enable this setting to allow coupon configuration settings applicable to the referral code.
6.Referral Configuration
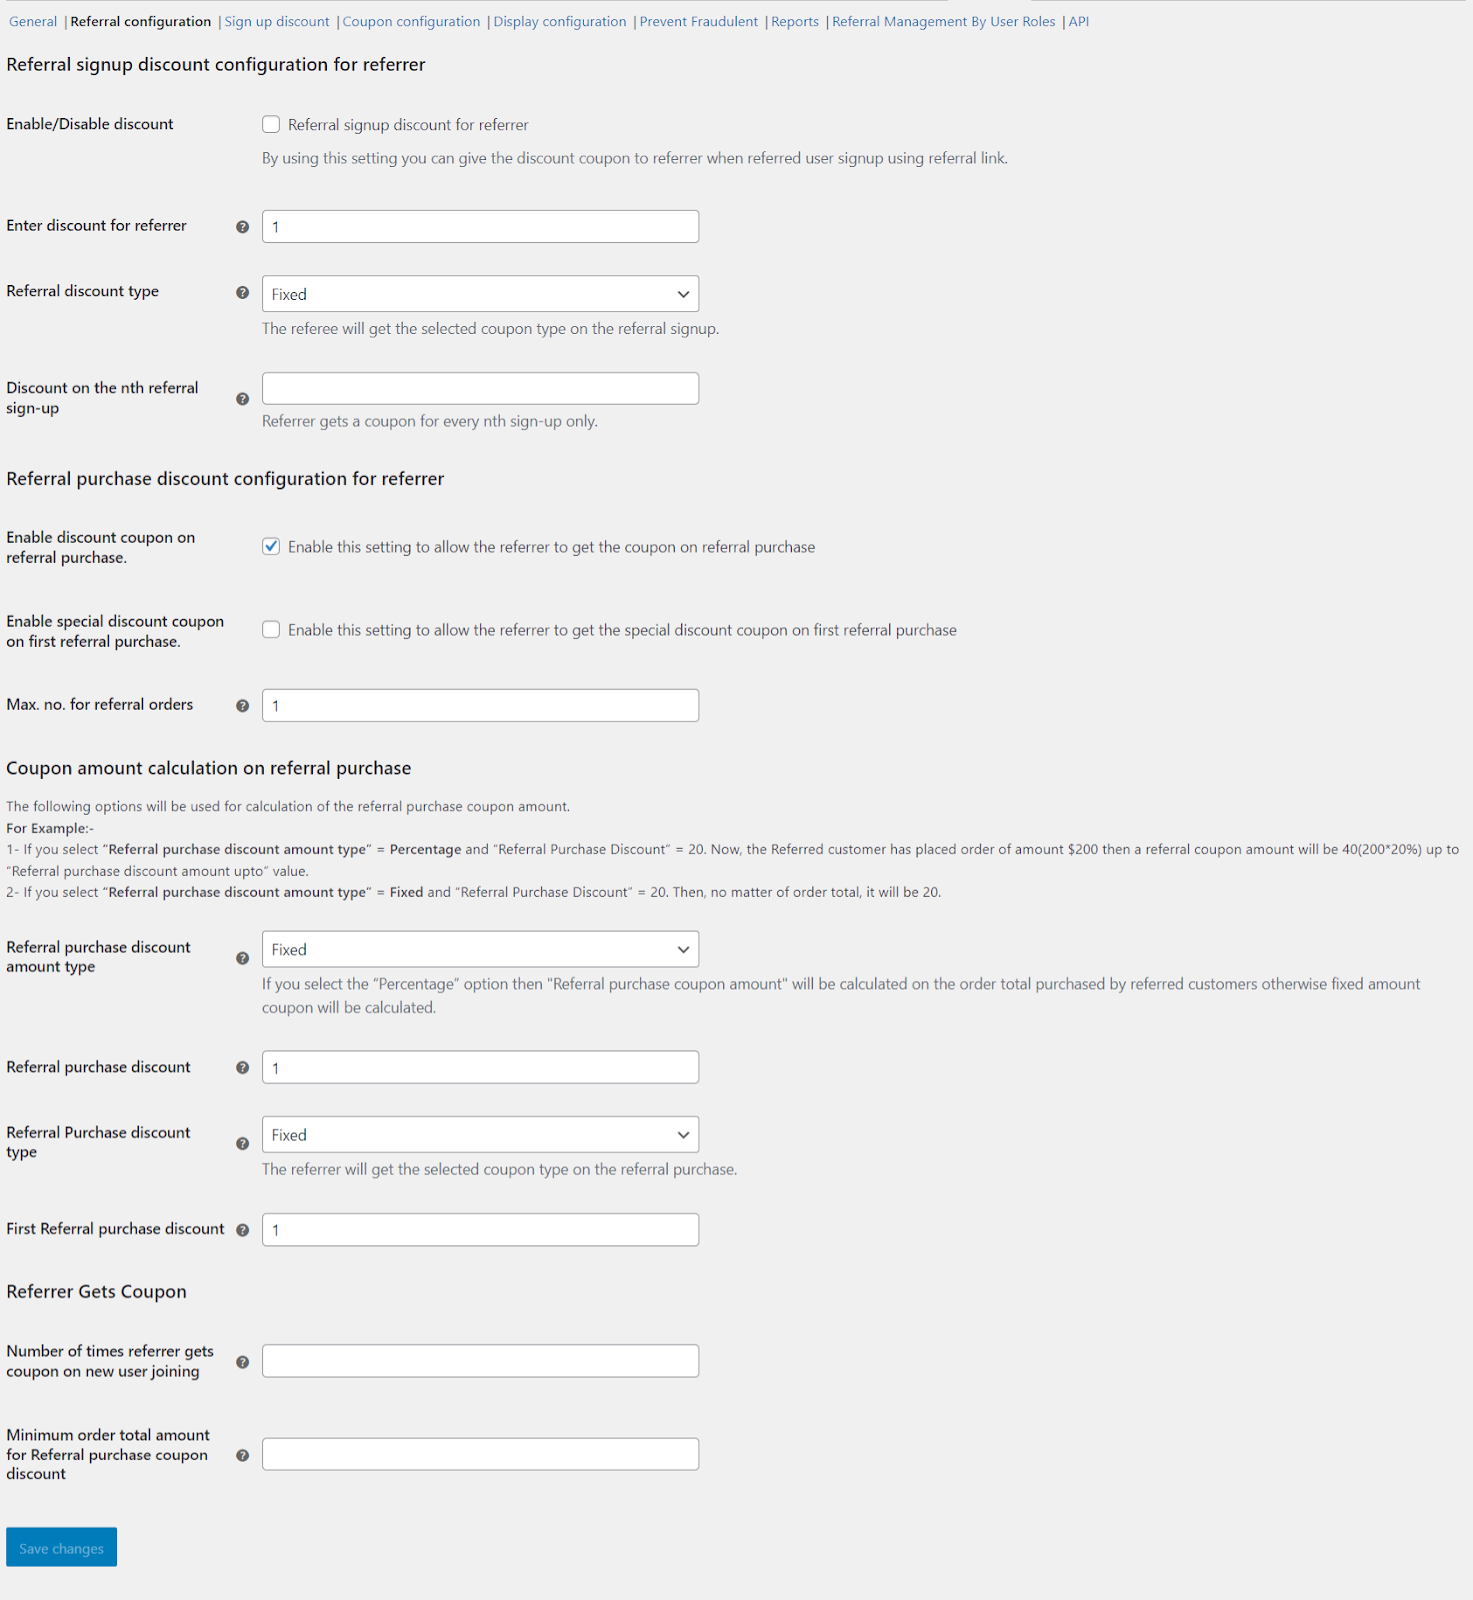
6.1.Referral Signup Discount For Referrer
- Enable/Disable Discount: With the WooCommerce customer referral program, admins can allow their referred users to earn discount coupons on signup.
- Enter Discount for Referrer: Enter the discount value for discount coupons that will be offered to the referrer.
- Referral Discount Type: Select referral discount value type as Fixed or Percentage discount coupons.
- Discount on nth referral sign-up: Set the number of sign-ups for coupons to the referee by using this WordPress referral plugin.
Note: If the set discount value is 10 and the discount type is set as Fixed, then the referee will receive a discount coupon of 10$ on signup. Or if the discount type is set as Percentage, then the referee will receive a discount coupon of 10% on signup
6.2.Referral Configuration
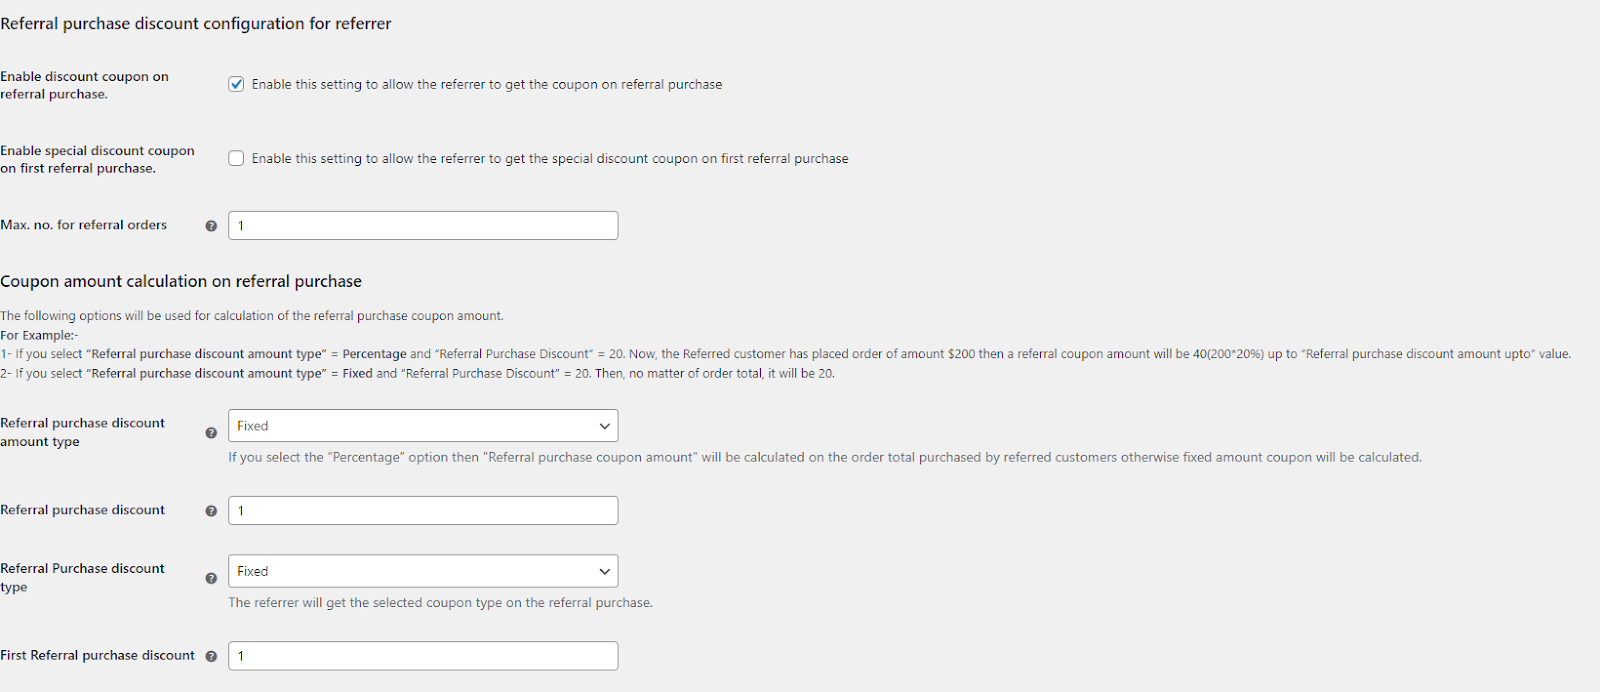
- Enable Discount Coupons on Referral Purchases: Enable customers (referrers) to get discount coupons on referral purchases.
- Enable Special Discount Coupon on First Referral Purchase: Using this setting of the Customer referral program, admins can allow the special discount coupon on the first referral purchase to your customers by using the WooCommerce referral plugin.
- Maximum Number For Referral Orders: Select the maximum number of orders required to be placed by referred users on which the referral discount coupon will be rewarded to the referrer.
- Referral Purchase Discount Amount Type: Select the referral purchase discount value type as Fixed or Percentage using the WooCommerce referral plugin.
- Referral Purchase Discount: Select the referral Purchase discount coupon value.
- Referral Purchase Discount Type: The referee will get the selected coupon type on the referral purchase.
- First Referral Purchase Discount: Enter the discount value you want to give your customers, who have referred other users on your site. This discount is applicable on the first referral purchase only.
6.3.Referrer Gets Coupon
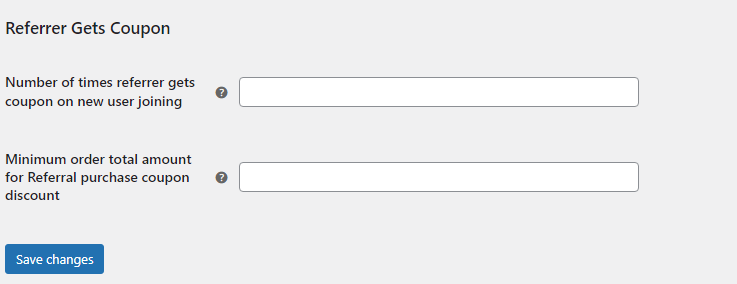
Number Of Times The Referrer Gets A Coupon On New Users Joining: You can enter the number of WooCommerce referral coupons a referee can redeem with the referral for a new sign-up of a customer or a reader.
Minimum order total amount for Referral purchase coupon discount: The admin can set a minimum order total amount for the referral purchase discount. The referrer will get a discount coupon when the referral purchase happens, for example:- User A refers to User B. User B makes a purchase( must be greater than field value). then user B gets the coupon.
Note: If the set discount value is 10 and the discount type is set as Fixed, then the referrer will receive a discount coupon of 10$ on referral purchases. Or if the discount type is set as Percentage, then the referrer will receive a discount coupon of 10% on referral purchases.
6.4.Referee Gets Coupon
The number of times the referee gets a coupon on a new user joining: By using this setting of the WooCommerce referral plugin you can limit the number of coupons a referee can redeem by making WooCommerce referrals for new user signups.
7.Signup Discount
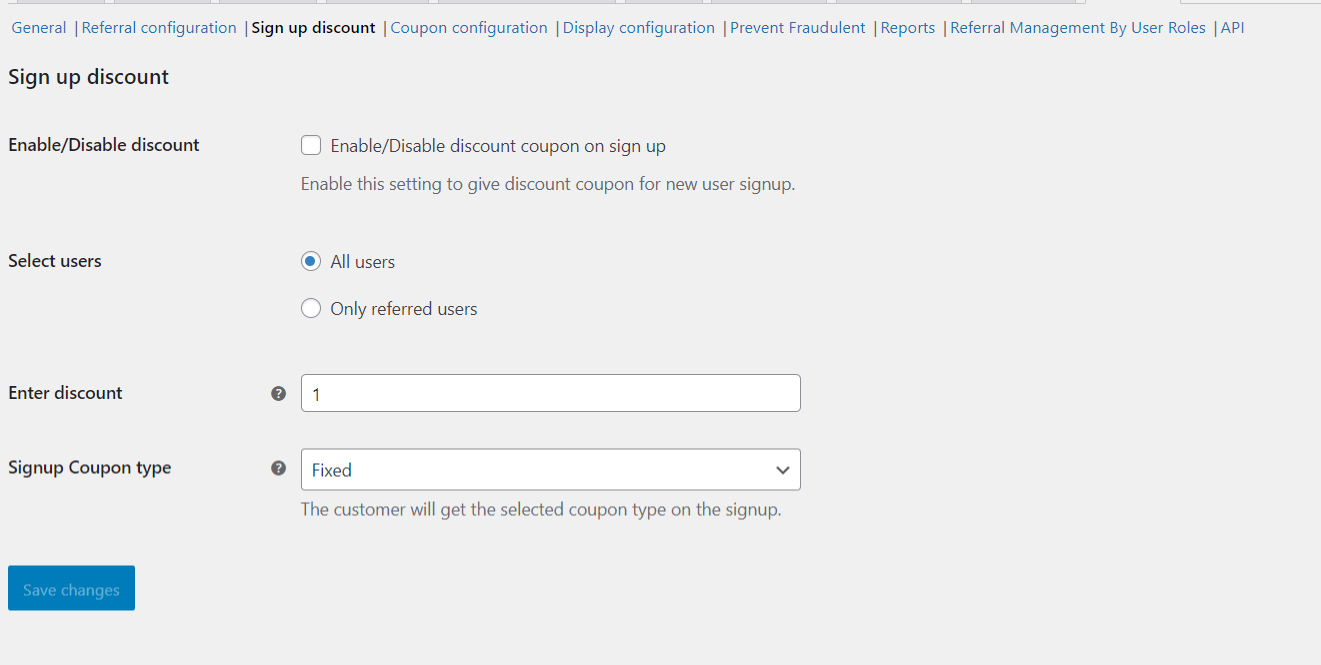
- Enable/Disable Discount: Admin can enable users to earn a discount coupon on signup.
- Select Users: WooCommerce customer referral program enables the admin to allow a discount coupon on signup to “All users” or “Only Referred” Users.
- Enter Discount: Set a discount value for signup discount coupons.
- Signup Coupon Type: The WooCommerce referral plugin allows you to select the discount type for the set discount value.
Note: If you have set the discount value as 10 and selected the Fixed discount type, then the users will get a discount coupon of 10 dollars. But if you have selected the discount type as Percentage, then the users will get a signup discount coupon of 10% on signup.
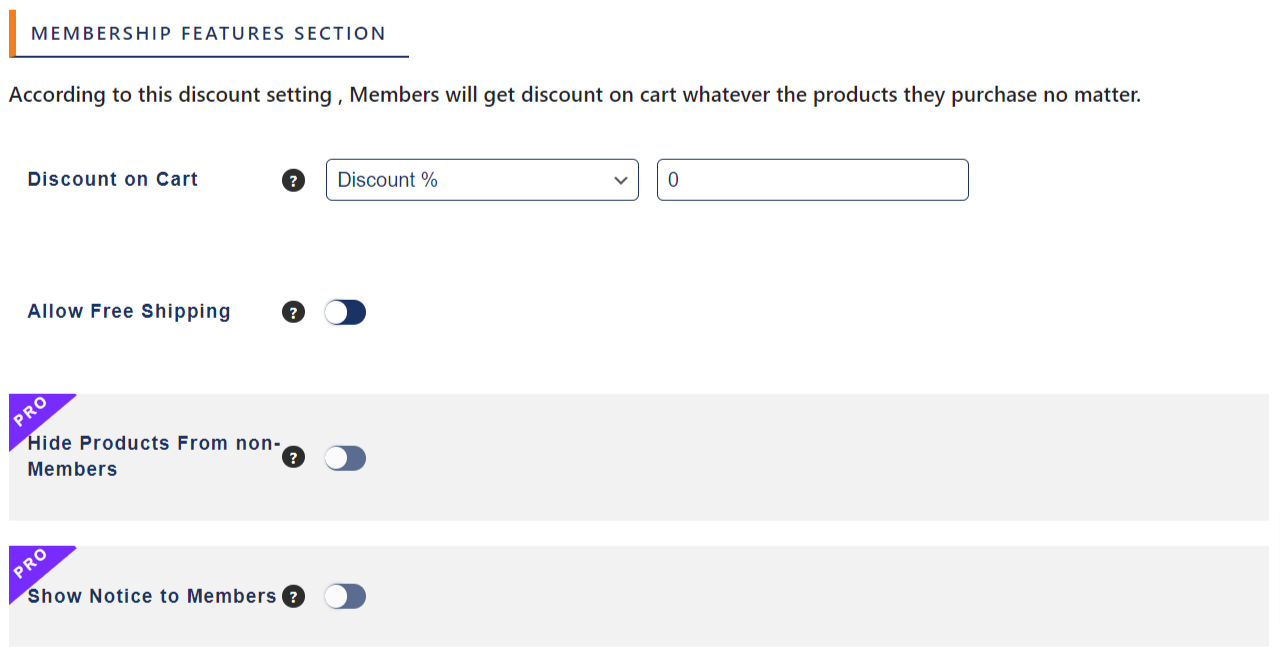
8.WooCommerce Referral Coupon Configuration
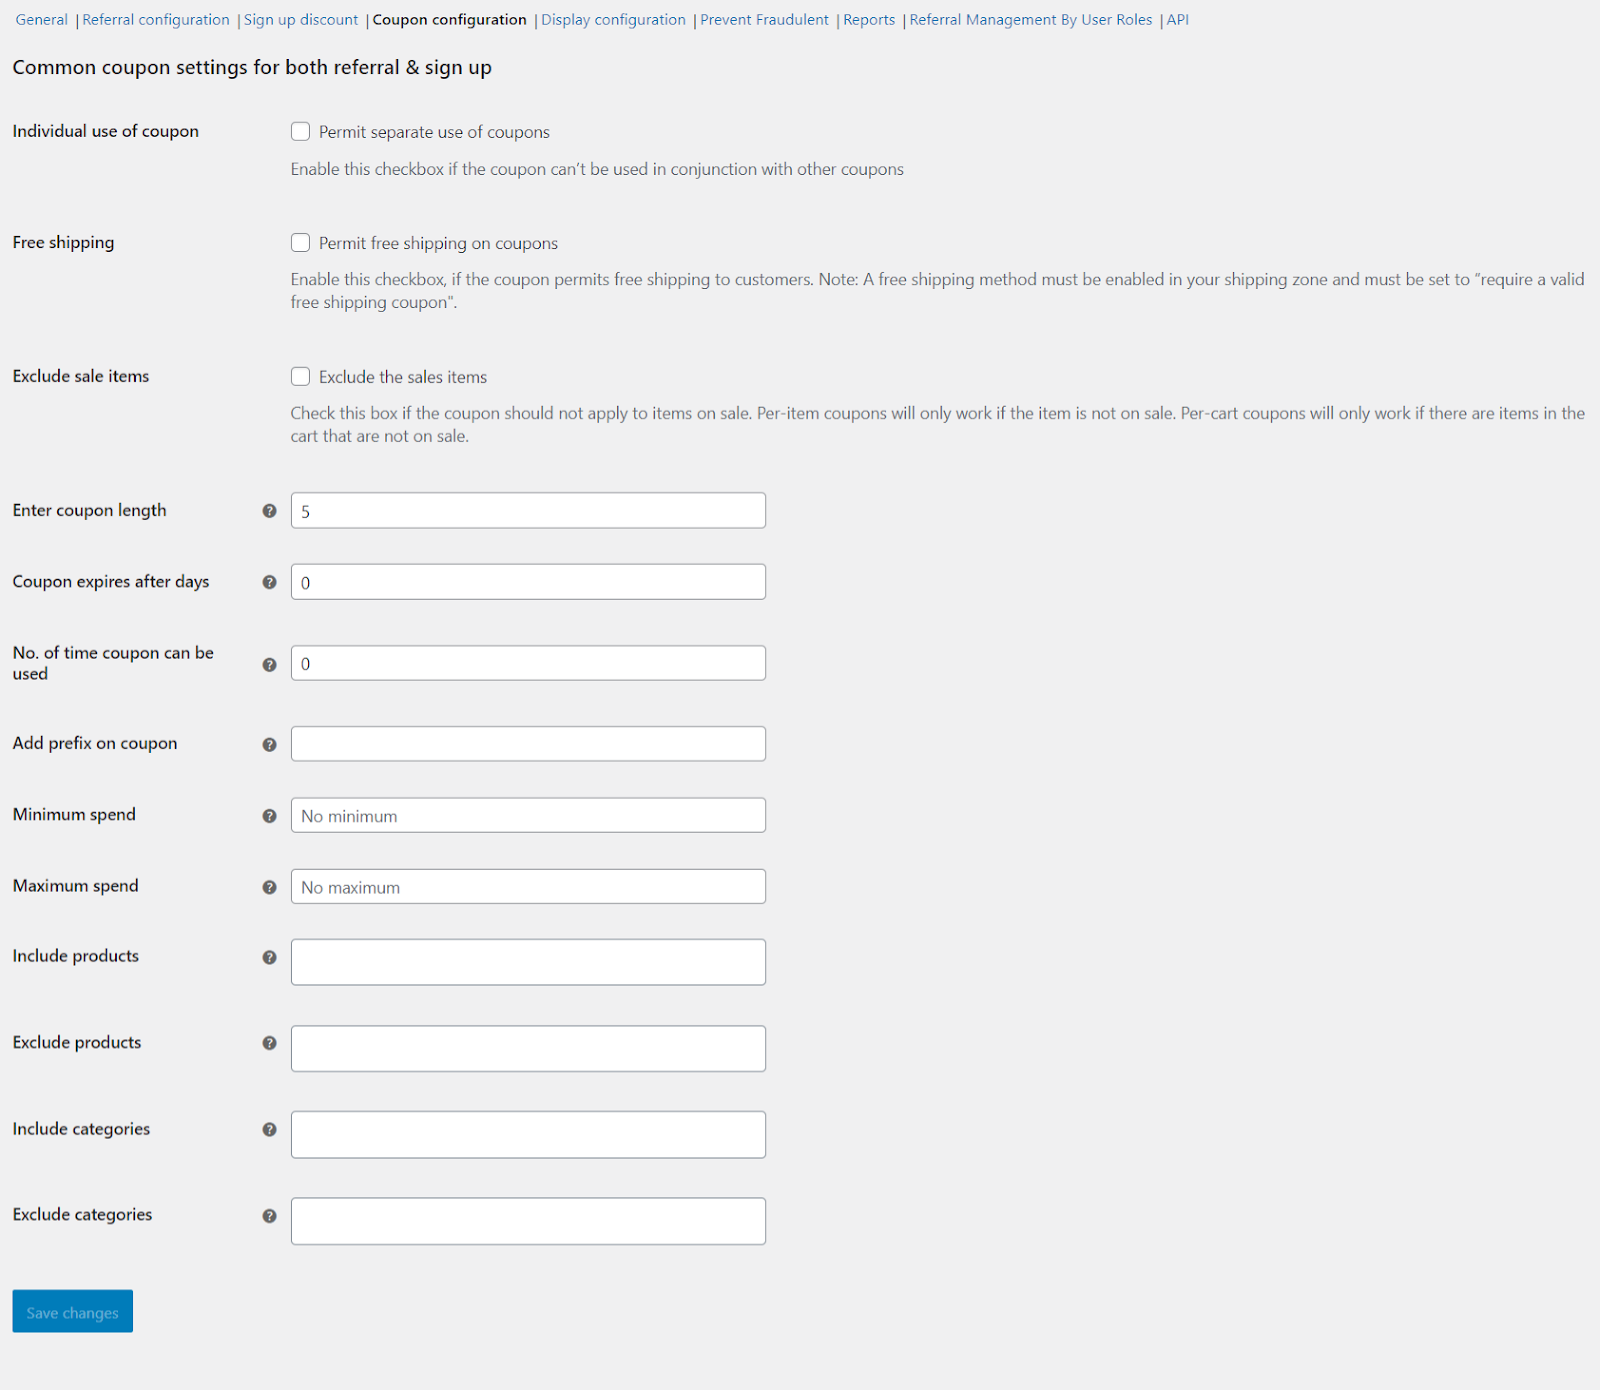
- Individual Use Of Coupon: Admin can restrict the use of referral reward coupons in conjunction with other discount coupons by using this WordPress referral plugin.
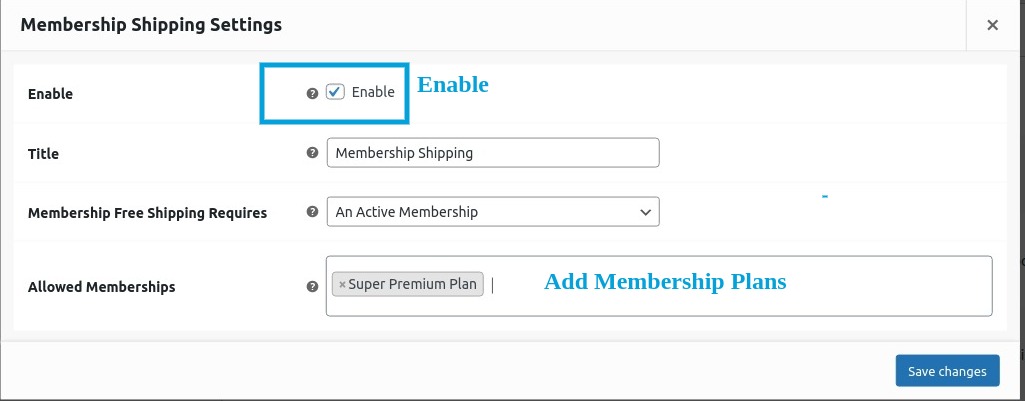
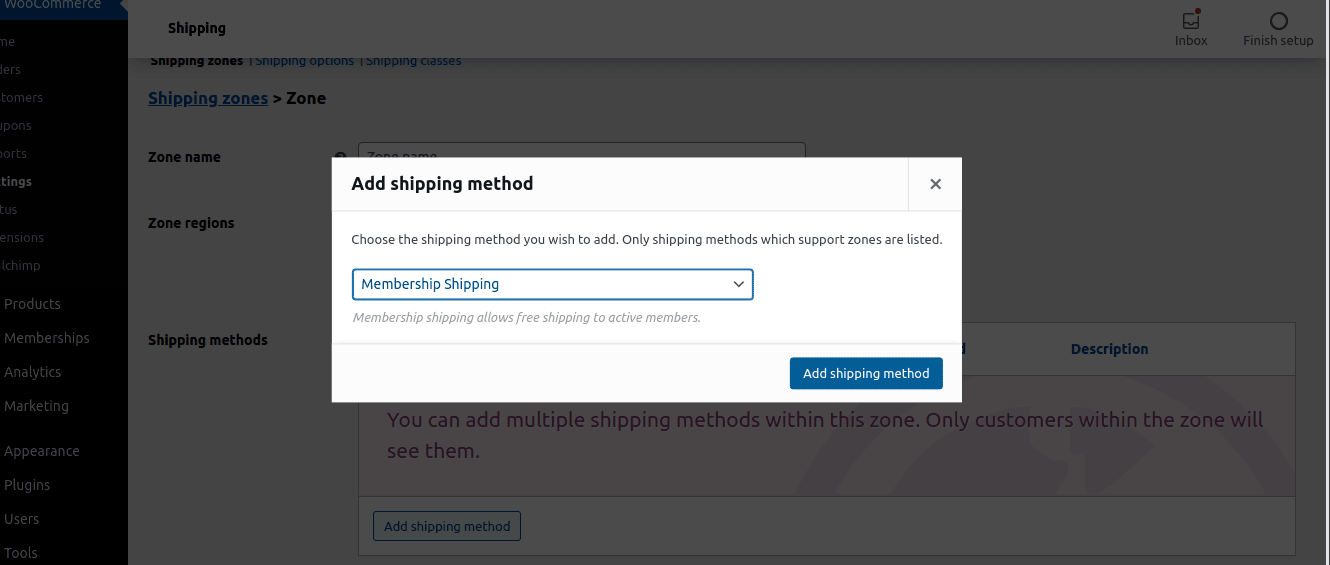
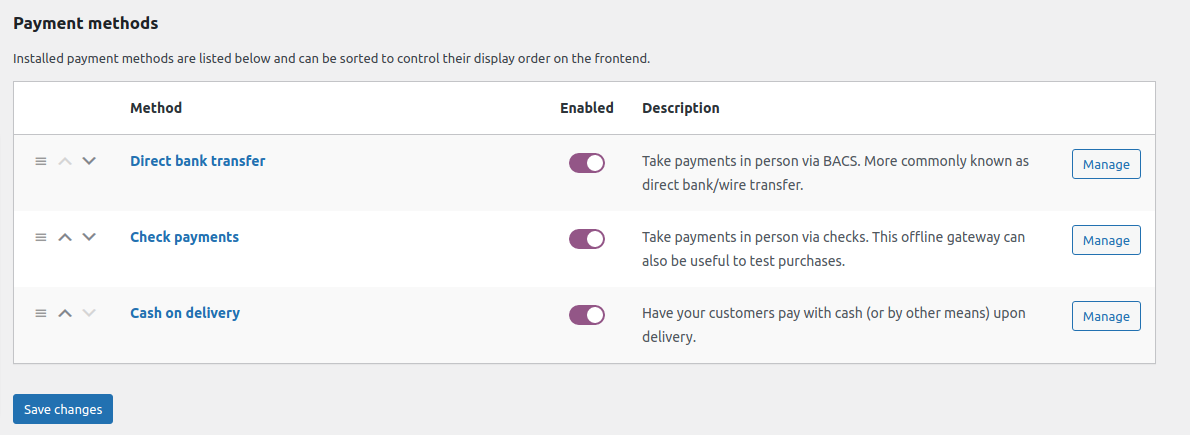
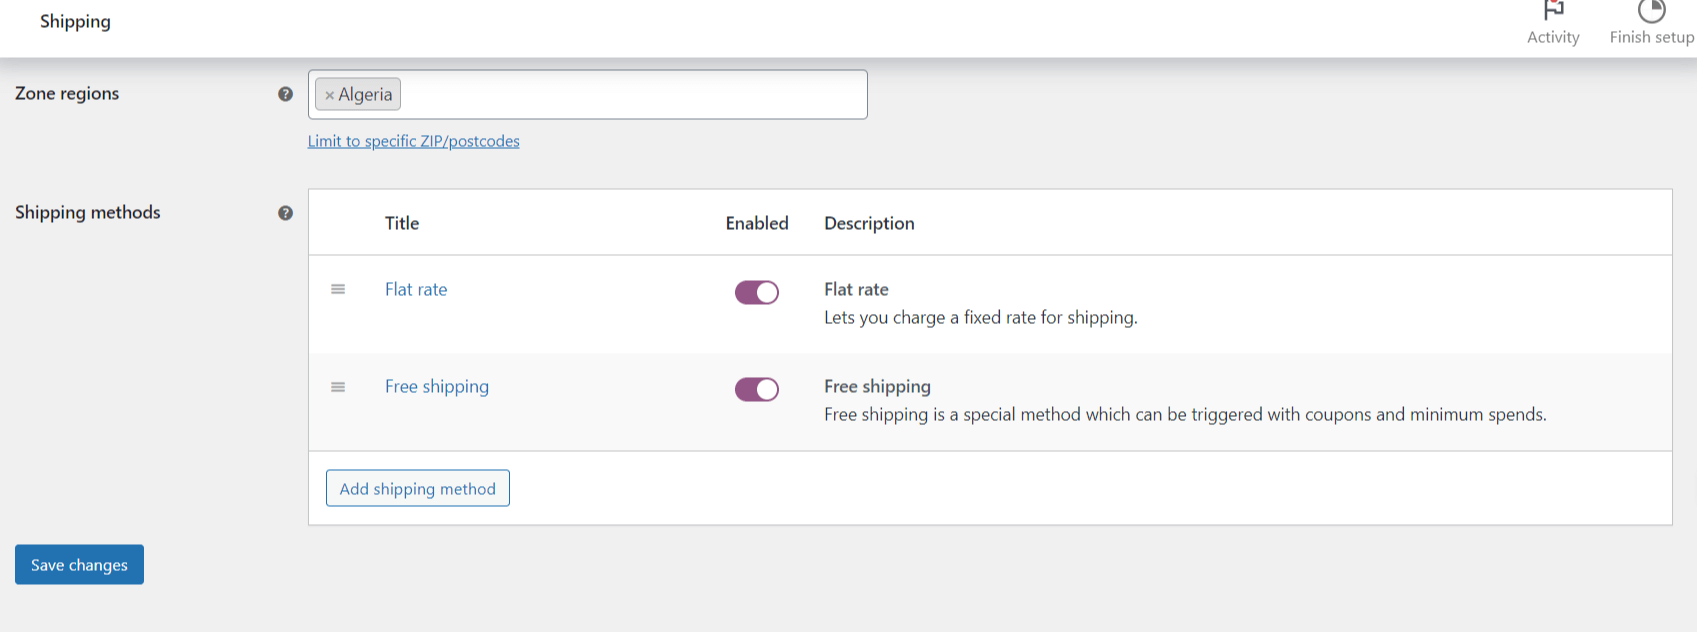
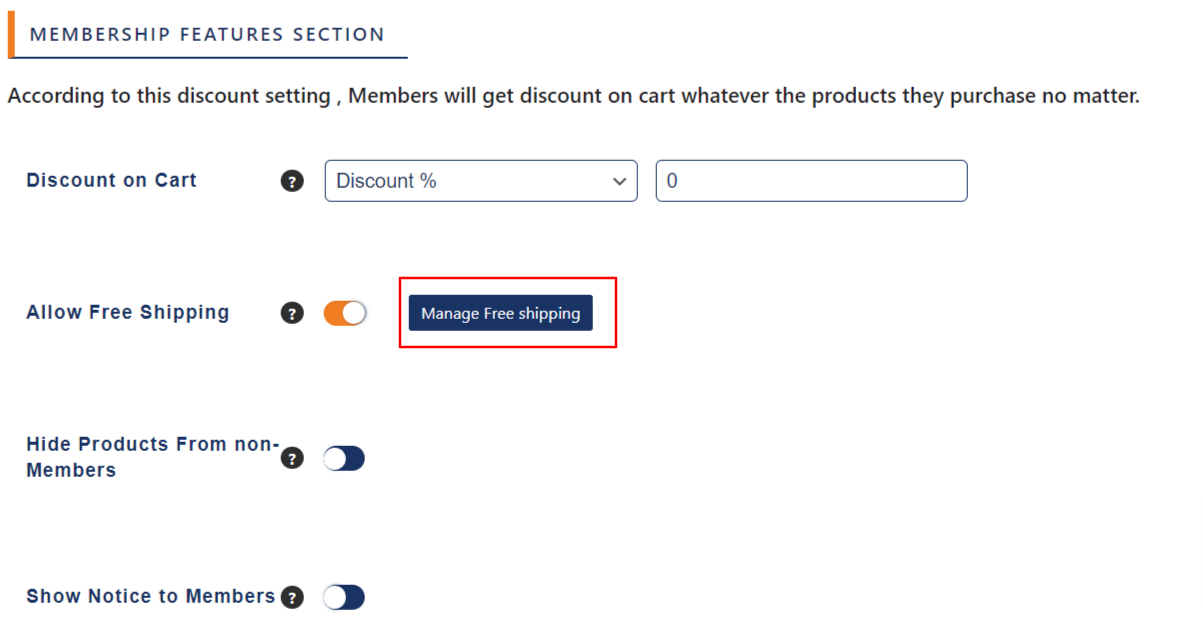
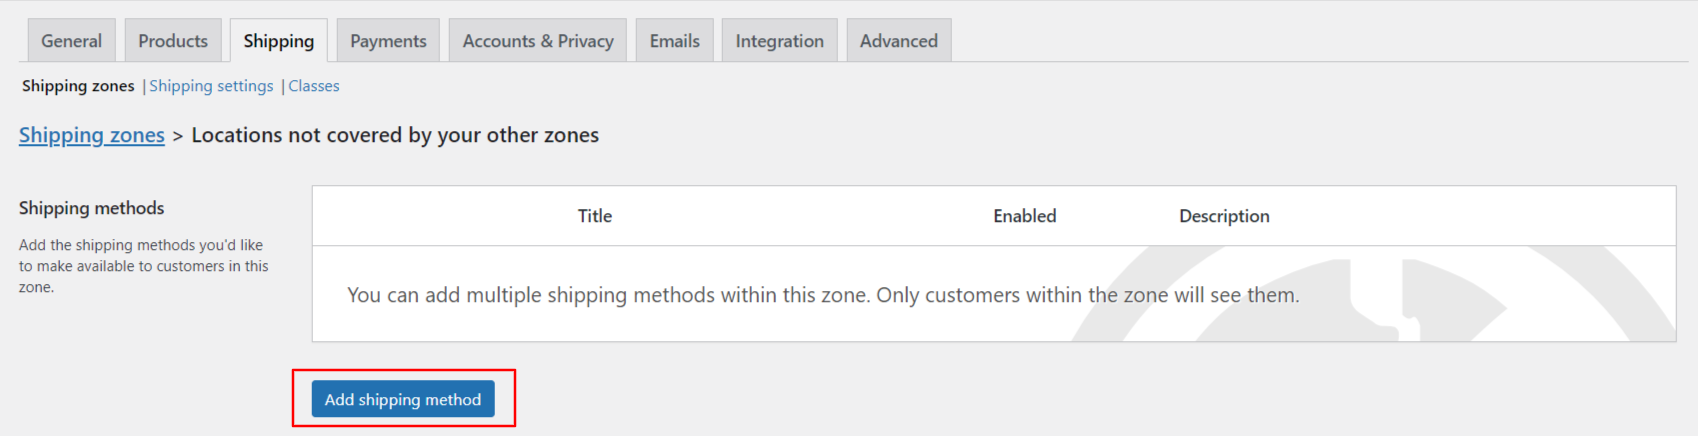
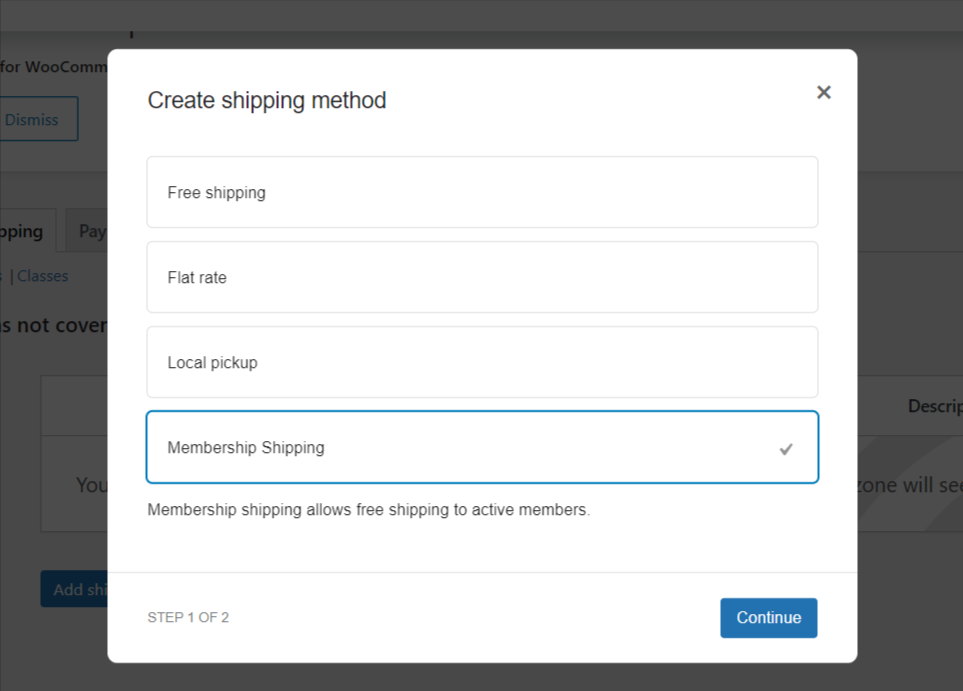
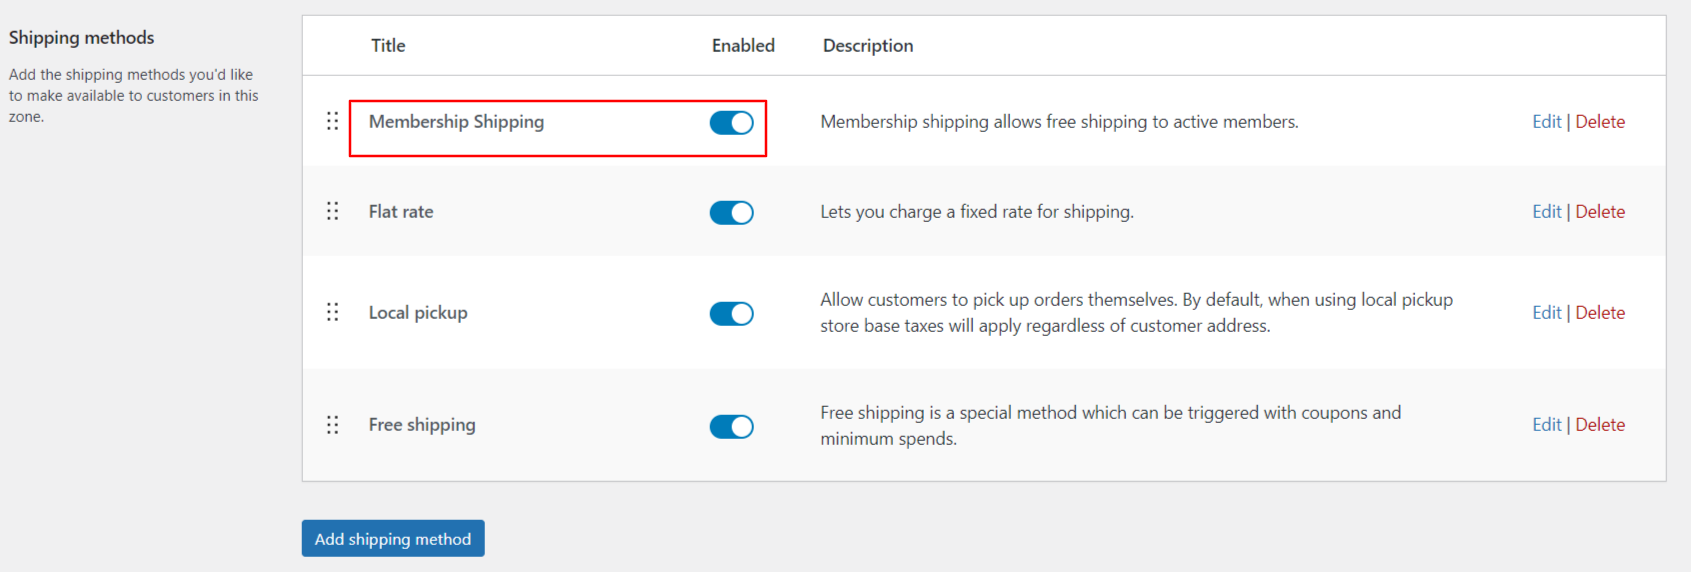
- Free Shipping: Admin can also offer free shipping coupons to users. A free shipping method must be enabled in your shipping zone and must be set to “require a valid free shipping coupon”.
- Exclude Sales Items: Admin can restrict the use of discount coupons on items that are on sale. Per-item coupons will only work if the item is not on sale. Per-cart coupons will only work if there are items in the cart that are not on sale.
- Enter Coupon Length: Choose the length of your discount coupon code.
- Coupon Expire Days: Select the days after which the discount coupons are not applicable.
- No. of Times A Coupon Can Be Used: The admin can decide the number of times a discount coupon can be redeemed.
- Add Prefix on Coupon: Admin can add a prefix of their choice on their coupon codes.
- Minimum Spend: Set the minimum spend limit on which discount coupons can be applied by the user.
- Maximum Spend: Set the maximum spend limit on which discount coupons can be applied by the user.
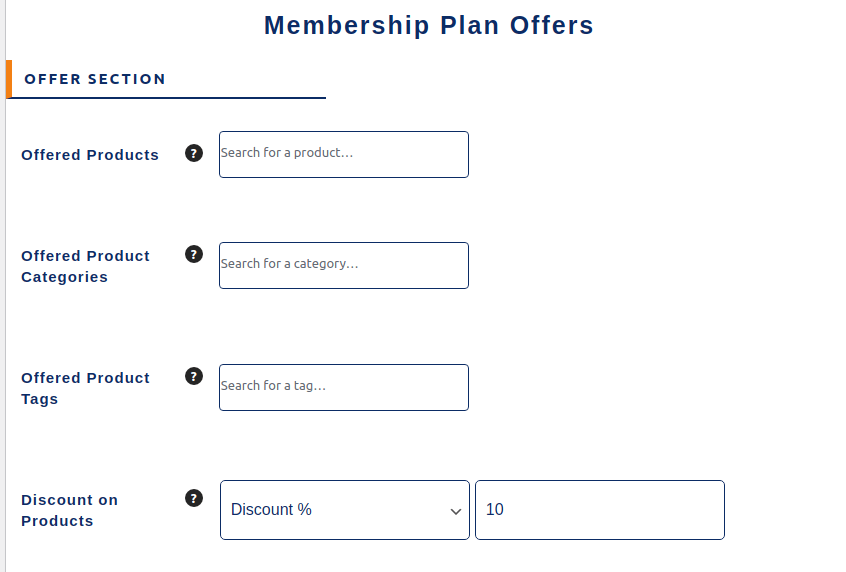
- Include products: Select the products that you want to include in your coupon referral program.
- Exclude Products: Select the products that you want to exclude from your coupon referral program.
- Include Categories: Admins can select the categories that you want to include in your coupon referral program.
- Exclude Categories: They also get a chance to exclude certain categories, that they want to exclude from the customer referral program.
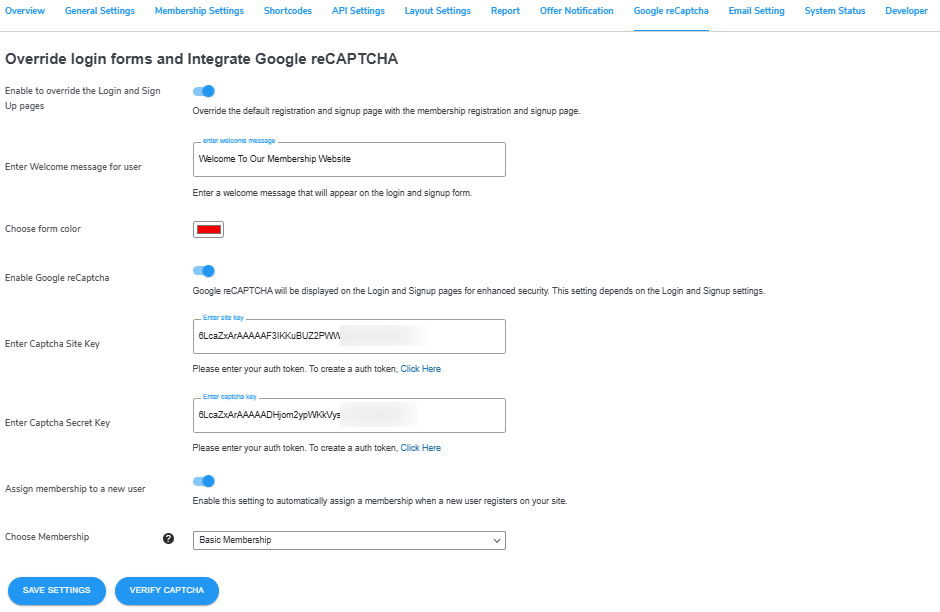
9.Display Configuration
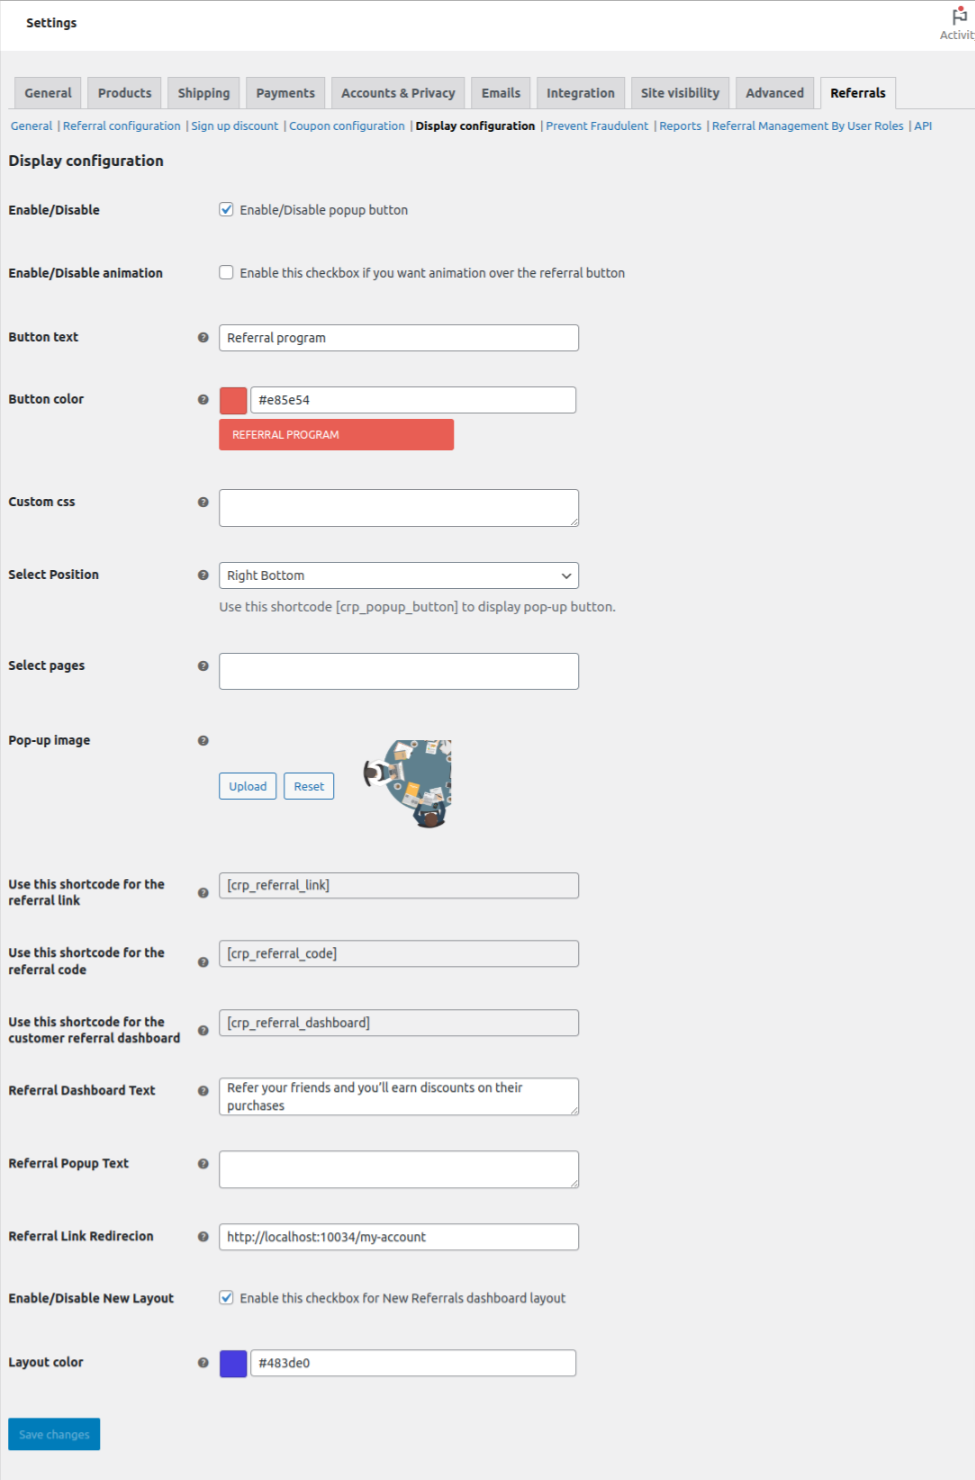
- Enable/Disable: The WooCommerce referral plugin allows the admin to display the referral system program pop-up button on their store.
- Enable/Disable Animation: Enable this checkbox if you want animation over the referral button.
- Button Text: The admin can edit the display text on the Referral Program Button.
- Button Color: Select a color scheme for the referral program button.
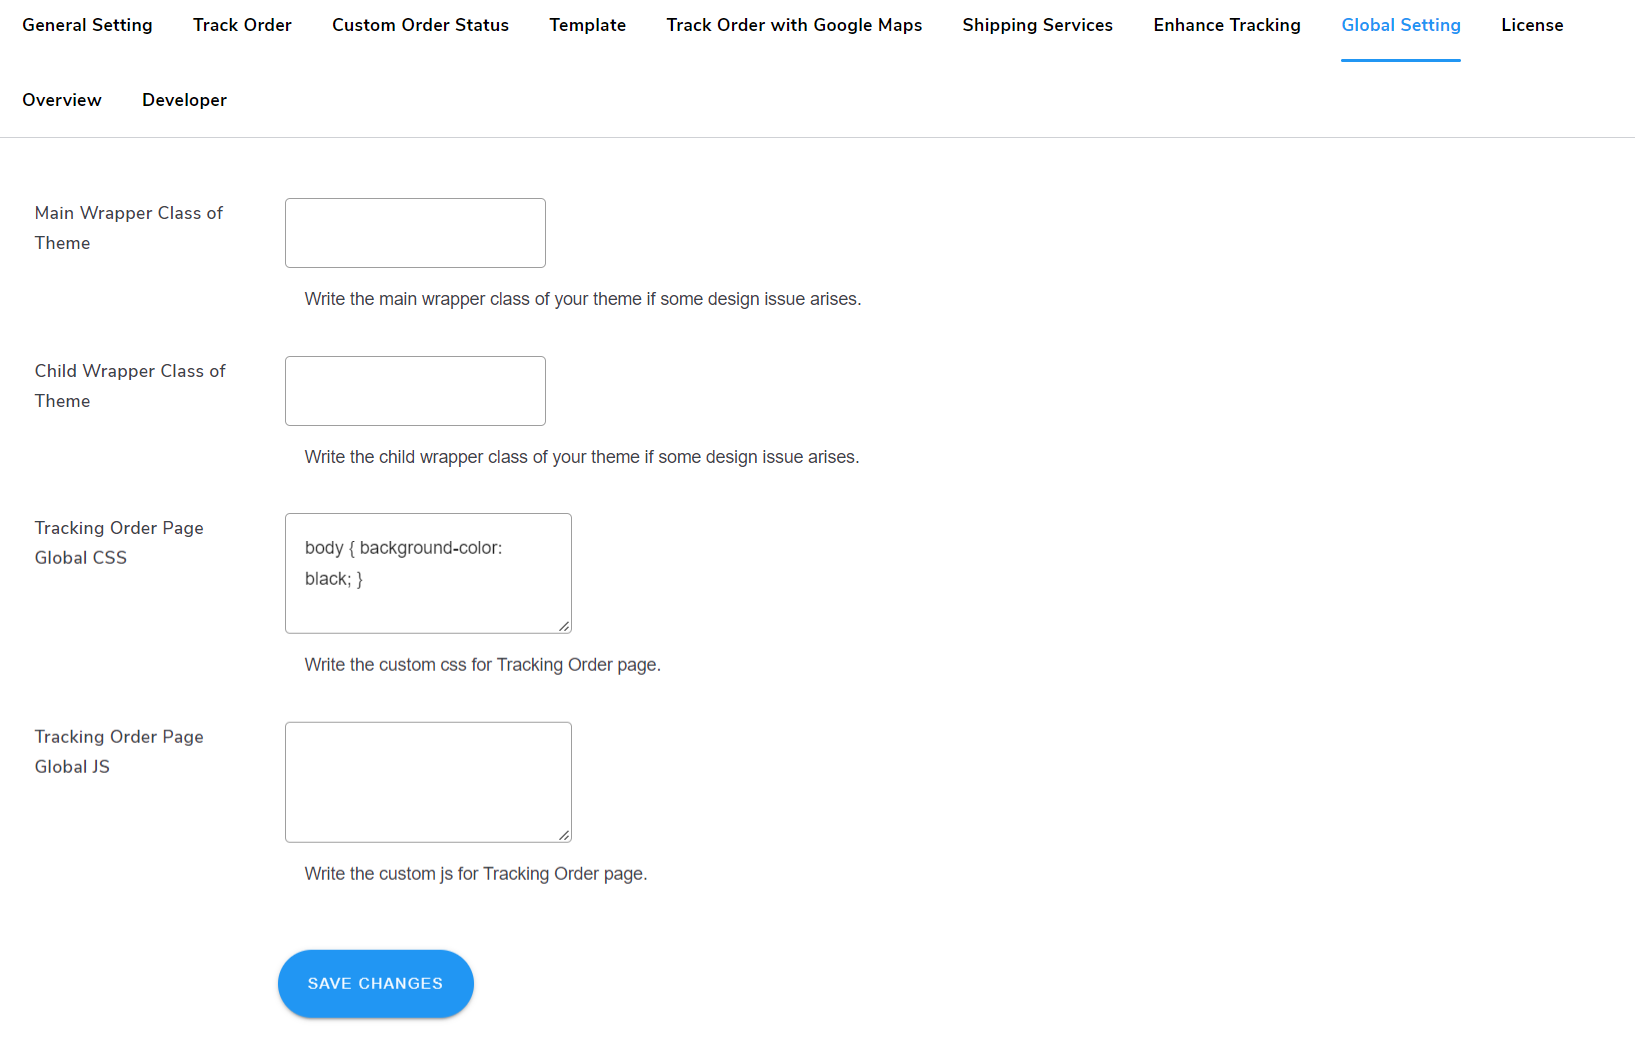
- Custom CSS: The eCommerce referral plugin allows the admin to use custom CSS to change the appearance of the referral program button according to their choice. Also, the admin can add the custom template code, here, for the custom referral link template.
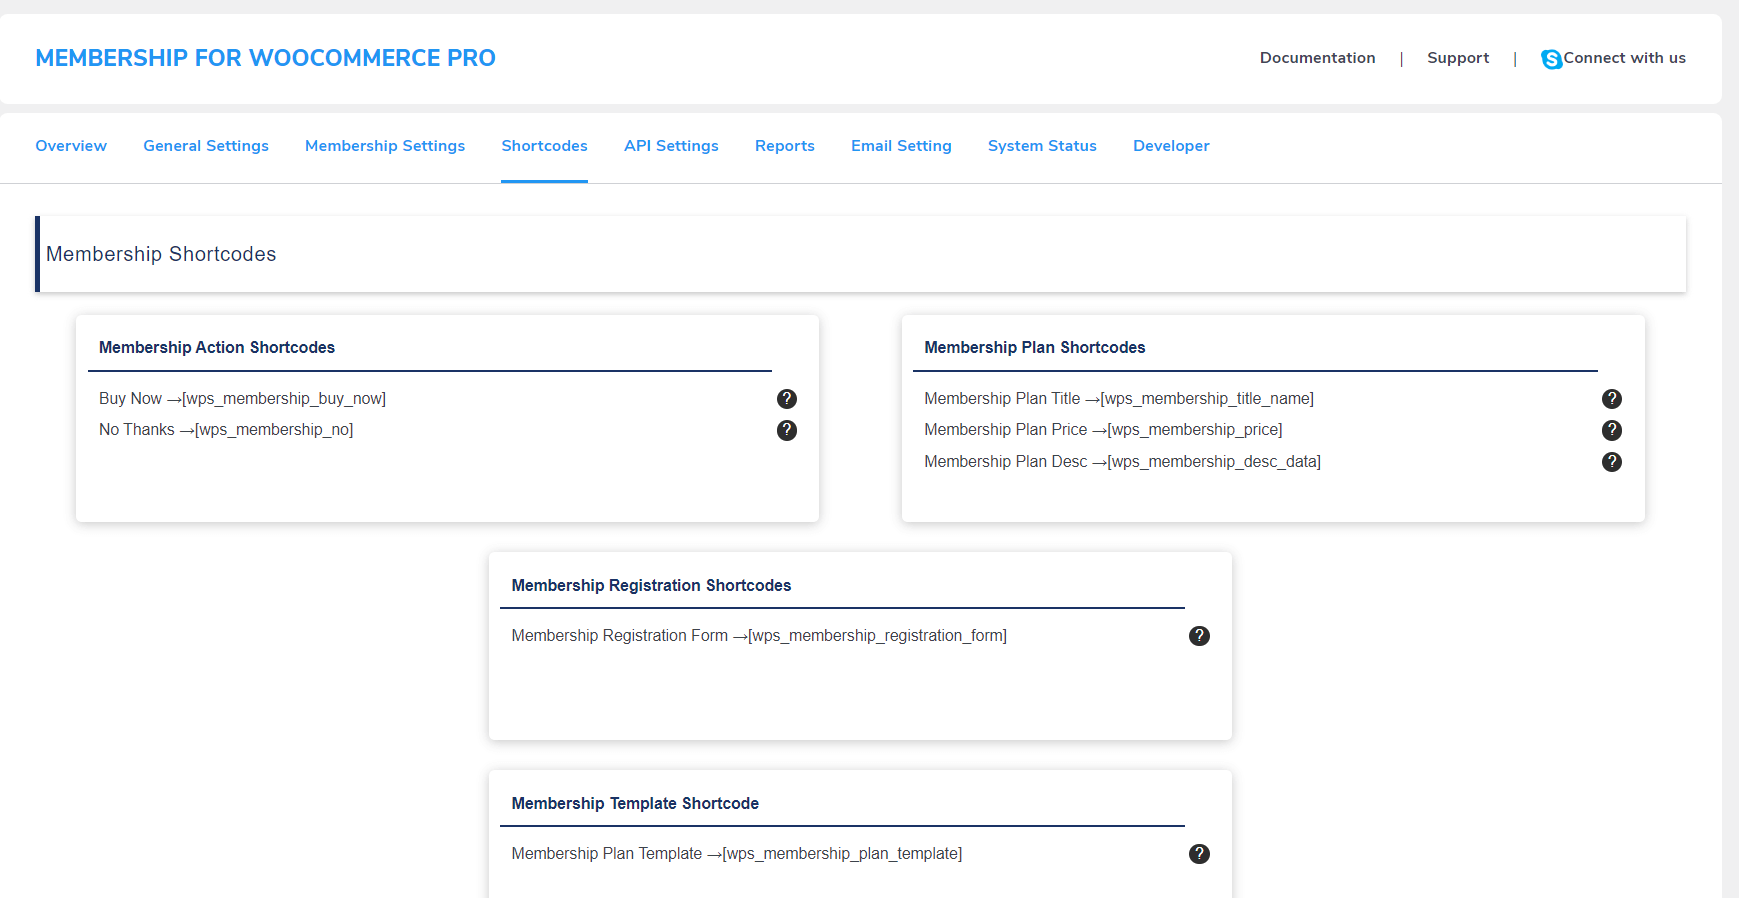
- Select Position: Admin can decide the position of the referral pop-up button and use this shortcode [crp_popup_button] to display the pop-up button anywhere on their WooCommerce store.
- Select Pages: Admin can select pages of the store on which they want to display the referral program button.
- Pop-up Image: The admin can set the referral program pop-up image by using this WordPress referral plugin.
- Use this shortcode for the referral link: Using the given shortcode: [crp_referral_link], you can display the referral link anywhere at your convenience.
- Use this shortcode for the referral code: Using the given shortcode:[crp_referral_dashboard], in the latest update of our Coupon Referral Program plugin, you can now display the referral dashboard on any page. You can also customize the text for the same referral dashboard.
- Use this shortcode for the customer referral dashboard: Using the given shortcode: [crp_referral_tab], you can now display all your referral codes in a dedicated WooCommerce referrals tab on any page.
- Referral Tab Text: Under this setting, you can customize the text that would appear in the referral tab on your front end.
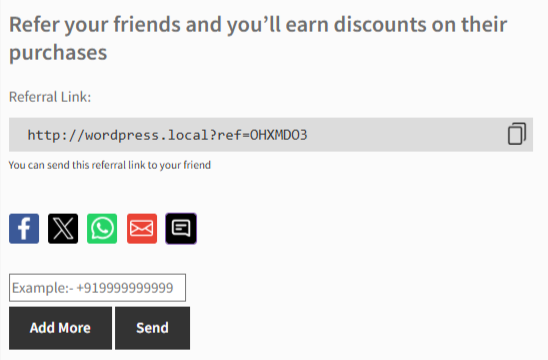
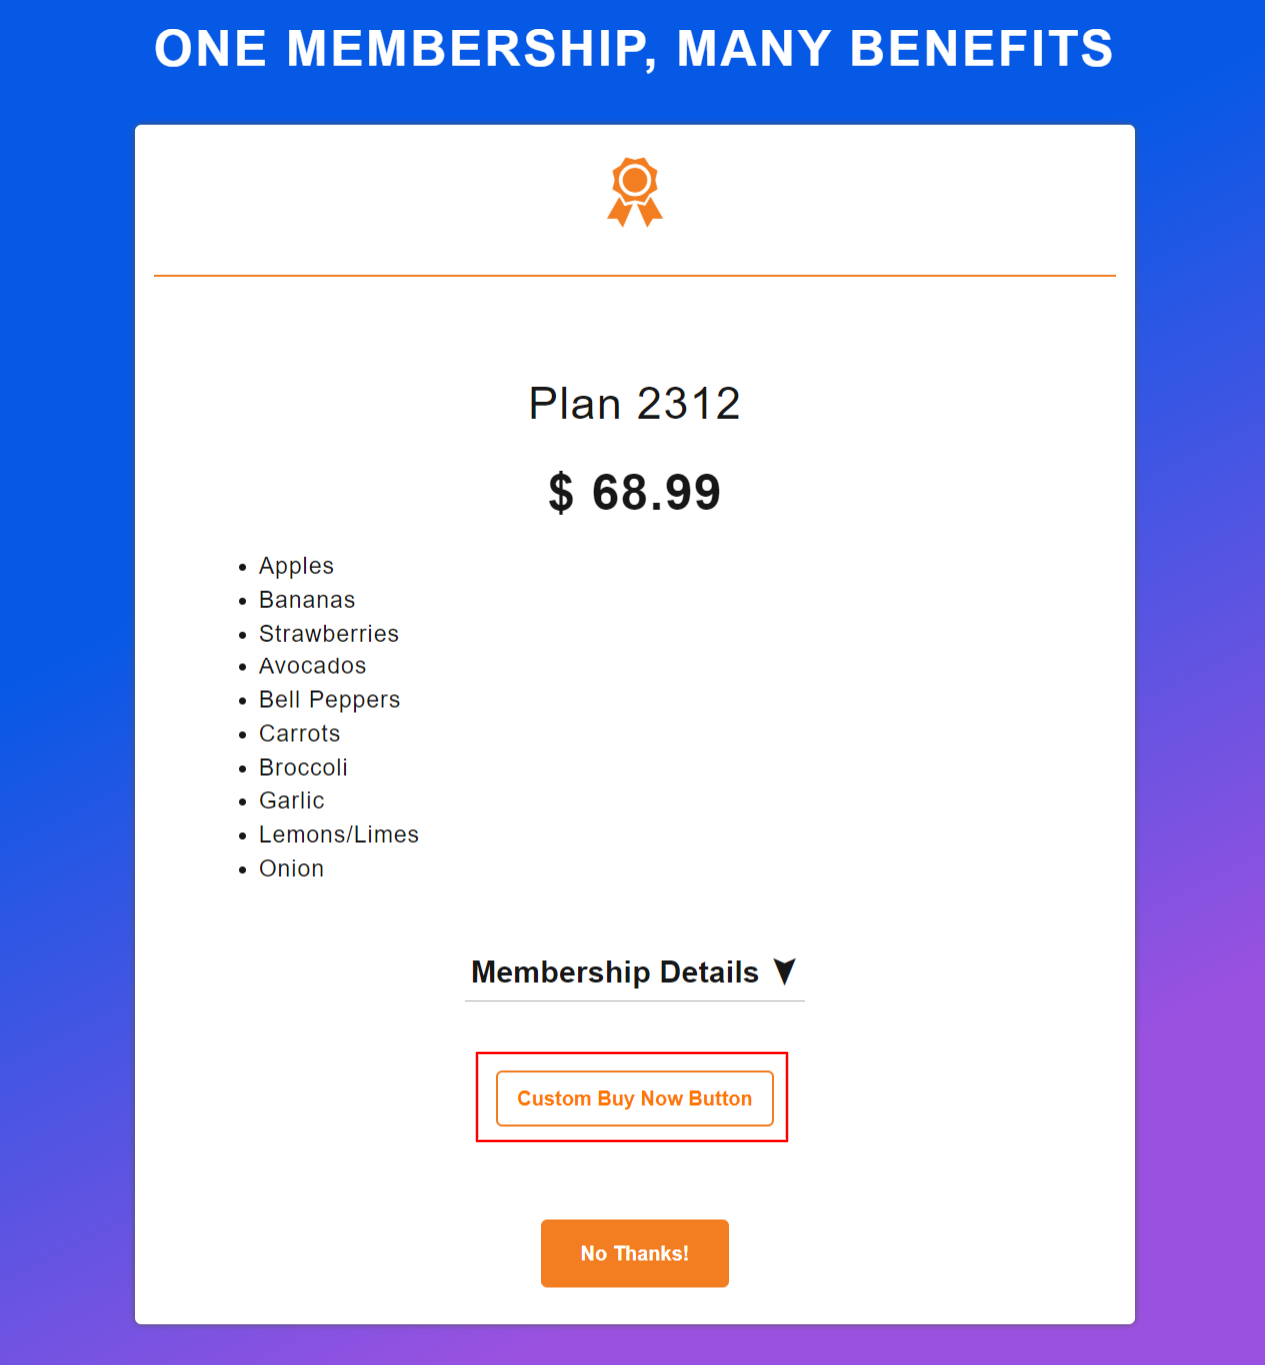
- Signup Popup text: Using this setting of the WooCommerce referral plugin, you can customize the text that appears on the modal window by clicking the “Referral Program” button on the front end. NOTE: If you leave this field blank, the default popup text will be displayed in the popup window as shown below.
- Referral Link Redirection: Utilizing this setting of the WooCommerce customer referral program, admins can now decide where they want to redirect the referral link. The referral links can either be redirected to the shop page the “My Account” page or the home page. The admin will just have to add the link in the blank field.
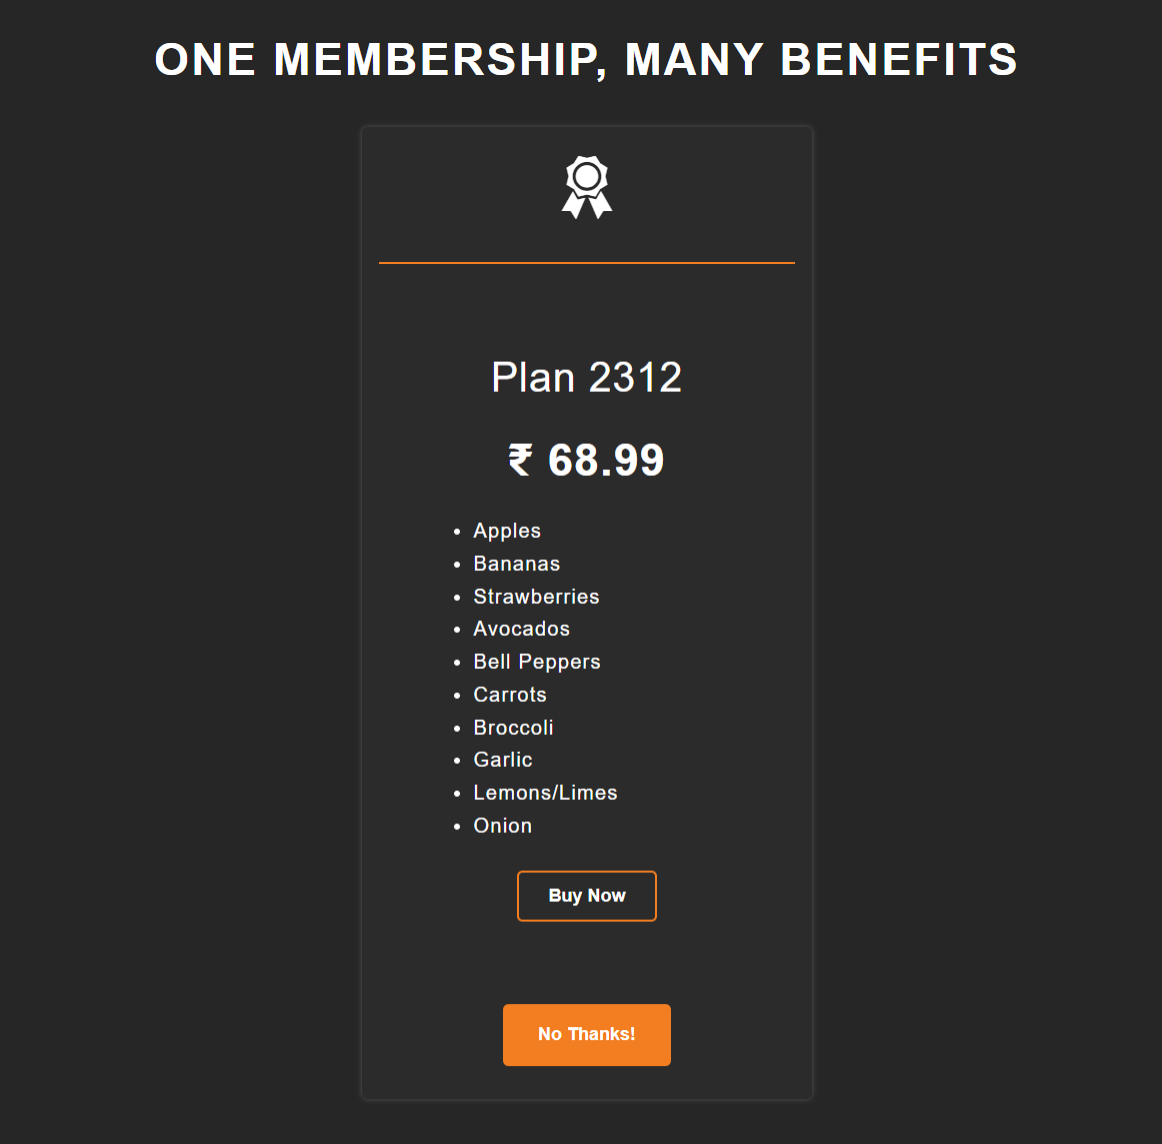
- Enable/Disable New Layout: The admin will get a chance to select whether he wants to go ahead with the new layout or proceed with the default old one.
- Layout Color: The admin has full flexibility to change the color of the selected layout.
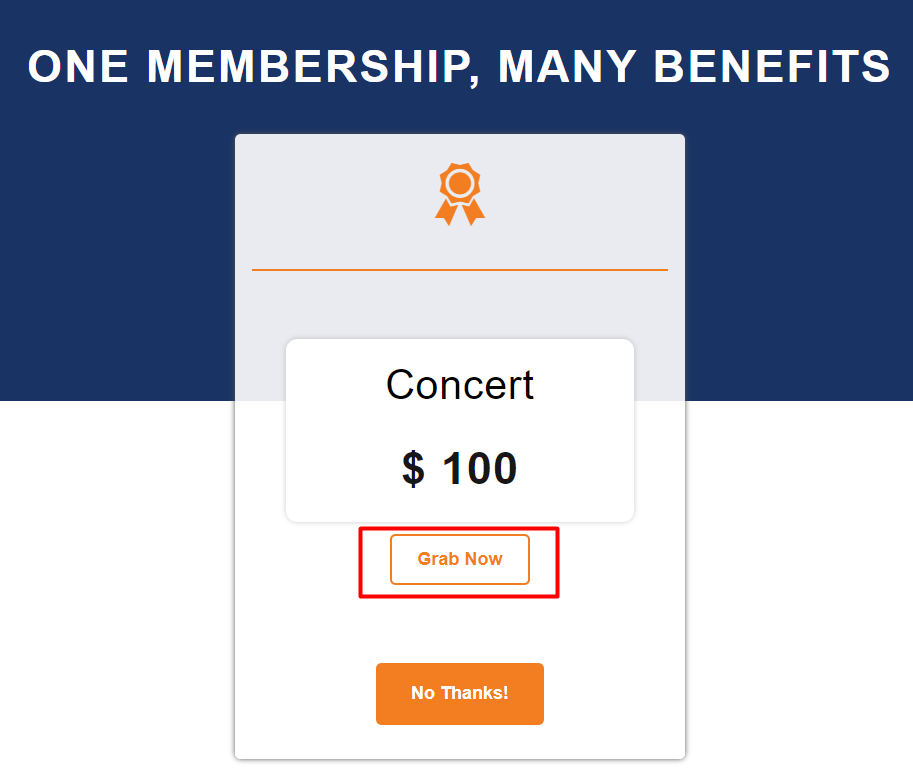
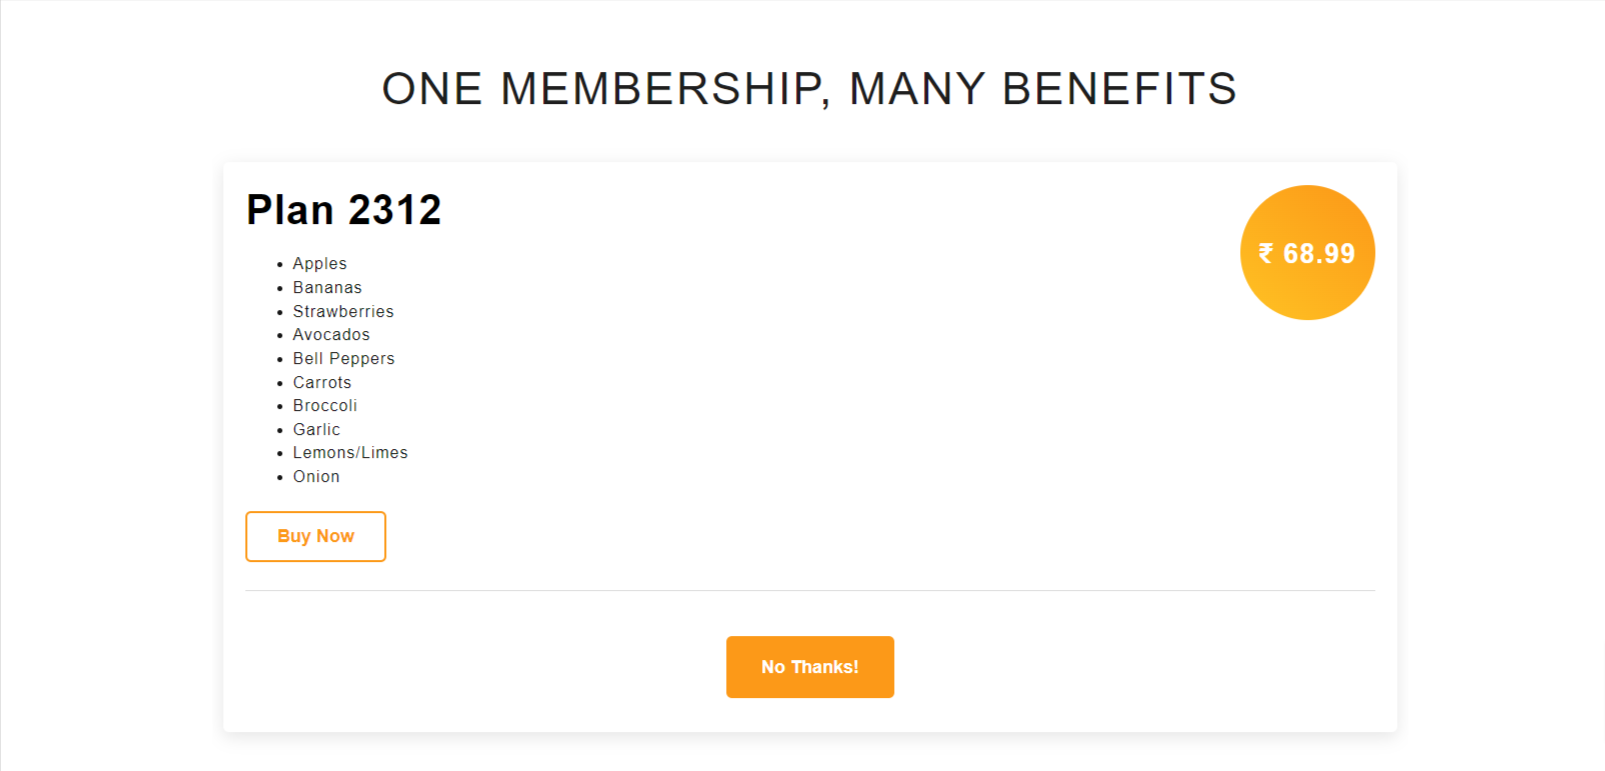
Frontend Representation Of The Layout –
10.Prevent Fraudulent
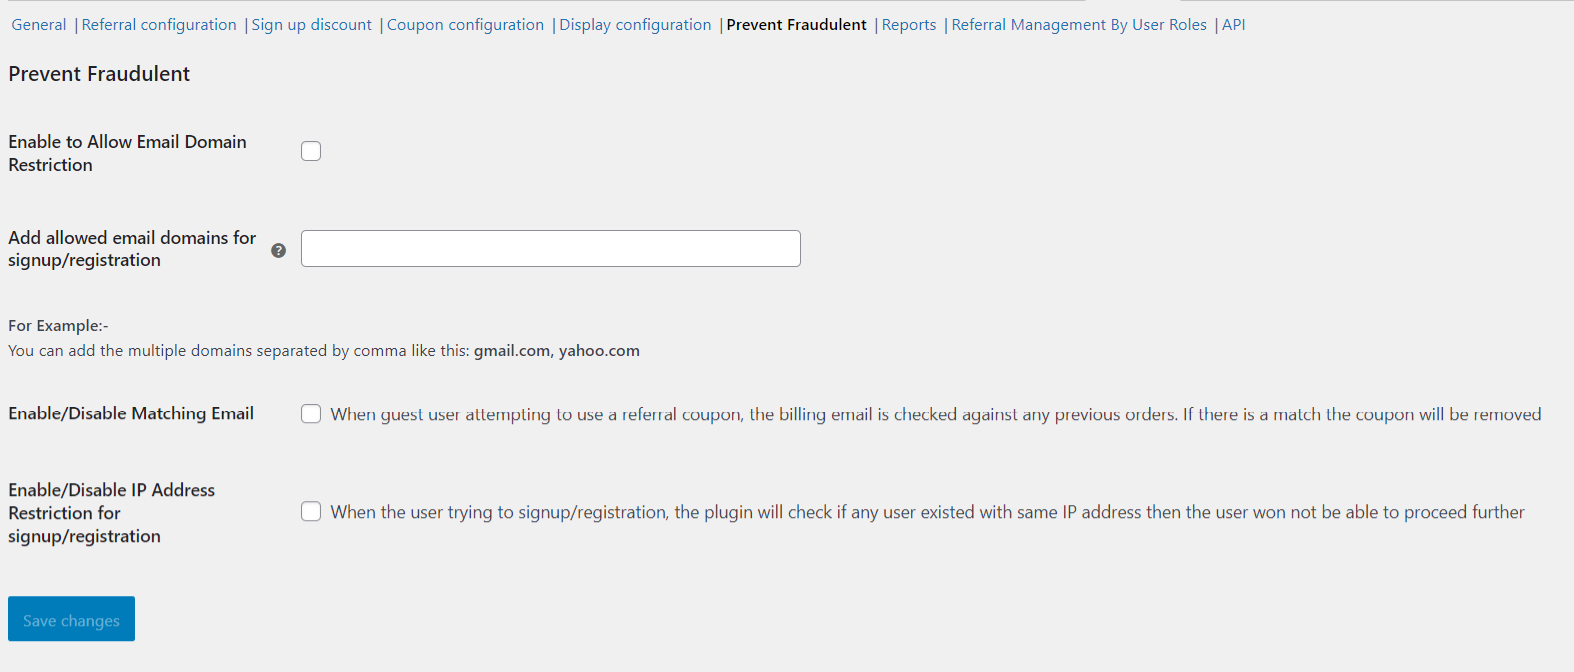
- Enable/Disable: Using this setting, you can enable email restrictions for disposable emails.
- Add allow email domains for signup: By using this eCommerce referral plugin you can mention all the email domains you want to allow sign-ups for, separated by a comma. This assists you in preventing disposal emails from signing up on your WooCommerce store.
- Enable/Disable Matching Email: By enabling this setting the admin can prevent the guest user from using a referral coupon, if the billing email is checked against any previous orders, and it is found that there is a match. Then the applied referral coupon code will be automatically removed.
- Enable/Disable IP Address Restriction For Signup/Registration: By enabling this setting, the plugin will check if the user signing up or registering already exists by analyzing the IP address, this prevents the admins from any fraudulent activities.
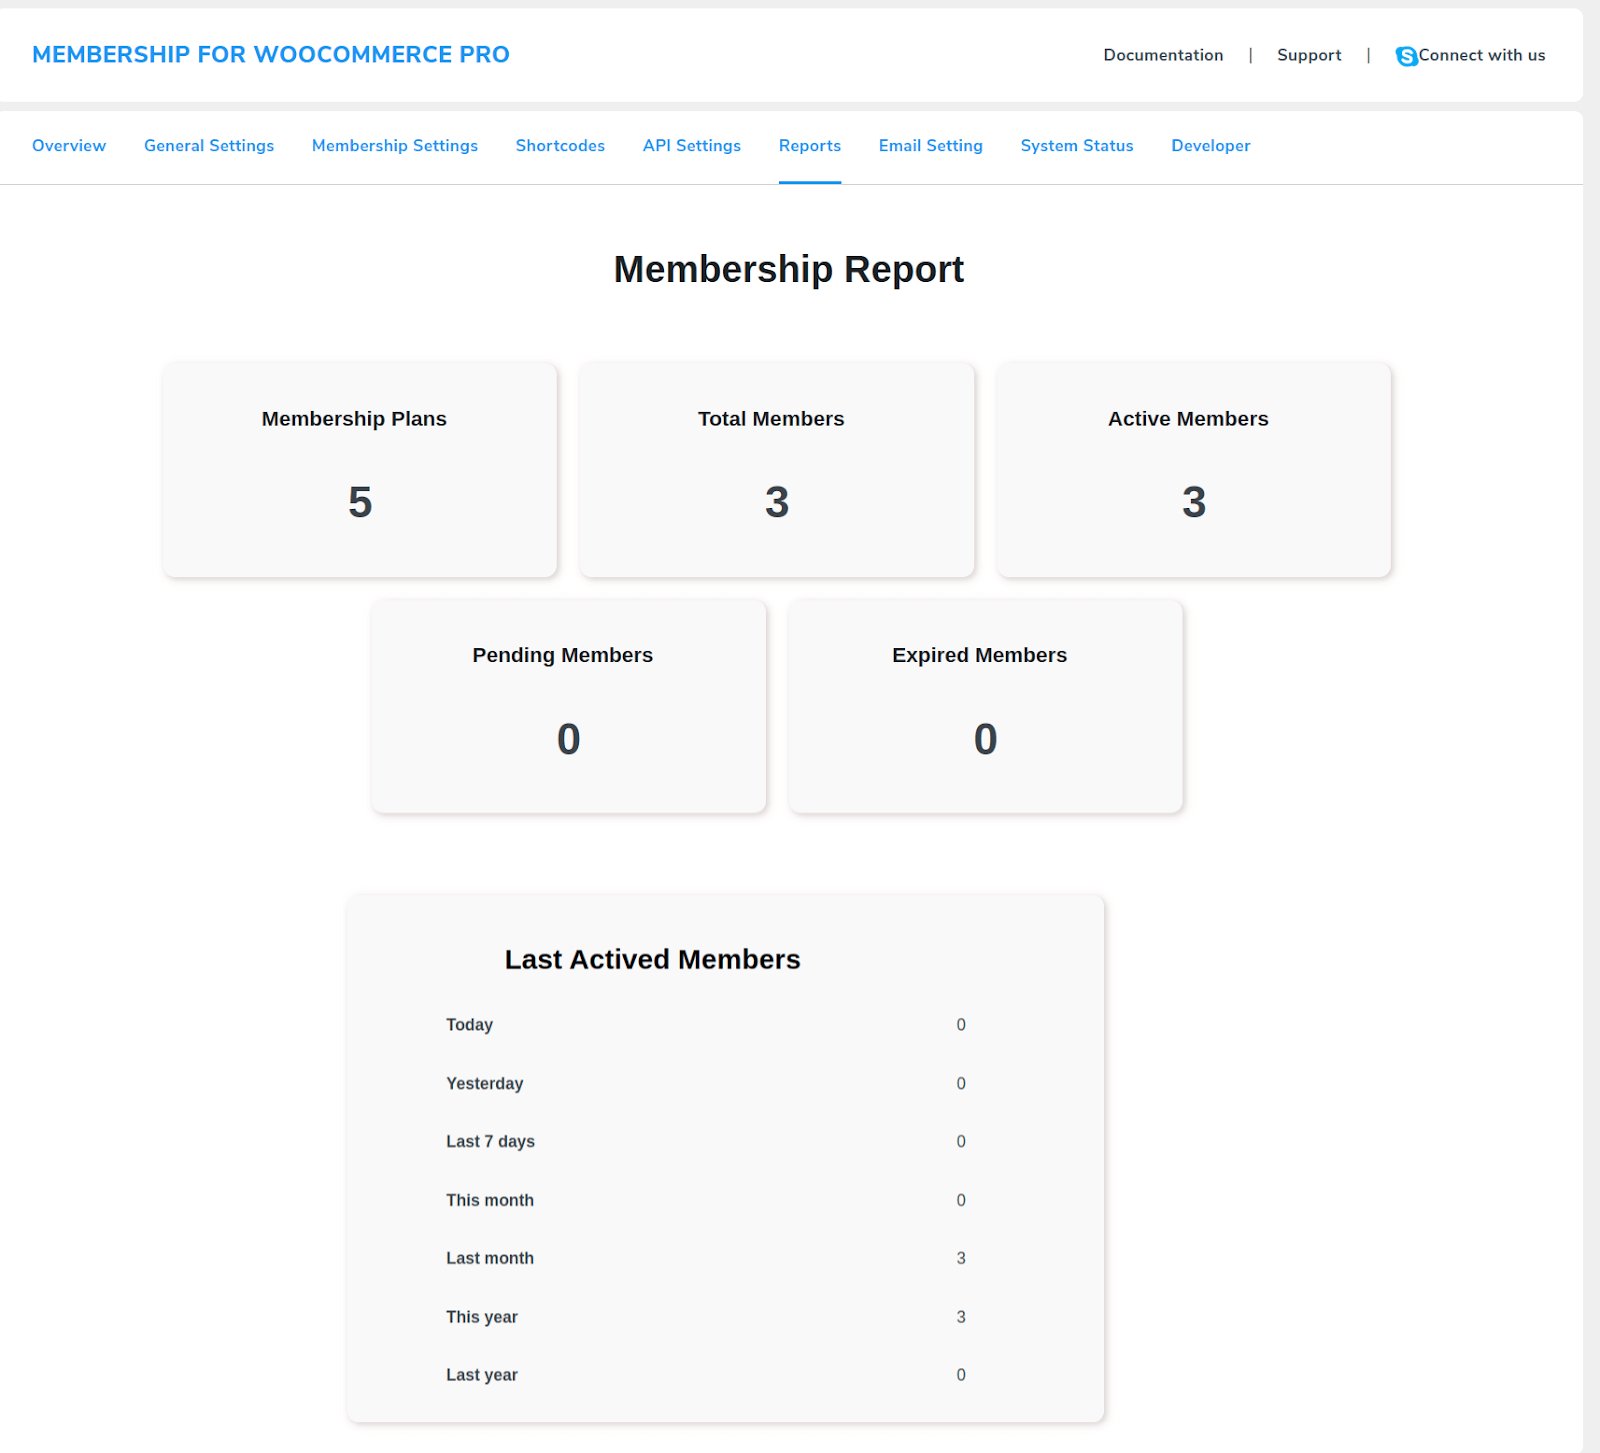
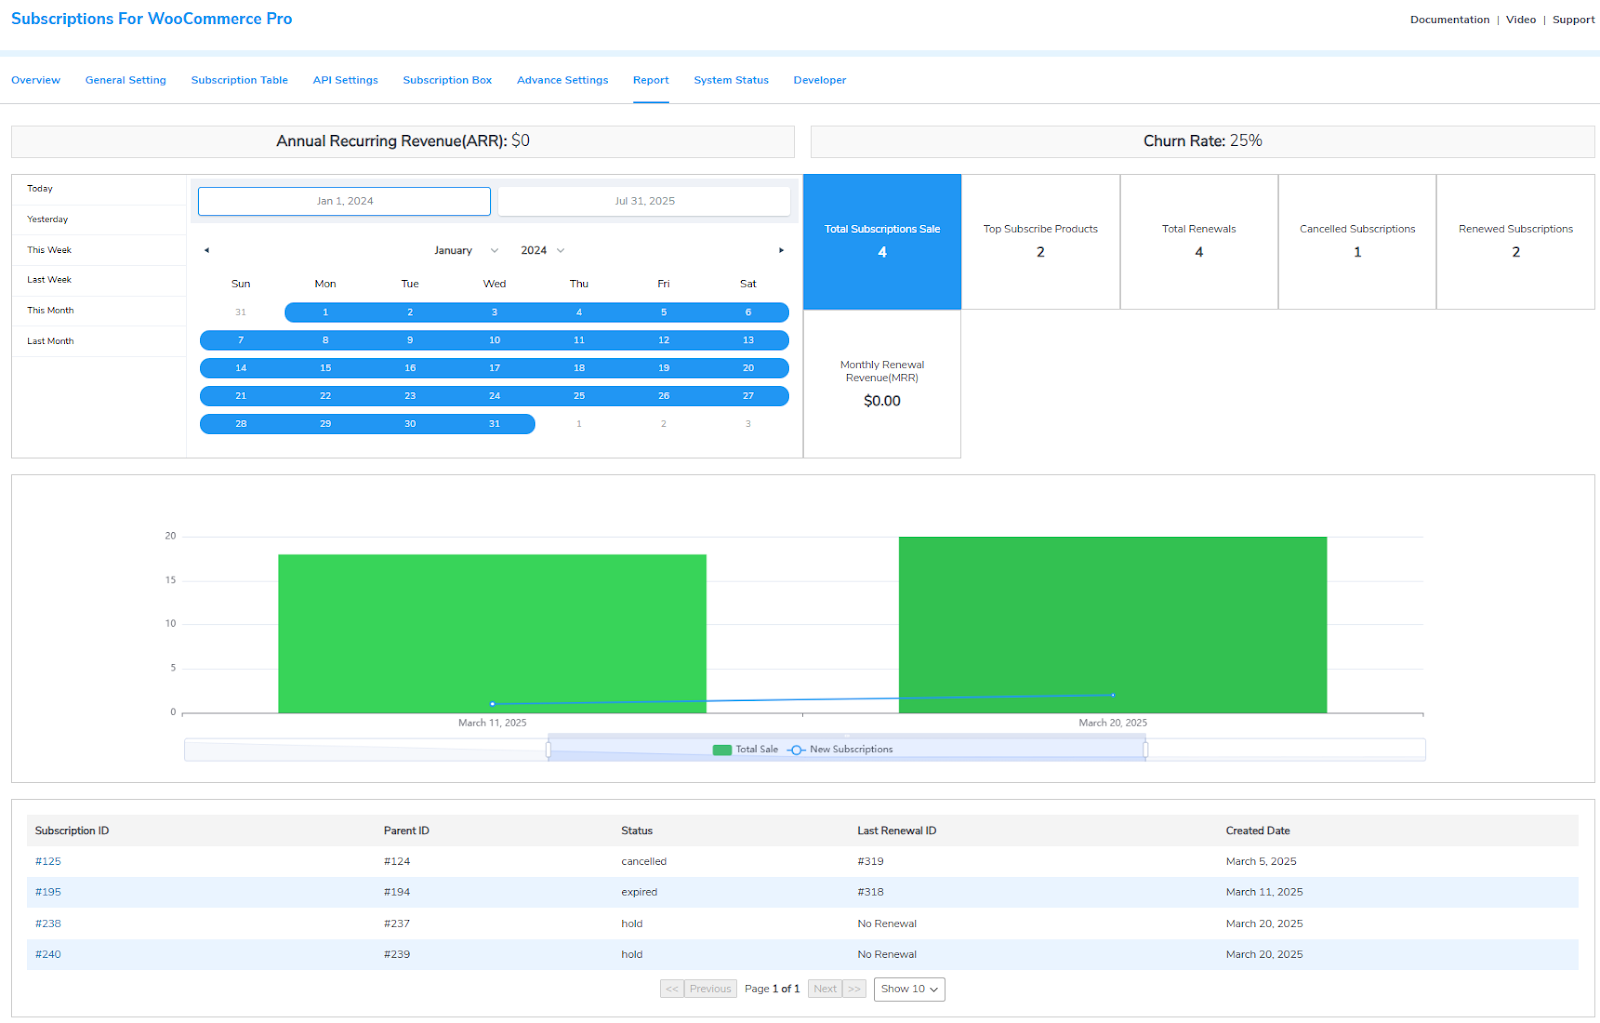
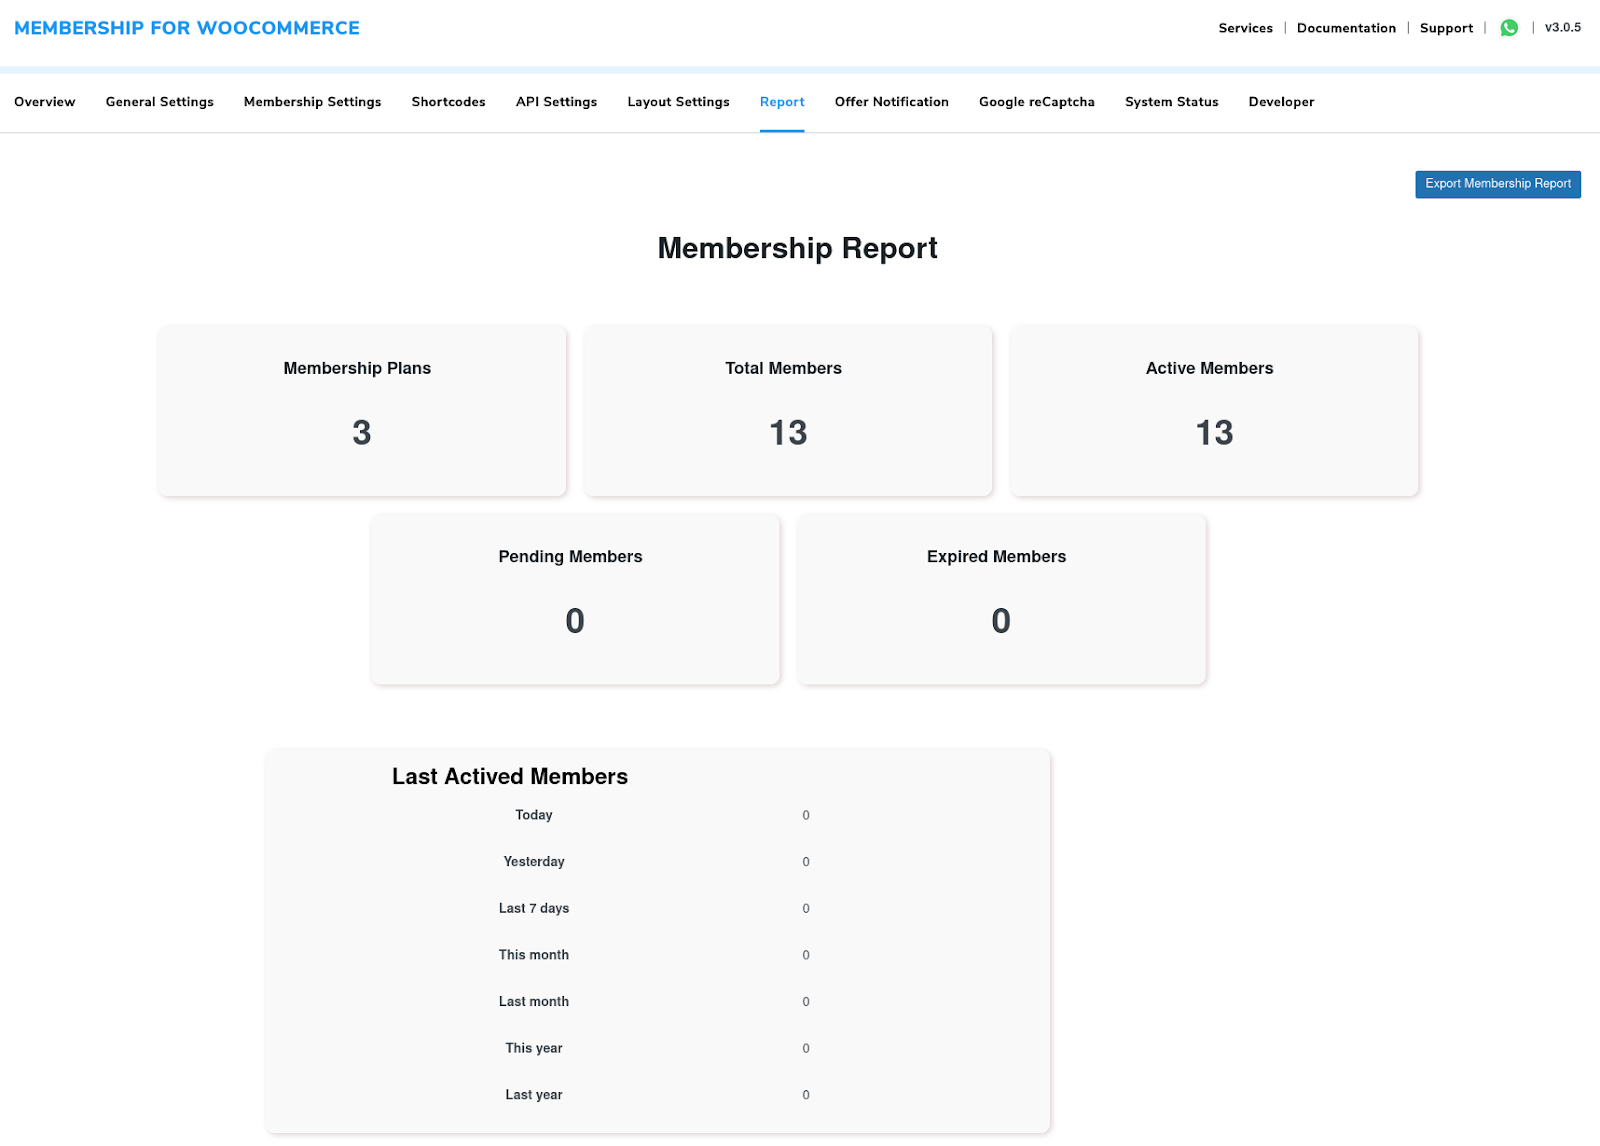
11.Referral Report
After the successful installation and activation of the Coupon Referral Program, a new section named Referrals will be added to the WooCommerce Reports where the admin can see the performance of their WooCommerce referral program.
The referrals report includes the coupon referred details like –
- Name of the Referrer
- User Email
- Referred Users
- Total Utilization
- No. of Coupons
Further, you can also check the coupon details by clicking on “View Coupon Details”.
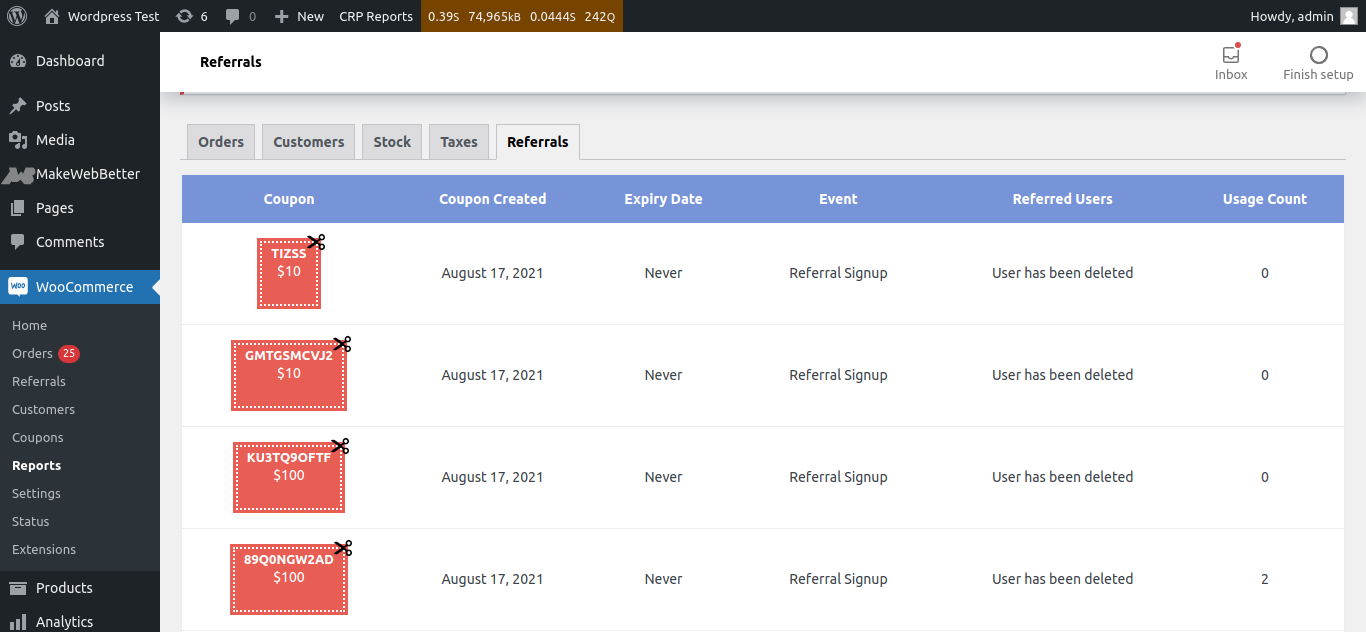
This report shows the following details:
- Coupon
- The date on which the Coupon was created
- Coupon expiry date
- Event
- Referred Users
- Usage Count
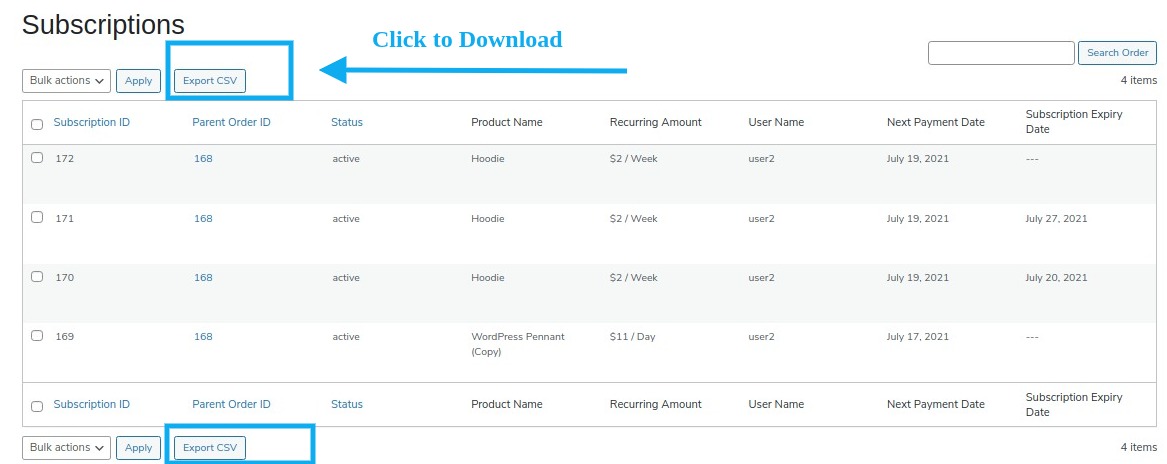
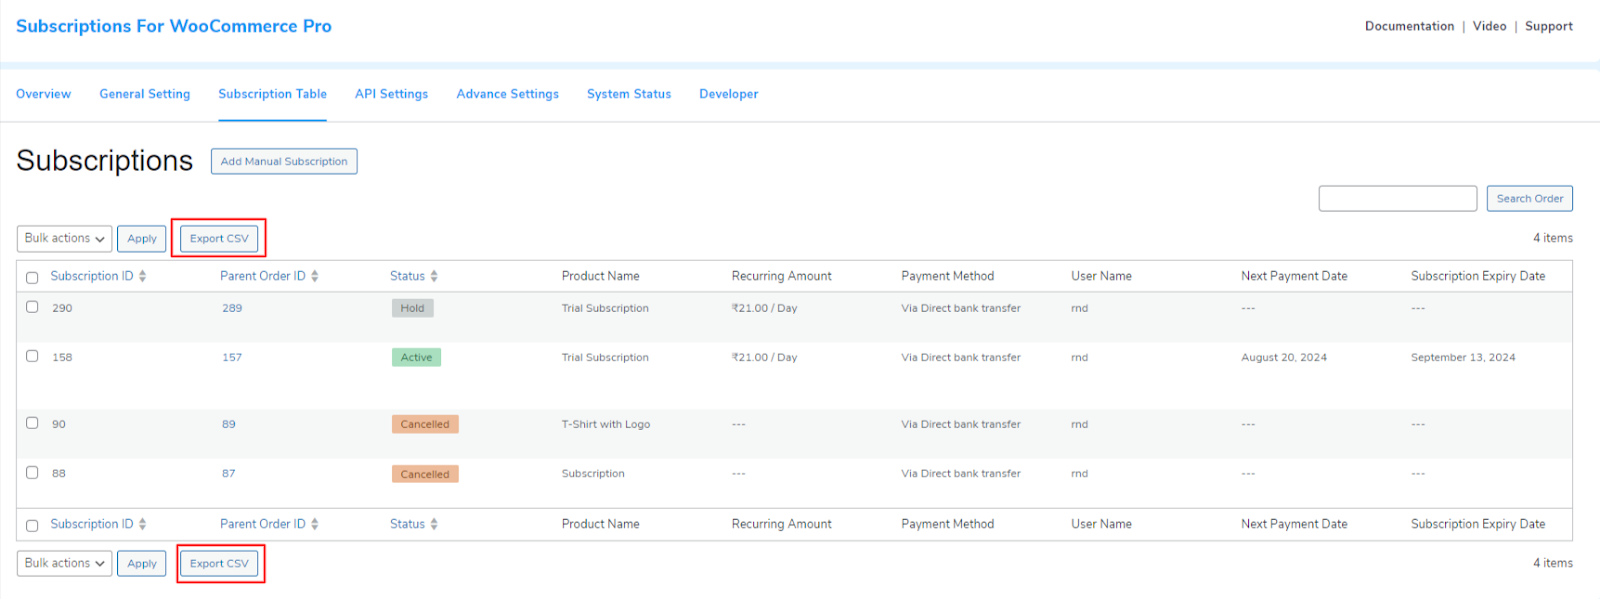
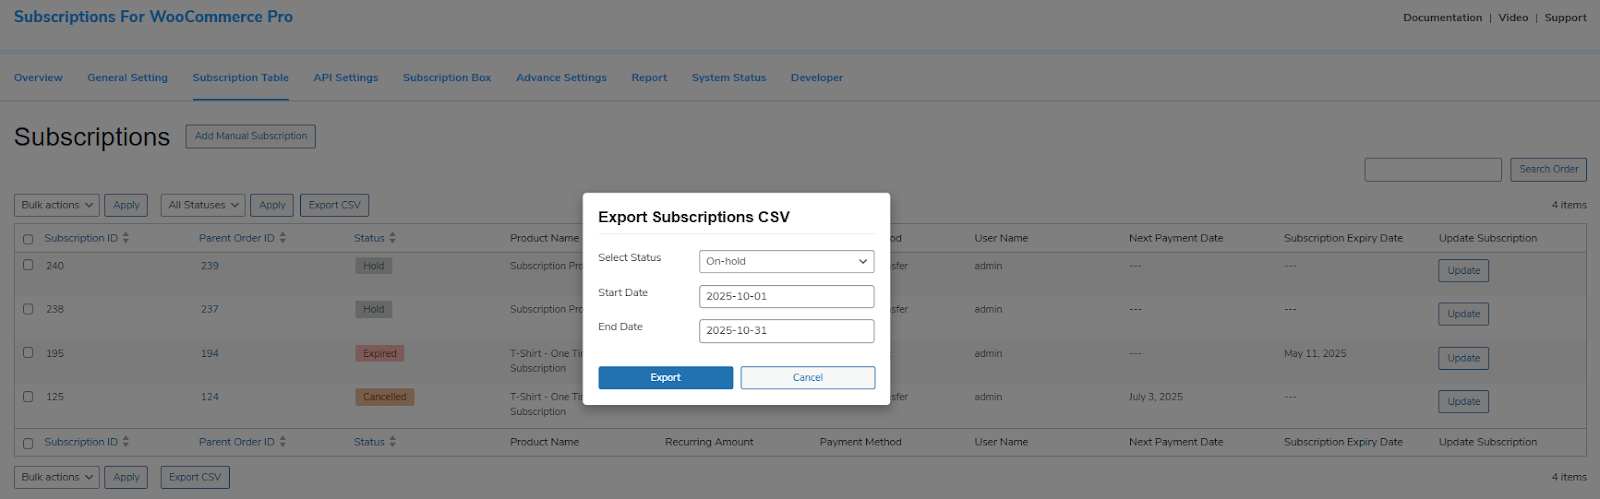
Additionally, you can export and download all the data in a CSV file by clicking on “Export CSV”
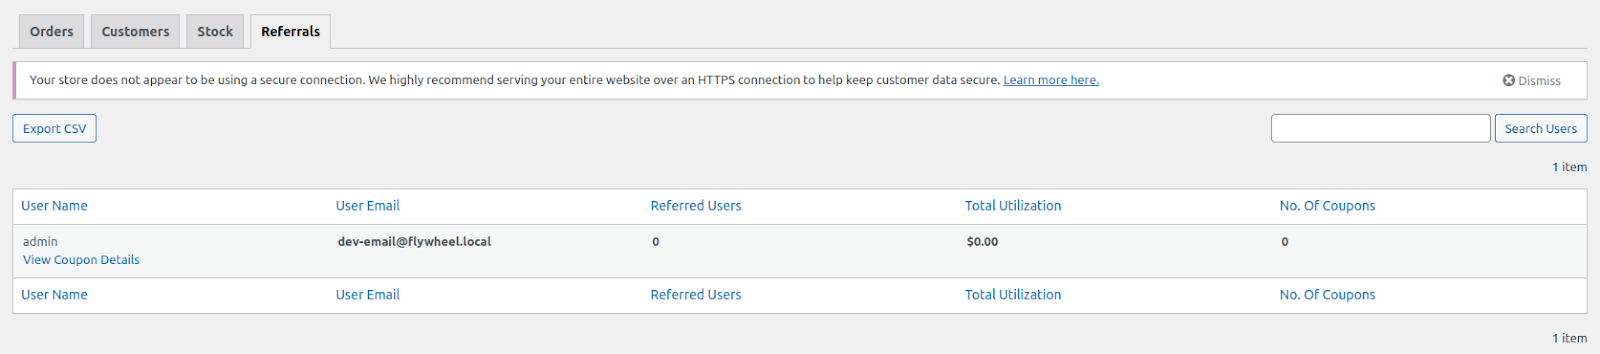
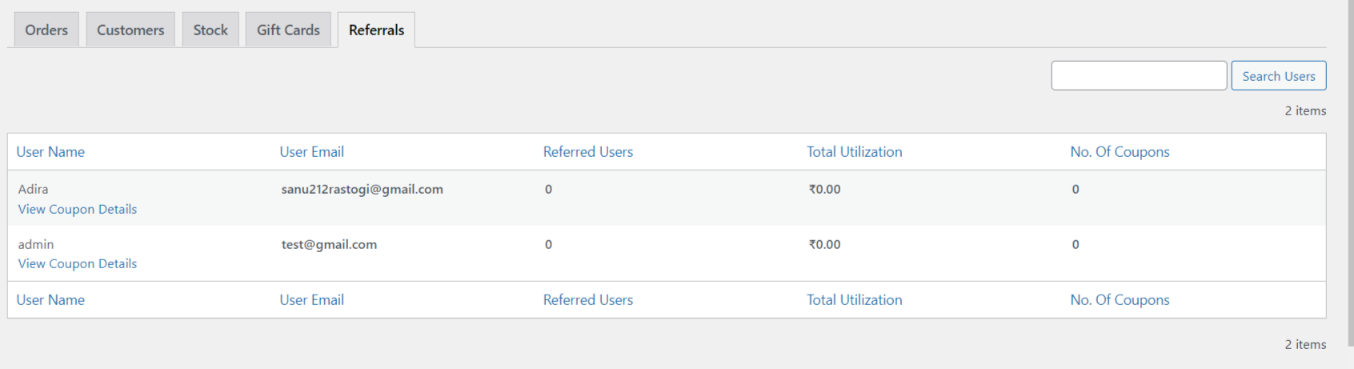
This report shows the following details:
- User Name
- Email of the User
- Referred Users
- Total Utilization
- Number of Coupons
Moreover, you can send referral reminder emails to the user by clicking on “ Referrals”.

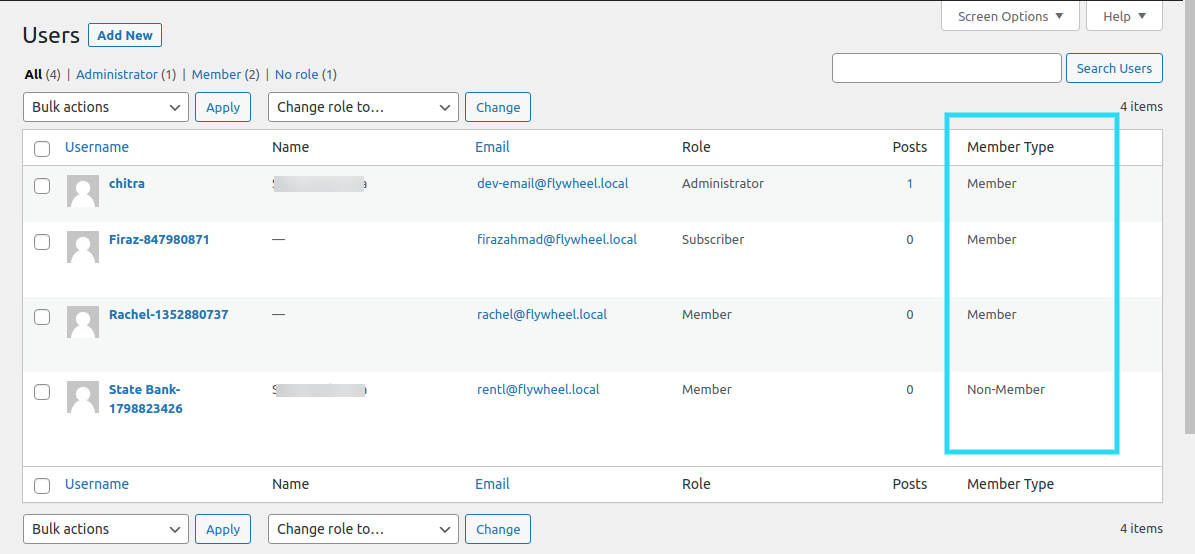
12.Referral Management by User Roles
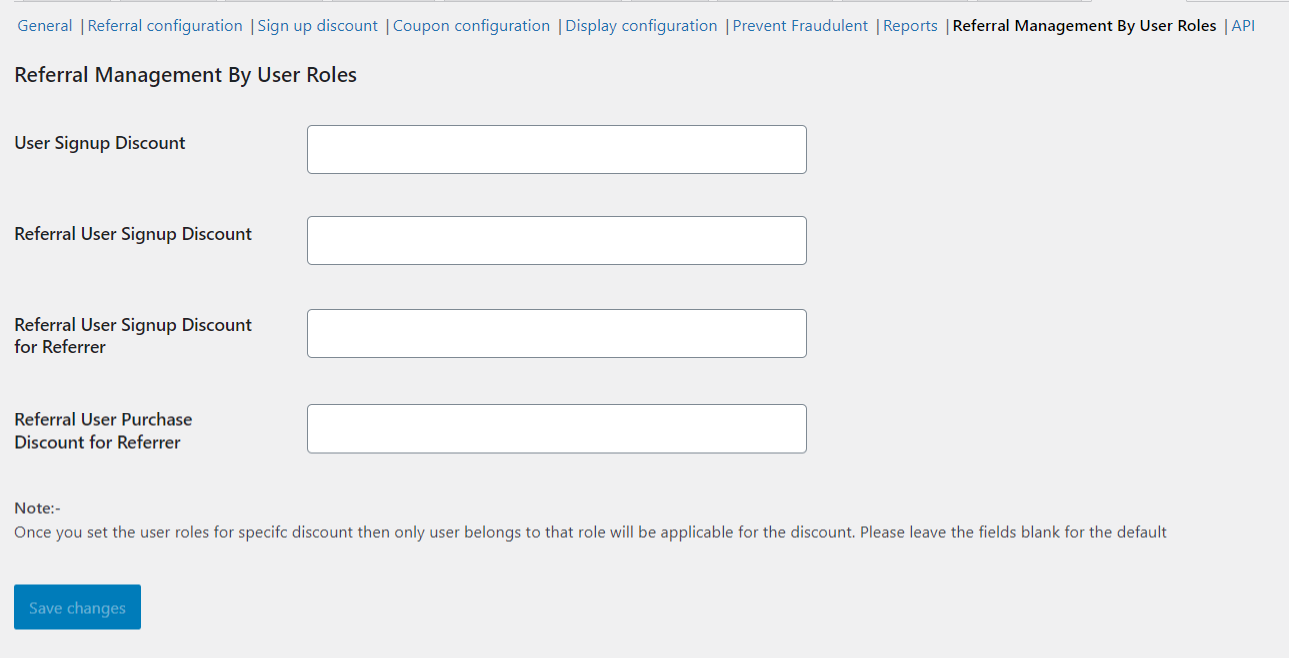
With this feature of the WooCommerce coupon referral program, admins can select user roles for each type of discount be it user sign up, referral user sign up, referral user sign up discount for referrer, and referral user purchase discount for referrer. The admins can leave the fields blank by default (i.e. no user roles specified). This helps the admins to segregate the discounts between users of different categories.
- User Signup Discount: Admin can determine the user role for the user signup discount. For example, whether he wants the customer to get the user discount or the subscriber.
- Referral User Signup Discount: In the same way he can also determine which user will get the referral user sign-up discount.
- Referral User Signup Discount for Referrer: Similarly, admins can determine or select the particular user roles, who will get the referral user signup discount for the referrer.
- Referral User Purchase Discount for Referrer: The same goes for the referral user purchase discount for referrer.
NOTE: It is important to note that after you set the user role for specific types of discounts, only the user belonging to that role will get those discounts. Admins can leave the field blank, for the default settings.
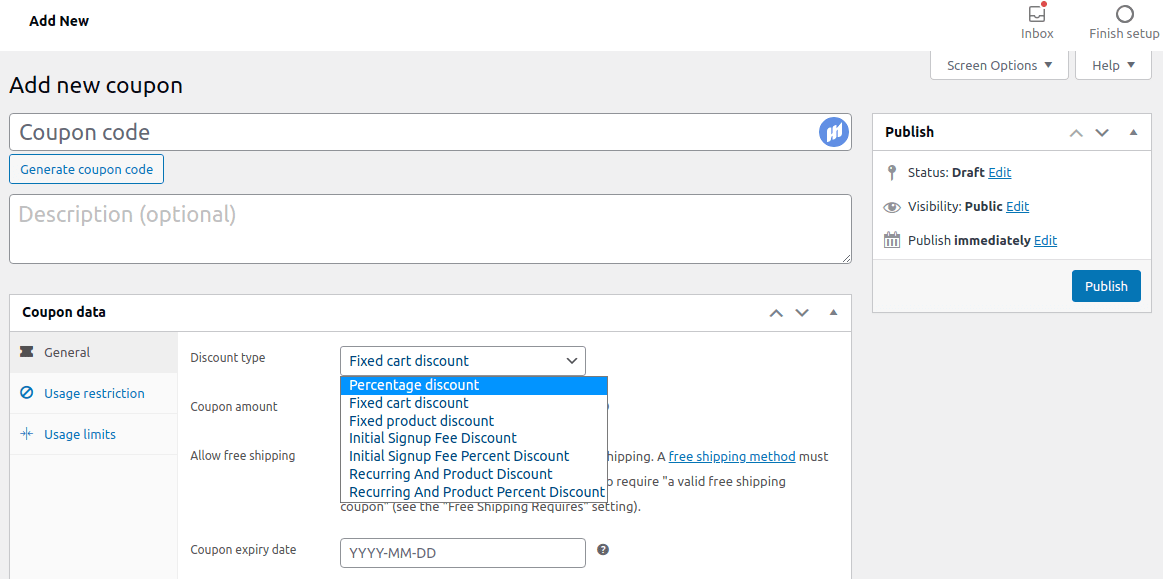
13.Coupon Data
The admins can update the details related to specific coupons by utilizing this setting.
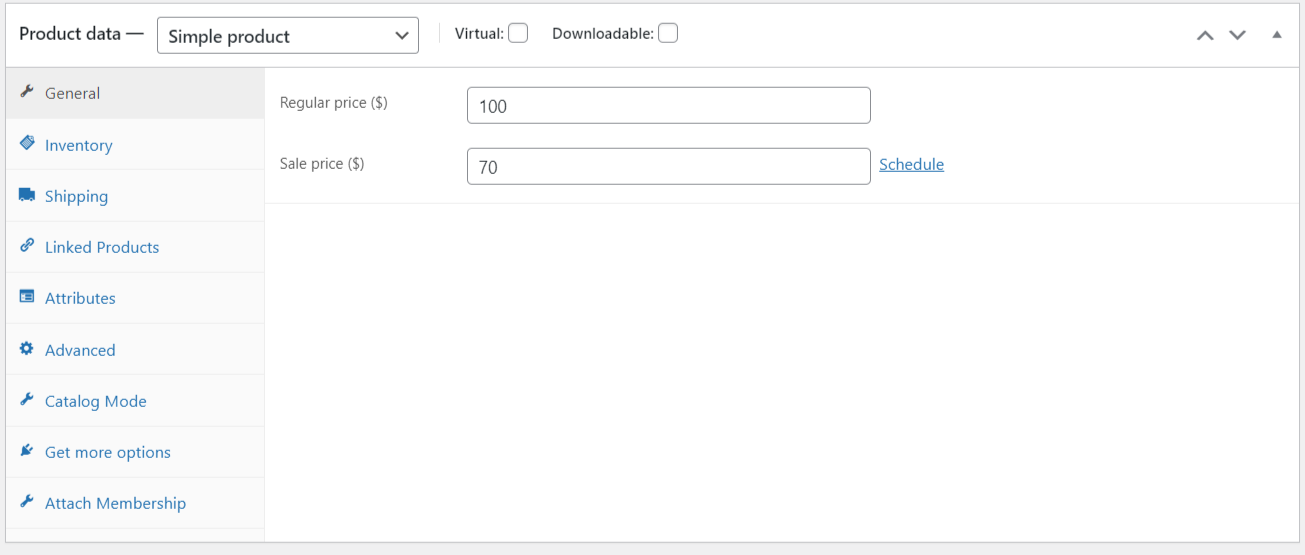
- Discount Type – Admin can implement a percentage discount or a fixed discount on the curated coupons.
- Coupon Amount – Enter the amount of discount that your customer will get upon using this coupon.
- Free Shipping – Enable this setting if the admin wants to allow “free shipping” to their customers.
- Coupon Expiry Date – Specify the date after which the created coupon will expire.
- Attach Free Item – The admin can mention which product he/she want to add as a “free item” when the customer utilizes the coupon.
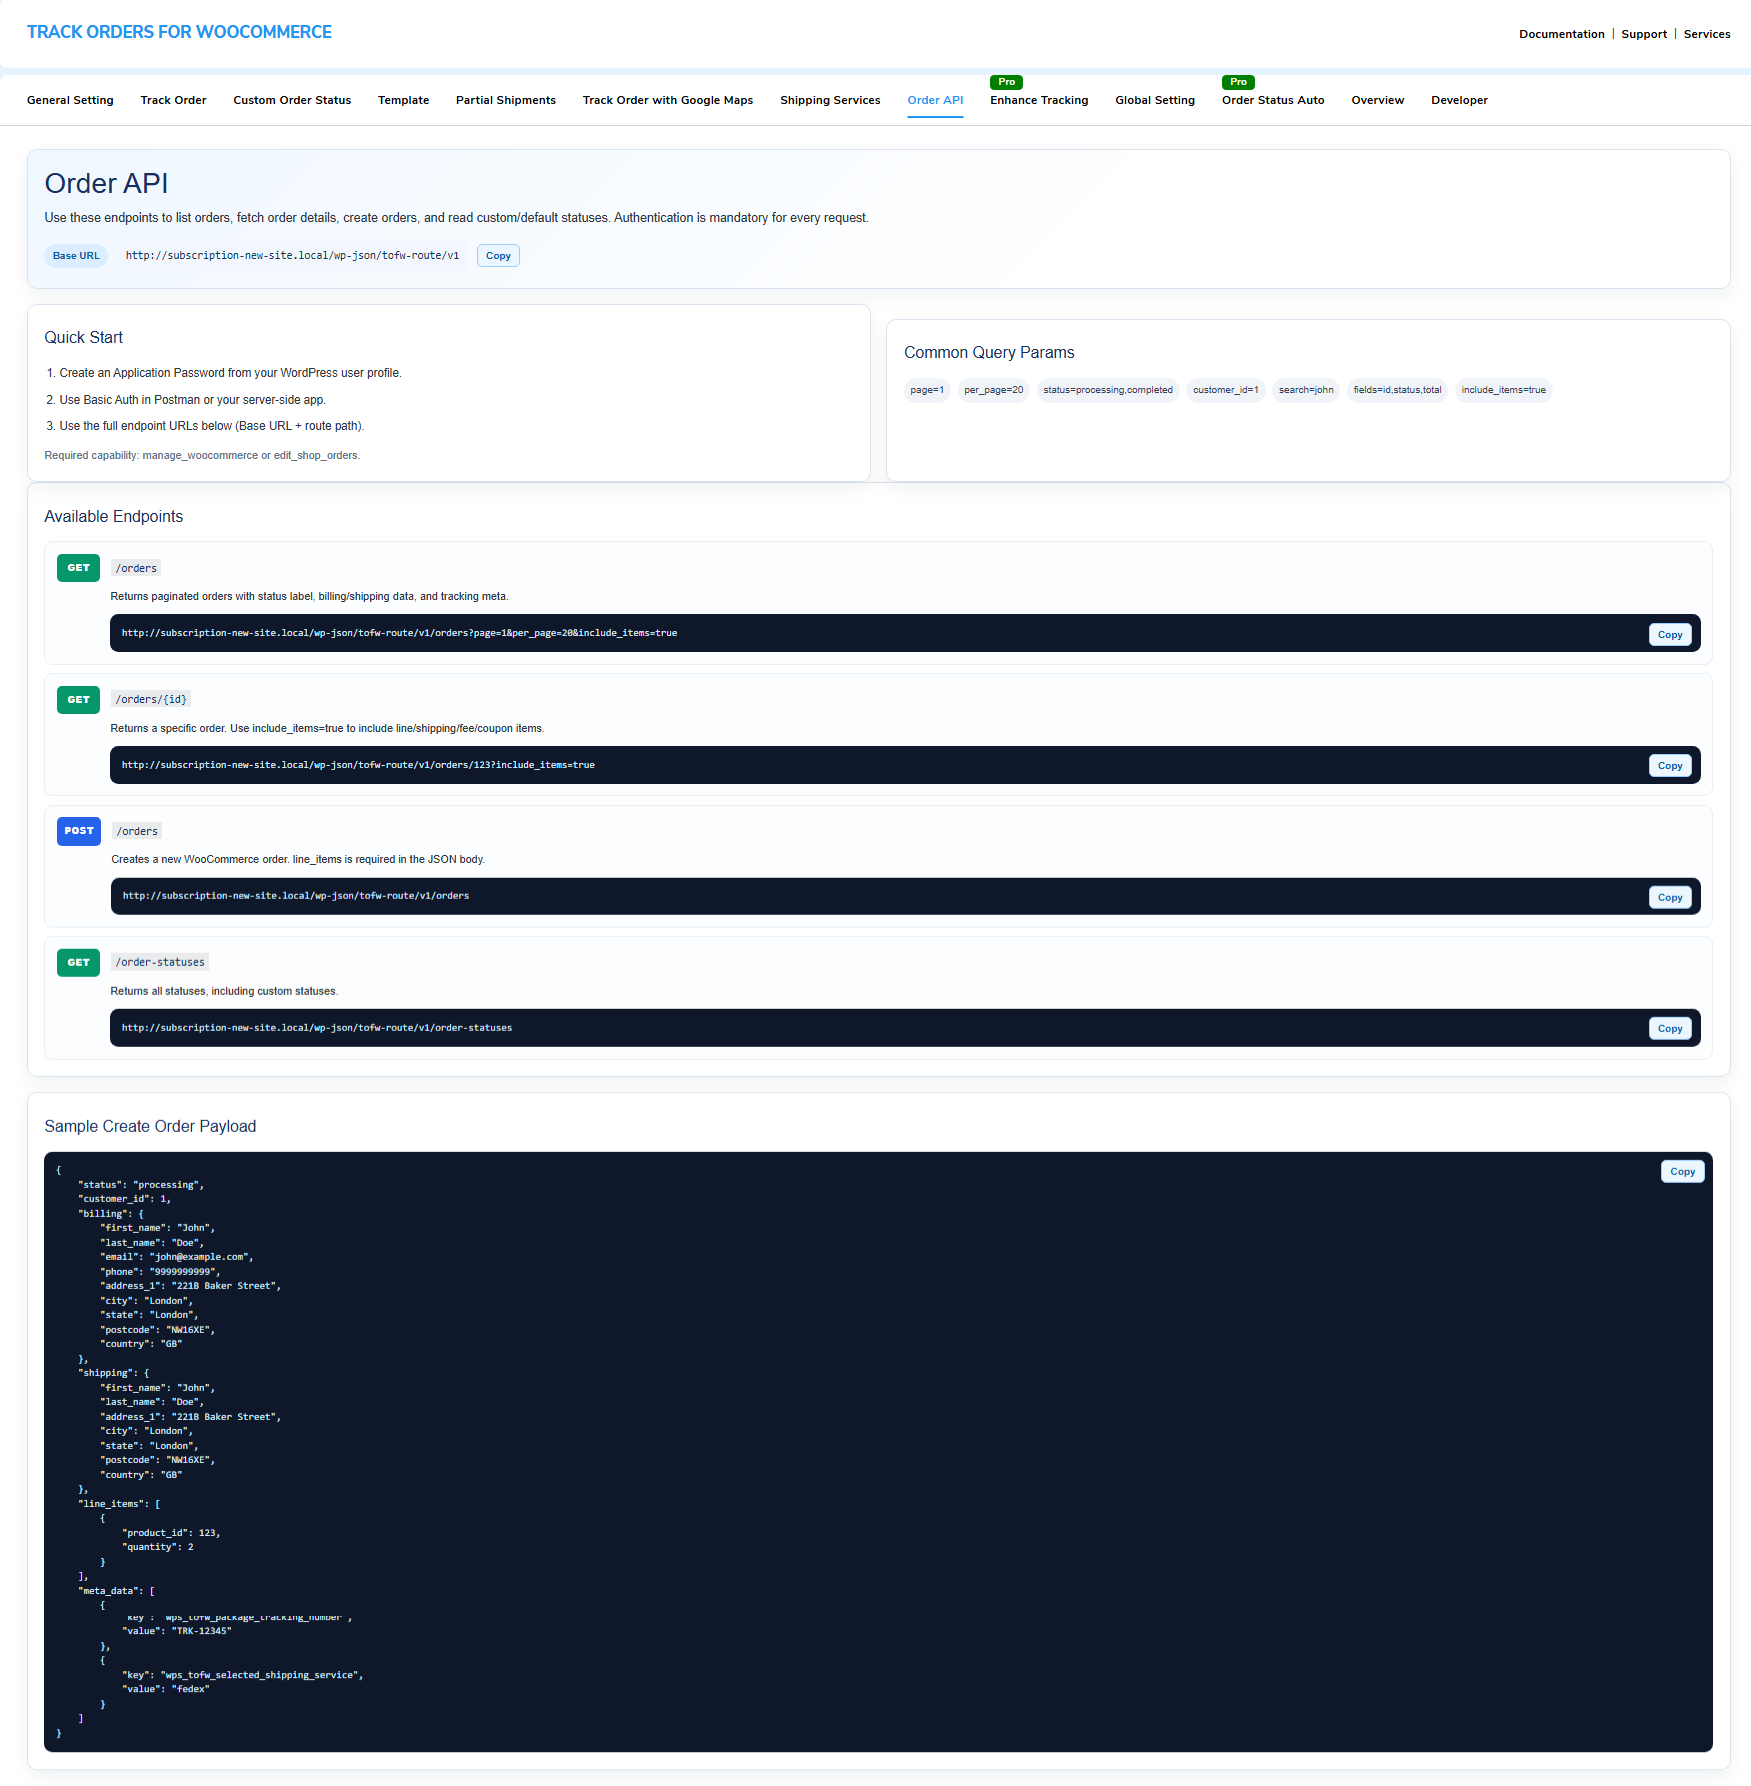
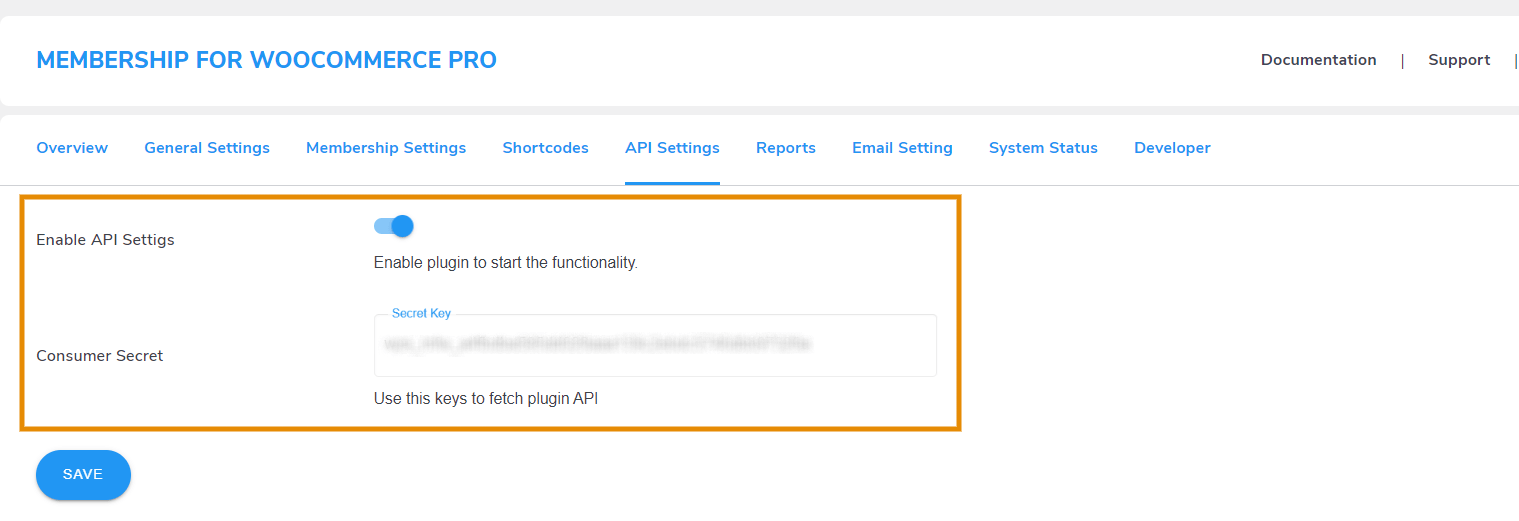
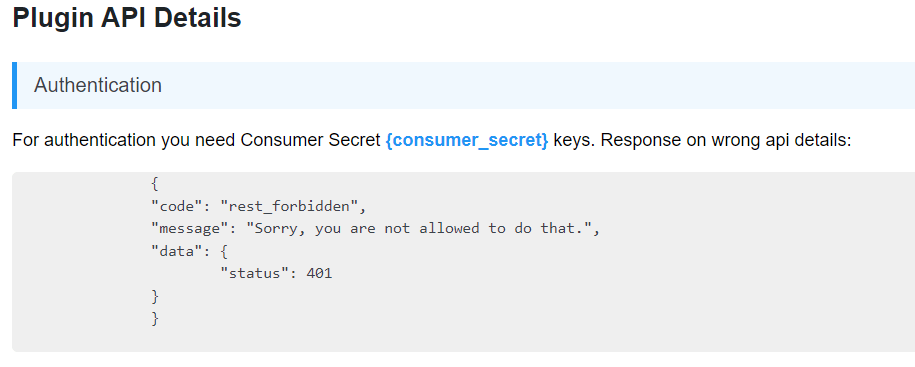
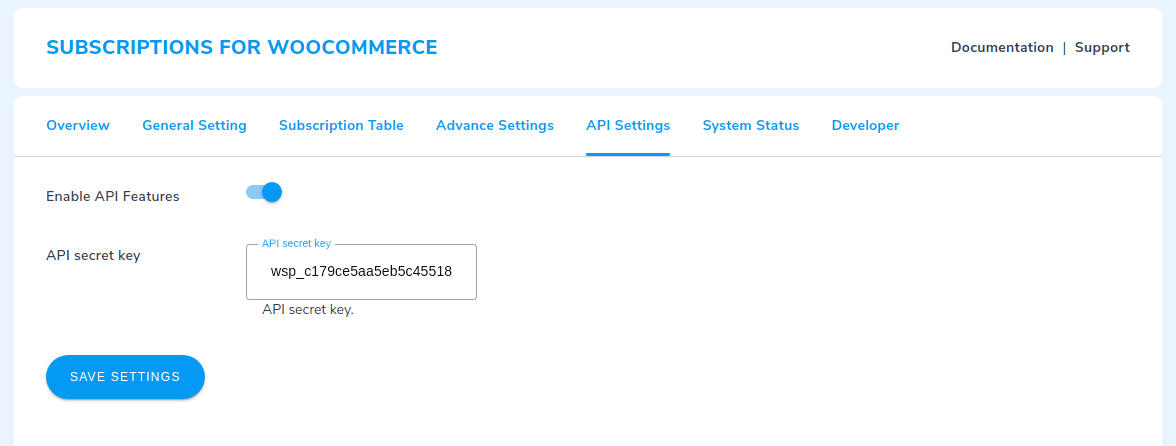
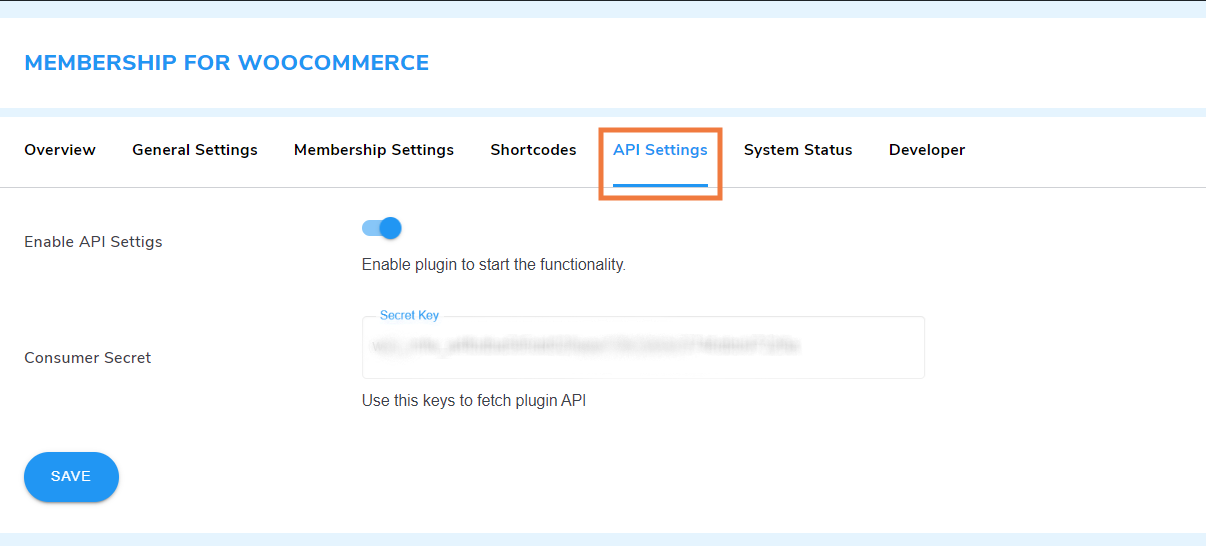
14.API
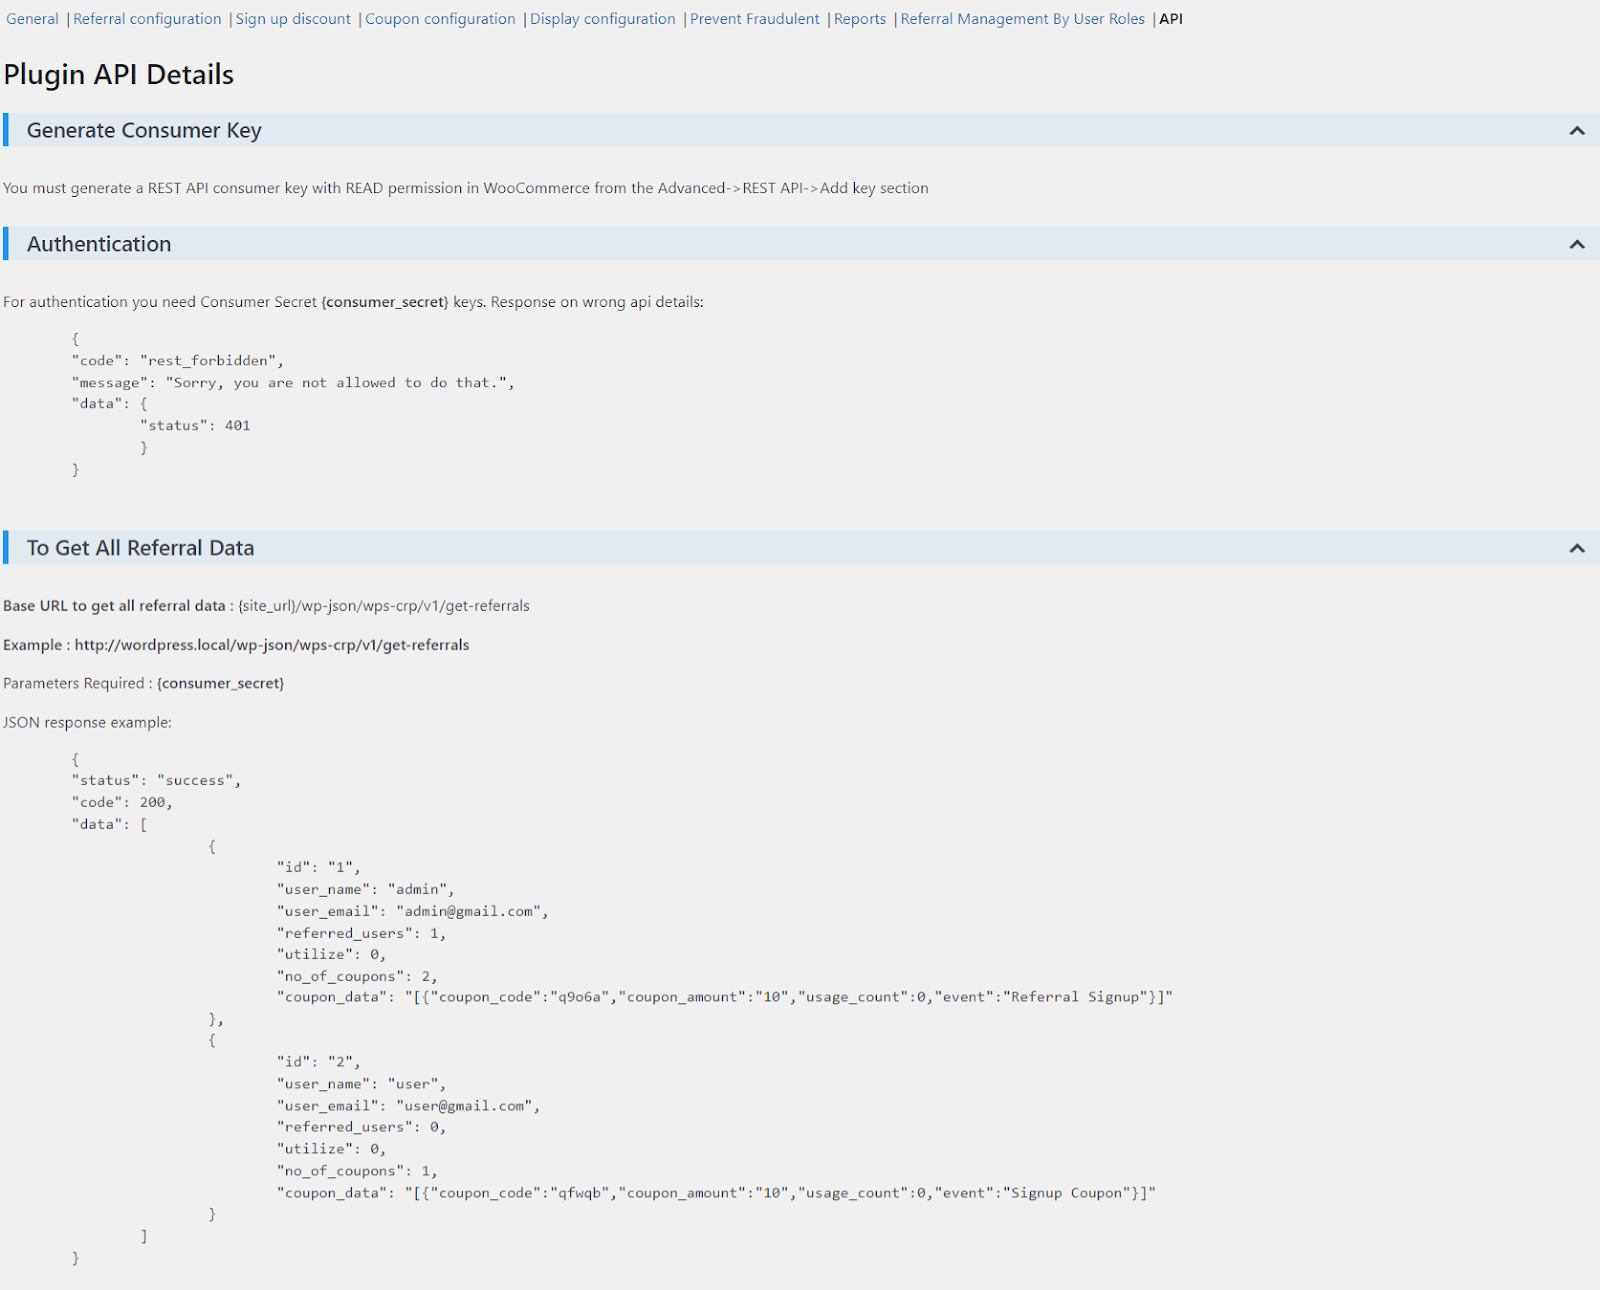
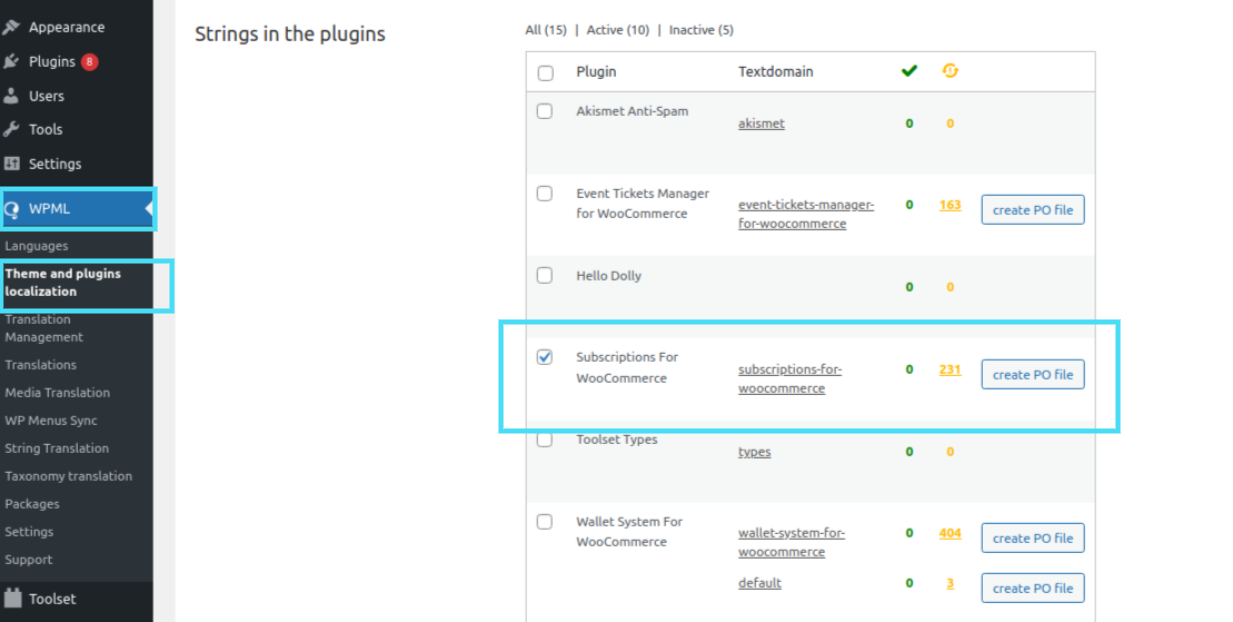
The API tab enables you to generate API keys for Referral Marketing Plugin . This allows external apps to retrieve all of the referral data from the site.
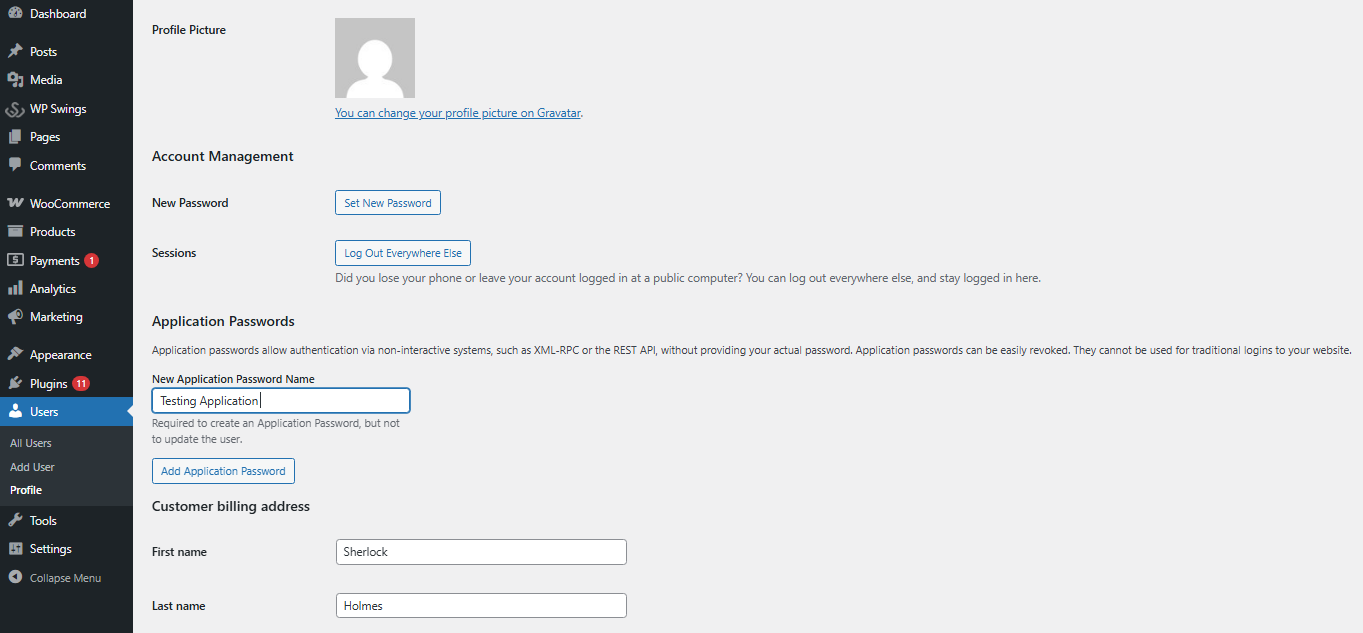
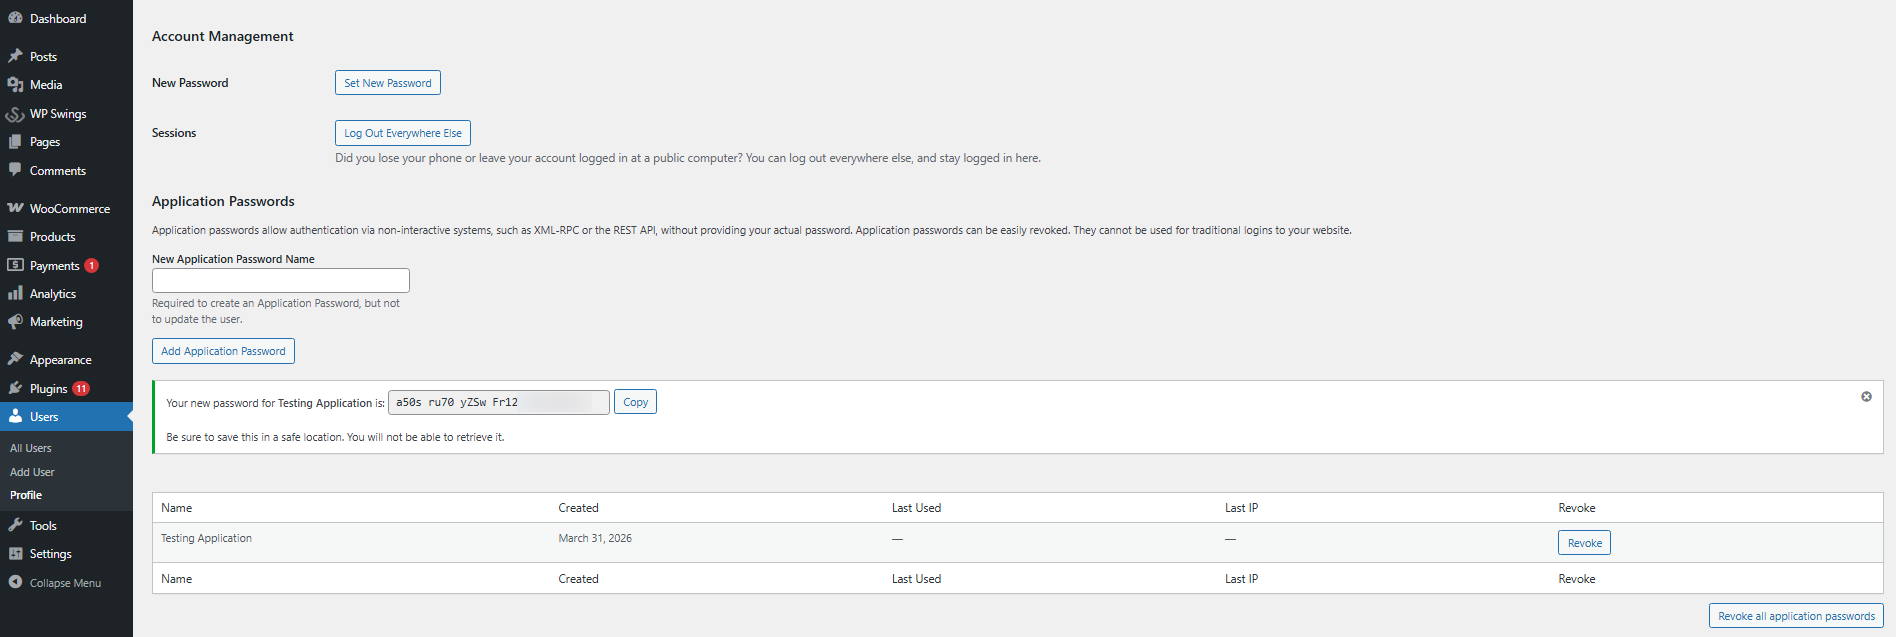
You must generate a REST API consumer key with READ permission in WooCommerce from the Advanced->REST API->Add key section
The generated REST API Key allow you to retrieve all of the referral data from the site.
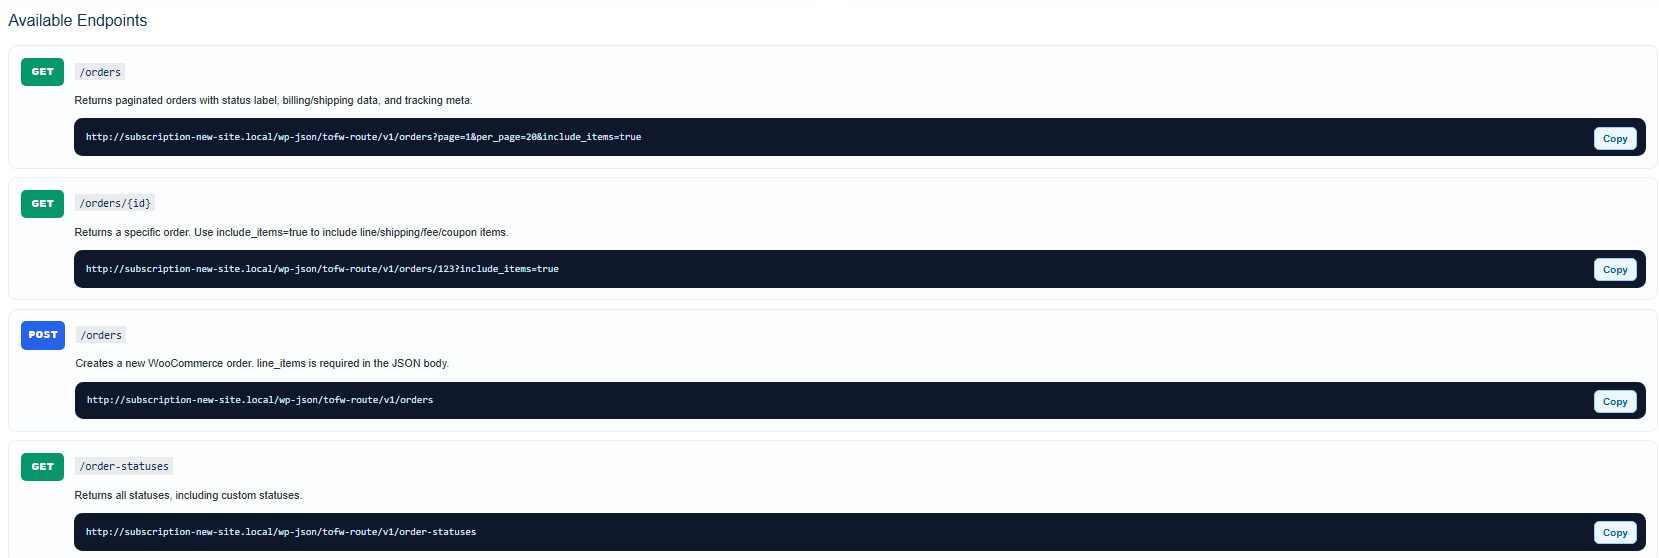
Base URL to get all referral data : {site_url}/wp-json/wps-crp/v1/get-referrals
Example : http://wordpress.local/wp-json/wps-crp/v1/get-referrals
Parameters Required : {consumer_secret}
JSON response example:
{
“status”: “success”,
“code”: 200,
“data”: [
{
“id”: “1”,
“user_name”: “admin”,
“user_email”: “[email protected]”,
“referred_users”: 1,
“utilize”: 0,
“no_of_coupons”: 2,
“coupon_data”: “[{“coupon_code”:”q9o6a”,”coupon_amount”:”10″,”usage_count”:0,”event”:”Referral Signup”}]”
},
{
“id”: “2”,
“user_name”: “user”,
“user_email”: “[email protected]”,
“referred_users”: 0,
“utilize”: 0,
“no_of_coupons”: 1,
“coupon_data”: “[{“coupon_code”:”qfwqb”,”coupon_amount”:”10″,”usage_count”:0,”event”:”Signup Coupon”}]”
}
]
}
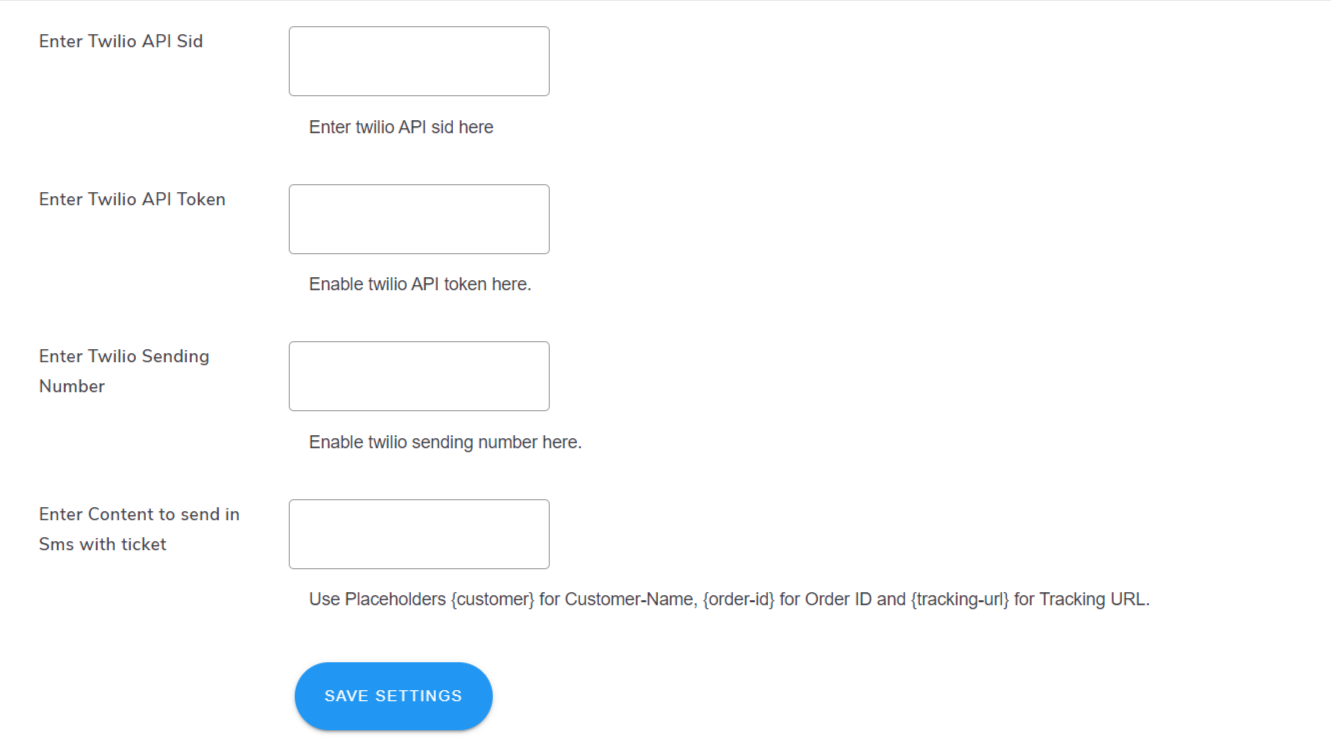
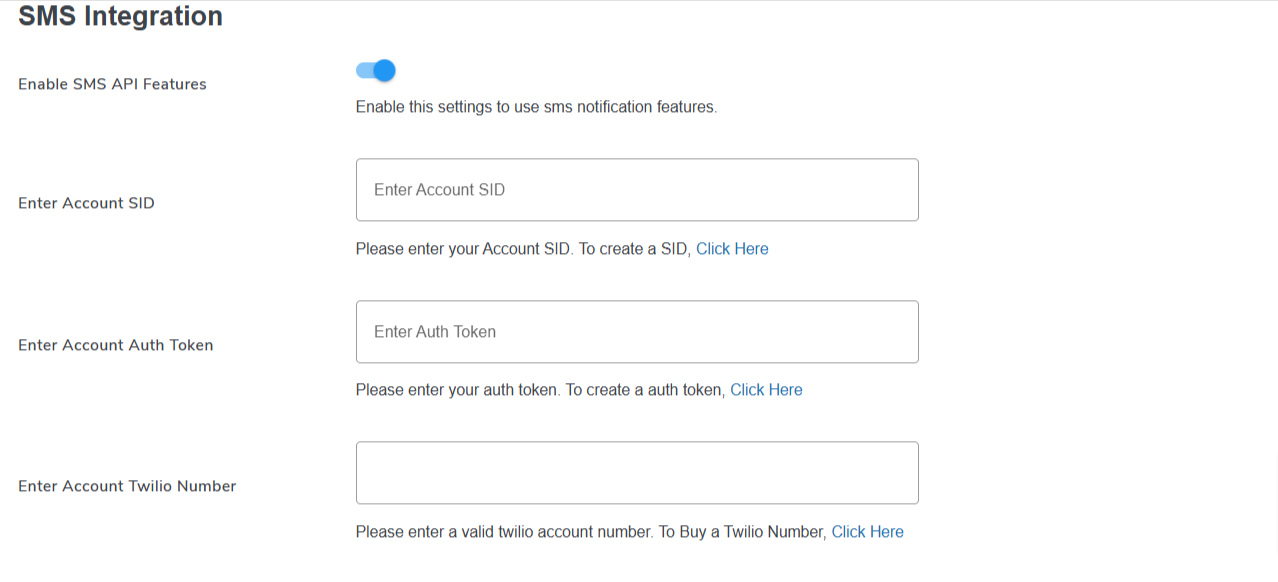
15.SMS Settings
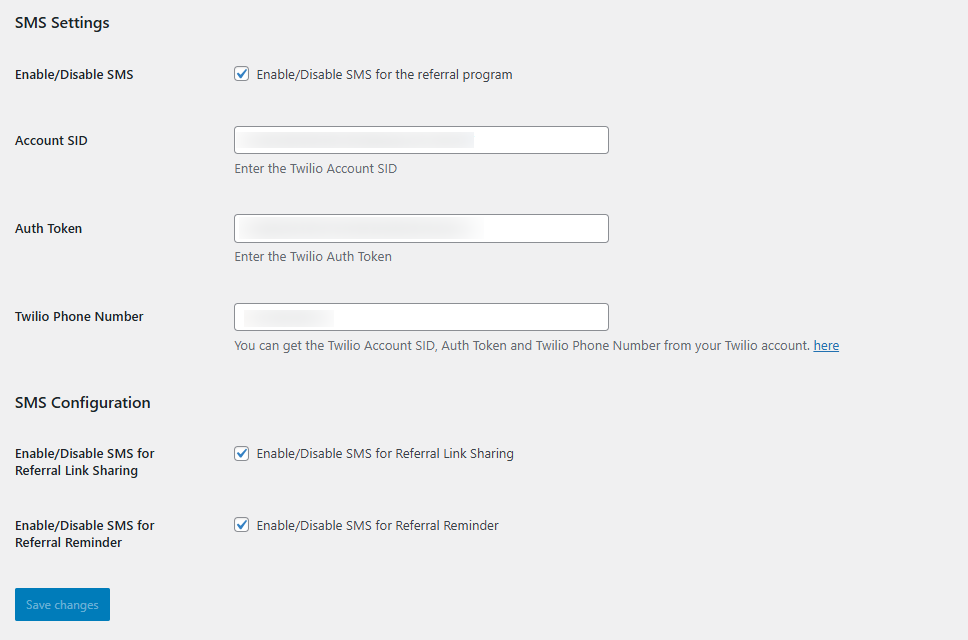
This setting deals with Twilio integration and offers multiple options for setting up your coupon referral plugin with it. Let’s debunk the setup options here –
- Enable Twilio API Integration: This toggle button is required to be enabled to offer easy Twilio service integration for your SMS reminders.
To send SMS reminders, our plugin offers Twilio compatibility. You are just required to create your Twilio account, link the respective credentials for integration, and send easy SMS reminders.
- Enter Twilio Account SID: You are required to input a Twilio API SID here, which you can easily copy-paste from your Twilio account page.
- Enter Auth Token: This setup option requires you to easily enter the Twilio API Token details for integration of your Twilio SMS reminder service.
- Enter Twilio Number: You need to enter your SMS Sending Number in the text box offered to complete the Twilio account integration settings with your plugin.
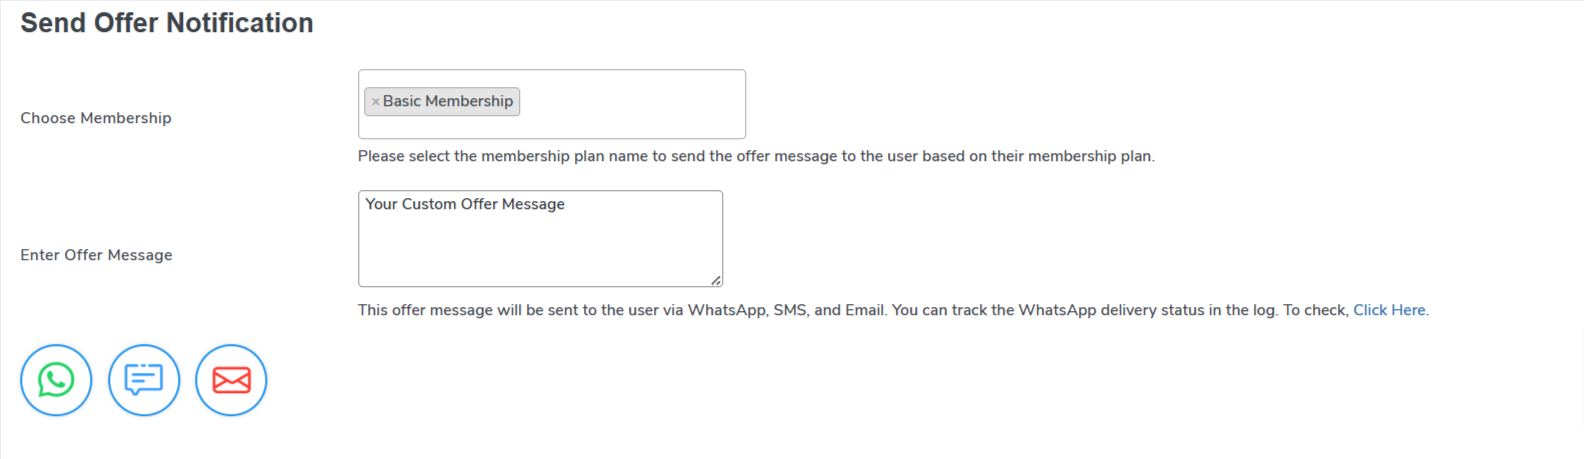
Frontend Representation of This feature –
(This is how the customers will get the option to share the referral coupon codes)
(This is the message the referrers receive the text messages)

15.1.SMS Configuration
- Enable/Disable SMS for Referral Link Sharing: Utilize this setting to enable/ disable the referral link sharing functionality.
- Enable/Disable SMS for Referral Reminder: Utilize this setting to enable/ disable the referral reminder functionality.
16.Compatibility With Zoho CRM Integration
The WooCommerce referral program is compatible with Zoho CRM Integration, allowing admins to map details related to the coupons. This functionality works against two fields: user and order. The parameters covered under this compatibility are referred user and order (to determine whether the user and the order are referred to or not).
17.Compatibility With Salesforce Integration With WooCommerce

WooCommerce referral program is compatible with Salesforce Integration for WooCommerce, the admins can map details related to the coupon details. This functionality works against two fields: user and order. The parameter covered under this compatibility is referred user (to determine whether the user is referred or not).
The admin can either “add a new field” or use an “existing field” to map a field to map these details.
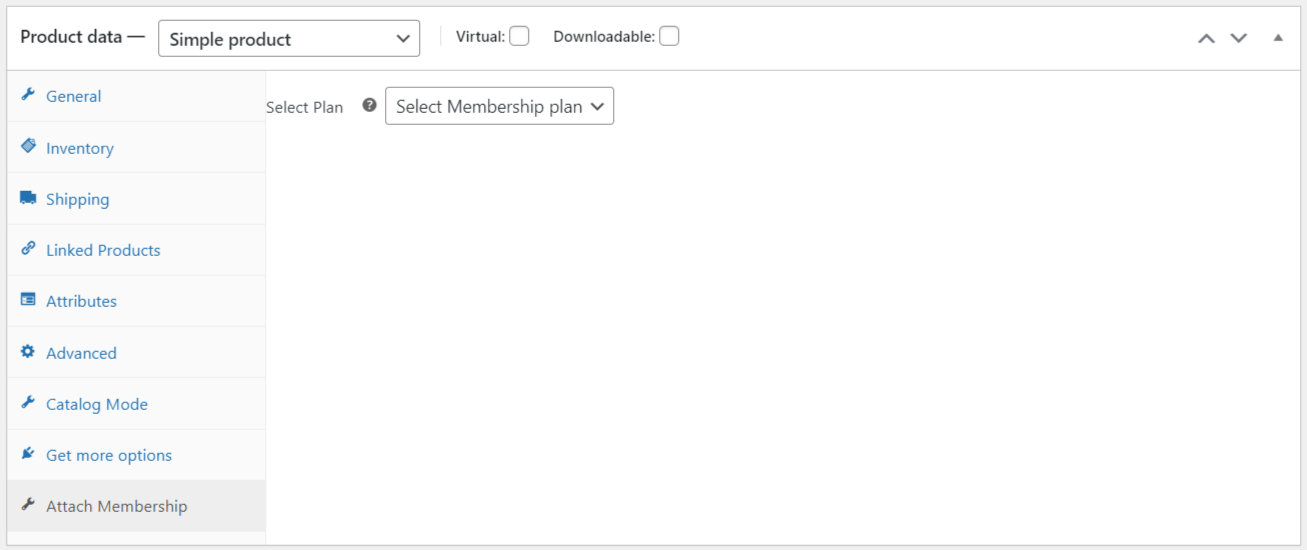
18.WooCommerce Points & Rewards
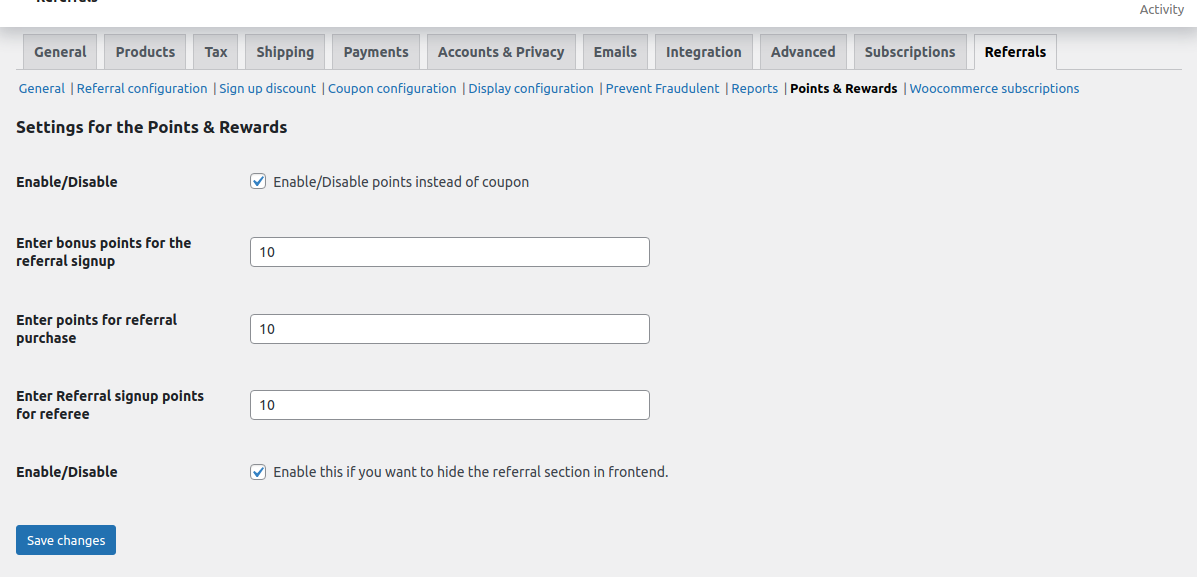
The Coupon Referral Program can be integrated with the WooCommerce Points & Rewards, the plugin that allows the admin to offer points instead of coupons as referral rewards on referral sign-up, referral purchase, and referee sign-up.
- Enable/Disable: Enable offering points instead of discount coupons.
- Enter Bonus Points for Referral Signup: The admin can offer reward points to the referrers when their referred users complete the signup process.
- Enter Points For Referral Purchase: Enable referrers to earn reward points when their referred users make purchases.
- Enable Referral Signup Points For The Referee: Enable the referred users to earn reward points upon completing the signup process.
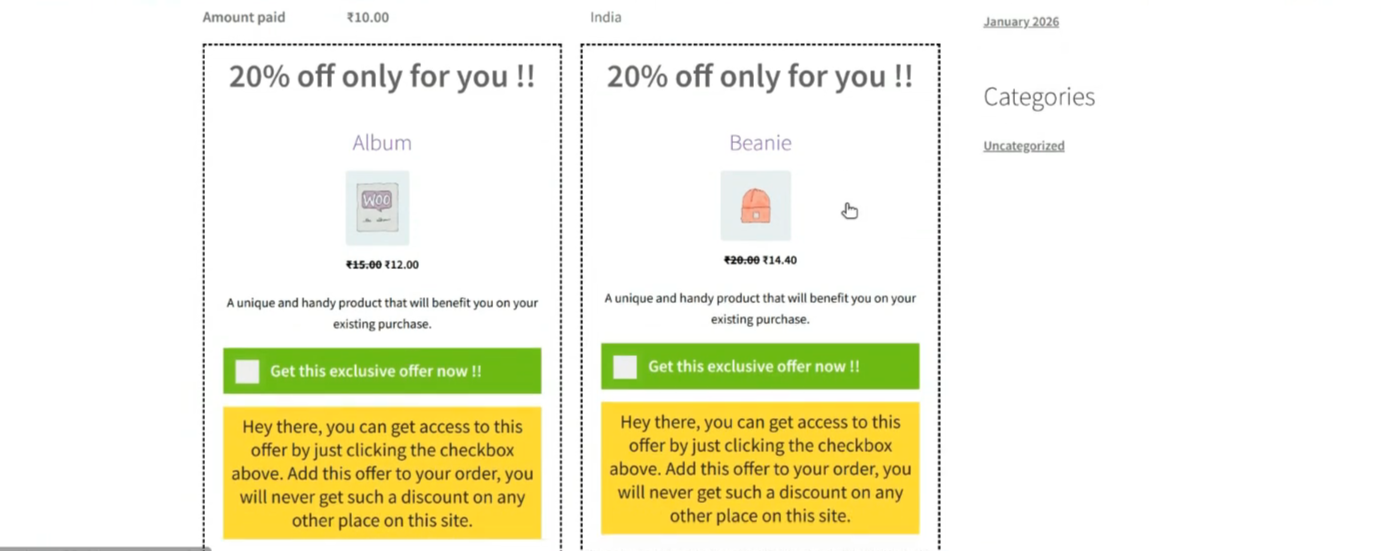
- Enable/Disable: Admin can choose to hide the coupon referral section in the front end.
For example: If this setting is disabled, then the front end would look similar to that in the image below.

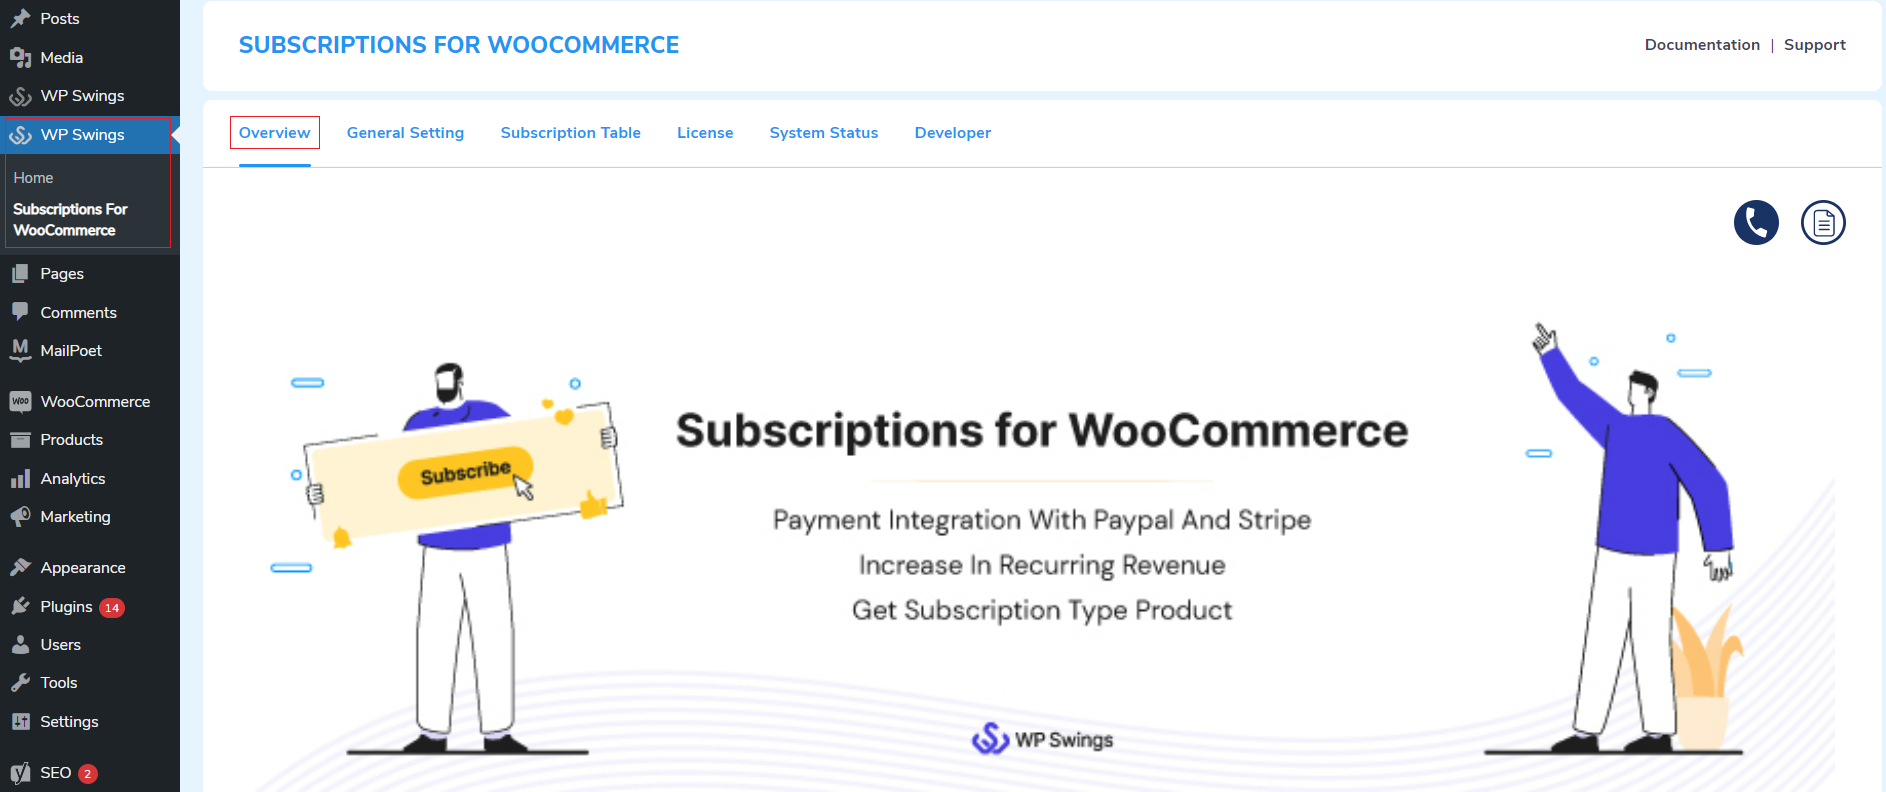
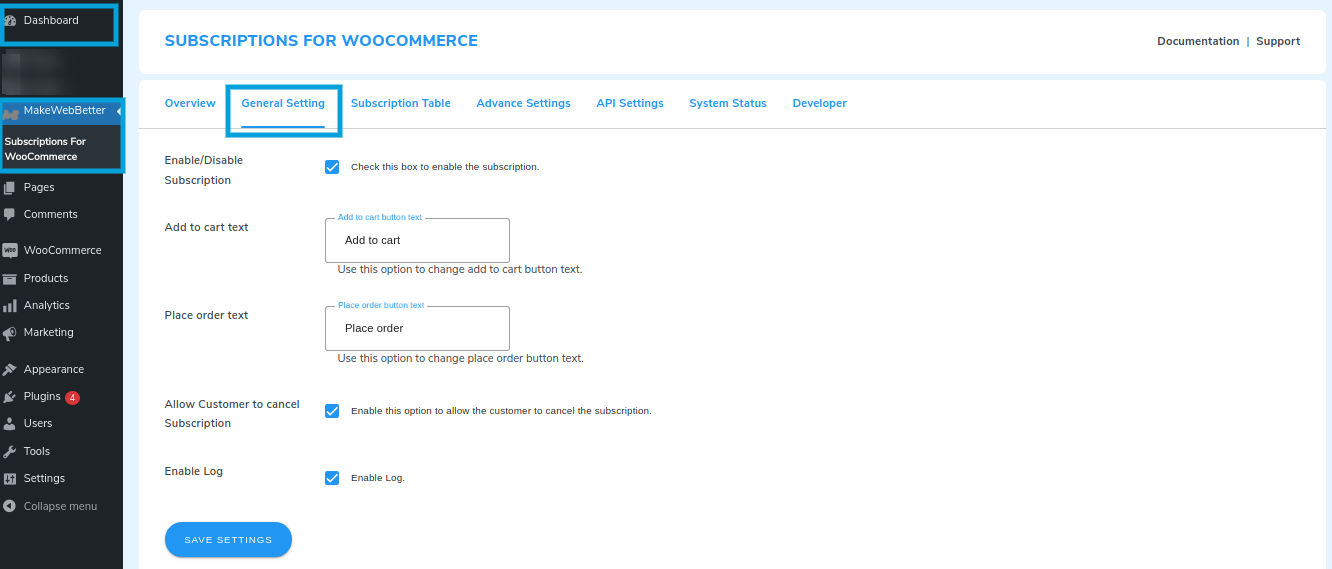
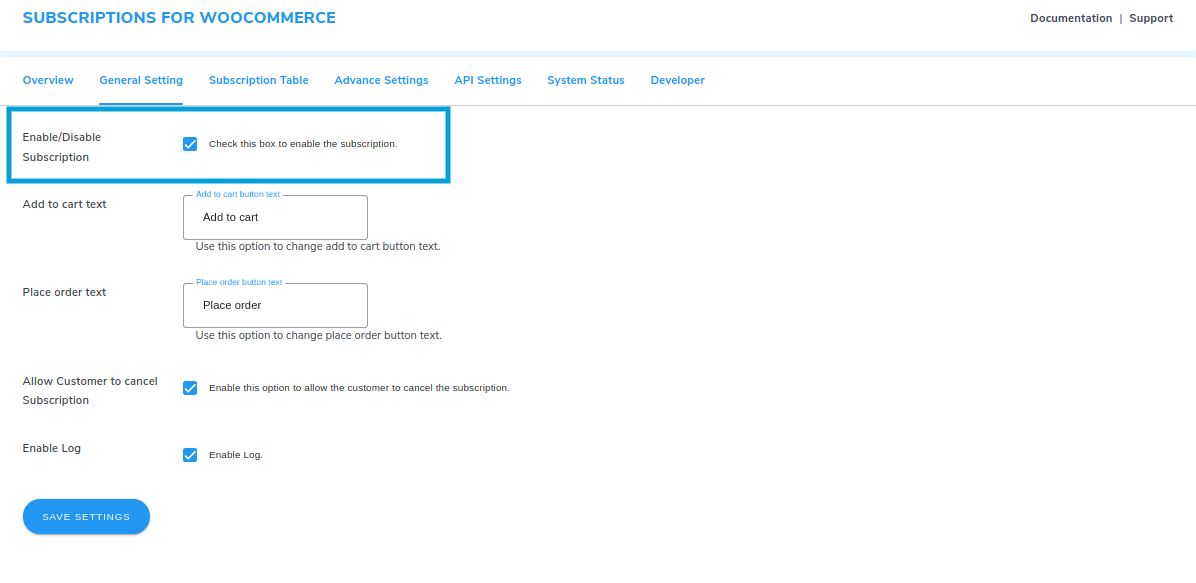
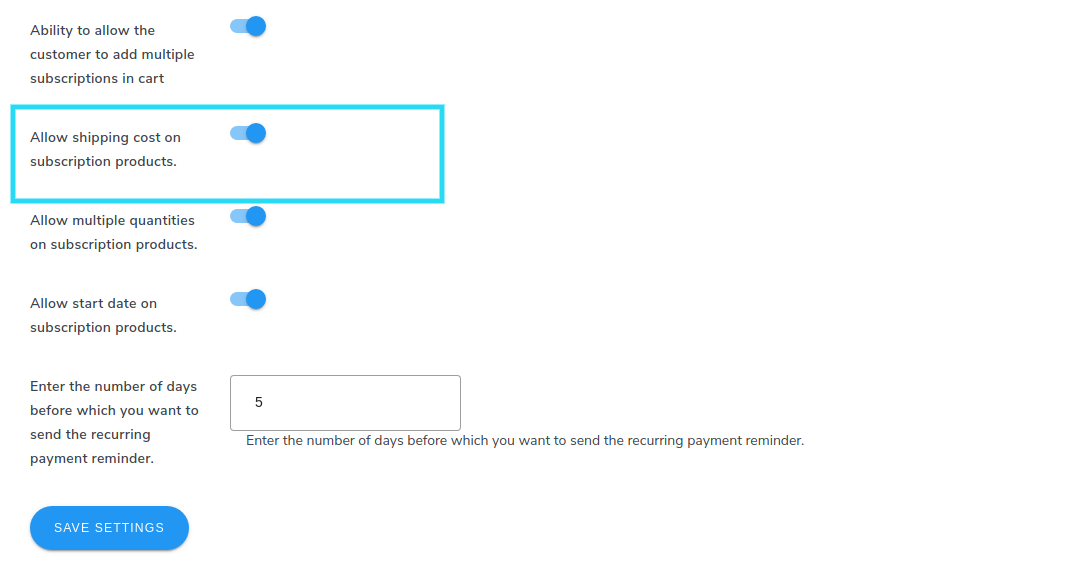
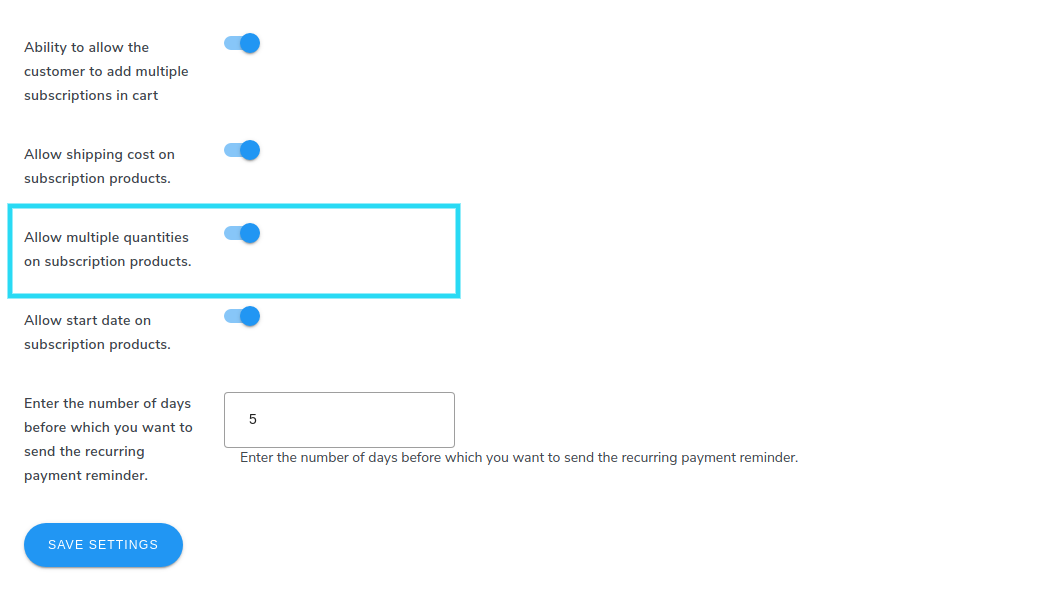
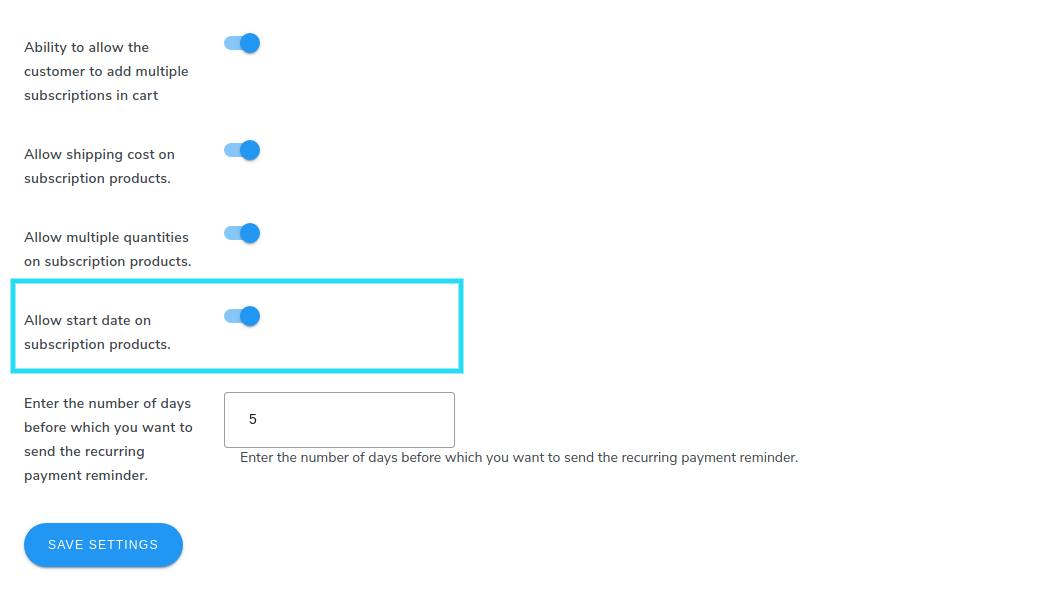
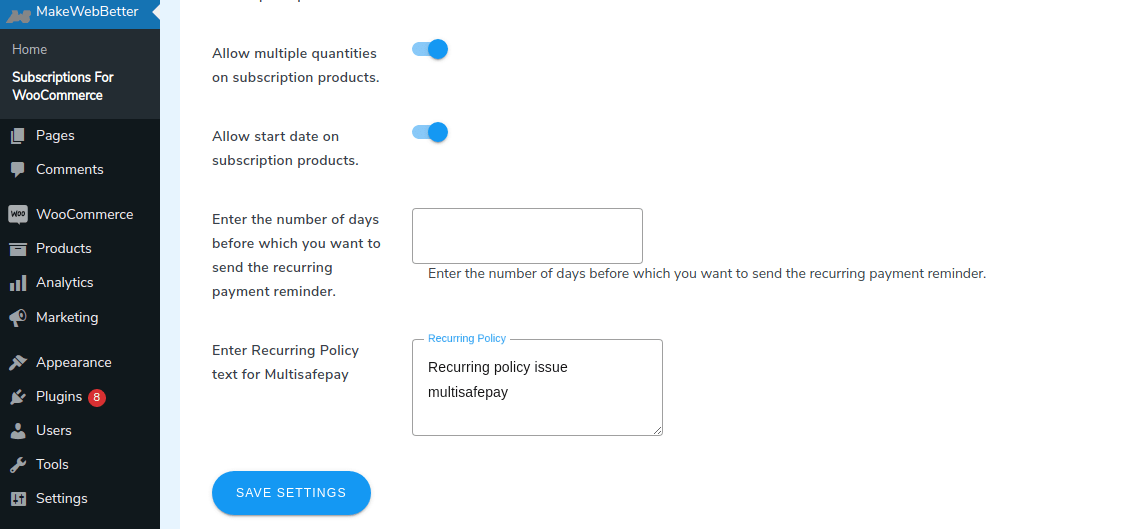
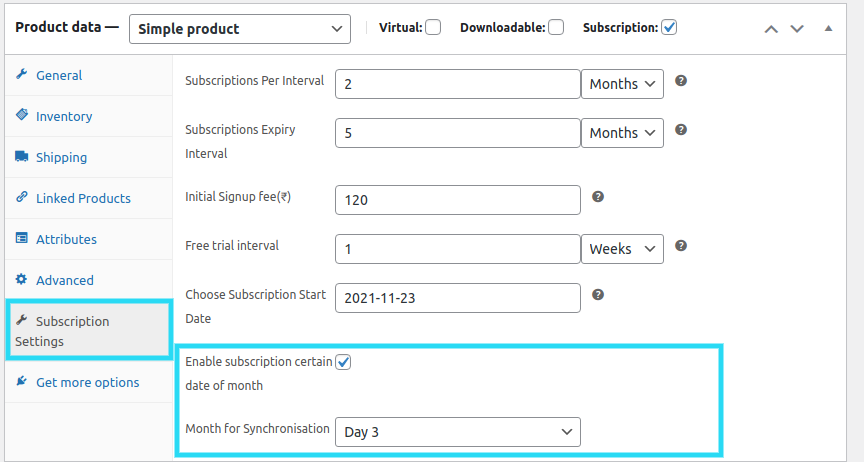
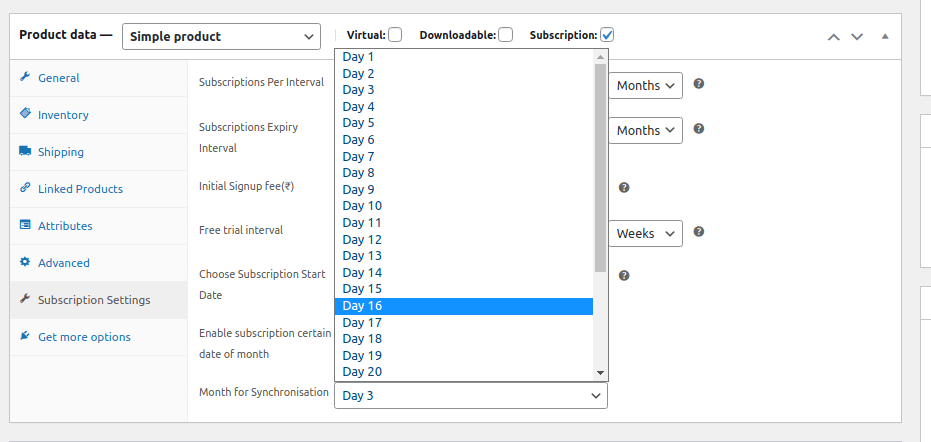
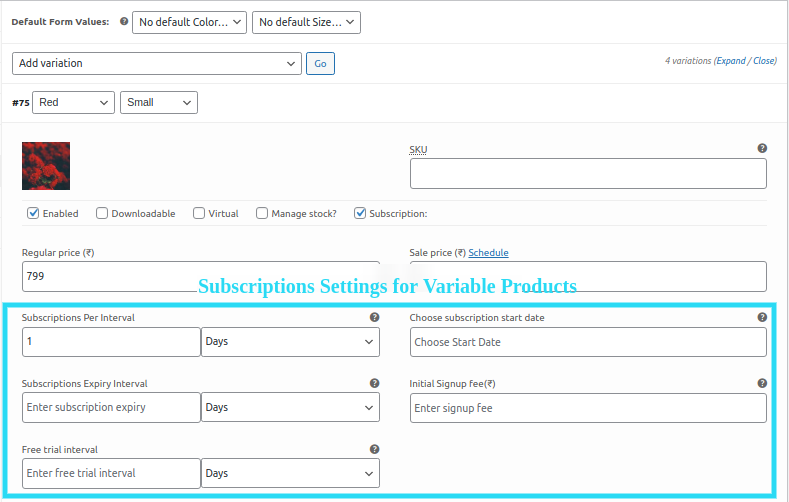
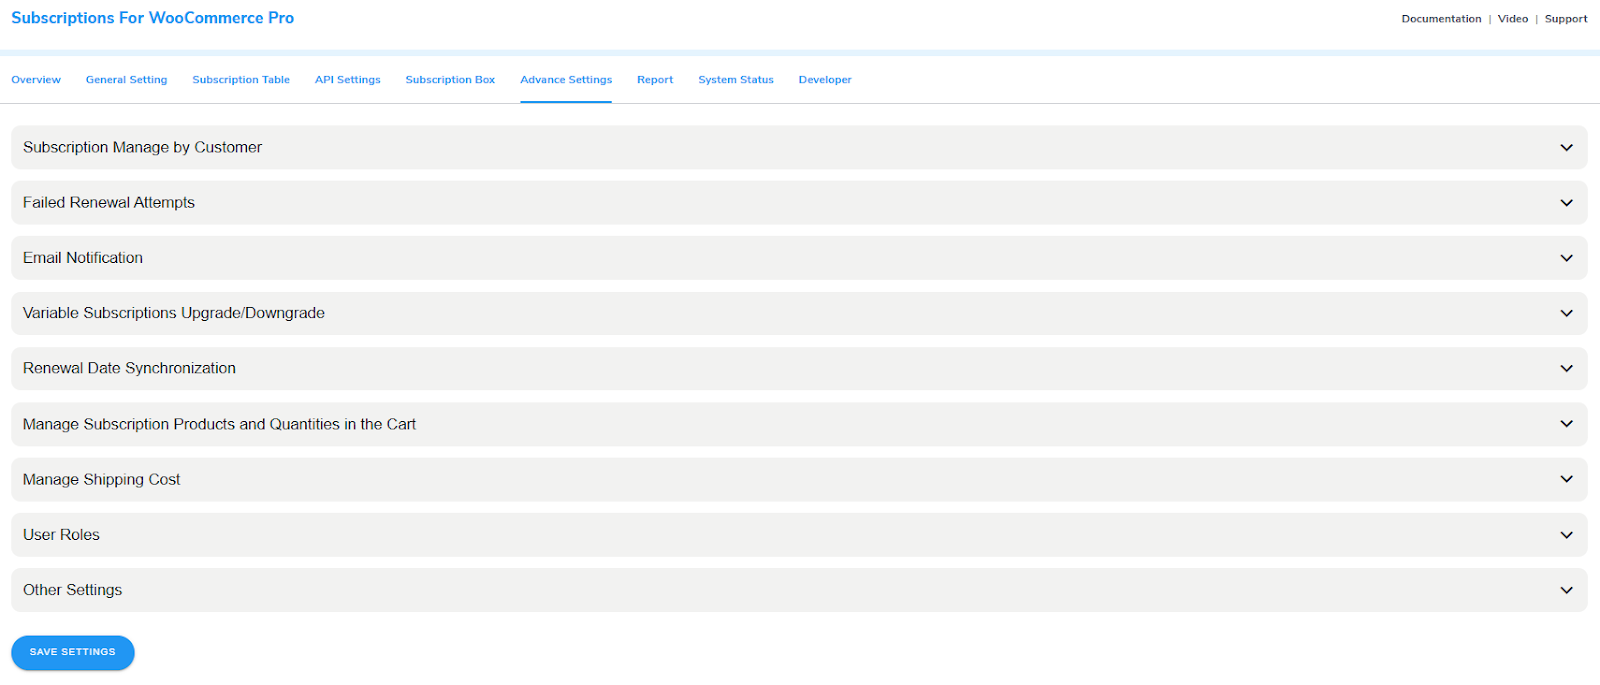
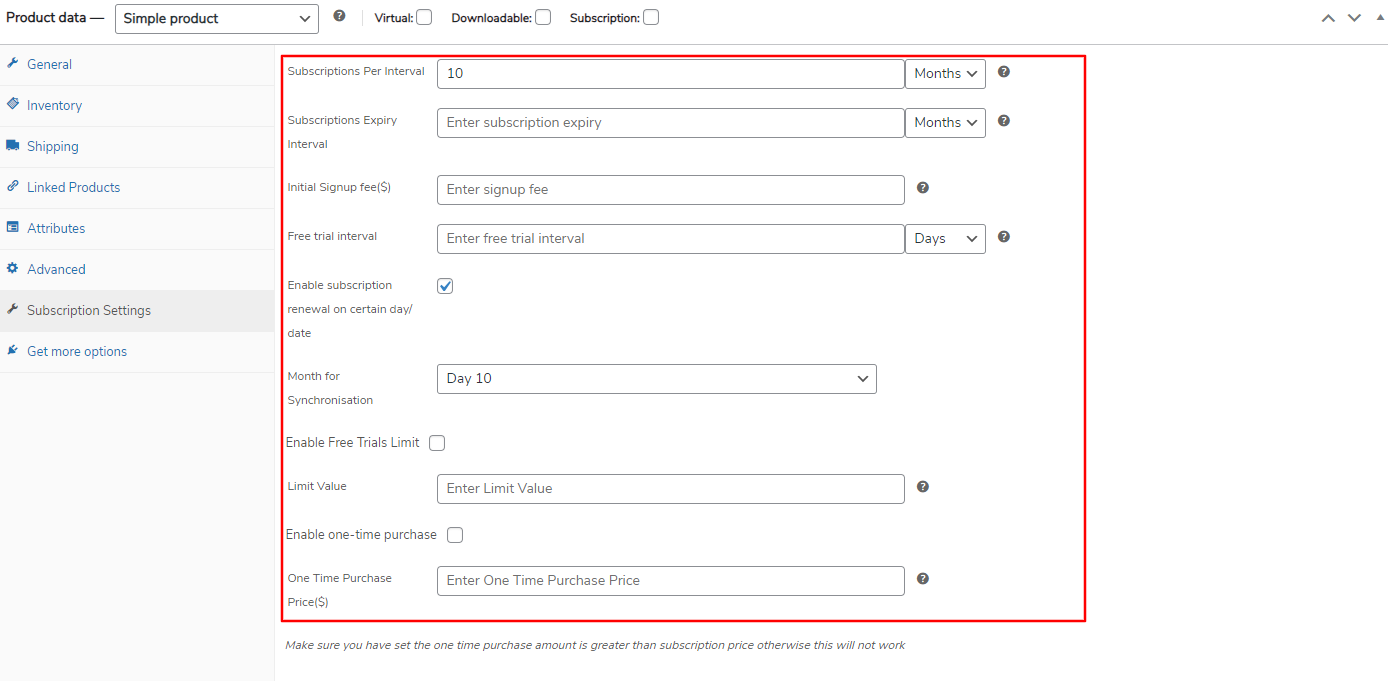
19.WooCommerce Subscription
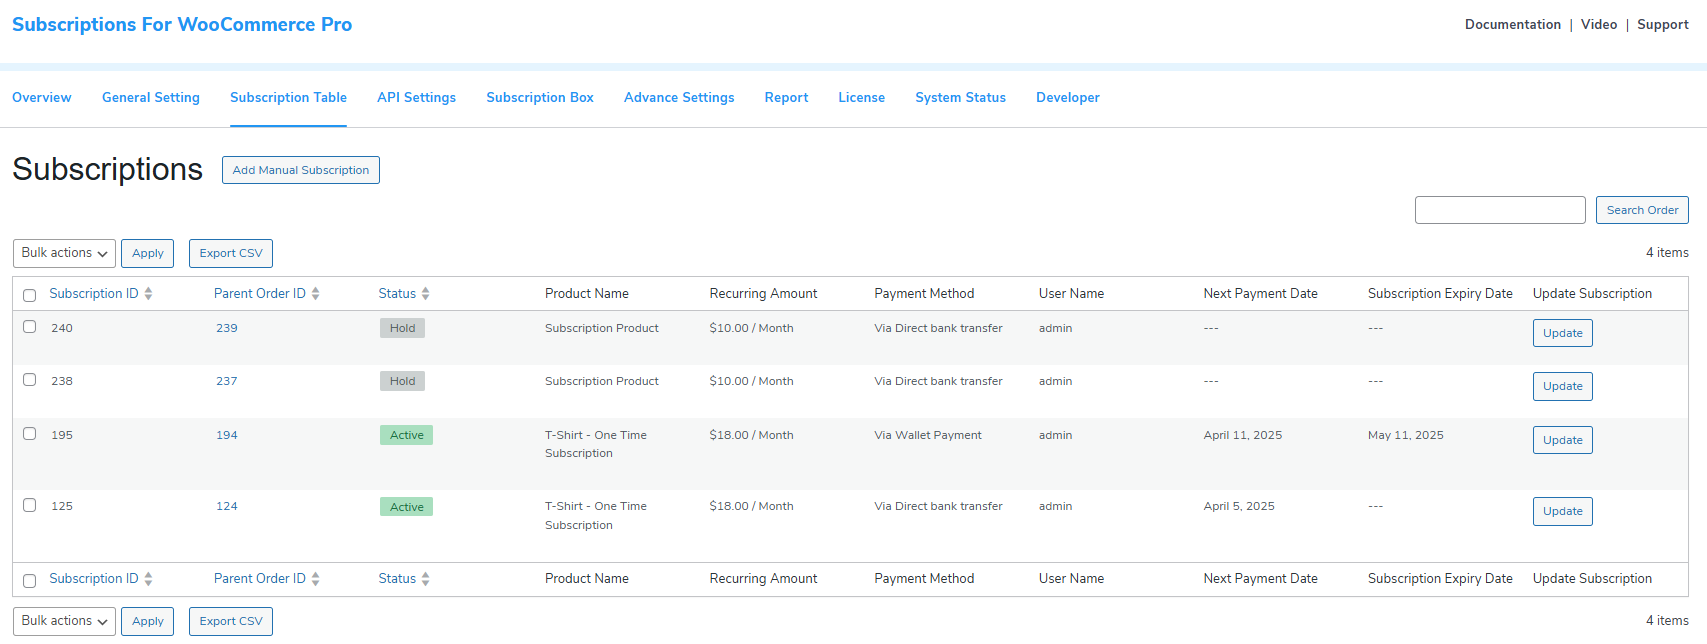
The coupon Referral Program is compatible with the WooCommerce Subscription plugin to reward the subscribers of your store.
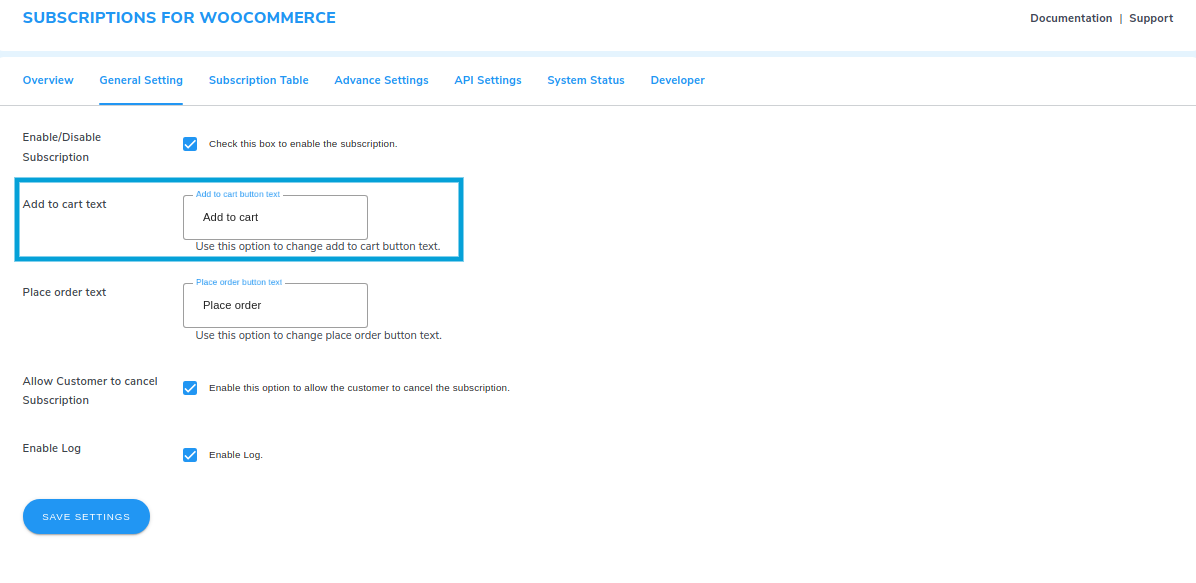
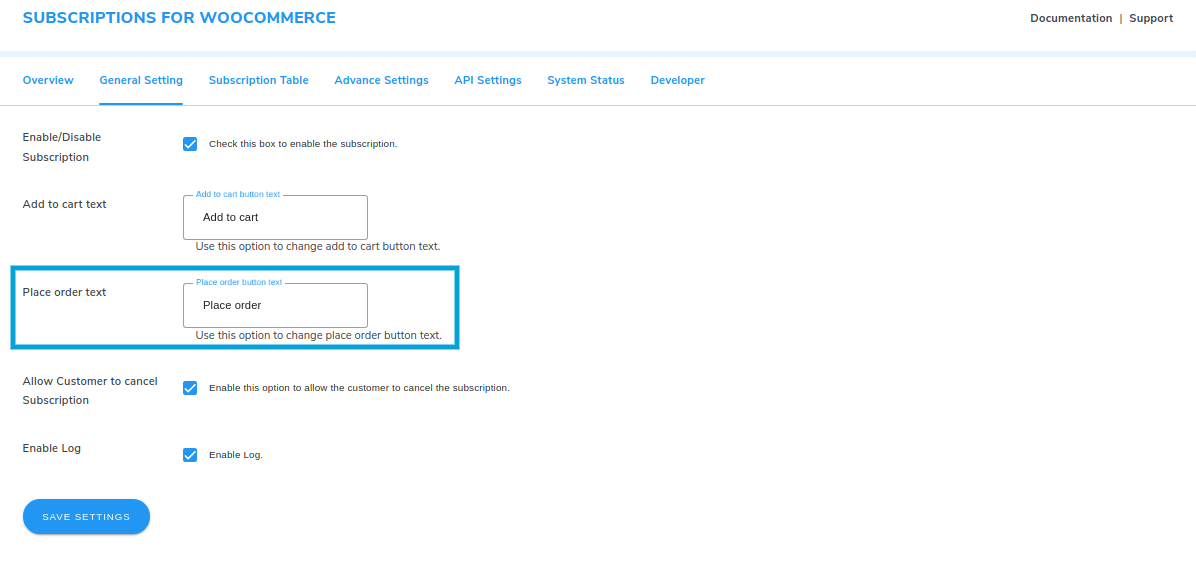
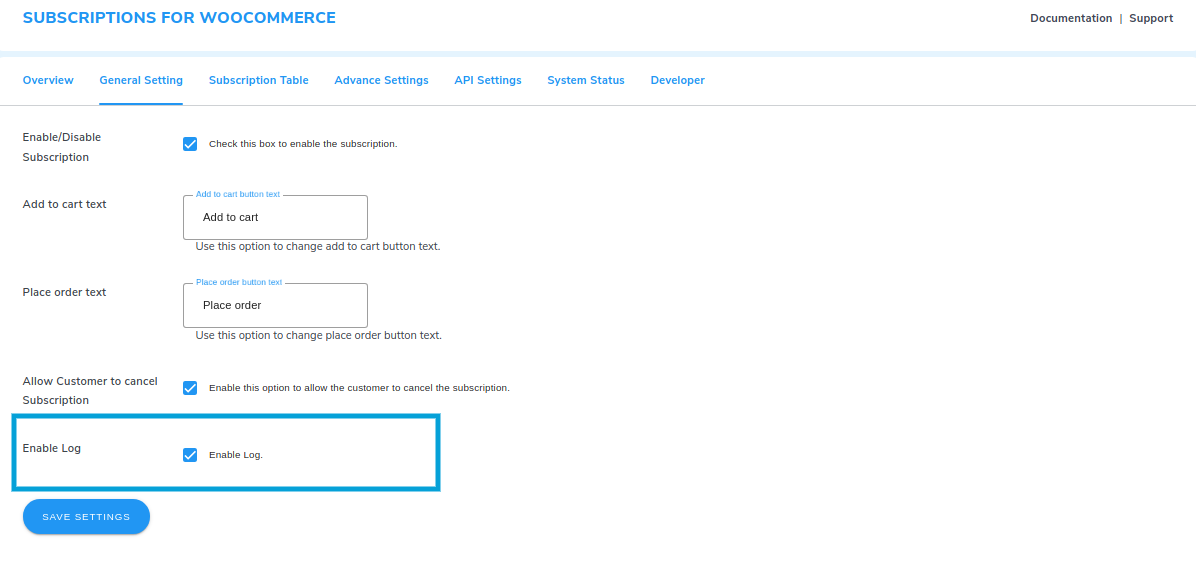
Settings for the WooCommerce Subscriptions,
-
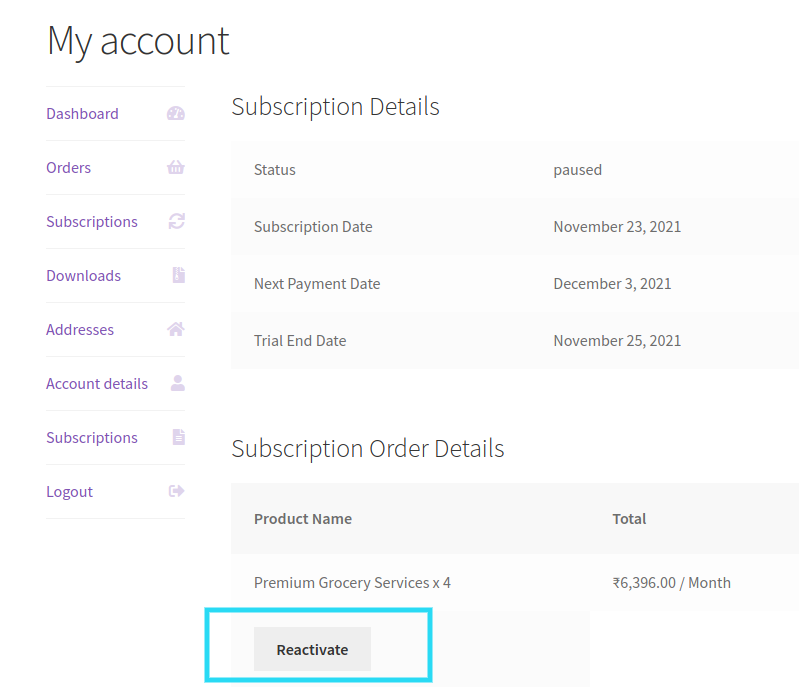
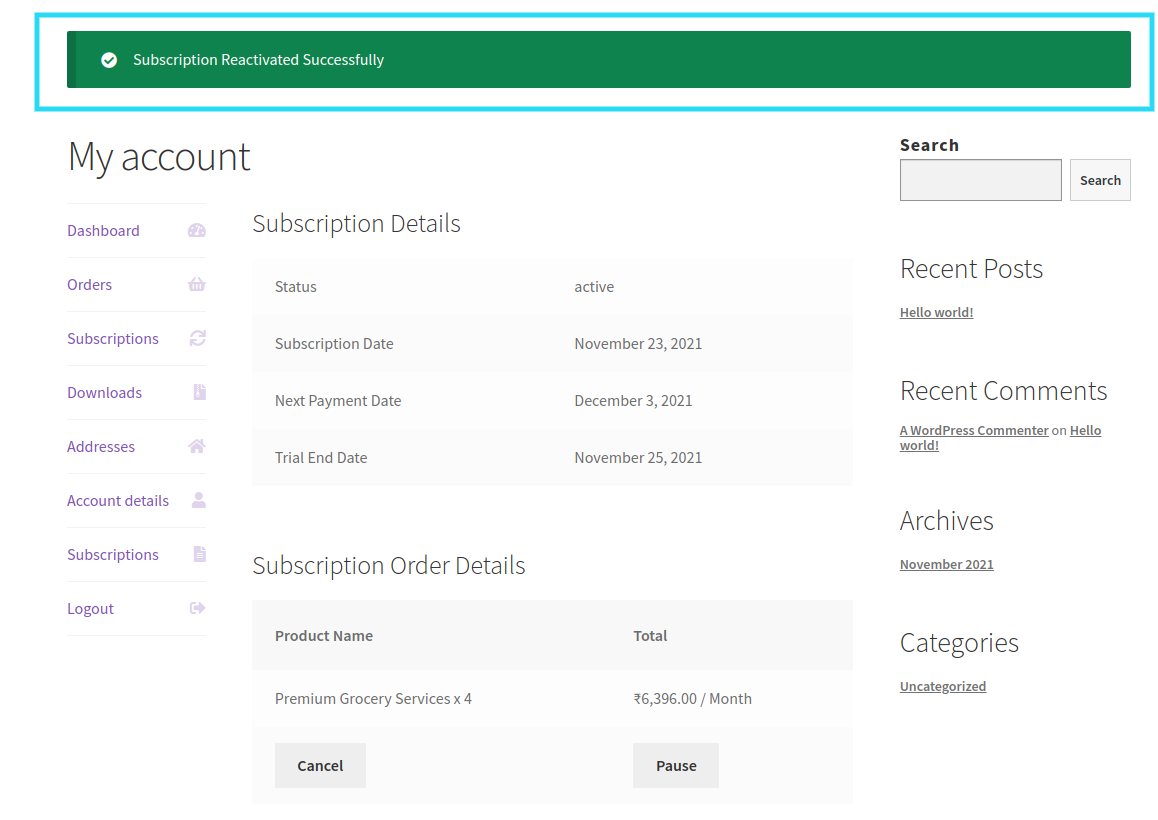
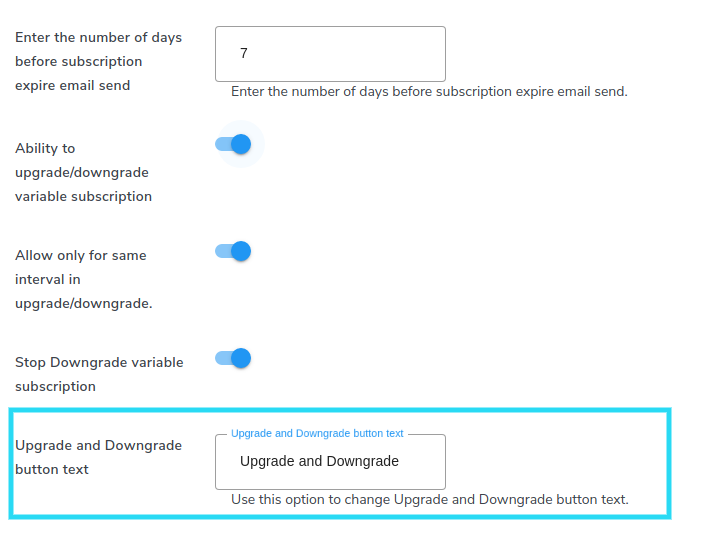
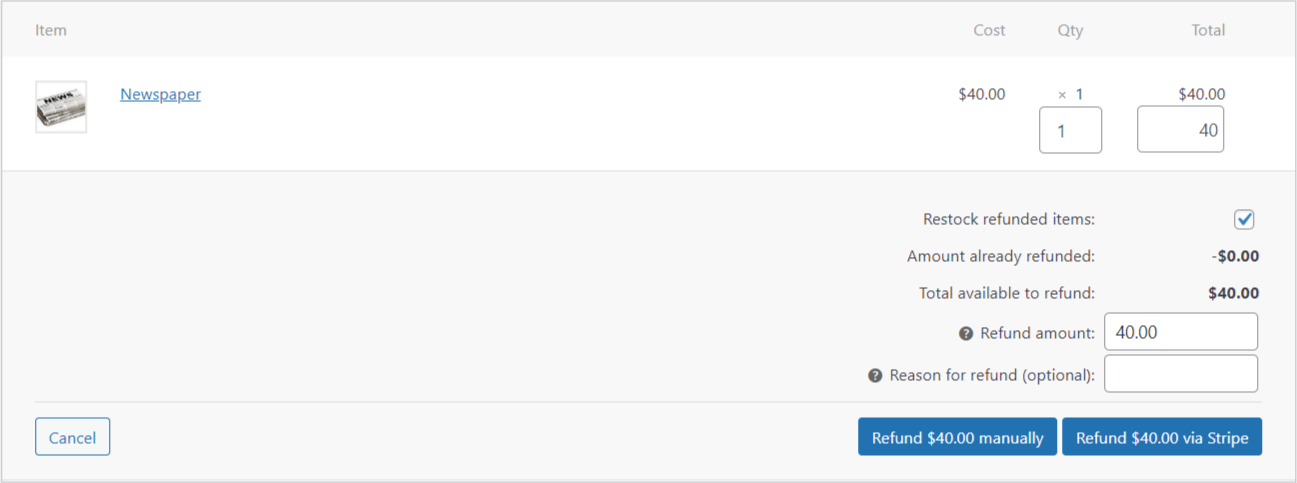
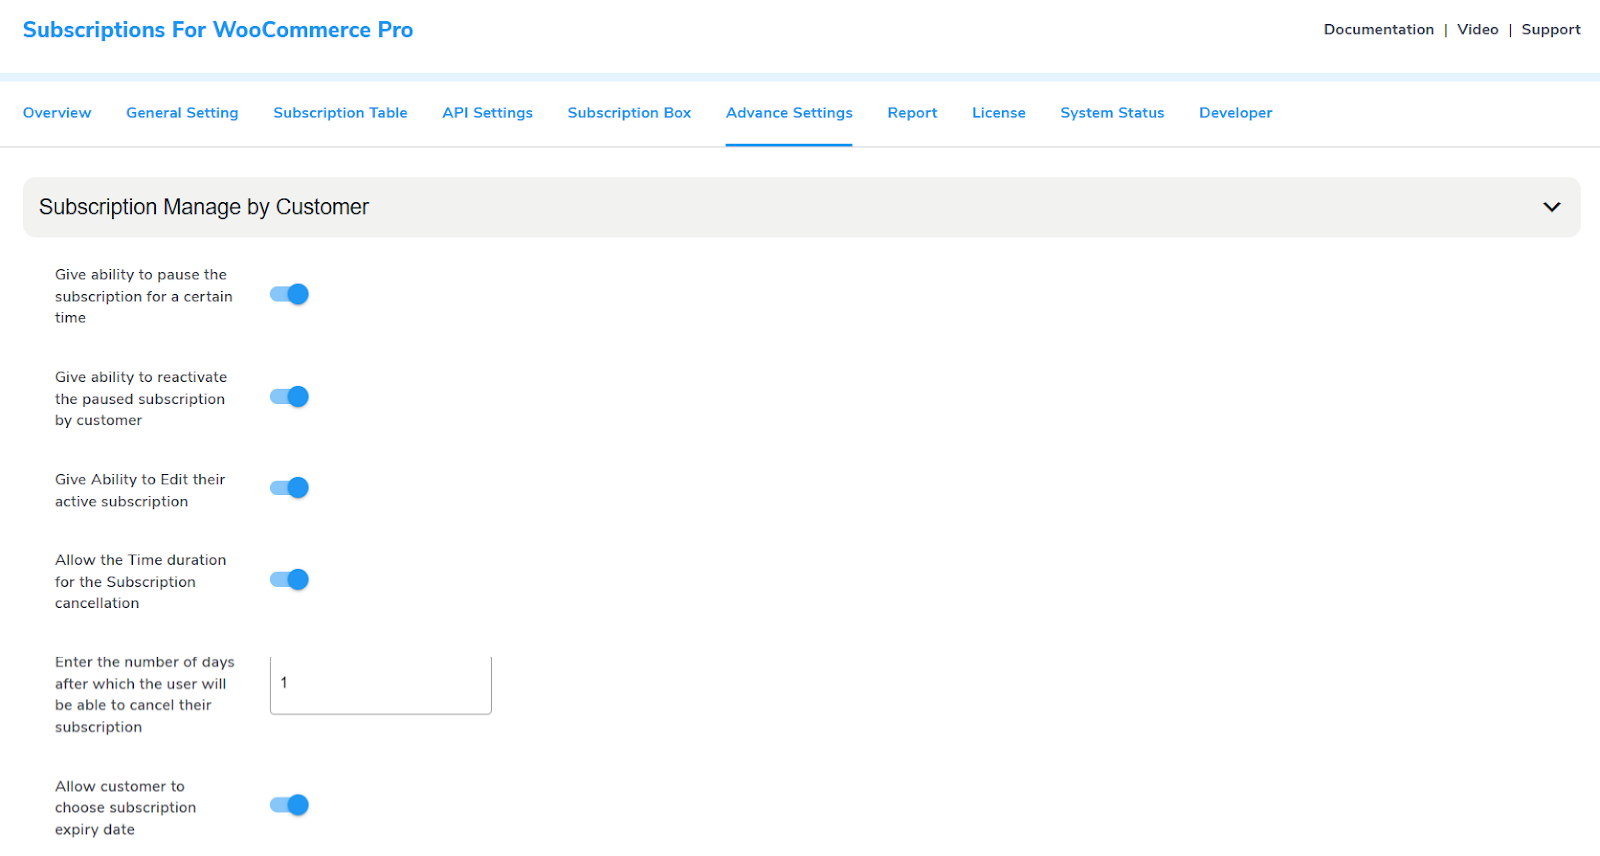
- Enable/Disable: Admin can allow customers to apply referral coupons for renewing product subscriptions.
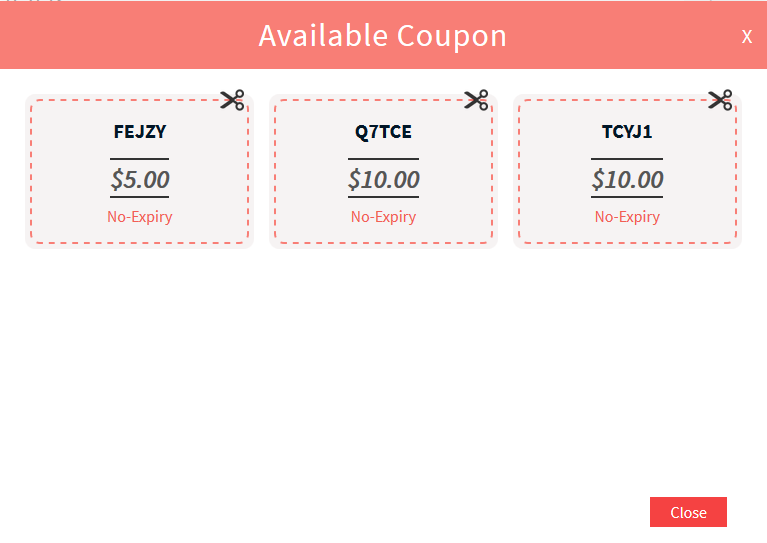
- Apply Coupons: There are two different methods to apply the coupon to the renewal of recurring payments.
1. All Coupons: The Admin can allow customers to use all types of coupons for product subscription renewals.
2. Allow Customers to Choose: The admin can allow customers to redeem a selected coupon for the renewal of their subscription products.
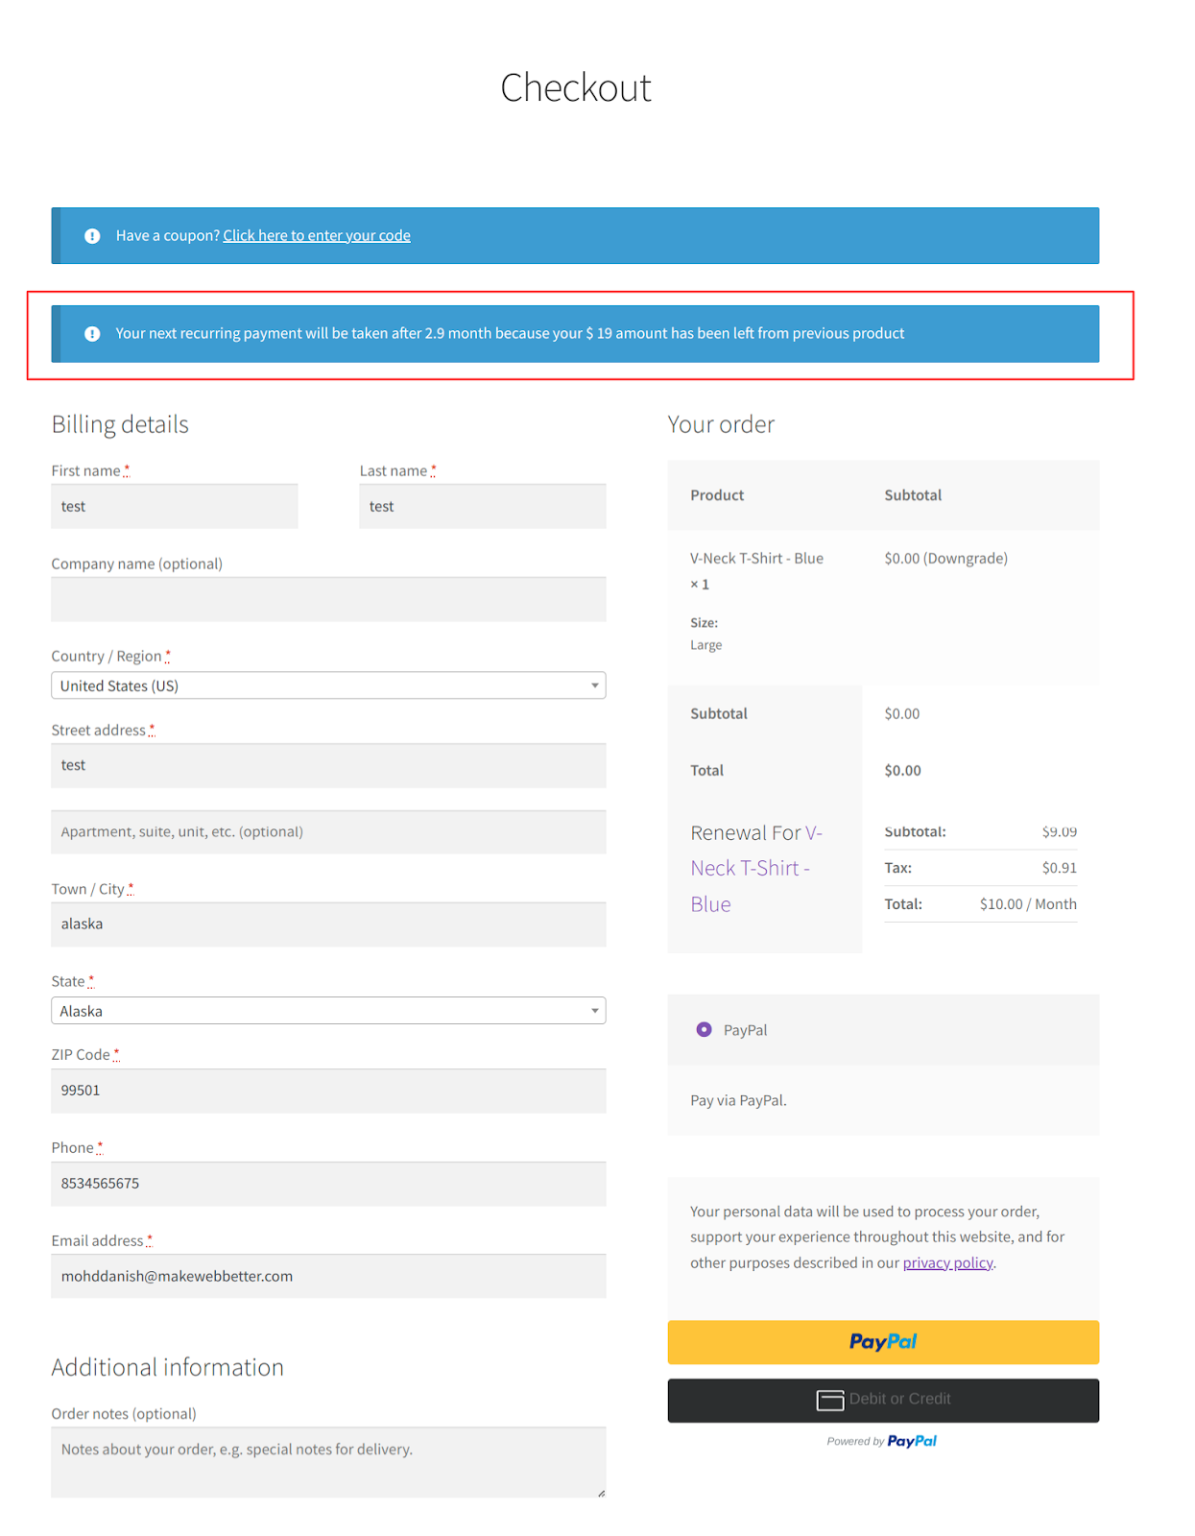
- Enable/Disable Discount for First Renewal Only: The admin can enable/disable for first renewable only. After enabling this feature, the coupon will be applied on the first renewal.
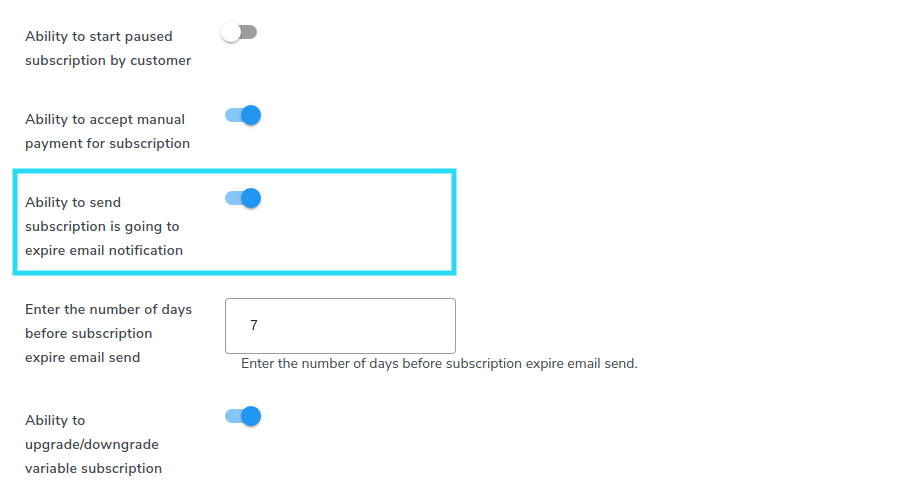
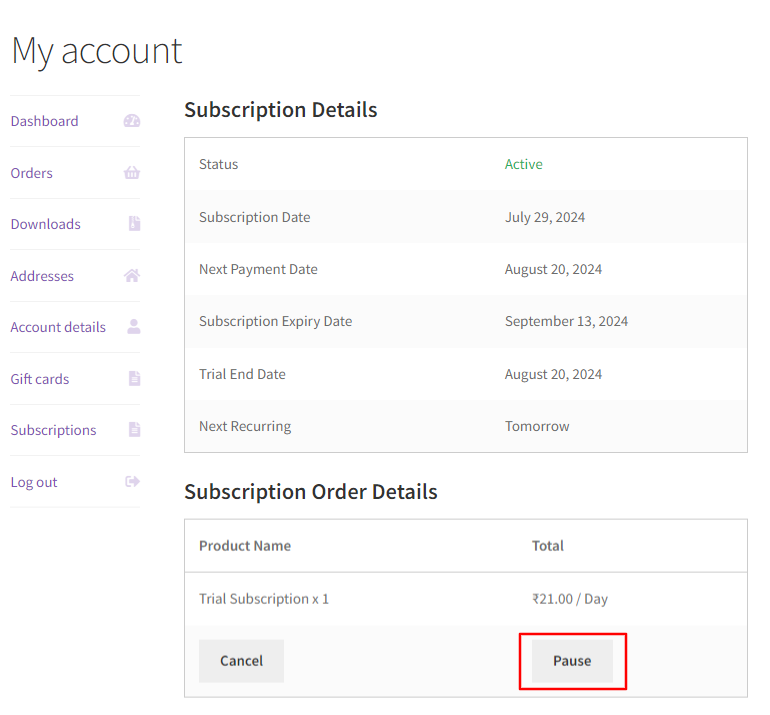
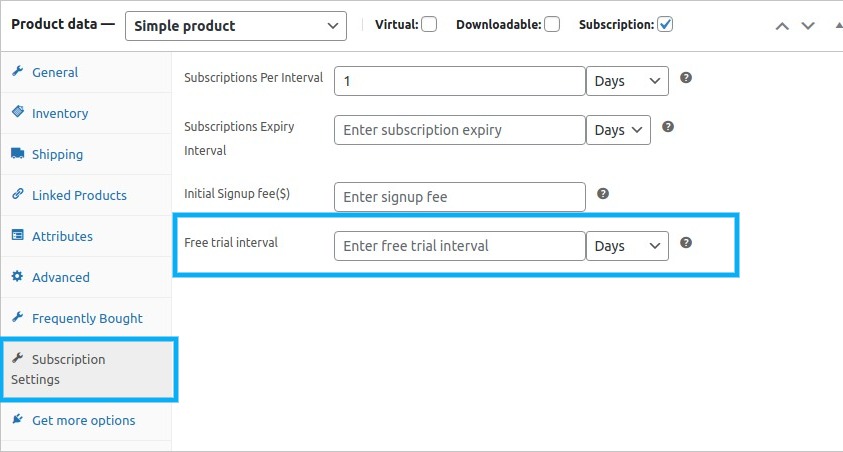
Give coupon discount when the referred customer paid after the free trial ended,
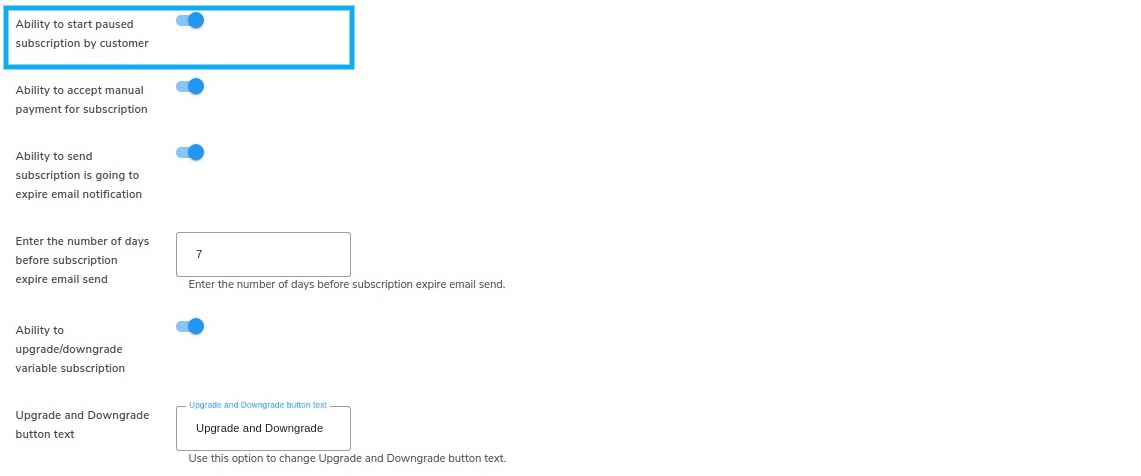
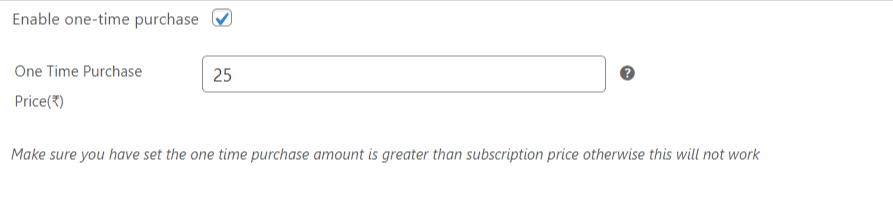
- Enable/Disable: Admin can allow customers to apply referral coupons for “free trial” product subscriptions. After enabling the settings, the user can get the discount coupon on the first recurring payment after the free trial is over
- Discount Coupon Amount: Enter the discount coupon amount.
- Discount Coupon Type: The admin can also select between “Fixed” or “Percentage”, for the discount type.
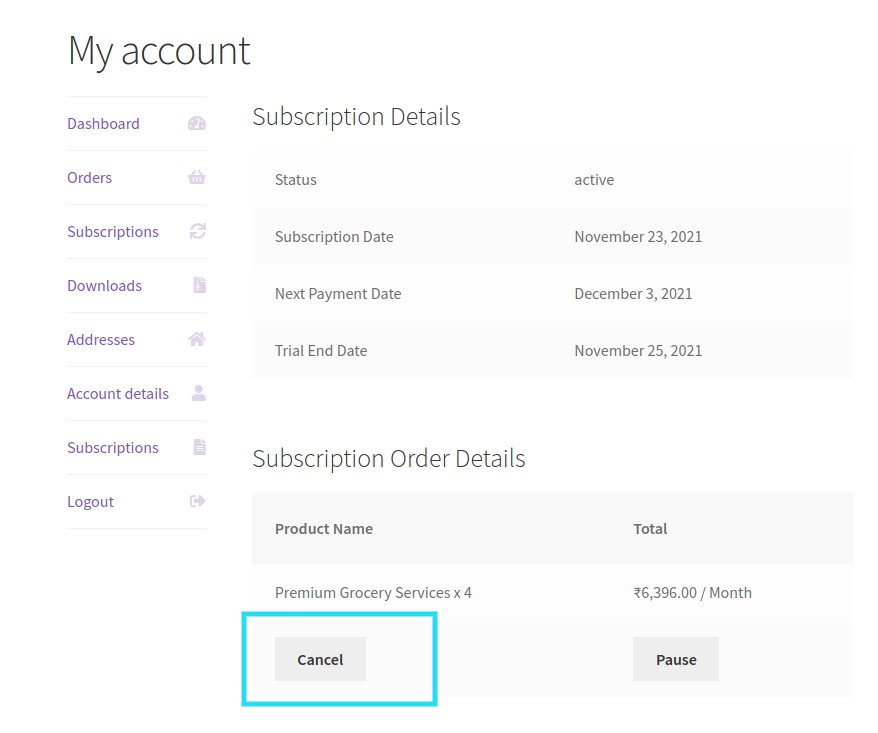
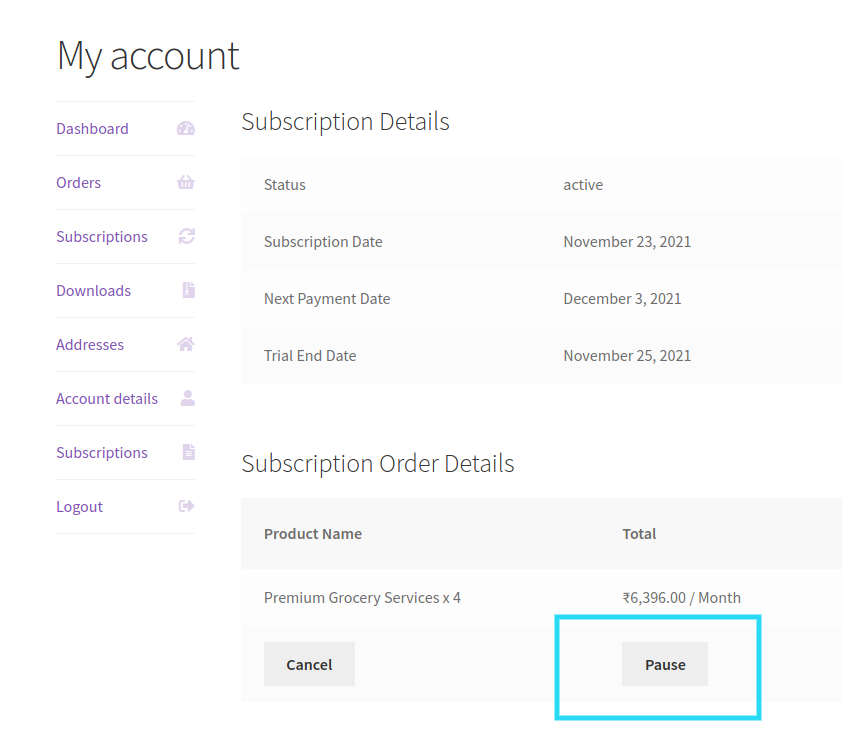
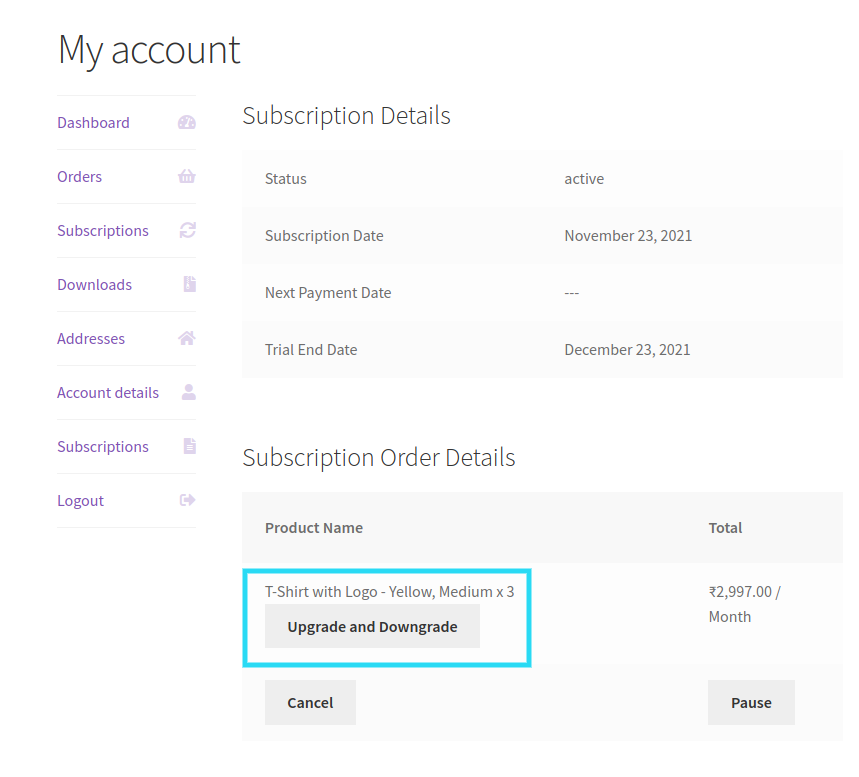
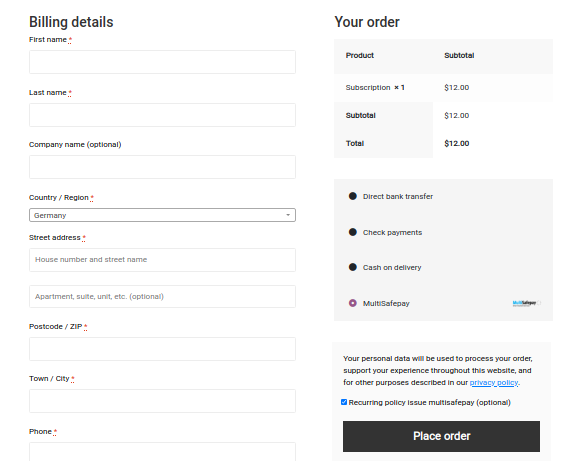
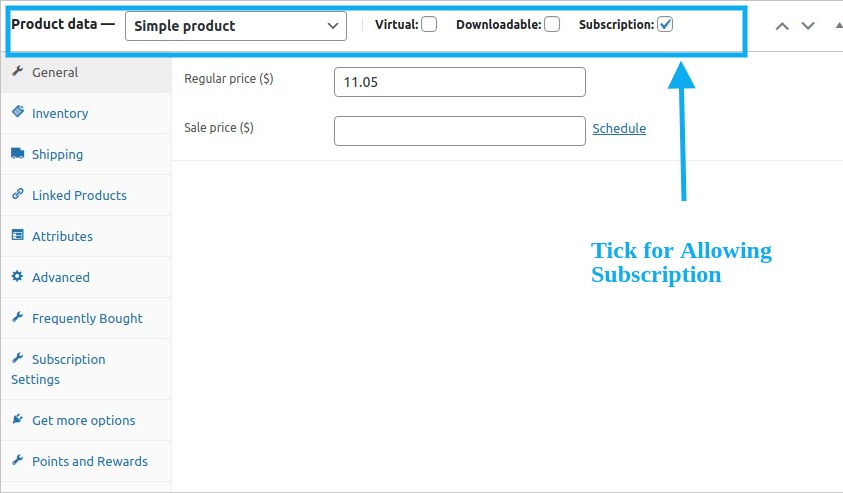
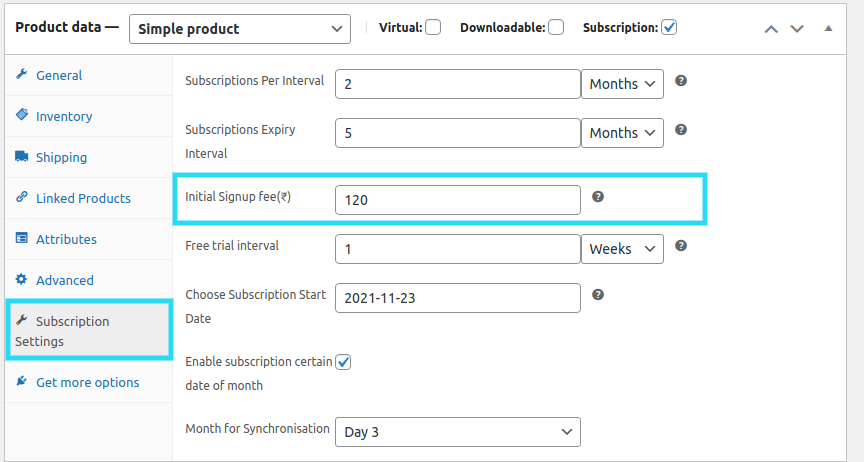
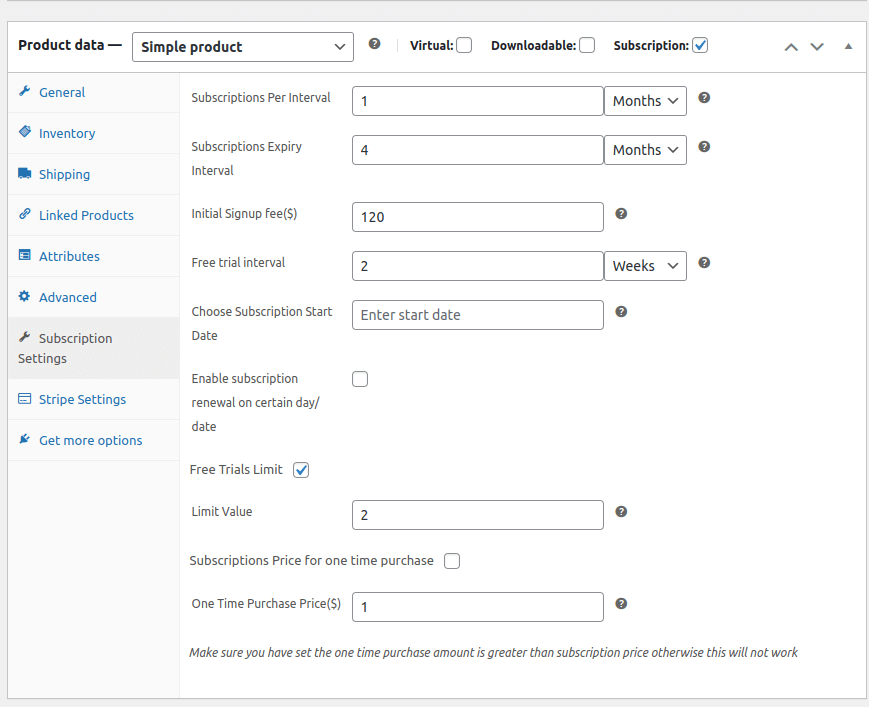
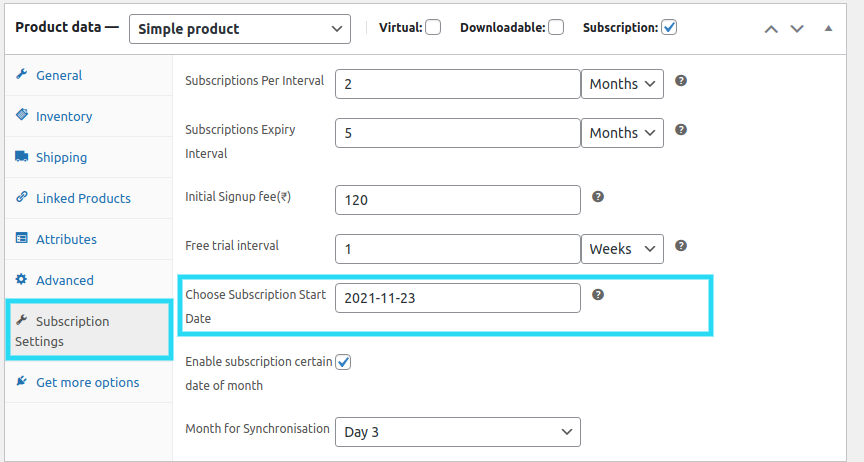
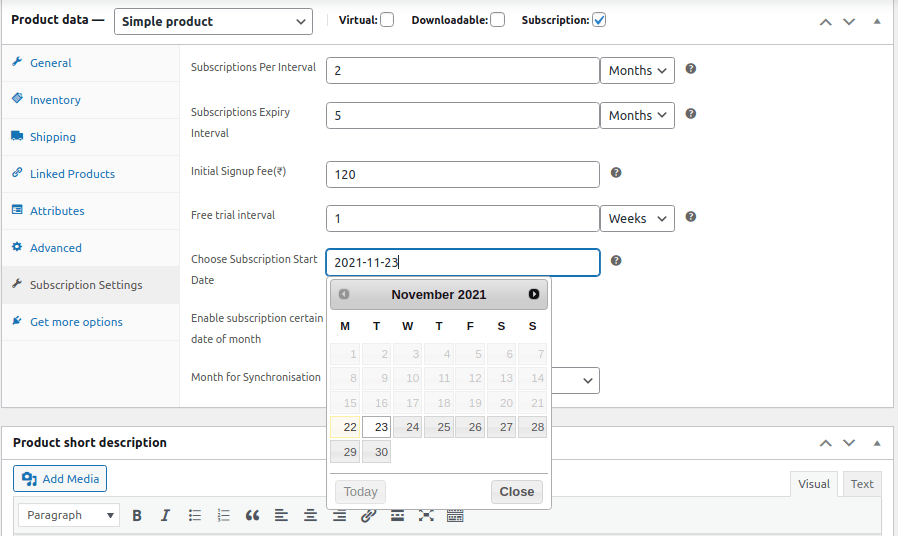
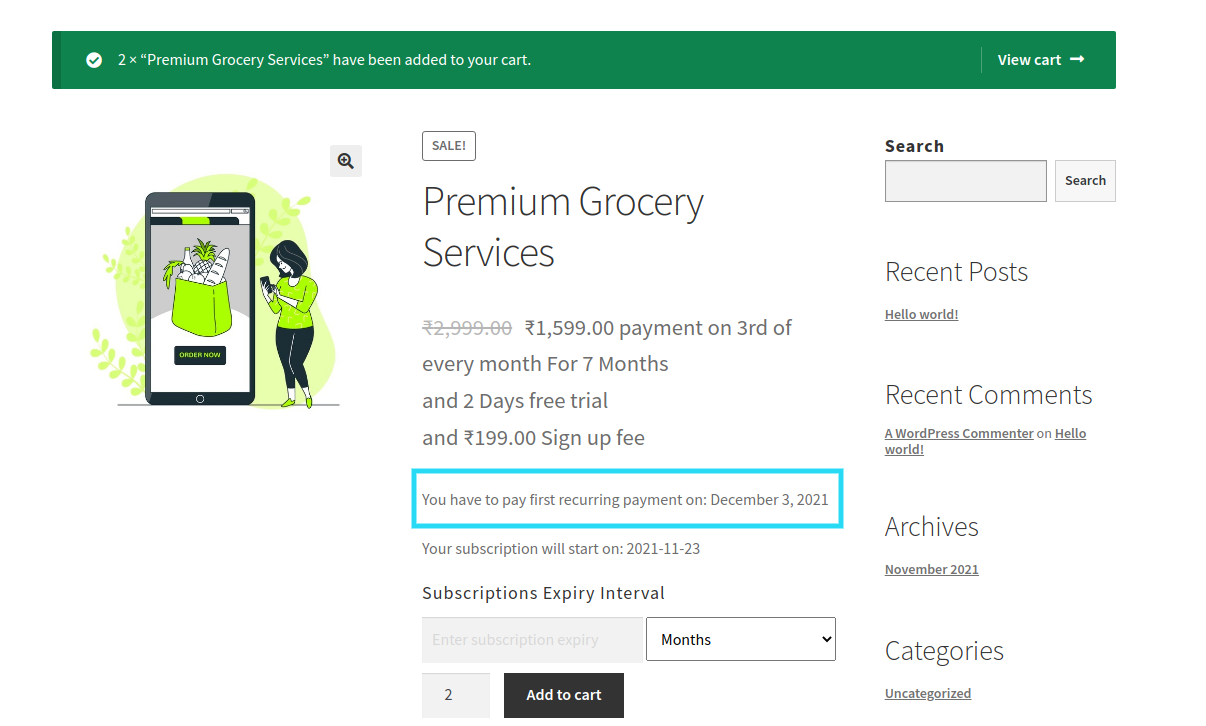
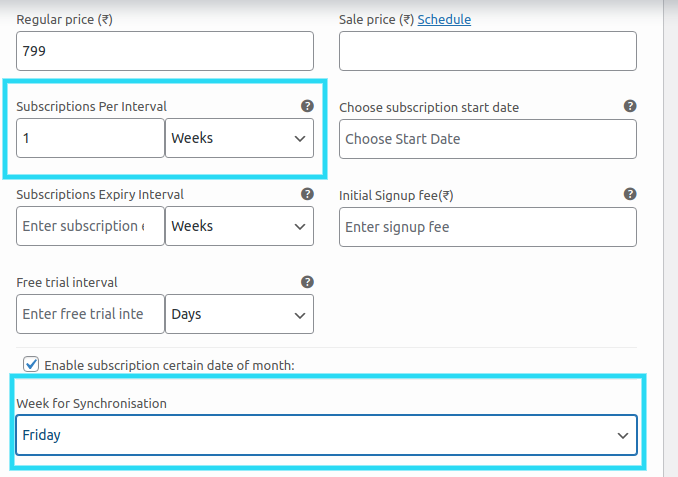
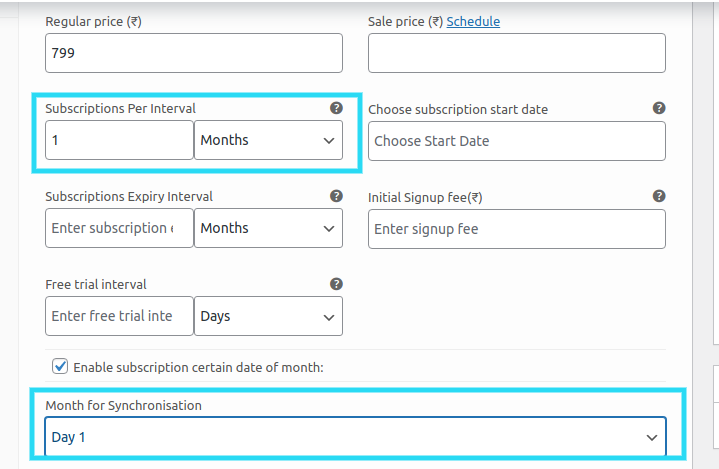
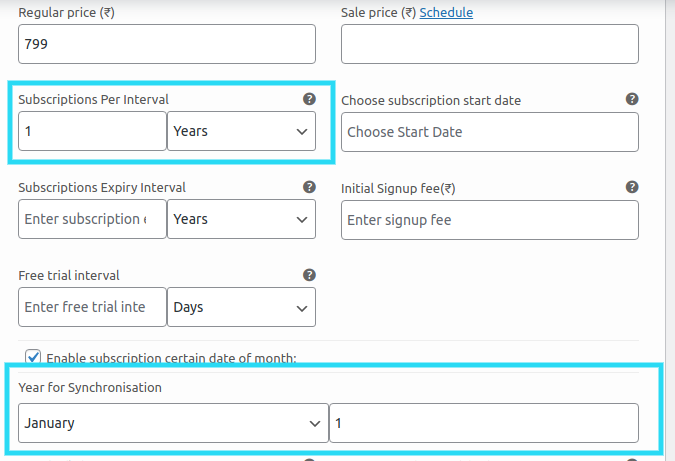
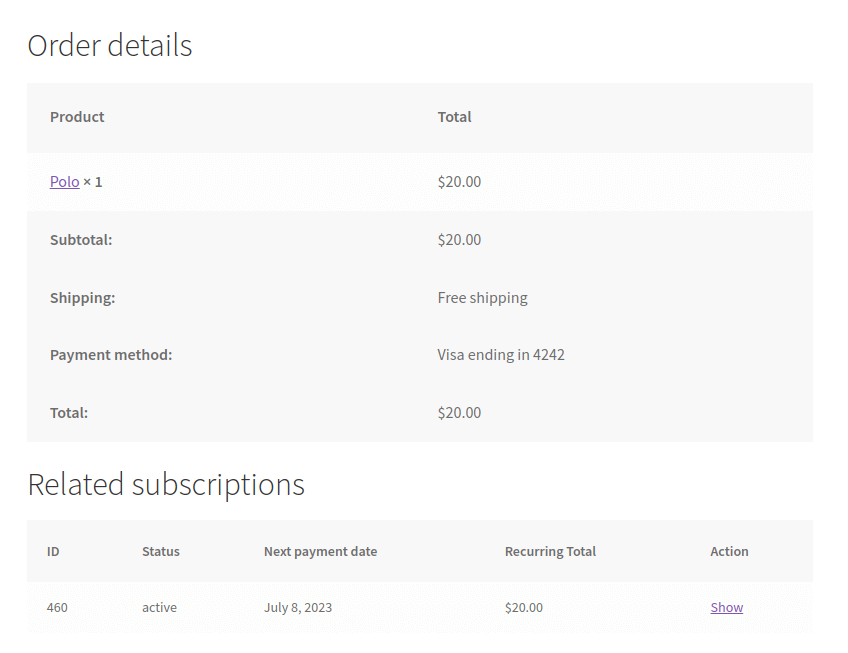
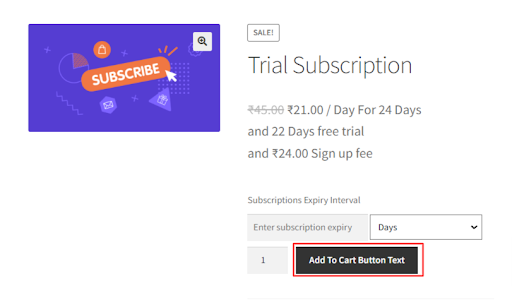
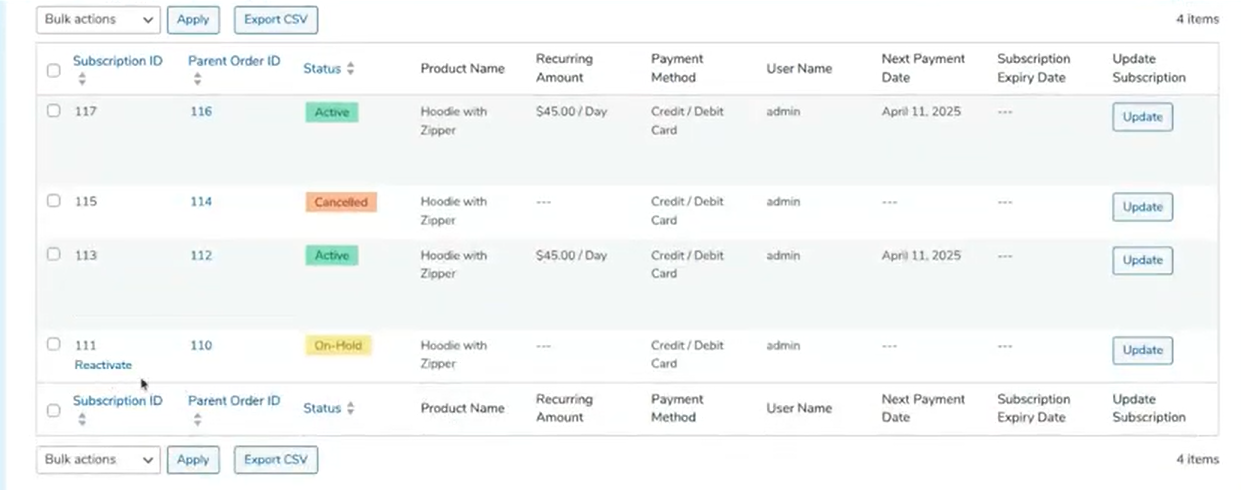
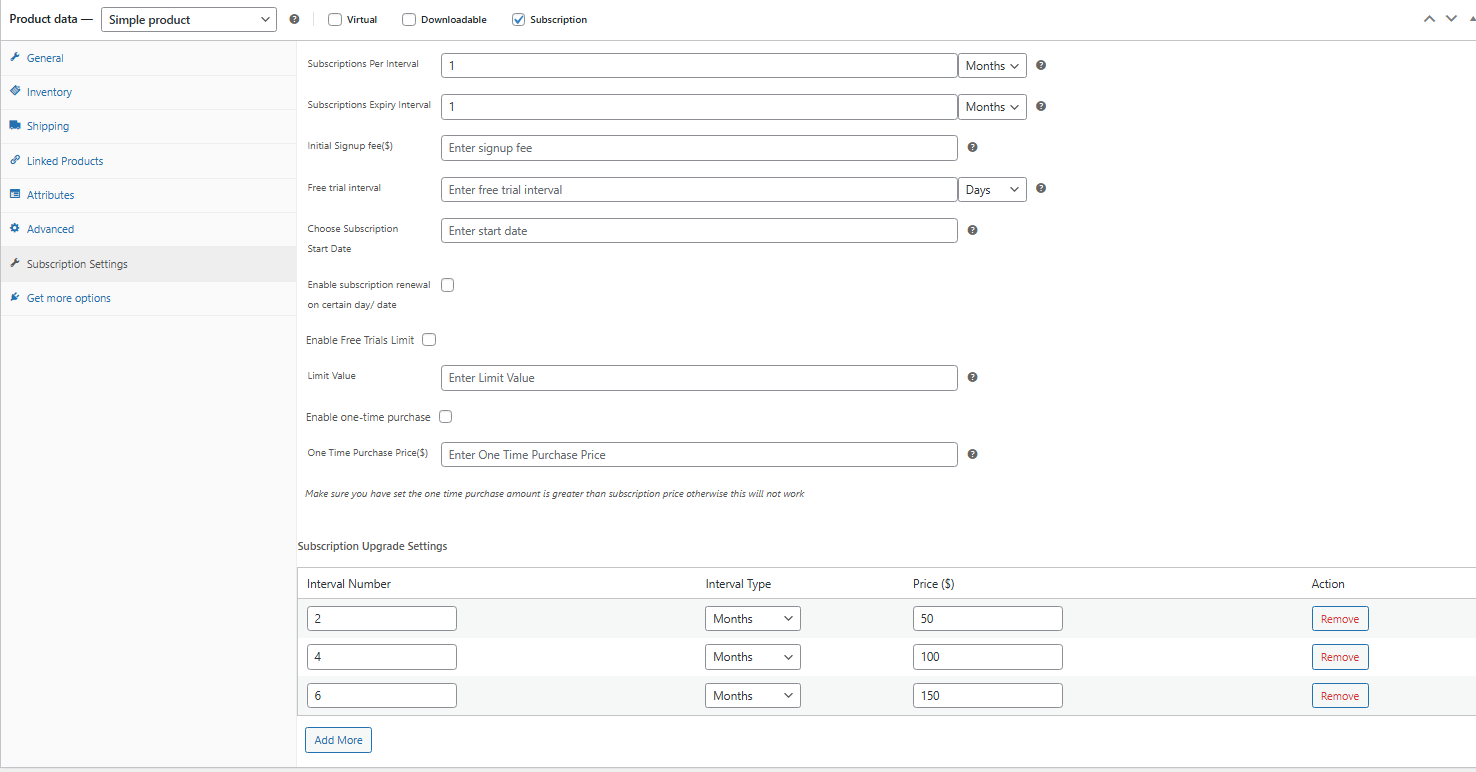
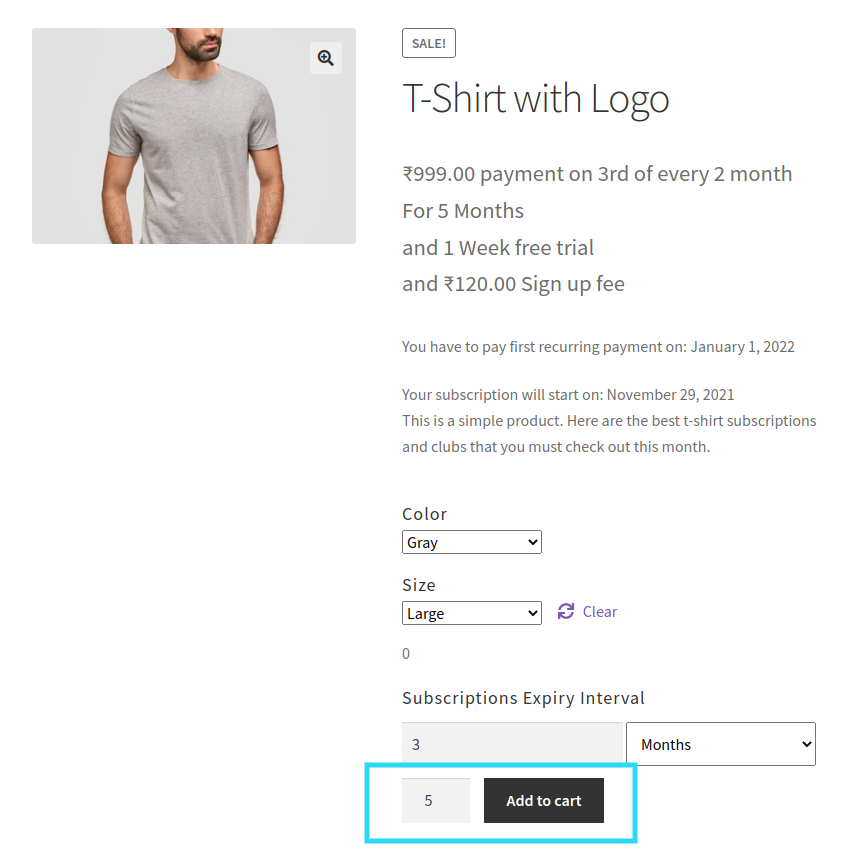
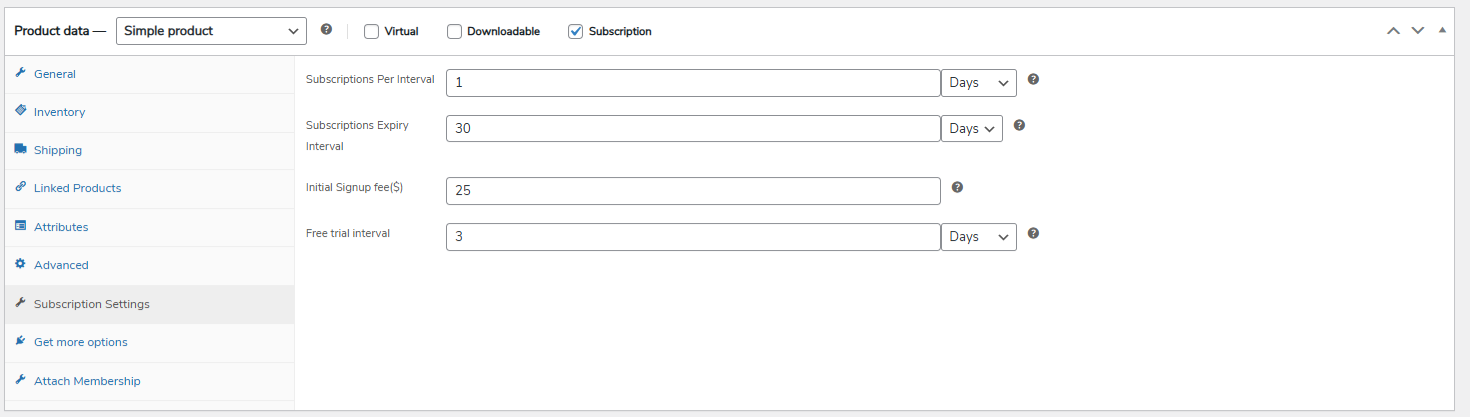
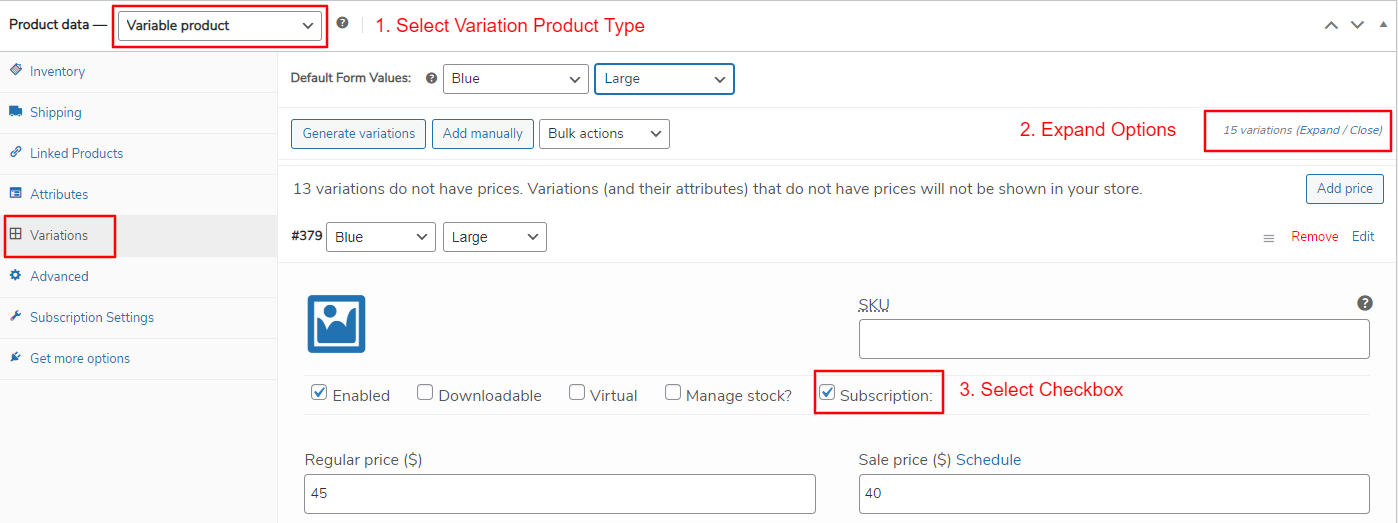
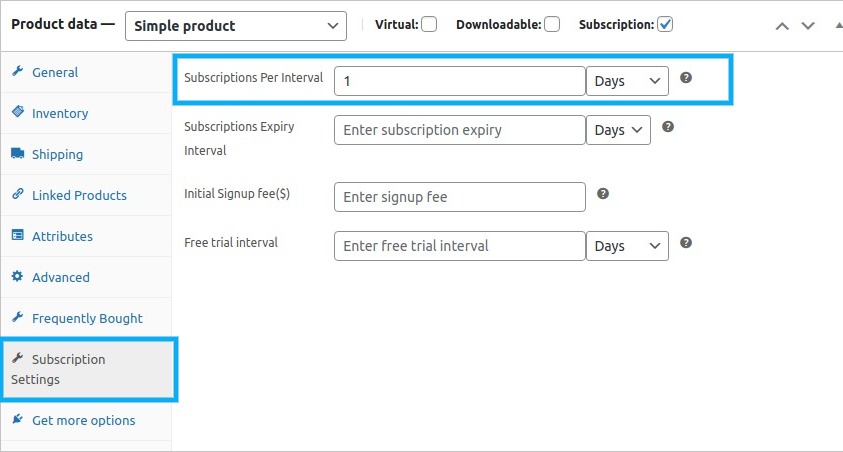
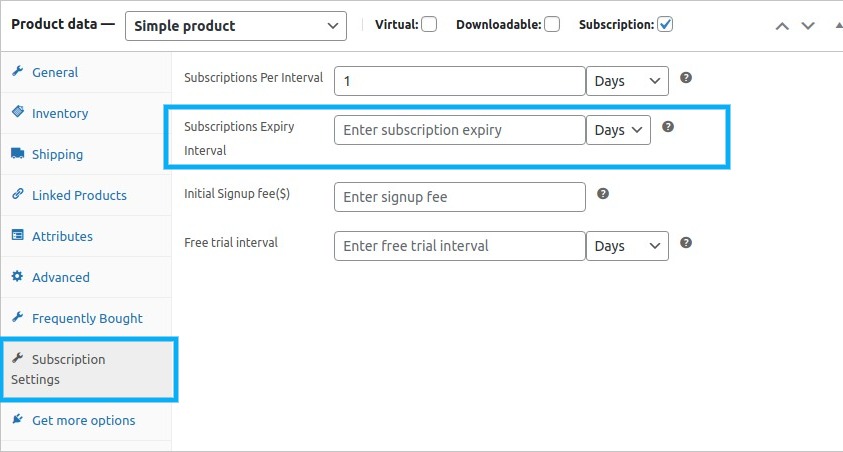
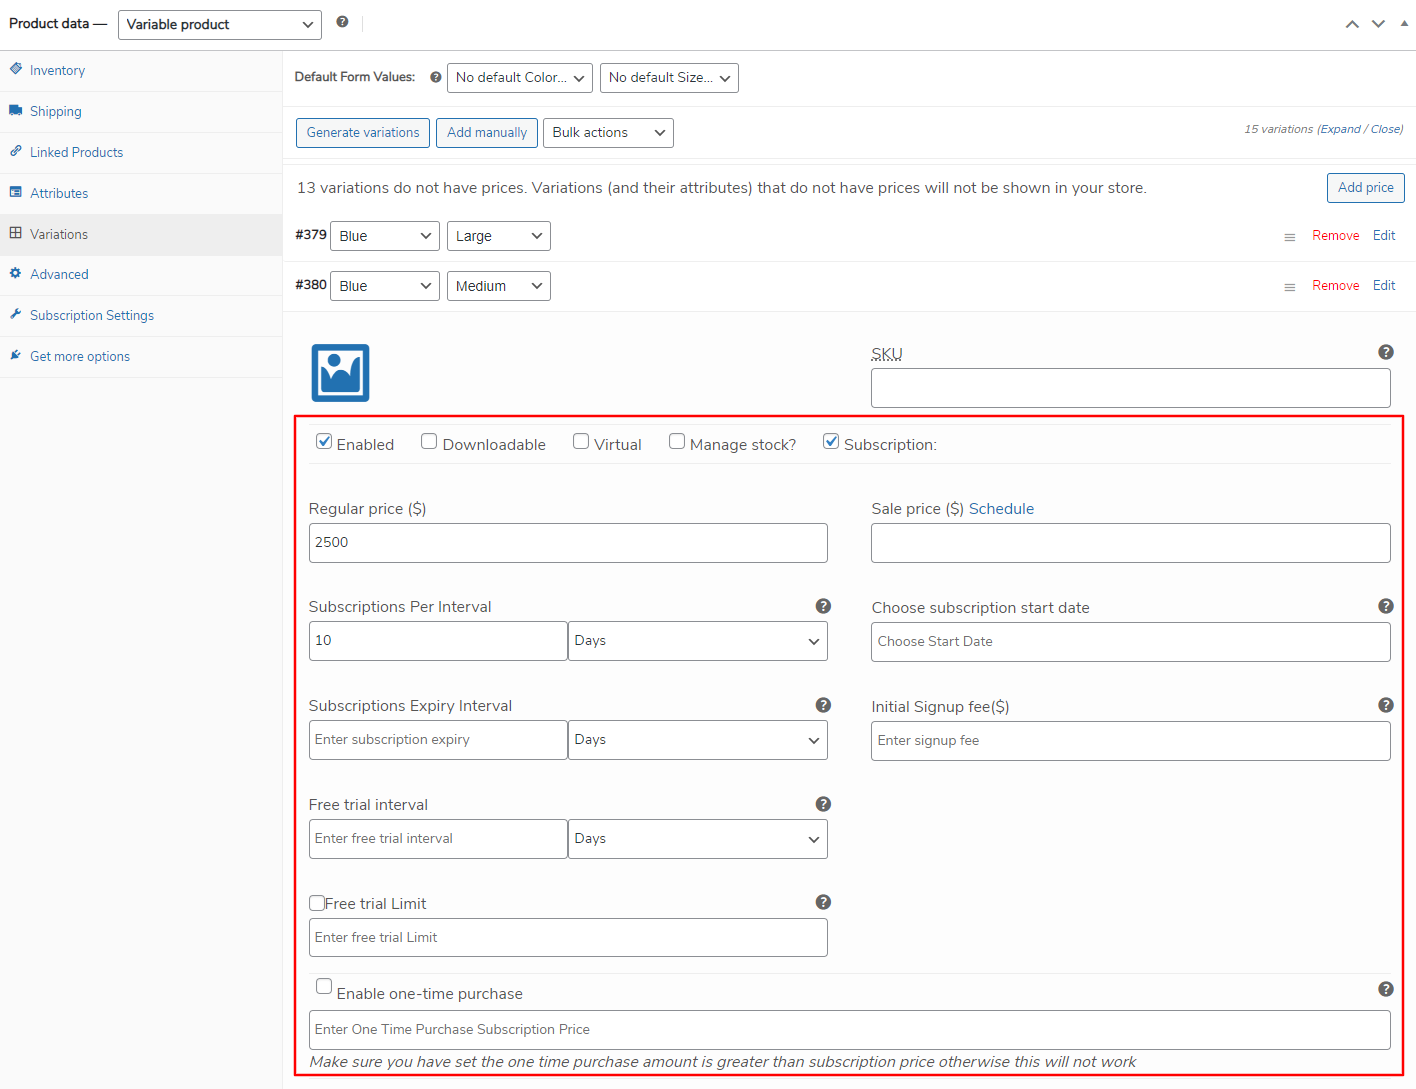
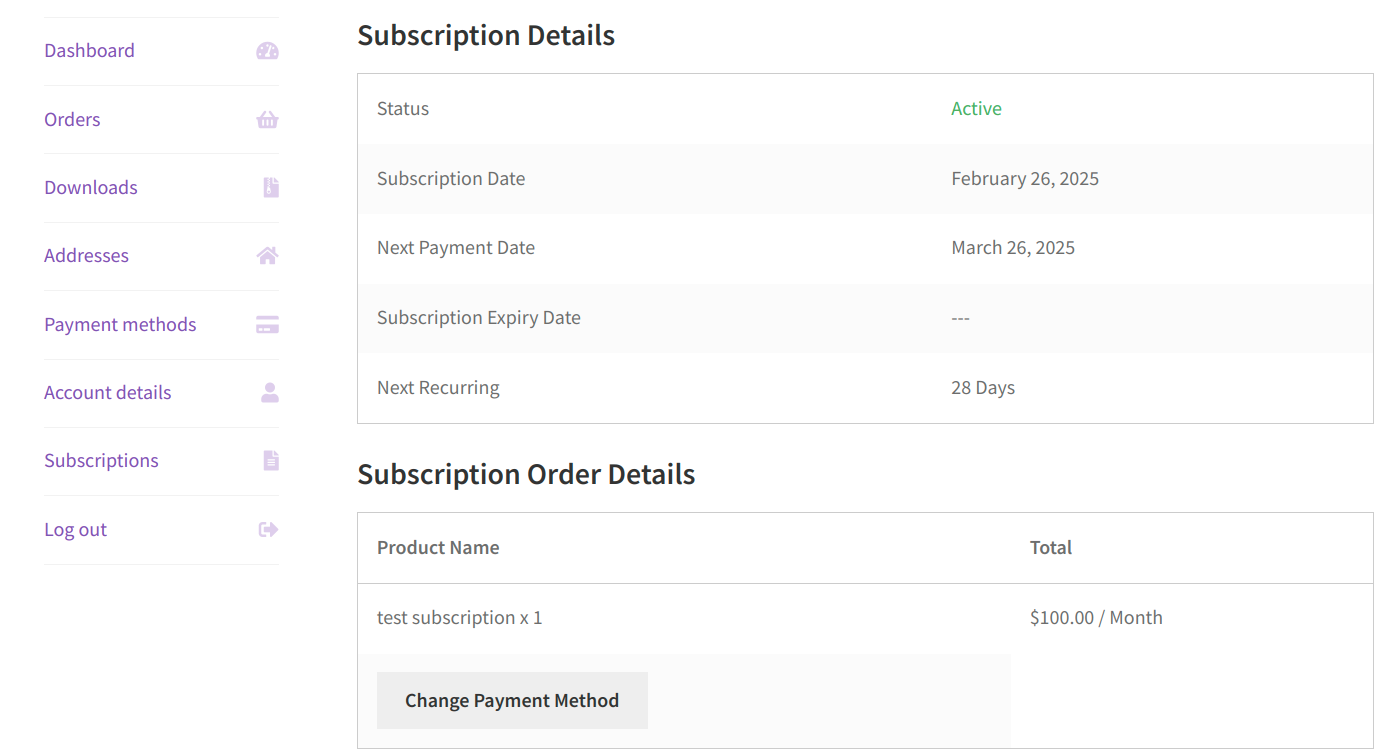
To start the subscription on their store, firstly you need to create a subscription product.

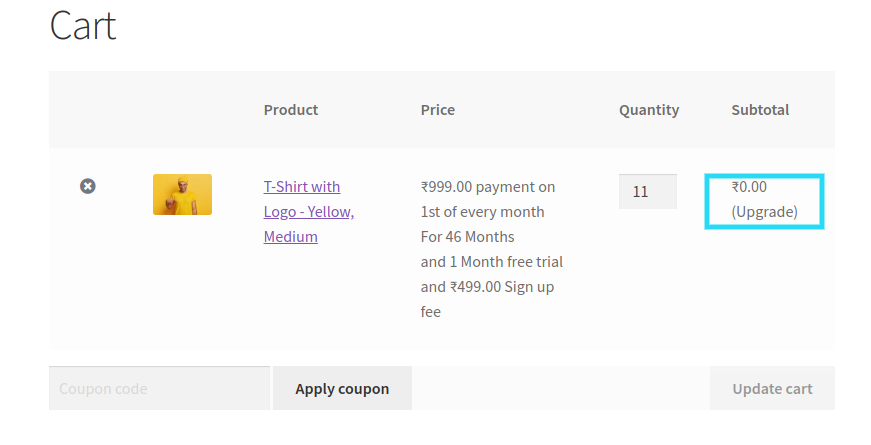
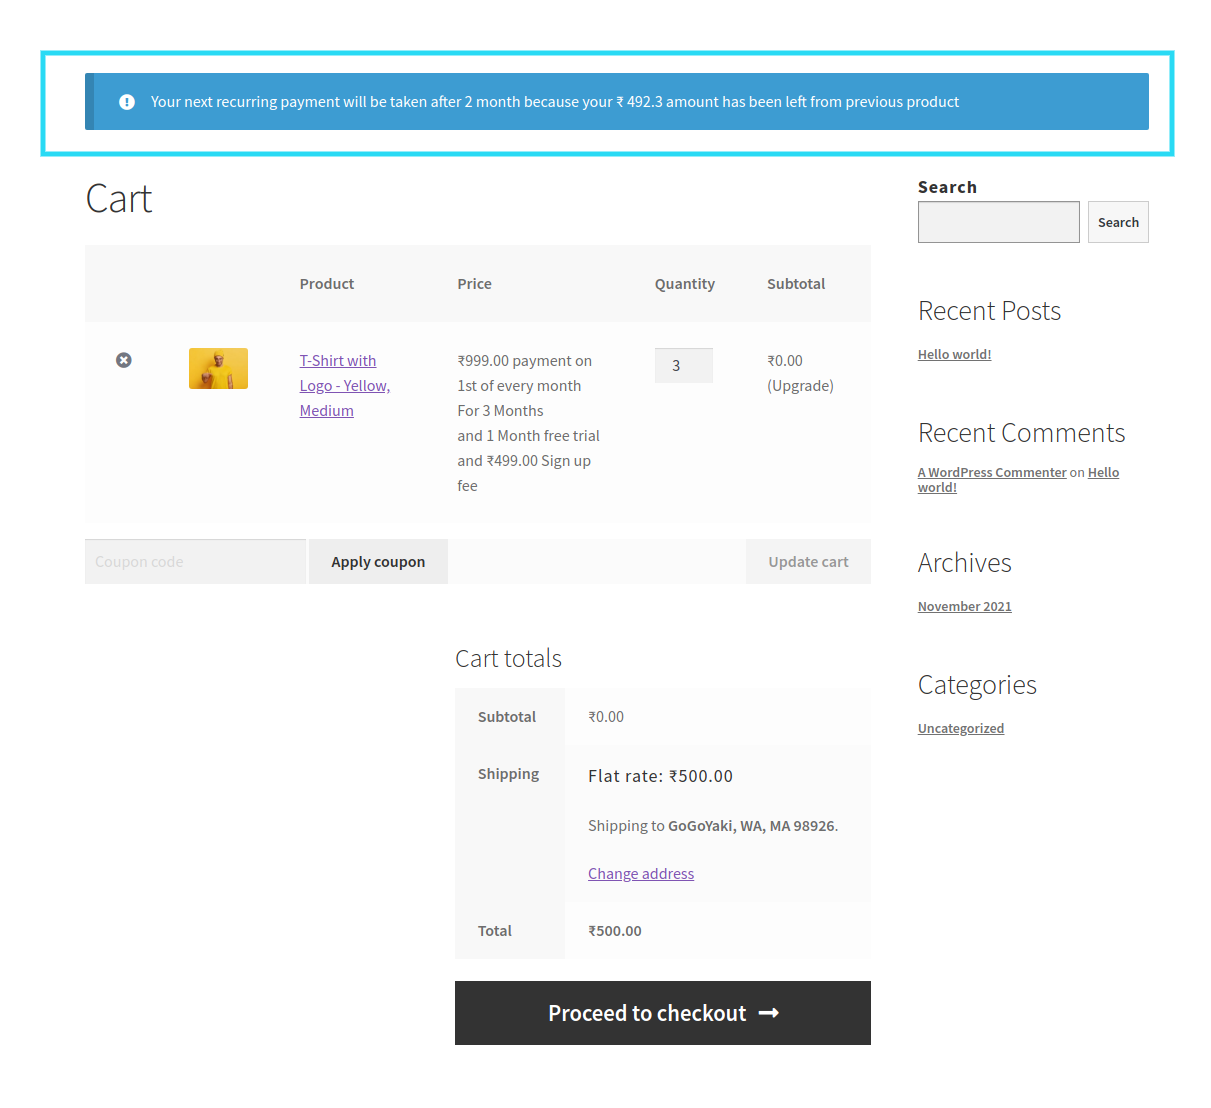
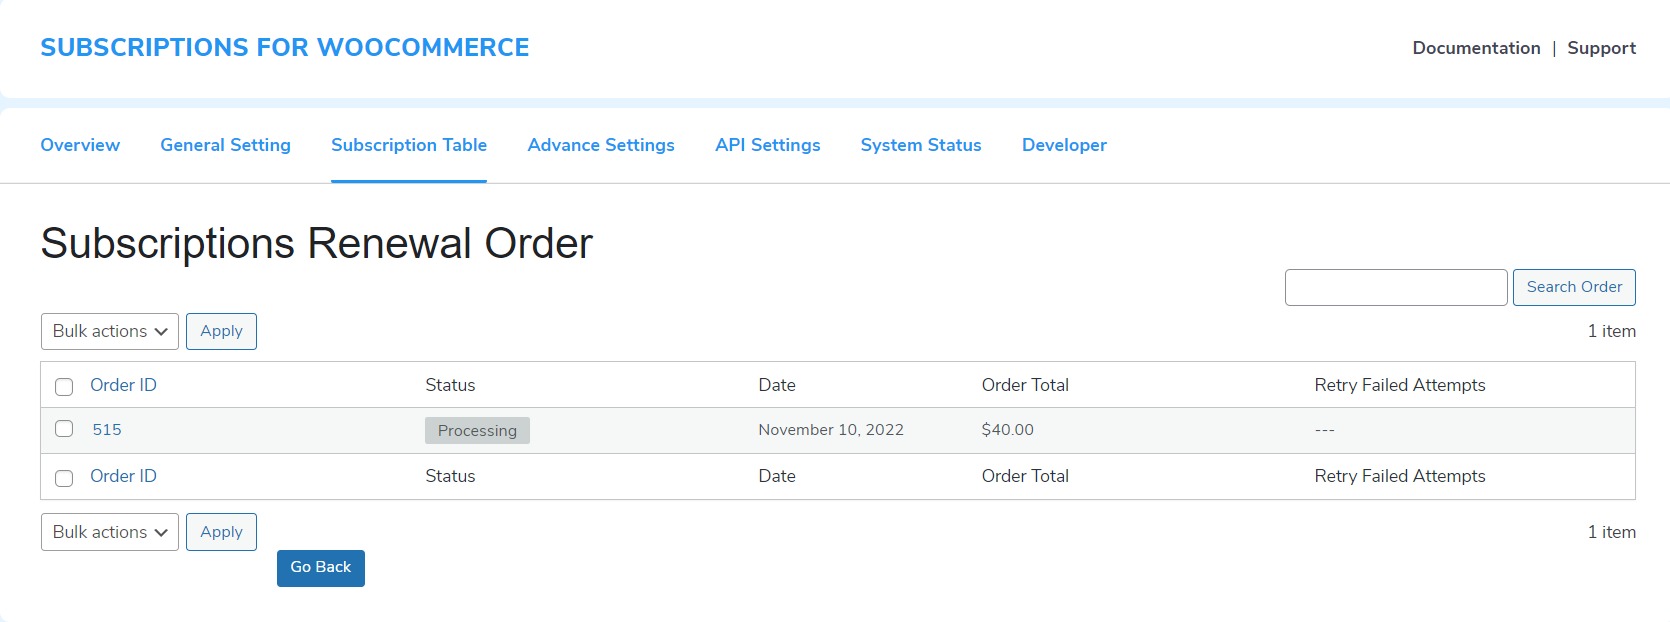
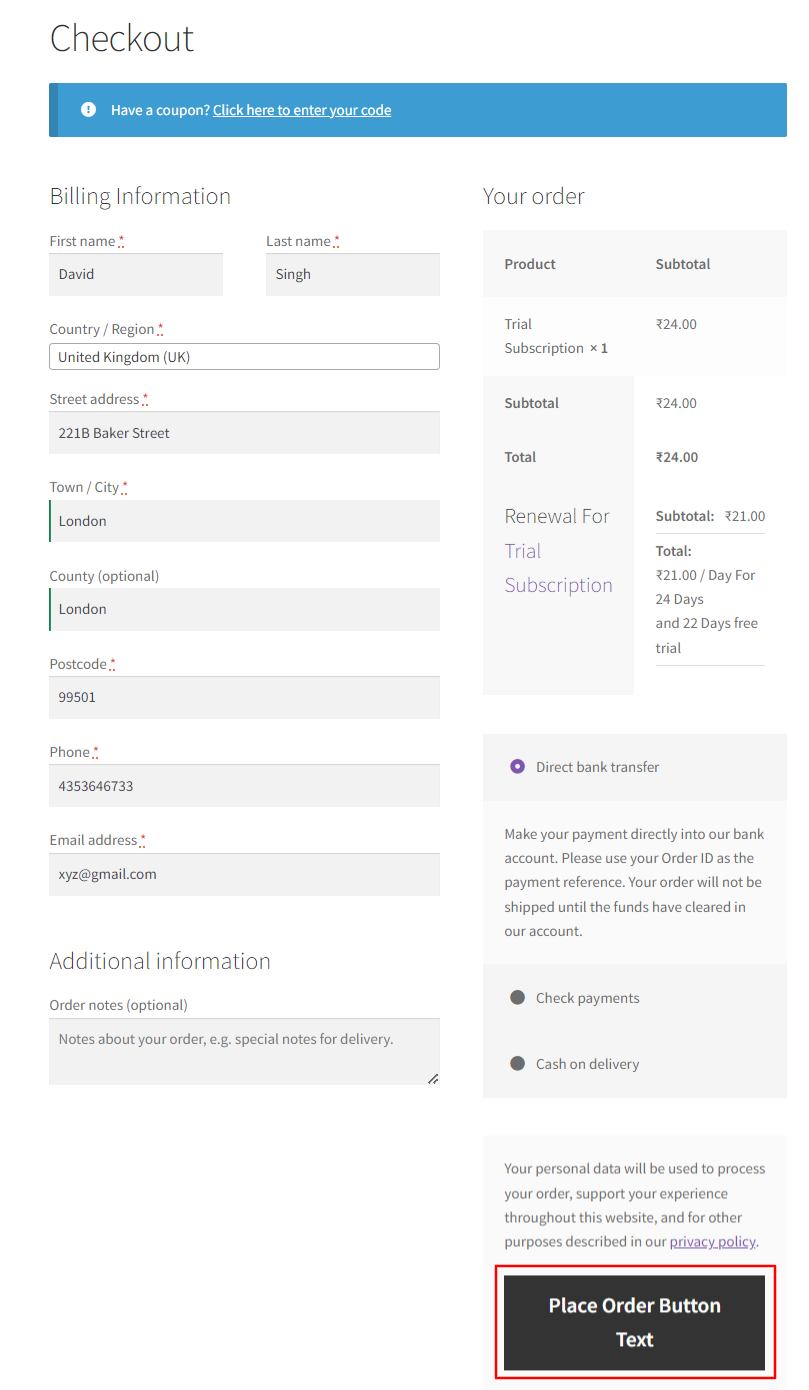
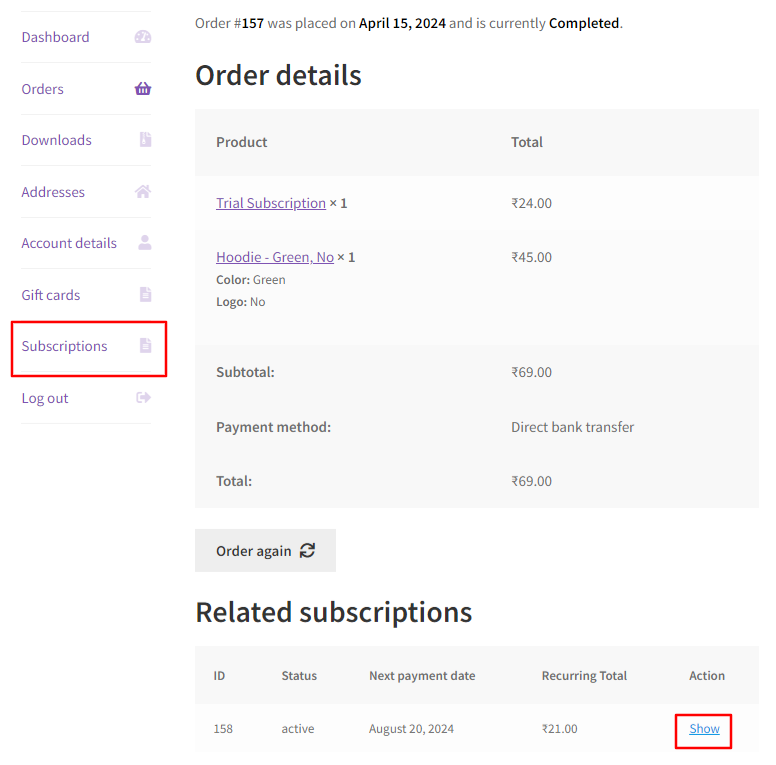
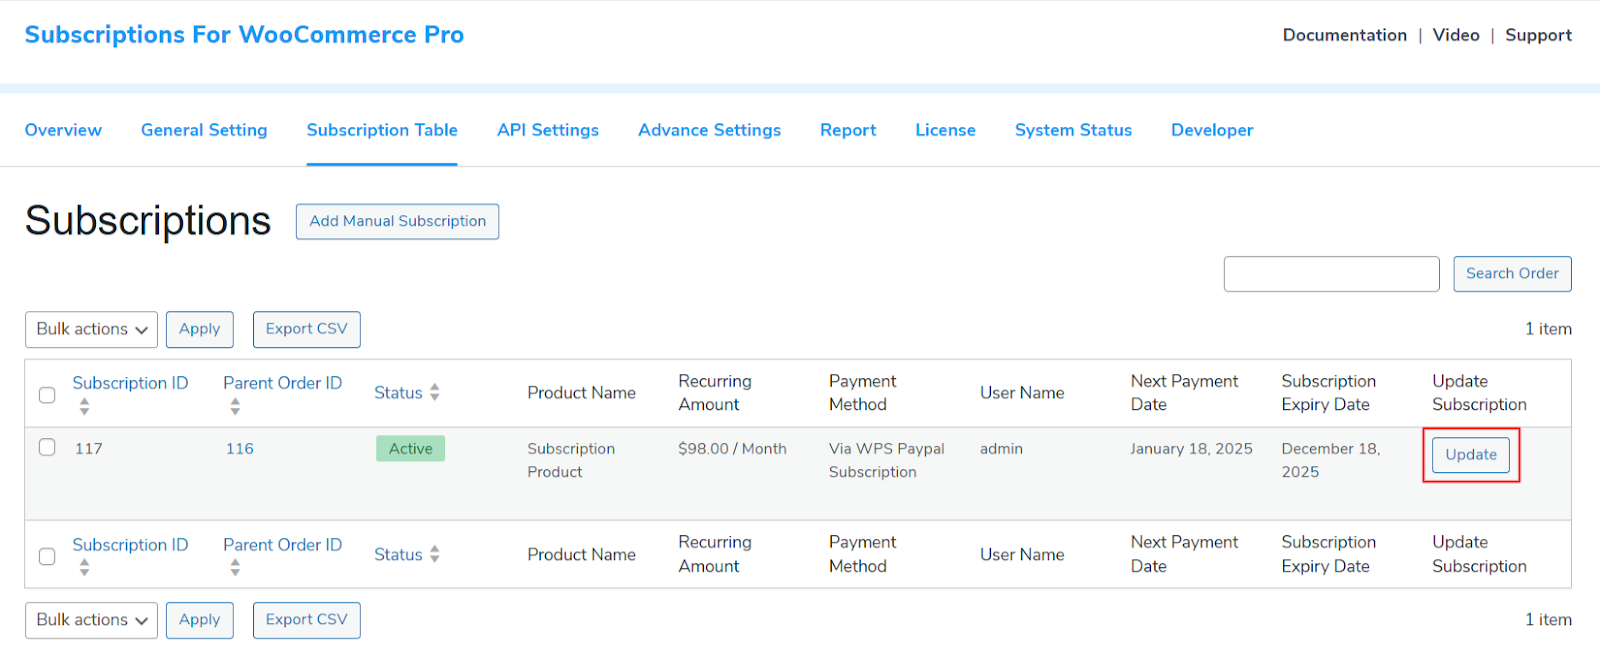
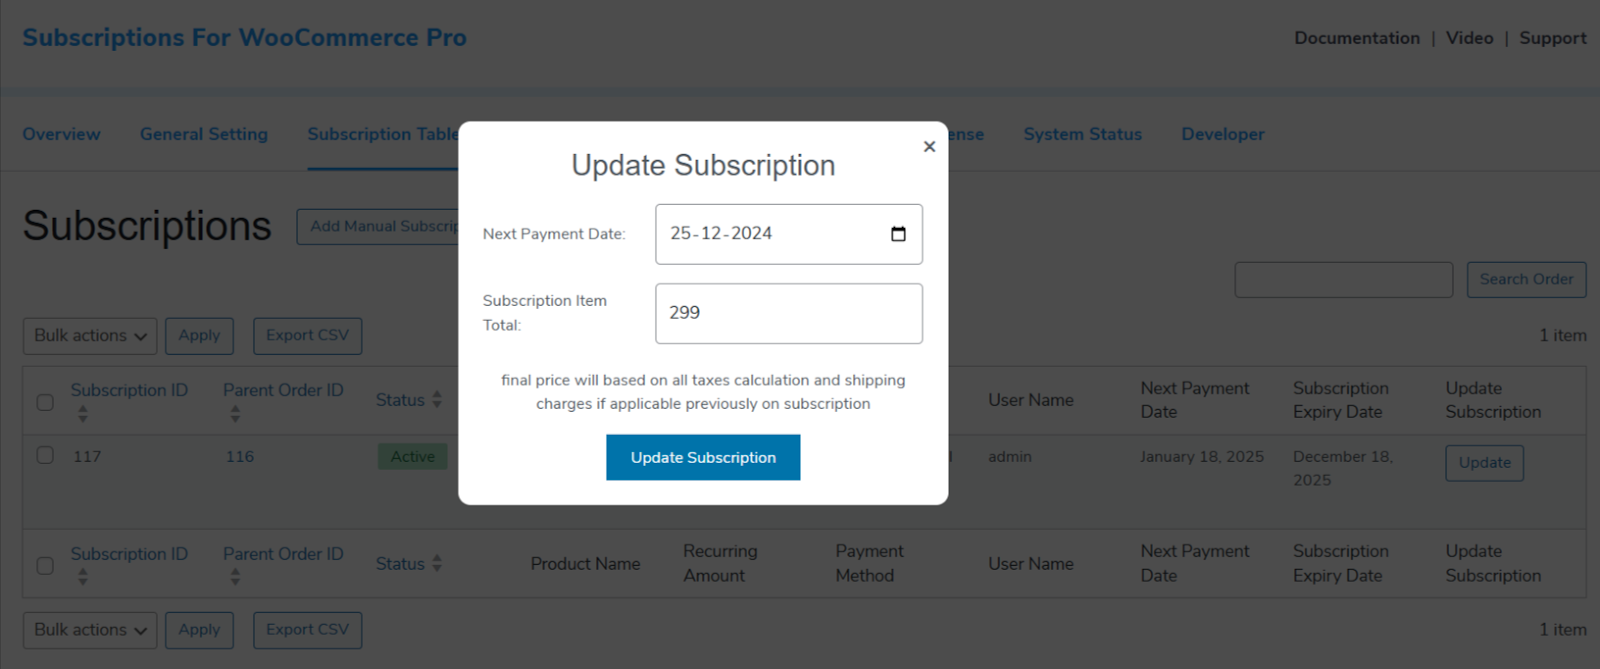
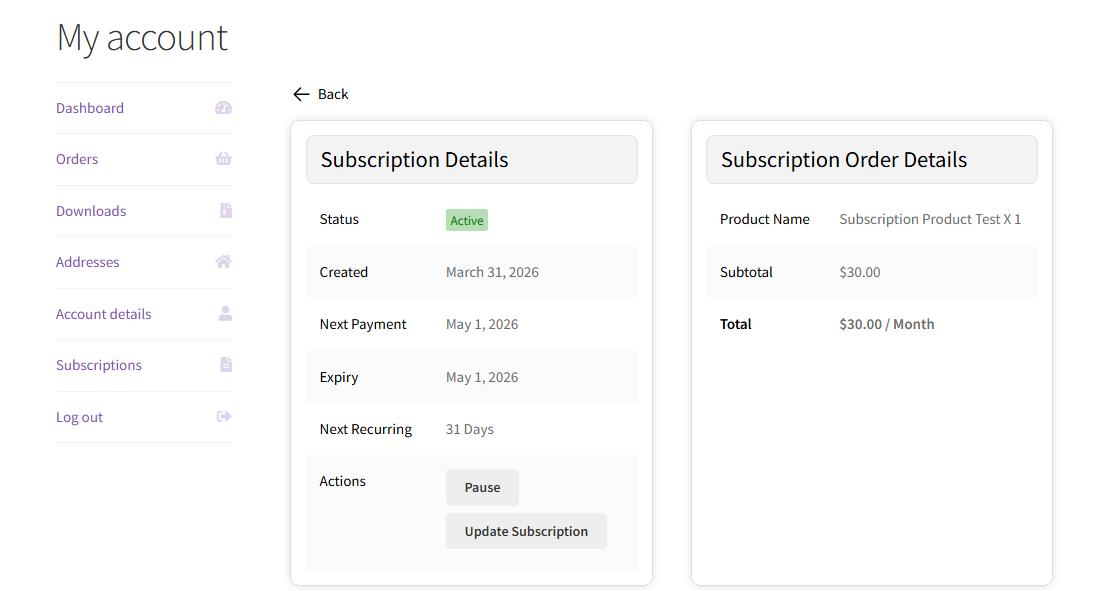
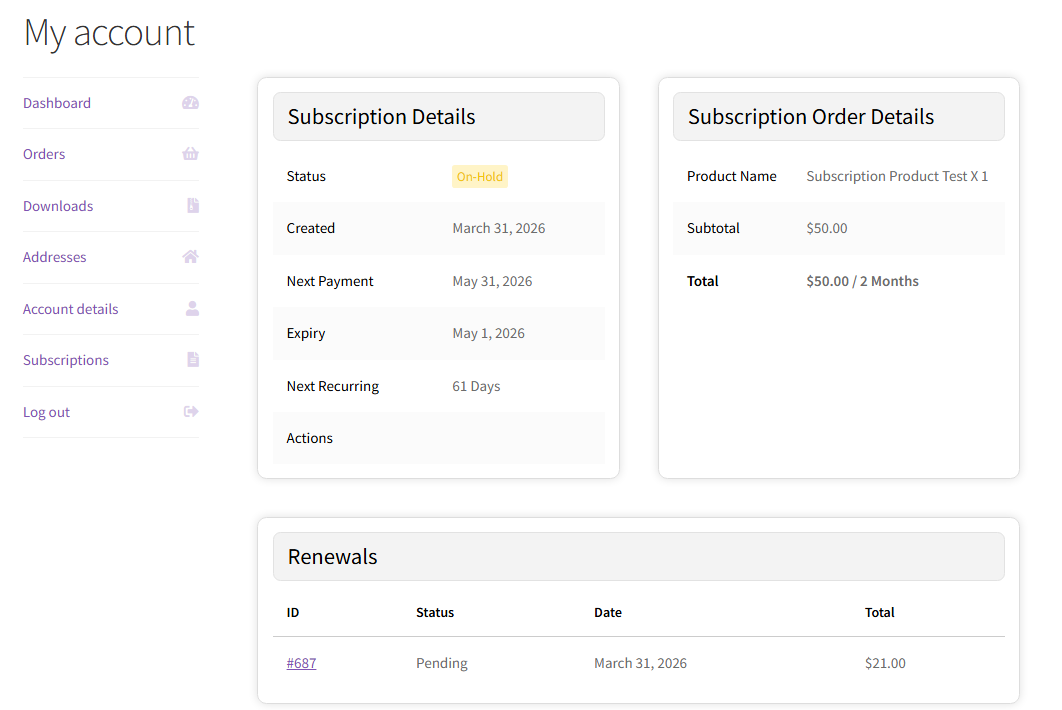
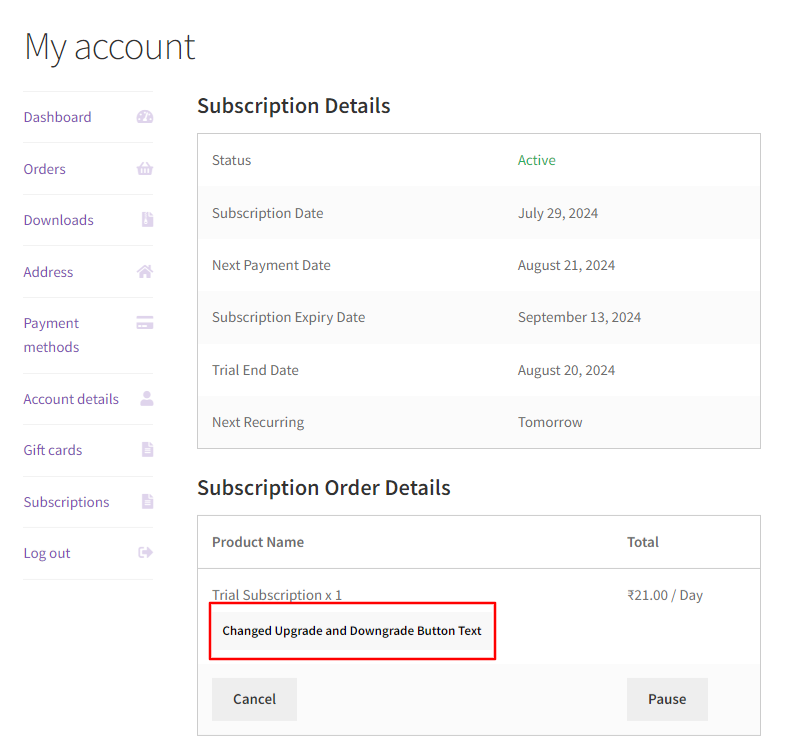
After successfully purchasing the subscription product, your customers can apply the coupons on the renewal order under the subscription.
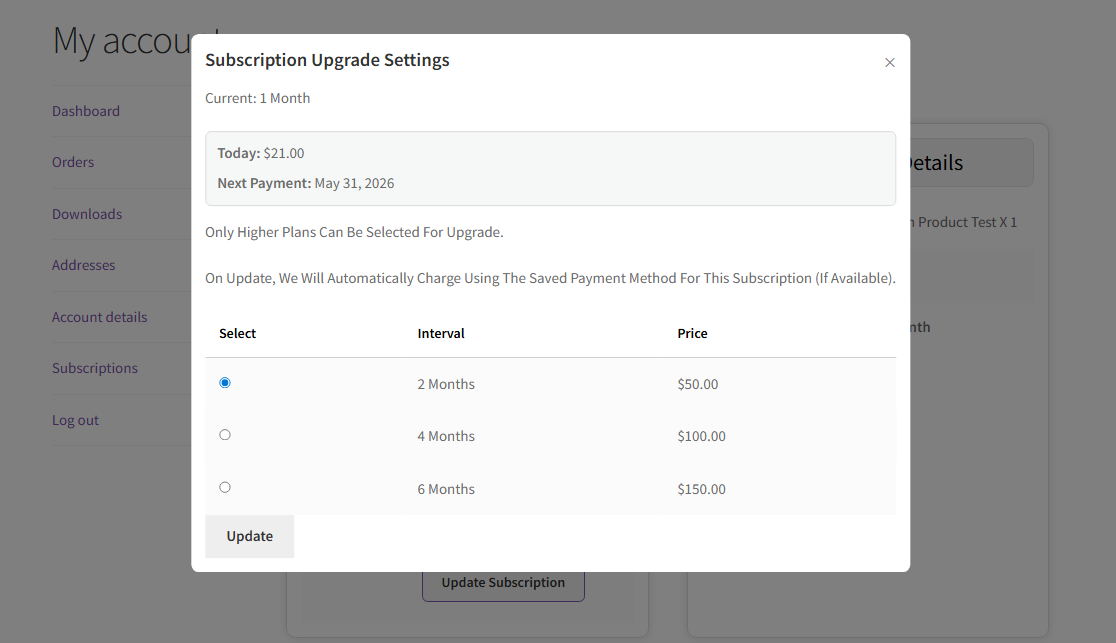
Click on the ‘Apply Coupon’ button, your customer will be able to apply the coupons for the recurring payment.

20.HPOS Compatibility
Coupon Referral Program is compatible with High Performance Order Storage (HPOS) Which uses WooCommerce CRUD design to store order data in custom tables to optimize order queries and ensure the smooth workflow of your WooCommerce store.
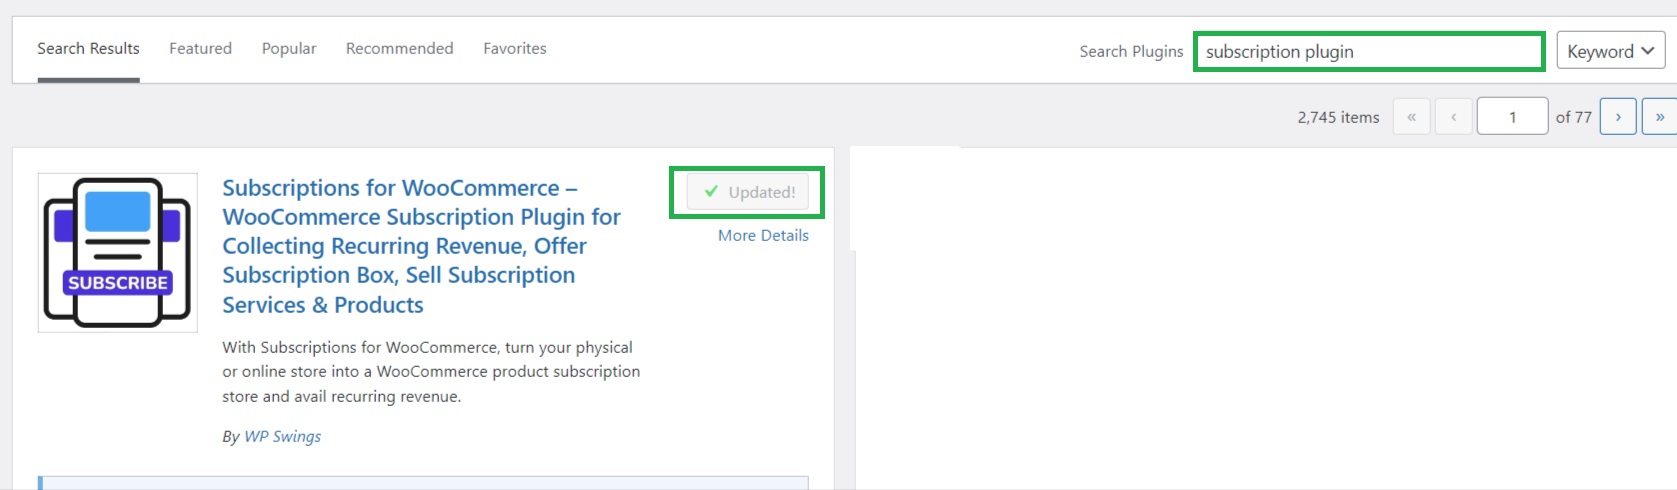
To Enable HPOS Follow these steps:
Firstly, make sure your WooCommerce version is updated with the latest 8.0. After that navigate to WooCommerce > Settings > Advanced > Features and choose the High Performance Order Storage option for orders.
For more information, refer to the WooCommerce HPOS Documentation
21.FAQ
Do we have the option to select a page where we want to redirect a user who uses a referral link?
Yes, we have this option in our plugin where you can select the page where you want a user to be redirected using a referral link.
For this: Go to plugin settings> Under Display configuration tab > Go to referral link redirection setting. From here you need to copy the page link where you want to redirect the user
Can we set the minimum order amount for the referral purchase discount coupon?
Yes, we have the option to set a minimum order amount for referral purchase discount coupons.
For this: Go to plugin settings>Referral configuration>Under Refer Gets Coupon section you will find the setting to set minimum order amount for referral purchase discount coupon.
Can we reward coupons when the referred customer paid after the free trial ended?
Yes, we have this feature to reward referred customers with coupons when they pay after the expiration of their free trial but for this, you must have downloaded the WooCommerce subscription plugin to find this setting
Till how many numbers of orders placed will be giving our customers the “Discount Coupon”?
You can easily set this by visiting “WooCommerce→ Settings→ Referrals→ General Referrals→ Required no of Orders”.
Can my users share his/her Referral Links to Facebook?
Yes, of course, please go to “WooCommerce→ Settings→ Referrals→ Social Sharing→ Enable Settings.
Can the Referred User get something just on Registration/Sign Up?
Yes, If the setting has been enabled “WooCommerce→ Settings→ Referrals→ Sign Up Discount→ Enable Settings” then all your customers would be rewarded with the discount coupon.
I use the Referral Link and register one new customer with that but still the Referee is not rewarded with any of the Discount Coupons. Am I missing something?
Please make sure the newly registered user has placed the order too, only then will the referee get the discount coupon.


5.2.Social Sharing
Note: If you click the Email button, the default email application of your system will be opened for emailing the referral link. You can add your custom email template under this setting