1.Overview
WP Ultimate PDF Generator Plugin allows you to convert all posts, pages, and products into PDF files. Blog readers can export posts into pdf and can print or send it to a registered email address.
This extension provides various key features :
- In this new version, we provide the 3 default templates for Post and Products.
- Custom post types- It supports custom post types and print them to PDF.
- Custom meta fields- It supports custom meta fields and prints them in PDF.
- Custom fonts- Feature to set Custom fonts for PDF.
- Header- You can include the header logo to pdf, Option to show site name, site description, and site URL.
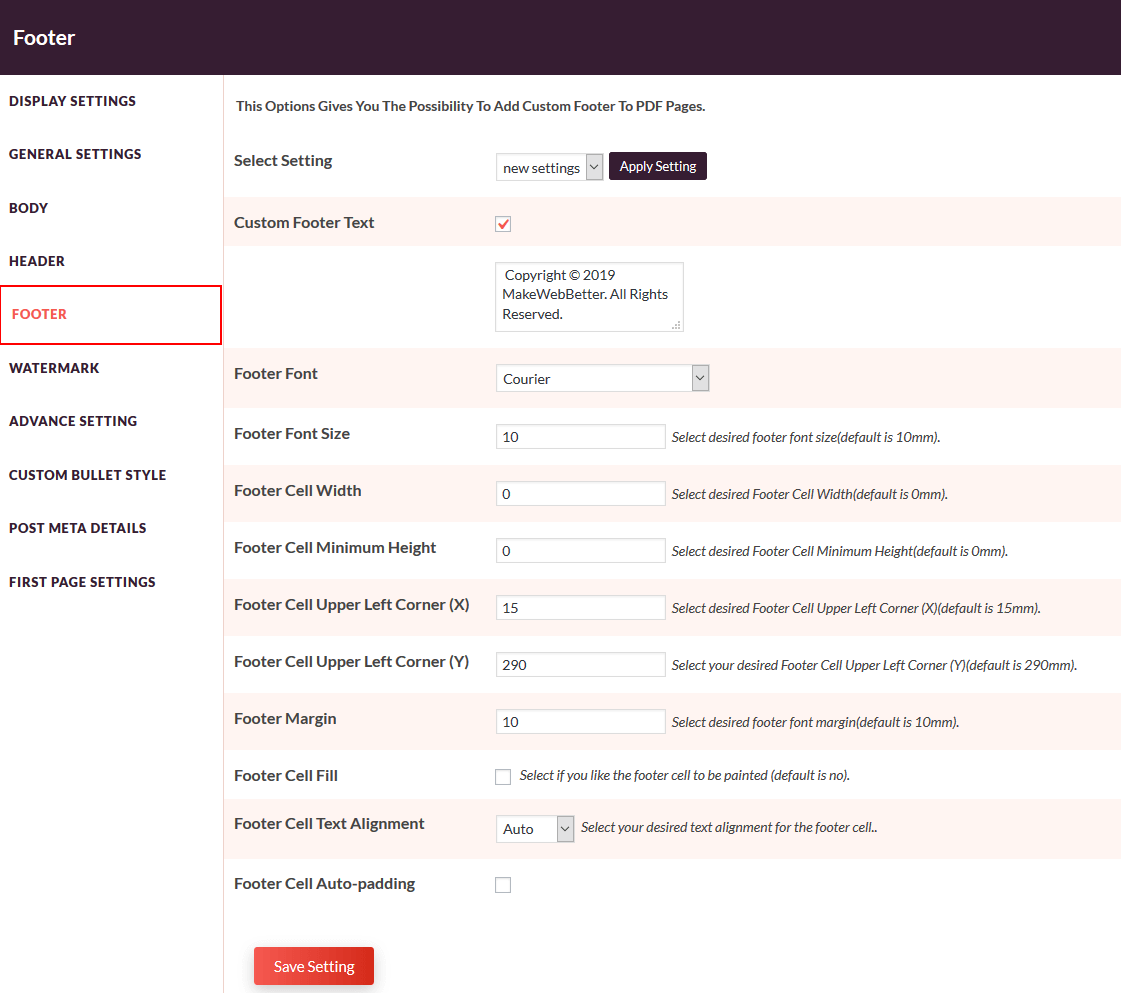
- Footer- You can add footer on all pages of PDF
- Watermark- Add watermark text and images to look PDF wonderful.
- Different Font- Can customize fonts of header and content.
- Featured Image- Can select to display featured images.
- File Name- Can set the filename for pdf. The default file name of the plugin is Post Id.
- Add Front Page- Add front page of the PDF with company name, logo, and much more.
- Four predefined templates fo the cover page: From now you can select any one pre-defined template for the cover page or upload the custom image for the cover page.
- PDF from Cache- Have the ability to generate pdf from the cache to reduce the load from the server and can schedule a backup of cache if Your blog is not updating too frequently and many more options.
- Custom CSS- Can add custom style to post contents, mostly all CSS supported.
- Title- Can set default blog title for pdf
- Email Mode- In email mode, each pdf export link generates a popup window and visitors have to enter an email address to which the created PDF will be sent.
- Setting to manage all post type custom fields.
- Cache supporting- It provides the functionality to deliver the cached PDF to decrease server memory usage if the cache is available in the system.
- ACF compatible – It is compatible with advanced custom fields and supports all its meta fields.
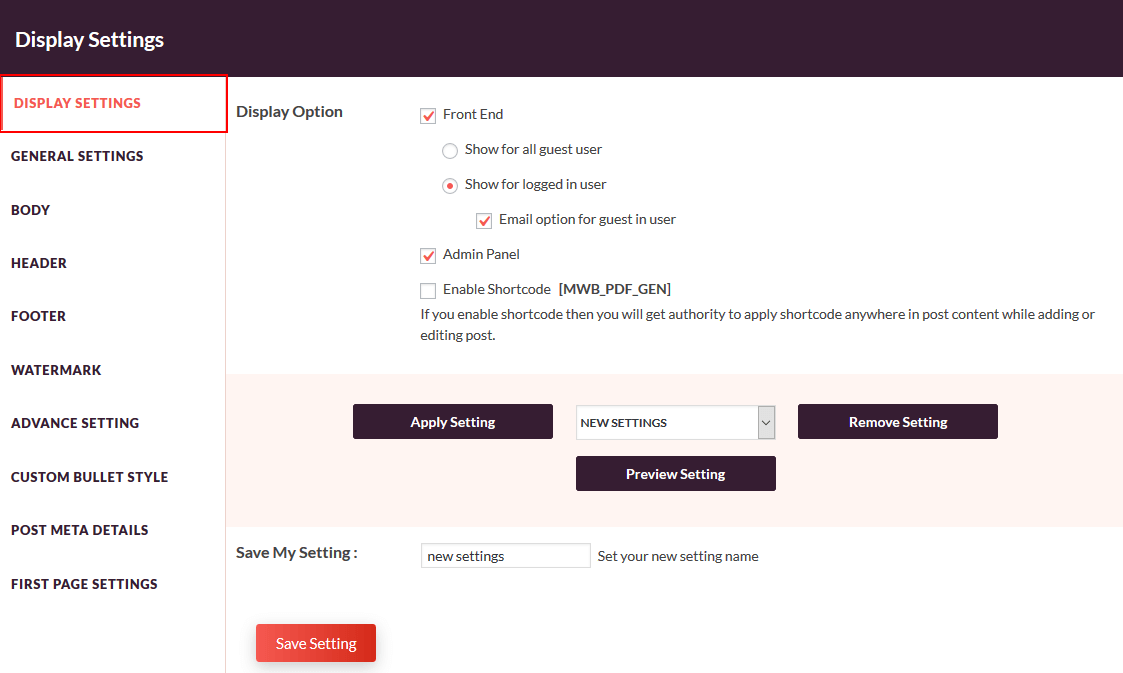
2.Display Settings
In this section, the Admin can create multiple settings to Display the PDF.
Display Options:
- Front End: Select users to show the pdf link on post, page, and product.
- Admin Panel: Enable Admin Panel option to display a pdf link on the post, page, and product only for the admin panel.
- Enable shortcode: If you enable shortcode then you will get the authority to apply shortcode anywhere in post content while adding or editing the post.
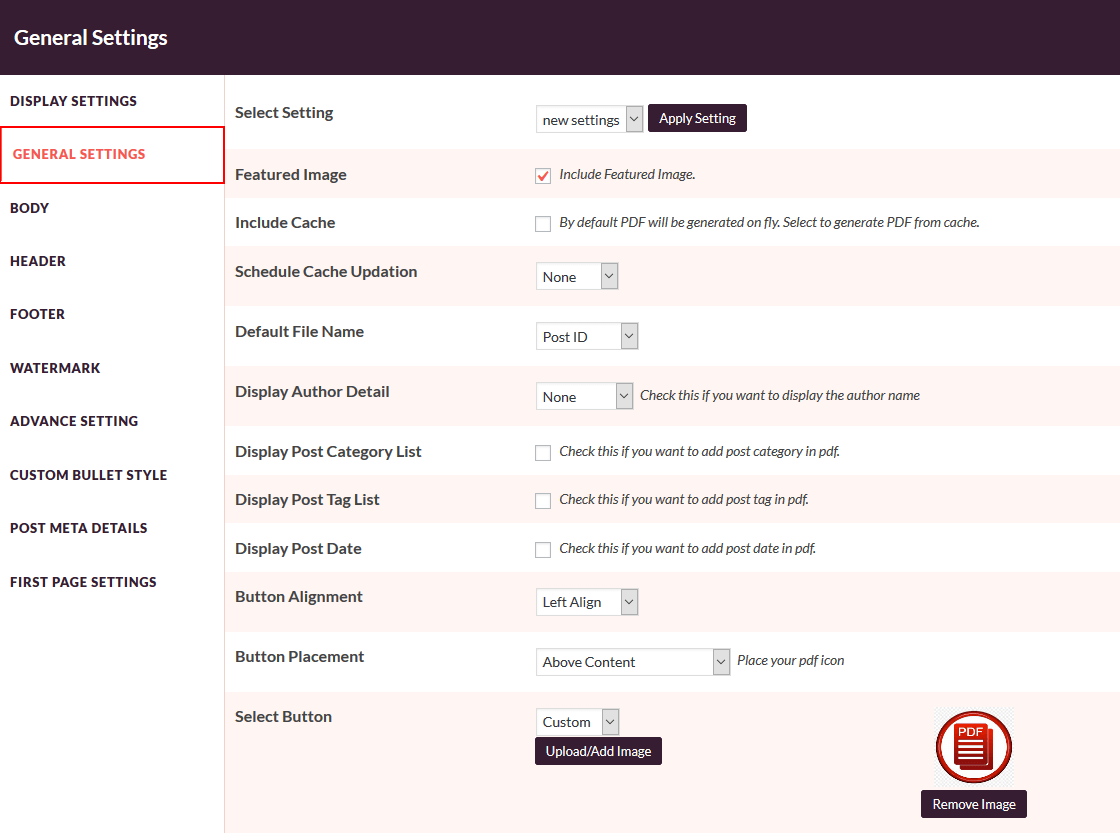
3.General Settings
This section allows you to set the general option for the PDF.
- Select Setting: firstly select an option that you want to apply on PDF.
- Featured Image: Select a featured image that you want to display on the PDF.
- Include Cache: Select if you want to render PDF from the cache if the cache is available.
- Schedule Cache Updation: Select the time duration for which you want Cache to be updated. By default, the cache will not be updated.
- Default File Name: Select the name of generating the PDF file (Post ID/ Post Name/Custom Name).
- Set PDF Page Color: Select the page color of your choice to add a color in your PDF file.
- Default File Name: Select name of generating the PDF file(Post ID/ Post Slug).
- Display Author Detail: Select this if you want to include the author’s details in the PDF, and how it should be formatted.
- Display Post Category List: Enable this setting to add post category in PDF.
- Display Post Tag List: Enable this setting to add post tag in PDF.
- Display Post Date: Enable this to display the post-release date in PDF.
- Button Alignment: Here you can set the location of the button. You can align the button left, right or center.
- Button Placement: Select the position of the PDF link on the Posts and pages.
- Select Button: You can add your custom buttons. By default, a pdf icon will display as a PDF link on the posts, pages, and products to generate the PDF file.
4.PDF Body
In this section, the admin can design the structure of the PDF file.

- Select Setting: firstly select an option that you want to apply on PDF.
- Post Template: Here we are proving three types of post templates, you can select any one predefined template whom you want to convert your post into PDF file.
- Product Template: Here we are proving three types of post templates, you can select any one predefined template whom you want to convert your product into PDF file.
- The number of Product PostMeta: In this section, you can enter the number of post meta fields to be displayed along with the short description on the converted PDF file.
- Image scaling Ratio: Select Image height and width with respect to original featured Image.
- Top/Left/Right Margin: Select options for left, right and top margin to pages of PDF file.
- Page Size: Select the needed page size (default is A4) of PDF file.
- Orientation: Select the desired page orientation (default is portrait) of PDF file.
- Unit of Measurement: Select the desired units of measurement (default is mm) of PDF file.
- Content Font: Select the font type for the PDF file.
- Content Font Size: Select the content size for PDF file.
- Custom Title: Enter a PDF title to replace with the post/Page title.
- Show PDF Icon to User Roles: Tick this checkbox if you want to restrict display of the PDF icon based on user roles.
- Select User Role For Which You Want To Show The Pdf Icon: From the dropdown menu, select the user roles for which you want to display the ‘generate pdf’ icon.
- RTL Support: Select this if you want to generate the PDF in the selected languages(Persian, Arabic).
- Custom CSS: Enable this setting if you want to write your custom CSS for the PDF file.
5.PDF Header
This section allows you to design the Header of the PDF file.
- Select Setting: Firstly select an option that you want to apply on PDF.
- Page Header: Select an image to upload a header logo for the PDF file.
- Hide QR Code: Select this option if you want to remove the scannable QR code from your generated PDF file.
- Header logo: Select to upload a header logo for the PDF file.
- Hide Site Name: Select this option if you want to remove the site name from the header.
- Hide Site URL: Select this option if you want to remove the site URL from the header of the PDF file.
- Header logo Image Factor: This will apply to logo width/height to provide logo image in some surrounding space.
- Header logo Top Margin: Enter top margin (default is 10 units) of the logo image.
- Header Font: Select different font for the header content.
- Header Font Size: Select different font size for the header content.
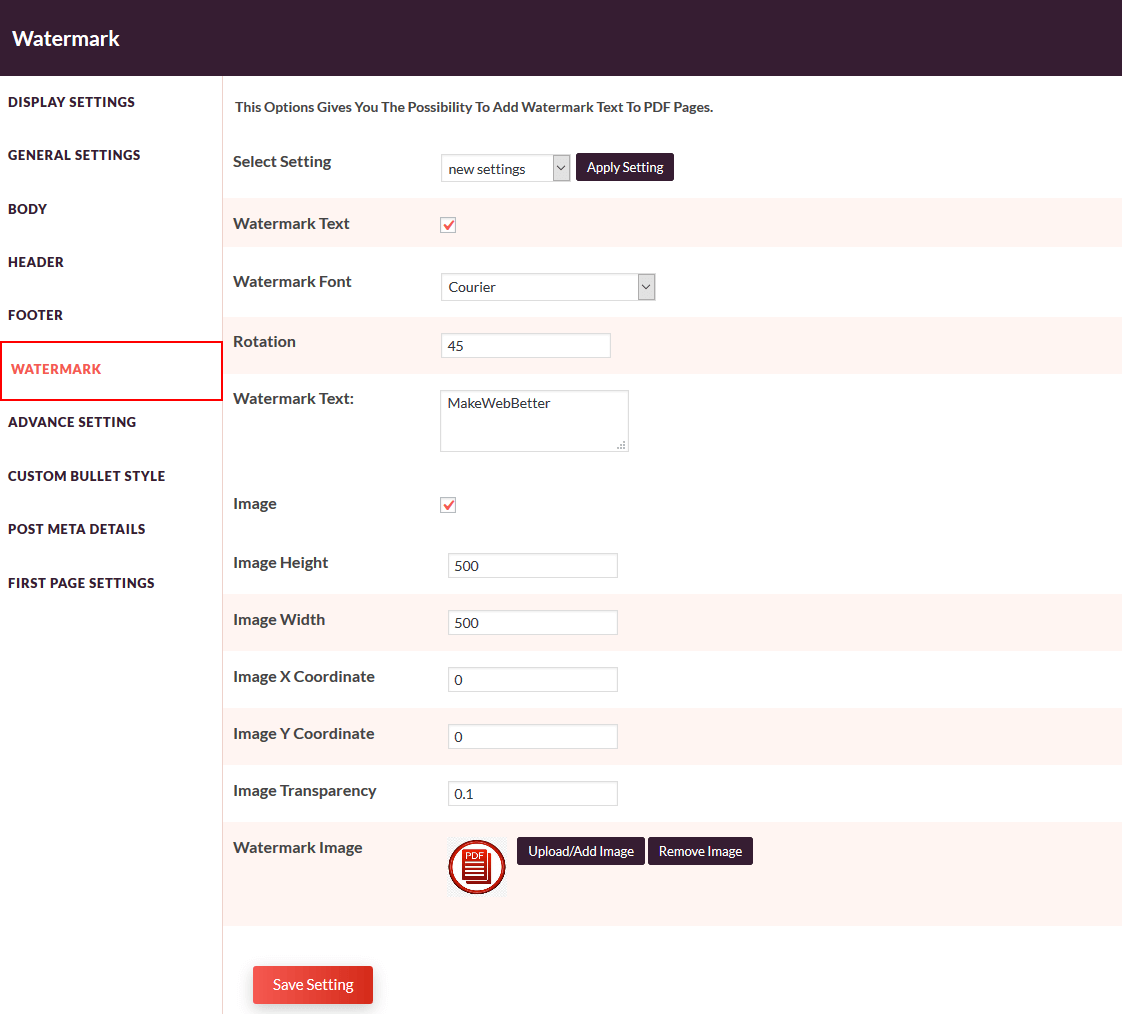
7.Watermark
This section allows you to add the watermark in the PDF file.
Watermark Text: Check this option to Add Watermark text to your PDF. Enter Font Type, Rotation and Watermark Text.
Watermark Image: Check this option to Add Watermark Image on your PDF file also you can enter Image height, width, transparency of the image.
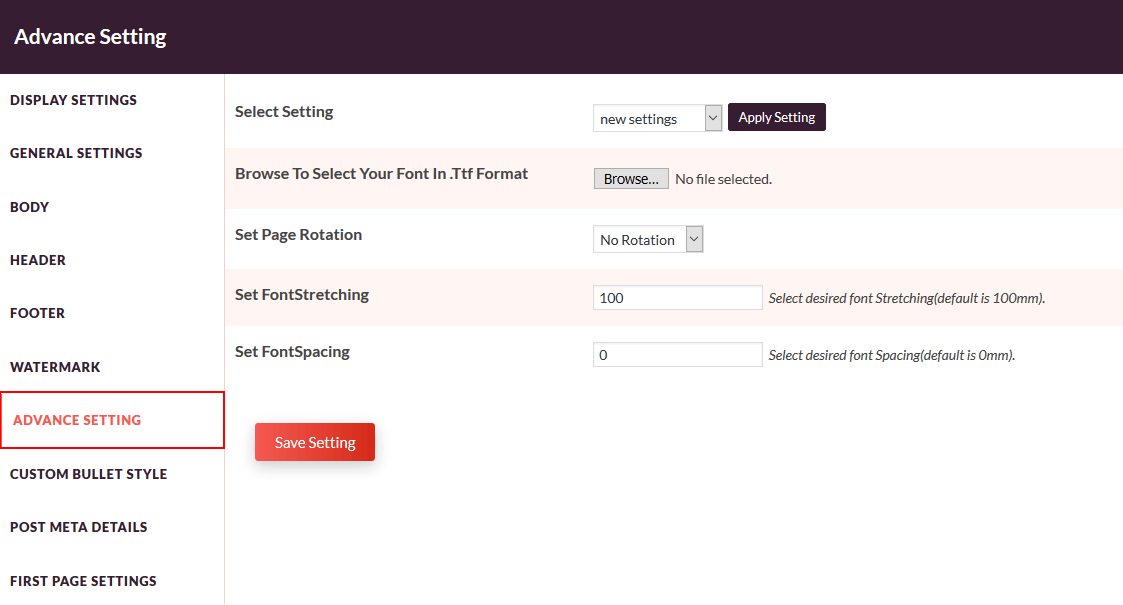
8.Advanced Setting
This setting allows you to add the advanced option of the PDF like the page Rotation, FontSpacing, FontStretching of the content of the PDF file.
- Select Setting: Firstly select an option that you want to apply on PDF.
- Browse to Select Your Font in the .ttf format: Browse a .ttf file, to upload it. TTF is a file extension for a font file, can easily be downloaded.
- Set FontSpacing: Enter the font space to set the desired space between letters to affect density in a line or block of text.
9.Custom Bullet Style
In this section, you can set the Bullet symbols for the PDF file.
- Select Setting: Firstly select an option that you want to apply on PDF.
- Bullet Symbol: Upload an image that you want to place as bullet points.
- Custom Bullet Image Height/Width: select the image height and width by default it is 3mm.
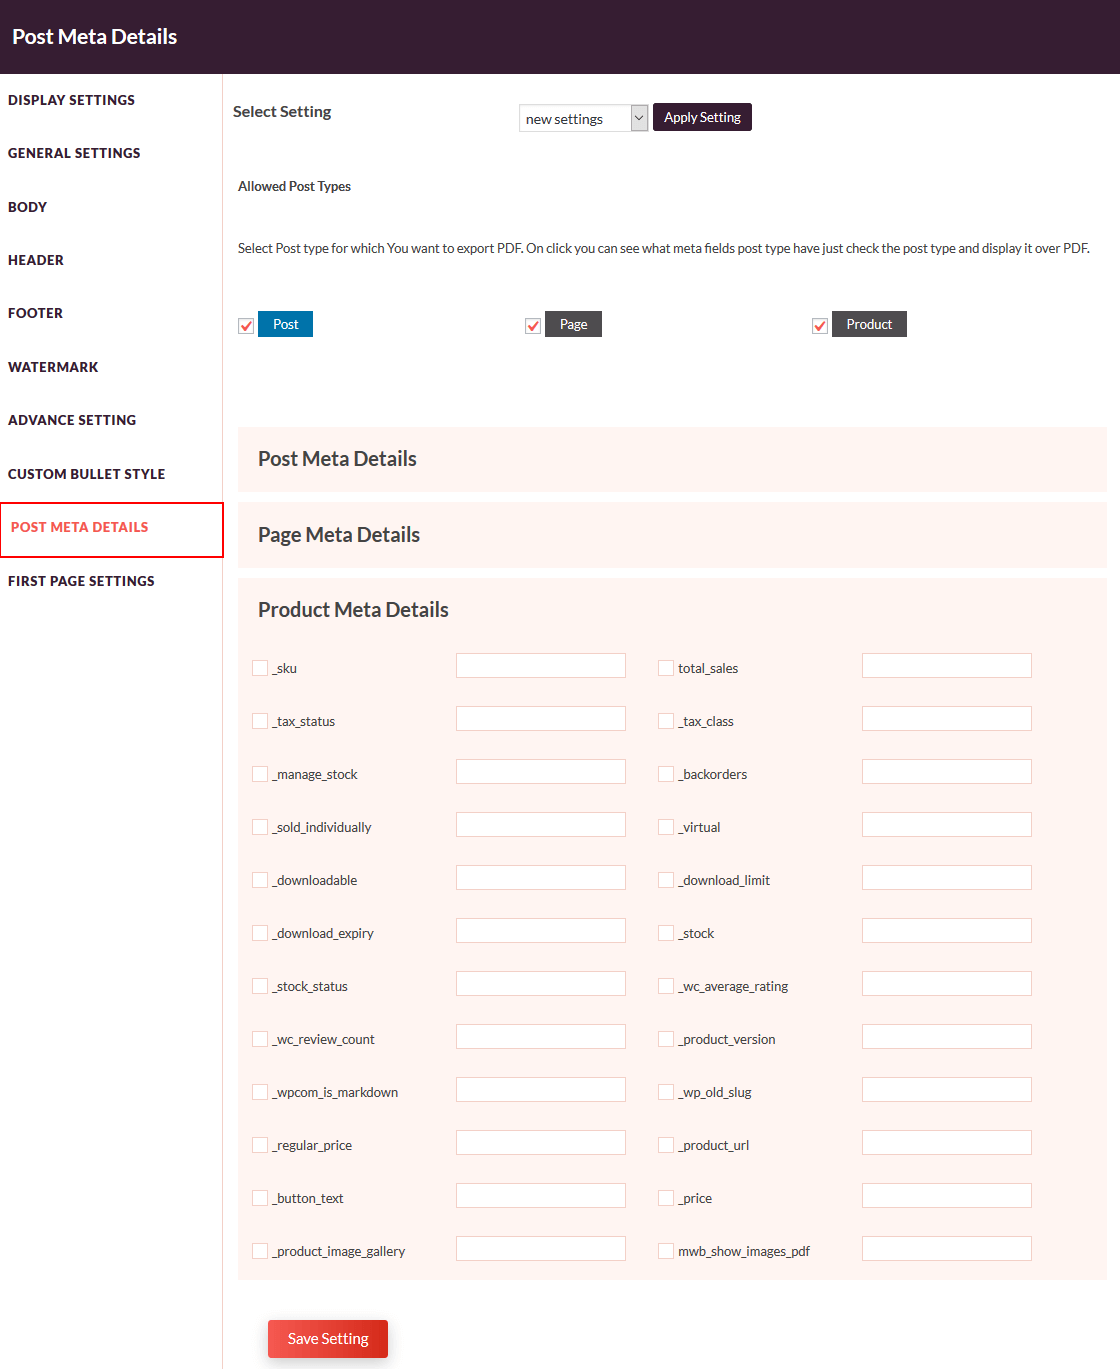
10.Post Meta Details
This setting allows you to display meta details of the Post, Page, and Product on the PDF files.
If you want to display the PDF with the Meta details, click on the selected post type to pick the meta fields that you want to display on the PDF file.
WP Ultimate PDF Generator LOG :
- It shows up all the log of the downloaded PDF with the user email and name along with the post, page or product name.
11.First Page Settings
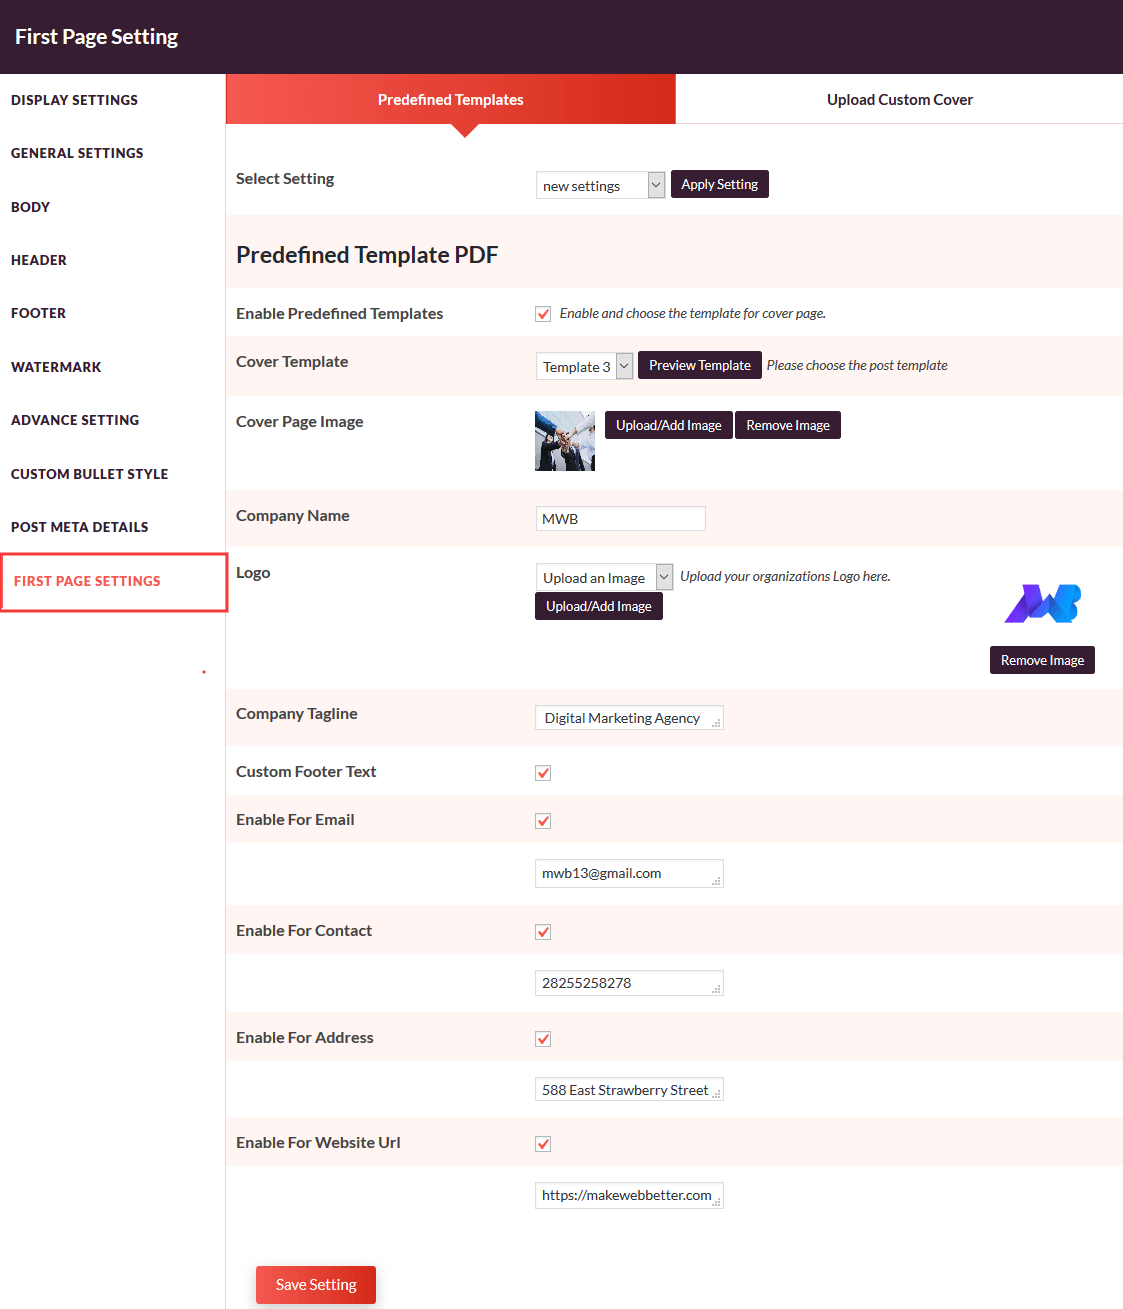
- Use Predefined Templates for the Cover page of the PDF:
Through this setting, you can design the first page of the PDF file with the different possibilities like Logo, Company Name, Tagline of the company, and add the custom Footer. In the custom footer, you can add the Company URL, Address, Contact Number and Email ID.
From now we are providing 4 predefined templates for the front page that allow you to change and remove the cover image according to requirements.- Enable Predefined Templates: Enable this setting to use the predefined templates for the Cover page of the PDF file.
- Cover Template: Select anyone template among four different templates.
- Cover Page Image: Select the image for the cover page template.
- Company Name: Enter the name of the company.
- Logo: Set the logo of the company.
- Company Tagline: Enter a tagline of the company.
- Custom Footer Text: Enter the custom text for the footer.
- Enable For Email: Enable this setting to add the email address.
- Enable For Contact: Enable this setting to add the contact number.
- Enable For Address: Enable this setting to add the address of the company on the cover page of PDF file.
- Enable For Website URL: Enable this setting to add the website URL on the cover page of PDF file.
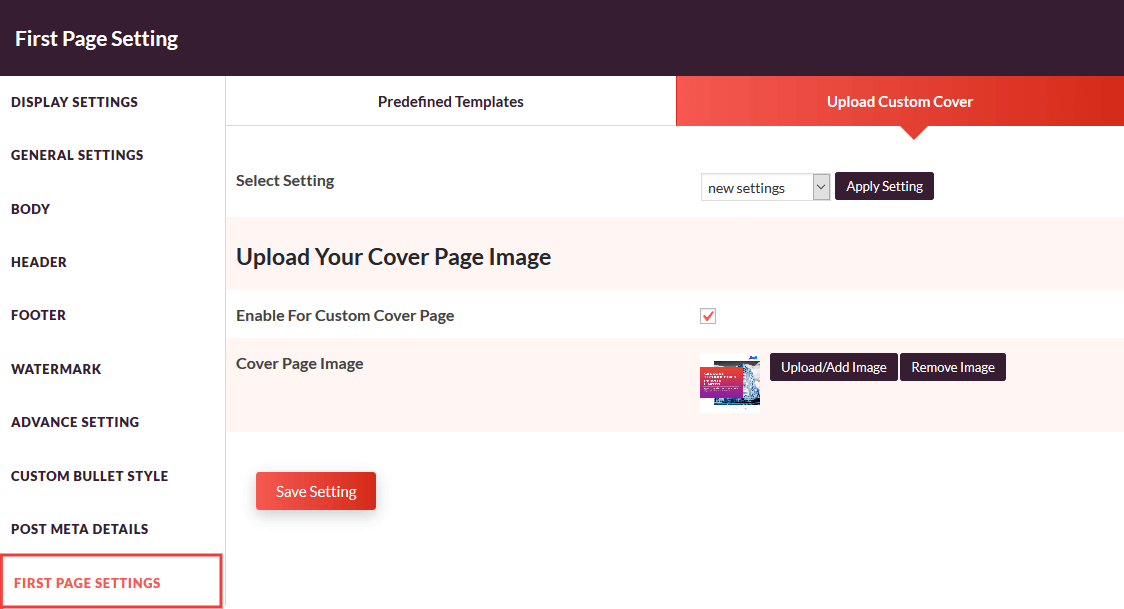
- Design and Upload Your own Custom Cover Page: This setting allow you to upload the custom cover for the PDF file.
12.FAQs
This plugin will work with other themes which doesn’t show full article on home page?
We generally fetch the article content from database, it does not depend on how much content is showing there. If the content is through meta fields then you have to select it from the settings as provided.

