1.Overview
Upsell Funnel Builder for WooCommerce PRO and Upsell Funnel Builder for WooCommerce provide customers with an unmatched shopping experience with One-Click Upsells, Cross-Sells, Product Recommendations, and order bump offers right where they’re most likely to buy!
⚠️ Update: Combined and Merged the Power of Order Bump Offers and One-Click Upsell Plugin for Your Woocommerce Store. Create an Engaging and Persuasive Sales Funnel to Target Your Best Customers, Engage Them With Frequently Bought Together, Upsell, and Cross-Sell Products, Increase Your Average Order Value, and Boost Sales in One Click.
Benefits
- Improved your customer’s personalized user experience
- Enhanced marketing insights for customer purchases based on behavior & preferences
- Higher ROI with less investment cost in marketing
- Better value proposition with your competitors
- Create offers seamlessly like bundled products, limited period offers, data-driven product recommendations
- Create WooCommerce order bumps and offer a cart funnel for simple, variable, and subscription products.
- Track the sale and behavior of every Order Bump Upsell they’ve added to their store.
- Smart Skip to skip the bump offers if already purchased
- Offer Upgrade to offer an upgrade on the existing purchase
- Create multiple WooCommerce bumps to offer funnels
- Shows upsell offers after checkout, the best time to persuade customers to buy more since s/he has already made a purchase.
- Track your upsell funnel sales data on Google Analytics and Facebook Pixel.
- Create a global funnel that triggers regardless of any product or category.
- Show exclusive offers based on the order email.
- View and edit your smart funnels in sandbox mode.
- Multiple funnels can be created with offers of your own choice.
- Custom offer pages can be created with the help of shortcodes.
- 8 predefined offer sales funnel templates that are completely customizable with Elementor.
- Offers can be purchased with a single click only.
- Custom funnels can be scheduled for specific weekdays.
- Customizable funnel workflow if the customer accepts or rejects an offer.
- Compatibility with all leading page builders. Supports Simple, Variable, Subscription, and Bundled Products.
Watch: Upsell Funnel Builder for WooCommerce.
Watch: How To Create Upsell Order Bumps In Your WooCommerce Store?
2.Installation
We have mentioned the installation process for both the Free and Premium Versions. The customers can refer to the one that is relevant to them.
It is important to note that before activating the plugin Upsell Funnel Builder For WooCommerce Pro, you should have the Upsell Funnel Builder for WooCommerce – WordPress plugin installed, as the plugin will not function without it.
So, if you don’t already have it, you can download it directly from here:
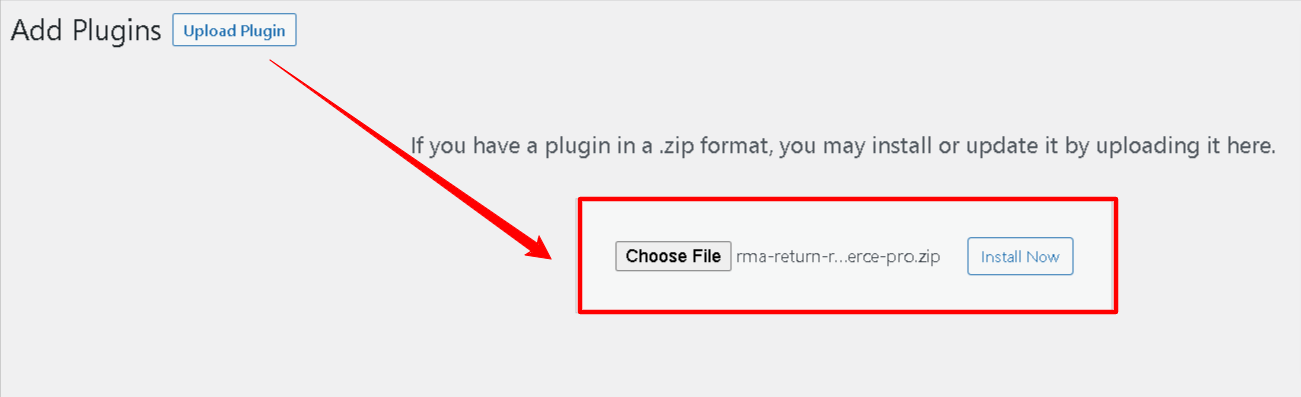
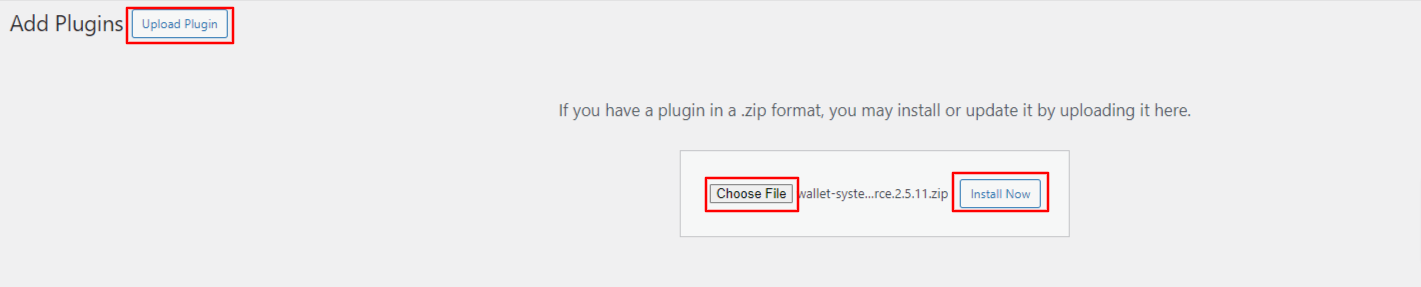
To download the premium plugin which you purchased please follow the below steps:-
- Go To https://wpswings.com/my-account
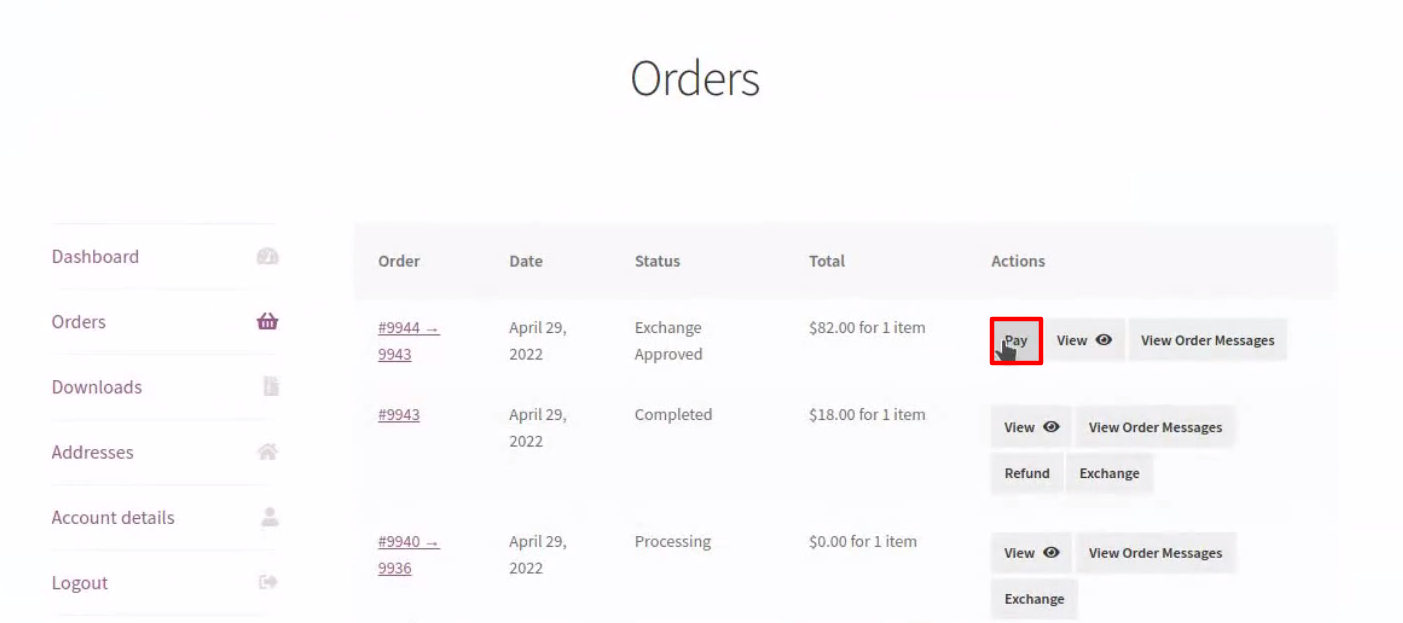
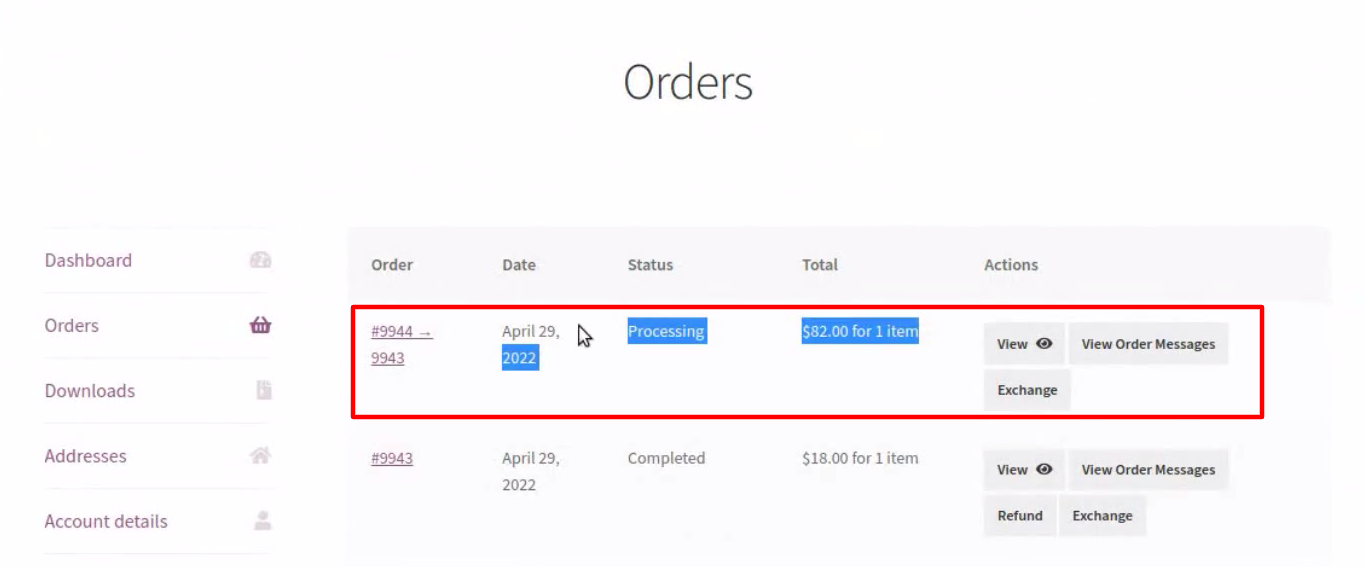
- Visit Orders Section
There you will get a License code and a Premium purchased plugin zip file
Download and use it on your website by activating it
Note: You need to have both Free and Pro plugins in order to use them smoothly
2.1.Free Version
Automatic Installation:
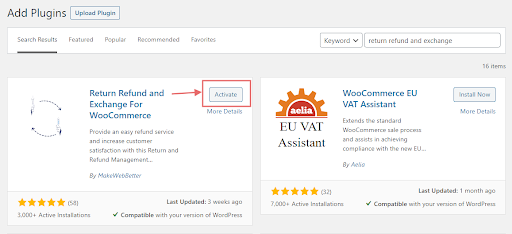
Automatic installation is the easiest option handled by WordPress. Follow these steps for automatic installation:
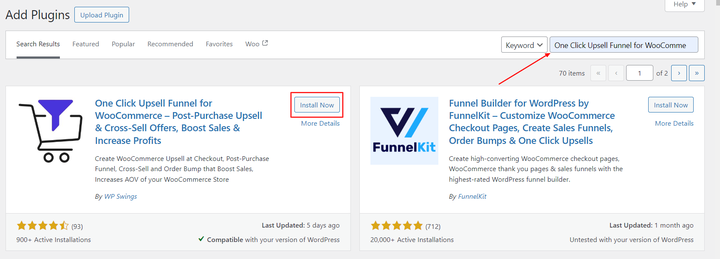
Type “Upsell Order Bump Offer for WooCommerce” and hit Search Plugins. Once you find ‘Upsell Order Bump Offer for WooCommerce’ by WP Swings you can view the details about it such as the point release, rating, and description. One can install it, simply by clicking “Install Now”.
Manual Installation:
Manual installation of the plugin is another option to install the plugin in the seller’s WordPress environment. The manual installation method involves downloading our Upsell Order Bump Offer for WooCommerce Extension and uploading it to the web server via their favorite FTP application. The steps for manual installation are as follows:
1. Upload the ‘upsell-order-bump-offer-for-woocommerce’ folder to the /wp-content/plugins/ directory.
2. Activate the plugin through the ‘Plugins’ menu in WordPress.
2.3.License Activation
To work correctly, the plugin must be installed by following the mentioned steps.
However, suppose you have purchased the premium version of the plugin and you want the benefit from automatic updates or access to the support platform to receive help from our staff. In that case, you need to activate the plugin. The License Key is sent to you on your email ID.
Also, after Purchasing the premium version, admins can navigate to My Account > Orders > Your Order. There you’ll find the License Key. The License Key is also sent to you on your email ID.

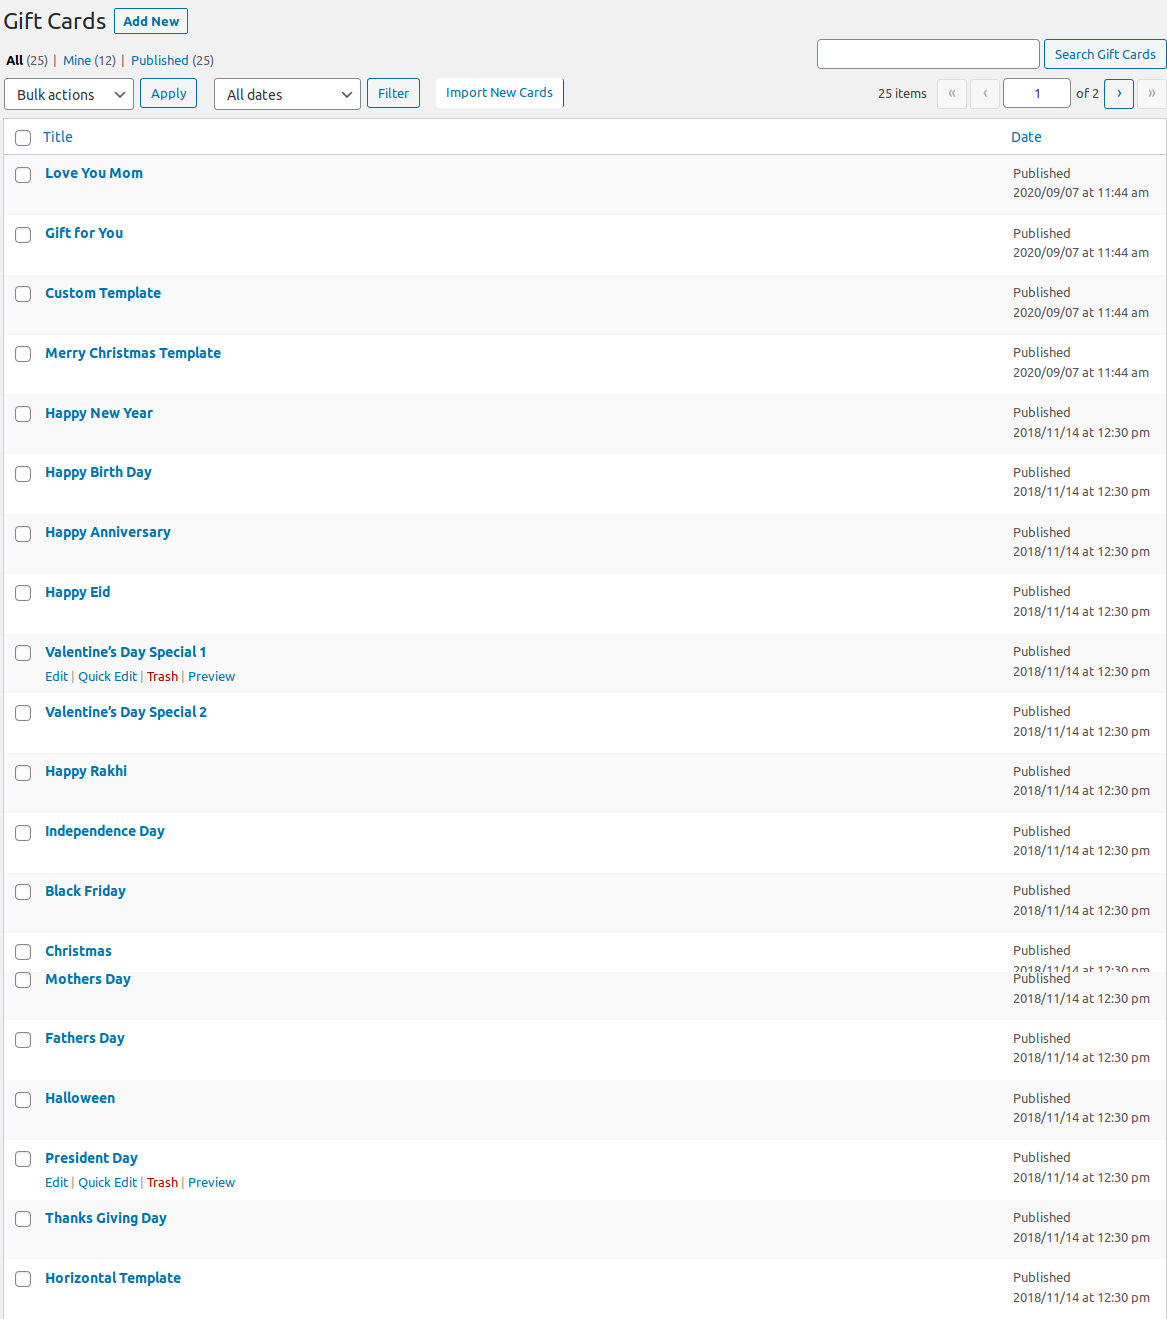
To activate the plugin, you have to navigate to the “License” tab, here you can enter the “License Code”, and click on the “Activate” button.
3.General Settings

-
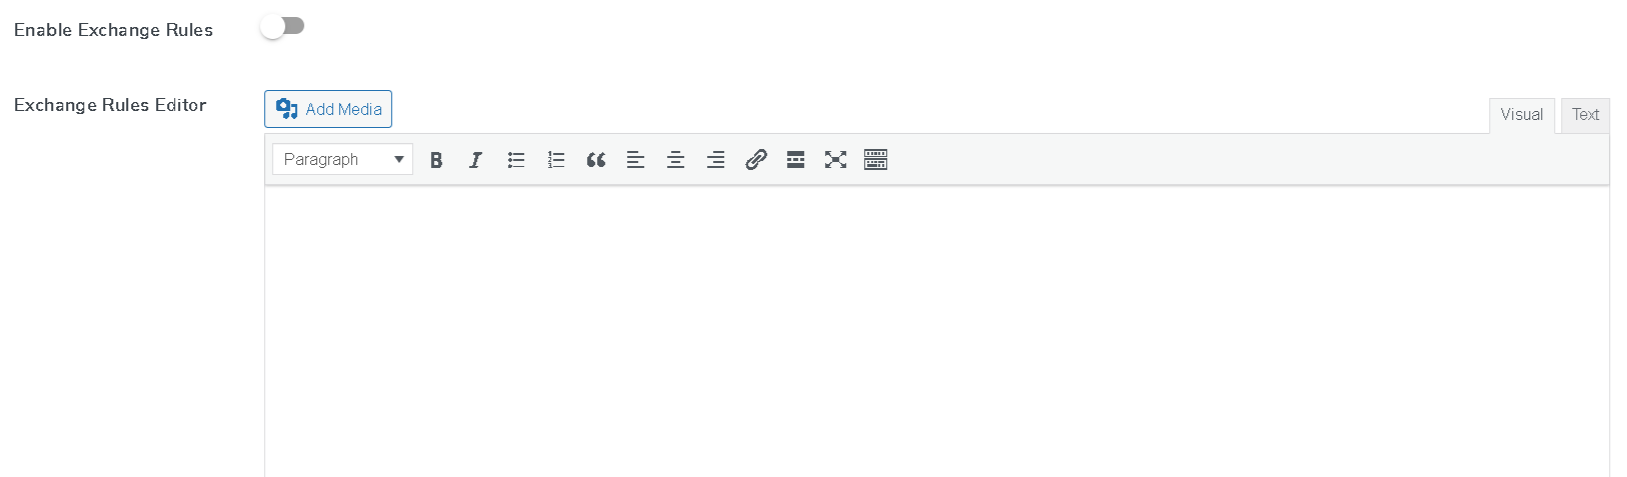
- Enable Funnel Builder:
Here, you can enable/disable the extension to ensure the smooth operation of the upsell order bump features. - Enable Campaign Labels:
Enable this setting if merchants want to label their new and running upsell funnel and order bump campaigns. - Skip for Same Offer:
By enabling this feature, the order bump upsell offer will be disabled if the offer product is already present in the cart. - Offer Price Format: Choose how you want to display the offer price. You can select between Regular Price, Offer Price, and Sales Price.
- Smart Skip if Already Purchased Premium :
This feature will allow you to skip the order bump offer for those customers who have already purchased the offer product in previous orders, making this a one-time exclusive offer. - Product Offer Strip: Premium
Admins can utilize this setting to run strip offers over selected products, informing customers about ongoing offers. To configure this setting, navigate to Point 13. - Abandoned Cart Bump: Premium
Merchants can utilize the compatibility with the WooCommerce Abandoned Cart Recovery Plugin to create abandoned cart bumps targeting the customers who have abandoned their carts.
- Enable Funnel Builder:
Click on Save Changes to save the settings.
4.Abandoned Cart Bump List
To navigate to this section, go to the Dashboard > Upsell Funnel Builder > Abandoned Bump List.
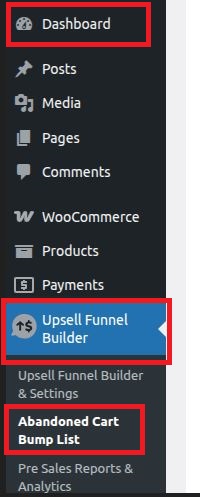
Use this section to create targeted order bumps, particularly for customers who have abandoned their carts.
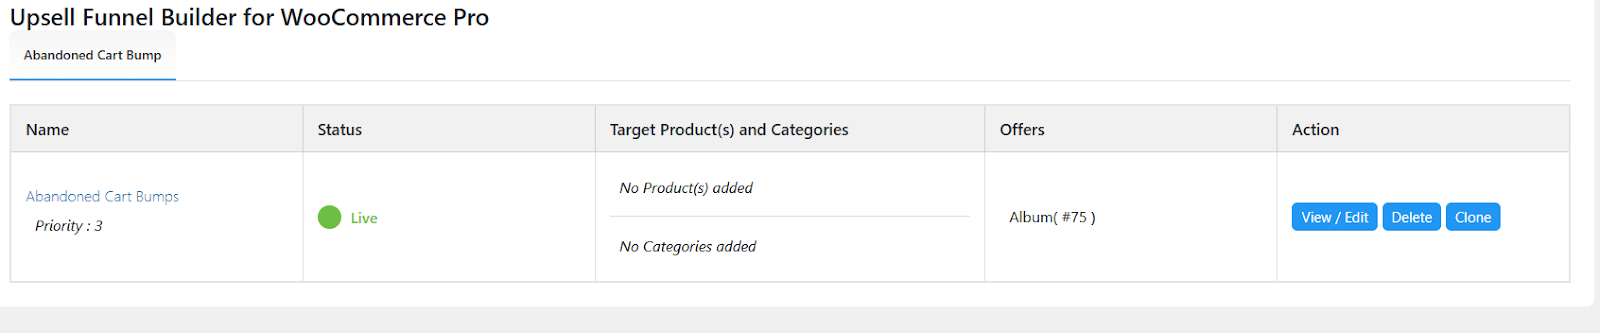
Merchants can run offers user-wise. This means that if a particular user has abandoned their cart with certain items. You can showcase those items to the abandoned users by running offers on them. As soon as the order is considered to be abandoned, a bump offer will be created.
NOTE: All the related settings to the bump offers will work exactly like other bump offers; refer to settings 6.2.1
5.Global Settings
The global settings of the Upsell Funnel Builder for WooCommerce is divided into two sections i.e. Pre Bump and Post Bump. There are dedicated settings for both of these sections.

5.1.Order Bump Settings

5.1.1.Enable Permalink On Product Title And Image
By enabling the permalink option from the Global Settings, your customers can view the bump offer product in detail.
5.1.2.Shortcode Order Bump
Merchants can utilize this shortcode- “[wps_bump_offer_shortcode]” to display bump offers on any page.
5.1.3.Enable Popup Exit-Intent
Admins can enable this setting to display the sales pop-up screen of the WooCommerce upsell product image when customers are exiting your website.
5.1.4.Enable Smart Pop-Up
Merchants can configure this setting and apply different types of pop-up options to showcase different order bump offers.
The options to select are –

The admin can also specify the number of seconds to delay the pop-up display on the cart/checkout page.
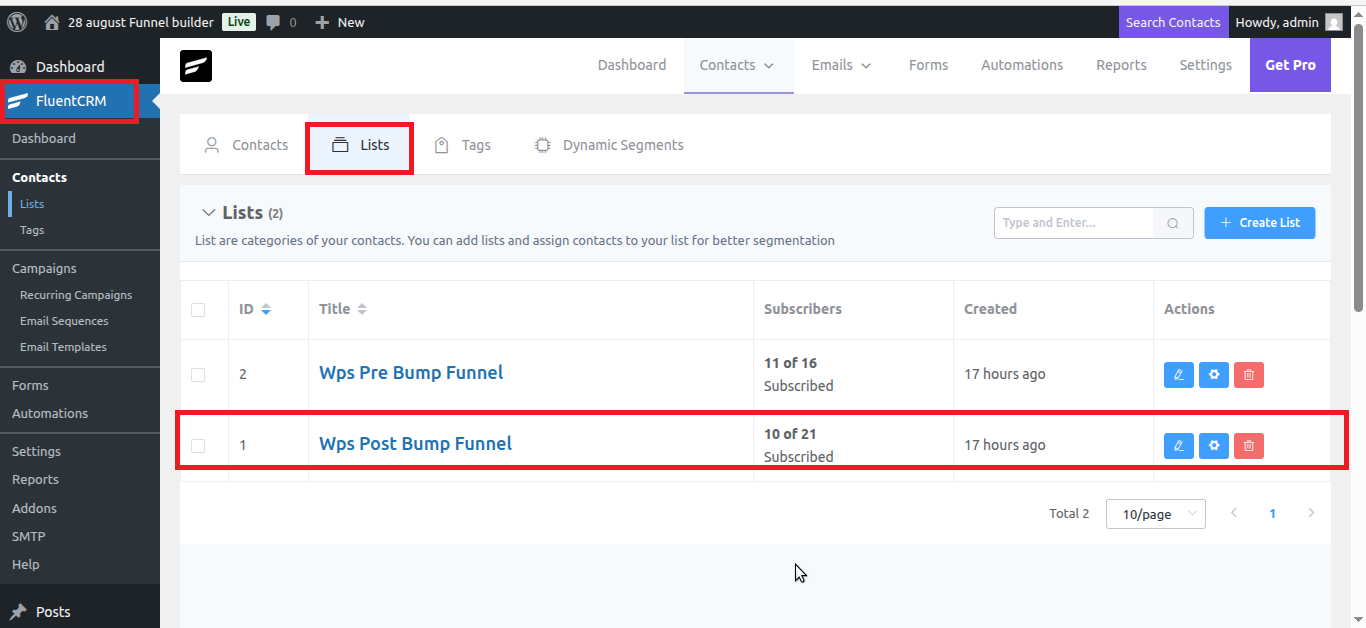
5.1.5.Enable Email Marketing Automation
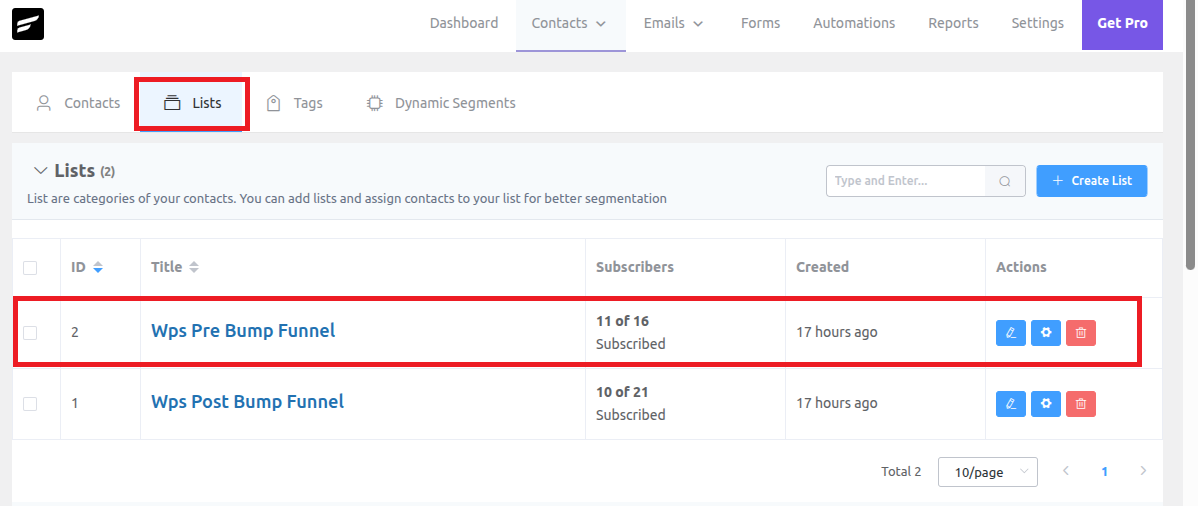
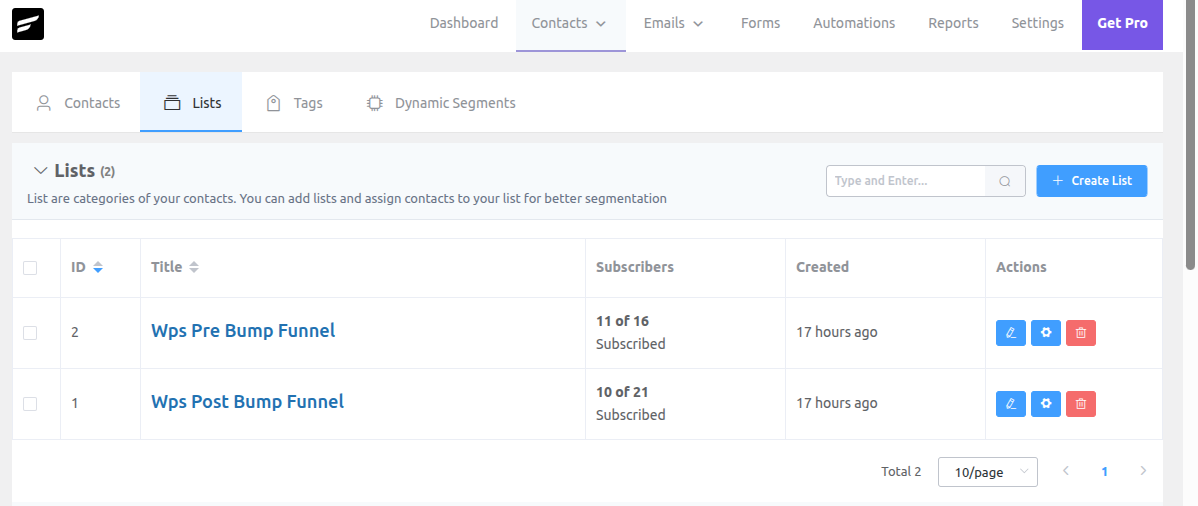
Admins can utilize this functionality to sync the email contacts of the customers who have purchased the pre-bump offer. This synced email contact can be used to send follow-up emails to your customers.
Note: For this feature to work seamlessly, the admins must have Fluent CRM integrated with their WooCommerce store. After enabling this functionality, two segments are created to monitor the sales. The WPS Pre-Bump Funnel has the contacts for the customers who have purchased the “pre-bump” offers.
5.1.6.Bump Offer Appearance
Select this feature to display the product title or image with a pop-up or without a pop-up window at the WooCommerce checkout pop-up page.
5.1.7.Offer Product Permalink Target Attribute
The WooCommerce upsell pop-up feature offers two options:
- Open the product page in the same frame within a pop-up
- Open the product page in a new tab.
5.1.8.Offer Target Dependency
Select whether the dependency of the offer product is automatically removed or not when the target product is removed from the cart.
5.1.9.Offer Location
From here, you can set the location of the offer section on the checkout page. You can choose to display the offer before Payment Gateway, after Payment Gateway, before Order Summary, or before the Place Order Button.
5.1.10.Enable FBT Location
Admins can enable this setting to make the “frequently bought together” offers’ location dynamic.
5.1.11.Frequently Bought Together Location
Using this setting, the admin can select where on the product page they want to display the “frequently bought together” offer. There are different options available.
5.1.12.AB Testing
Merchants can use this feature to get a chance to see which of the order bump offers are working in their favor and which ones are not serving or meeting the requirements of their WooCommerce store.
5.1.13.Restrict Woo Coupons
Enable this feature if you want to remove any other applied discount coupons from the cart item.
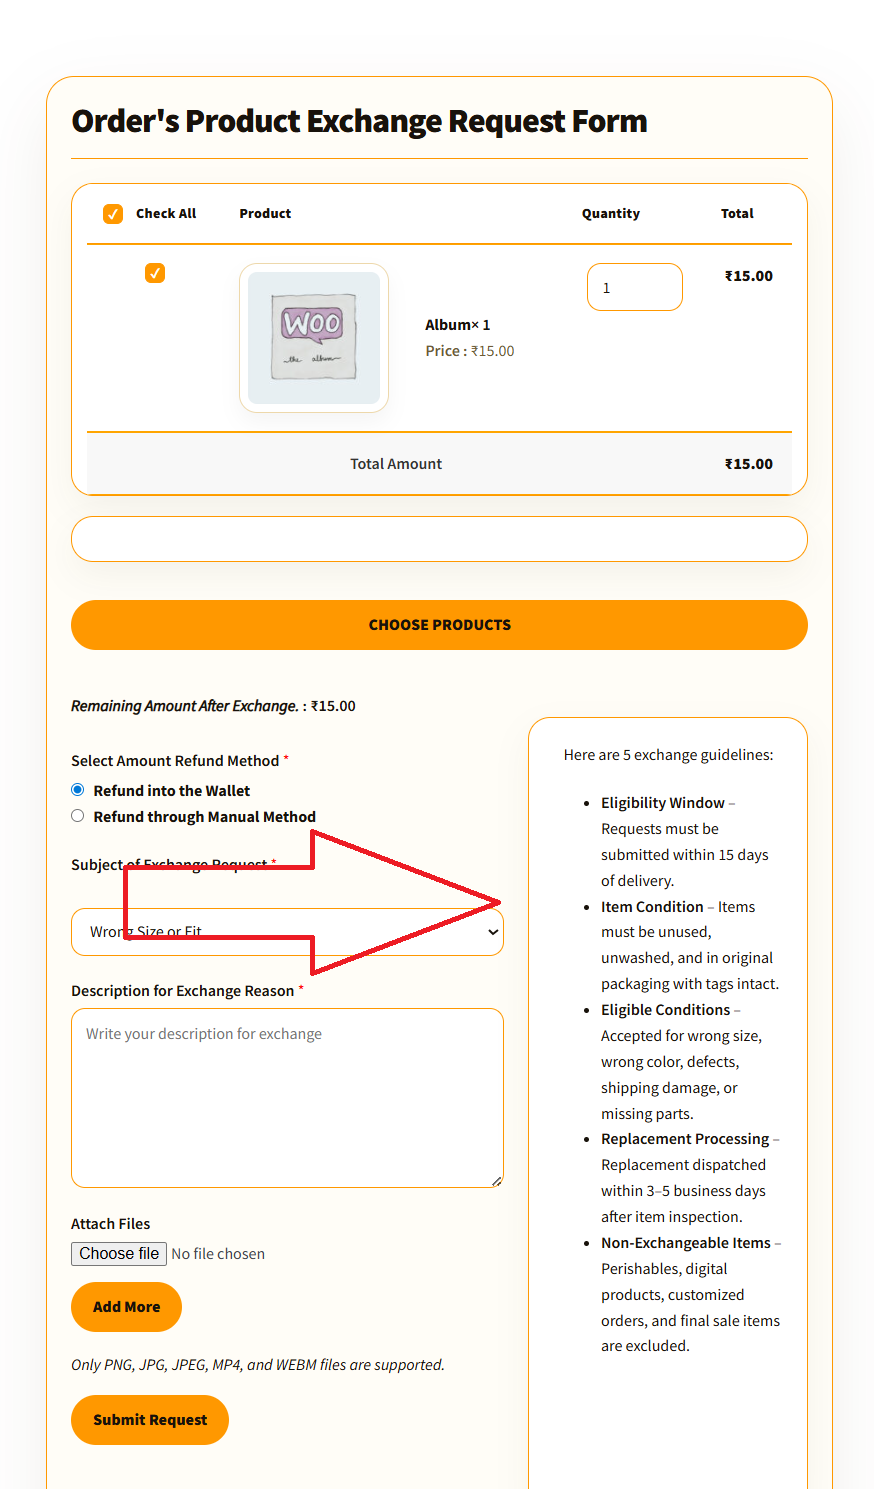
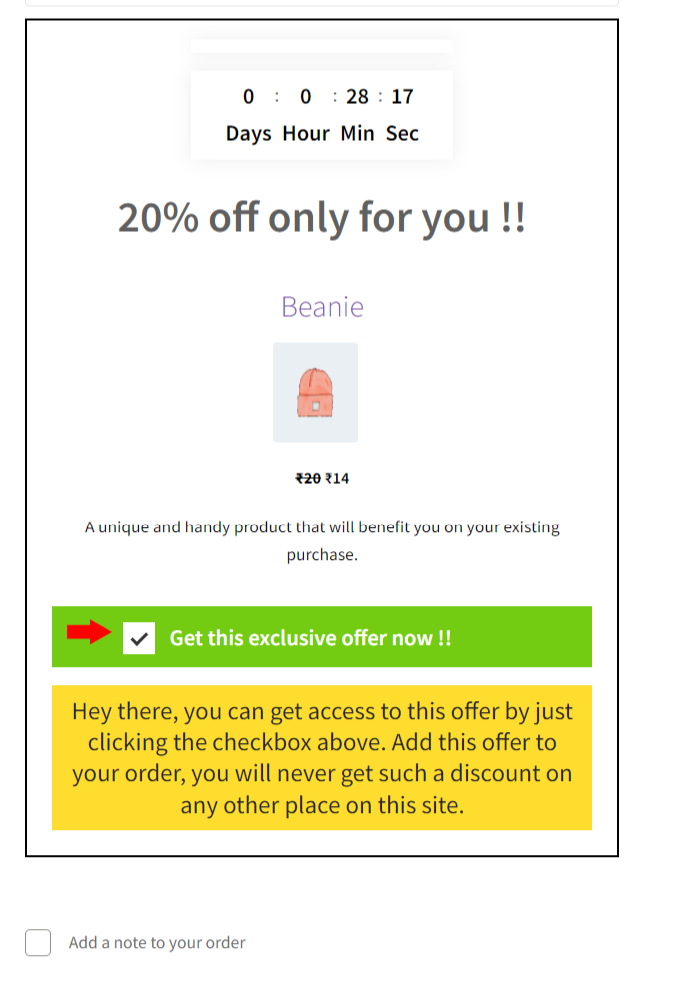
5.1.14.Enable Arrow Feature
Enable this feature to show an arrow on the offer checkbox to emphasize the offer and make it attractive to customers. Transform the arrow into various colors and catch your user’s attention while browsing.
Frontend Representation,

5.1.15.Enable Delete All Data On Uninstall
Merchants can enable this setting to delete all the mentioned data when the plugin is uninstalled.
5.1.16.Enable Cart Upsell
Merchants can enable these settings and show order bumps on the cart page.
5.1.17.Cart Upsell Offer Location
They also get a chance to choose the location of bump offers, You can display them “Before Order Summary”, “Before Payment Gateways”, “After Payment Gateways”, or “Before Place Order Button” or the admins can also incorporate bump offers across the website as per their requirements, using this [wps_bump_offer_shortcode] shortcode. This increases the accessibility of the bump offers, further increasing the overall user experience.
5.1.18.Multiple Order Bumps Count
Enter the number of order bump counts you want to show on the checkout upsell WooCommerce page. If you add different offer products for a similar target product, those offer products will be displayed to the user at the checkout page.
5.1.19.Set Custom Order Success Page
This setting enables the admins to create a custom order success page, as per their liking. To do so, the admin can create a page first. Click on “from here, create a custom order success page.” After clicking, you will be redirected to the section from where you can create a new page or utilize the existing one. After successfully creating a page, you will have to click on the “quick edit” button to get the “slug” of the created or existing page.
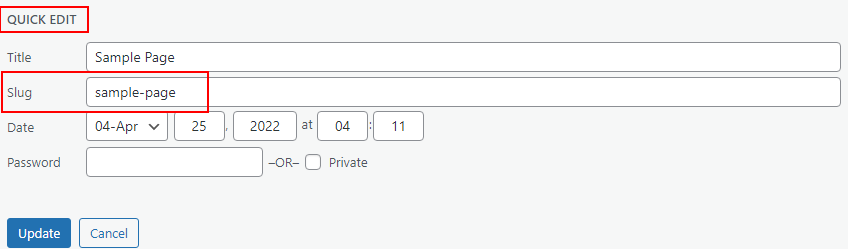
Now, just copy the slug and paste it into the field. After doing this, you and your customers will see the checkout success page that you have customized.
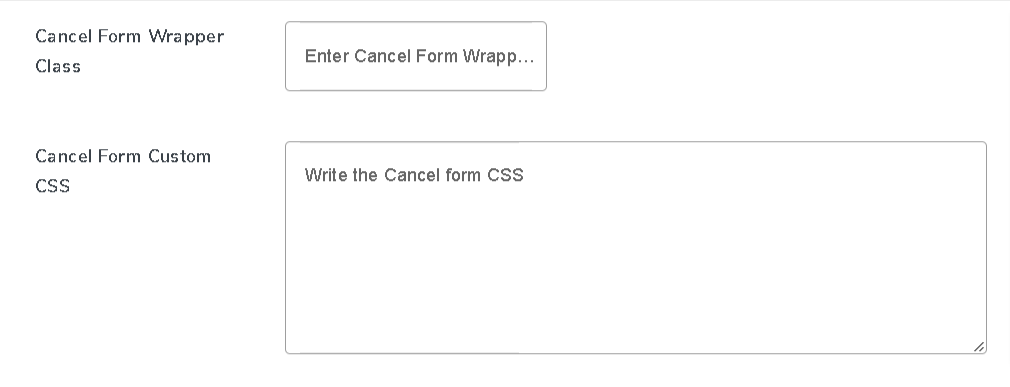
5.1.20.Global Custom CSS
If you want to add some custom styling, you can do it by adding custom CSS here.
5.1.21.Global Custom JS
If you want to add some custom UI functionality, you can do it by adding custom JS here.
Click on Save Changes to save the settings.
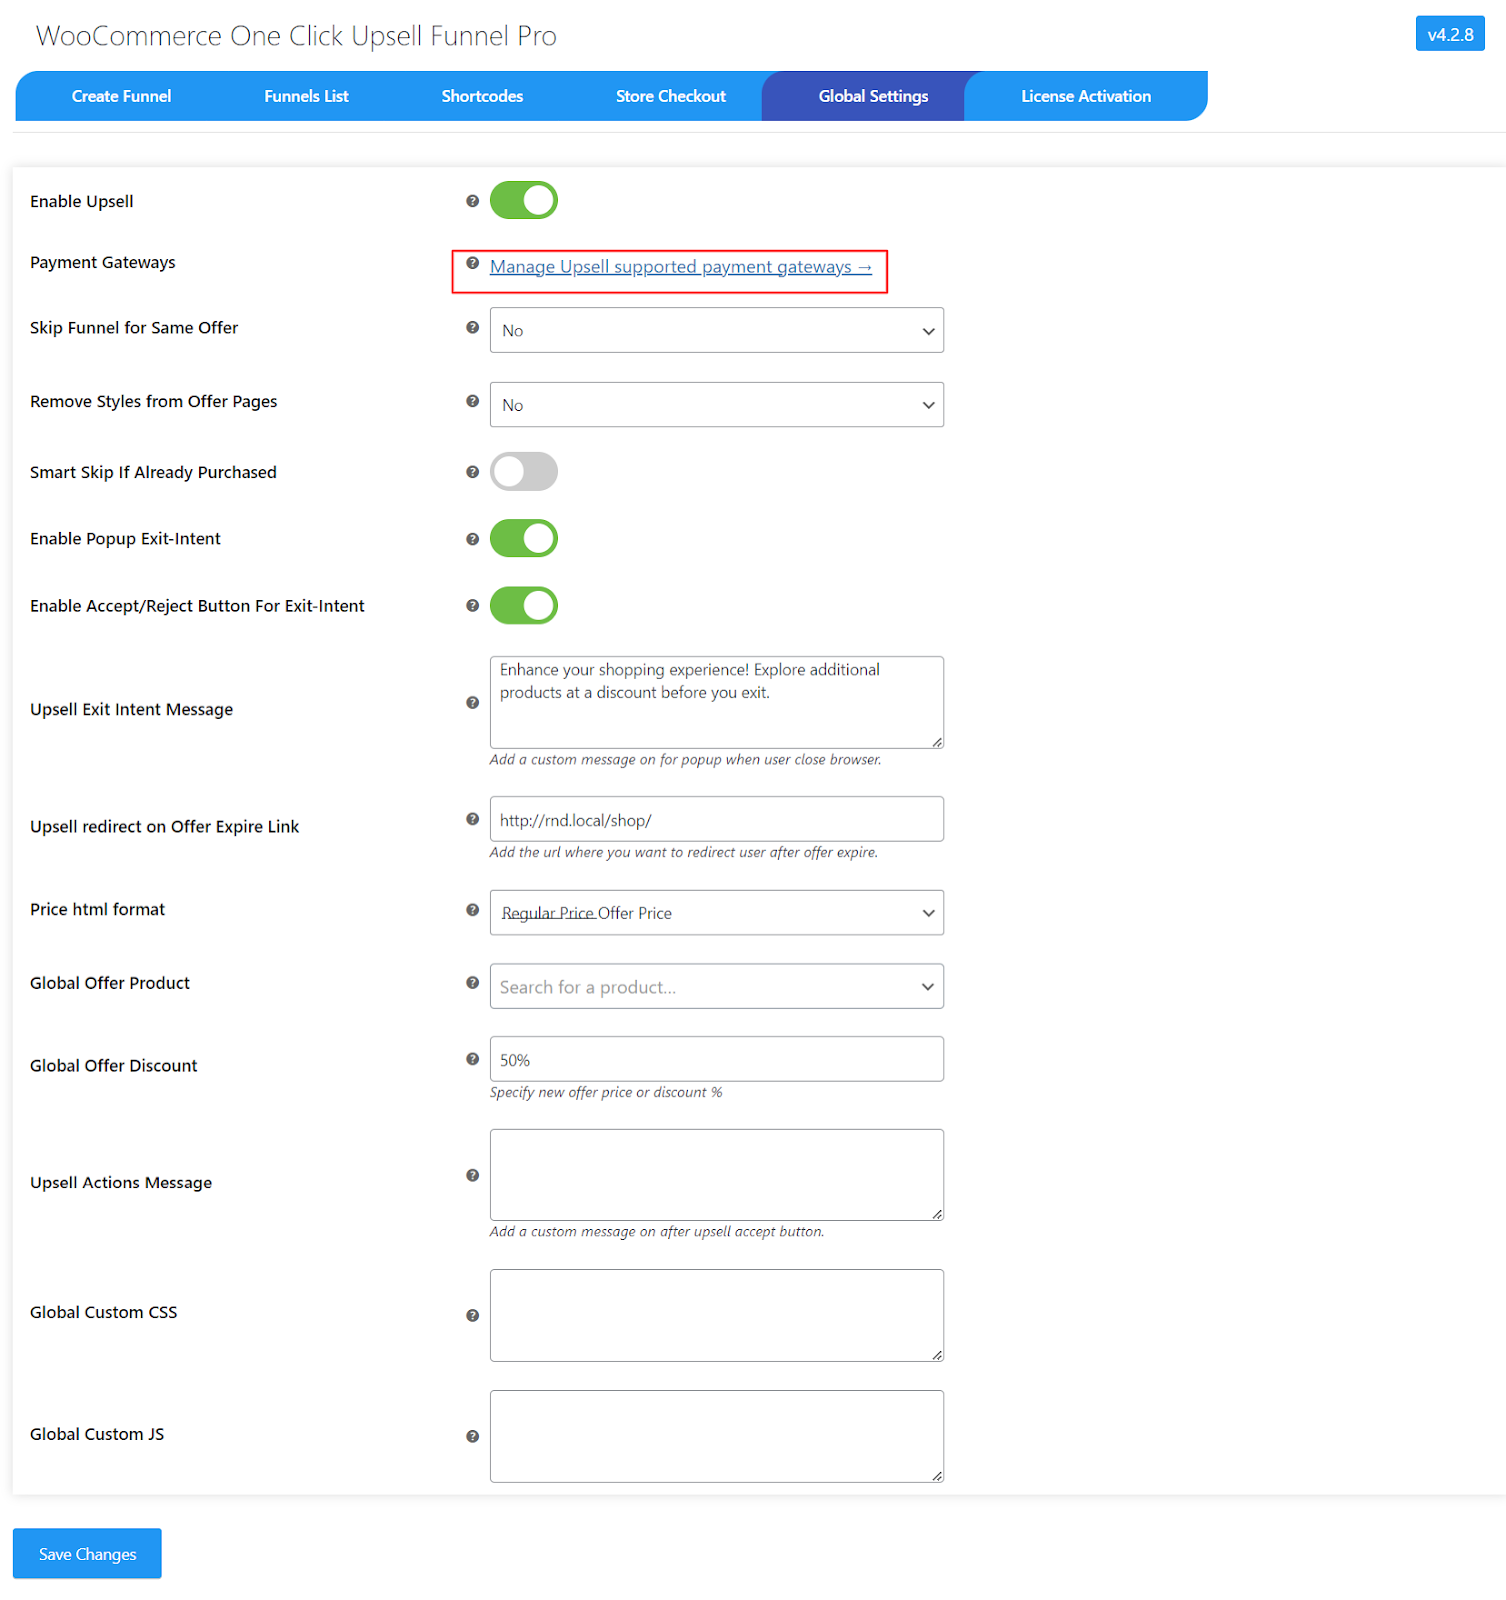
5.1.2.Upsell Funnel Settings

-
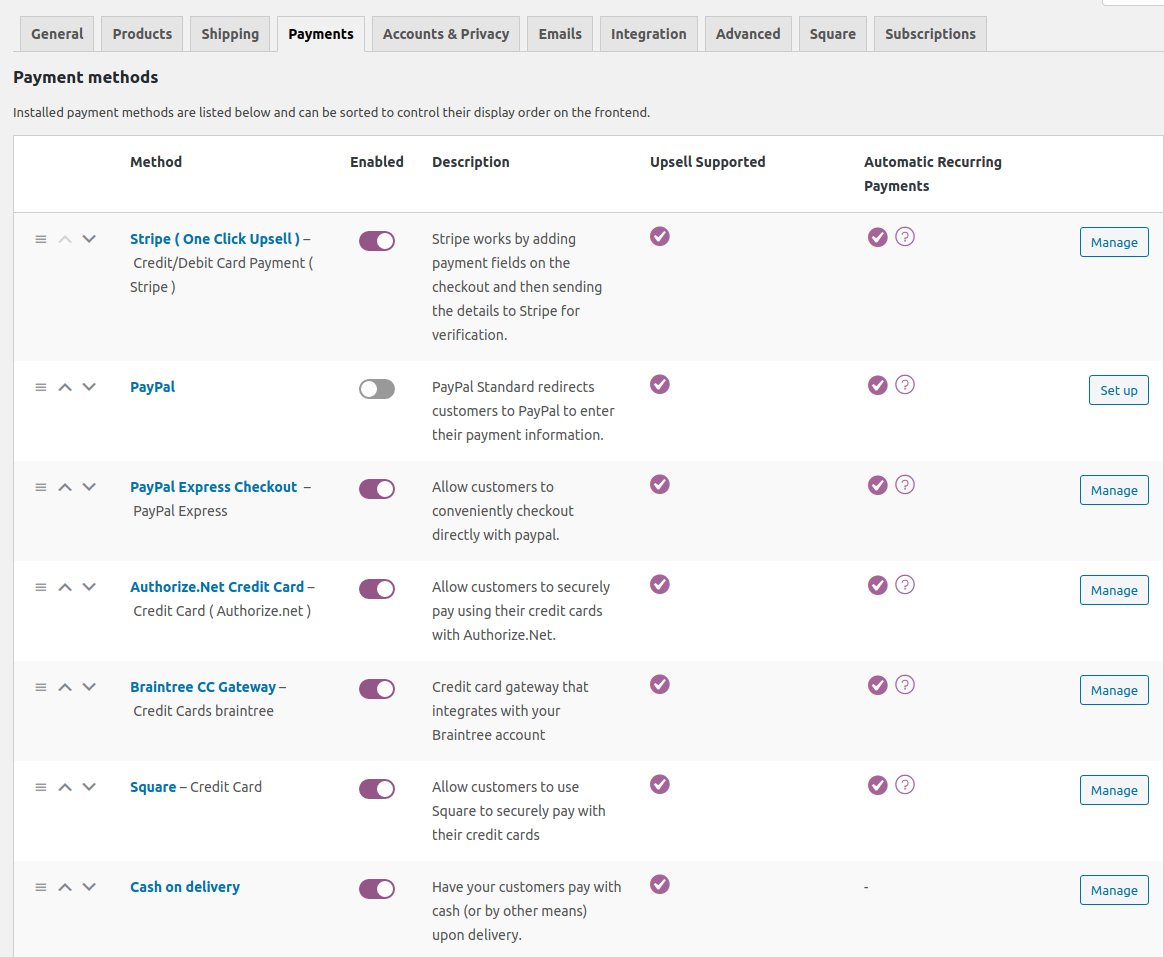
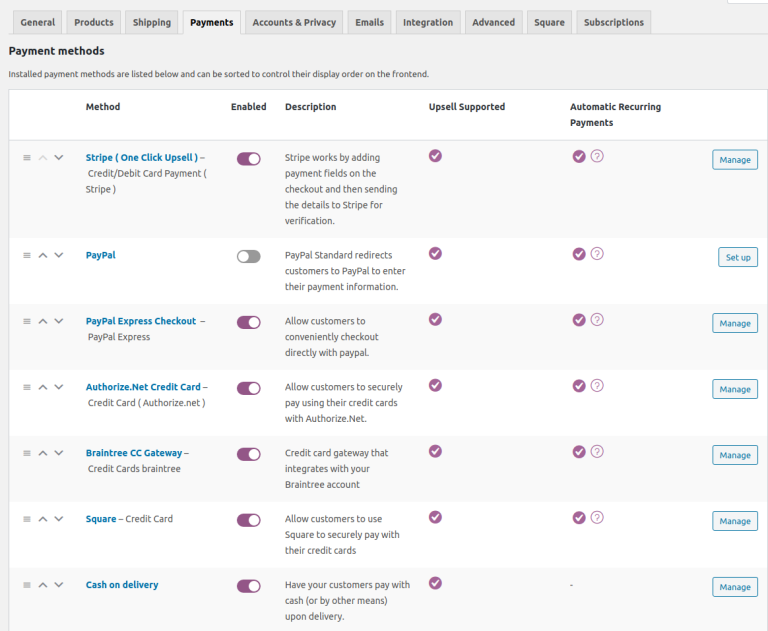
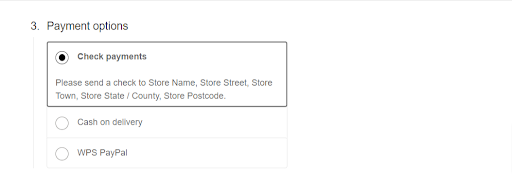
Payment Gateways:
This is very important for Upsell offers. You can set up the supported payment gateways here. Here you can set up and manage the payment gateways for this plugin.

Here is a clear explanation of the payment gateways:
-
Stripe Settings:
The plugin provides a new stripe integration that you can set up. Stripe requires public and secret keys which you can get from the Stripe Dashboard.
Gateway flow: checkout ➝ stripe payment ➝ upsell offer ➝ thank you.
-
PayPal Settings:
This WooCommerce funnel plugin works with WooCommerce Paypal Payments.
In WooCommerce PayPal Payments, the customer is redirected to the PayPal page to complete the transaction. WooCommerce PayPal Payments needs API-level credentials such as API Signature, API username, and API password.
Gateway flow: checkout ➝ PayPal payment ➝ upsell offer ➝ thank you.
-
Authorize.net Credit Card:
The plugin provides a new Authorize.net Credit Card Integration. Authorize.net requires an API Login ID, API Transaction Key, and API Signature Key.
Gateway flow: checkout ➝ authorize payment ➝ upsell offer ➝ thank you.
-
Braintree:
The plugin provides integration with Braintree. You need a Public Key, Private Key, and Merchant ID to set up Braintree.
Gateway flow: checkout ➝ Braintree ➝ upsell offer ➝ thank you.
-
Square:
Go to the Configure Settings page and connect your Square account.
Gateway flow: checkout ➝ square payment ➝ upsell offer ➝ thank you.
-
Paystack:
WooCommerce upsell plugin is compatible with Paystack.
Gateway flow: checkout ➝ paystack payment ➝ upsell offer ➝ thank you.
-
Cardcom Settings:
The smart funnel plugin provides an integrated Cardcom gateway to charge for Upsell Orders.
So if you want to use Cardcom, you must use Cardcom provided with the plugin. Cardcom needs a CVV terminal number and API username in order to work.
Gateway flow: checkout ➝ Cardcom ➝ upsell offer ➝ thank you.
-
Vipps:
The plugin is compatible with Vipps
Gateway flow: checkout ➝ Vipps ➝ upsell offer ➝ thank you.
-
Manual Payment Methods:
The plugin also supports manual WooCommerce payment methods.
Thus, the merchants can now accept payments through offline methods that include:
1. Direct Bank Transfer or BACS
2. COD
3. Check Payments
-
Mollie:
The custom funnel plugin supports integration with Mollie.
Gateway flow: checkout ➝ authorize payment ➝ upsell offer ➝ thank you.
Note: All these credentials are provided by the Payment Gateways. Also, in the case of a redirection-based payment gateway such as PayPal or CardCom the customer is redirected to another page to complete the payment process.
As a result, payment will be made for both the product in the cart and the upselling product.
-
Free Order Upsell: Premium
When this feature is enabled, the upsell funnel can trigger even if the cart total is zero. This allows upsell offers to appear during checkout regardless of whether the customer’s order total is zero.
-
Remove Style from Offer Pages:
Remove the theme and other plugin styles from the offer page. (Note: This does not apply to the custom offer page.)
-
Pop-up on Exit Intent:
Enable the Pop-up on exit intent and customize the message according to your needs.
After that, the pop-up will be shown to users when they try to exit the page during an upsell offer.
Note: You can only customize the message and enable the Accept/Decline Button in the pro version of the upsell plugin
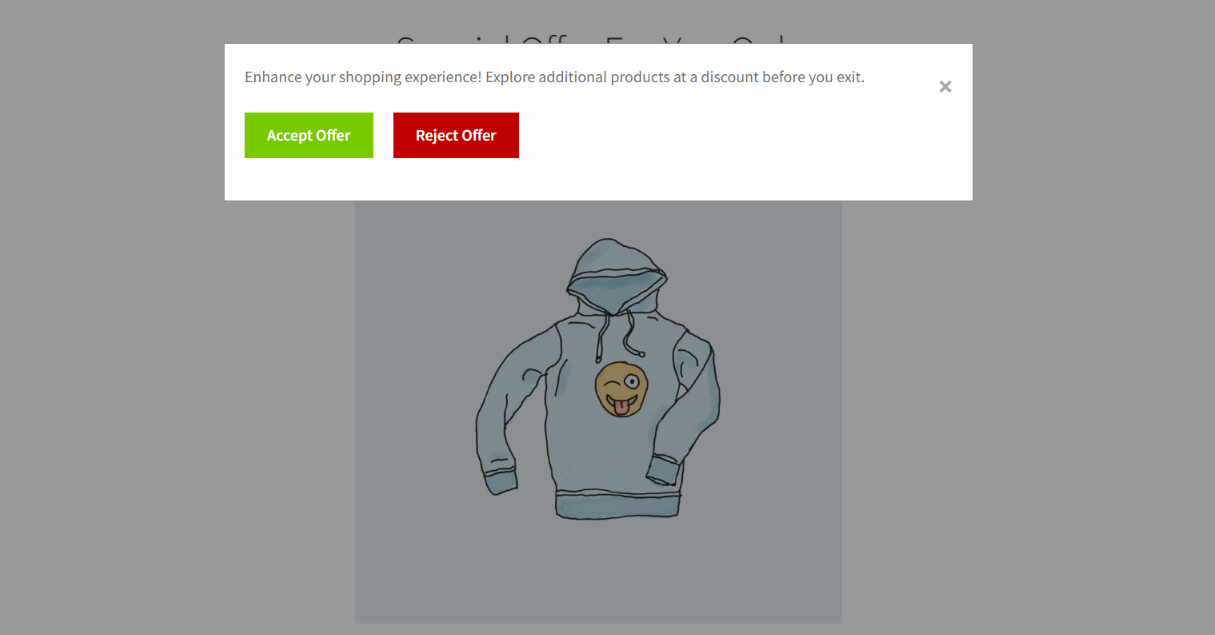
They can simply Accept or Reject the offer and proceed with their checkout.\
-
Accept/Reject Button for Exit Intent: Premium
Enable the Accept and Decline buttons to appear on the pop-up of Exit Intent.
-
Upsell Exit Intent Message: Premium
Write Your custom message to show on the upsell Exit Intent Pop-up Upsell.
-
Upsell Redirect On Offer Expire Link: Premium
Add URL to redirect the user when an Upsell Offer expires.

-
Global Offer Product:
Set the Global Offer Product. When no offer product is set, the global offer product will be visible when the admin simply views the Custom offer page.
(Note: Applicable only for custom offer pages in sandbox view, not for Offers that come post-checkout).
-
Global Offer Discount:
Set a Global Offer Discount on the product price.
(Note: Applicable only for custom offer pages in sandbox view, not for Offers that come post checkout).
-
Upsell Actions Message:
This message is displayed along with the loader whenever a customer accepts or rejects the upsell offer.
-
Global CSS and JS:
Write your custom CSS and JS for the offer page without any script and style tags.
-
Enable Stripe Notice For Checkout Page: Premium
By enabling this setting, you can showcase the stripe notice over the checkout page.
-
Enter Stripe Checkout Notice: Premium
You can modify the notice that will be shown on the checkout page when the stripe is selected as the payment option.
And last, don’t forget to hit the Save Changes button.
6.Order Bump Settings

6.1.Order Bump List

With Upsell Funnel Builder, you can create or begin implementing the functionality of WooCommerce order bump in your store.
Each workflow consists of a sequence of features, such as creating new bump offers, bump lists, global settings, and offering background colors.
- In the Bump List section, the admin can start creating Order Bumps by clicking on the ‘Create New Bump‘ button.
- NOTE: Only the first Order Bump will work. Please activate the PRO version to make it all work.
- Admins can easily export the details of the created order bump and make changes in the JSON file. And similarly, import the updated JSON file to restore the bumps and funnels.
6.2.Create Order Bump Settings
6.2.1.Order Bump Settings

(This is how your order bump offer will look after creating it. The admins can easily clone/duplicate the created bump offers to create a similar one.)
You’ll get these options after clicking on the “Create New Order Bump” button. Want order bump campaigns, but you’re confused which settings to configure? Don’t worry, because now you can simply select the predefined campaigns where all the settings are already configured for you.
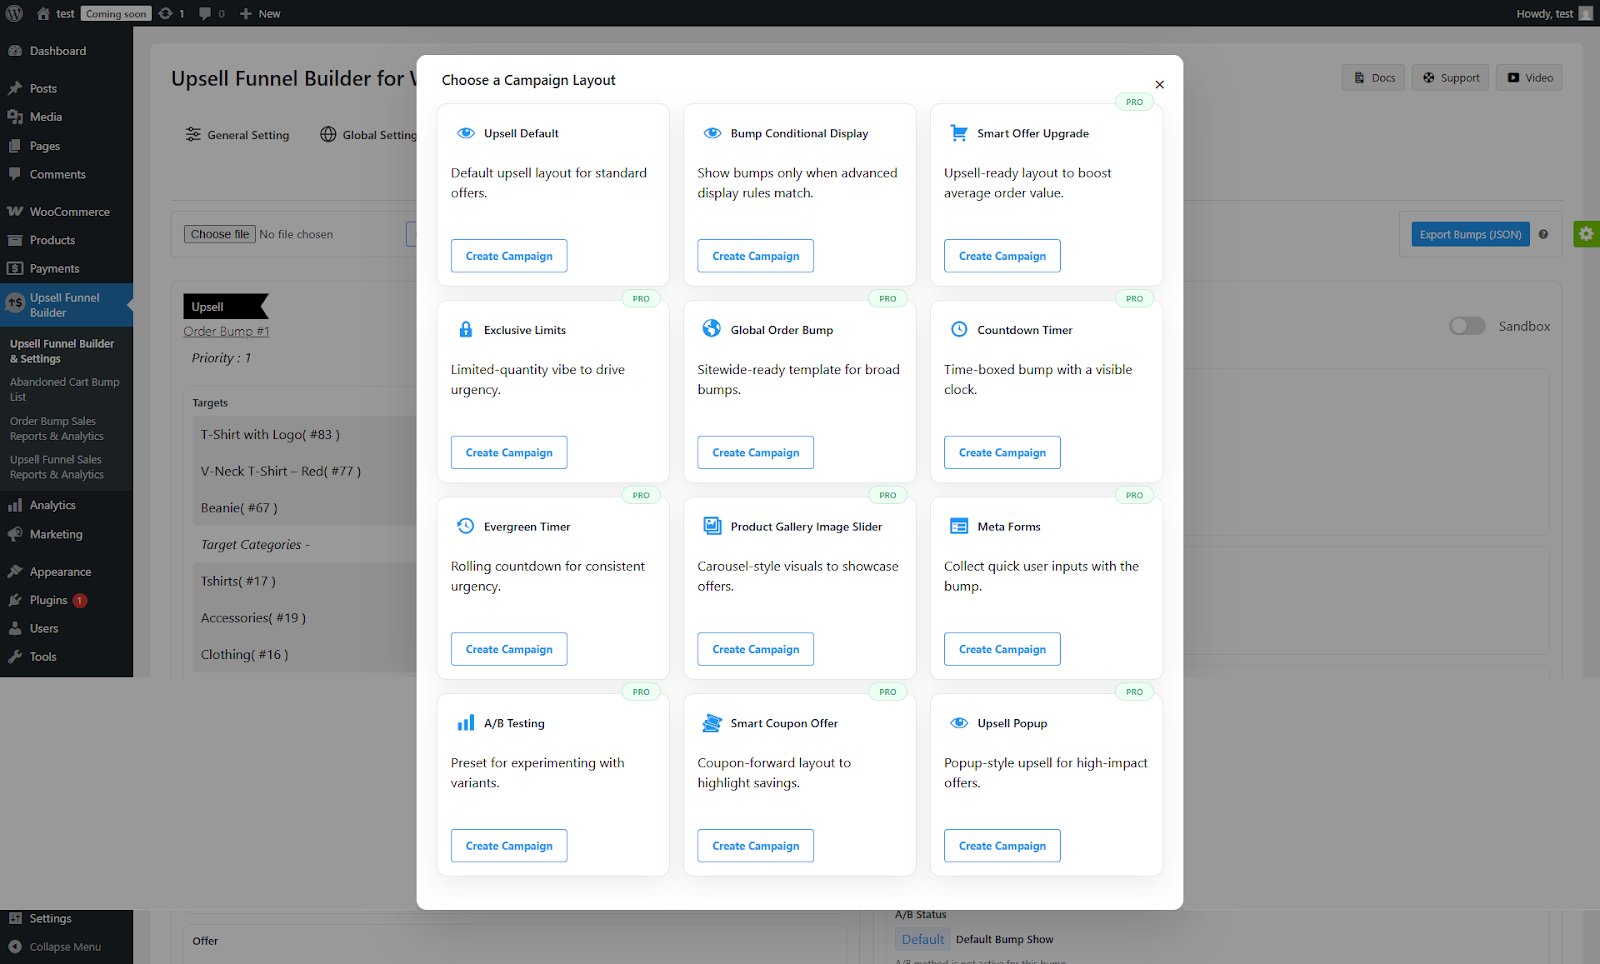
After clicking on the create campaign button, all the relevant settings will automatically be configured.

-
Name Of The Order Bump:
Enter the name of your order bump offer.
-
Priority Of The Order Bump WooCommerce Premium :
Decide the priority of your bump offer funnel next to this option.
Note: Do not use the same priority for multiple order bumps.

-
Set Minimum Cart Value For Order Bump: Premium
WooCommerce Store Owners can set minimum cart value for individual products, categories, vendors, and total cart value using Order Limits. This feature ensures that the Minimum order amount is met. You can enter a minimum order value in Cart and Checkout, this enables you to offer your clients products per your specified criteria.

How to add an upsell on the checkout: Upsell Order Bump Offer For WooCommerce || 2024
-
Select Target Products:
Enter the target product here. When the customer purchases, the targeted product the order bump upsell offer will be shown.
-
Select Target Categories:
Enter the product categories. You can select multiple categories here. This will trigger the WooCommerce order bumps offer if the customer buys a product from any of these selected categories.
-
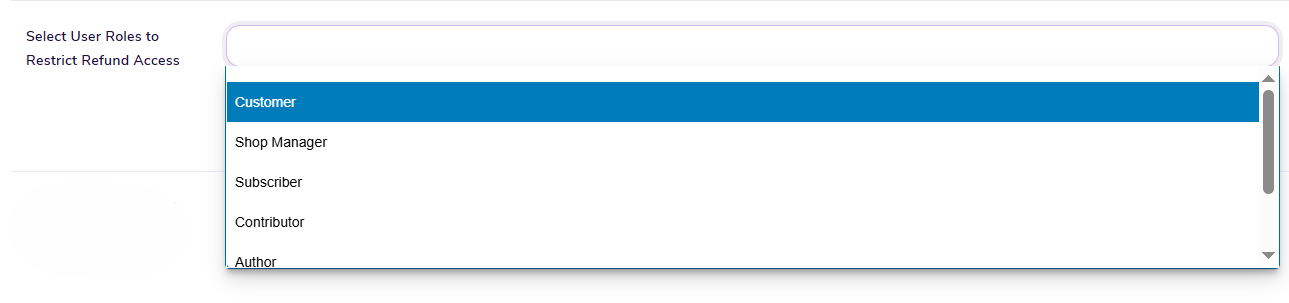
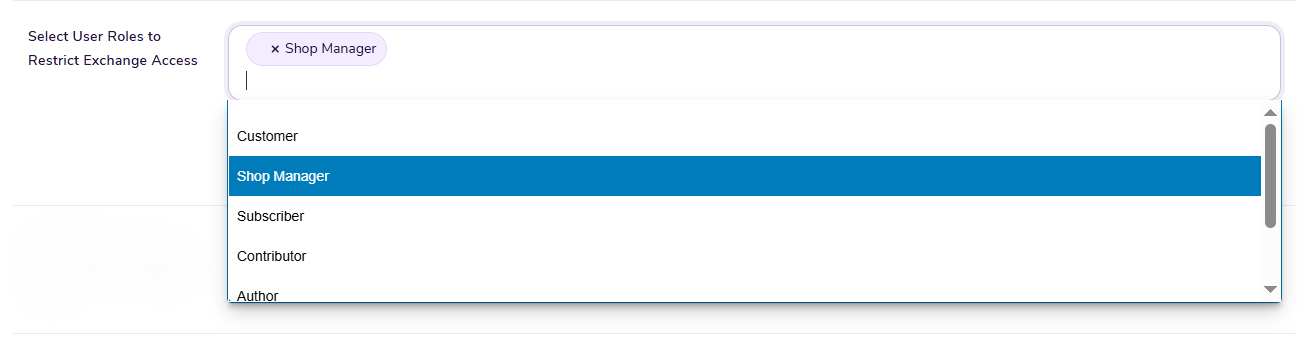
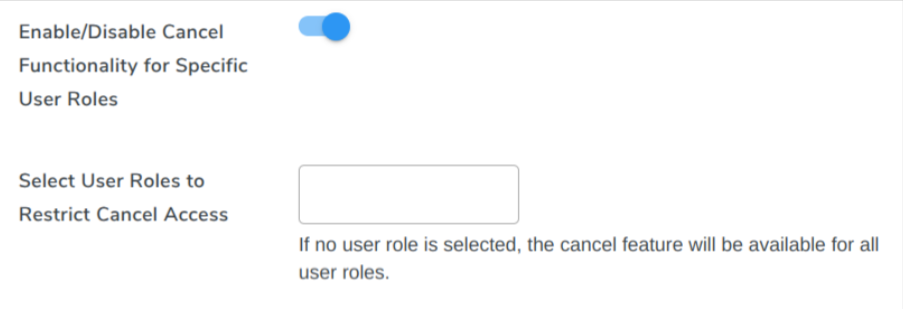
Select roles to exclude:
Use this setting to exclude roles, for which, you don’t want to display the bump offer.
-
Set Campaign label:

-
This setting allows the admins to set campaign labels for order bump offers.
Frontend Settings: (This is how the labels will be shown over the order bump offers.)

-
Order Bump Schedule:
Schedule your Bump Offers for selected days or daily.
-
Bump Conditional Display:
Admins get to decide the conditions under which your customers will see the bump offers. The predefined conditions are Cart total, Subtotal, Coupon Applied, User Login Status, and Registered Users.

-
Smart Offer Upgrade: Premium
Smart Offer Upgrade helps you display an upgrade for the initial product as an order bump upsell offer. If the customer accepts the offer, the initial product will be replaced with the upgraded product.
-
Exclusive Limits: Premium
Merchants can enter the limit of the number of times a WooCommerce bump offer funnel is triggered for a customer. Enter a number beside the “Exclusive Limits” option which will represent how many times a funnel is triggered.
Note: Enter 0 if you don’t want to set any limit.
-
Global Order Bump: Premium
Enable this option if you want your funnel to trigger every time a product is added by a customer to the cart.
-
Countdown Timer: Premium
Using a Countdown Timer on offers can help you create urgency in the WooCommerce store and scarcity in your products, which is one of the best ways to increase conversions and sales. With WooCommerce order bumps offer timer, customers are more inclined to act quickly and make a purchase, since they are anxious that your products might not be available in the future.
-
Evergreen Timer: Premium
This is a type of countdown timer but with variation. The admin can utilize this Order Bump feature to incorporate an evergreen timer on the checkout page, which automatically resumes whenever the page is refreshed. But, there’s a catch here, the timer will resume at the exact time the admin inputs, while enabling this feature.
When the admin enables this feature, he is asked to “set the time in minutes”, This means he can select the time to which he wants the timer to resume when the checkout page is refreshed.
-
Product Gallery Image Slider: Premium
This feature allows you to add the product image with a slider at a particular order bump.

-
Meta Forms: Premium
You can add custom fields to the checkout form with the help of the Meta Form option.
To add a field you need to fill in the following details:
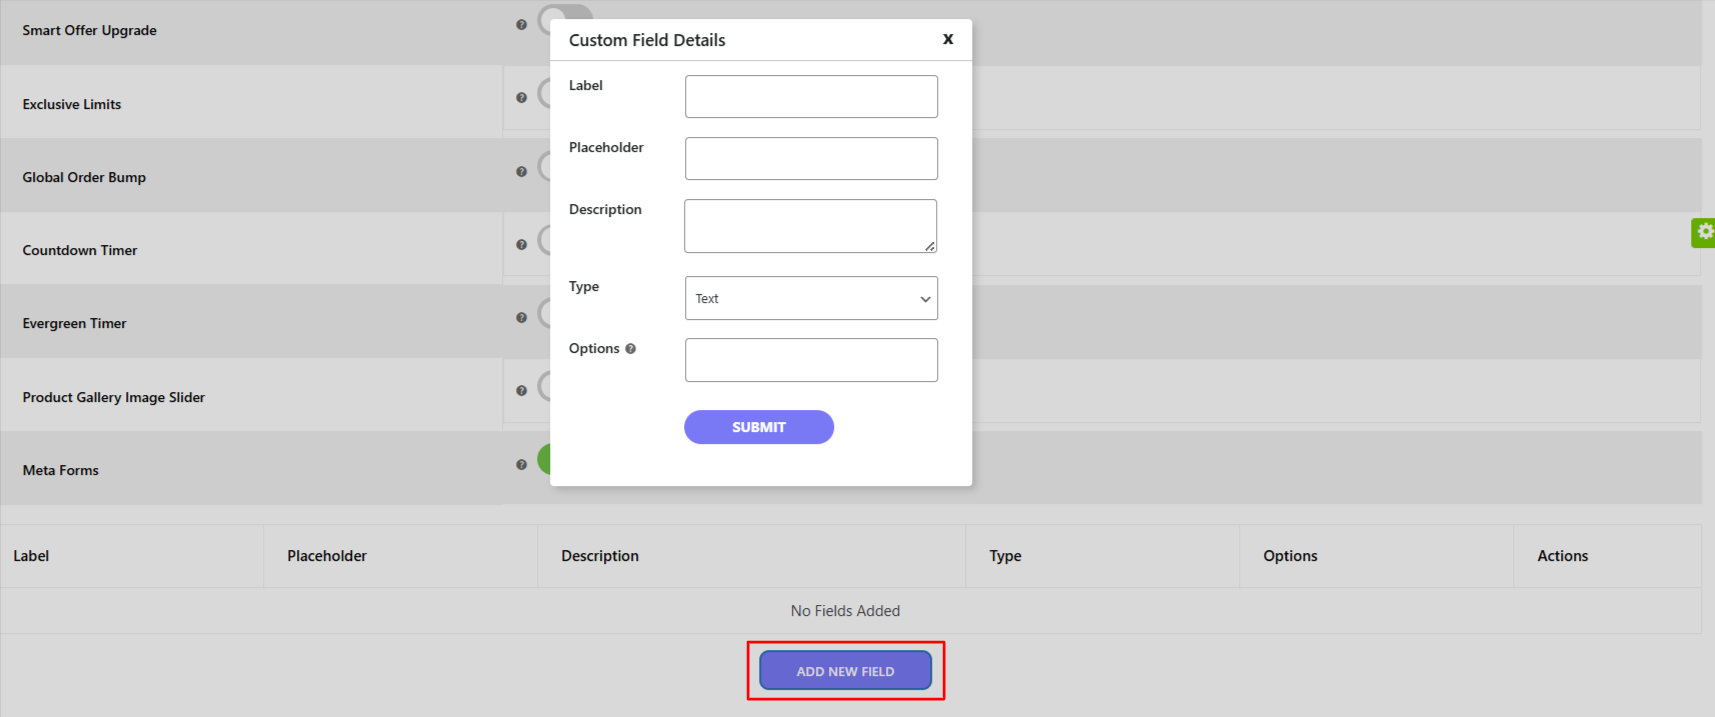
- Name: Enter the name of the field.
- Placeholder: Provide a placeholder for the expected value in the form field.
- Description: A short description of the field.
Type: Choose the type of input you want from the customers. The input types allowed are number, text, checkbox, date, and month.
6.2.2.Order Bump Offer
Offer Section Settings:
After adding all the details, scroll down and go to the Order Bump Offer section to attach an offer that suits your customers’ needs.
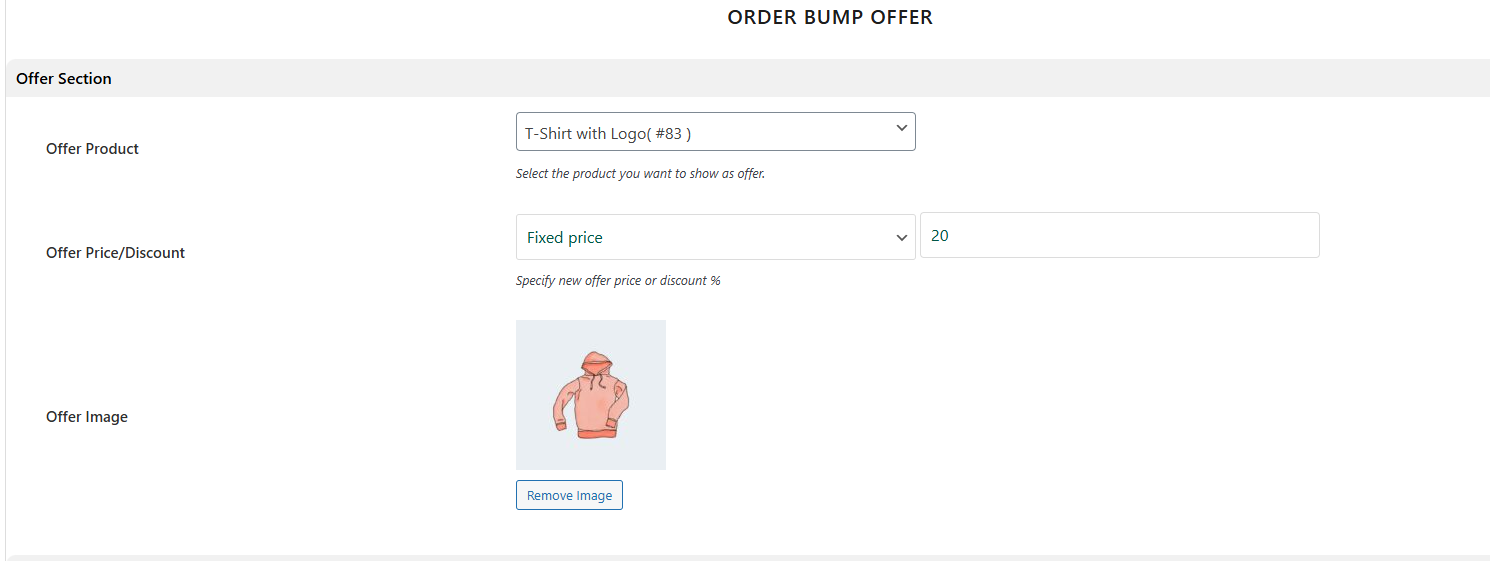
- Offer Product: Choose the offer product you want to give as an Order bump Upsell offer.
- Offer Price/ Discount: Select the discount type. You can provide the discount in two ways:
- Discount %: If you want to discount the product in percentage, select the price type as Discount % and enter the percentage scale. Example 20 or 25.
- Fixed Price: Enter a fixed price for the offered product without the currency. Make sure the offer price is less than the original price.
- No Discount: Choose this option if you don’t want to offer any discount on the WooCommerce bump offer product.
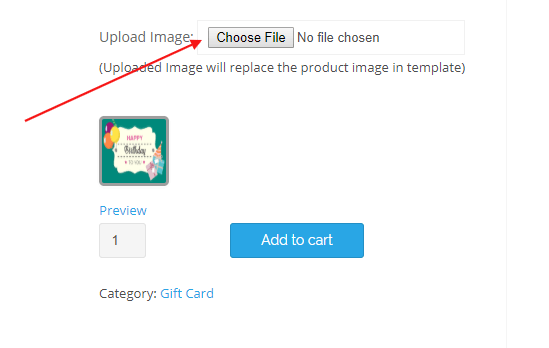
- Offer Image: Merchants can upload custom images to their upsell bump offers that resonate with their brand goals
Display Section:
Set the method for displaying bump statistics alongside performance on the front end. There are two methods: the Default Method and AB Testing.

Offer Quantity Section: Premium
After adding all the details, scroll down and go to the Order Bump Offer section to attach the offer quantity that suits your customers’ needs.

The Offer Quantity section allows your customers to select the quantity of bump offer products.
Under this section you’ll find the following options:
- Enable Offer Quantity: To enable the Offer Quantity Section press the toggle button beside this option.
- Quantity Fixed/Variable: Now you can either keep the fixed or variable. If you’re keeping the quantity variable you have to specify the Minimum Quantity and Maximum Quantity.
Offer Coupon Email Section: Premium
Admins can utilize this feature, to reward the customers, when they make a successful bump offer purchase.
The coupon email section allows the admins to select the products for which, they want to issue discount coupons.
- Enable Coupon Email Offer: Admins can enable this setting, to offer discount coupons via emails to the customers.
- Select Coupon: Enter the products, for which, you want to issue the discount coupons.
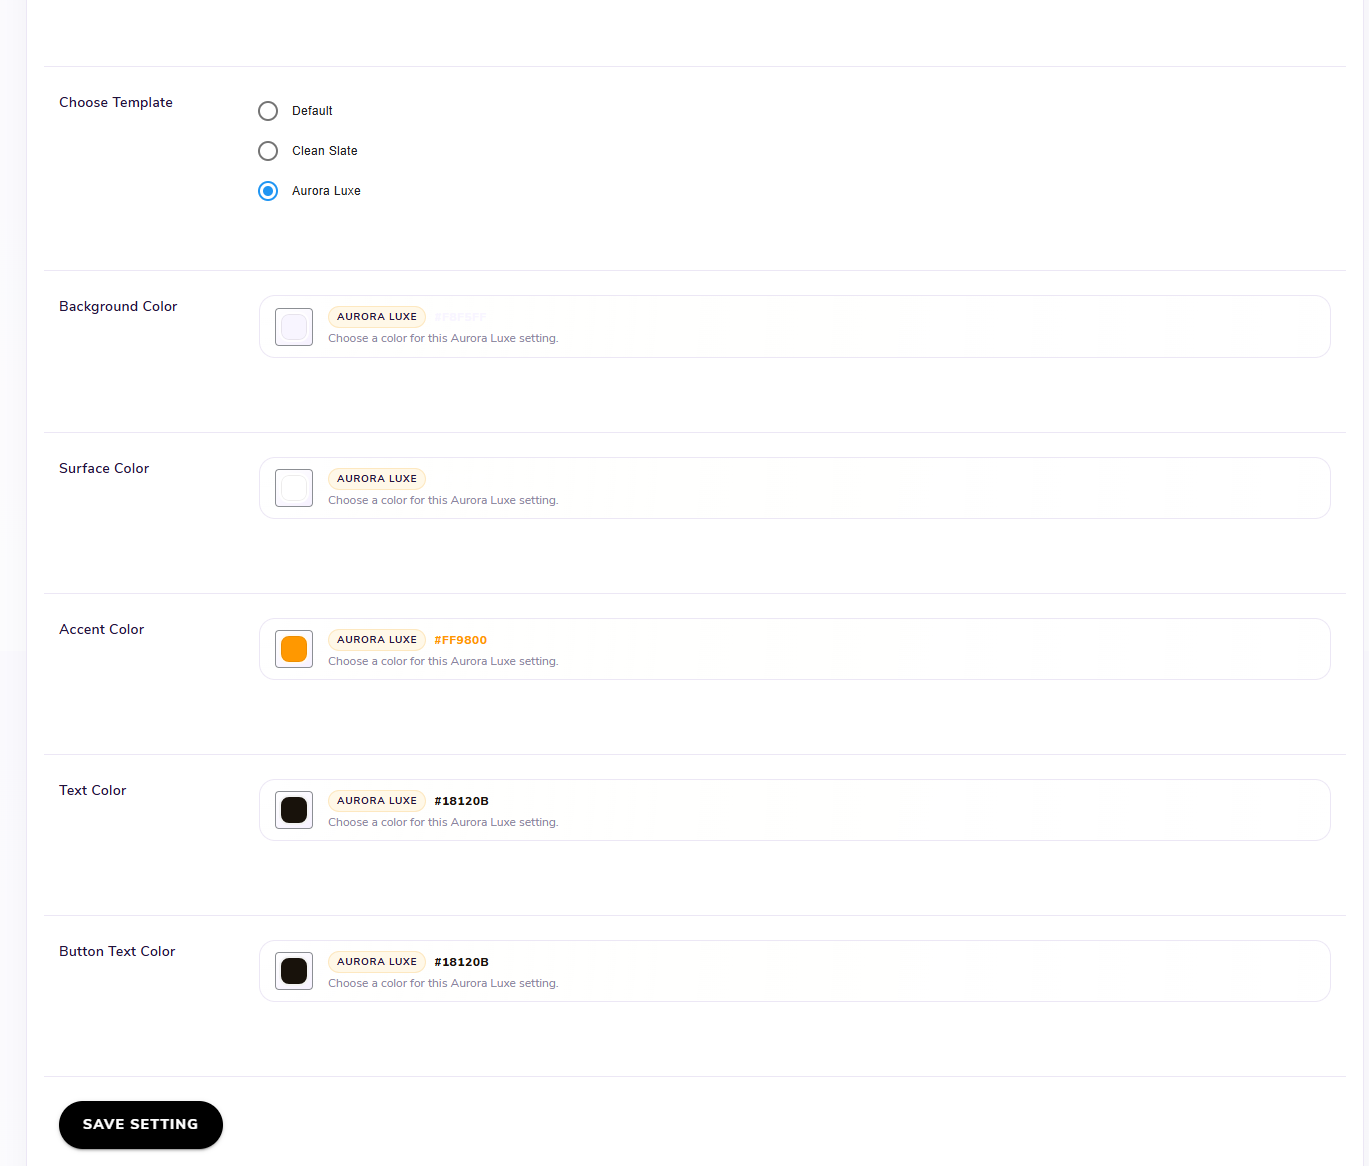
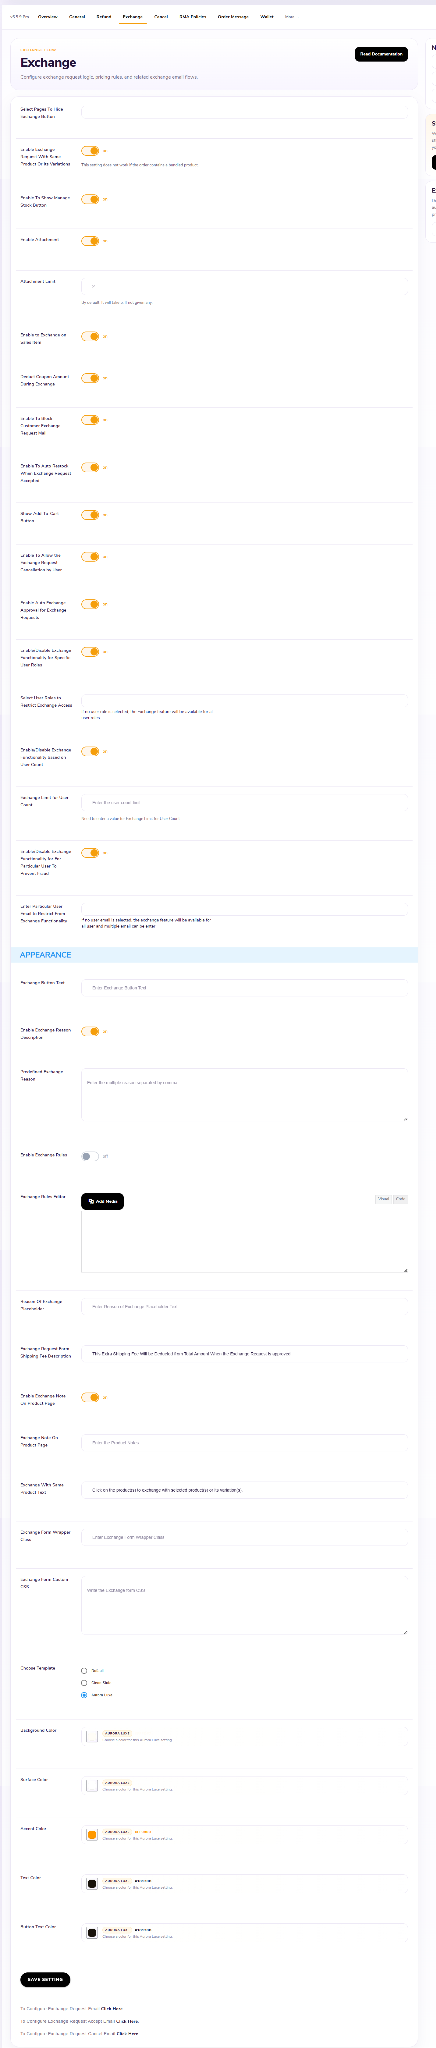
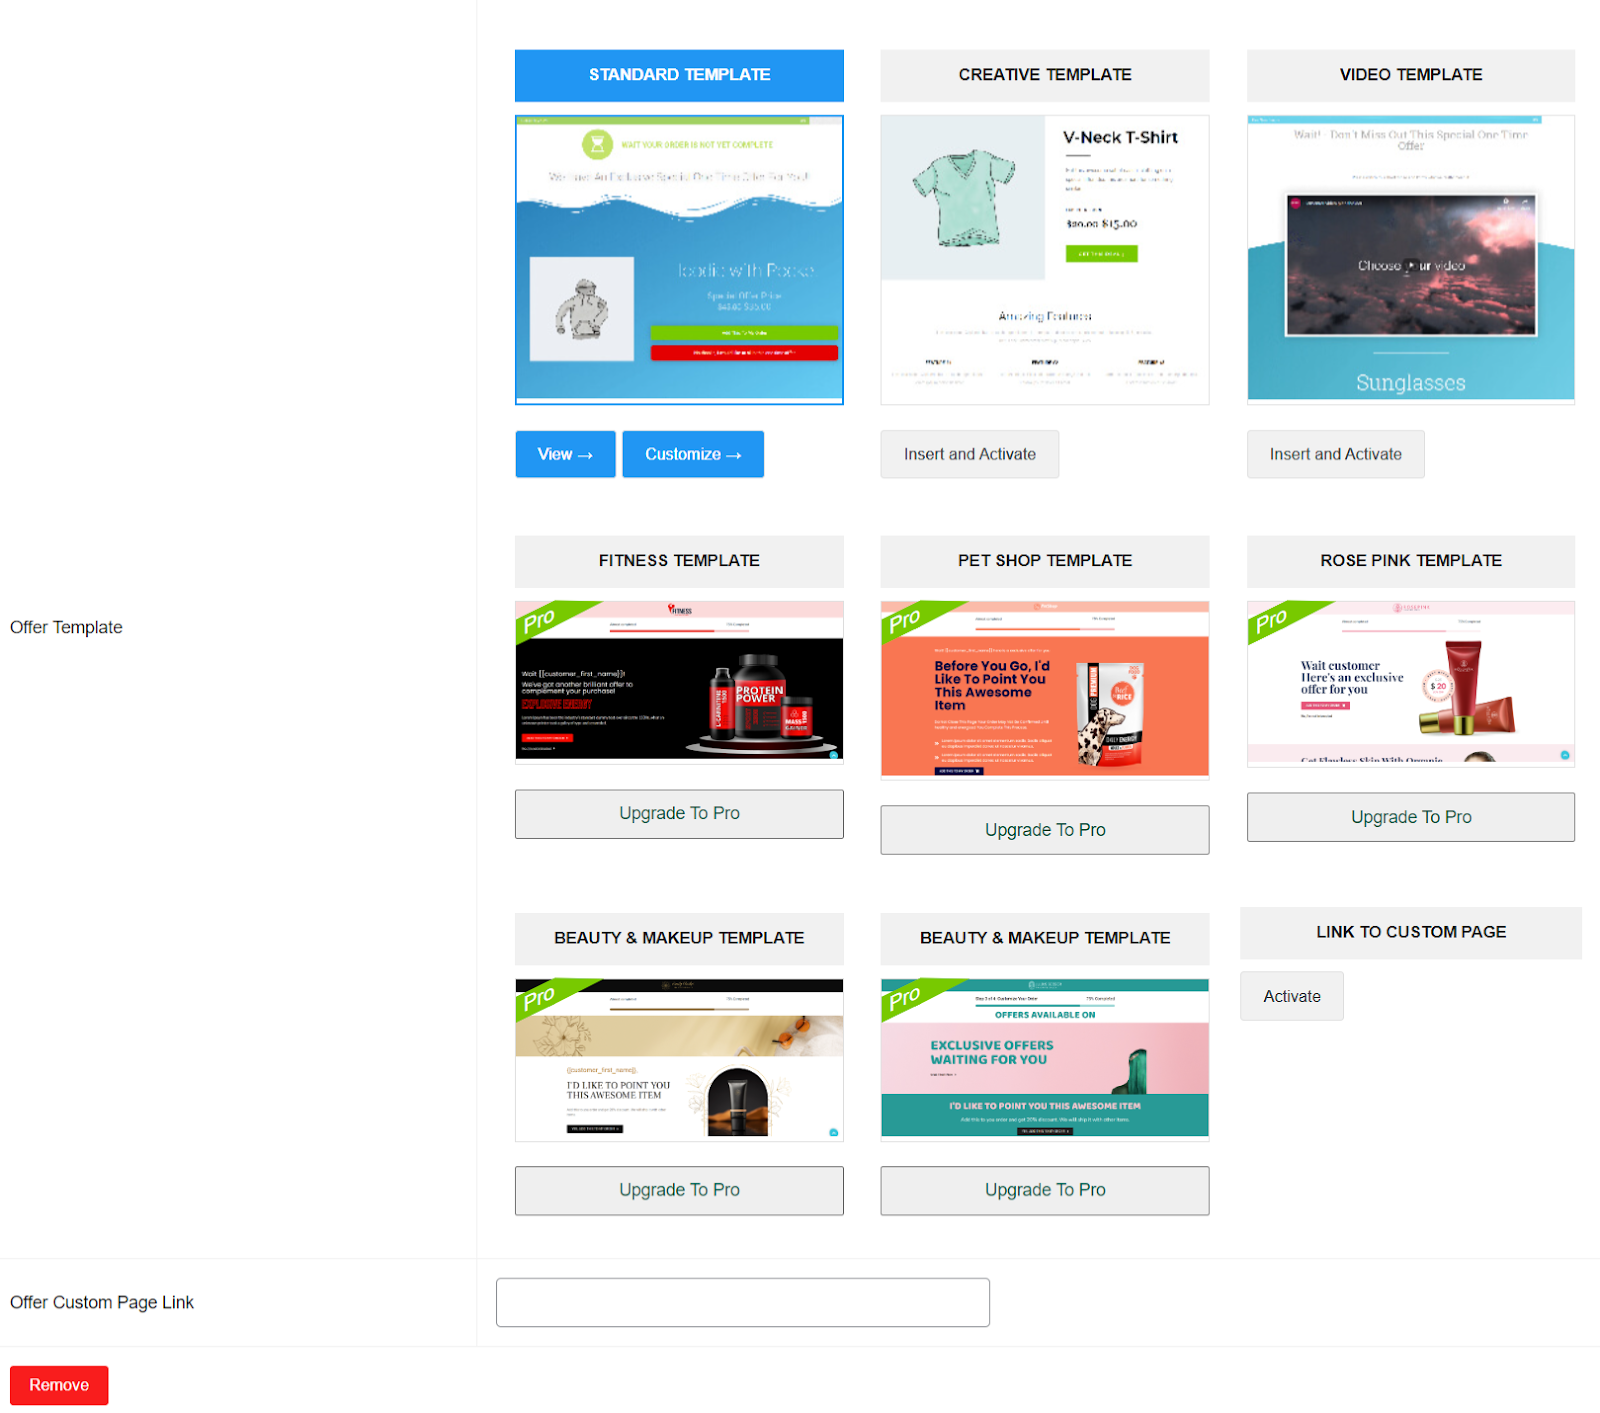
6.2.3.Appearance

You get three tabs here in this section,
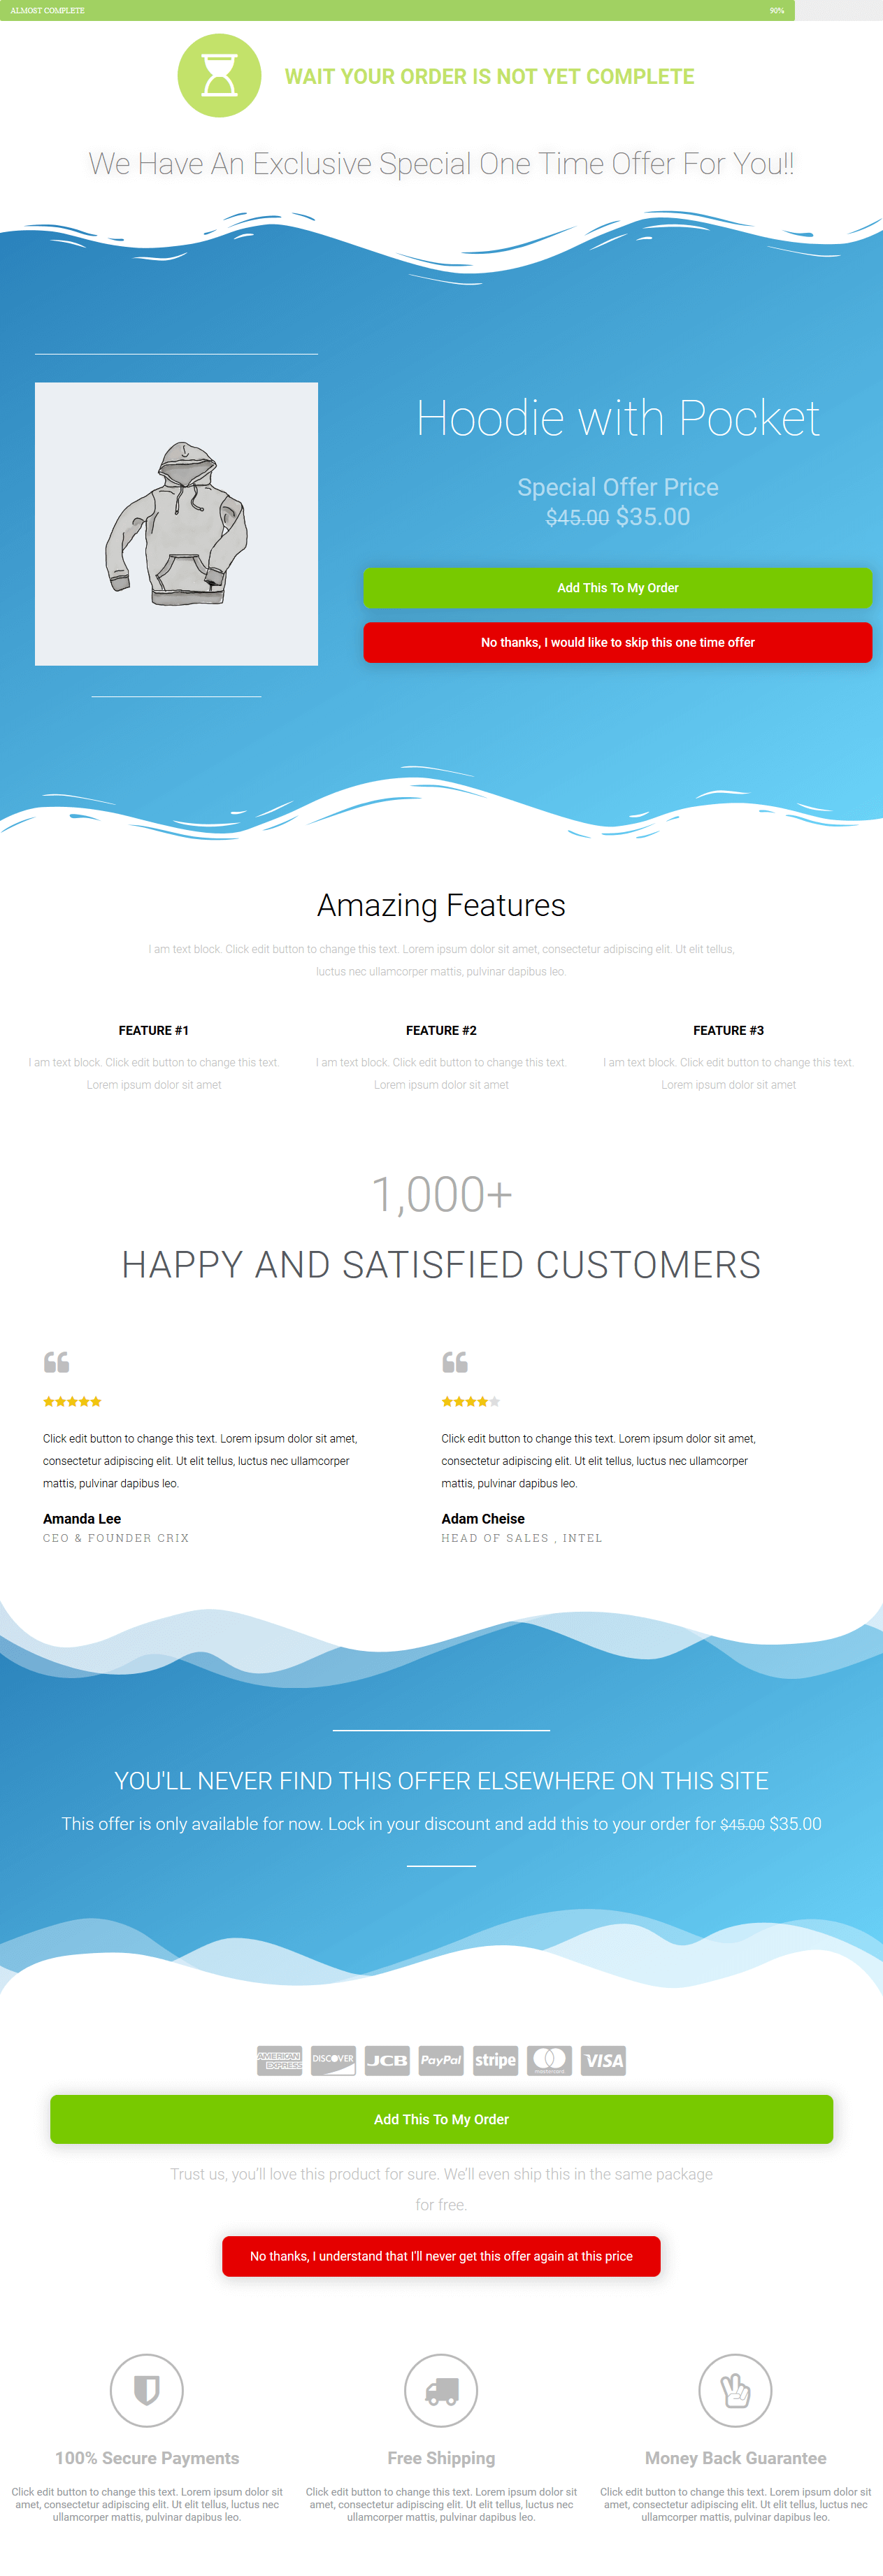
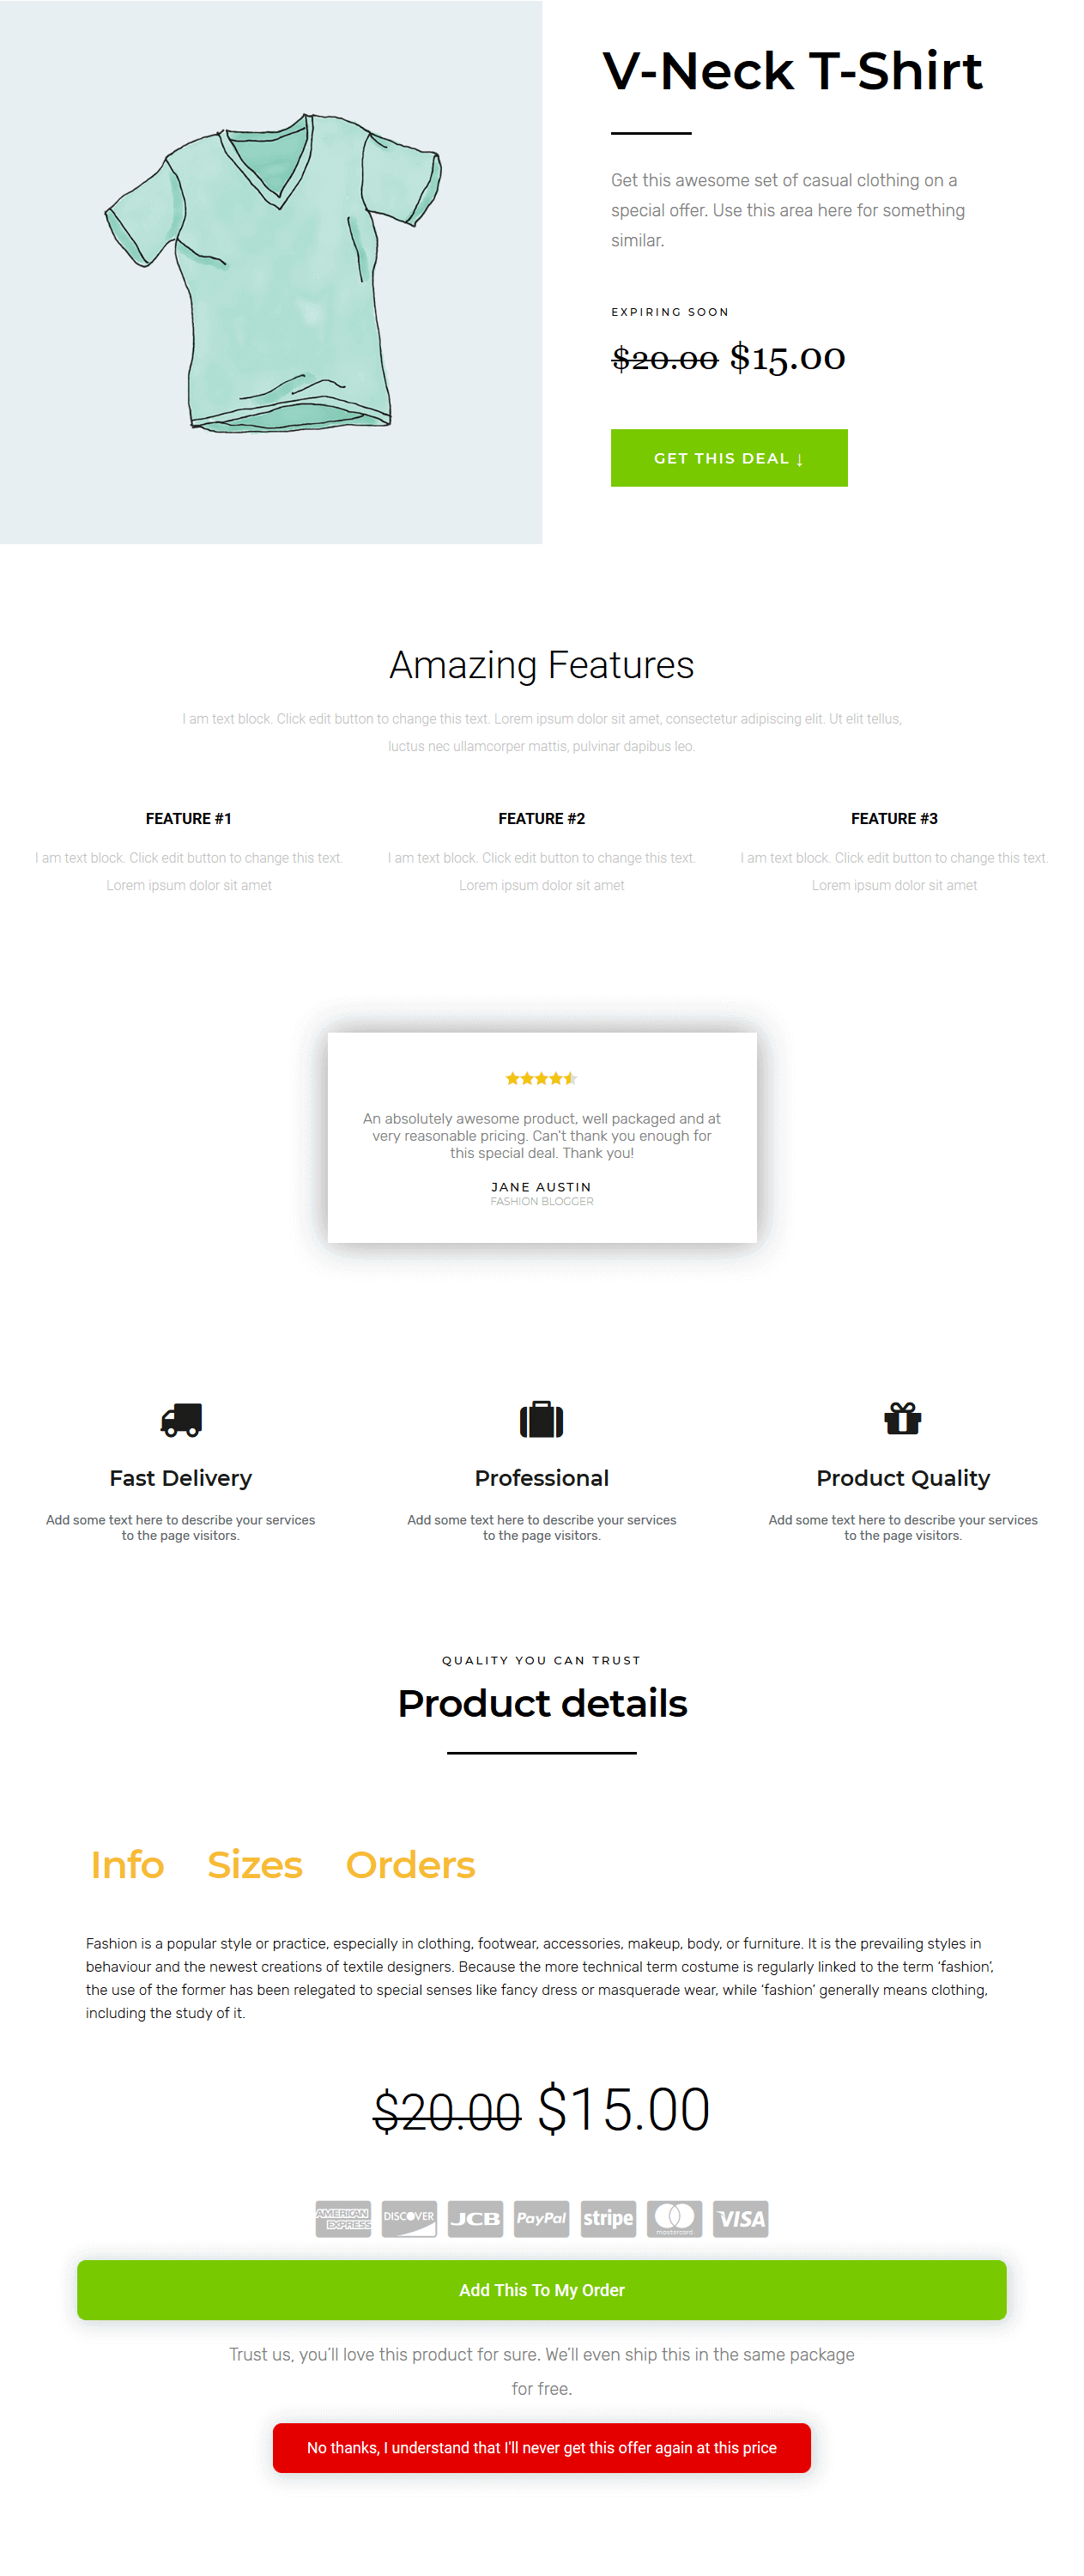
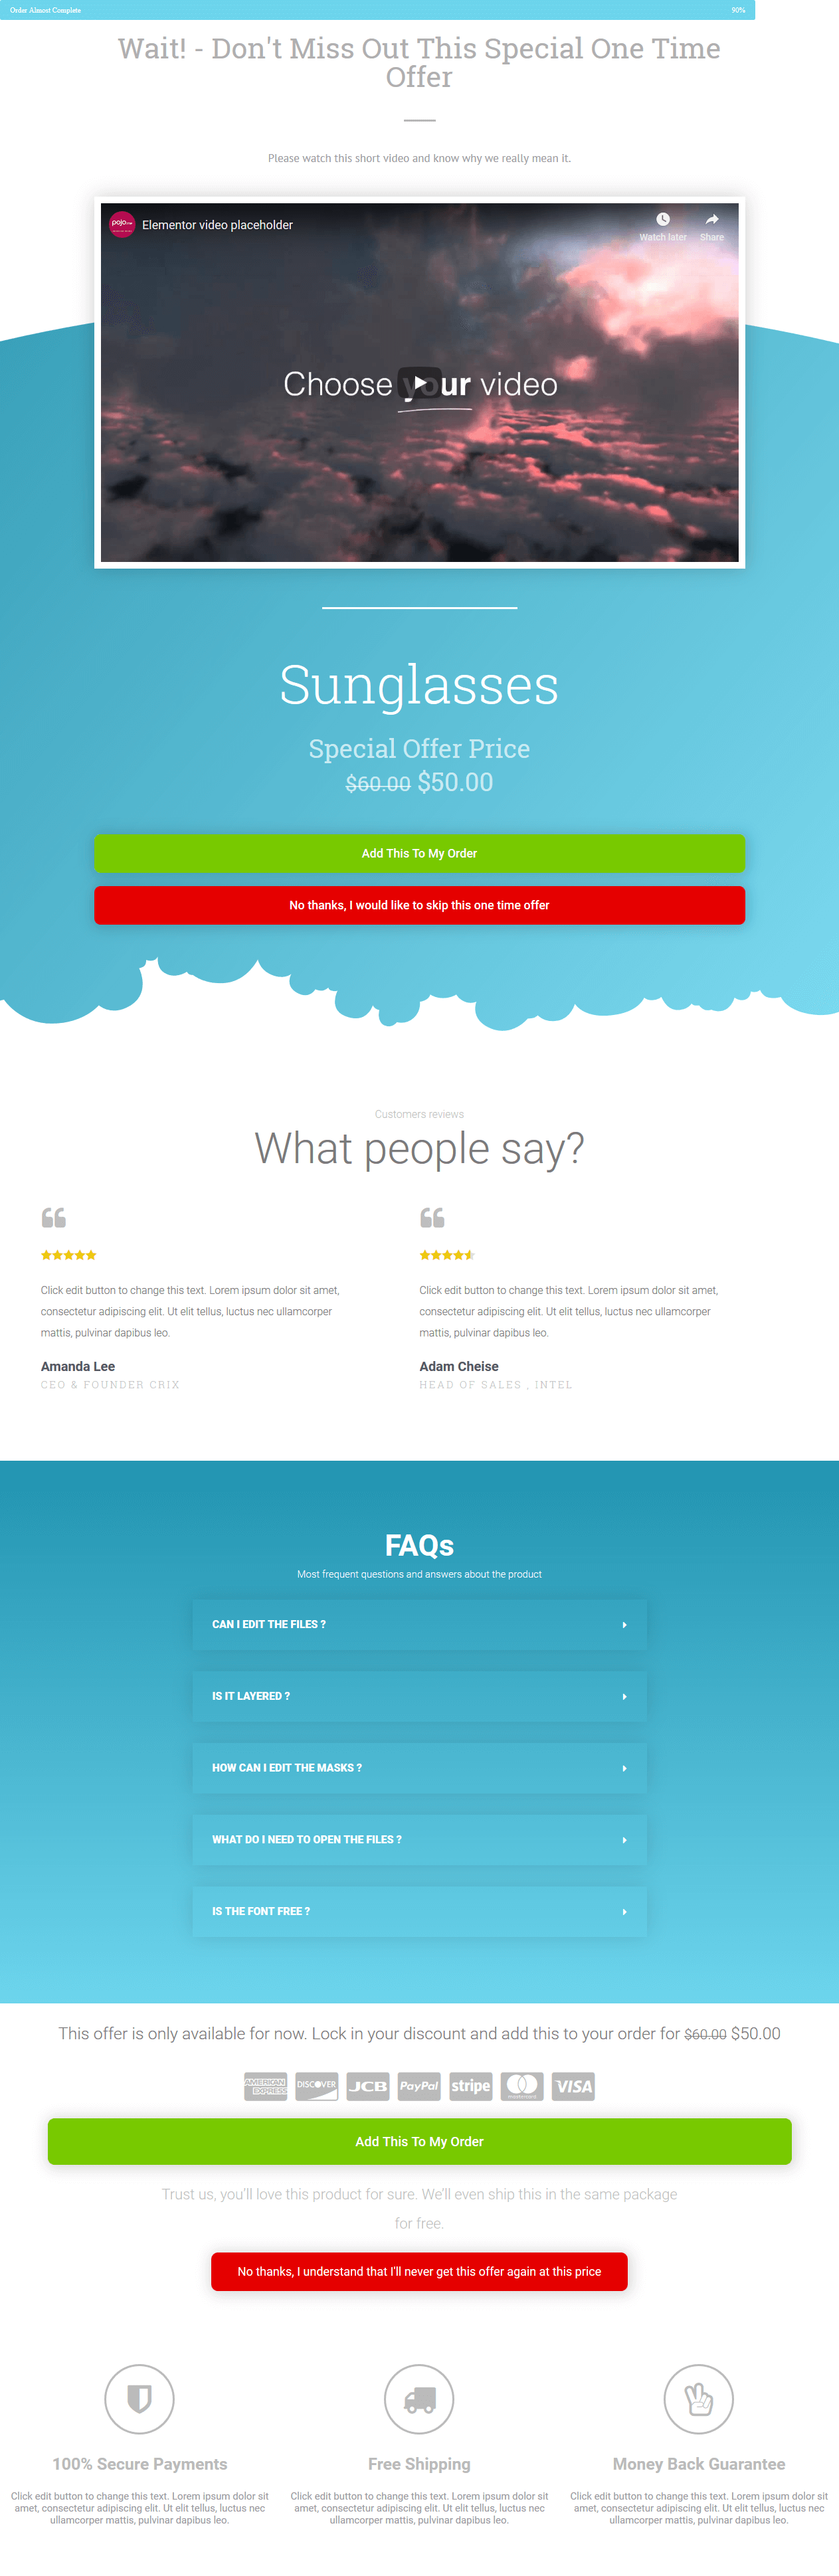
- Template: For the free version, you can select any one of the three default offer templates we provide.
If you installed the premium version of the plugin, you get access to 10 + templates.
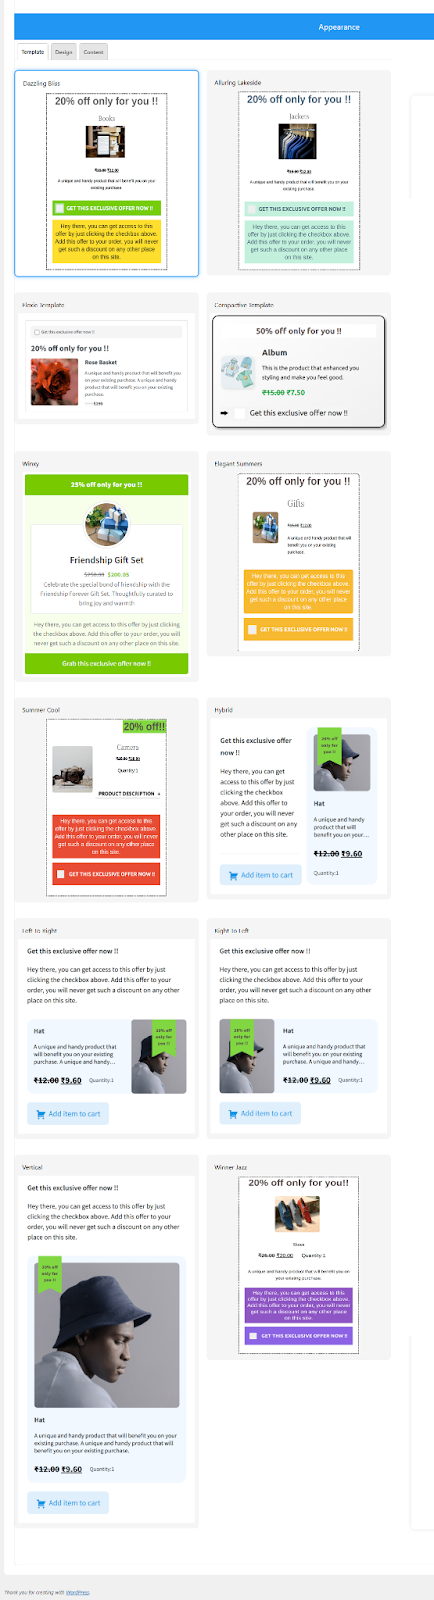
- Design: You can customize the template design according to your requirements. You can customize the Bump Offer Box, Discount Section, Product Section, Accept Offer Section, and Offer Description Section. And also preview the real-time changes in the template.
- Content: You can update the content of the offer template like the Discount Title, Product Description, Lead Title, and Offer Description, in this section.

After completing the setup, make the Order Bump Offer Live by enabling the toggle button.
Click on the Save Changes button after making the order bump offer Live and proceed to the next step.
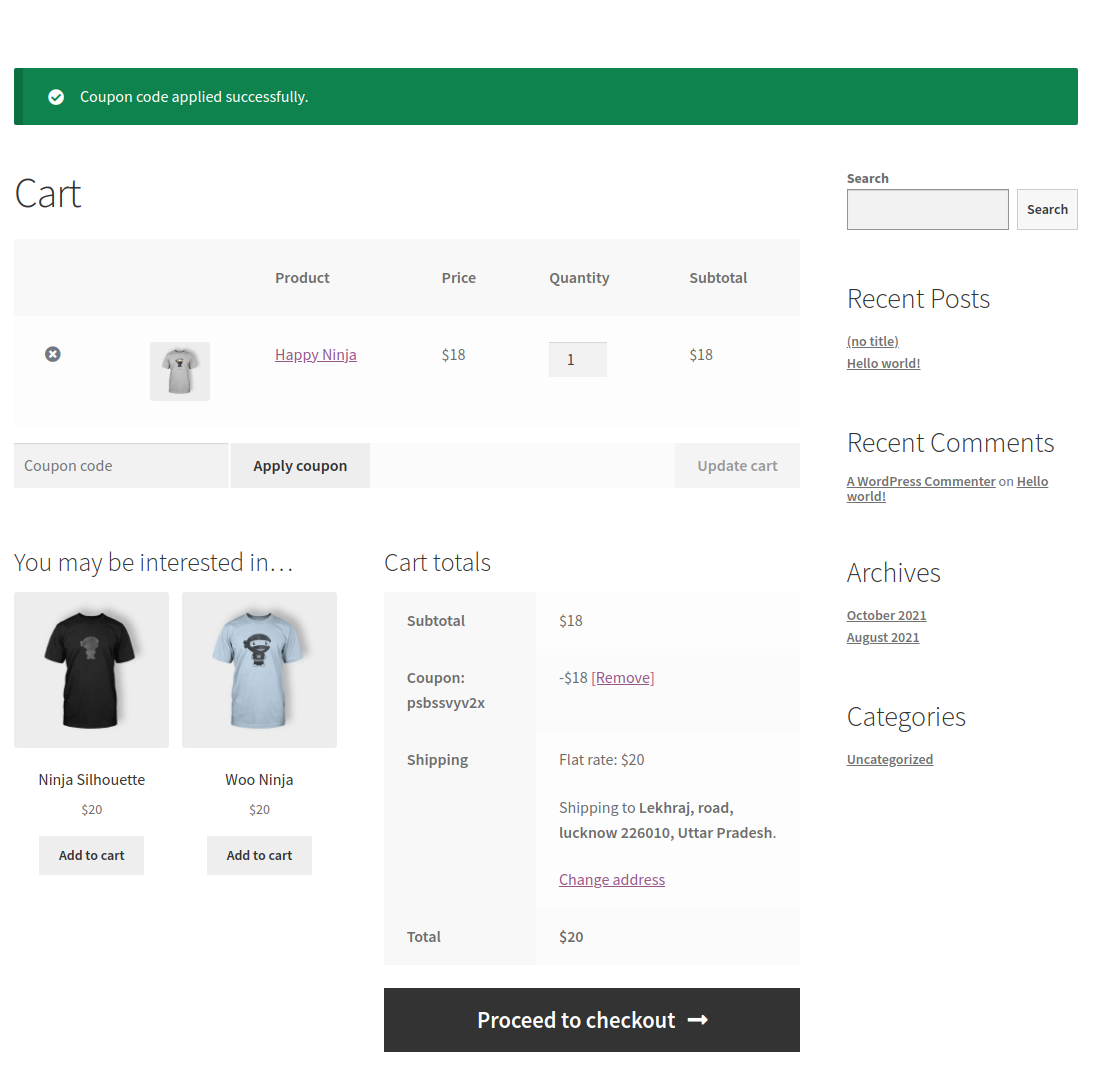
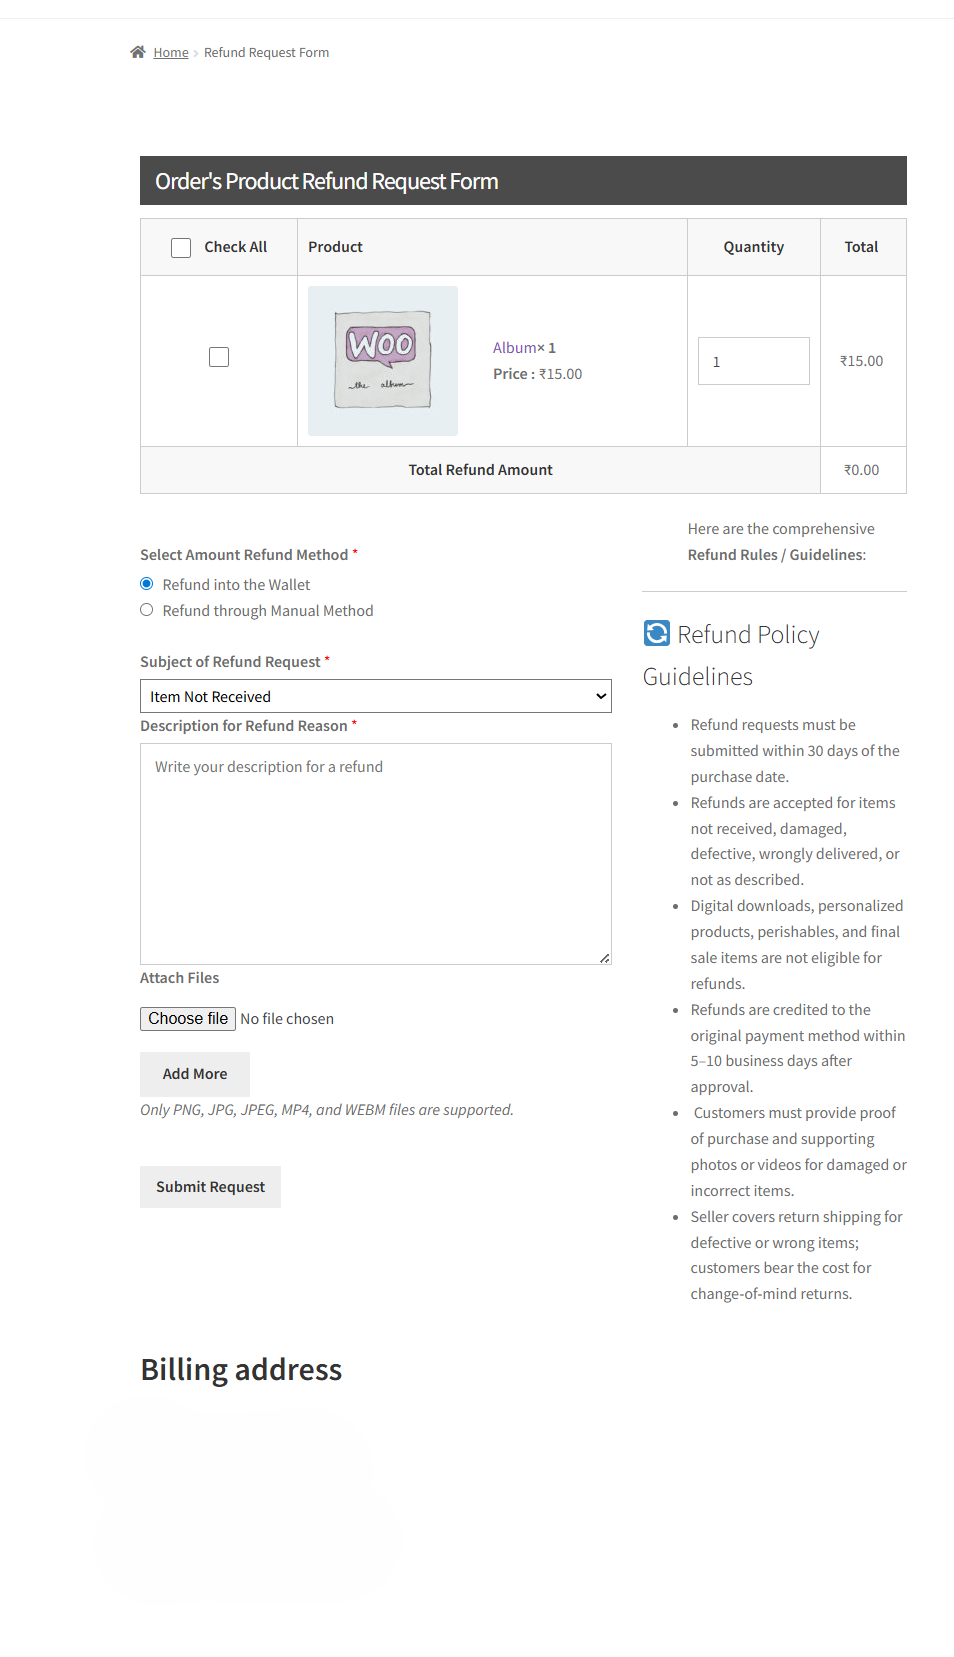
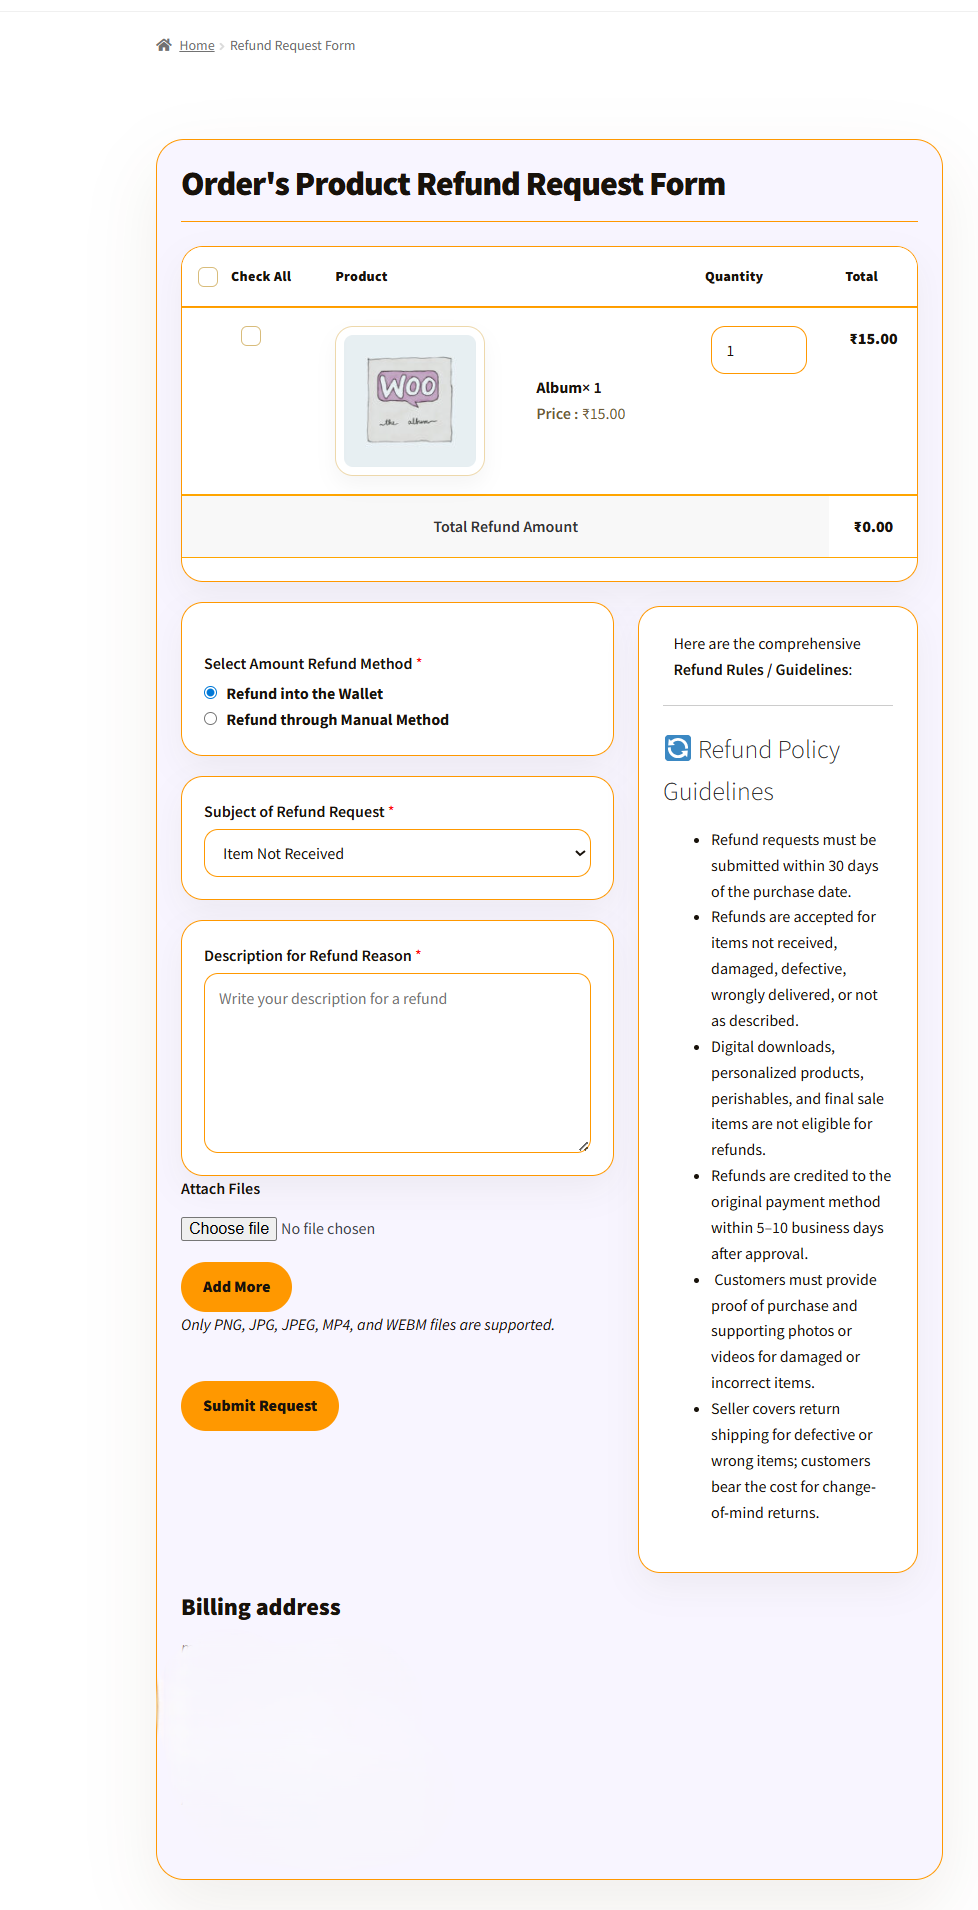
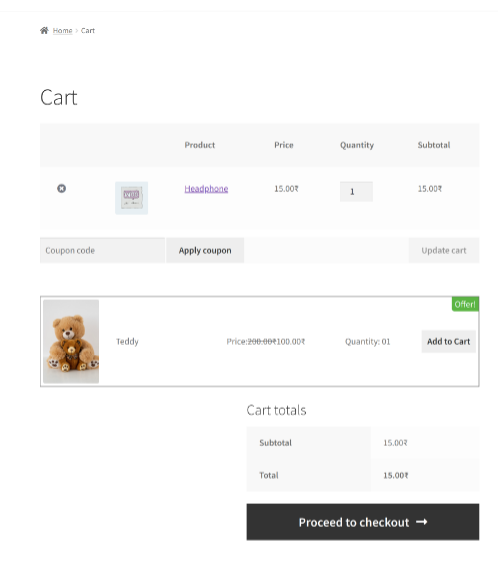
Frontend Representation Of The Bump Offer Over The Cart Page,
7.Upsell Funnel Settings
In this section, you can create new funnels that will take action on your WooCommerce store when a purchase happens.

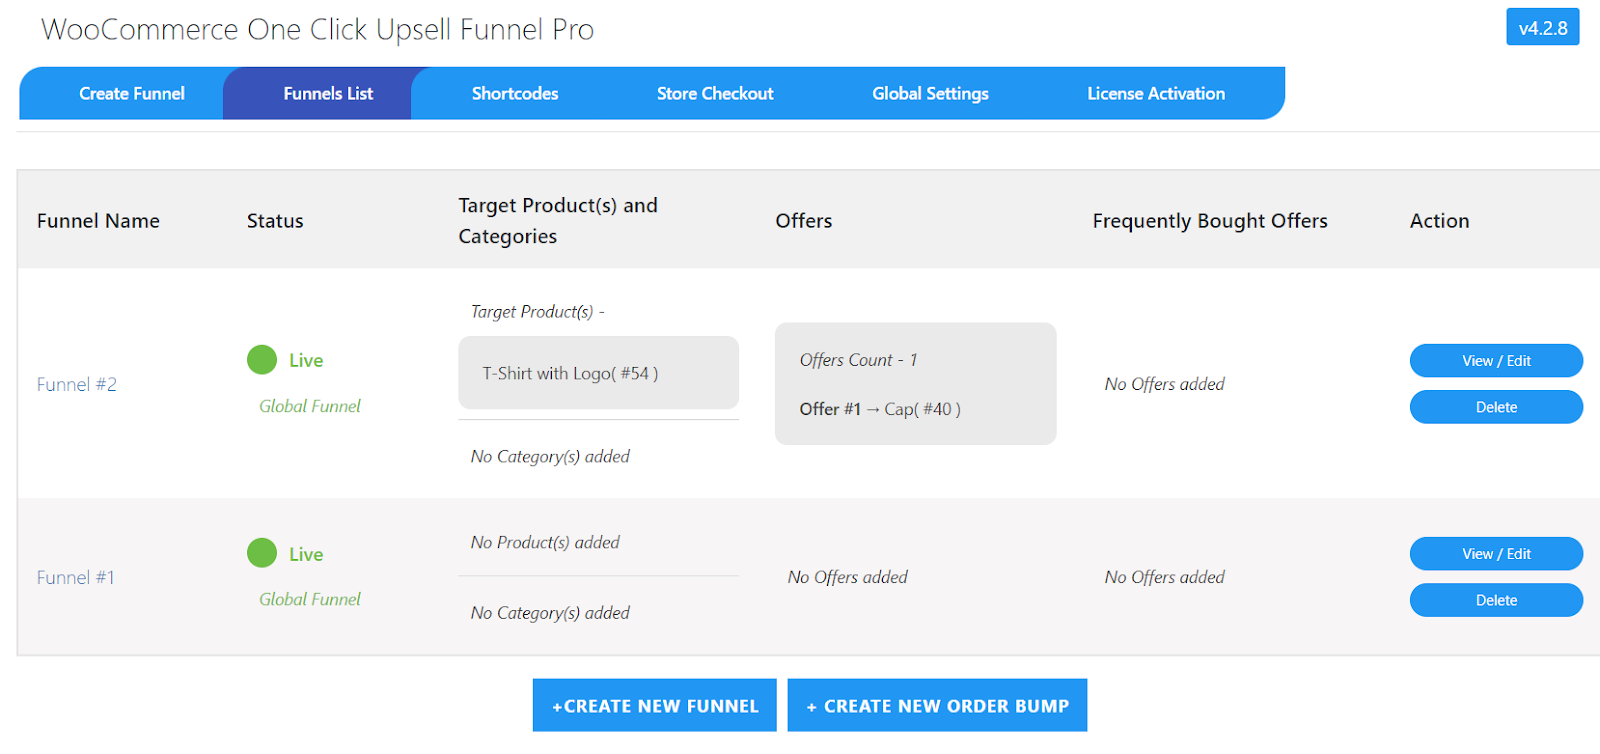
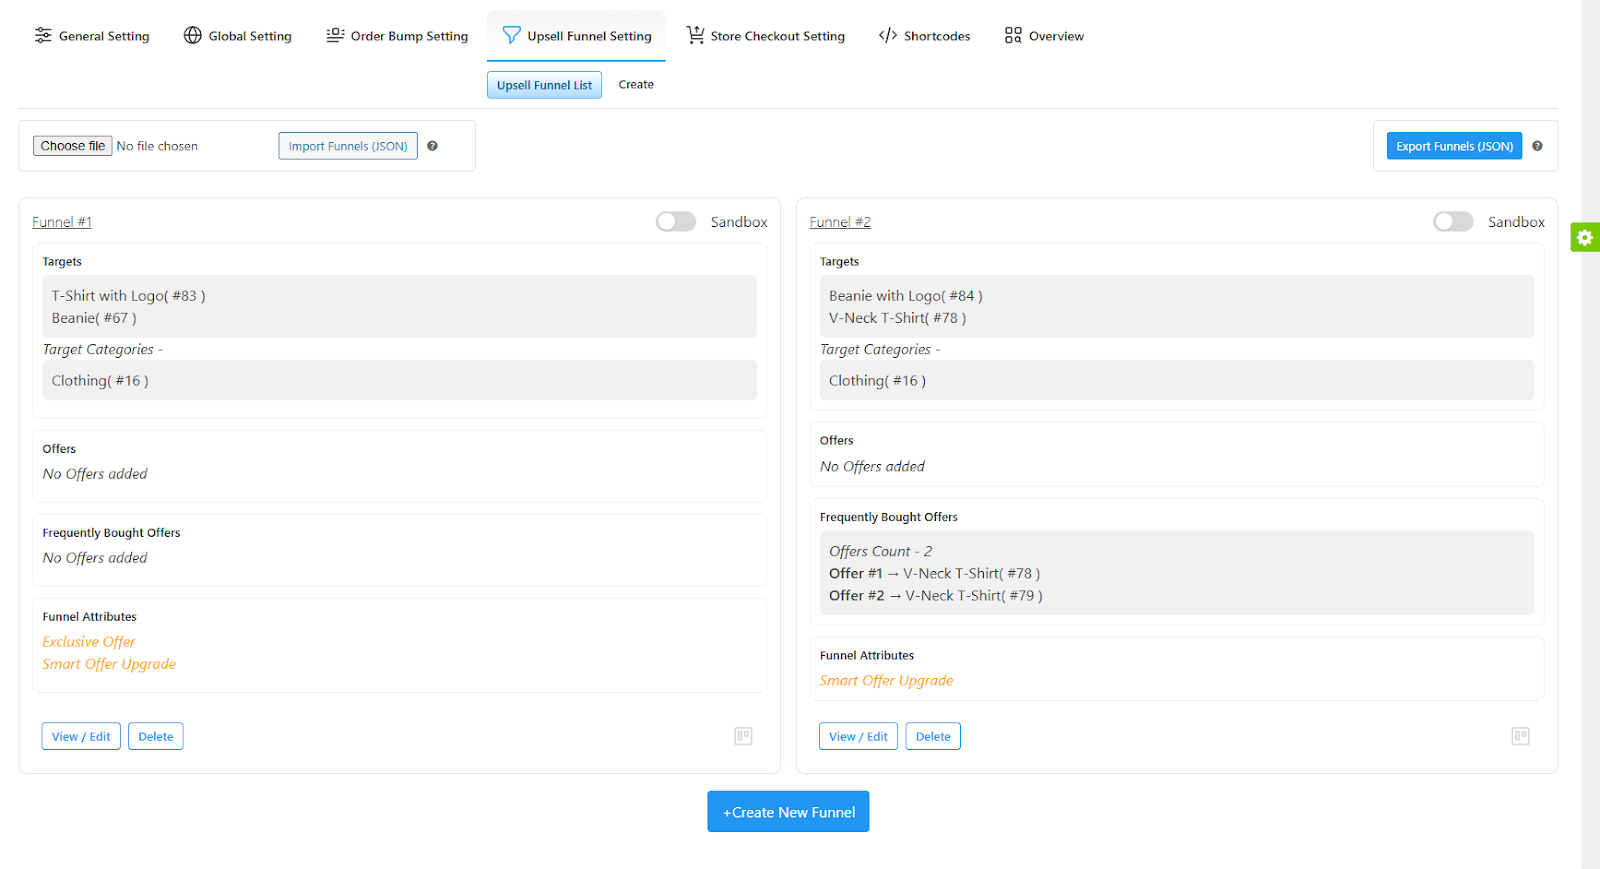
7.1.Upsell Funnel List
To create a new WooCommerce funnel, go to the Funnel List section. This section displays the list of all funnels you have created. If you want to create a new funnel, click on the Create New Funnel button.
When you click on Create New Funnel, you’ll be asked to add the details about your smart funnel.
When you click on Create New Funnel, you’ll be asked to add the details about your smart funnel. Want to create upsell funnel campaigns, but you’re confused which settings to configure? Don’t worry, because now you can simply select the predefined campaigns where all the settings are already configured for you.
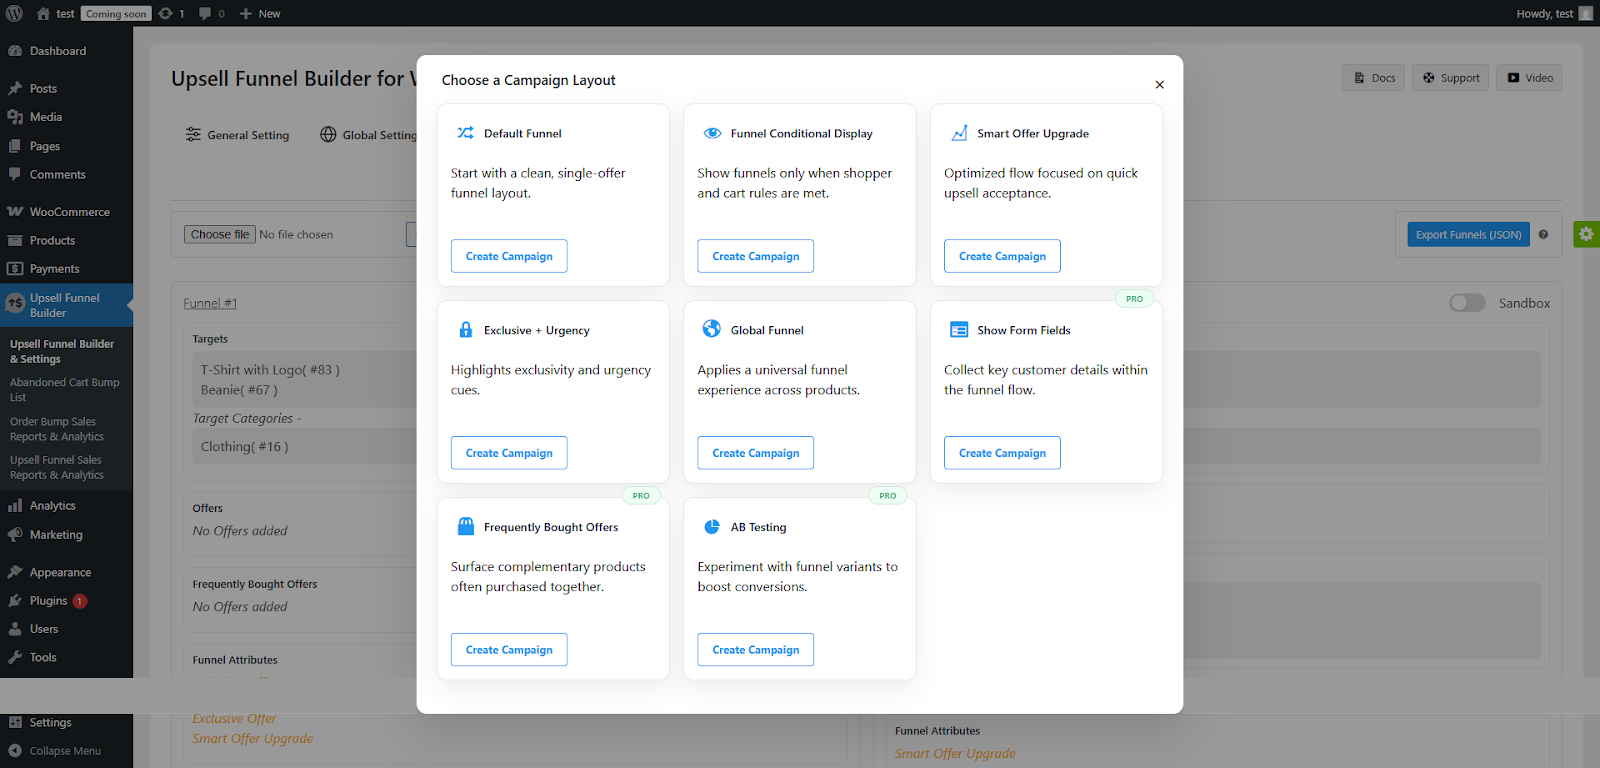
After clicking on the create campaign button, all the relevant settings will automatically be configured.
7.2.Create Upsell Funnel Settings
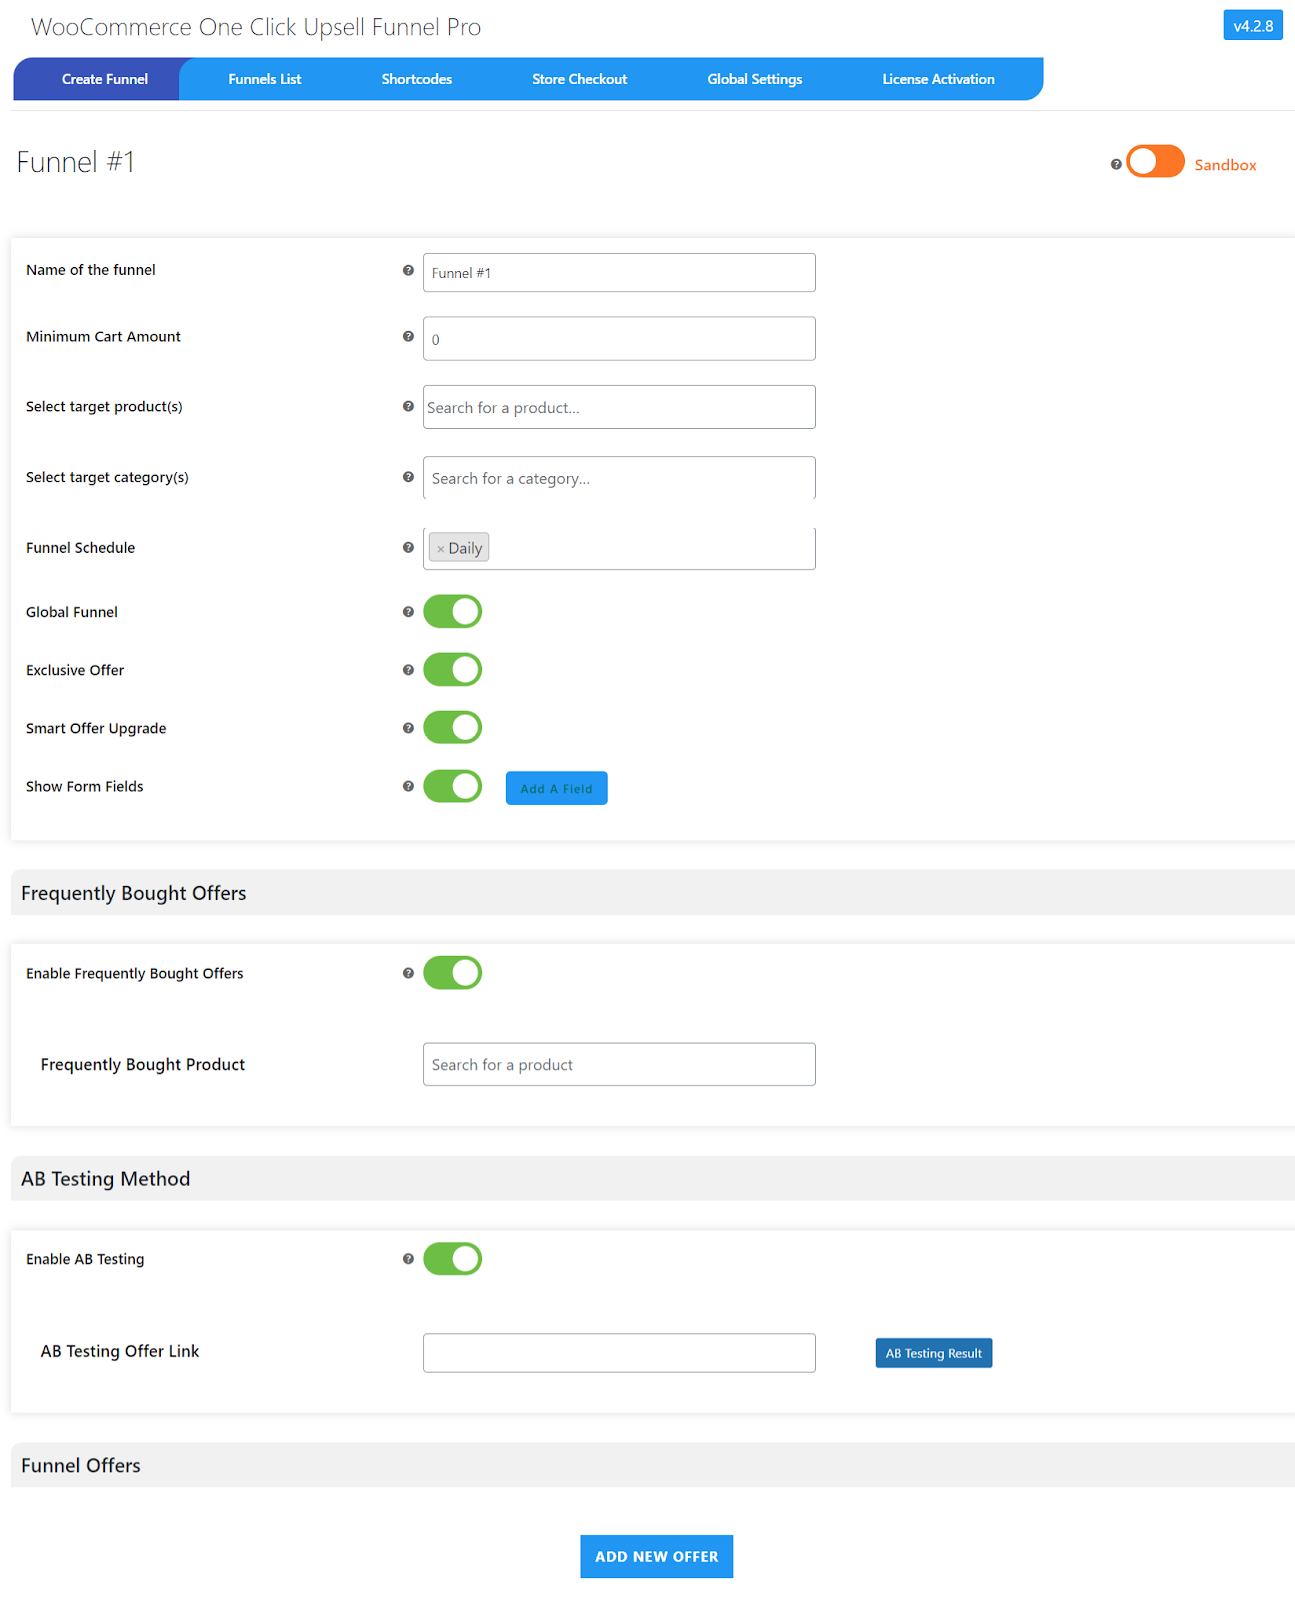
7.2.1.Upsell Funnel Settings
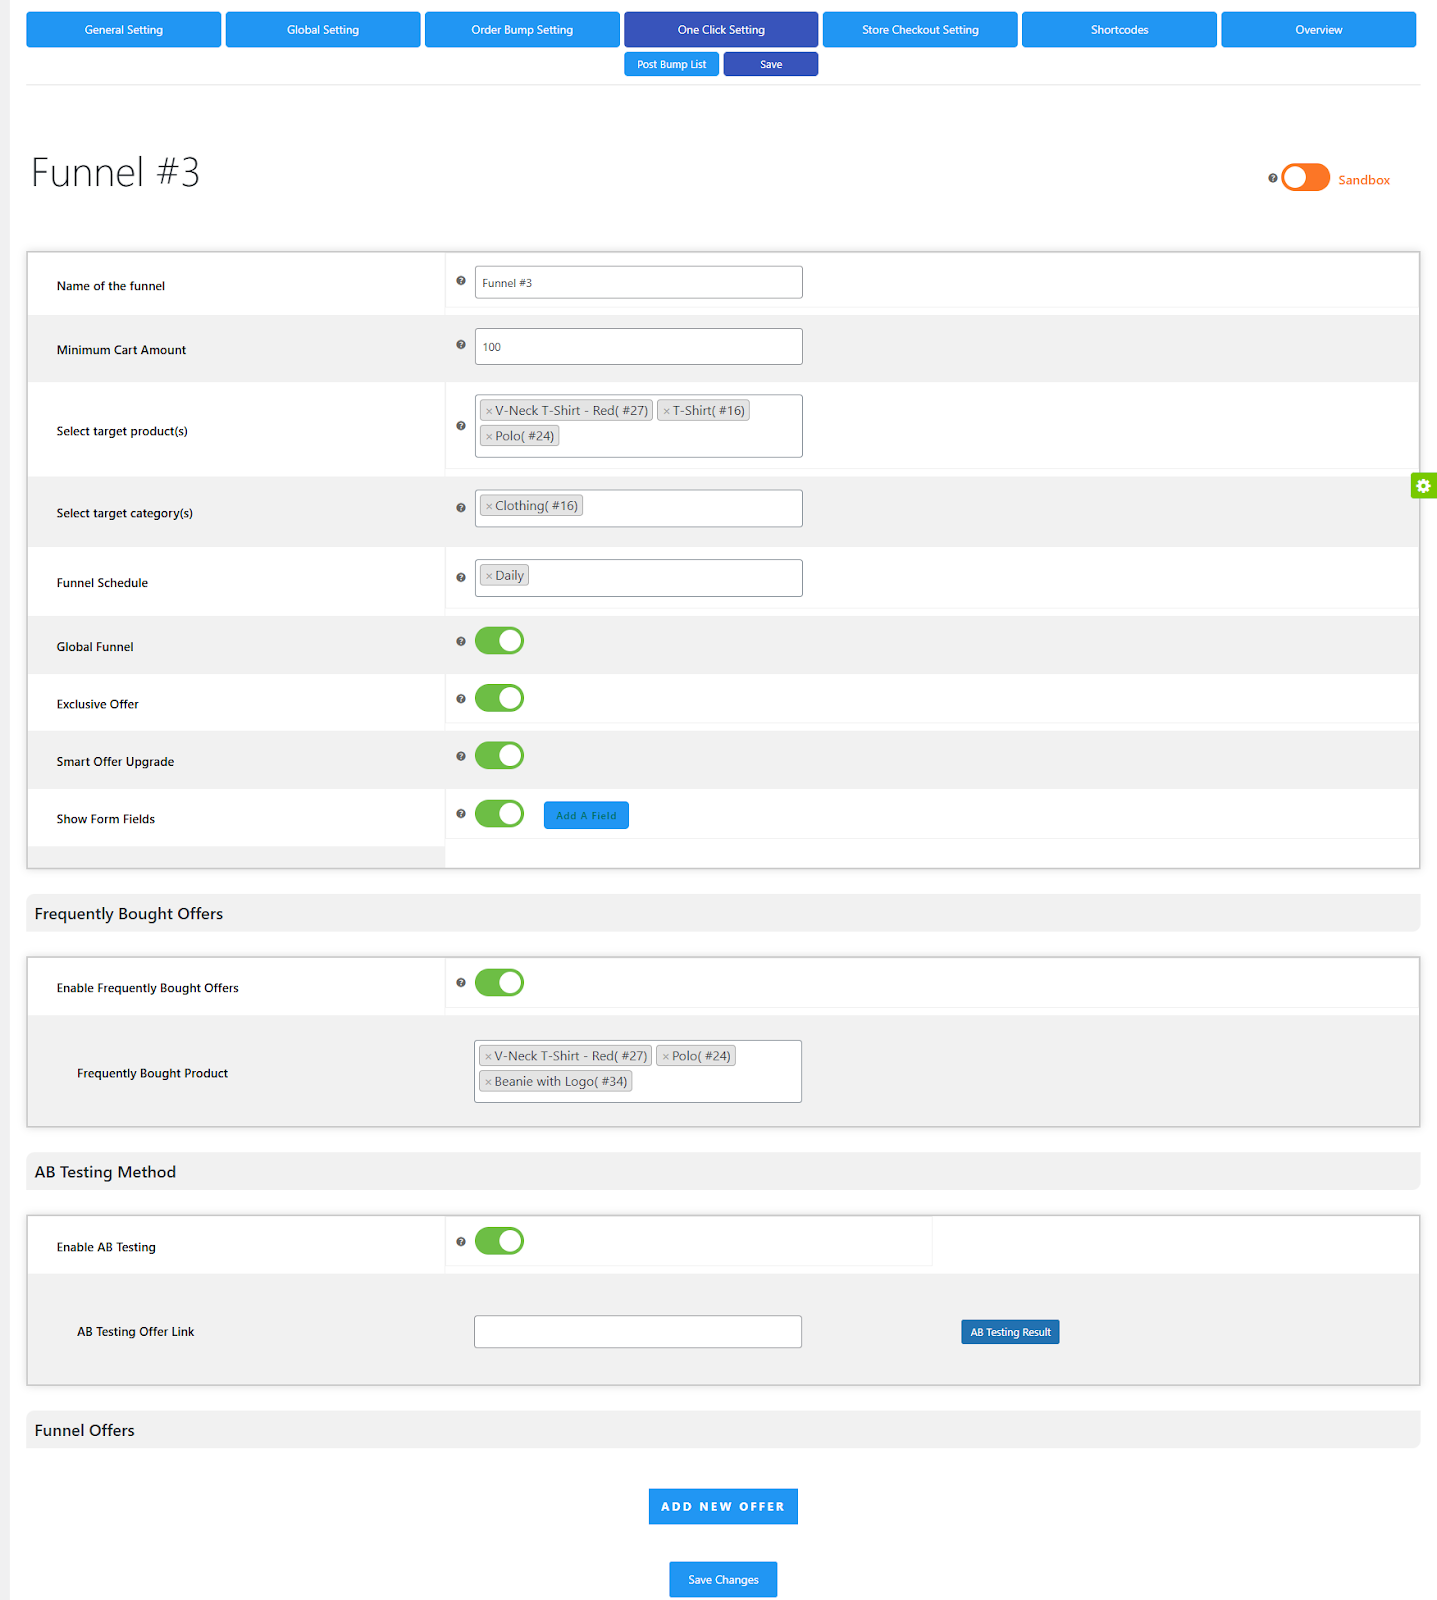
7.2.1.1.Name Of The Funnel
Add a name you want to give to your sales funnel.
7.2.1.2.Minimum Cart Amount
Enter the minimum cart amount to trigger the funnel.
7.2.1.3.Select Target Product(s)
Select one or more products as a target product. Whenever a customer purchases a target product, the funnel will come into action.
7.2.1.4.Select Target Categories
Select the target categories of the product. Whenever a customer purchases a product from that category, the funnel will come into action.
7.2.1.5.Funnel Schedule
Schedule your custom funnel for specific weekdays or let it execute daily.
7.2.1.6.Funnel Conditional Display
Admins can decide the conditions under which your customers will see the bump offers. The predefined conditions are Cart total, Subtotal, Coupon Applied, User Login Status, Device Type, Country/Region, and Registered Users.

7.2.1.7.Global Funnel
Click on this toggle button and enable it if you want to turn this funnel into a global funnel. A global funnel doesn’t depend on any target product or category. So, if you want to trigger this funnel always, enable this feature.
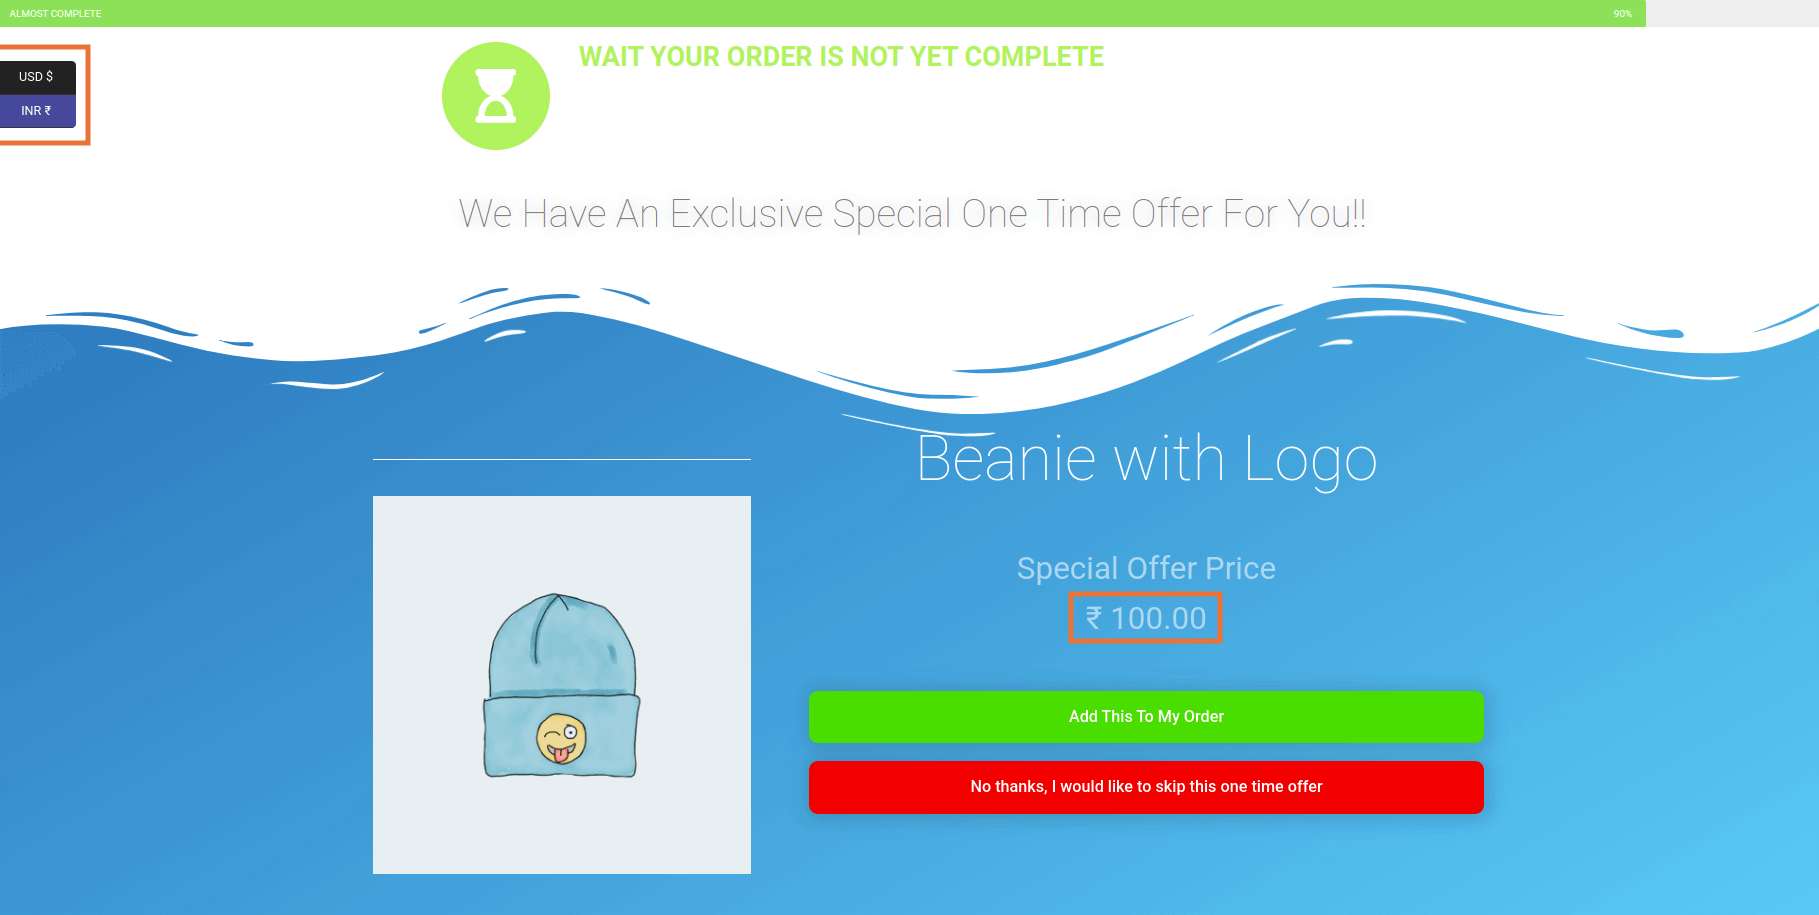
7.2.1.8.Exclusive Offer
By enabling this setting, you can create exclusive one-time upsell offers on your store to raise urgency among your customers.
The Exclusive Offer will make your post-purchase upsell offers visible to the customer once. This setting works for the billing email.
7.2.1.9.Smart Offer Upgrade
By enabling this feature, you can offer an upgraded product to the customers after the purchase is done.
If they accept the upgrade offer, the initial product will be replaced by the offer product. Note: The Smart Offer Upgrade feature doesn’t work if the Global Funnel feature is enabled for a similar funnel.
7.2.1.10.Show Form Fields
This Option Allows you to create custom form fields on the offer page, Applicable to the first offer only.
7.2.1.11.Frequently Bought Offers
The plugin allows merchants to add additional offers on the post-purchase upsell offer page. To add additional products, perform the following steps:
- Visit the Funnel List to add additional products to previous funnels or new funnels.
- Now scroll down towards the Frequently Bought Offers portion.
- Enable the slider switch beside Frequently Bought Offers to add frequently bought products.
- Now, enter the additional product in the input field next to the Frequently Bought Offers Product.
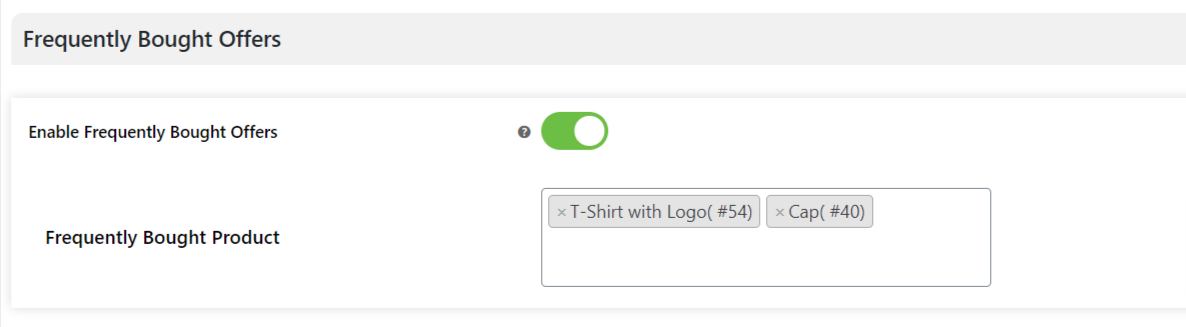
Note: The frequently bought offers will only be visible on the first offer of the smart funnel.
7.2.1.12.Enable AB Testing
To create an A/B Test, you must install the Elementor Page Builder. After the installation –
- Navigate to the Elementor dashboard and create a new customized template.
- After customization, save the template and copy its URL.
- Navigate to the funnel section and enable the A/B testing Method to paste your Elementor template URL.

That’s it. Now, the A/B testing will be running between your customized template and the template you selected in the offer section.
You can click on the A/B testing result button to see how your A/B testing funnel performed using various matrices like Trigger Count, Success Count, Offer Viewed, Offer Accepted, Offer Rejected, Offers Pending, etc.
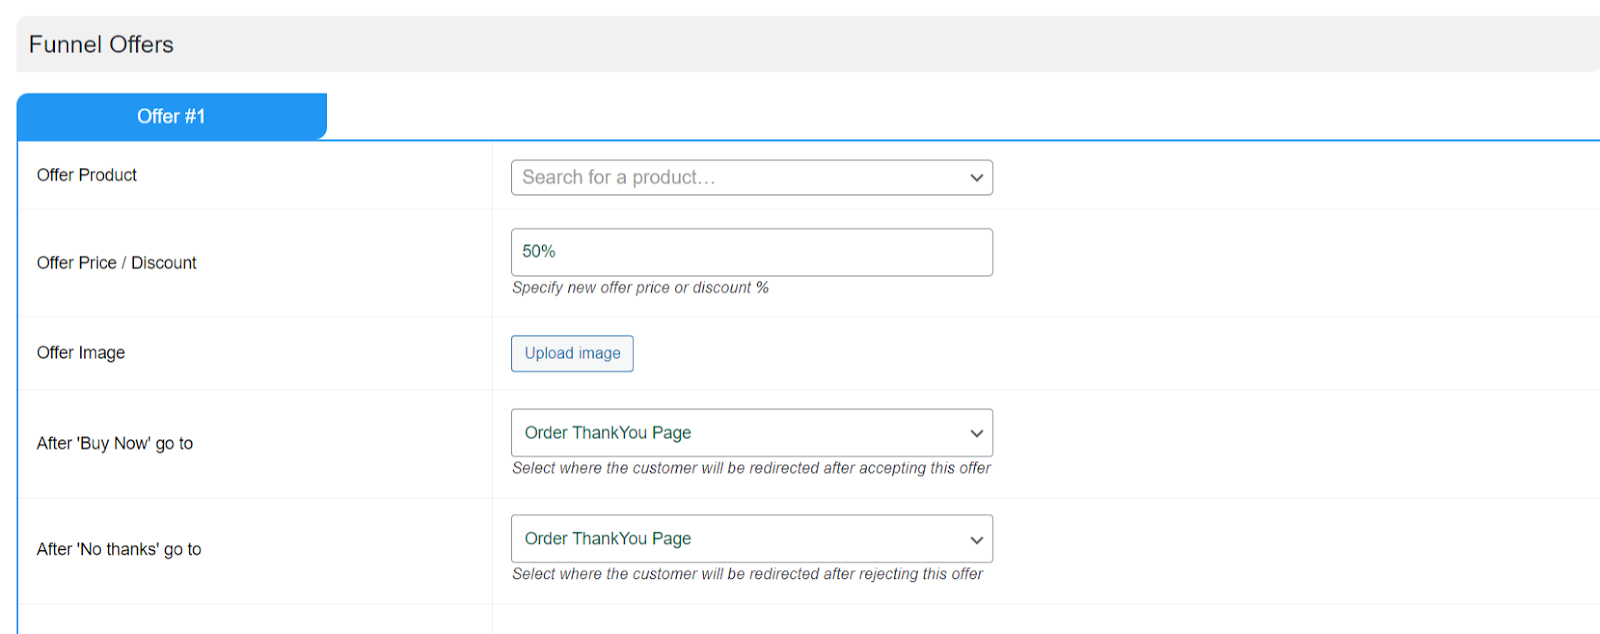
7.2.1.2.Funnel Offers
You’ll be asked to fill in these details once you click on Add New Offer:
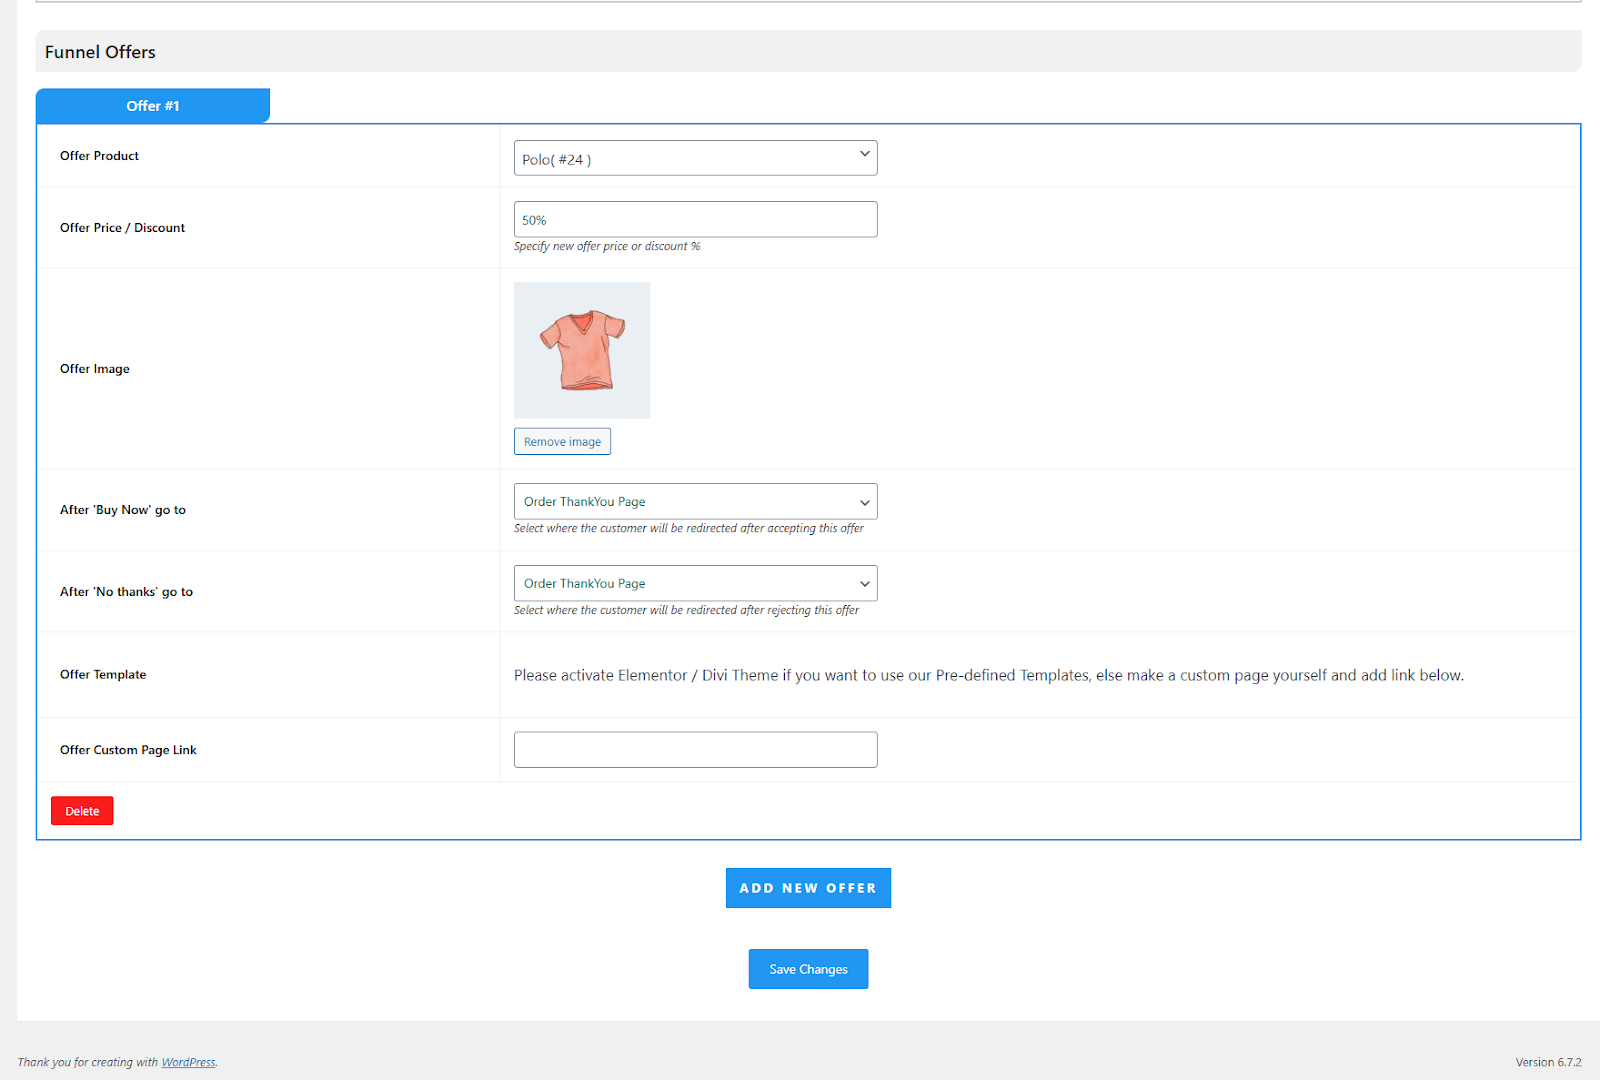
- Offer Product: Select the product you want to feature in the offer.
- Offer Price/Discount: Enter the new offer price or specify the discount percentage.
- Offer Image: Choose an image to represent your offer.
- After ‘Buy Now’ Go To: Select the page where users will be redirected after accepting the offer
- After ‘No Thanks’ Go To: Select the page where users will be redirected after rejecting the offer
- Offer Template: Once you’ve filled out the details, you can choose a funnel template that suits your needs.
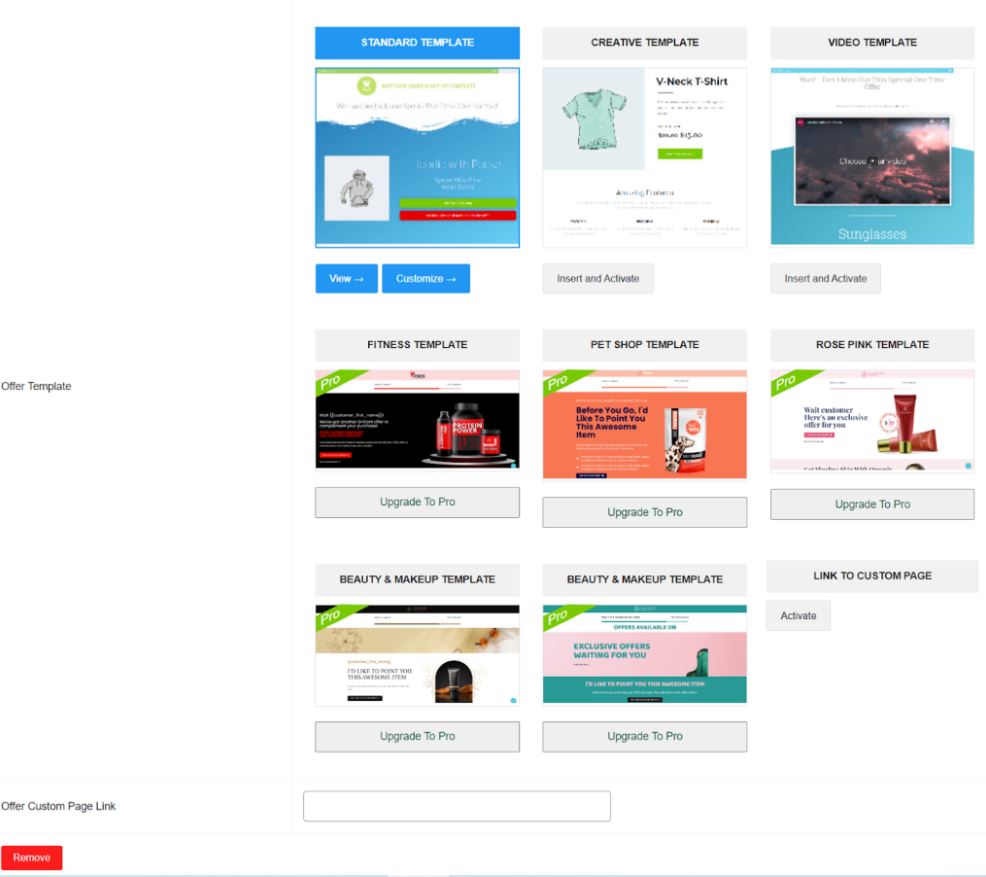
- Offer Custom Page Link: If you prefer not to use any built-in templates, you can create a custom offer page and customize it using the shortcodes provided in the Shortcodes section. Once done, simply add the link to your custom page here to use it.
After setting up your offer, click on the Sandbox toggle button to make the Upsell Funnel Live and click on the Save Changes button.
8.Store Checkout Settings
In this tab, the Upsell plugin lets you customize your checkout and thank you pages however you like.
You can hide, disable or rearrange fields, so only the ones you need are shown, making the process smoother.
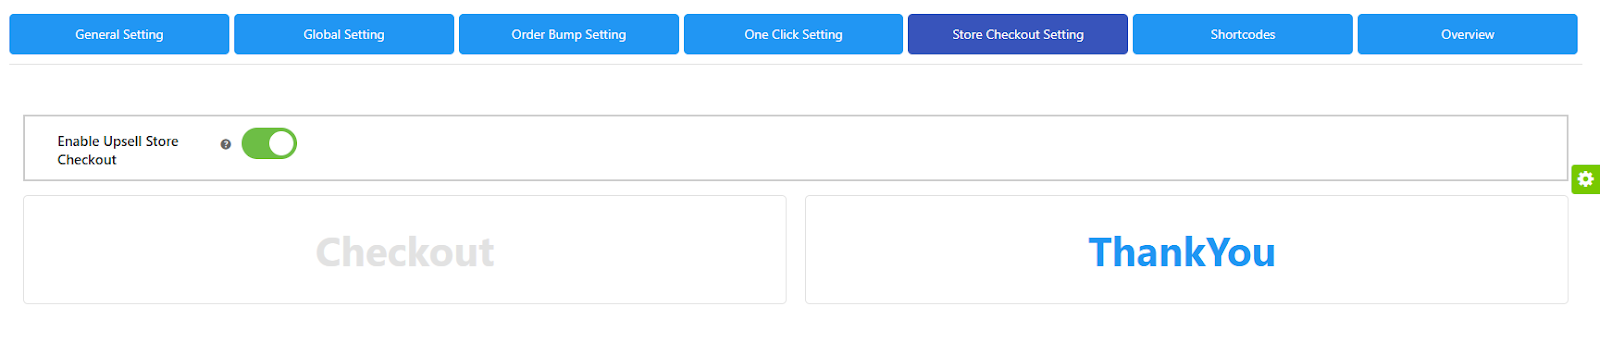
Click the button in the respective sections to enable the checkout and Thank You pages. Then, select any page to start customizing it. You can also preview your customized pages before enabling this feature by clicking the “Preview” button.
8.1.Checkout Page
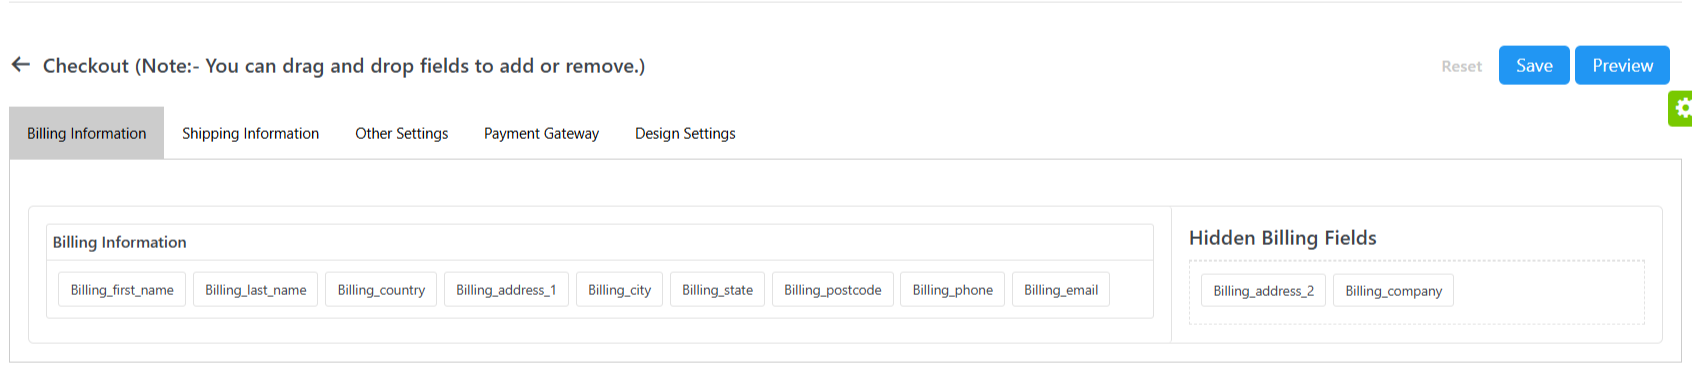
As shown in the screenshot above, the admin can customize the checkout page by modifying billing and shipping information fields, adjusting other settings, and configuring payment gateways.
As shown in the screenshot above, the admin can customize the checkout page by modifying billing and shipping information fields, adjusting other settings, and configuring payment gateways.
They can easily drag and drop to show or hide fields. After making the desired changes, the admin can click the “Save” button in the upper right corner to save or reset the customizations.
Frontend Representation:
I have hidden all the fields except for Billing First Name and Billing Country, so only those fields will be visible to users on the front end.

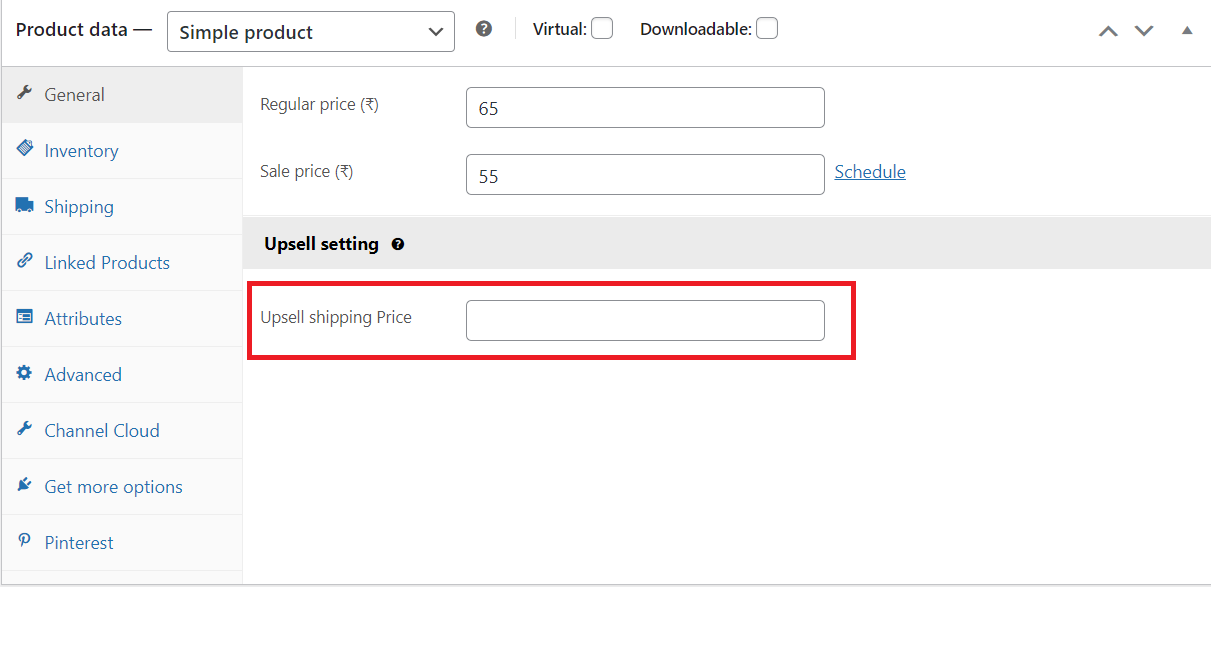
-
Add Dynamic Shipping Price on COD, Wallet, and Stripe

Now, you can put the Shipping price on Cash on Delivery, Wallet, and Stripe while making the WooCommerce one-click checkout by using this latest feature. Letting customers know the accurate accounting of every penny on checkout may increase your AOV and sales.
To add the shipping price for a specific product, navigate to that product under Products, then select General > Upsell Settings > Upsell Shipping Price, and enter the price.
8.2.Thank You Page
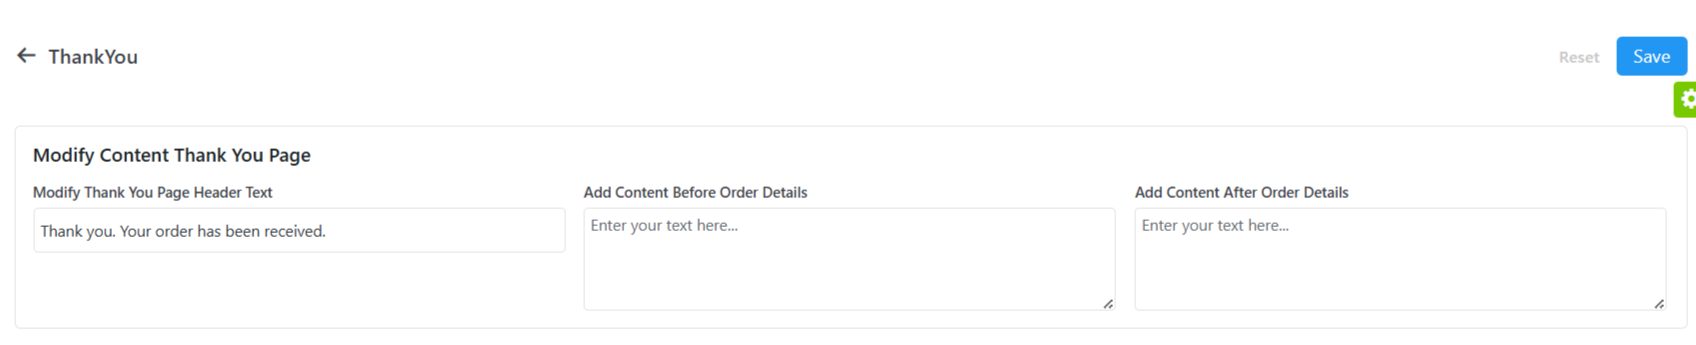
Similarly, on the Thank You page, you can customize the header text, add content before the order details, include content after the order details, and add content after the billing and shipping addresses.
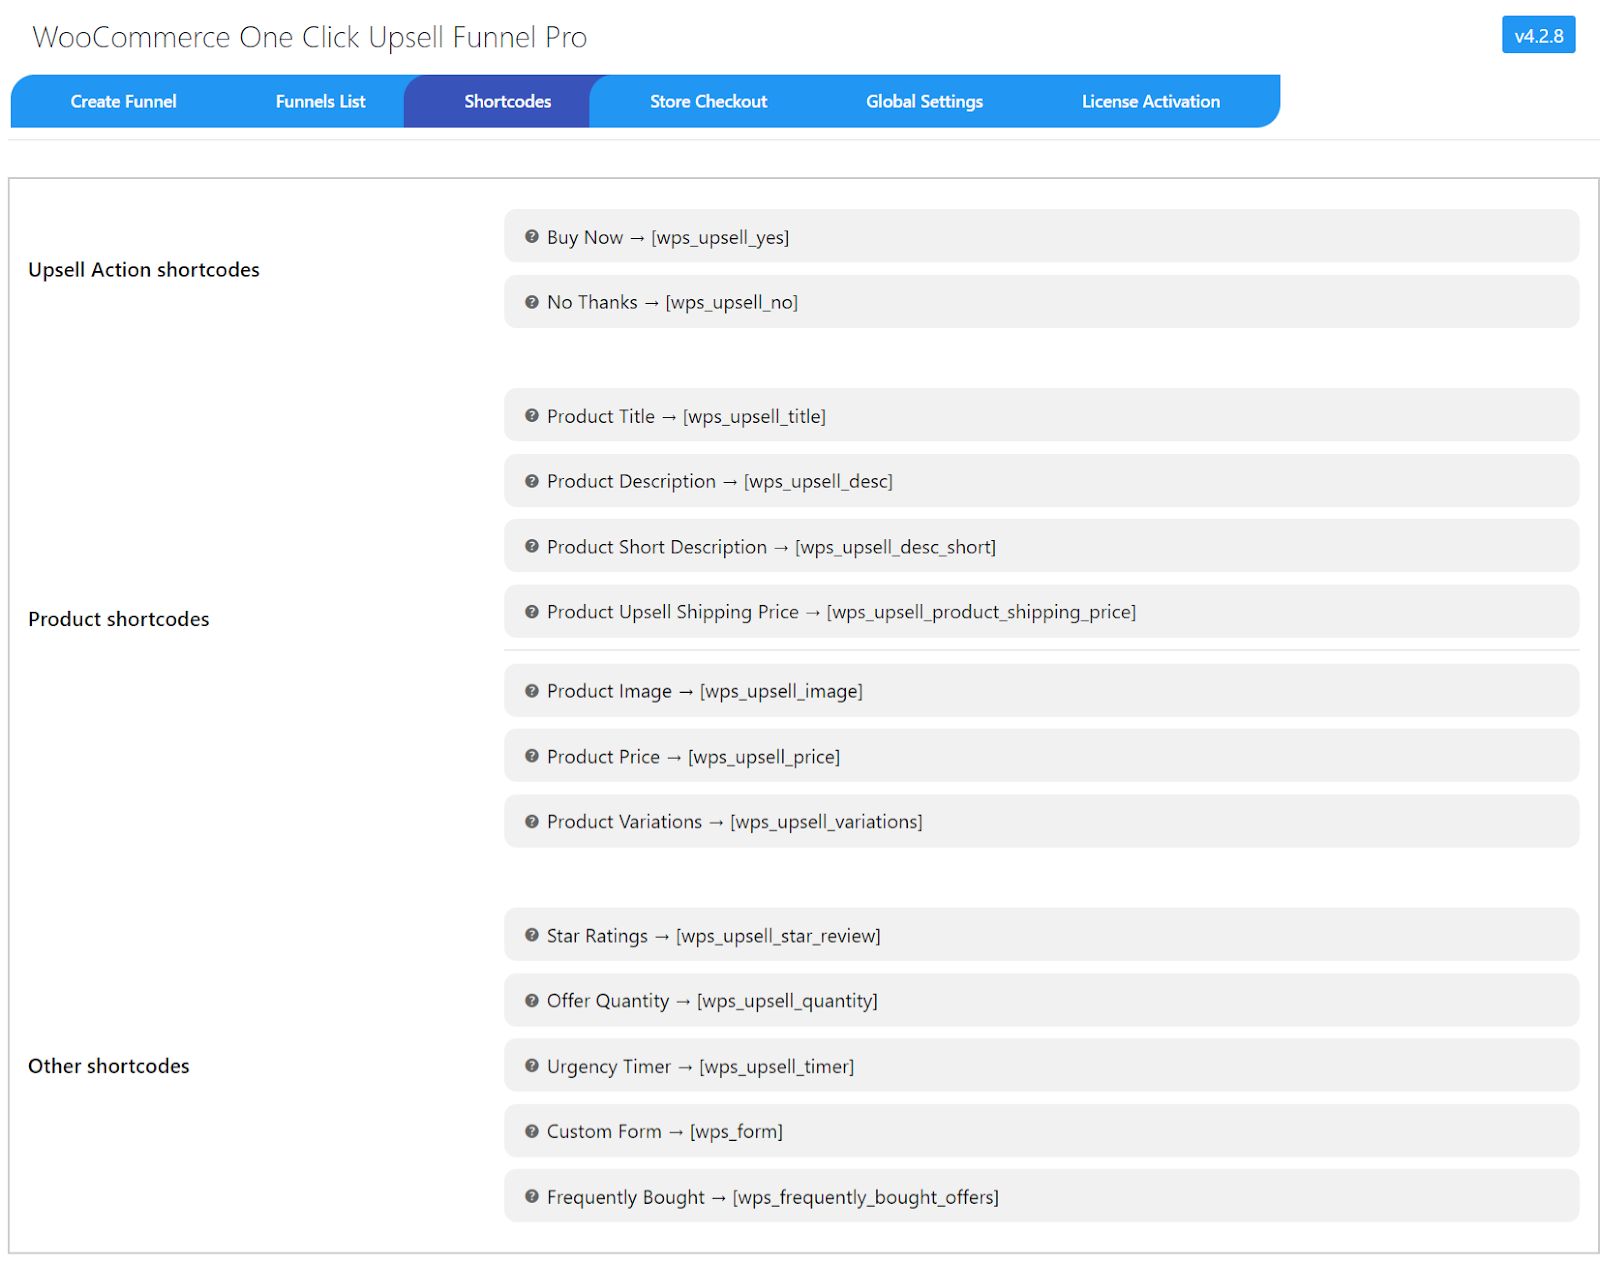
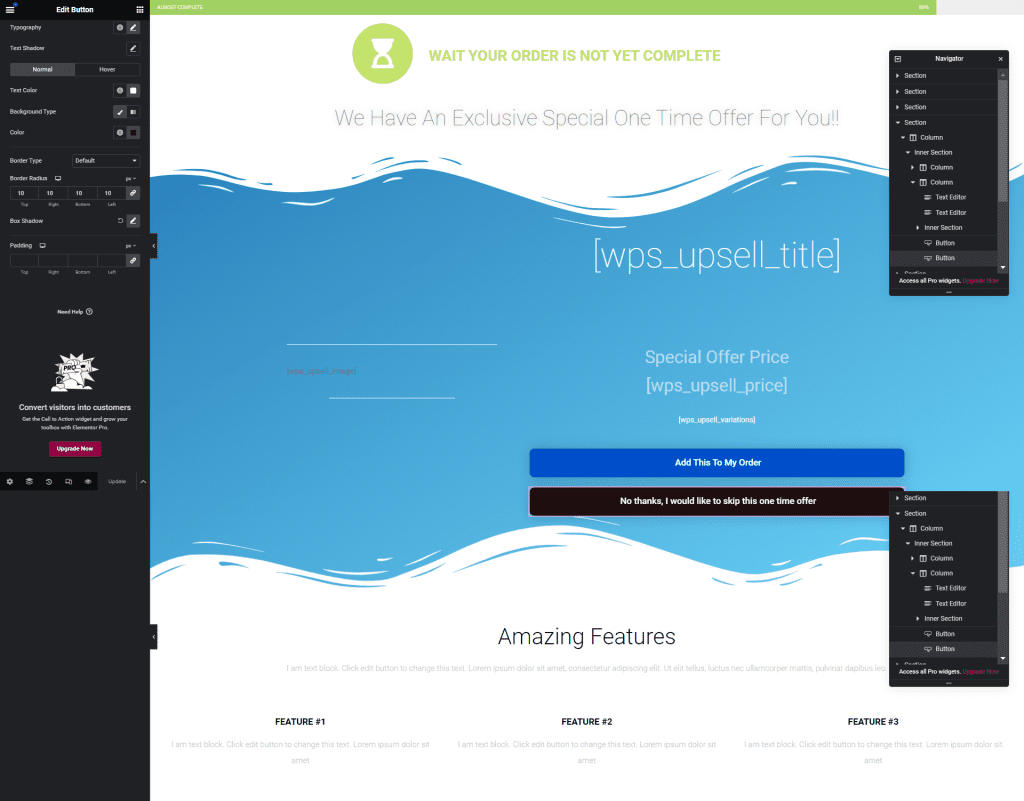
9.Shortcodes
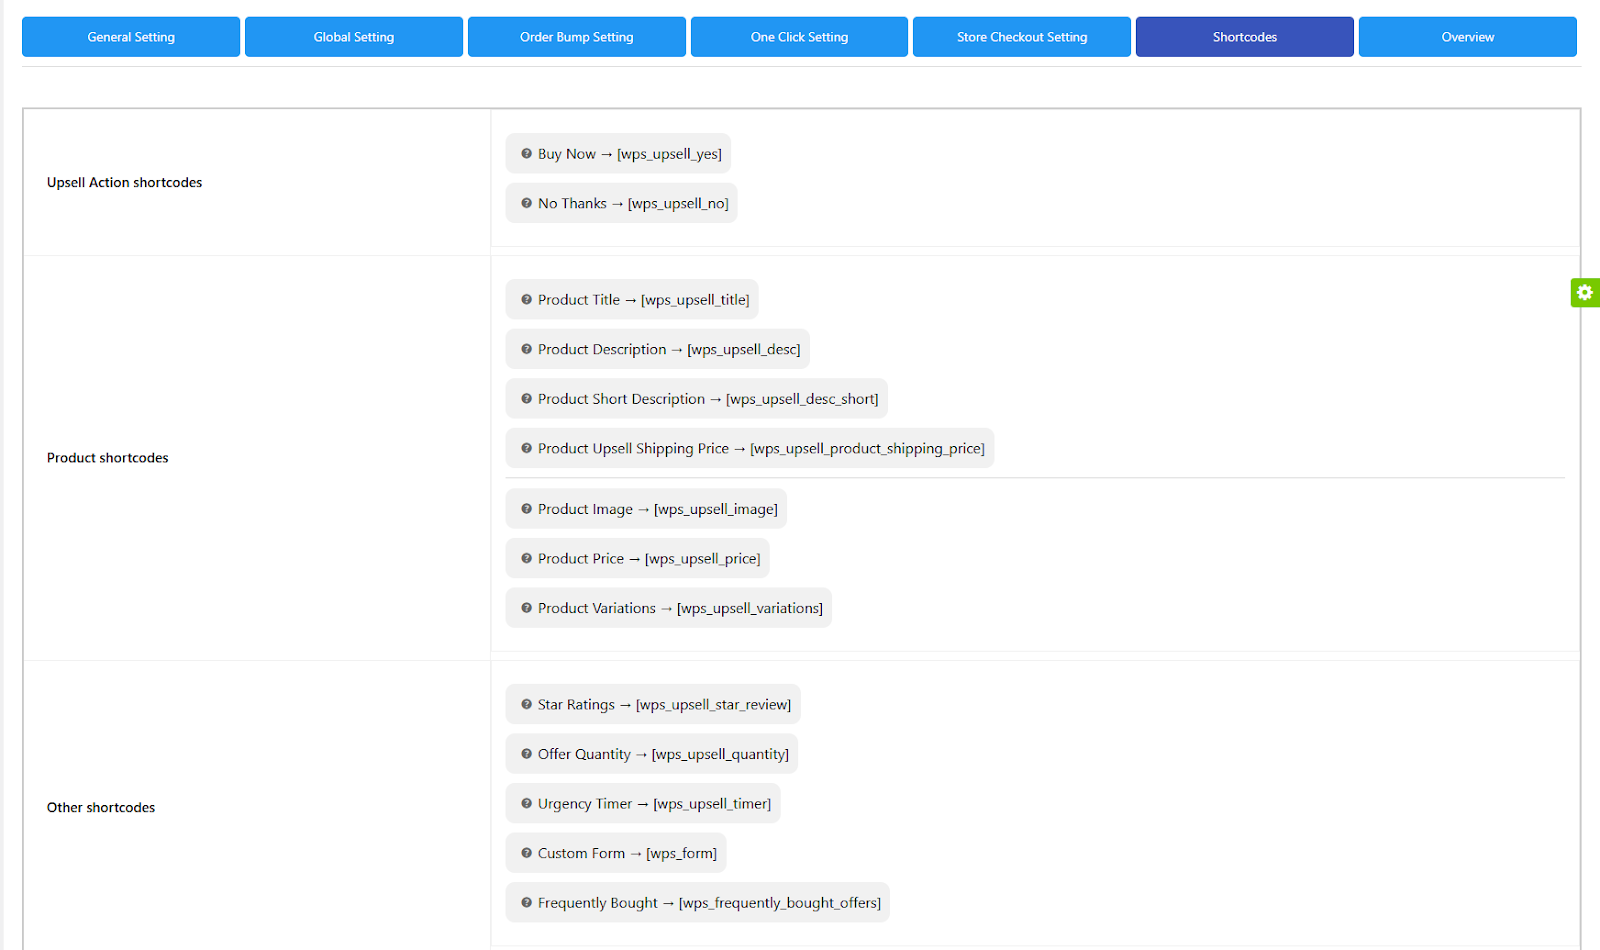
This extension provides some advanced shortcodes to design custom funnel offer pages for your brand.
All that you have to do is just use the suitable shortcodes on the custom page.
Here we are providing three types of shortcodes :
9.1.Upsell Action Shortcodes
- Buy Now: This shortcode is used for the “Buy Now” link. In HTML use it as href =”[wps_upsell_yes]” in the anchor tag.
- No Thanks: This shortcode is used for the “No Thanks” link. In HTML use it as href =”[wps_upsell_no]” in the anchor tag.
9.2.Product Shortcodes
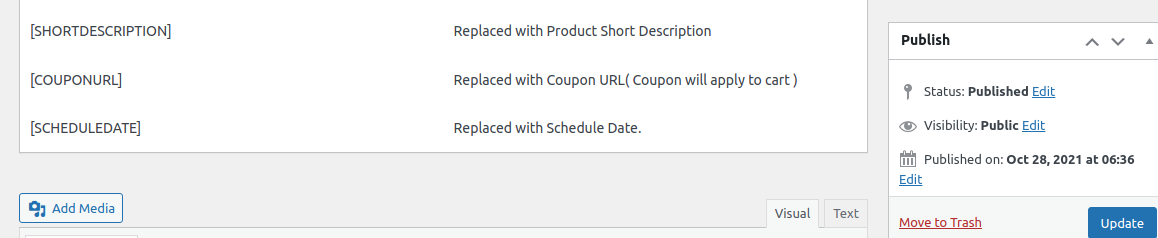
- Product Title: This shortcode returns the product title. Use it as [wps_upsell_title].
- Product Description: This shortcode returns the product description. Use it as [wps_upsell_desc].
- Product Short Description: This shortcode returns a short description of the product. Use it as [wps_upsell_desc_short].
- Product Upsell Shipping Price: This shortcode returns an Upsell Shipping Price. Use it as [wps_upsell_product_shipping_price].
- Product Image: This shortcode returns a product image. Use it as [wps_upsell_image].
- Product Price: This shortcode returns the product price. Use it as [wps_upsell_price].
- Product Variation: This shortcode returns product variations. Use it as [wps_upsell_variations].
9.3.Other Shortcodes
- Star Rating: This shortcode returns the star rating. It can be used as [wps_upsell_star_review=4.5].
- Offer Quantity: This shortcode returns the offer quantity field. You can restrict the customer to select the quantity offered. Use it as [wps_upsell_quantity max=4 min=1]. The default quantity is max=3 and min=1.
- Urgency Timer: This shortcode returns the urgency timer. You can specify the timer limit as [wps_upsell_timer minutes=5]. After the timer is over, the No Thanks Upsell action will be triggered.
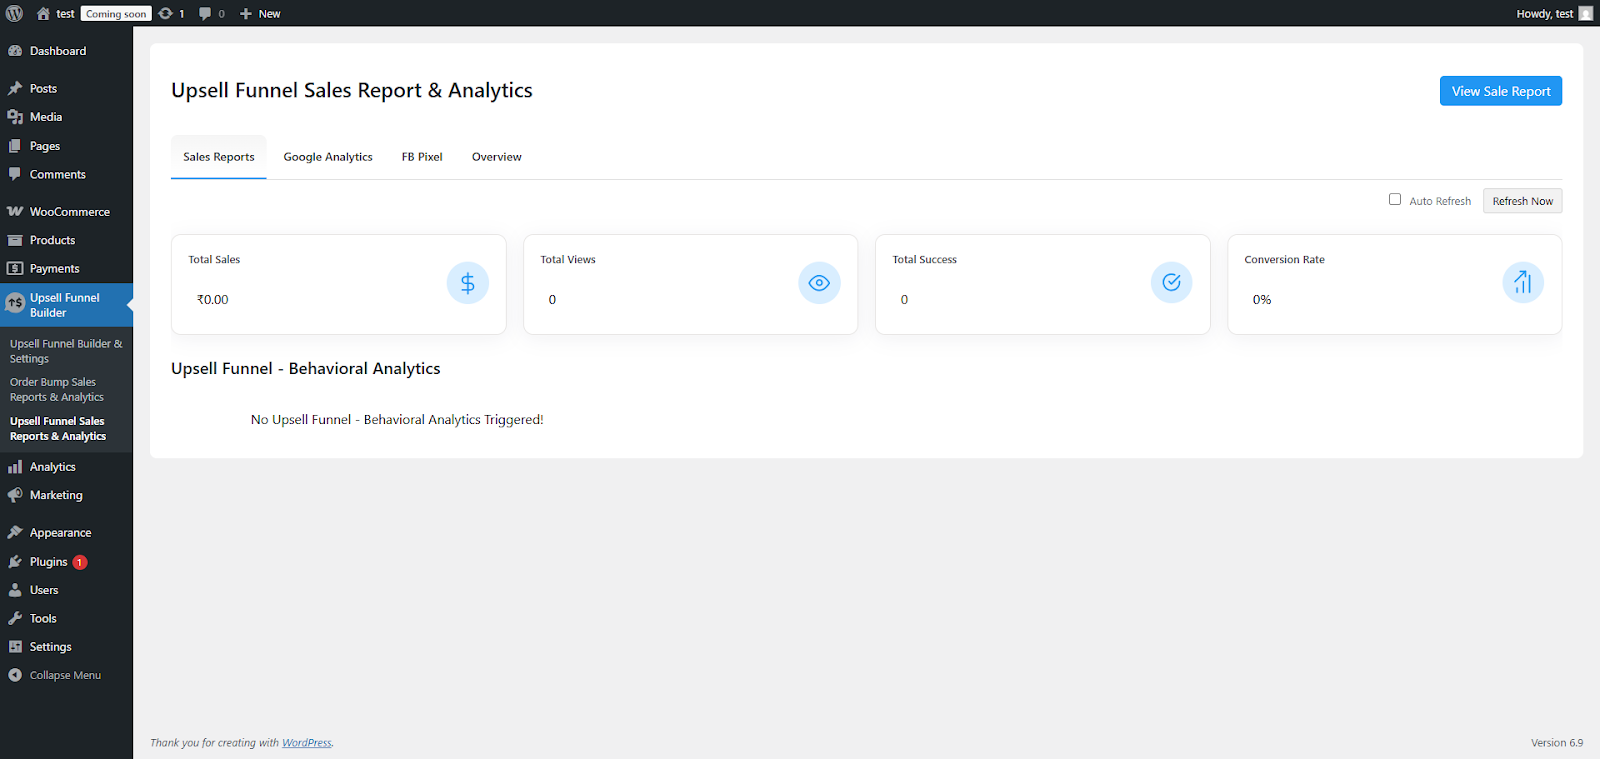
10.Sales Reports and Analytics
The admin can get access to the Upsell Funnel Builder Sales Report. This section is divided into two sections – Pre Sales Report and Post Sales Report by navigating through the following steps, 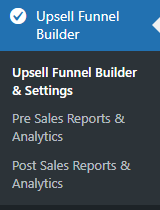
10.1.Pre Sales Reports & Analytics
After clicking on the “Pre Sales Reports & Analytics” section, you will be redirected to this section,
10.1.1.Order Bump WooCommerce Sales - Reports
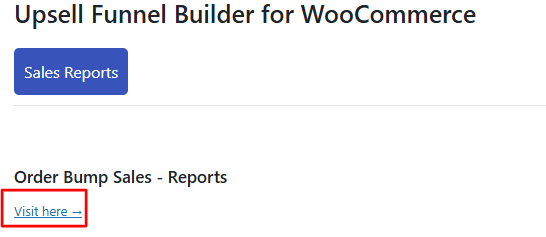
Click on “Visit Here” to check the order bump offer reports for a specific period.
Here you can check:
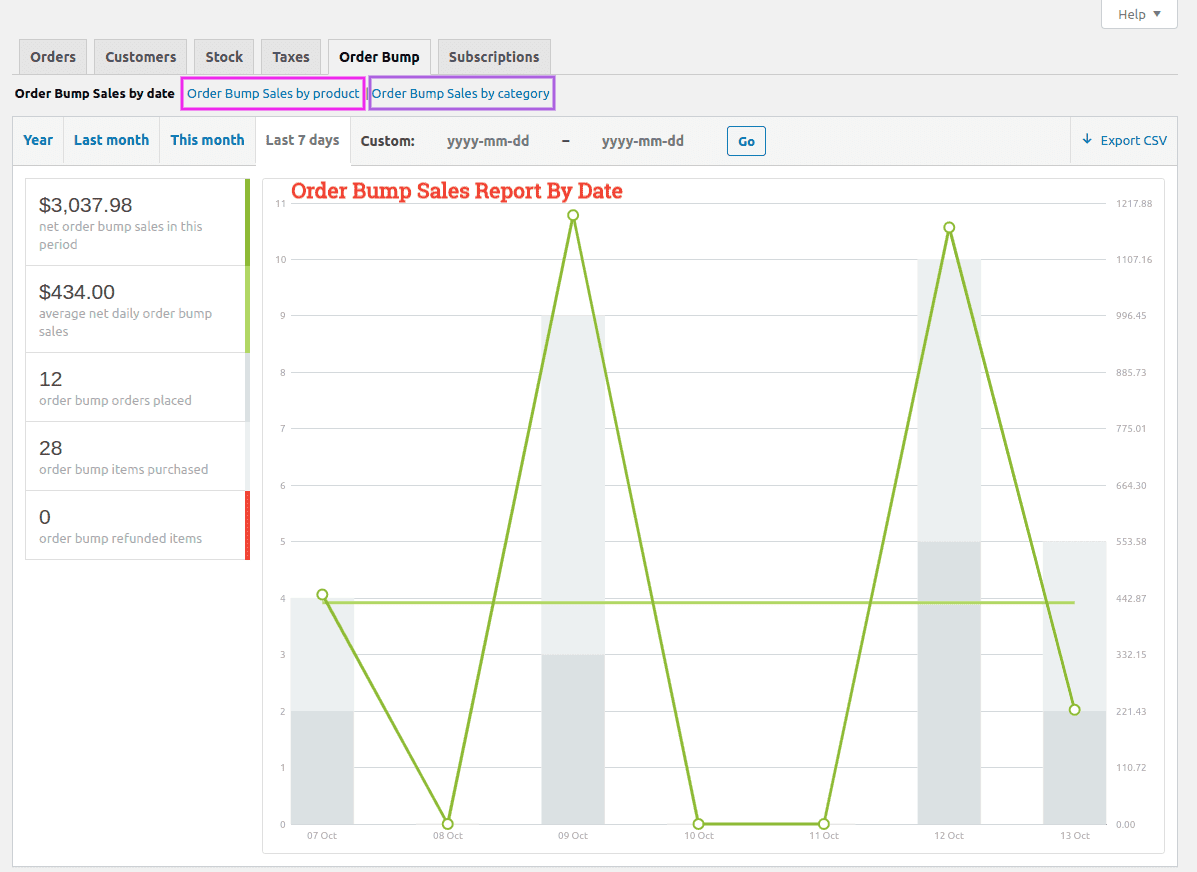
- Net Order Bump Sales: This is the sum of the order bump item total after any refunds(whole order refunds) and excluding shipping and taxes.
- Order Bump Orders Placed: Total order bump orders placed during the set period.
- Order Bump Items Purchased: Total number of order bump items purchased over a set period.
- Order Bump Refunded Items: Total order bump refunded items from fully refunded orders.
10.1.2.Order Bump - Behavioral Analytics
You can track the behavior of every order bump you’ve created through this feature. Just navigate to your WordPress dashboard, Upsell Funnel Builder > Sales Reports and Analytics, and you’ll find a report named Order Bump – Behavioral Analytics there.
This report shows:

- Name: Name of your order bump.
- View Count: Number of times customers the order bump offer was viewed.
- Success Count: Number of times the order bump offer was purchased
- Offer Accept Count: Number of times customers accepted the order bump offer
- Offer Remove Count: Number of times an offer was removed after getting accepted
- Conversion Rate: Conversion Rate is the ratio of Success Count by View Count.
- Total Sales: Total amount of sales of the order bump offer
10.1.2.Post Sales Report & Analytics
After clicking on the “Post Sales Reports & Analytics” section, you will be redirected to this section,
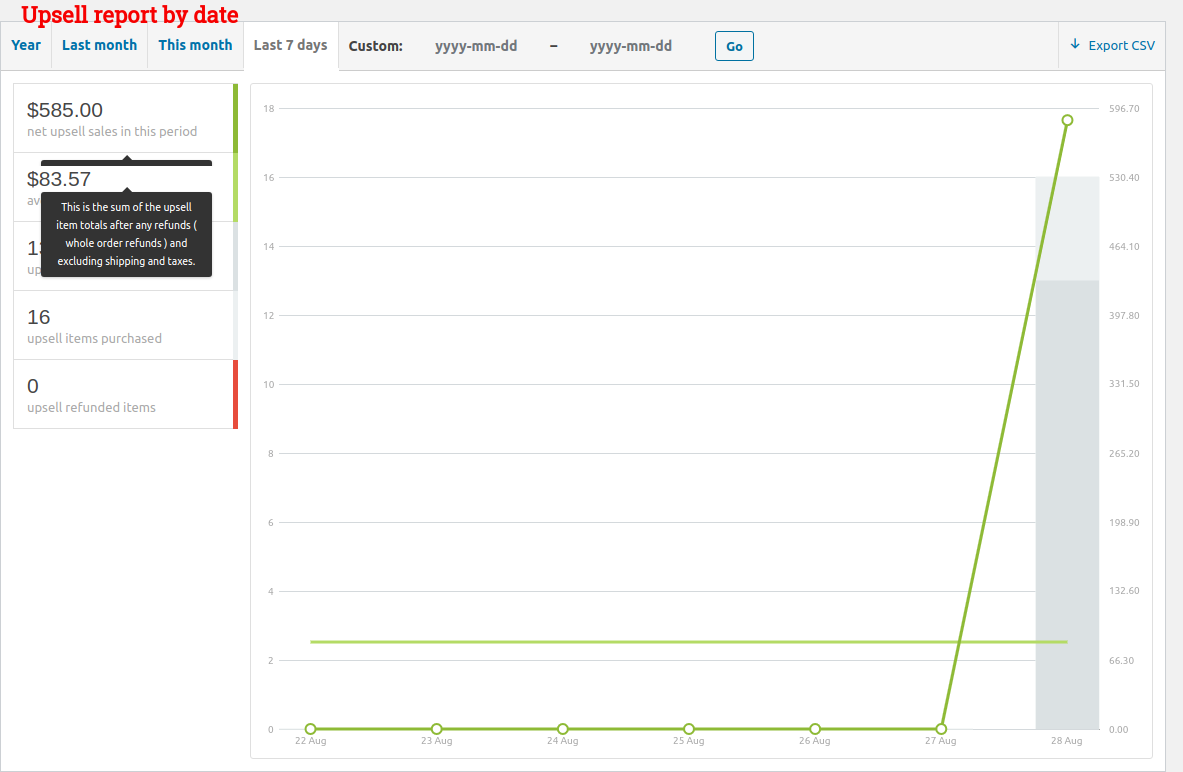
10.1.2.1.Sales Report
Create a sales report for the products in your store including or excluding items based on net sales, orders placed, orders purchased and refunds, name of order, view count, conversion rates, and total sales, and generate your report with a click.
Navigate to the Report, Analytics, and Tracking Section,
![]()
Click here to check the upsell reports for a specific period.

Here you can check:
- Net upsell sales: This is the sum of the upsell item totals after any refunds (whole order refunds) and excluding shipping and taxes.
- Average net daily upsell sales: Daily average of total upsell sales over the set time.
- Upsell orders placed: Total upsell orders placed within the set time.
- Upsell items purchased: Total number of upsell items purchased within the set time.
- Upsell refunded items: Total upsell refunded items from fully refunded orders.
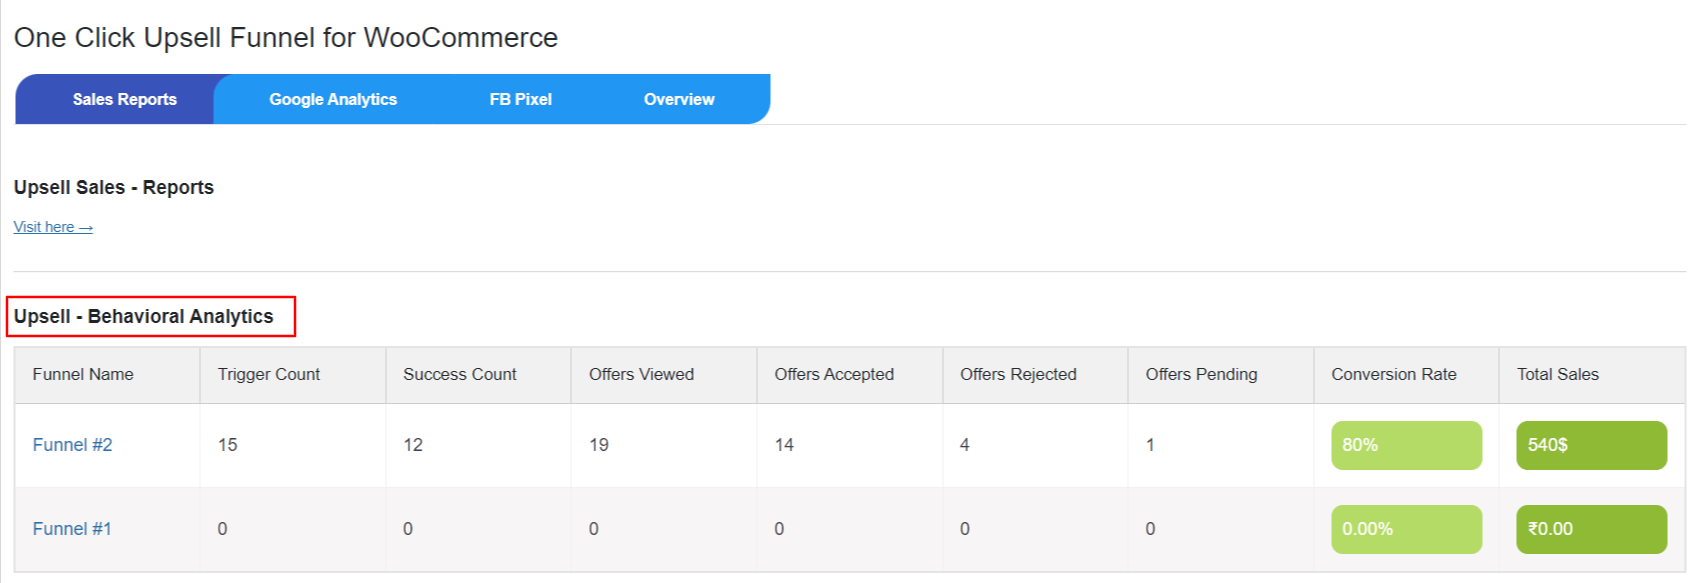
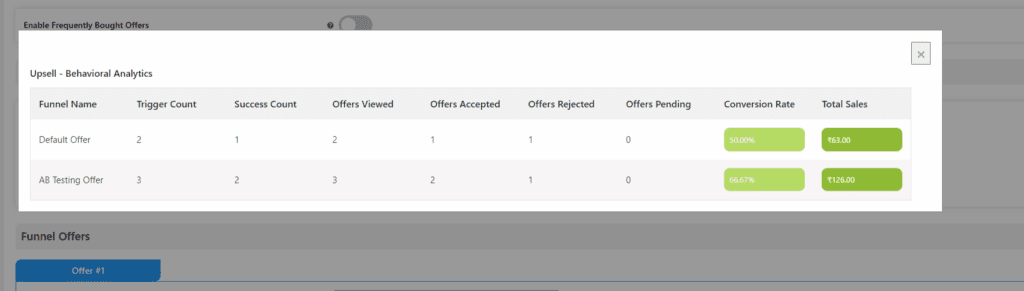
10.1.2.2.Upsell - Behavioral Analytics
This report shows you the data of every individual custom funnel. With this report, you can check the performance of the funnel, its offers, and its success rate.
Here are the metrics this report shows:
- Funnel Name: Name of the funnel.
- Trigger Count: Number of times a funnel has been triggered
- Success Count: Number of times a Funnel is Successful. A Funnel is considered successful if any of its Offers are accepted.
- Offers Viewed: Number of times the offers in the funnel were viewed by the customers.
- Offers Accepted: Number of times the offers in the funnel were accepted by the customers.
- Offers Rejected: Number of times the offers in the funnel were rejected by the customers.
- Offers Pending: Number of times the offers in the funnel were viewed but no action was taken by the customers or they simply closed the browser window and left.
- Conversion Rate: Percentage ratio of Success count vs Trigger Count.
- Total Sales: Total amount of sales of Upsell Offer Items generated by the smart funnel ( including refunds if any)
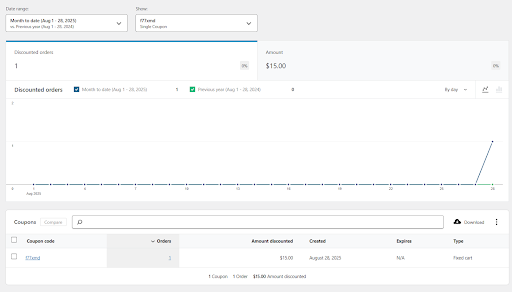
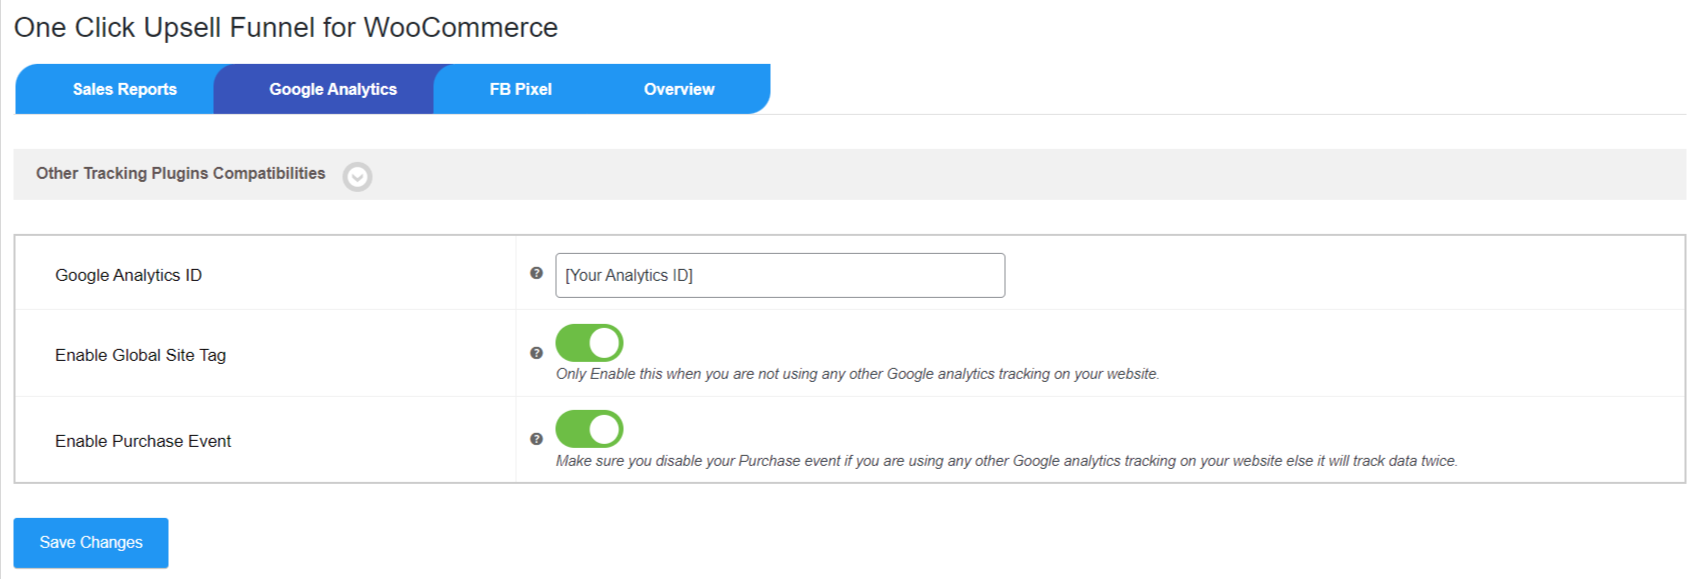
10.1.2.3.Google Analytics
![]()
Analyze all sorts of insights of your website by using Google Analytics. It provides a wide range of useful insights into how people use your website. With this, you can gain a comprehensive and easy-to-understand variety of relevant factors that will help you increase the overall sales.
- Google Analytics ID: Enter your Google Analytics tracking ID. You can find it by logging into your Google Analytics account.
- Enable Global Site Tag: Add Global Site Tag “gtag.js” to your website. Note: Only Enable this when you are not using any other Google Analytics tracking on your website.
- Enable Purchase Event: This will trigger the Google Analytics purchase event for parent orders and upsells accordingly
Note: Make sure you disable your Purchase event if you are using any other Google Analytics tracking on your website else it will track data twice.
Please check the “Other Tracking Plugins Compatibilities” section by clicking on the arrow above it.
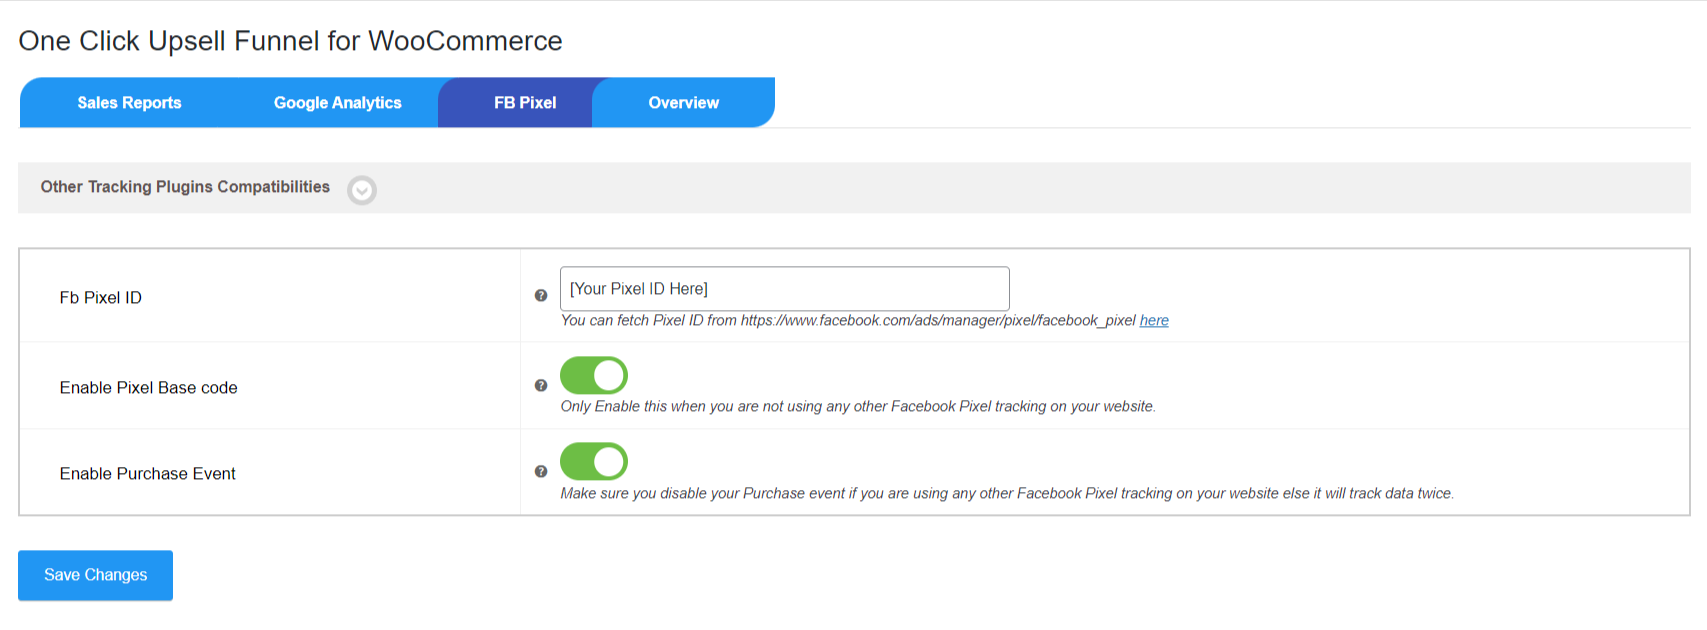
10.1.2.4. FB Pixels
![]()
- FB Pixel ID: Enter your Facebook Pixel ID here. You can fetch your Pixel ID from here.
- Enable Pixel Base Code: Add Facebook Pixel Base Code to your website.
Note: Only Enable this when you are not using any other Facebook Pixel tracking on your website.
- Enable Purchase Event: This will trigger the Facebook Pixel purchase event for parent orders and upsells accordingly
Note: Make sure you disable your Purchase event if you are using any other Facebook Pixel tracking on your website else it will track data twice.
Please check the “Other Tracking Plugins Compatibilities” section by clicking on the arrow above it.
11.WPS Bump Recommendation With Discount
With this feature of the WooCommerce Upsell plugin, the merchants can set bump recommendations for different products listed on their platforms, which will reflect when the customer adds a product to their cart. This is the ultimate upselling hack for boosting sales.
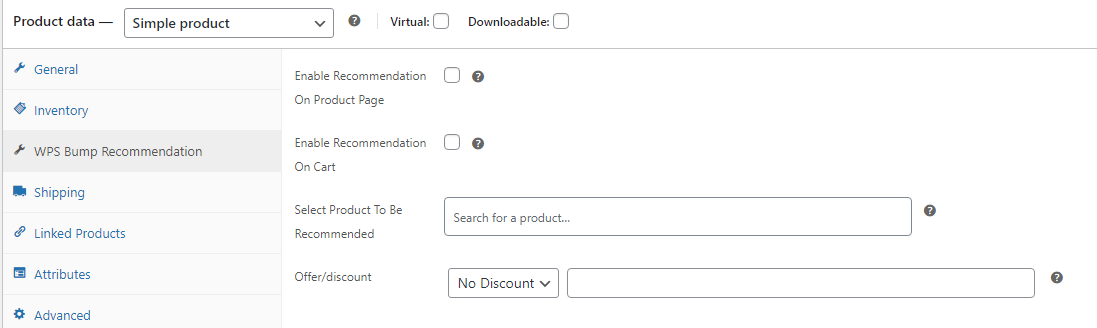
The admin can enable this setting by going to the “Edit product” page of the particular product. After that scroll down to find the “WPS Bump Recommendation” section, here you can enable this feature. After enabling the feature, you can now enter the “products to sync this with”, you can add up to 3 products that you want to show as product recommendations.
The admins can also add discounted prices for the product recommendation section. There are two kinds of discounts that the admin can choose from – fixed discount and percentage discount. This enables admins to set a discounted price for the existing prices for these products.
- Enable Recommendation On Product Page: Enable this setting to display the product recommendations over the product page.
- Enable Recommendation On Cart: Enable this setting to display the product recommendations over the cart page.
- Select Product To Be Recommended: Use this option to enter the products that you want to display, by using the recommendation feature.
- Offer/Discount: Admin can choose from a “fixed/percentage” discount and also enter the discount that he wants to give to the customers.
Frontend Screenshot for Product Page:
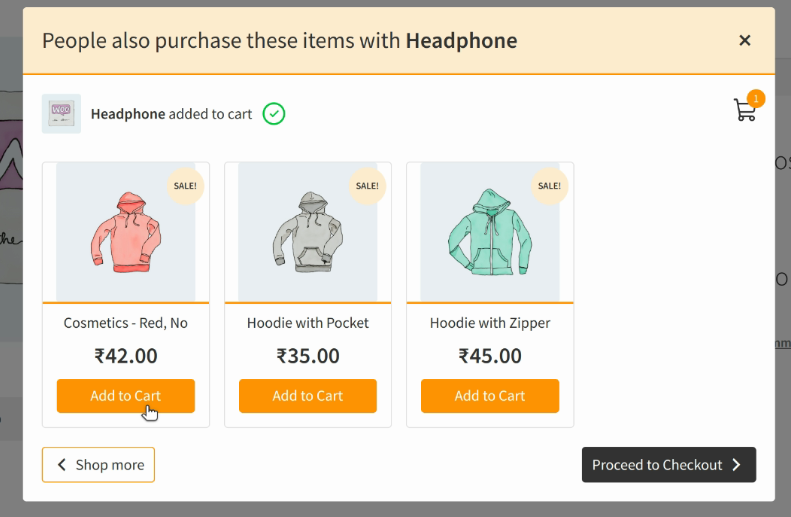
Frontend Screenshot for Cart Page:
12.WPS Frequently Bought Together
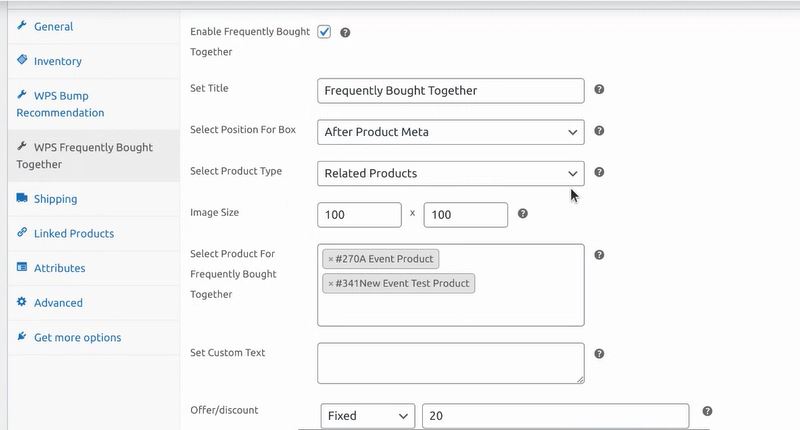
With this feature of WooCommerce order bump, merchants can showcase a list of products that are ‘frequently bought together’ so that their customers can consider buying those products, increasing their eCommerce store’s revenue.
- Enable Frequently Bought Together: The admin can use this setting to enable this feature.
- Set Title: You can also change or modify the name of this bump offer, at your convenience.
- Select The Product Type: The type of products that will be combined in this bump offer can also be selected.
- Select Product For Frequently Bought Together: The products that will be shown can also be entered.
- Select Position Box: The position of the box is also dynamic, which means the admin can choose the position of the box
- Image Size: The size of this bump offer can also be selected.
- Set Custom Text: The admin can choose any custom text that he wants to show.
- Offer/Discount: Admin can choose from a “fixed/percentage” discount and also enter the discount that he wants to give to the customers.
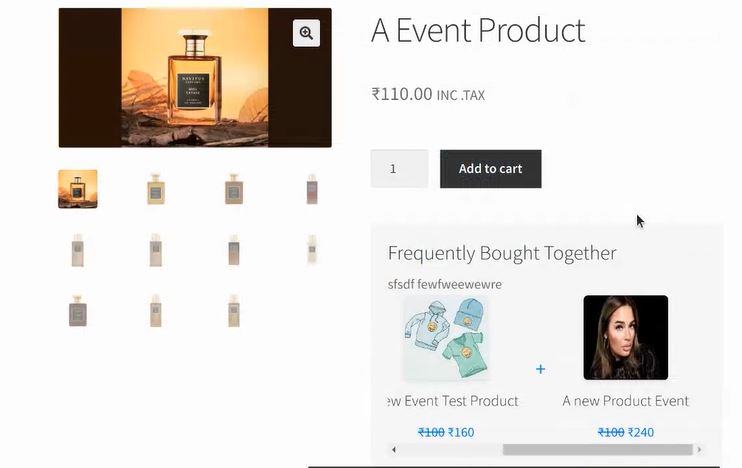
Frontend Screenshot:
13.Plugin Compatibilities
With the Upsell Funnel Builder plugin, you can also use additional plugins for enhanced features:
13.1.Fluent CRM
The WooCommerce upsell plugin is compatible with Fluent CRM. This enables the merchants to send follow-up emails to the customers who have purchased pre-bump or post-bump offers. We have created a separate list that showcases whether the customer has purchased a pre-bump or post-bump offer, to send mail accordingly.
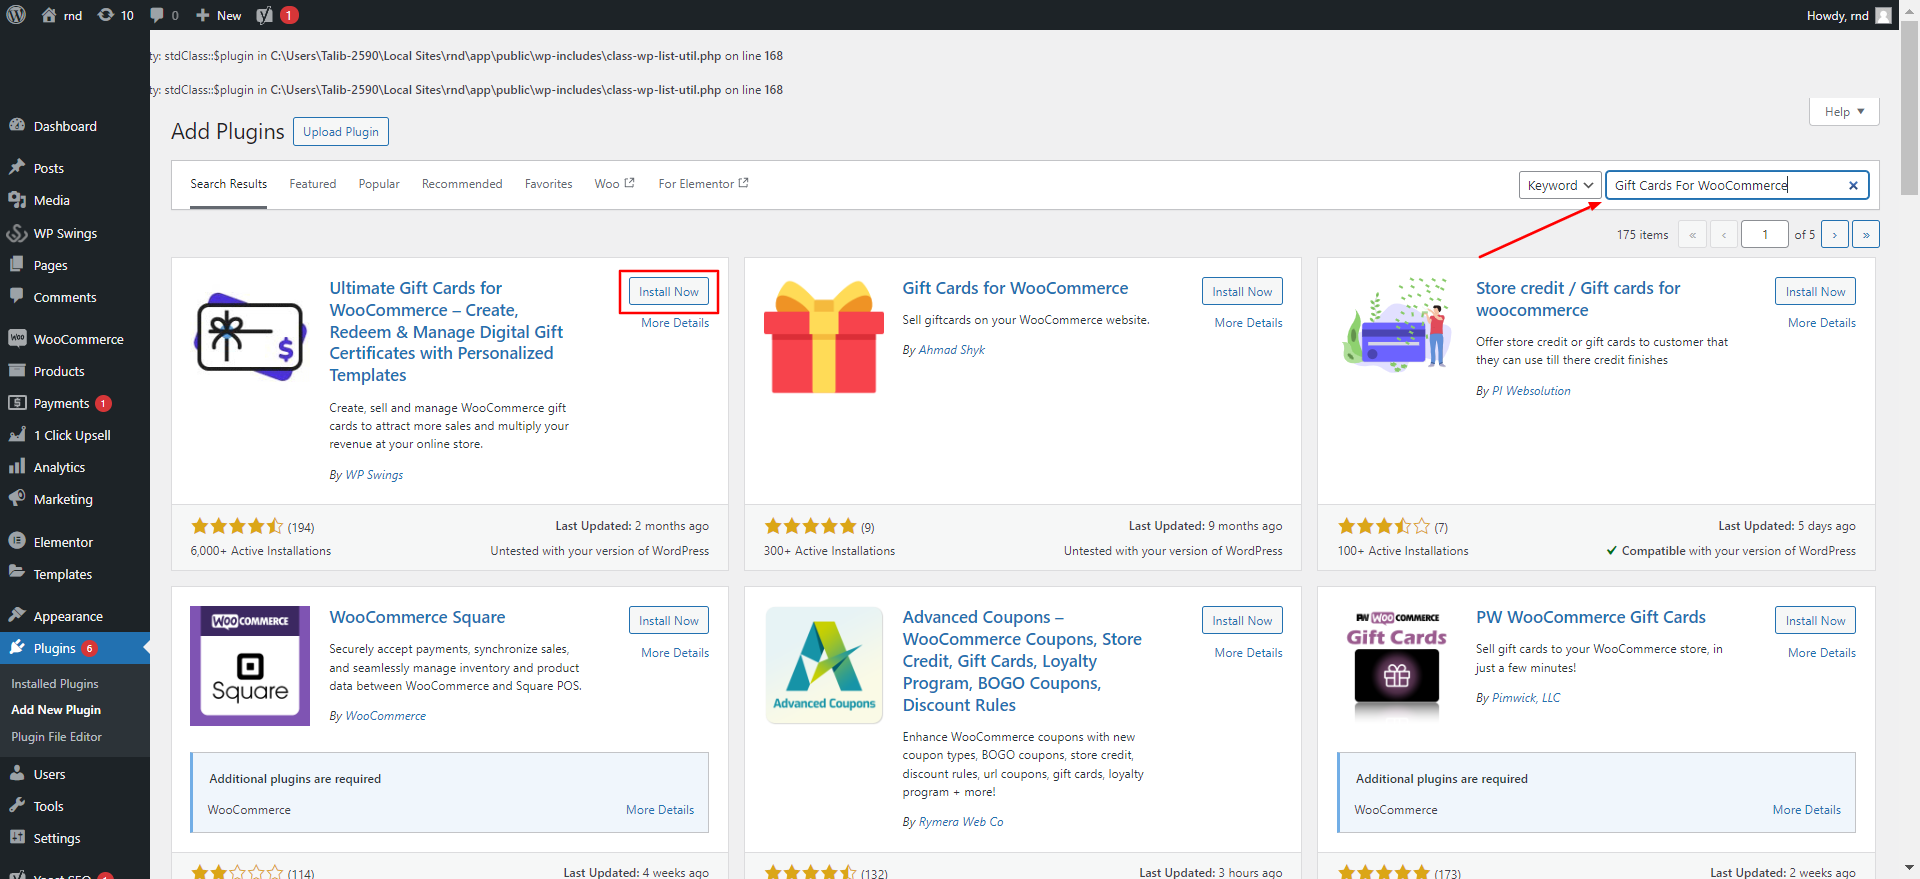
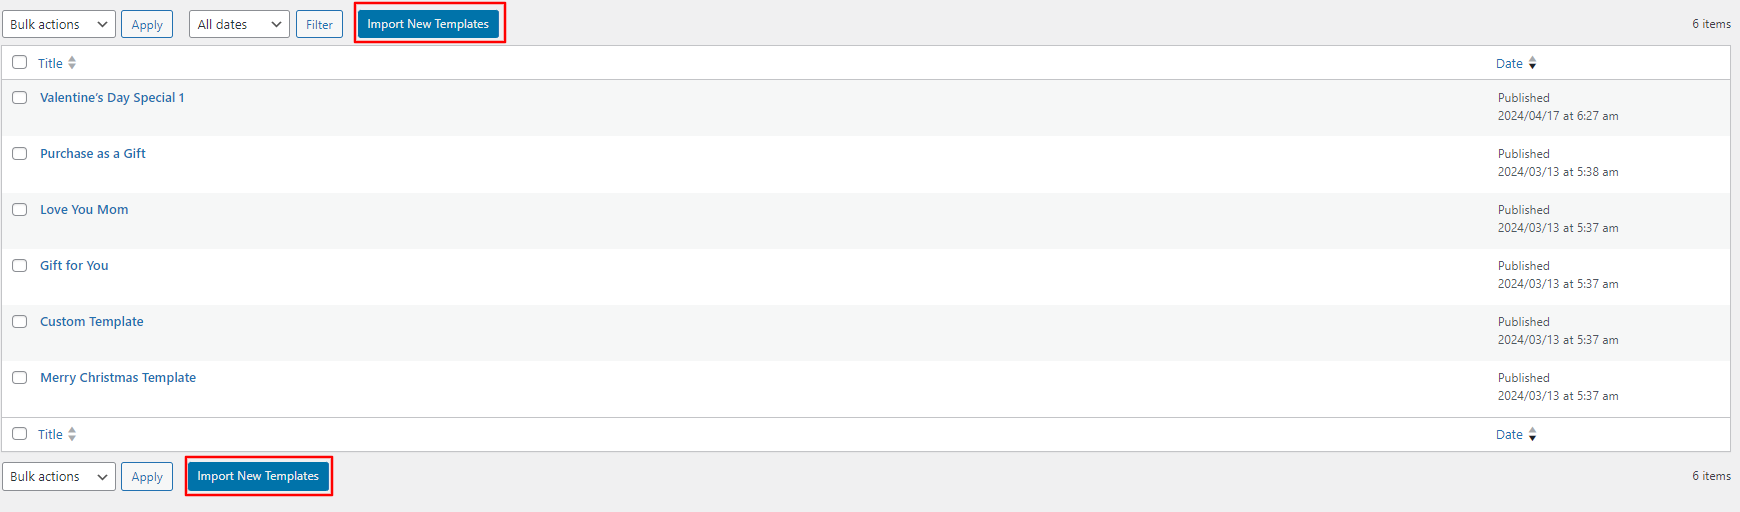
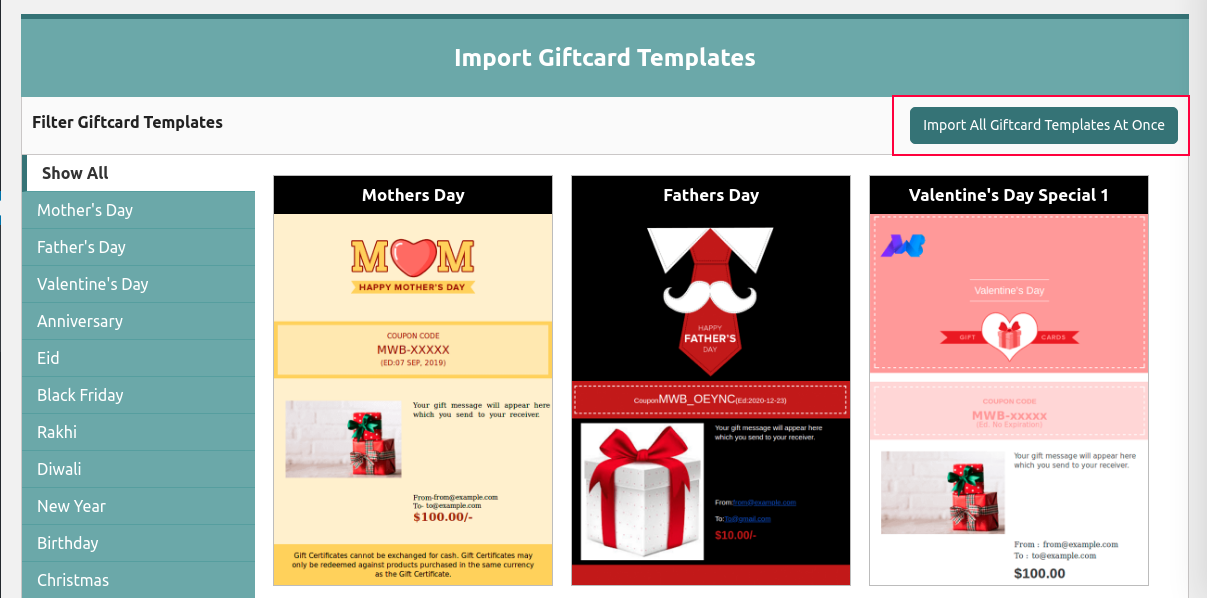
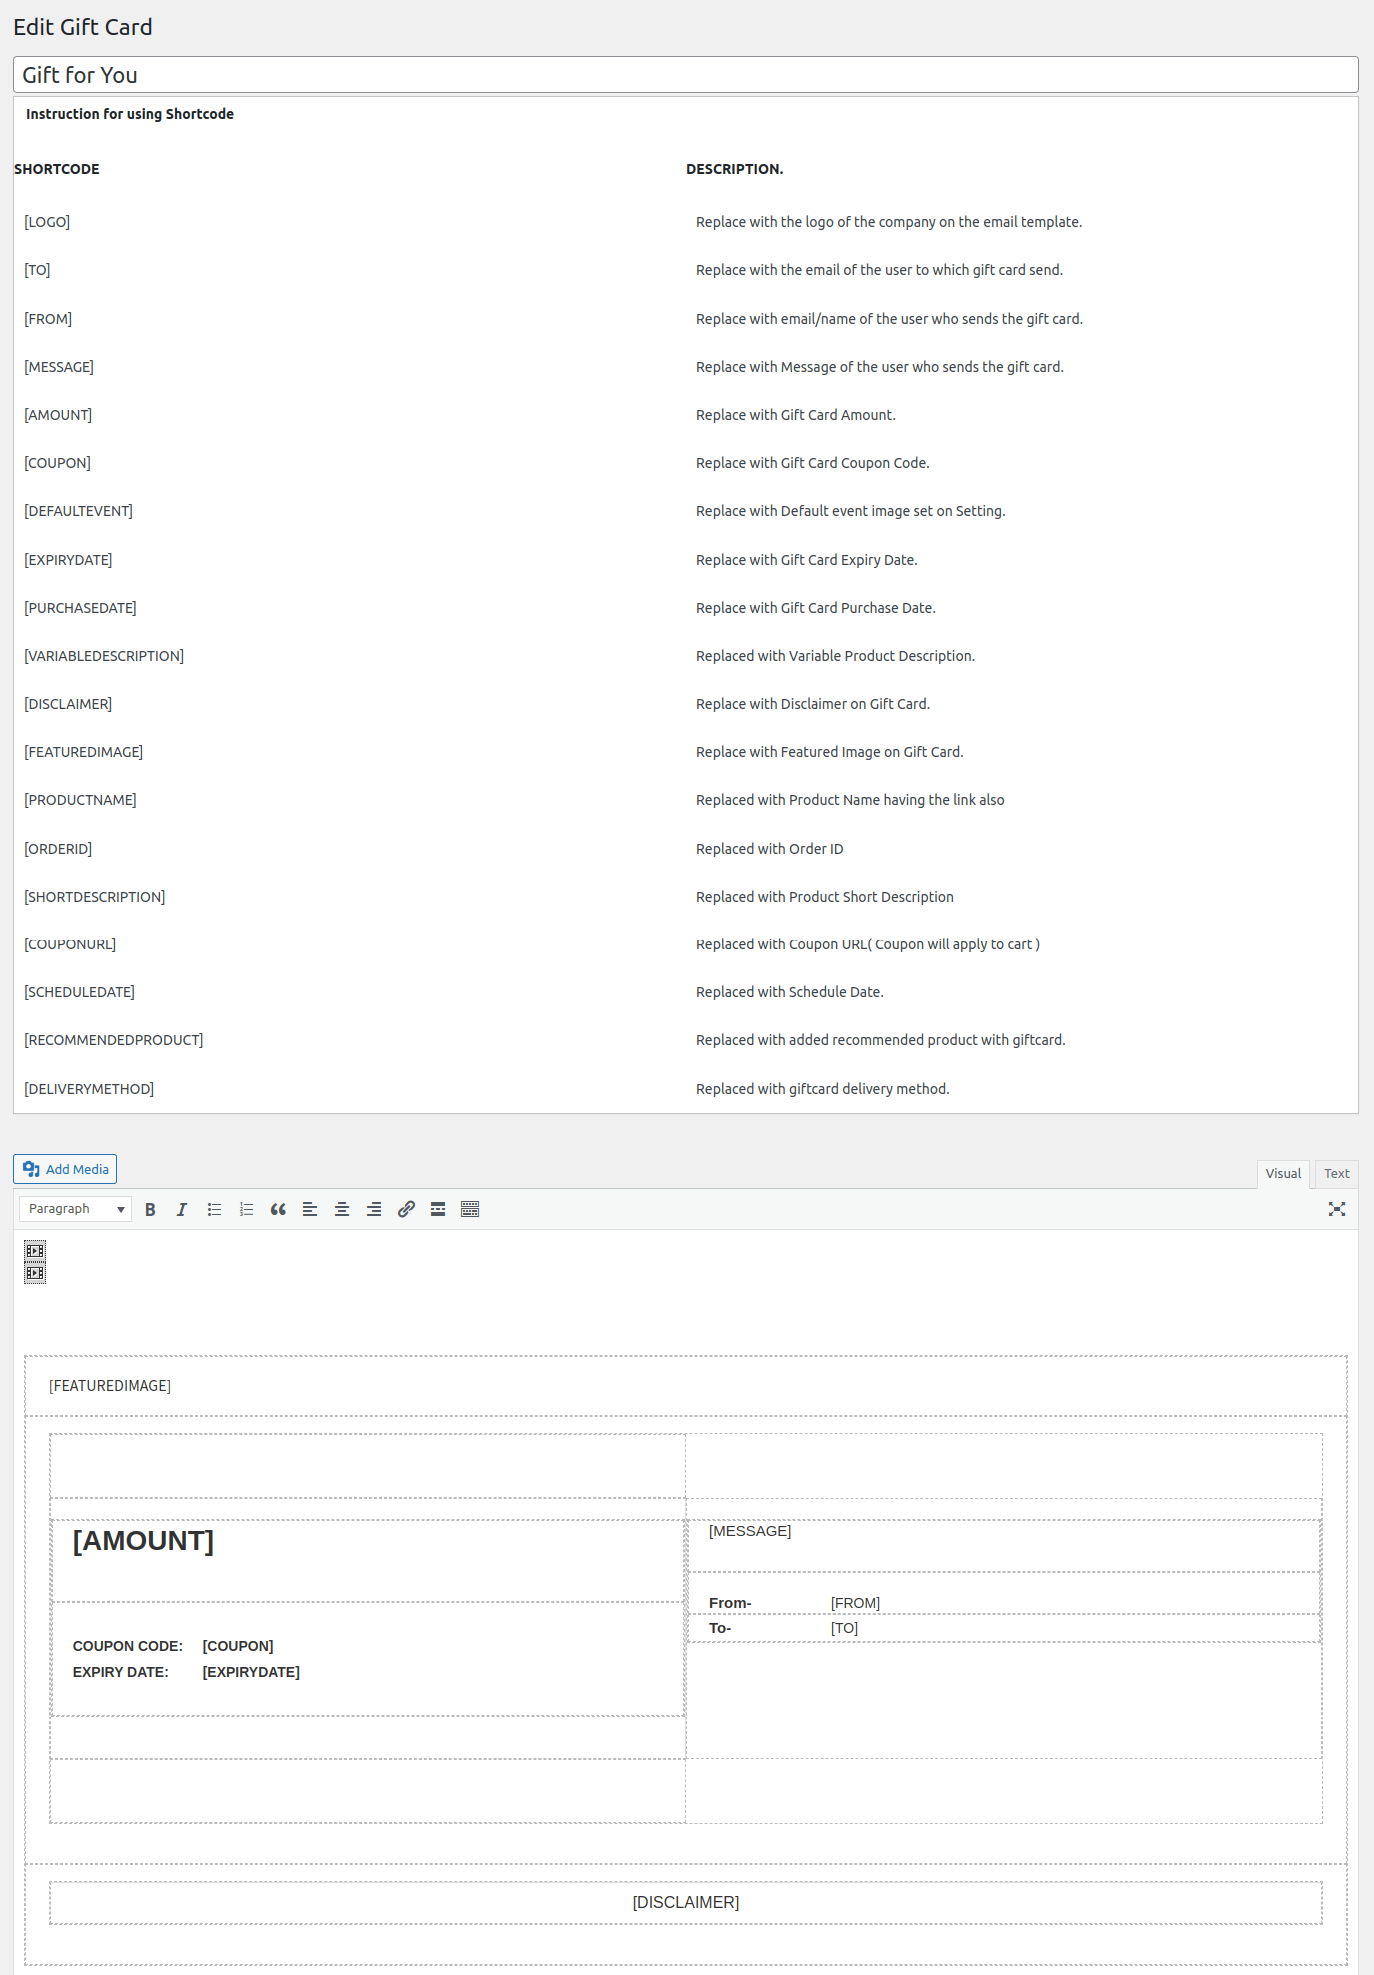
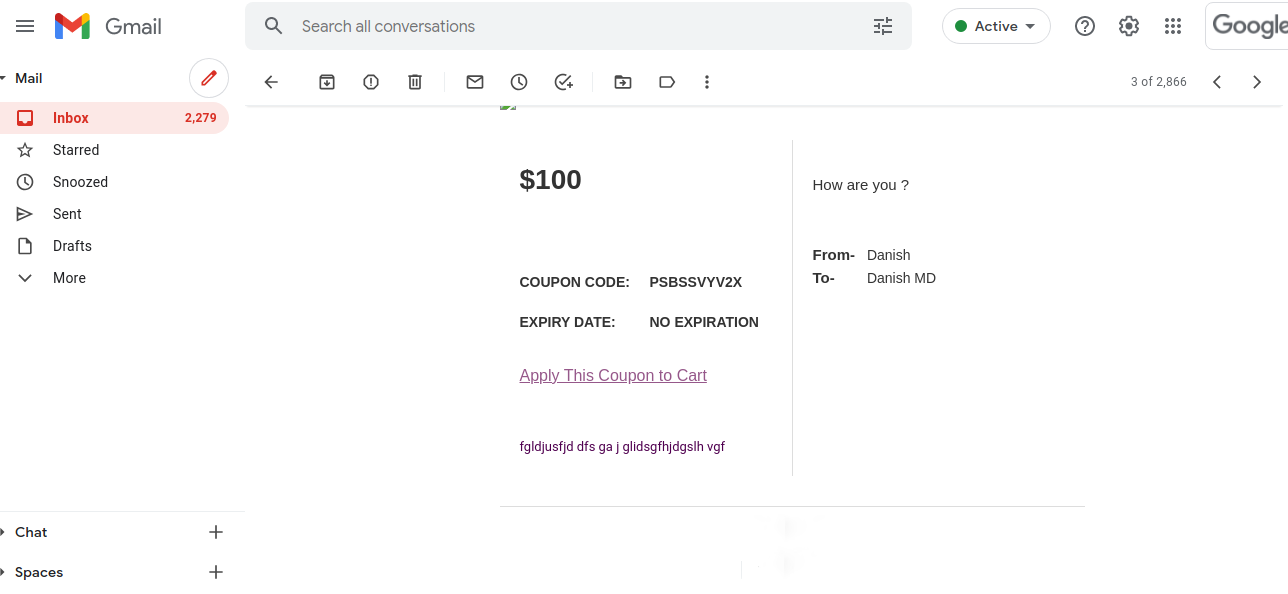
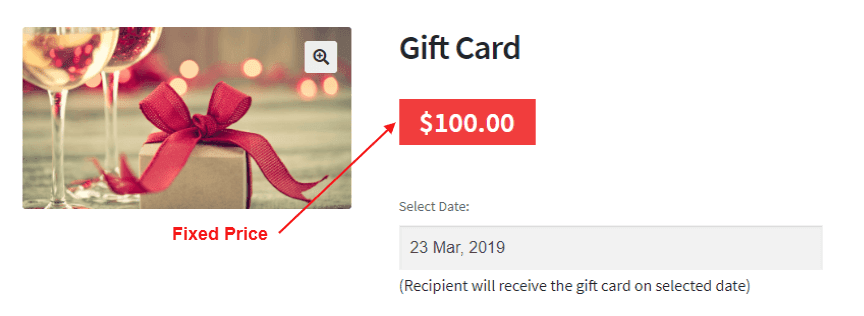
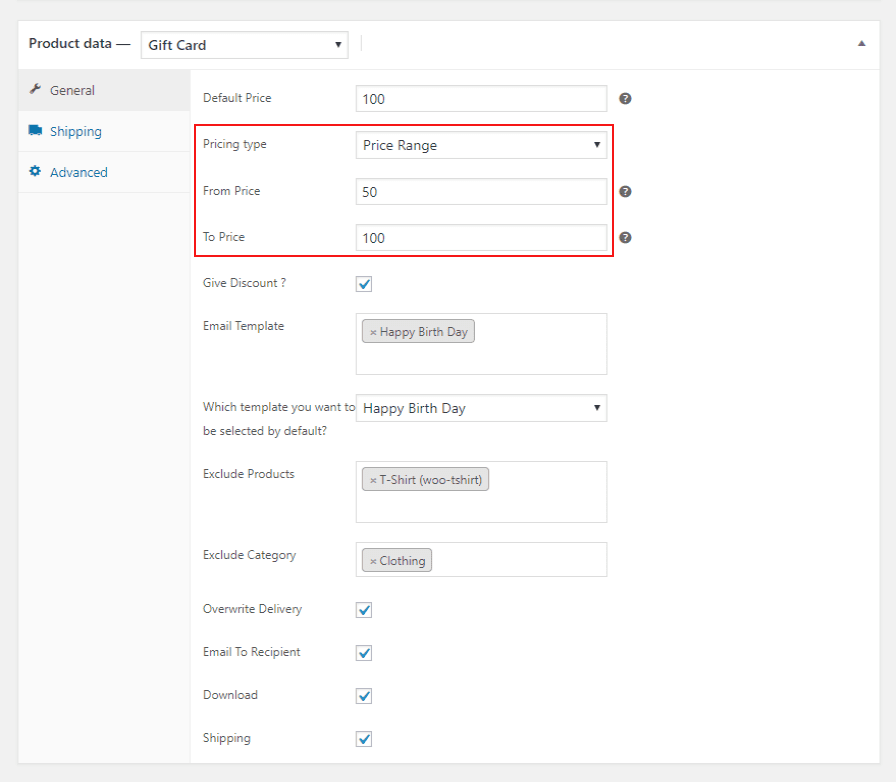
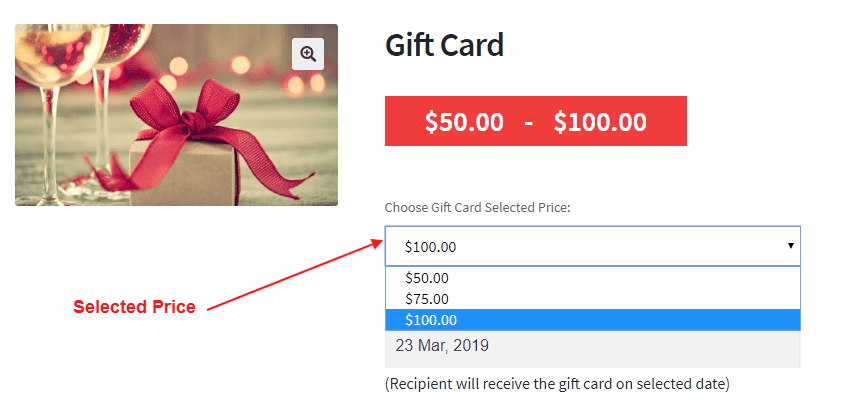
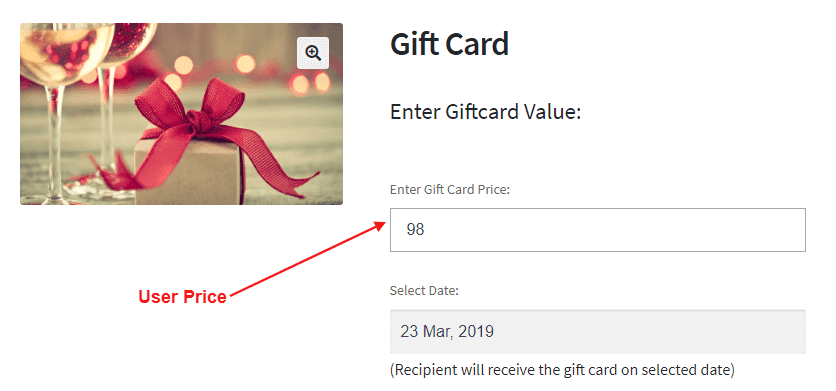
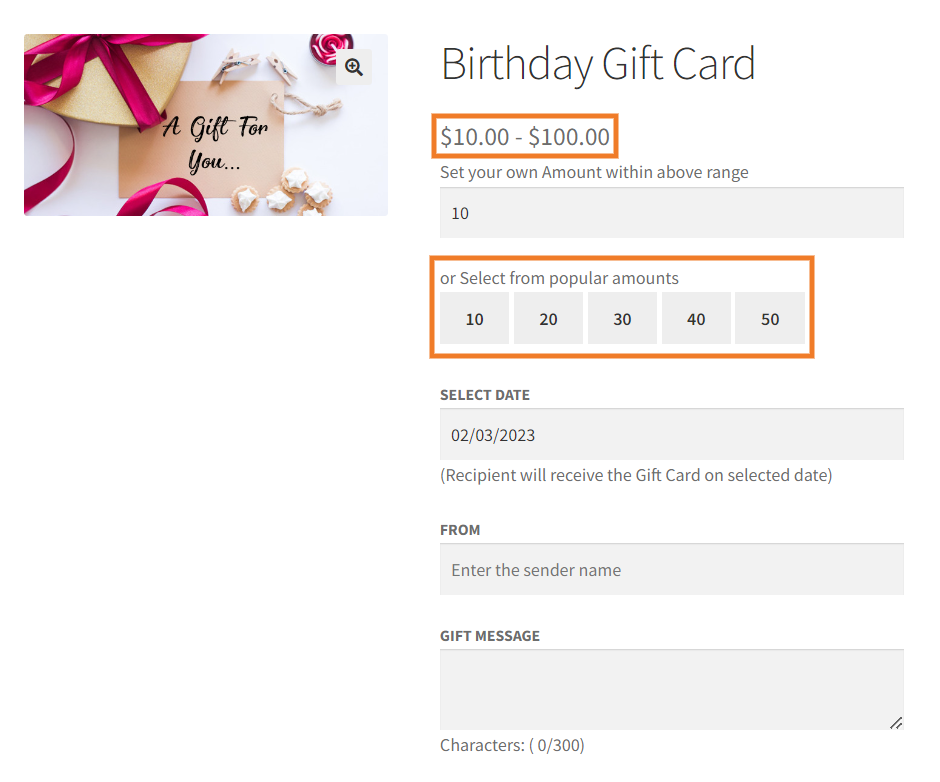
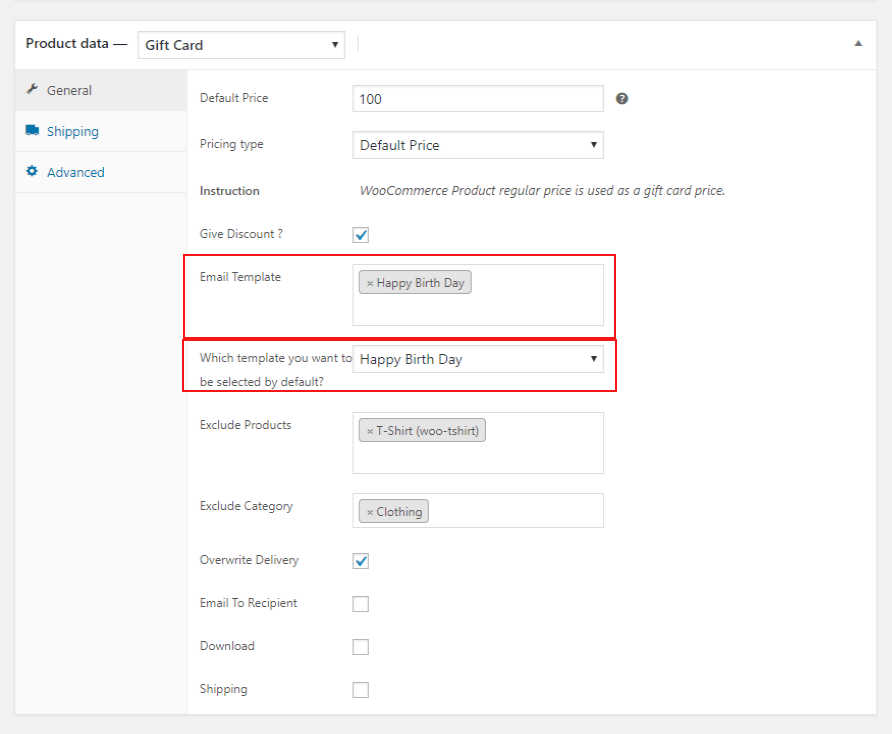
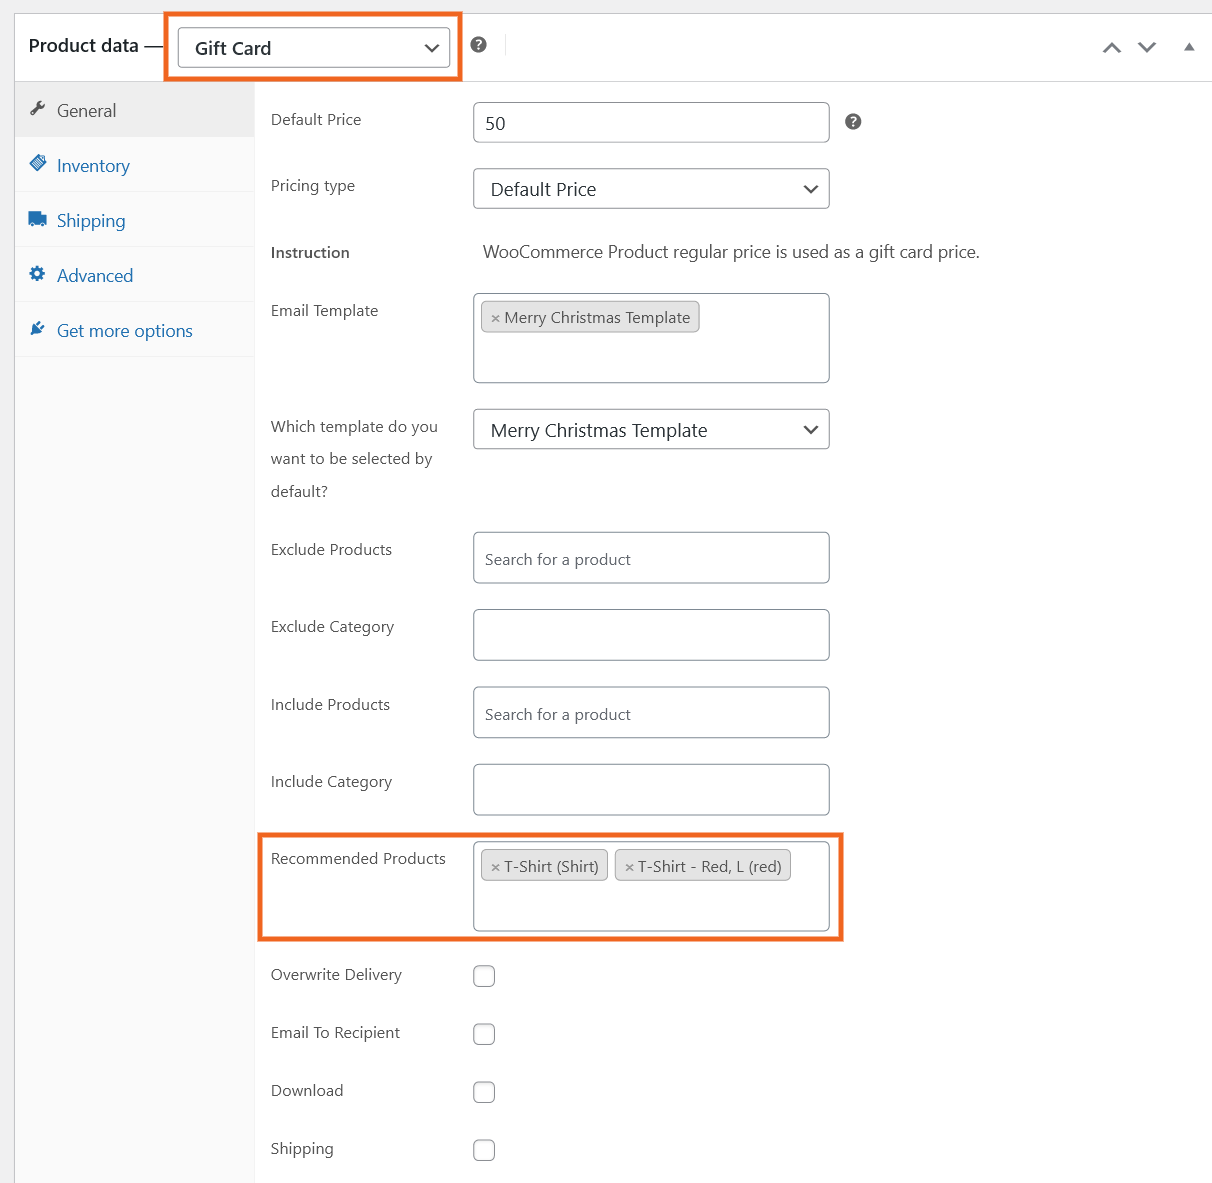
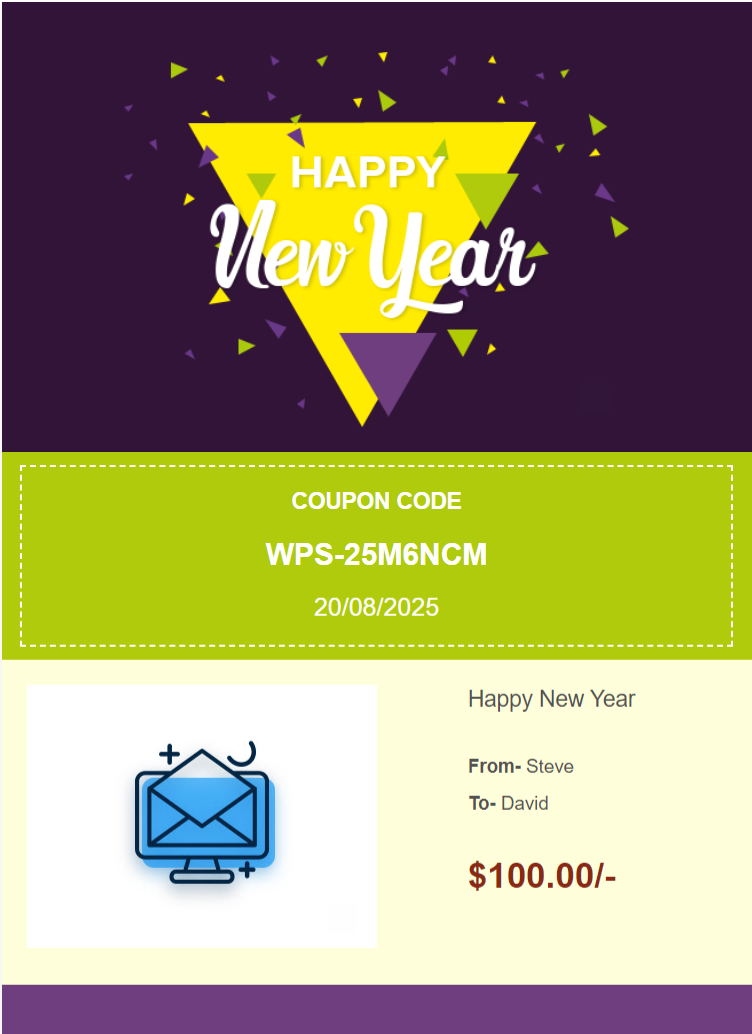
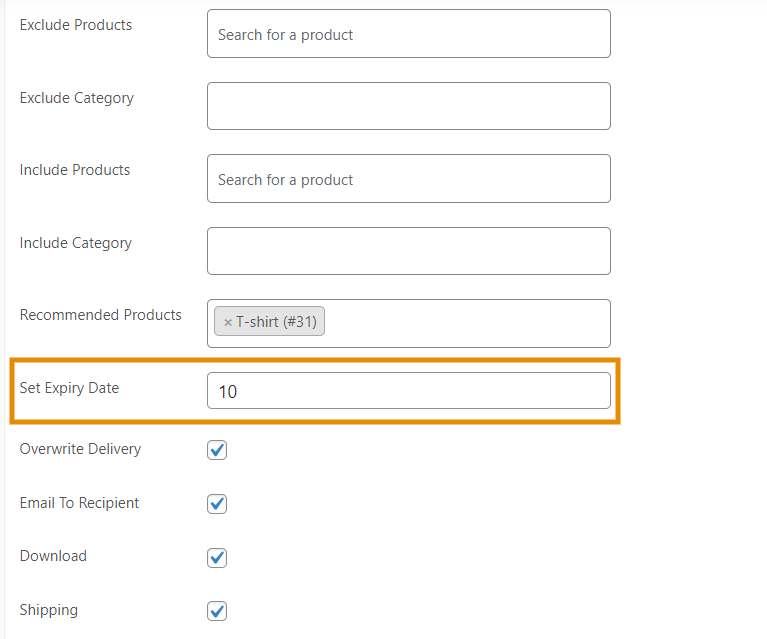
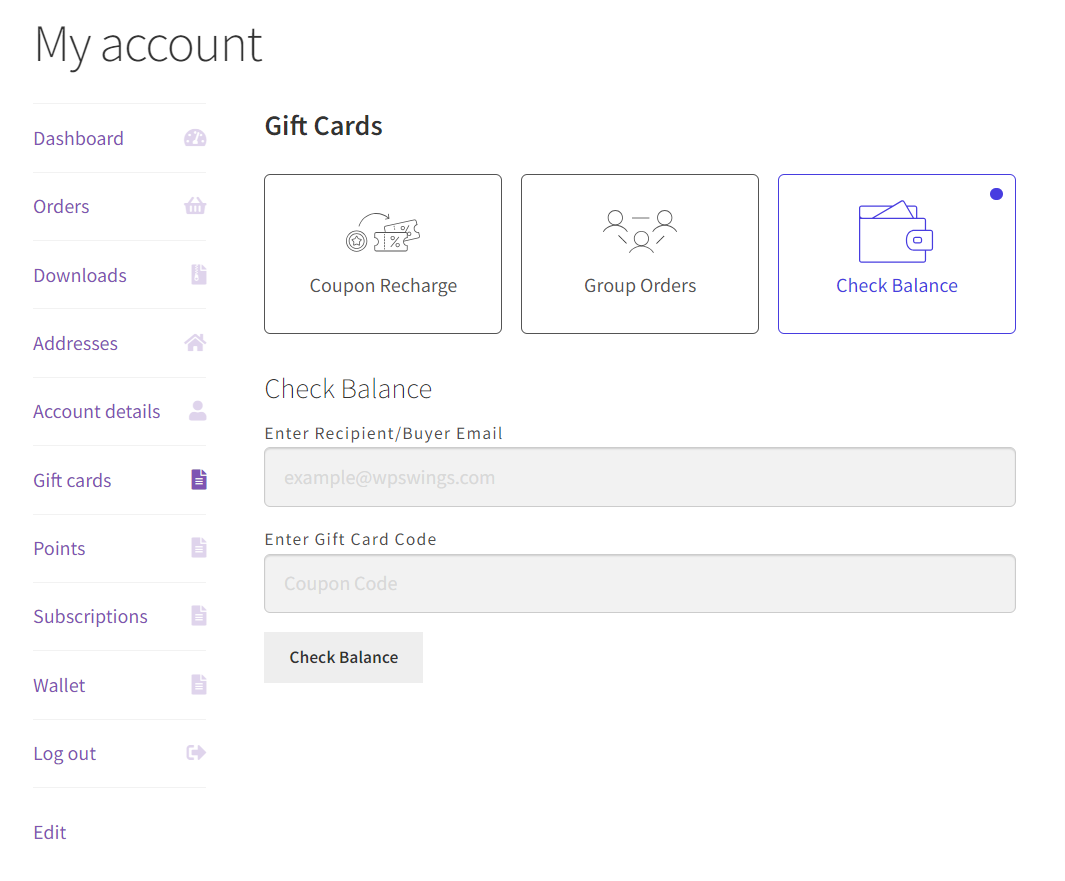
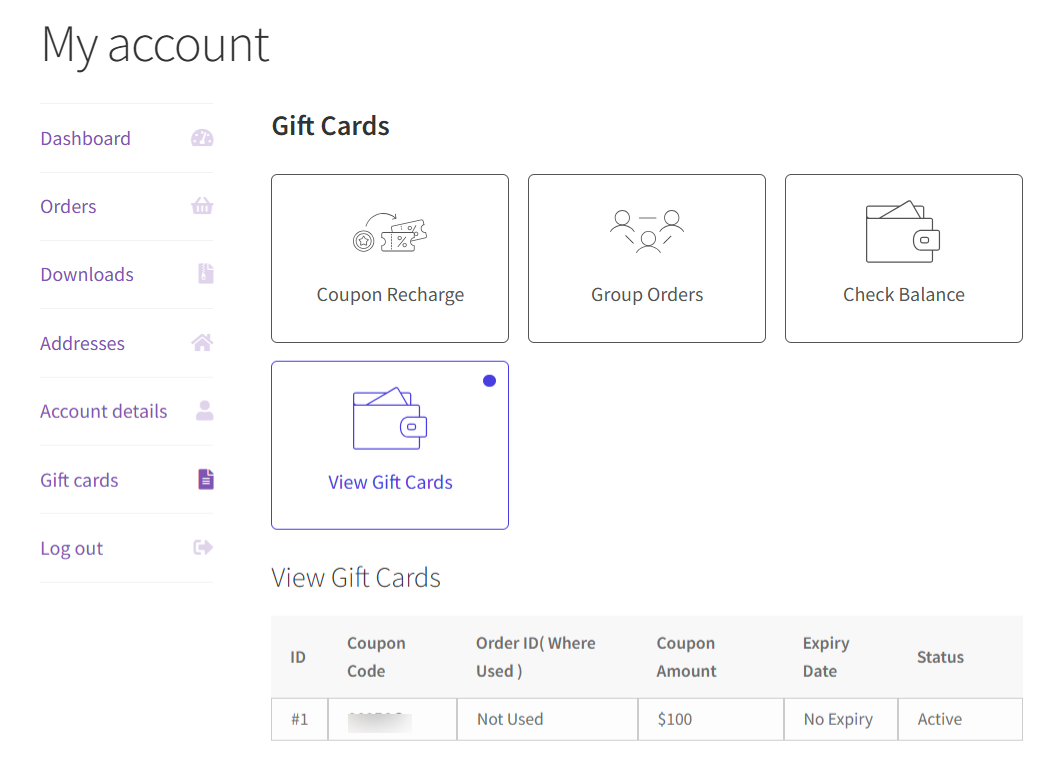
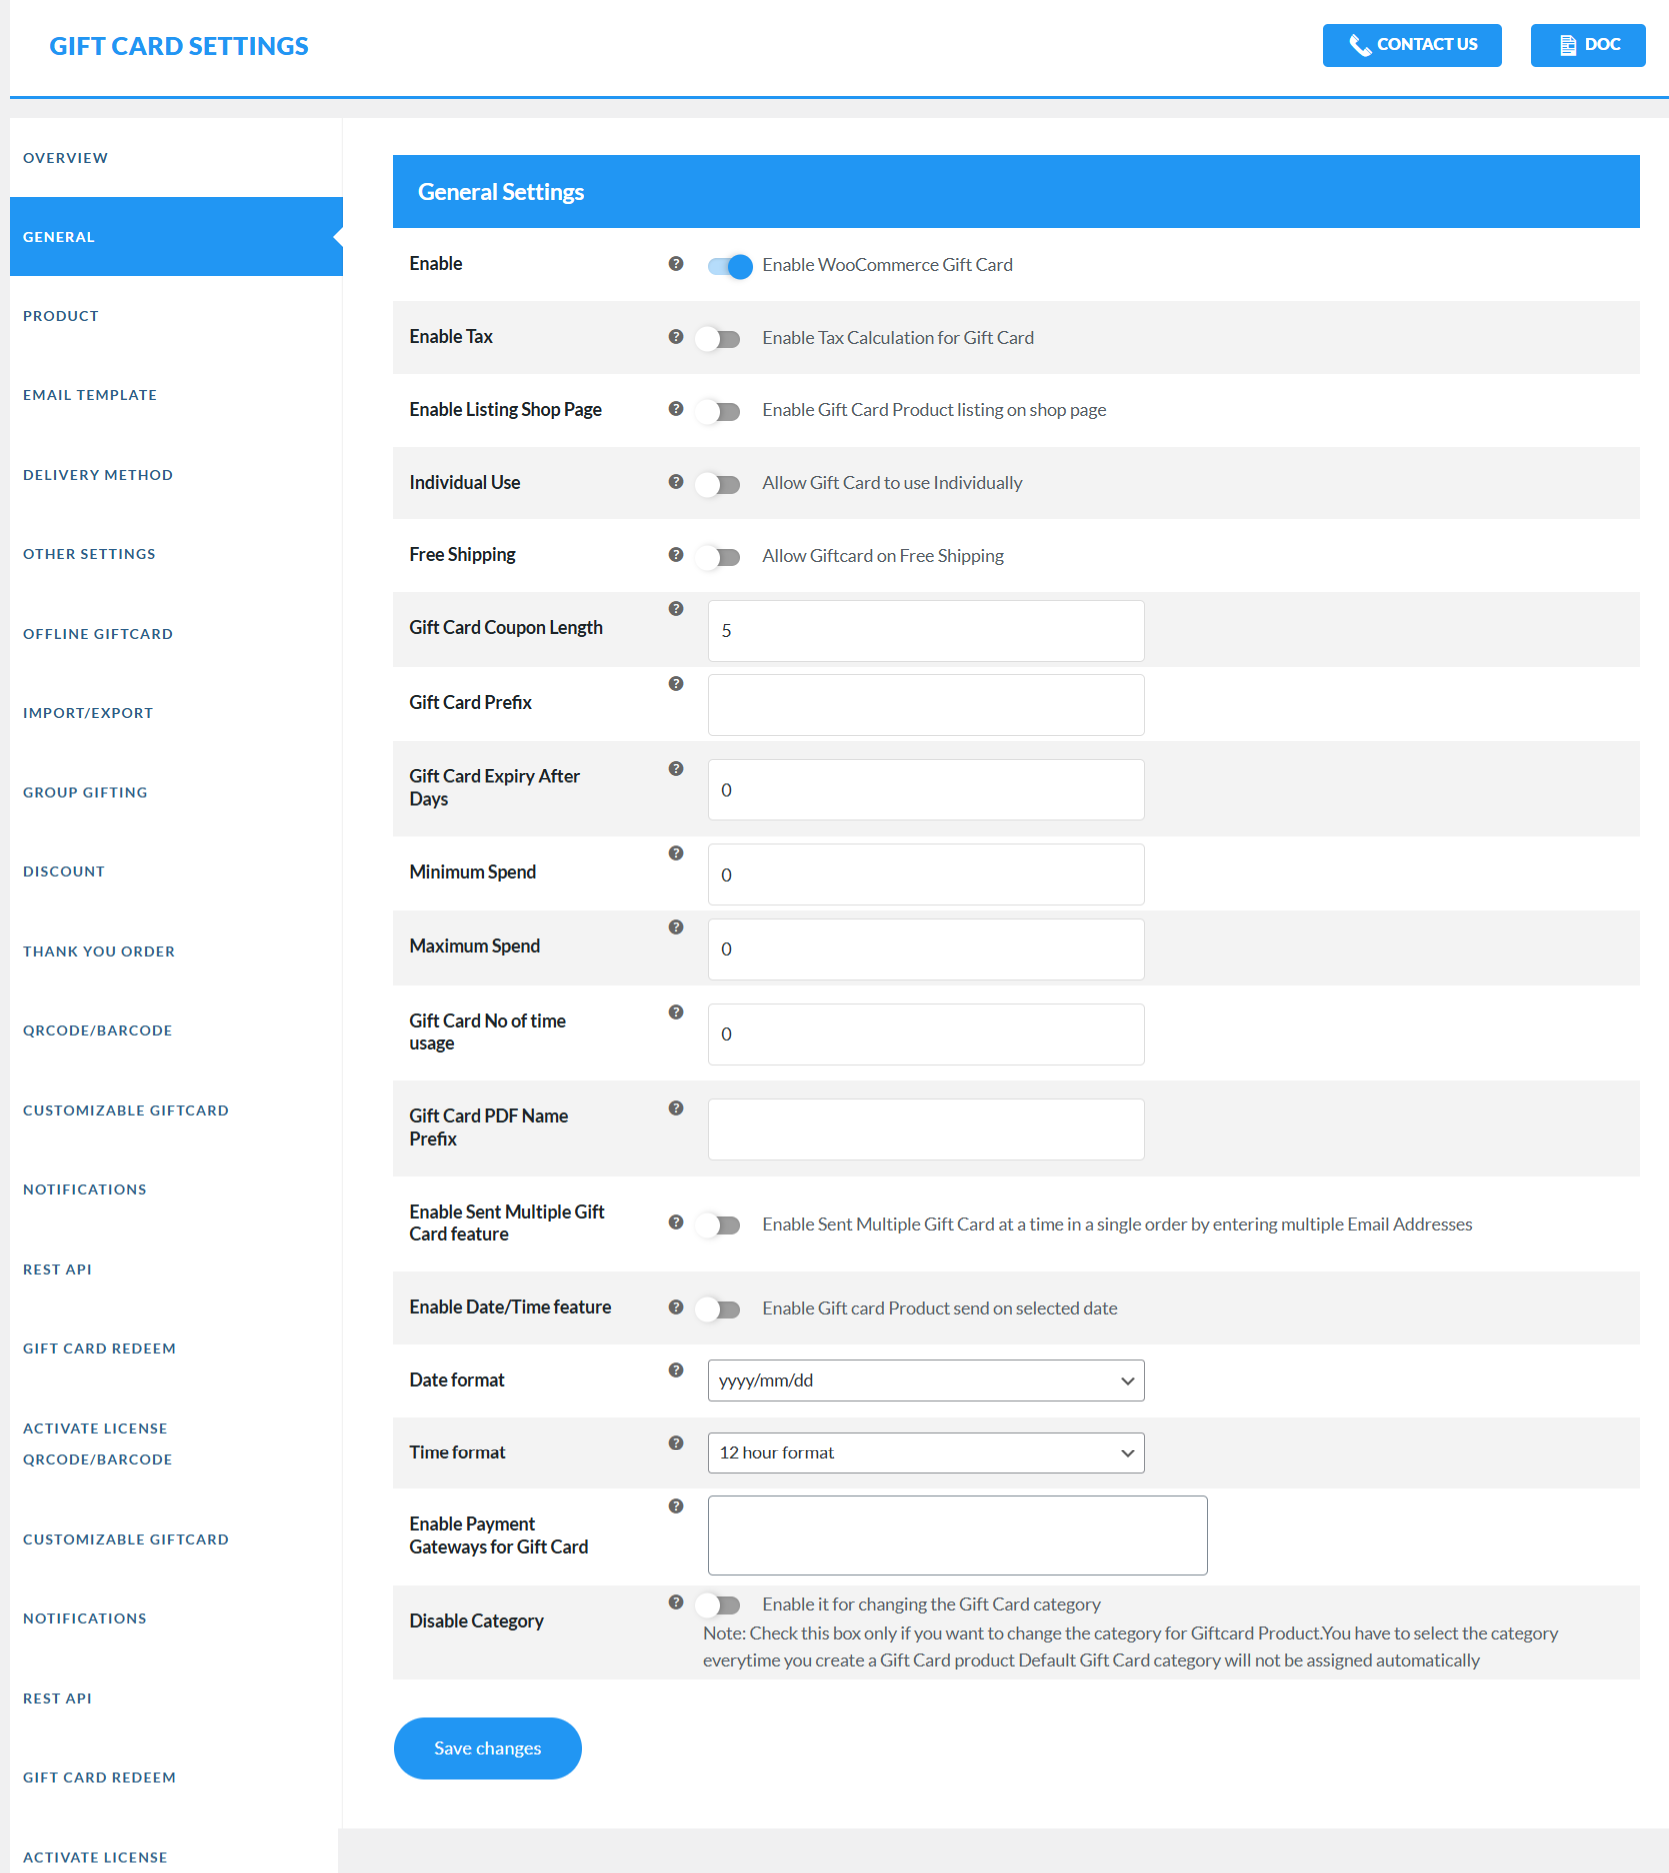
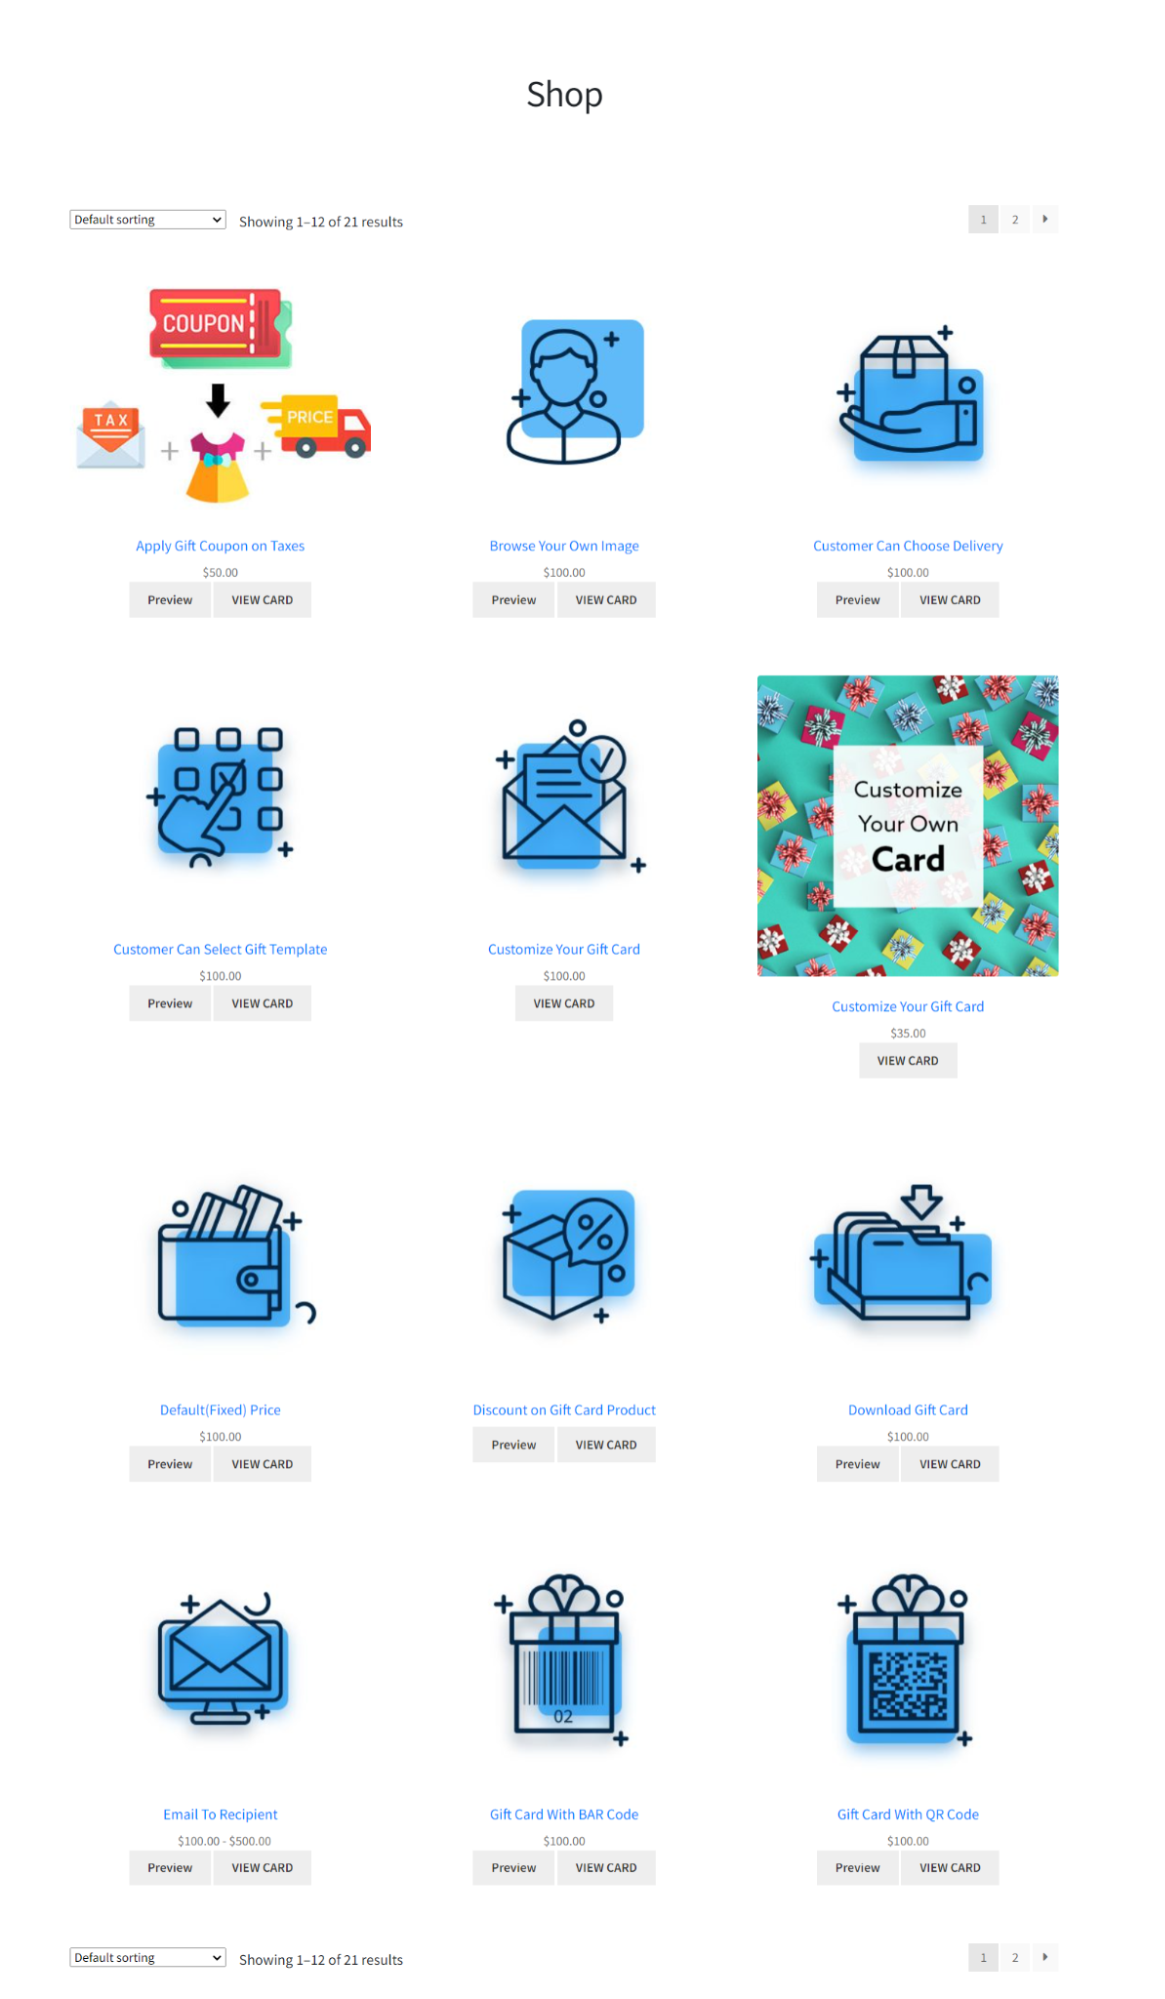
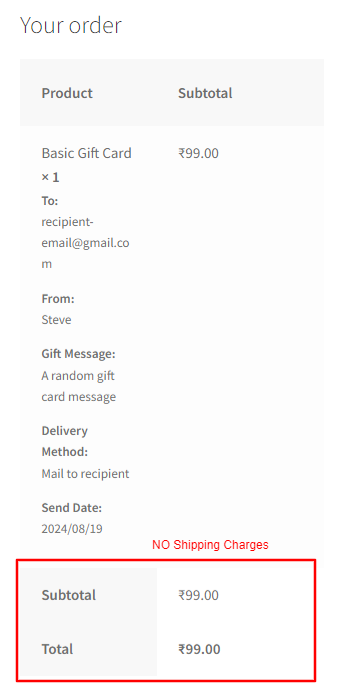
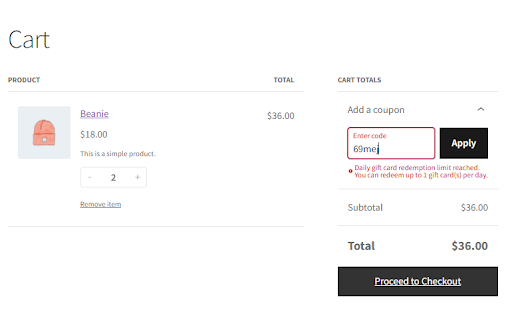
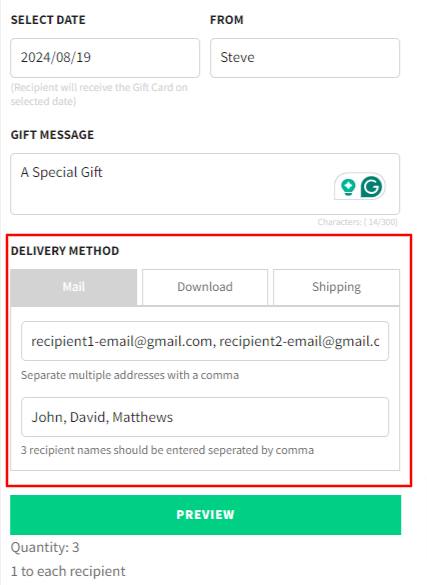
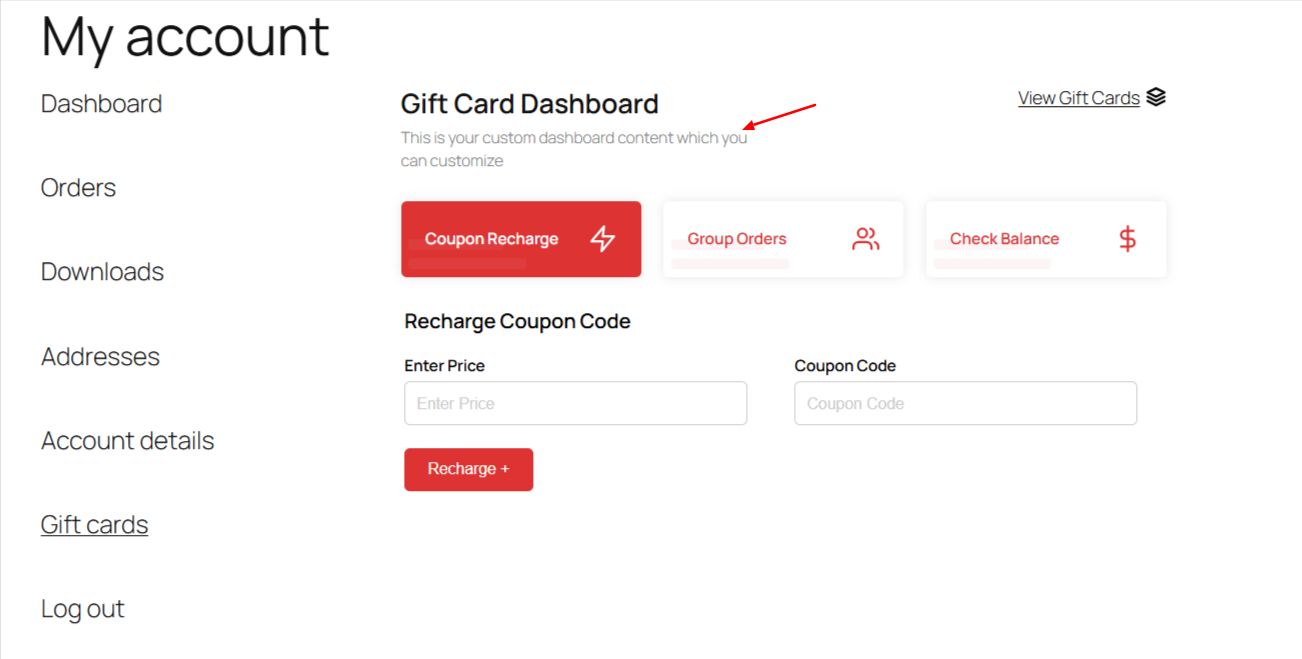
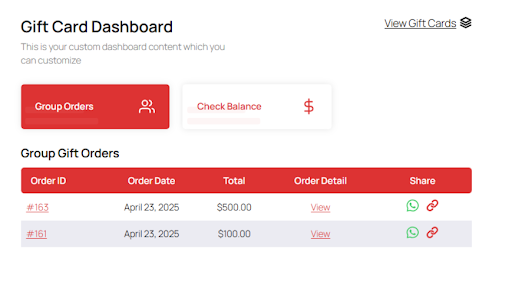
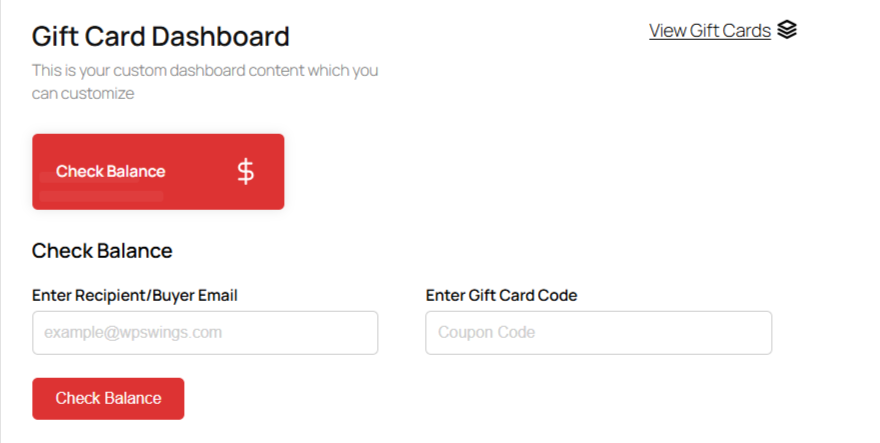
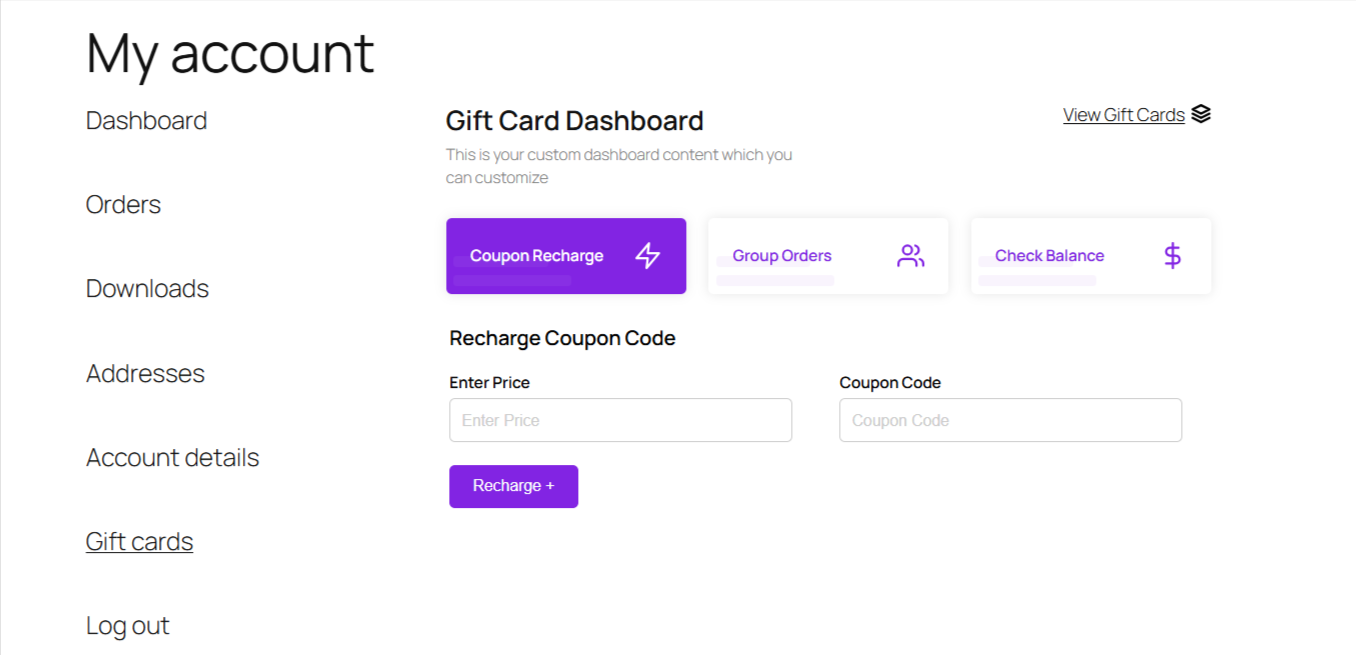
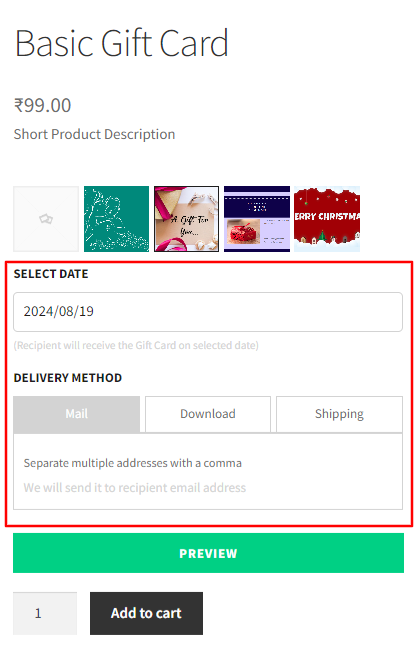
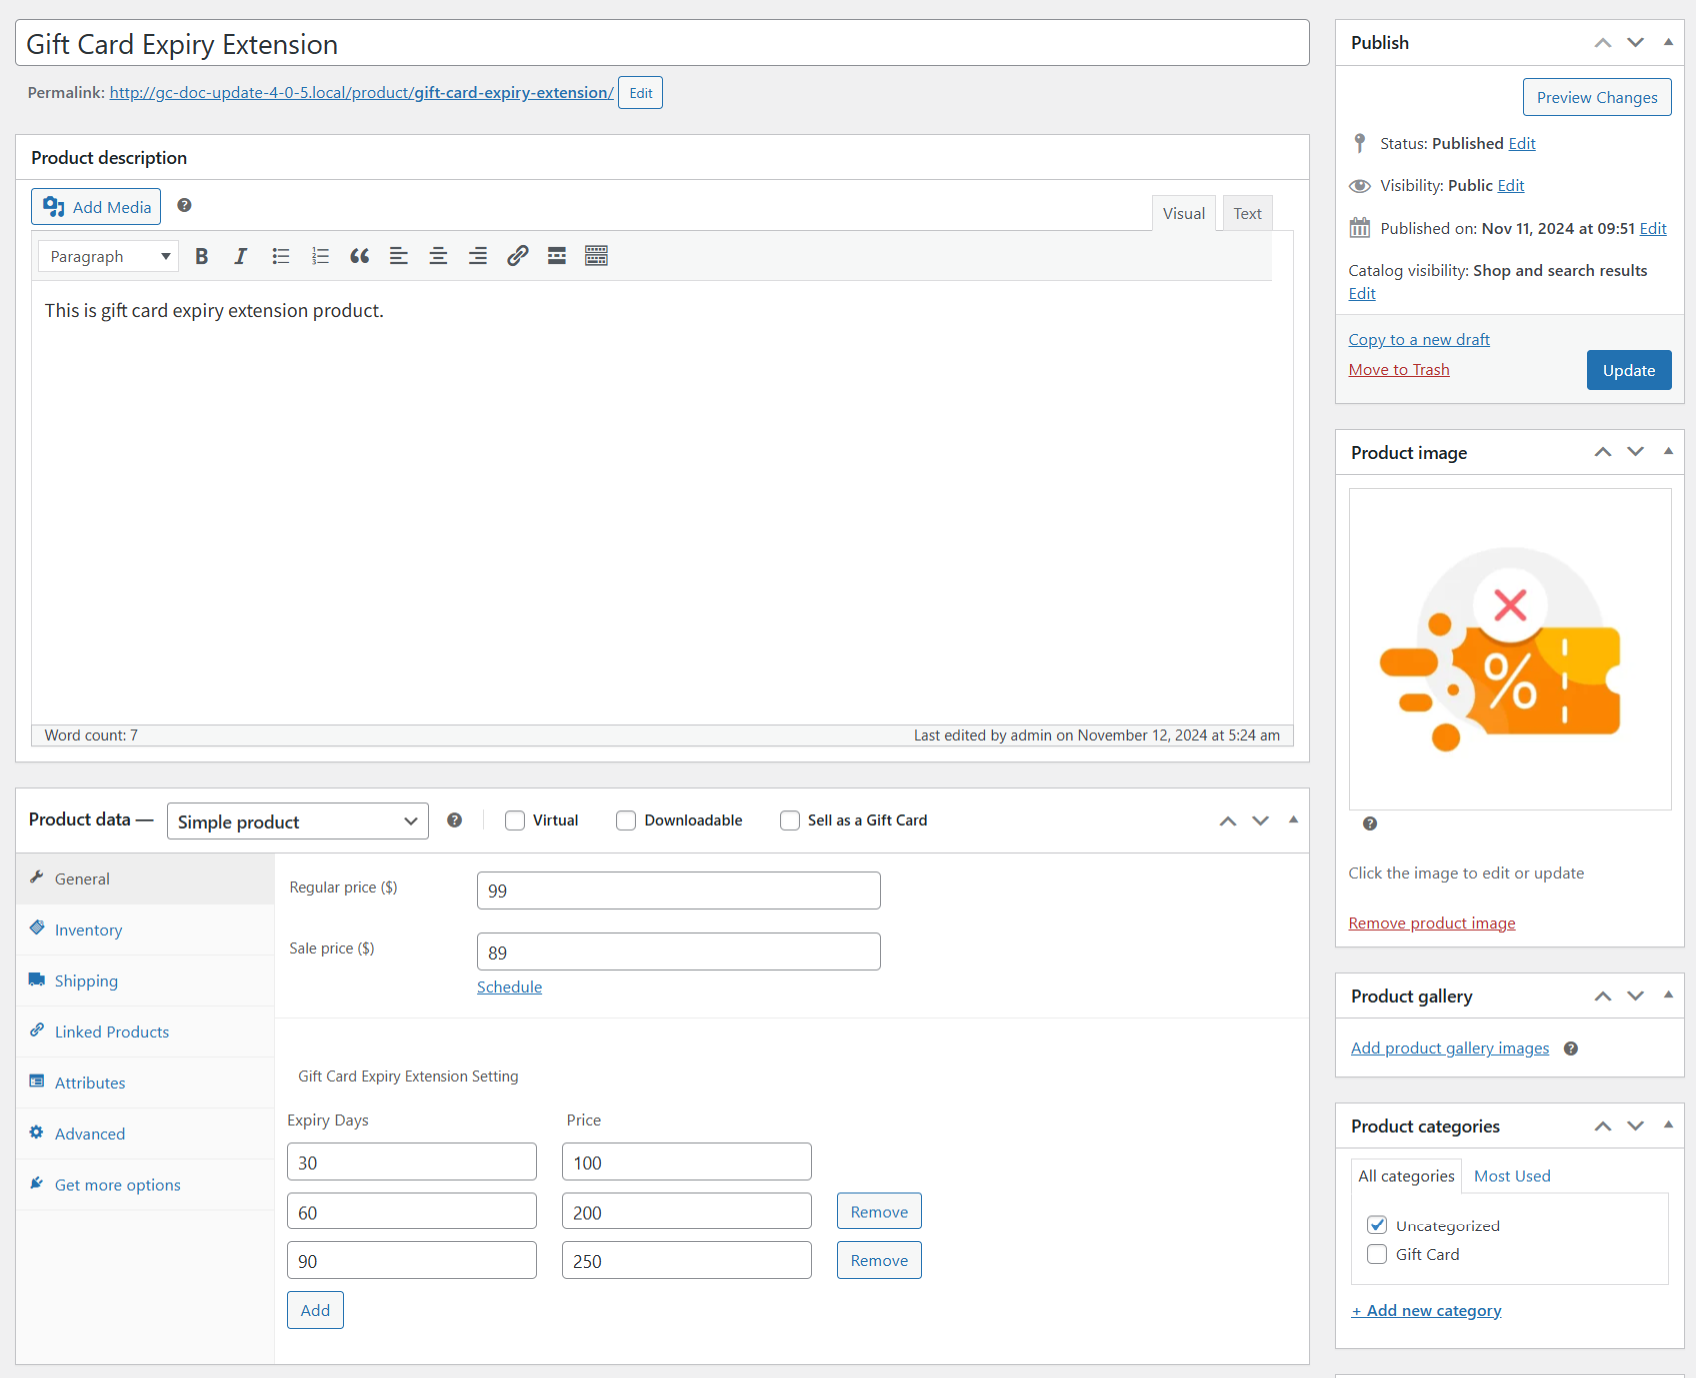
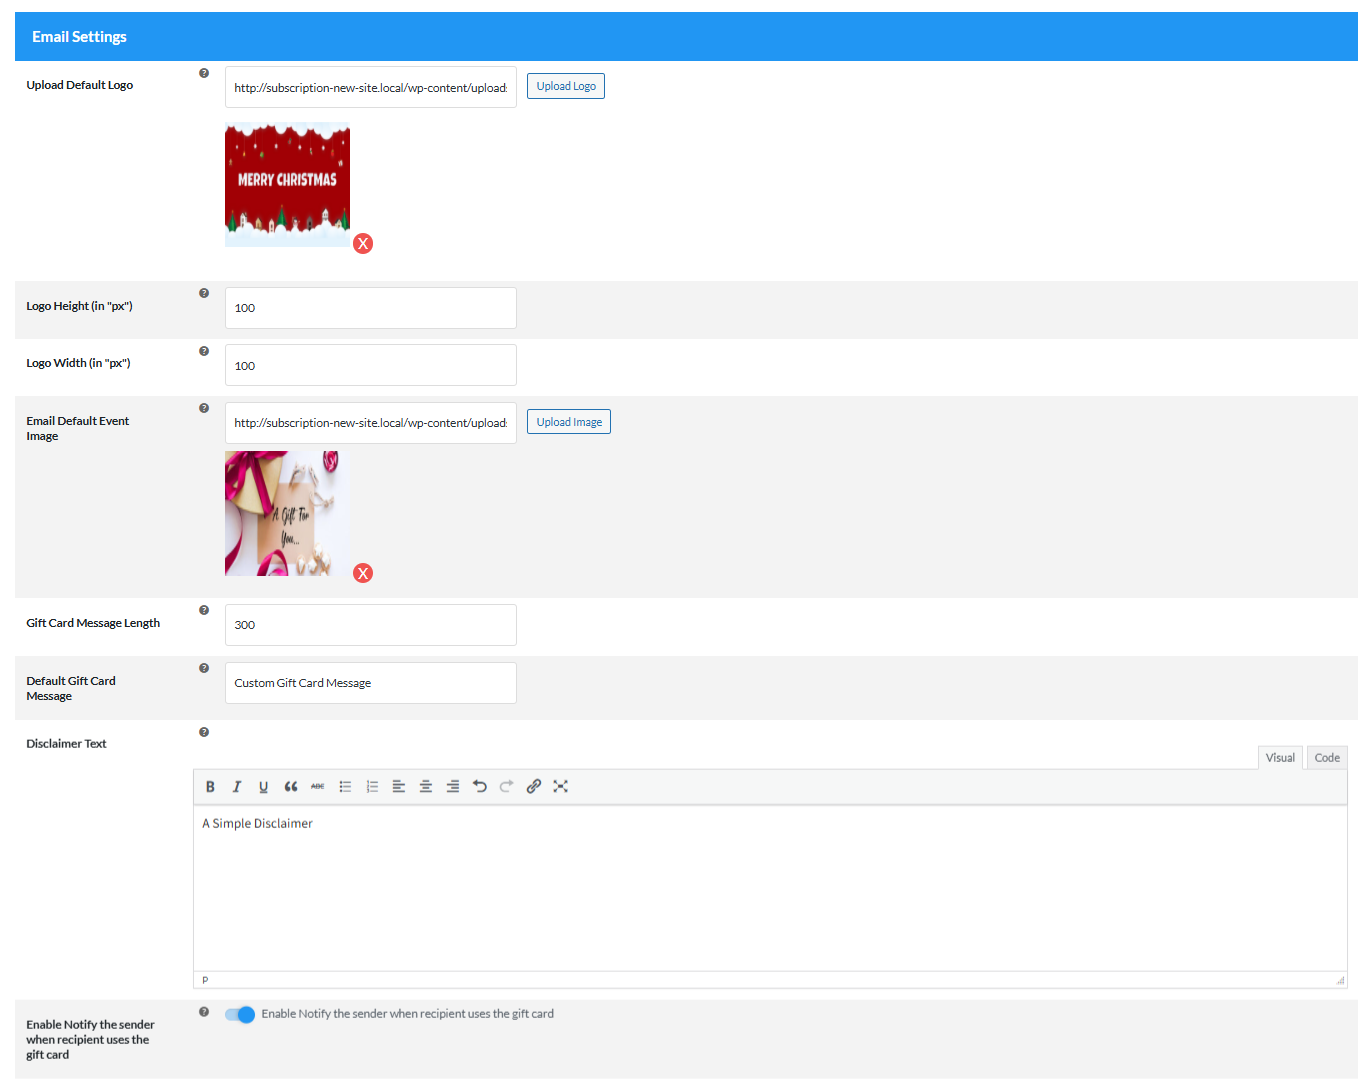
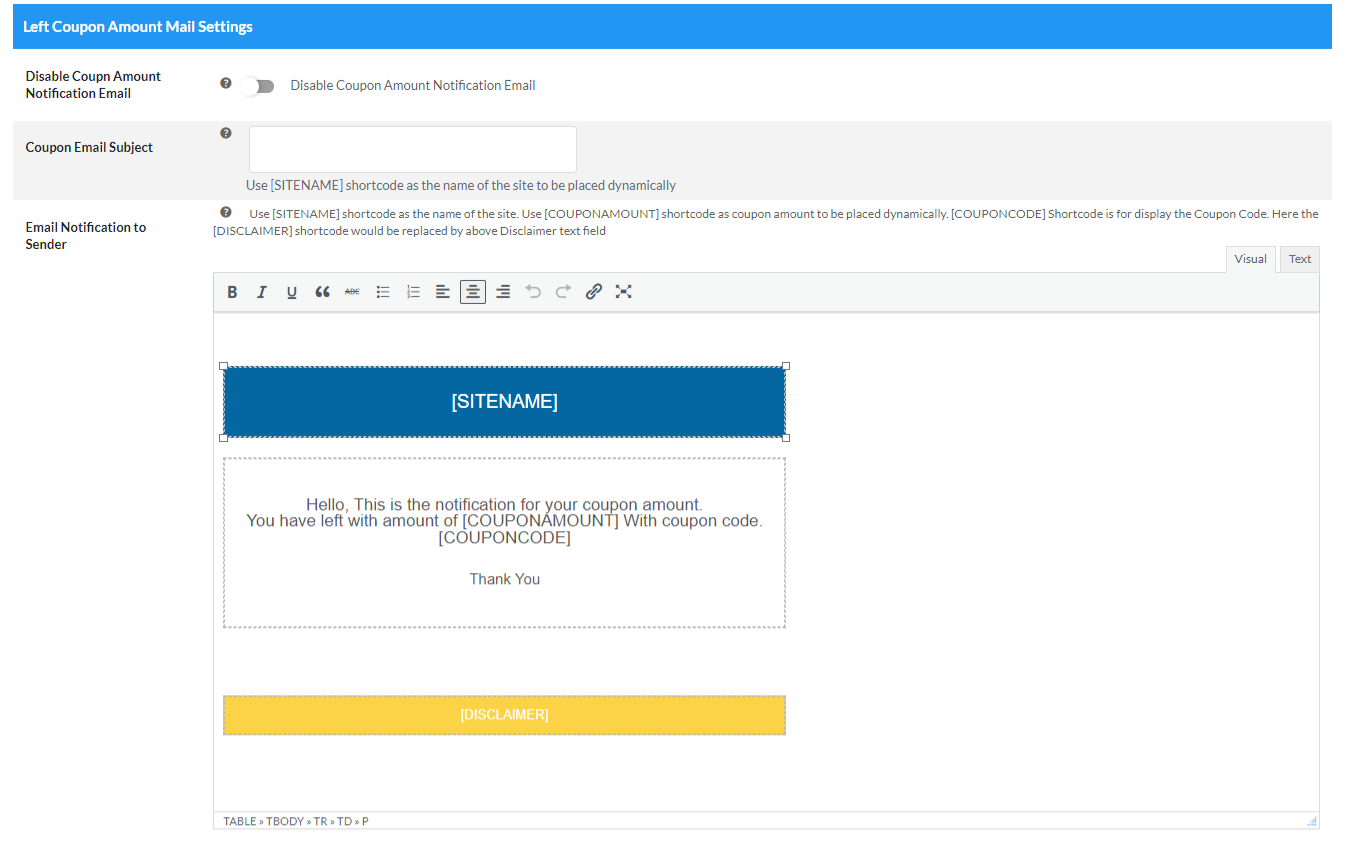
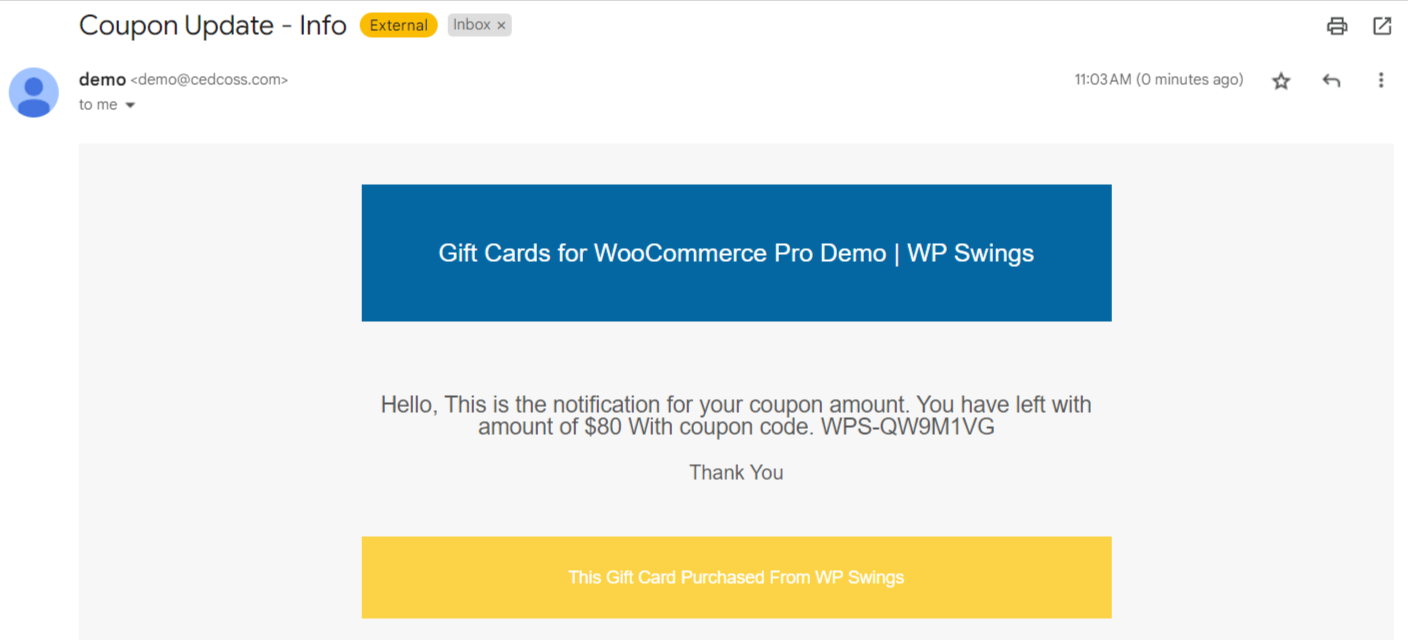
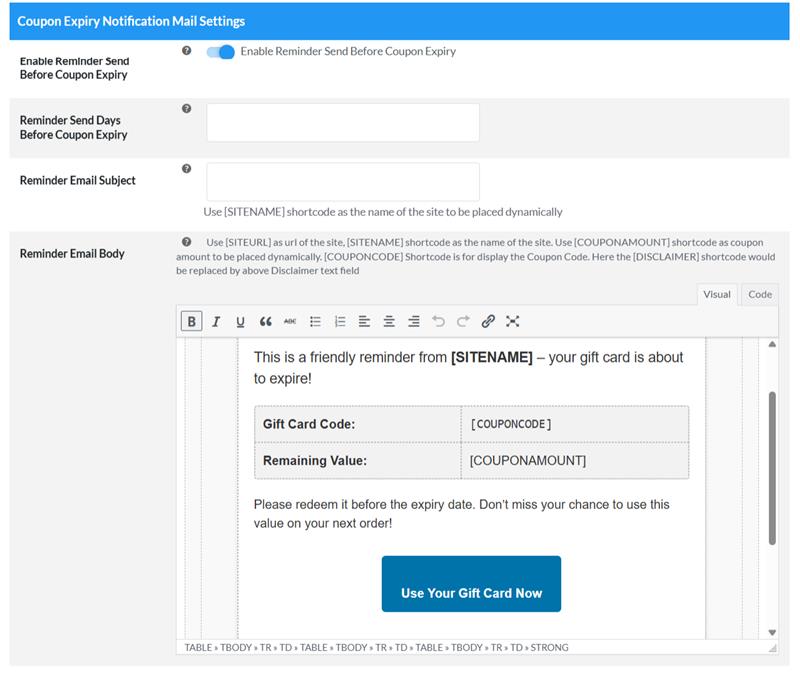
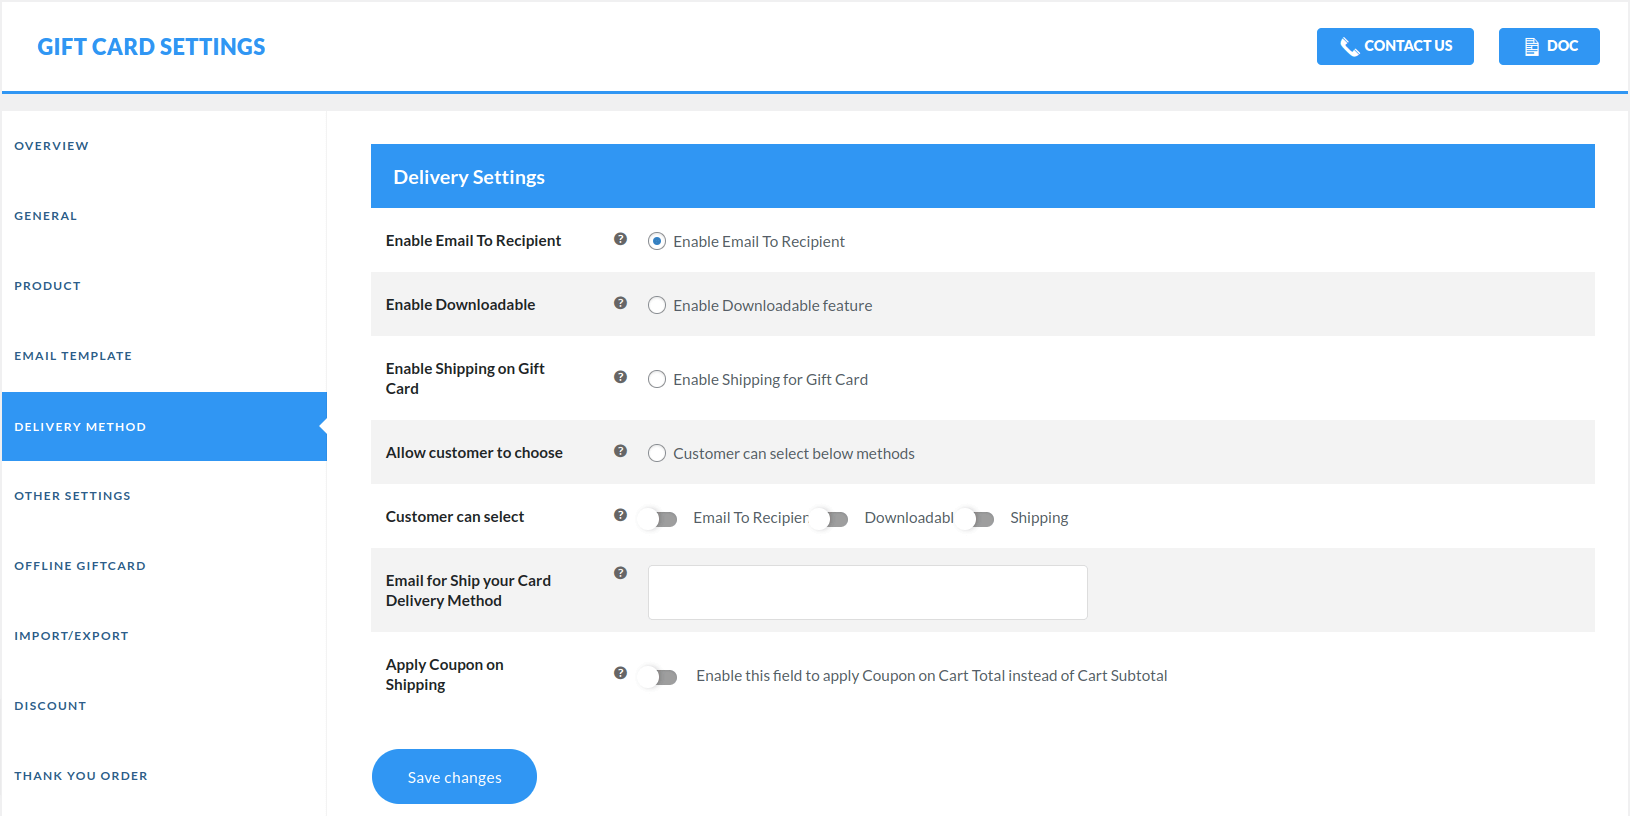
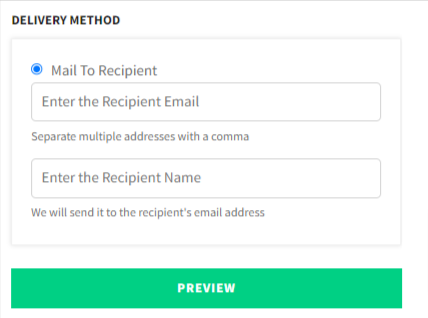
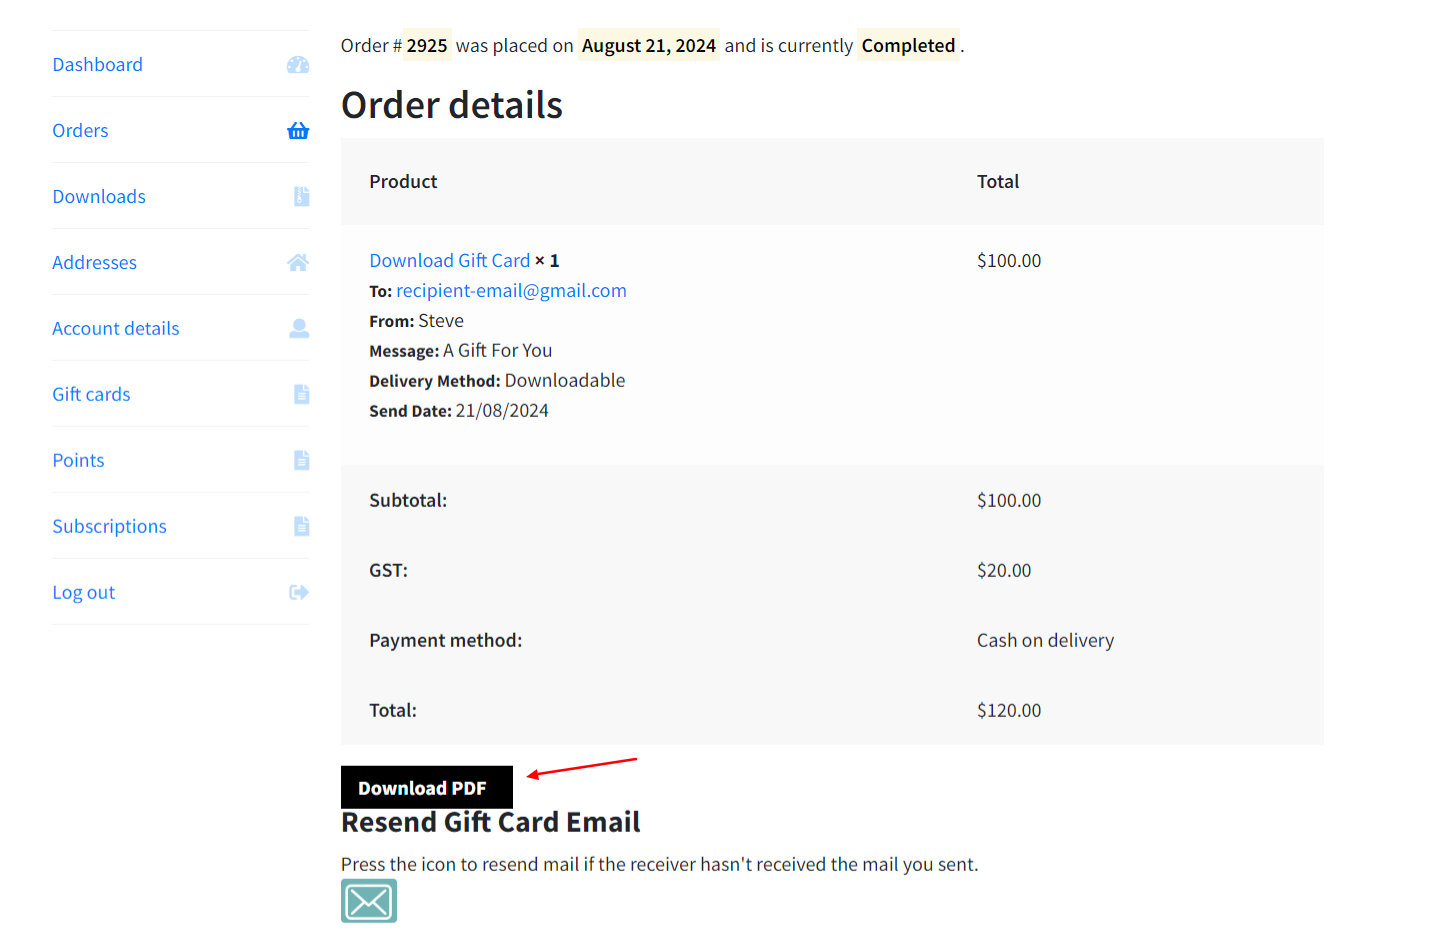
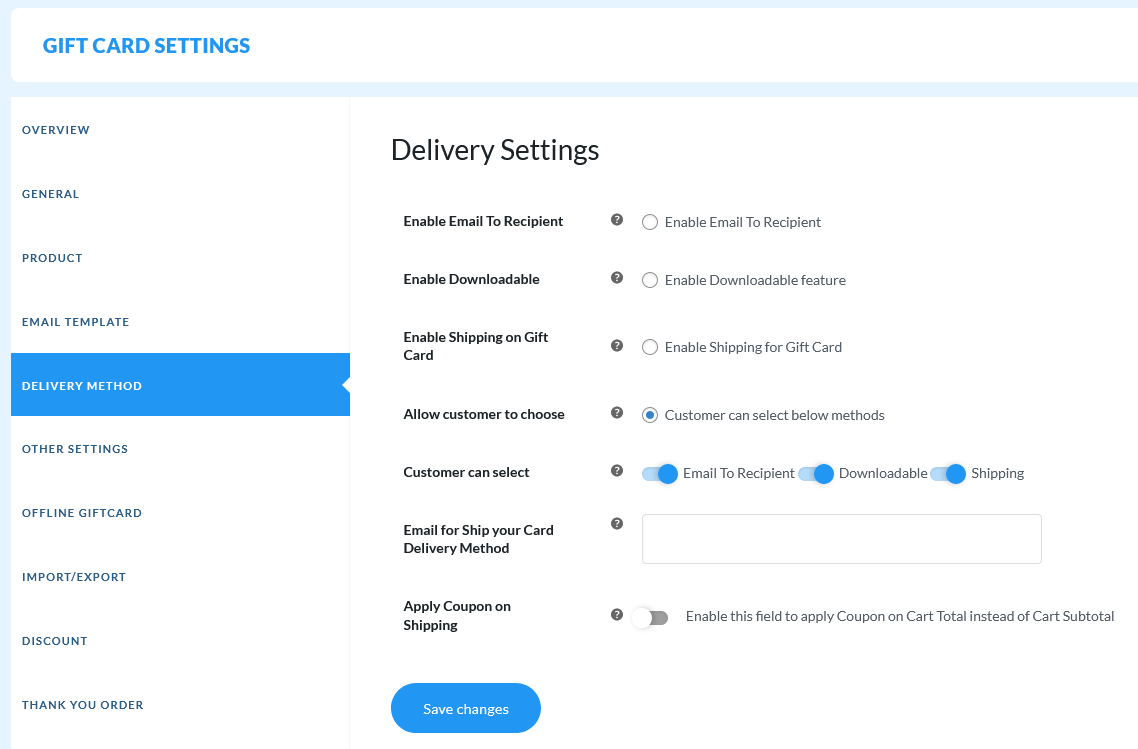
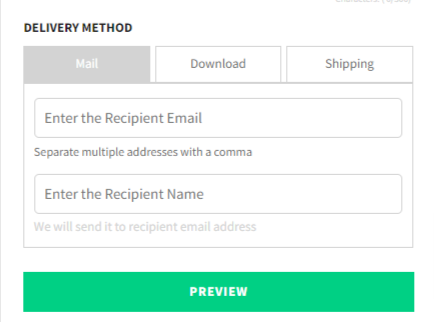
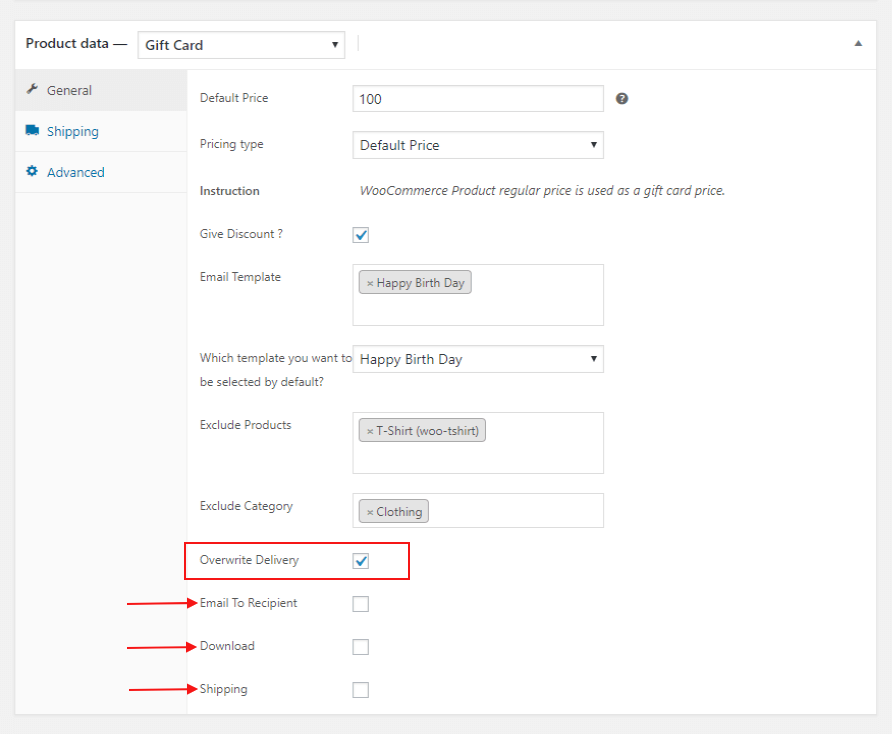
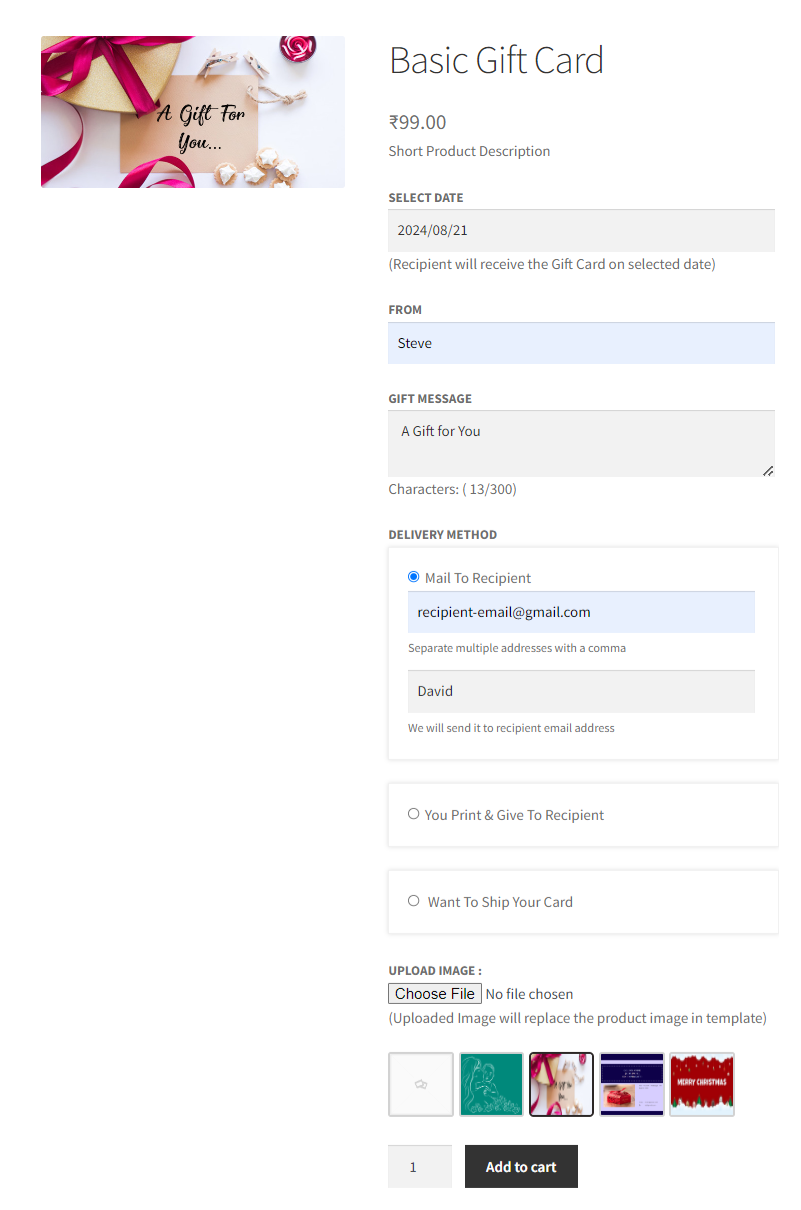
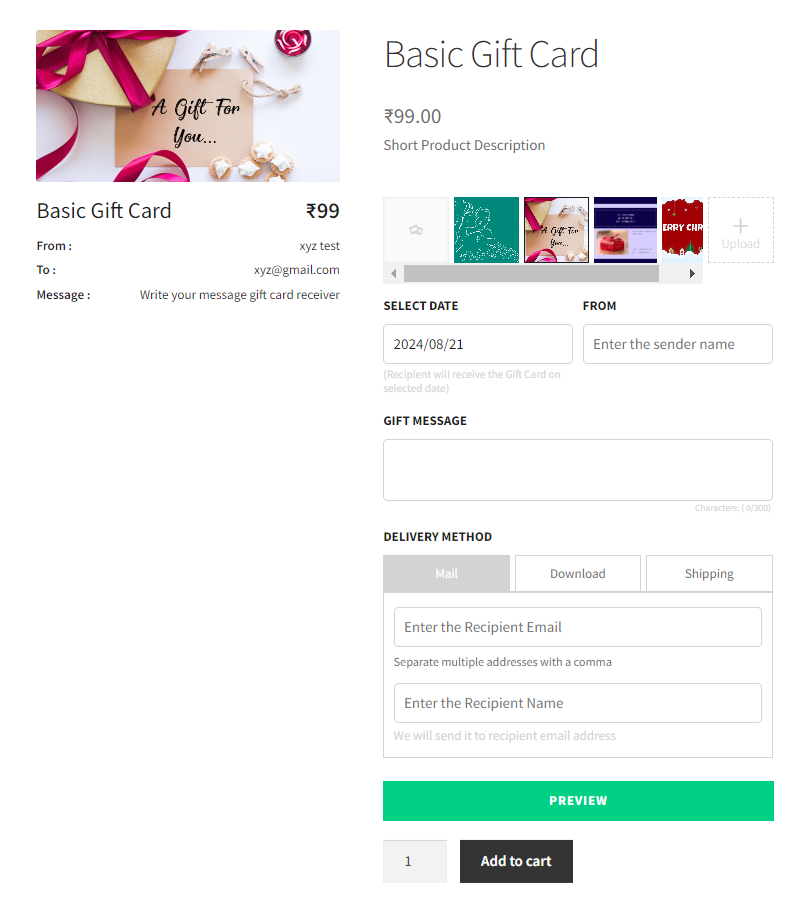
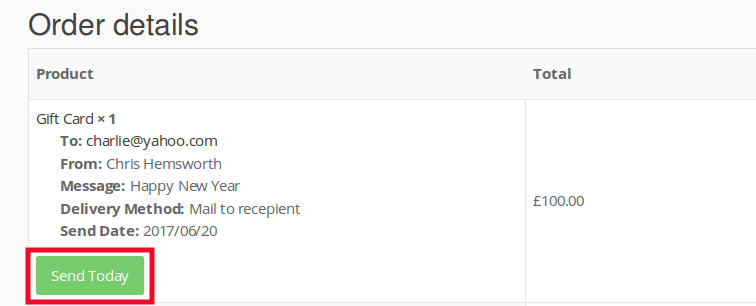
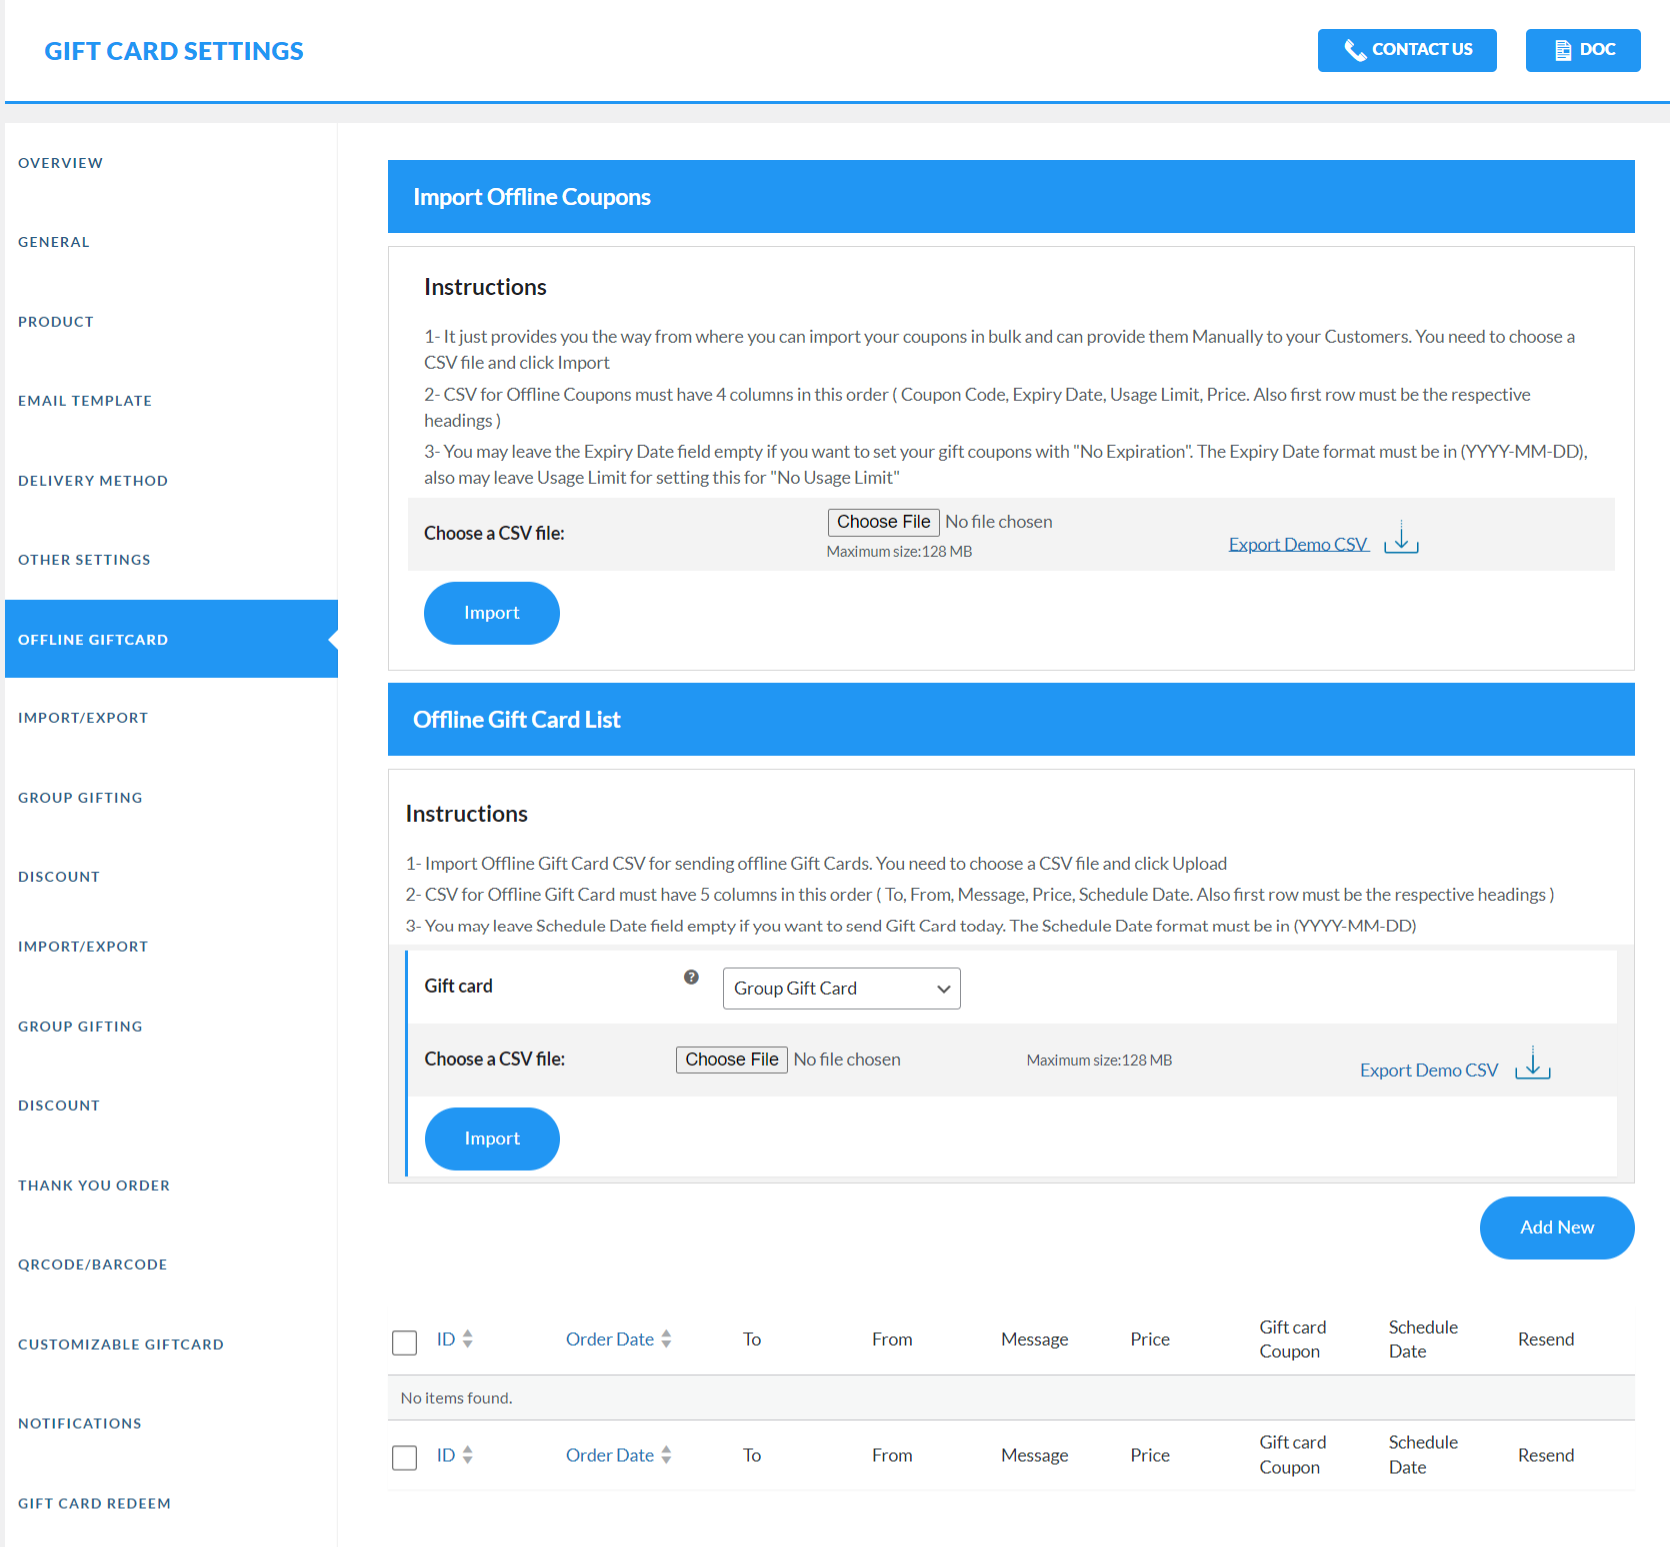
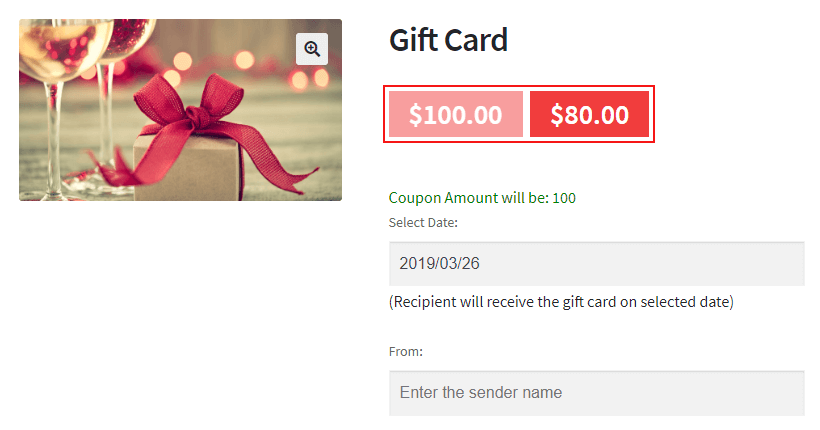
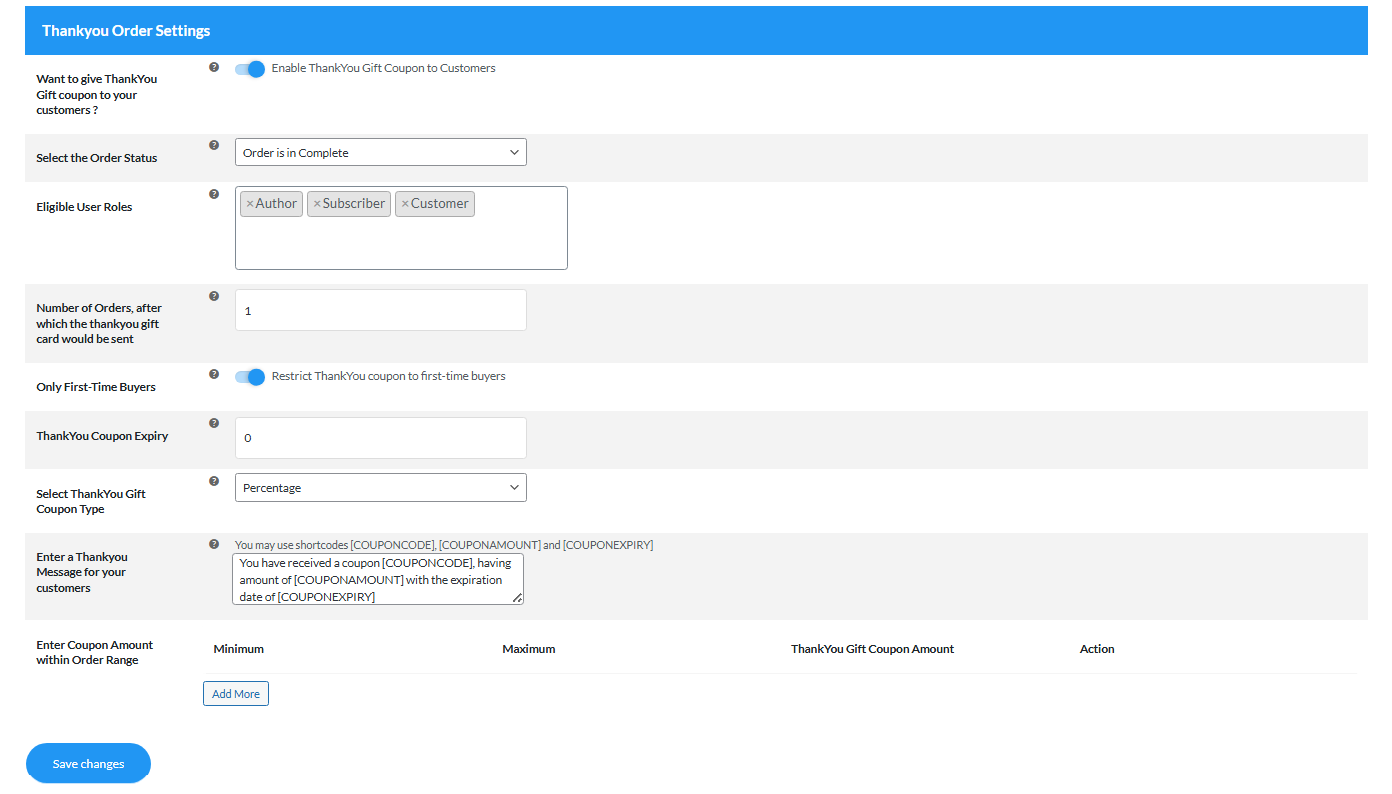
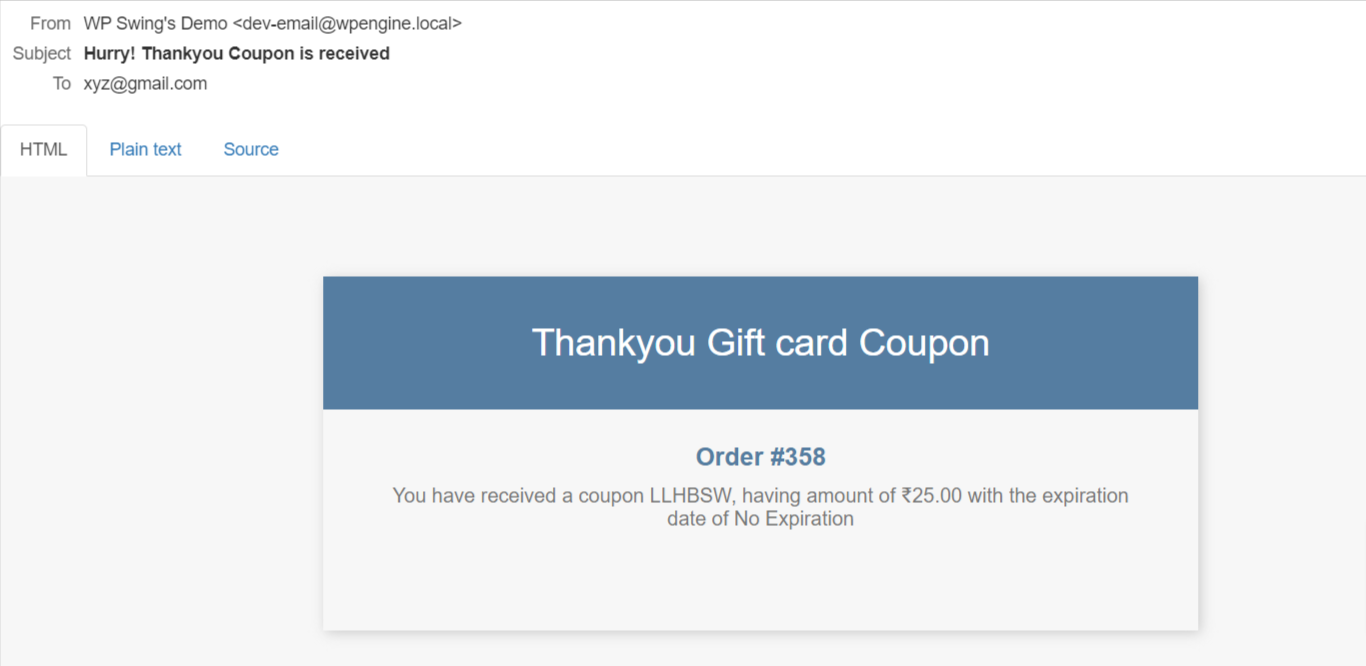
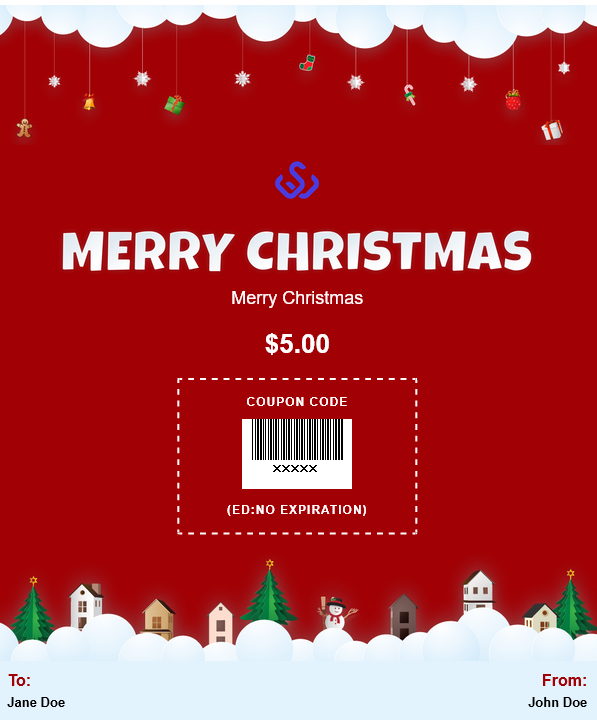
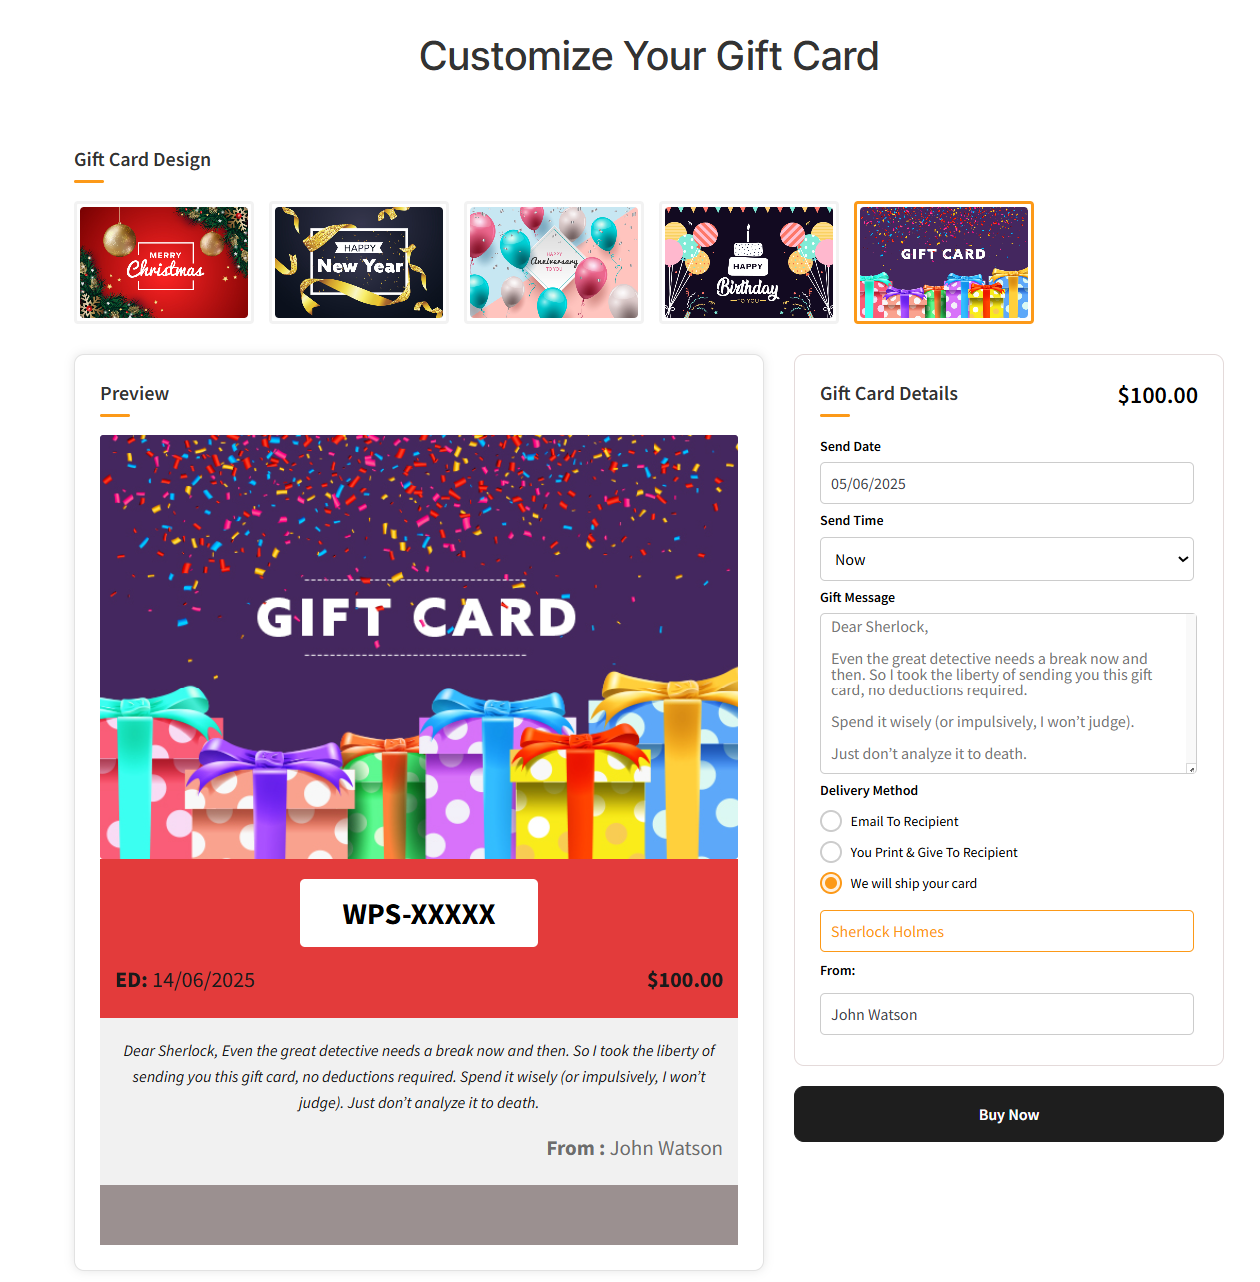
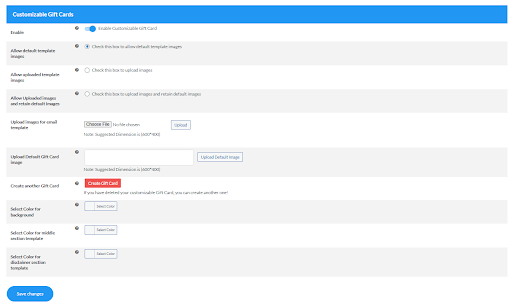
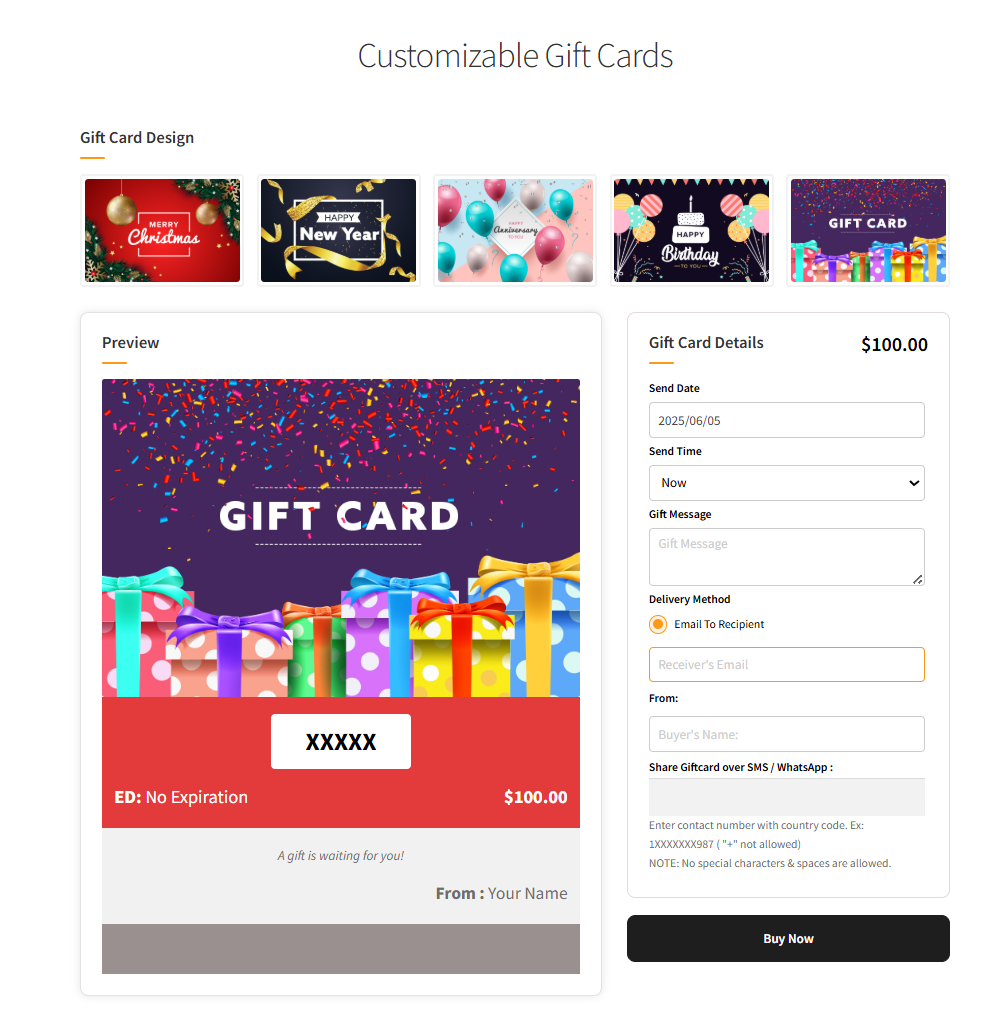
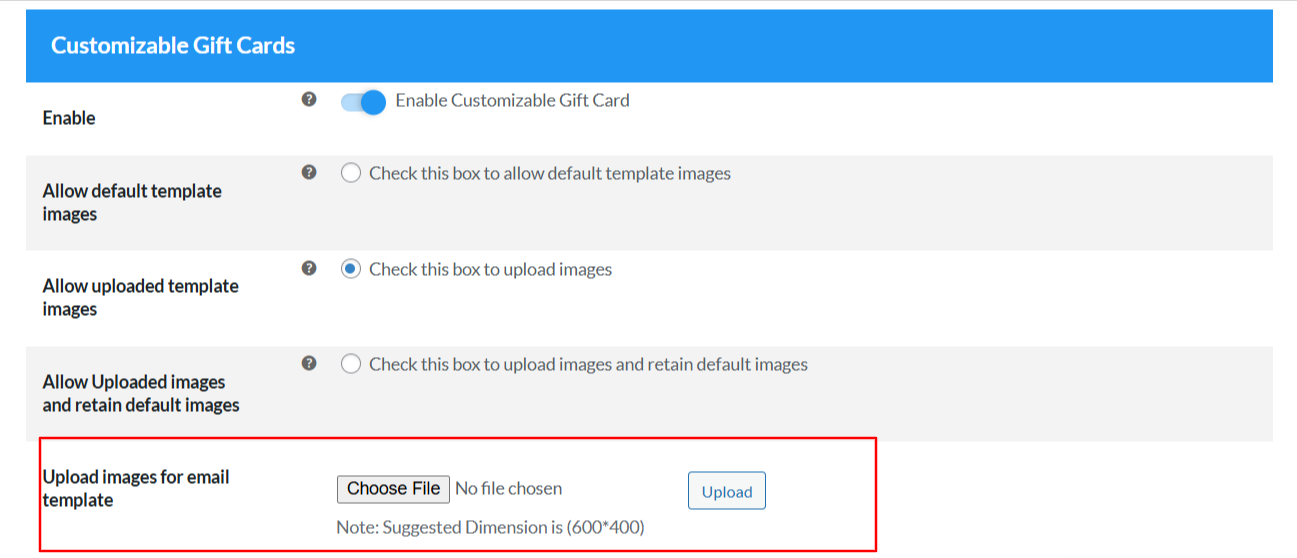
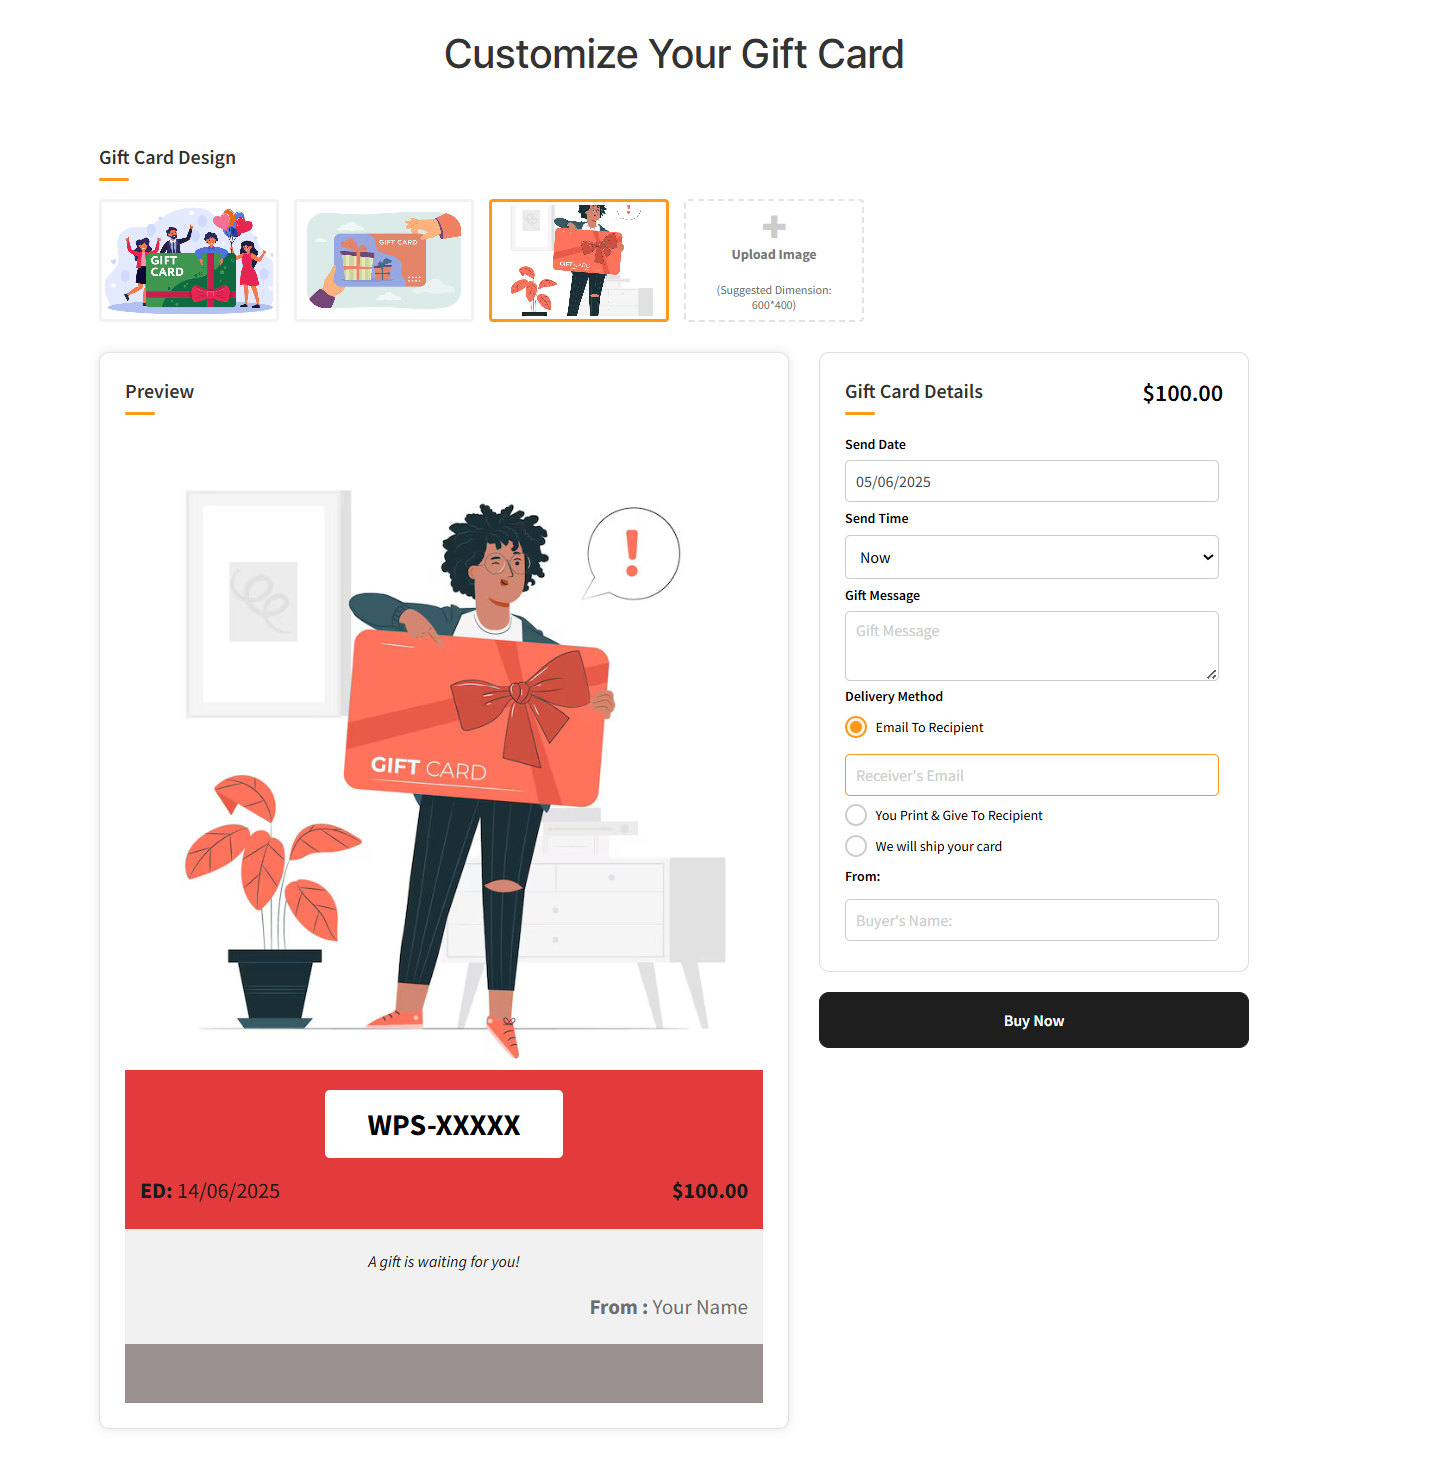
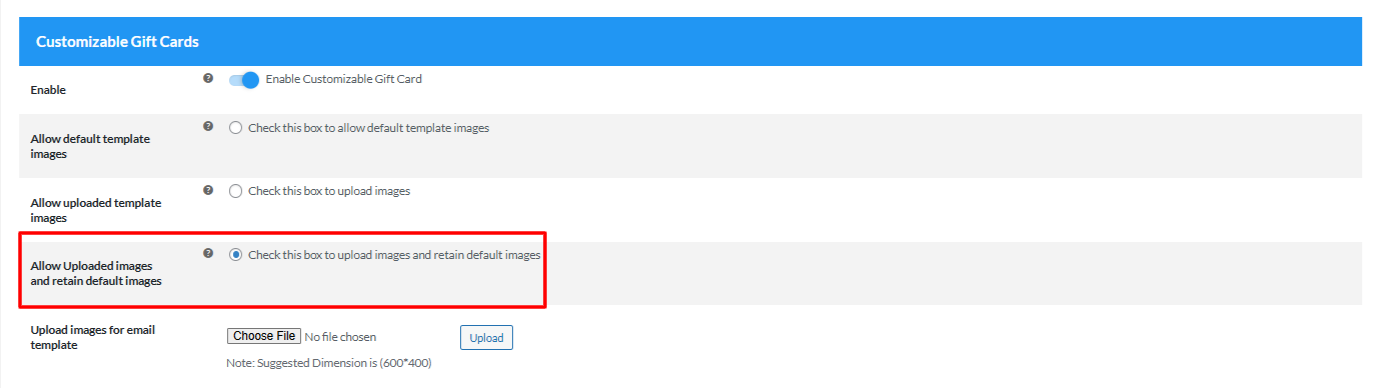
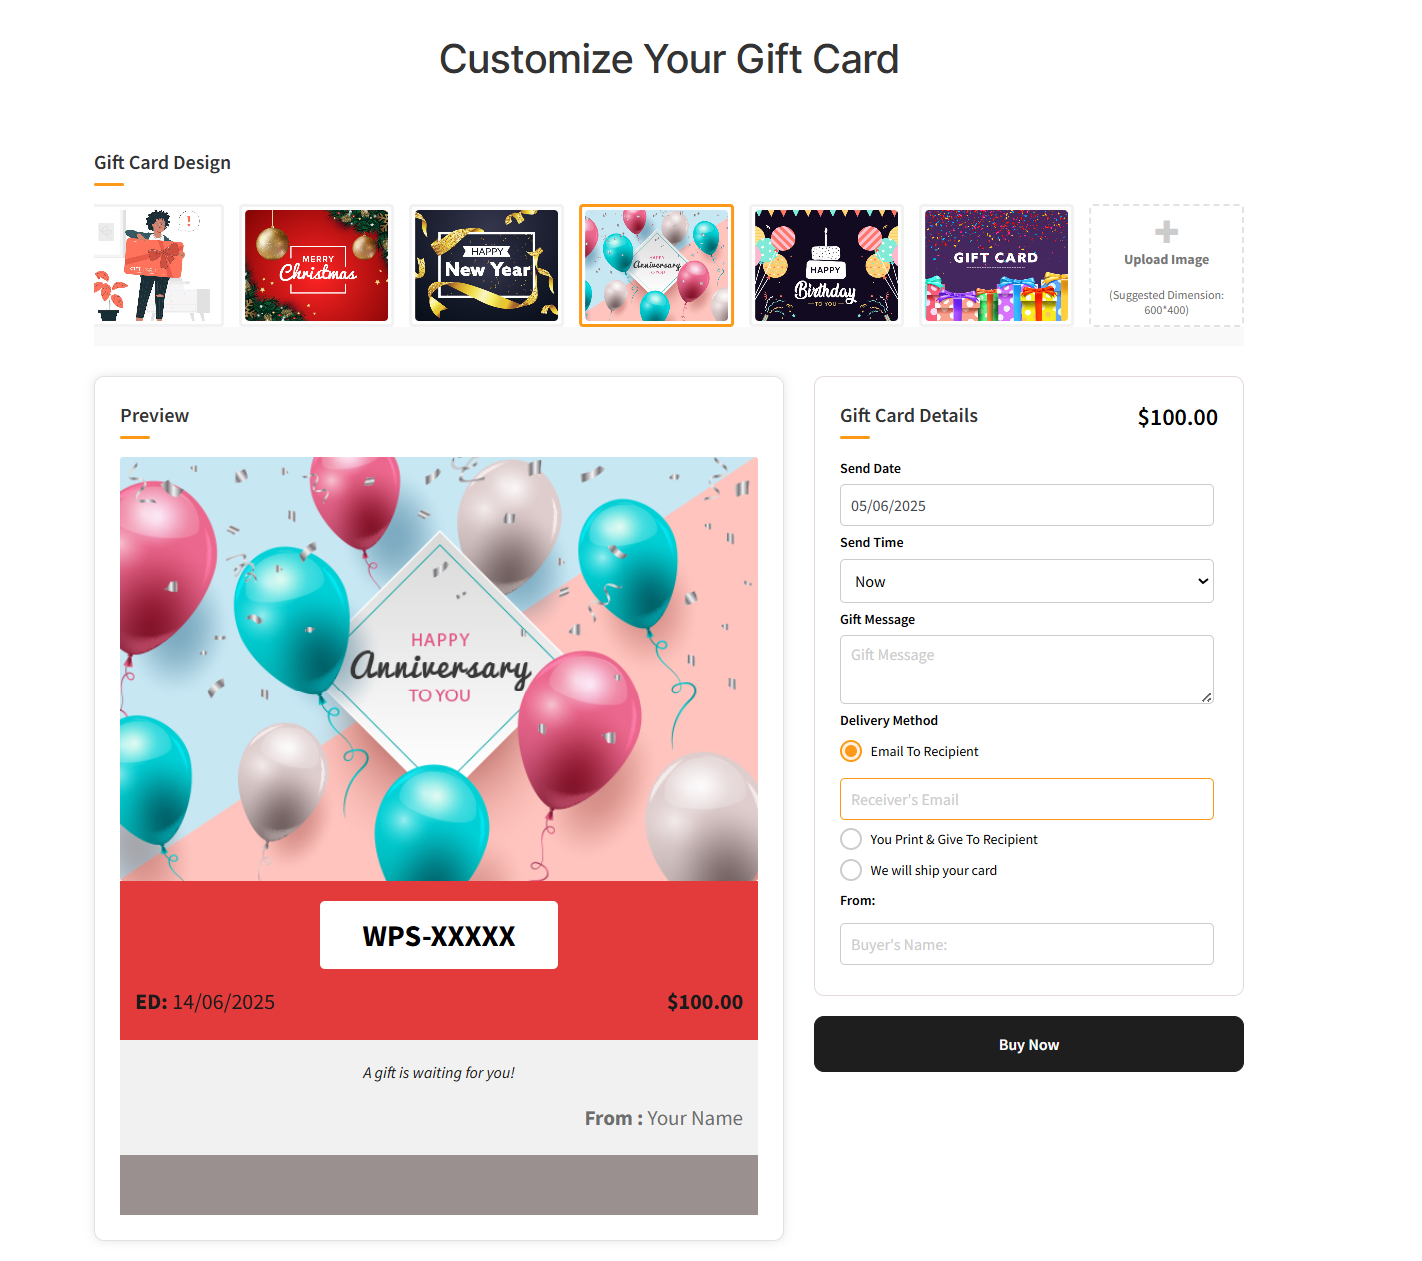
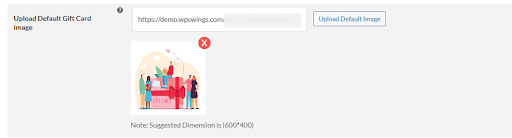
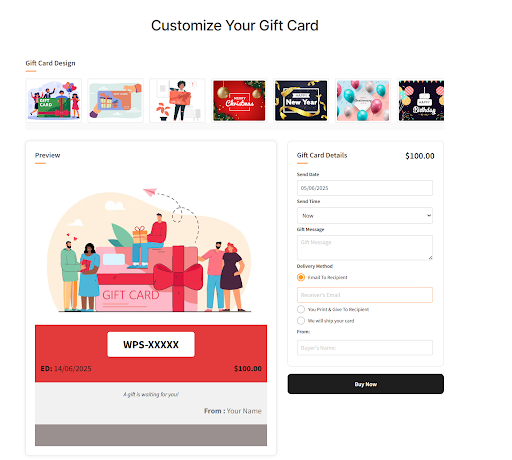
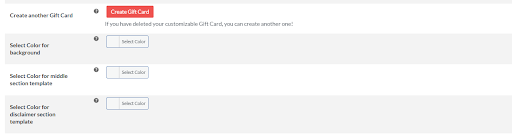
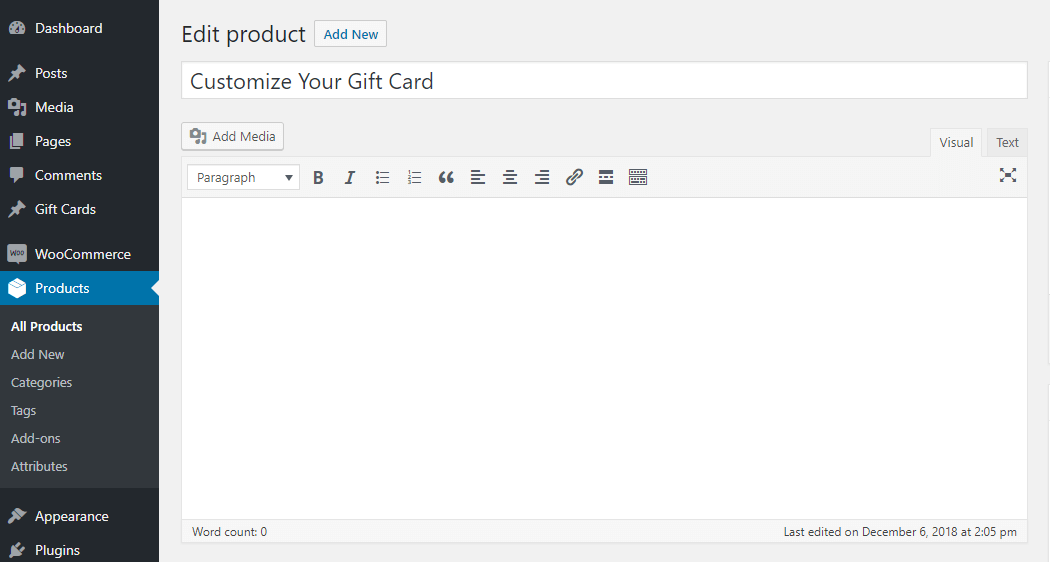
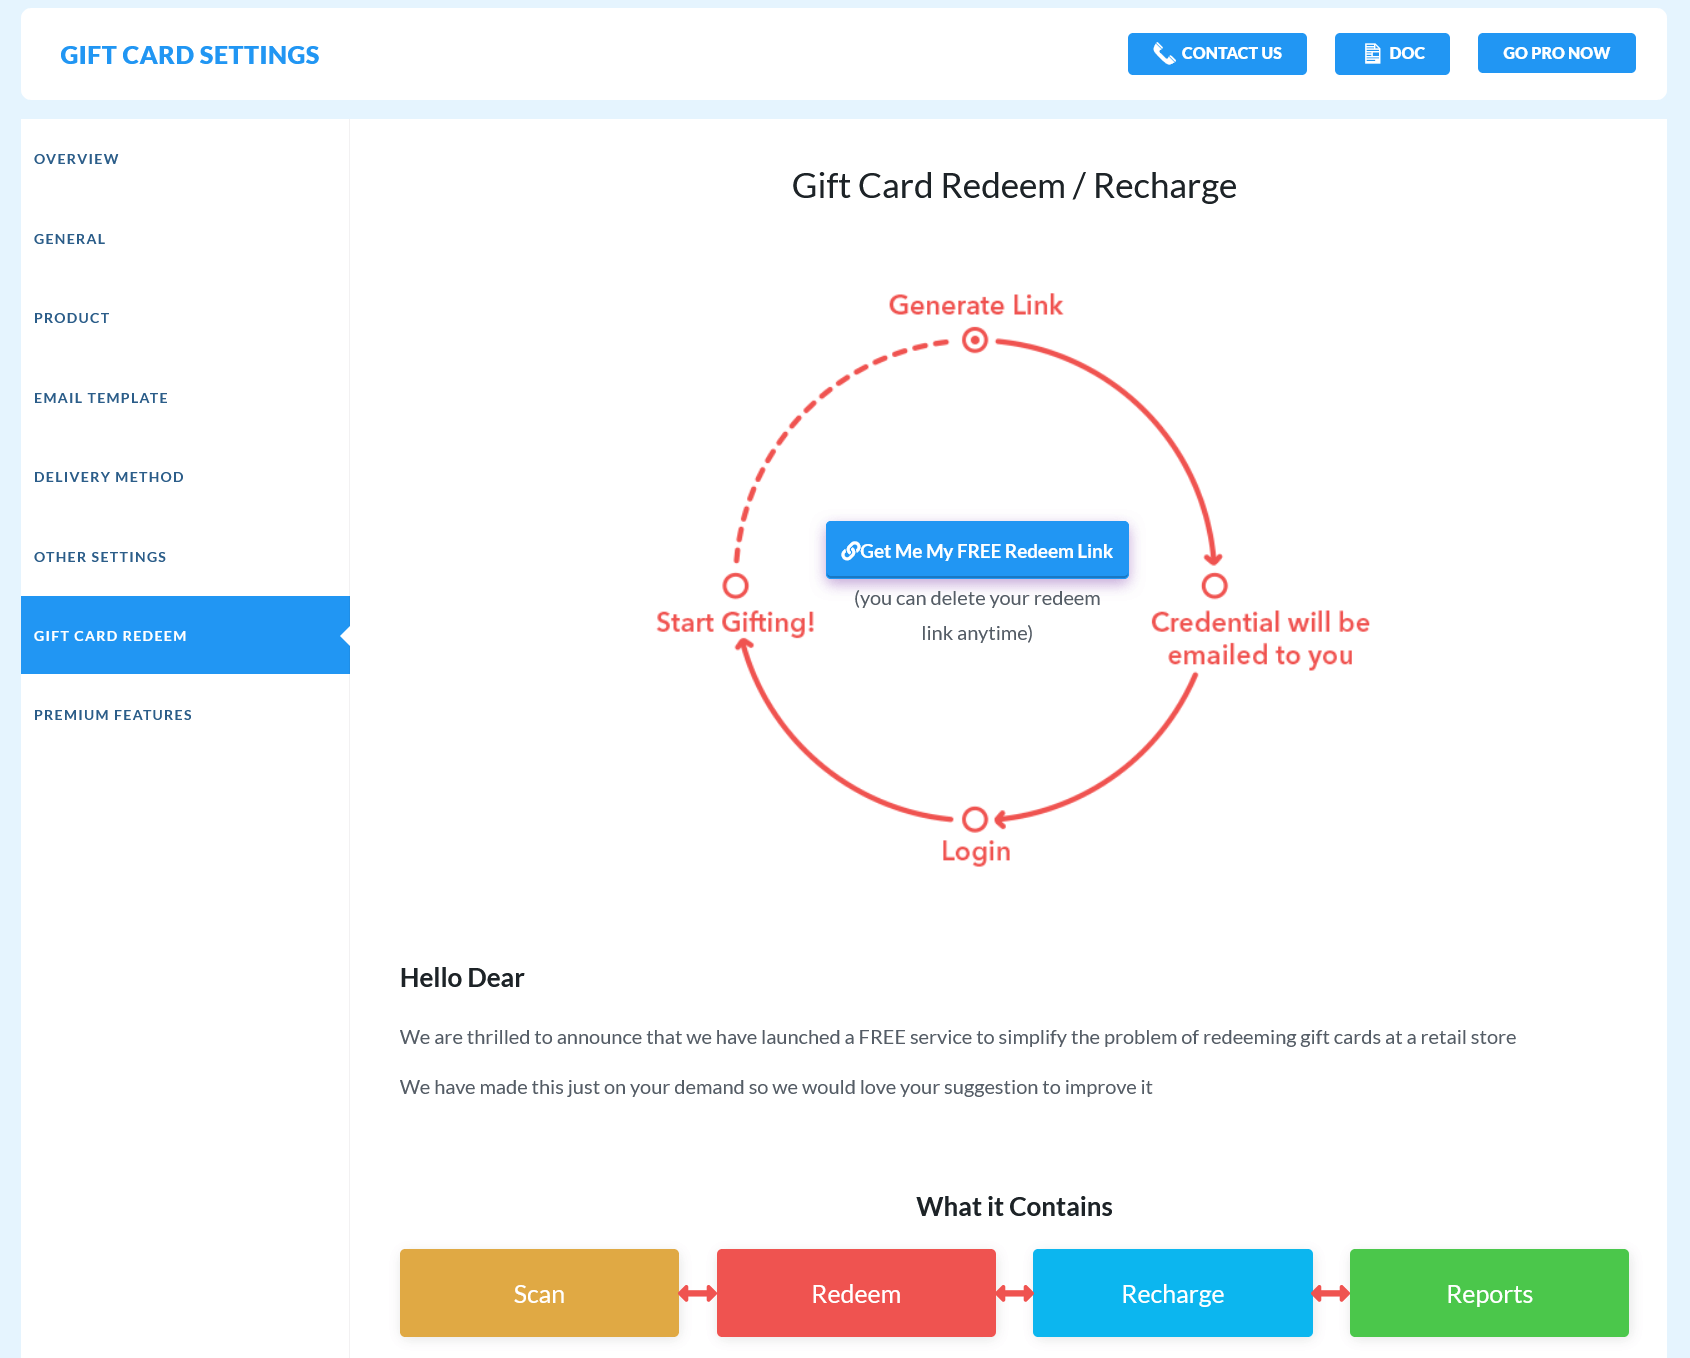
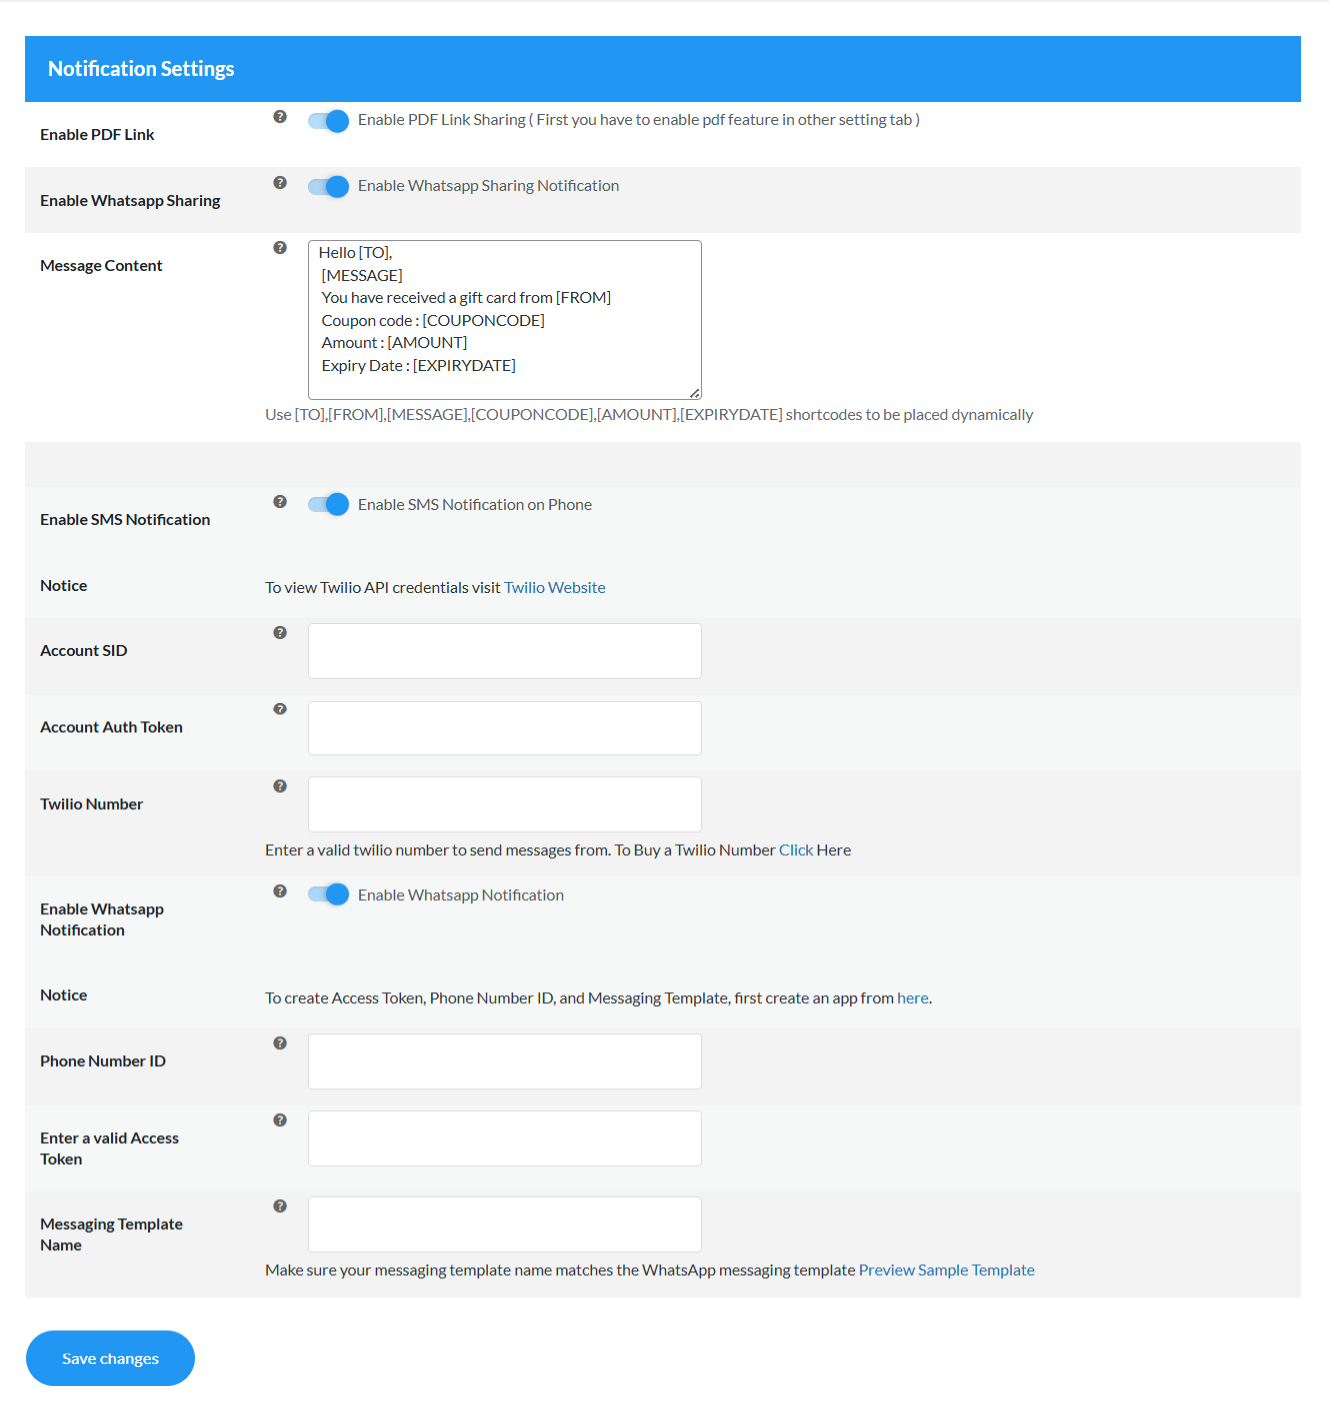
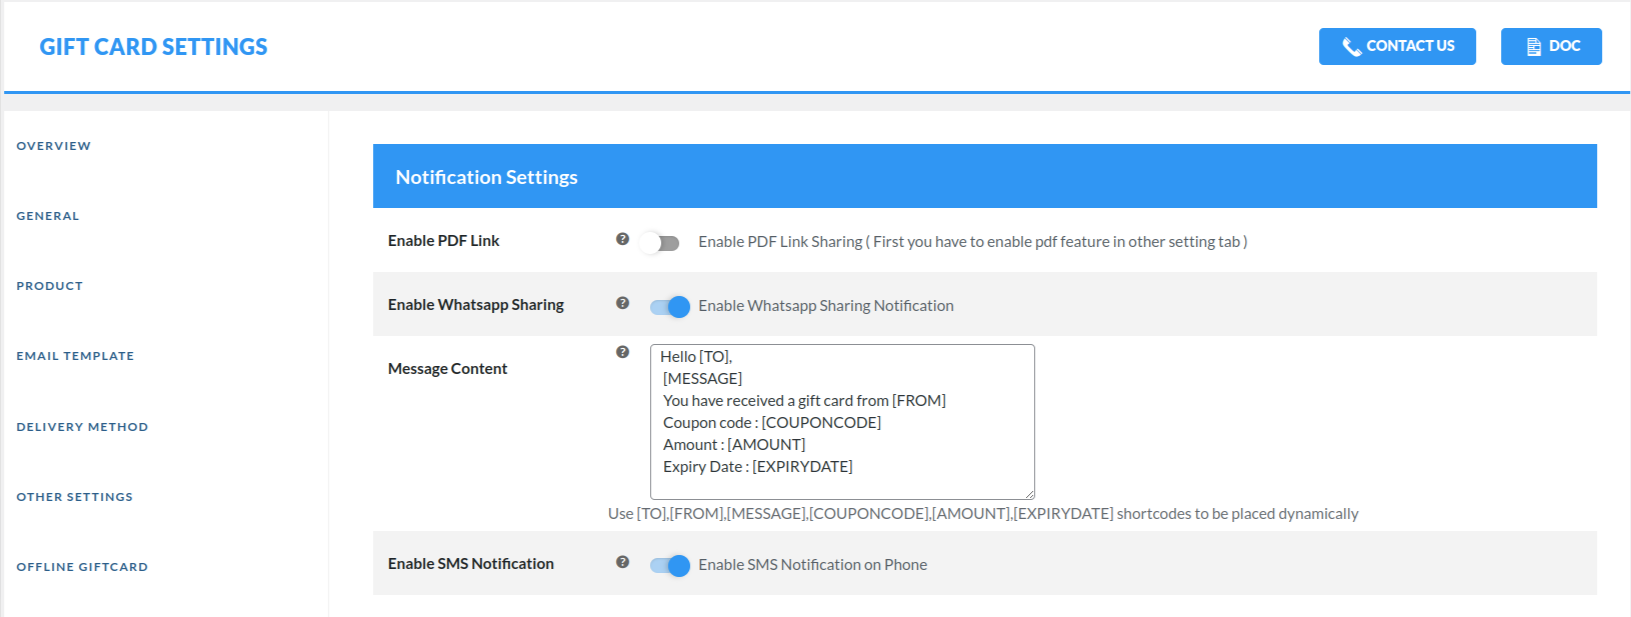
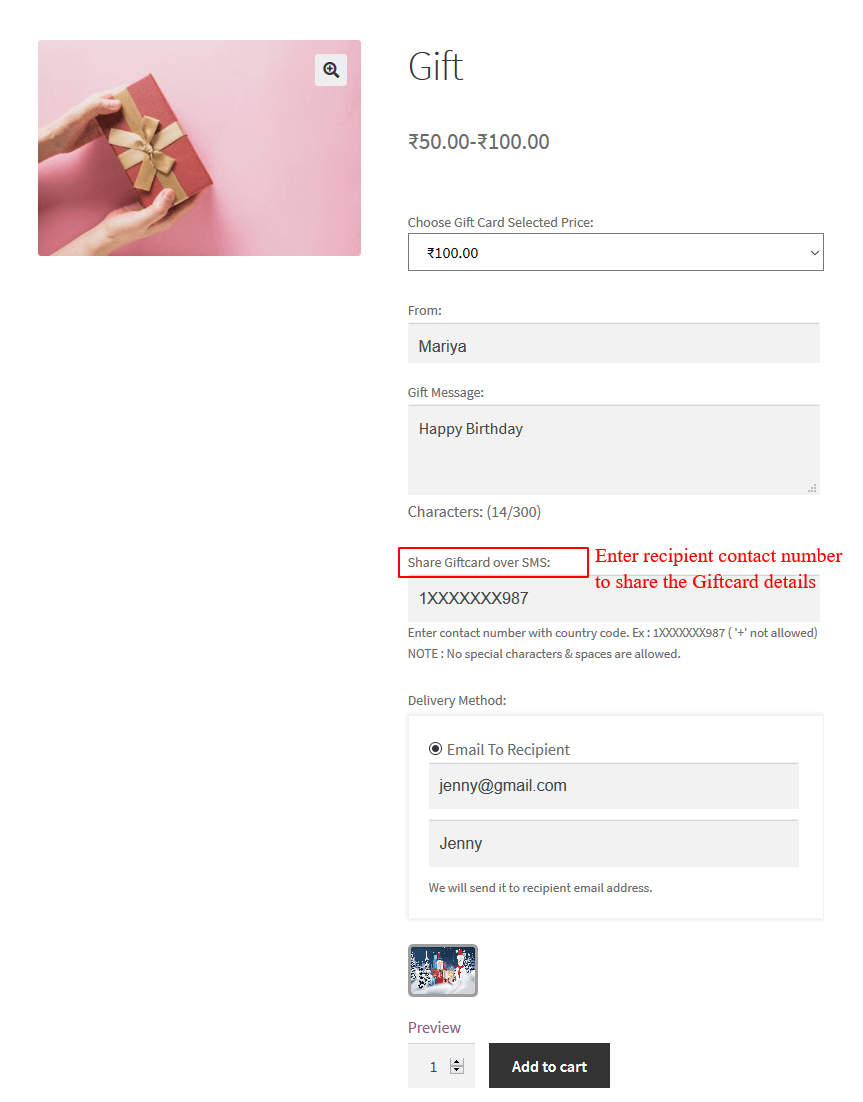
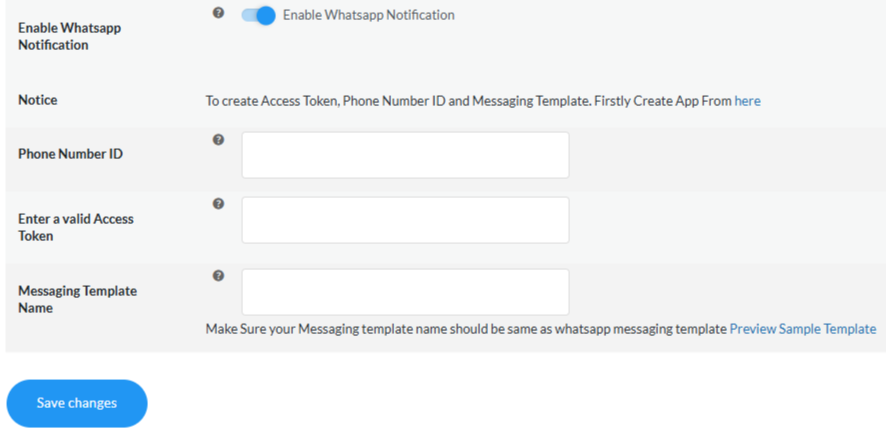
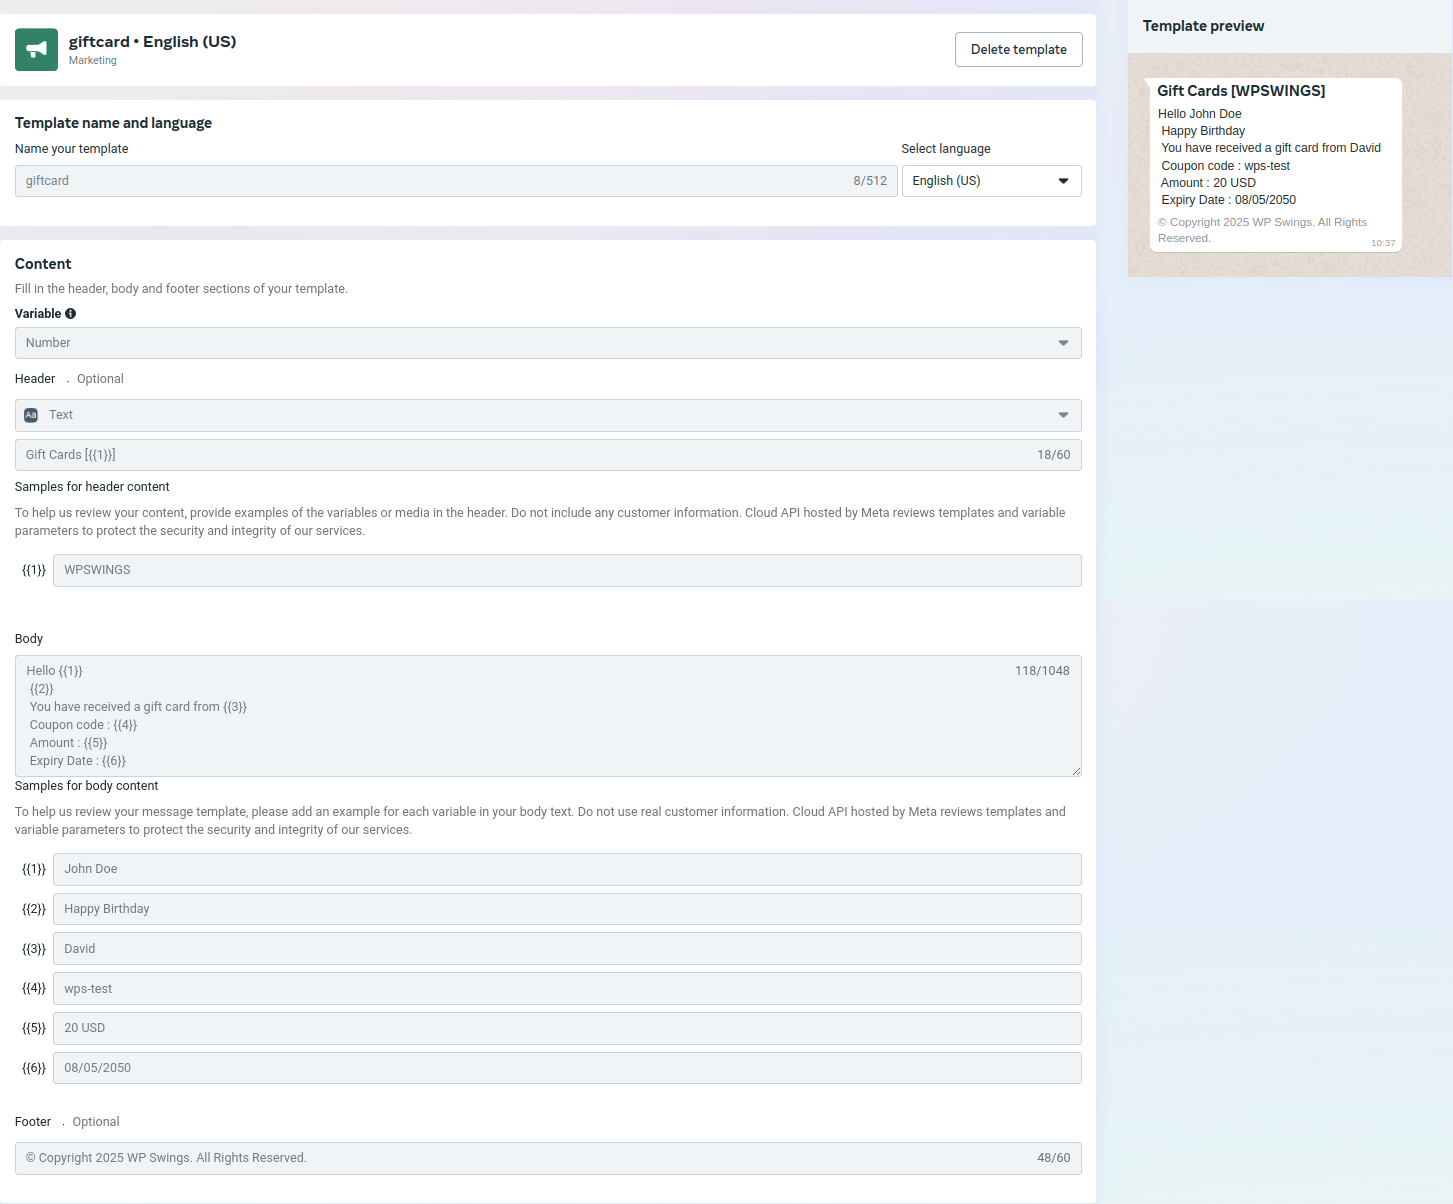
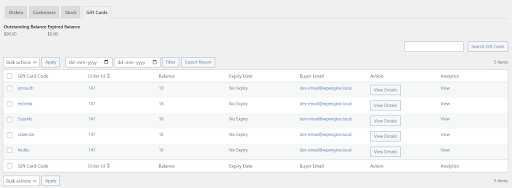
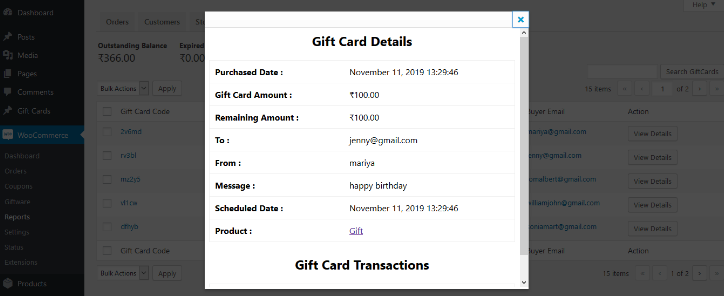
13.2.WooCommerce Gift Cards
The Upsell Order Bump Offer plugin is compatible with the Ultimate Gift Cards For WooCommerce Free and Gift Cards For WooCommerce Pro which allows your customers to redeem their gift cards and earn even more discounts. This will allow the merchants to offer more payment options to their customers for the bump offers.
Try The Free Version Of Ultimate Gift Cards for WooCommerce
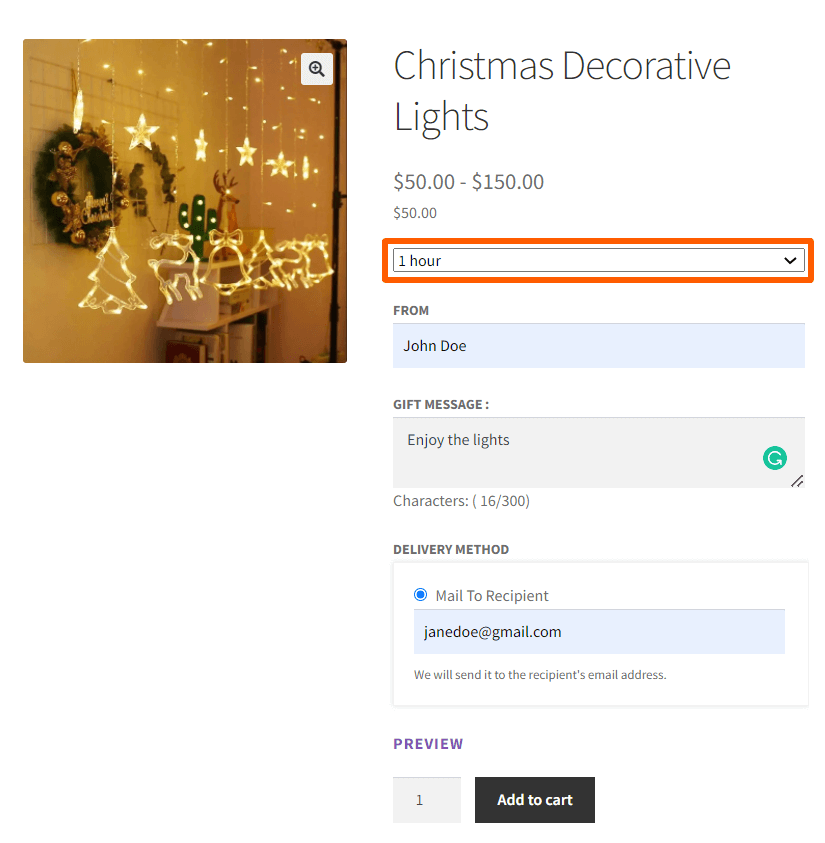
13.3.Subscriptions For WooCommerce
The Upsell Order Bump plugin is compatible with the Subscriptions For WooCommerce Free and Subscriptions For WooCommerce Pro allows your customers to create offers on subscription products.
Try The Free Version of Subscriptions for WooCommerce
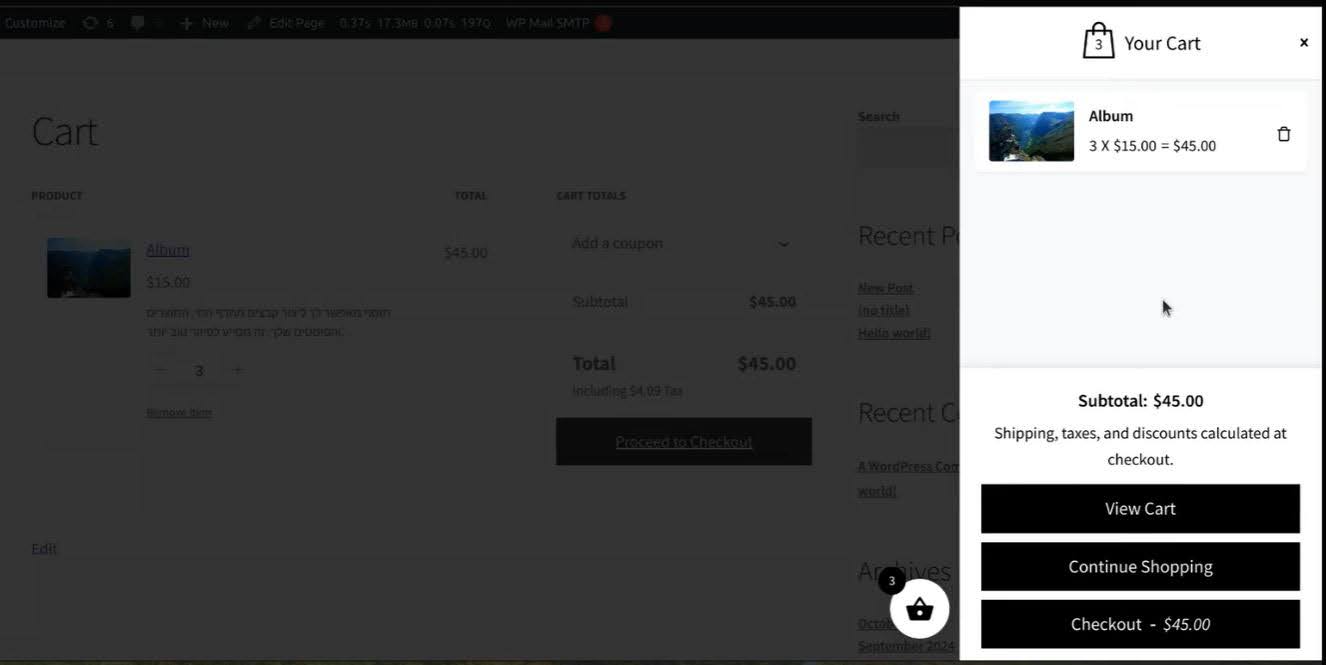
13.4.Side Cart Woocommerce
Order Bump Plugin is compatible with the Side Cart WooCommerce plugin. This compatibility enhances the customer experience of your website. Previously, the customer had to navigate to the cart page to make additions to his existing purchases. After the implementation of this compatibility, they can do this while being on the shop page. All the themes that include the side cart functionality will also work seamlessly.
Frontend Representation –
13.5.Direct Checkout for WooCommerce
WooCommerce order bump is compatible with Direct Checkout for WooCommerce, simplifying the checkout process. With Direct Checkout, the admins can easily convert into a one-click process & customer decision to direct sale. This further helps with the upselling and cross-selling process.
13.6.WPML Compatibility
The Upsell Order Bump Offer plugin is compatible with most of the popular themes and plugins you require. This will enable your users to access content in their native language.
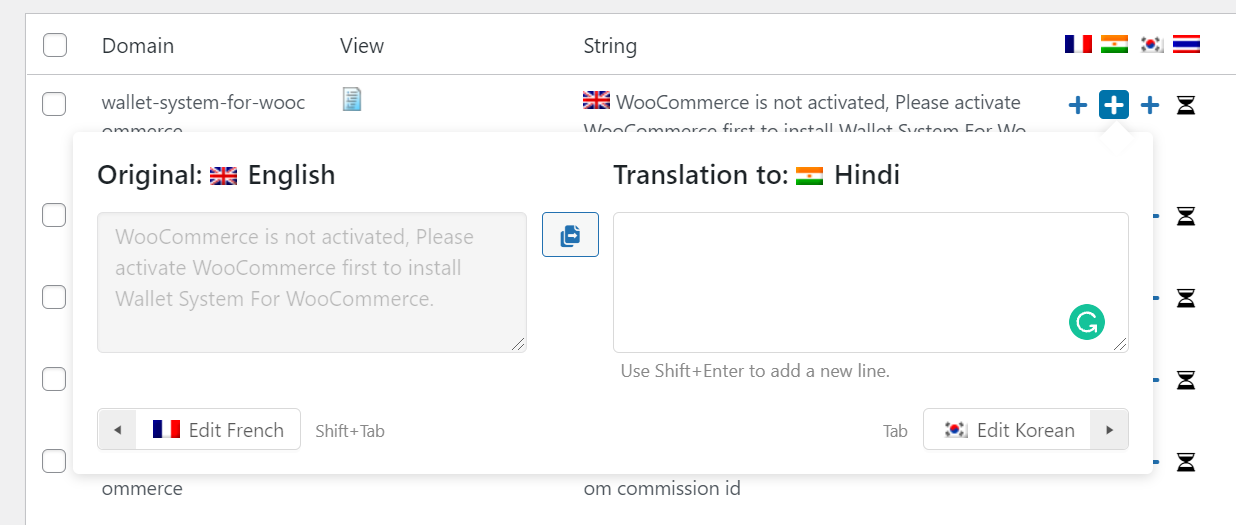
To initiate the translation process, just you have to first extract all your plugin-based strings effectively and then proceed with the following steps-
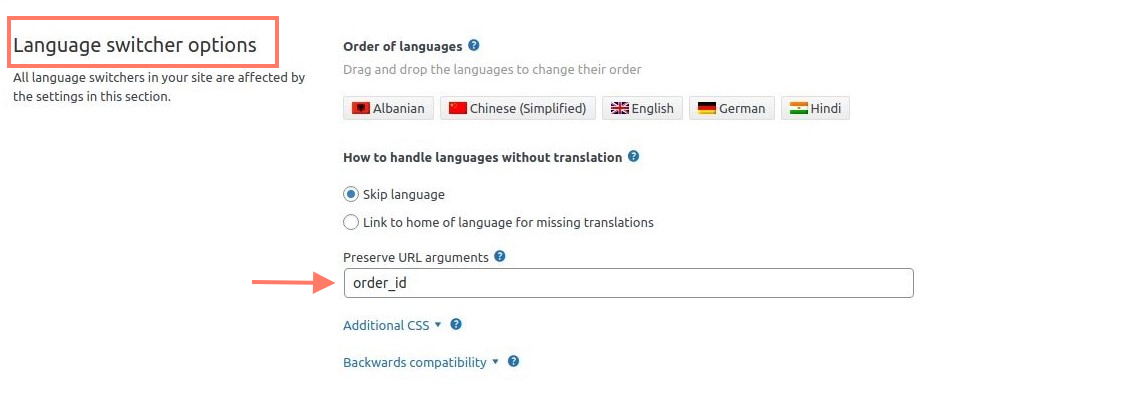
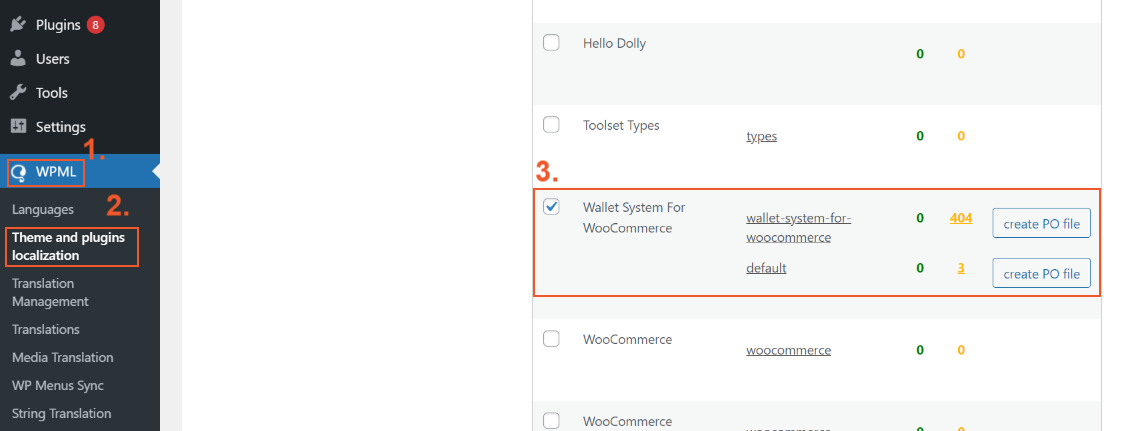
- First head on to your WordPress Backend and then navigate towards WPML > Themes Plugins Localization.
- After that select your specified plugin from the list of plugins available there and hit on Scan Selected Plugins for Strings.
![]()
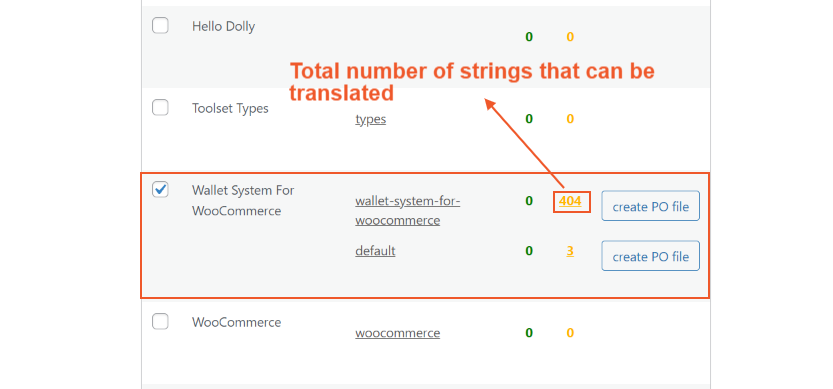
- As the scan progresses and completes, thereby you receive the total number of your plugin-based required strings that can be translated into numbers.
- Then click on the number of strings that are highlighted in front of your plugin name to initiate the process further.
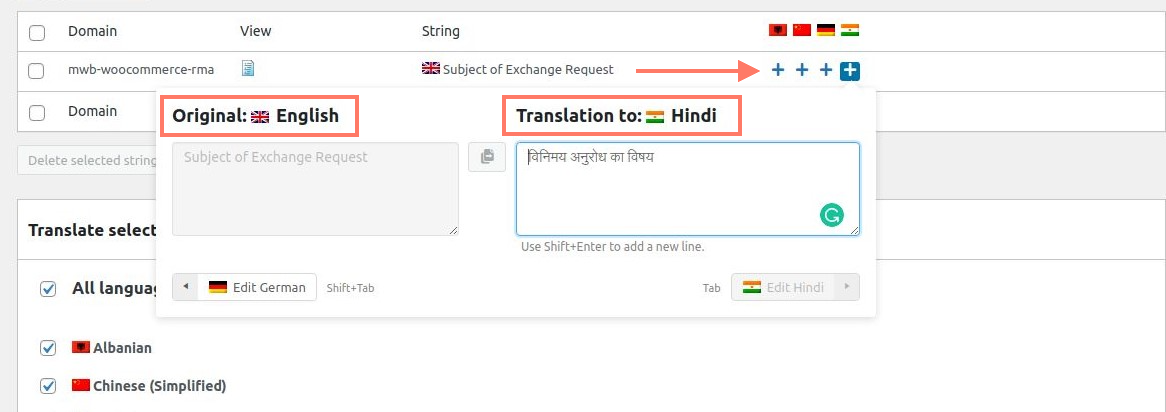
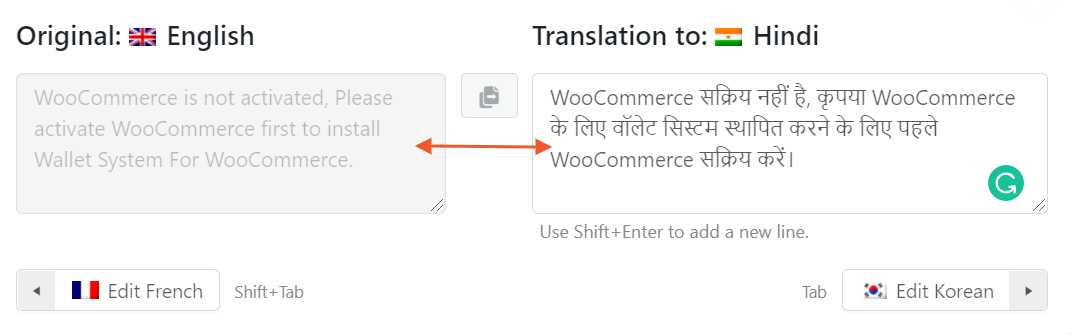
- After that, you’ll be routed to a page with a list of all the plugin’s strings, from which you can then translate every one.
- When you arrive at this page, tap the + button beside each string in a sequence to manually process and select a string for the translated version. A pop-up window will appear, spurring you to input the substring translated version.
![]()
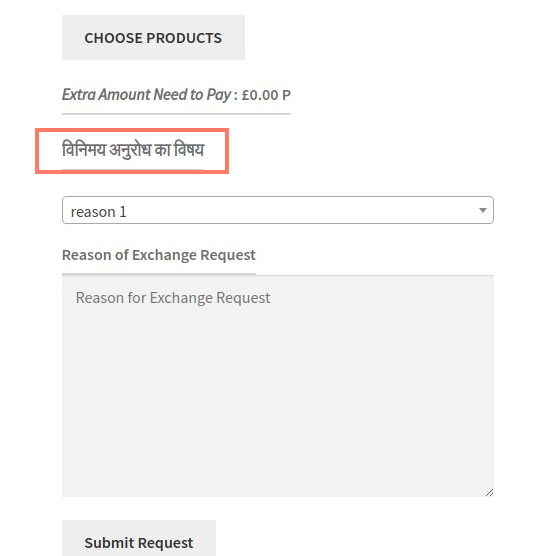
- Once you’ve finished writing the translation, it will be automatically saved, and then when the customer chooses a different dialect, the English translation of the string will appear.
In this way, you can effectively translate all your plugin-based strings and hence enjoy multilingual integration benefits. So whether it is in Arabic or Hebrew language, the Upsell Order Bump Offer plugin will support it.
13.7.Product Bundles
The WooCommerce Upsell Plugin is compatible with WooCommerce Product Bundles Plugin too which is designed to help store owners create outstanding deals by bundling existing simple, variable, and subscription products. It’s a great way to make cross-selling easier in your WooCommerce store.
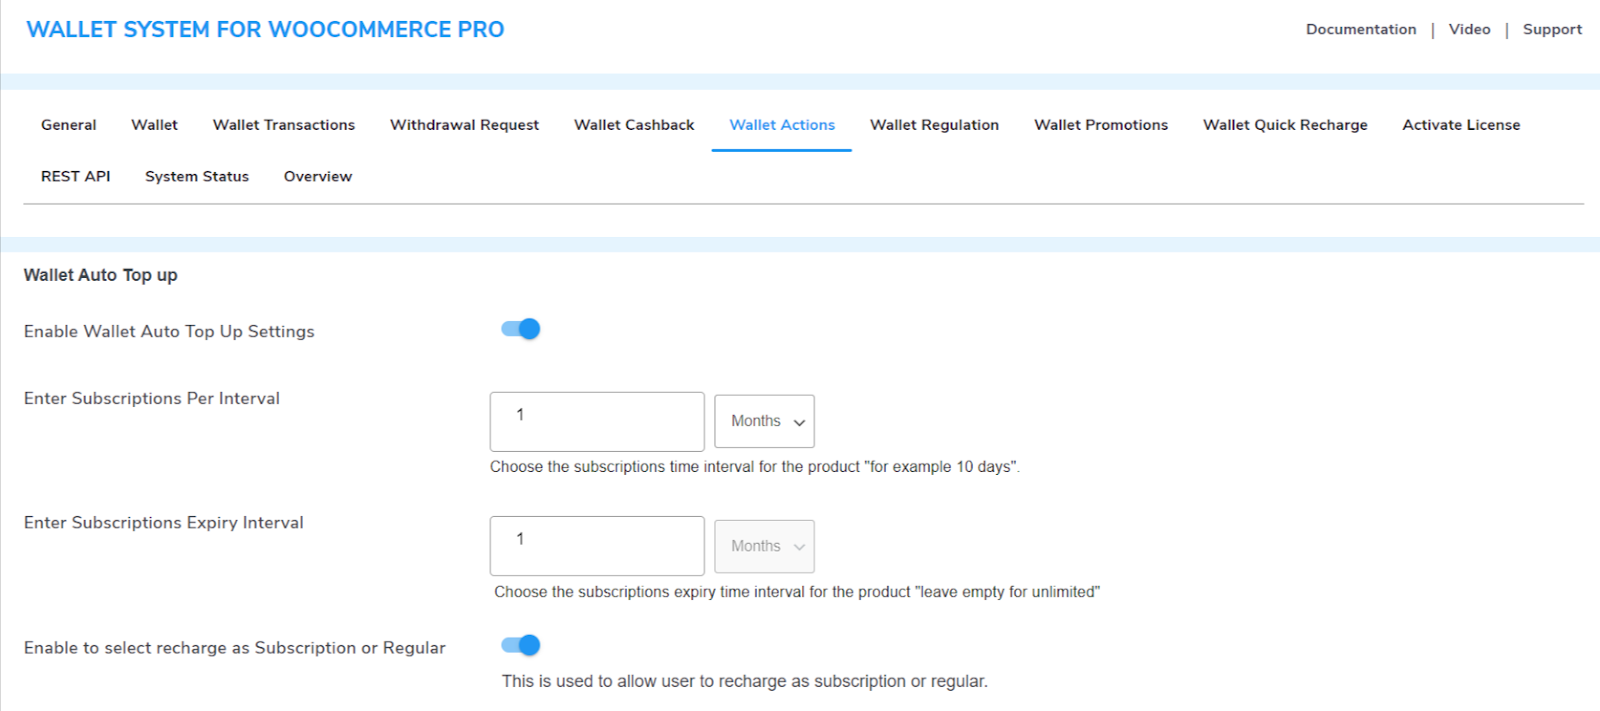
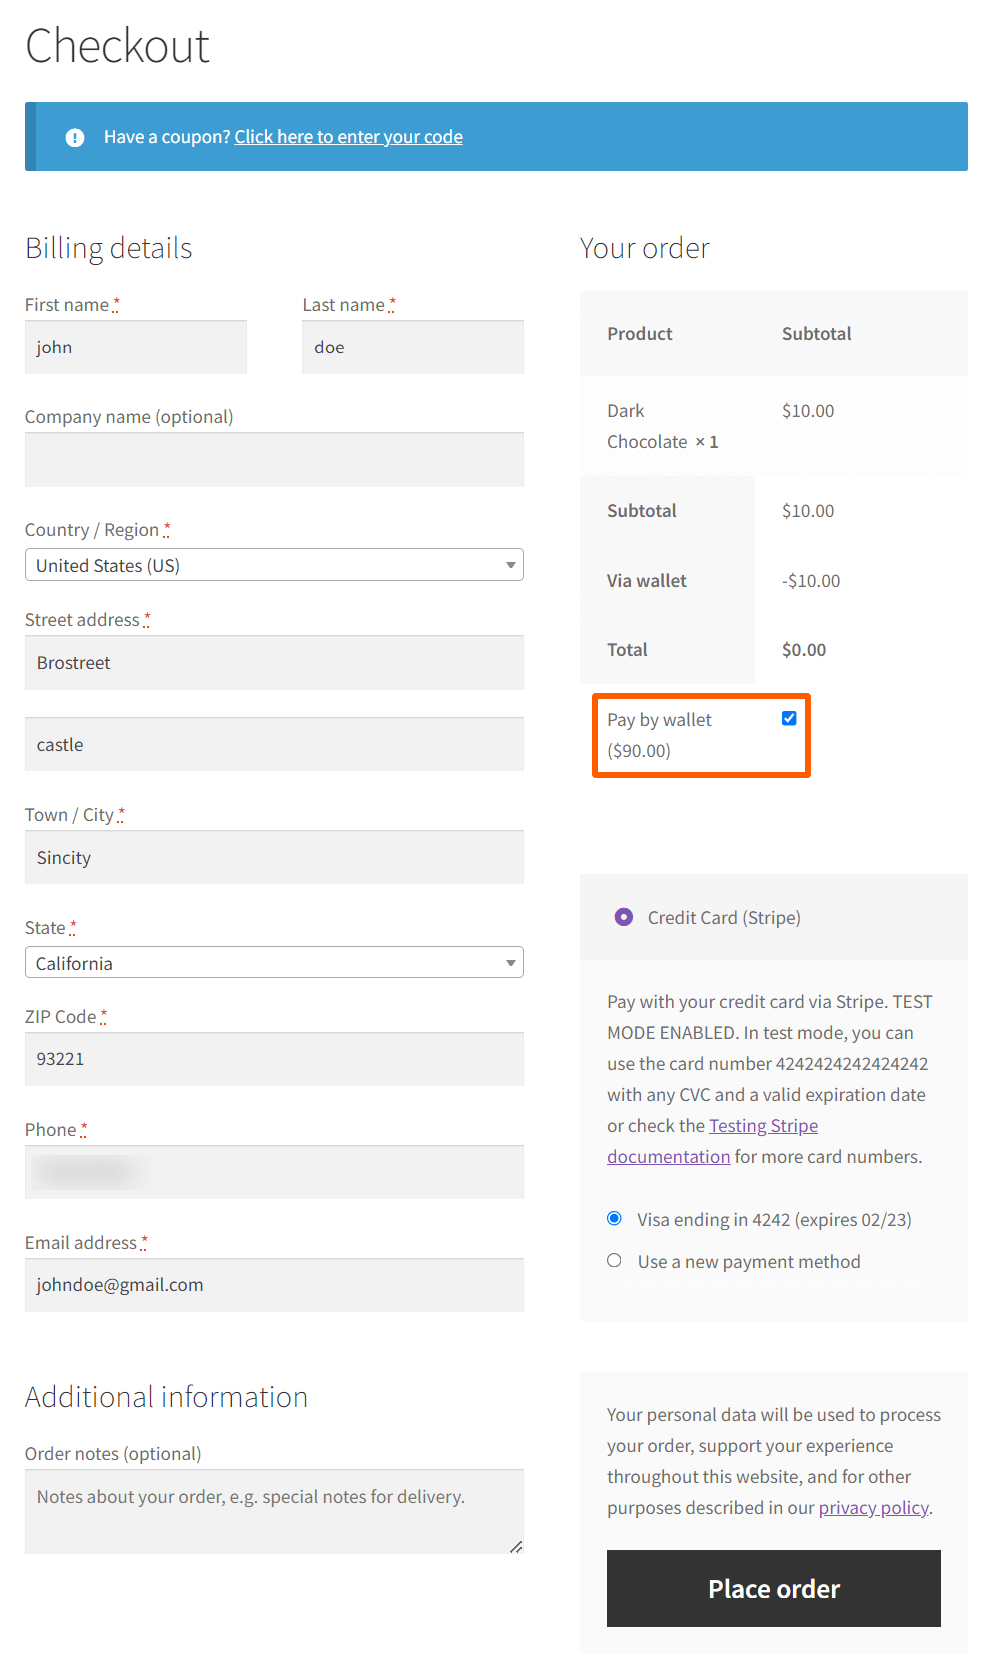
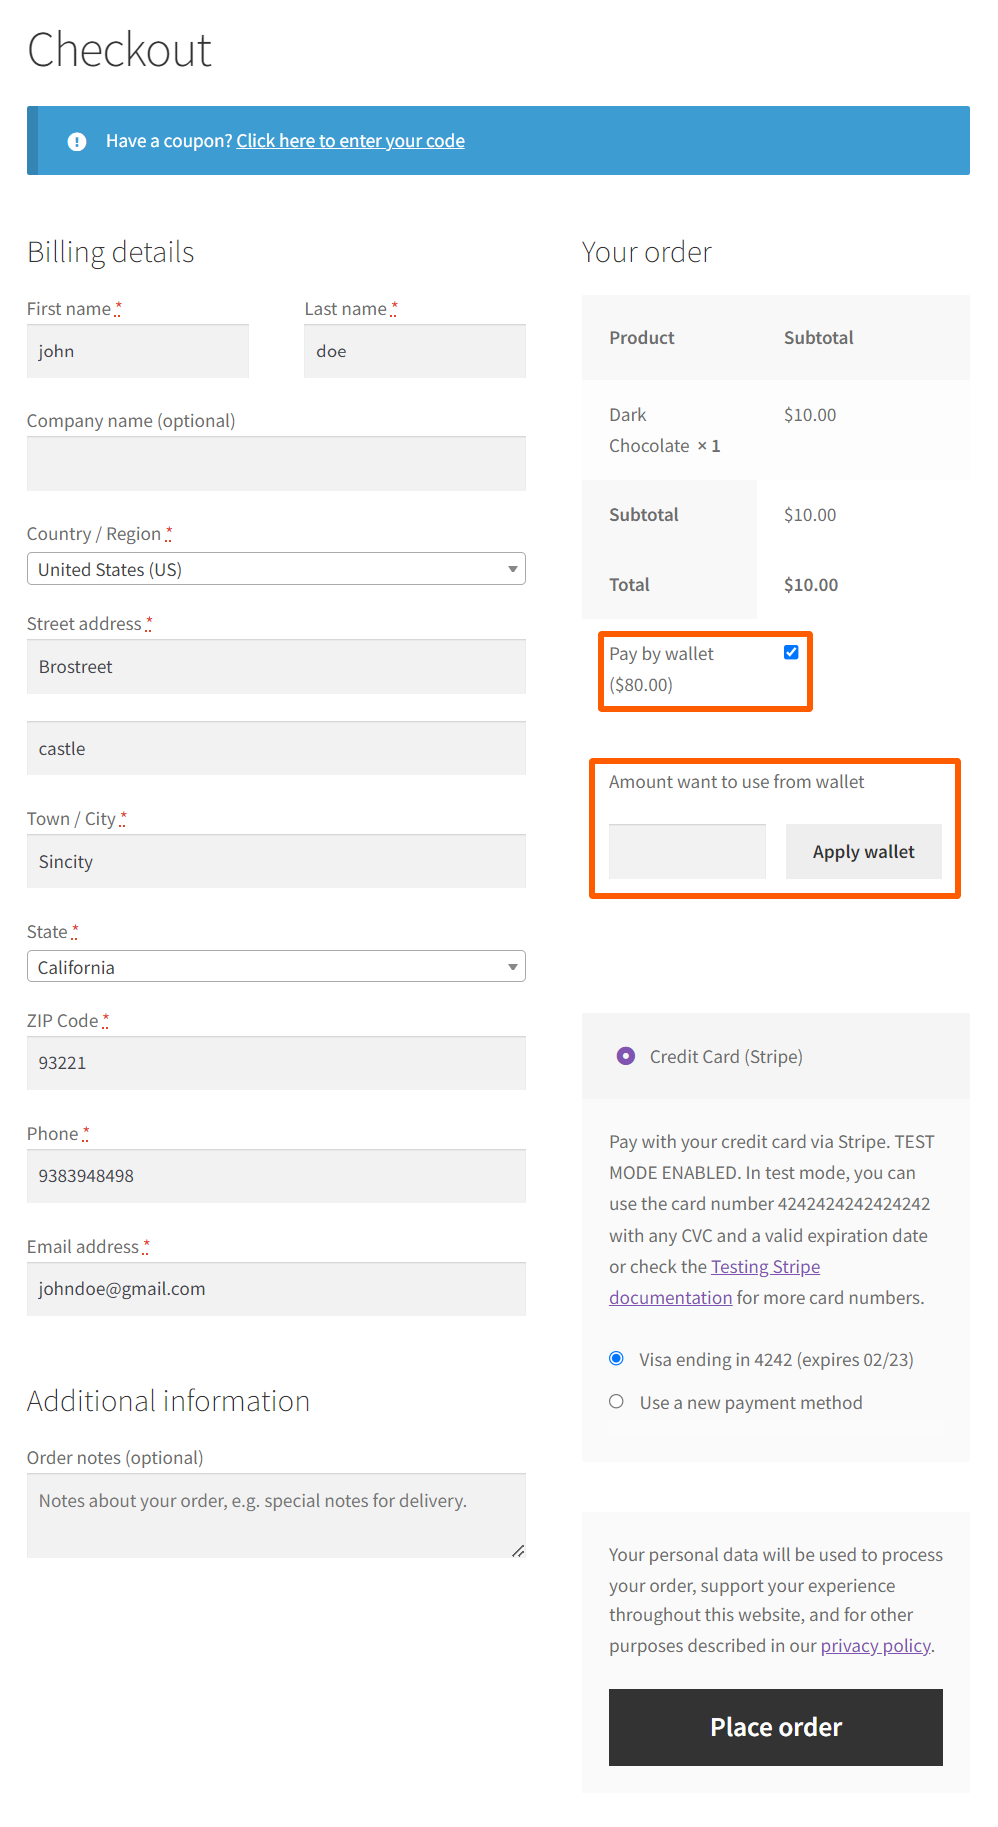
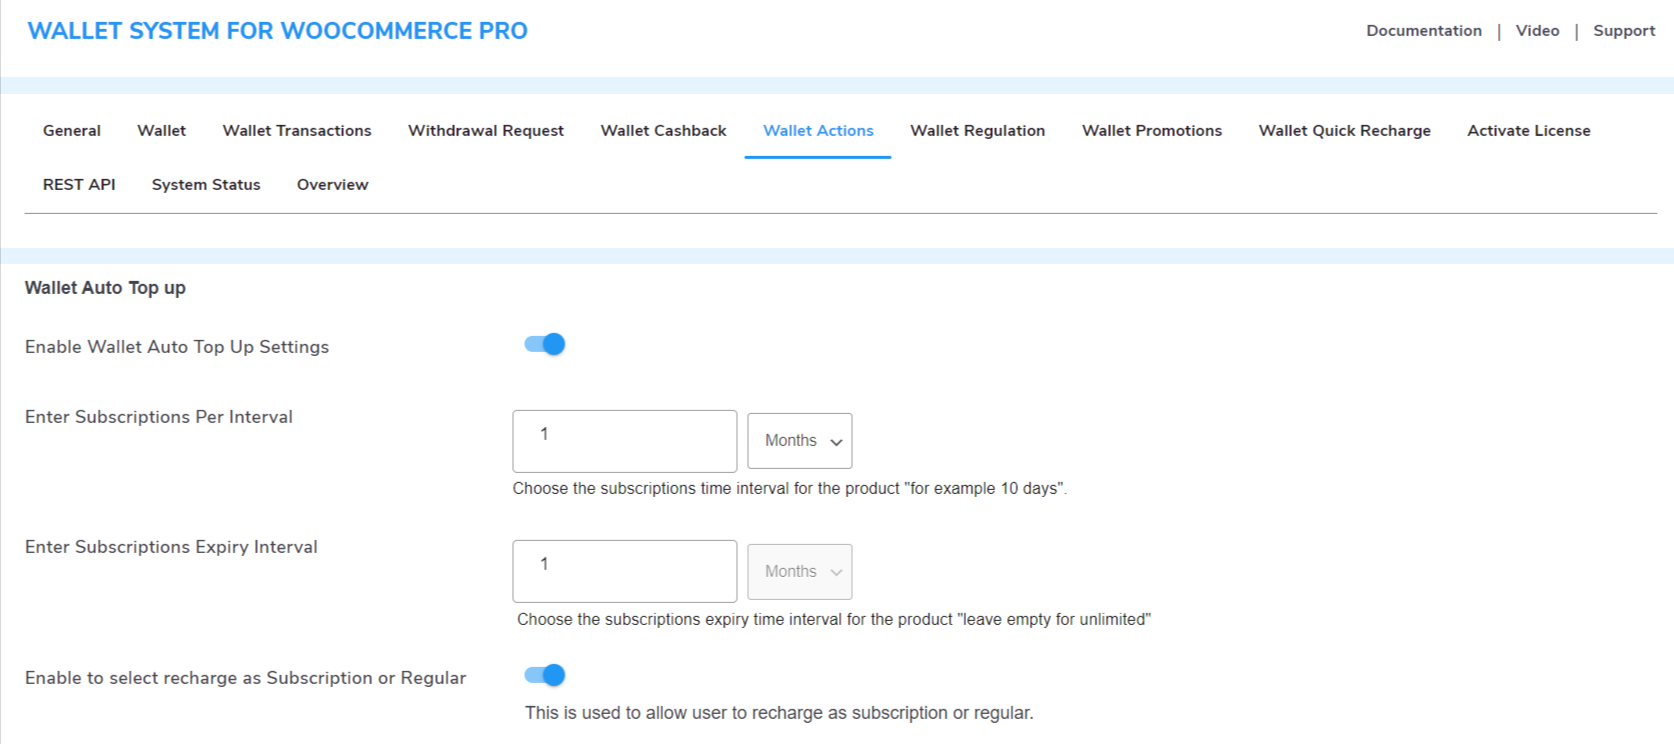
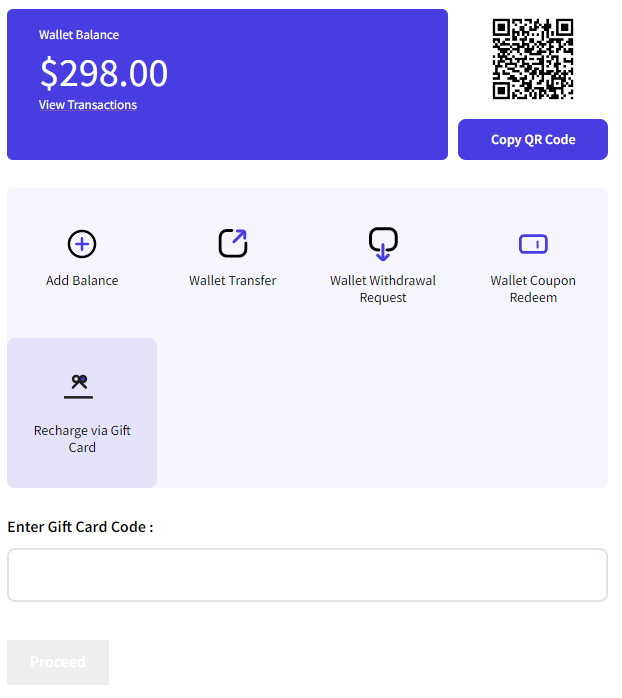
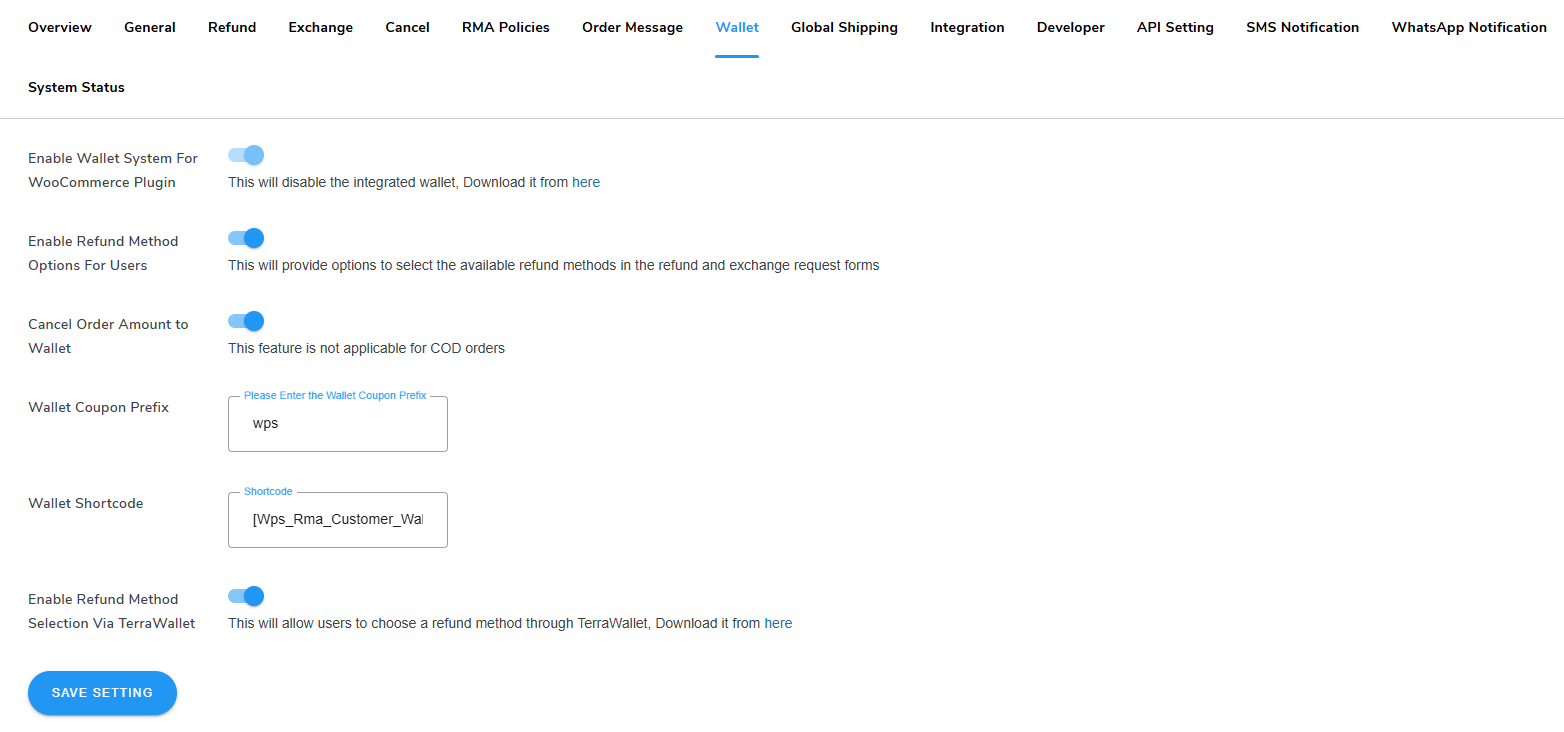
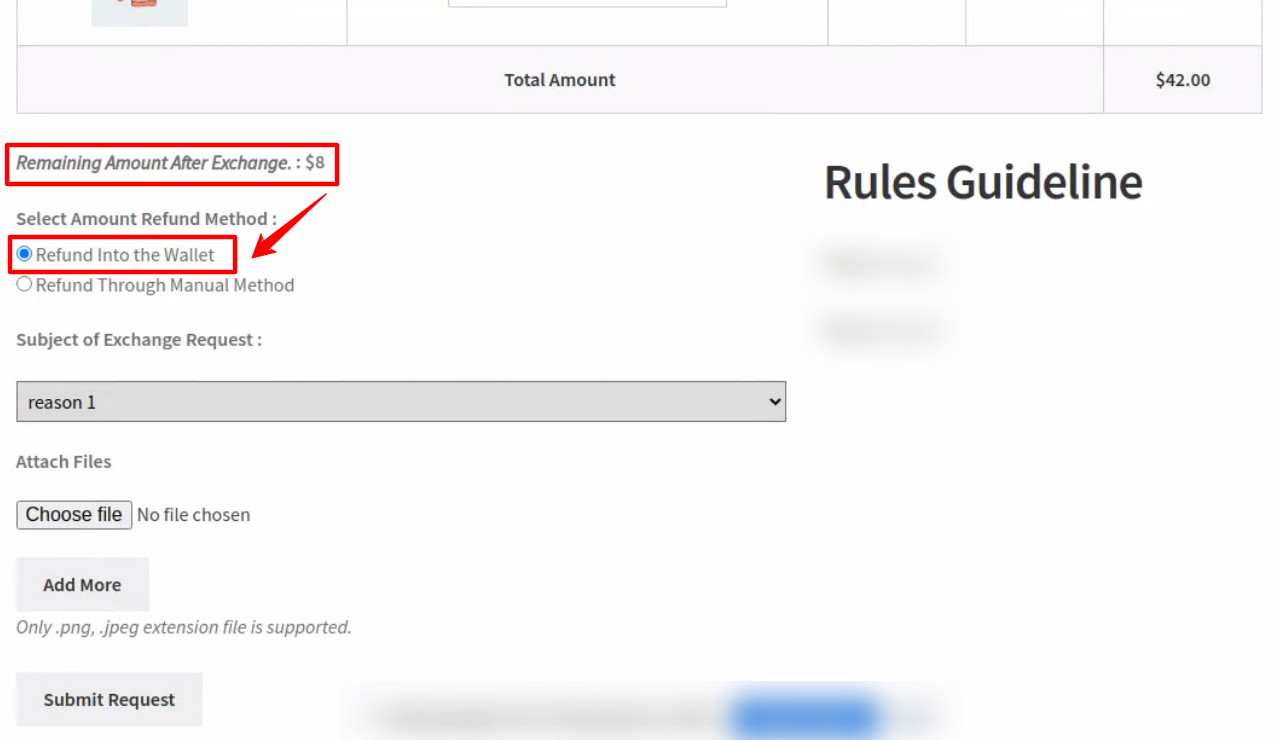
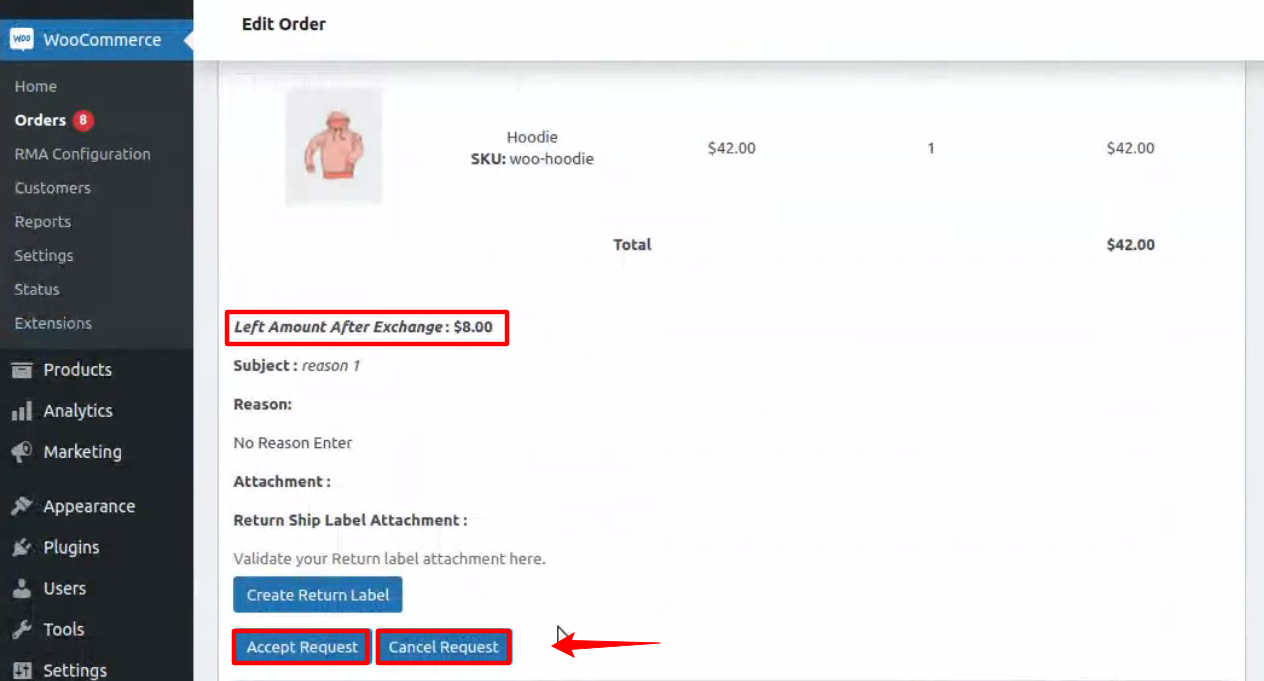
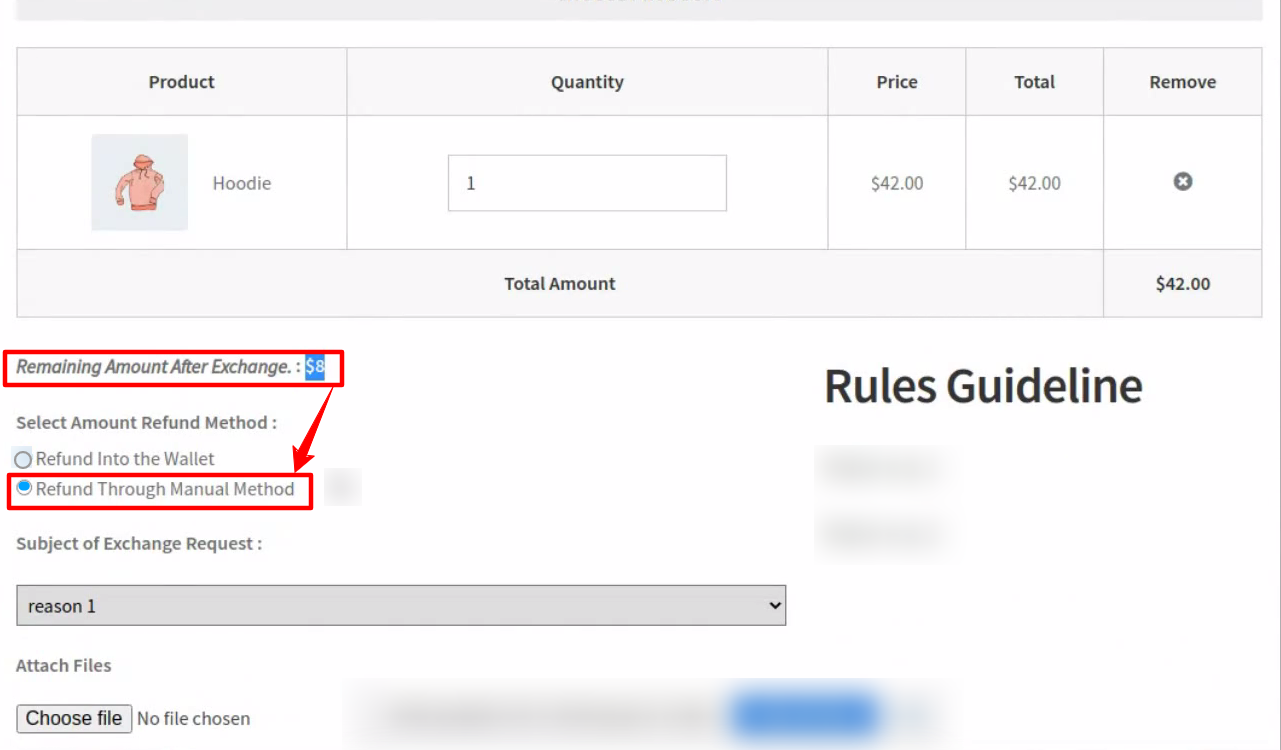
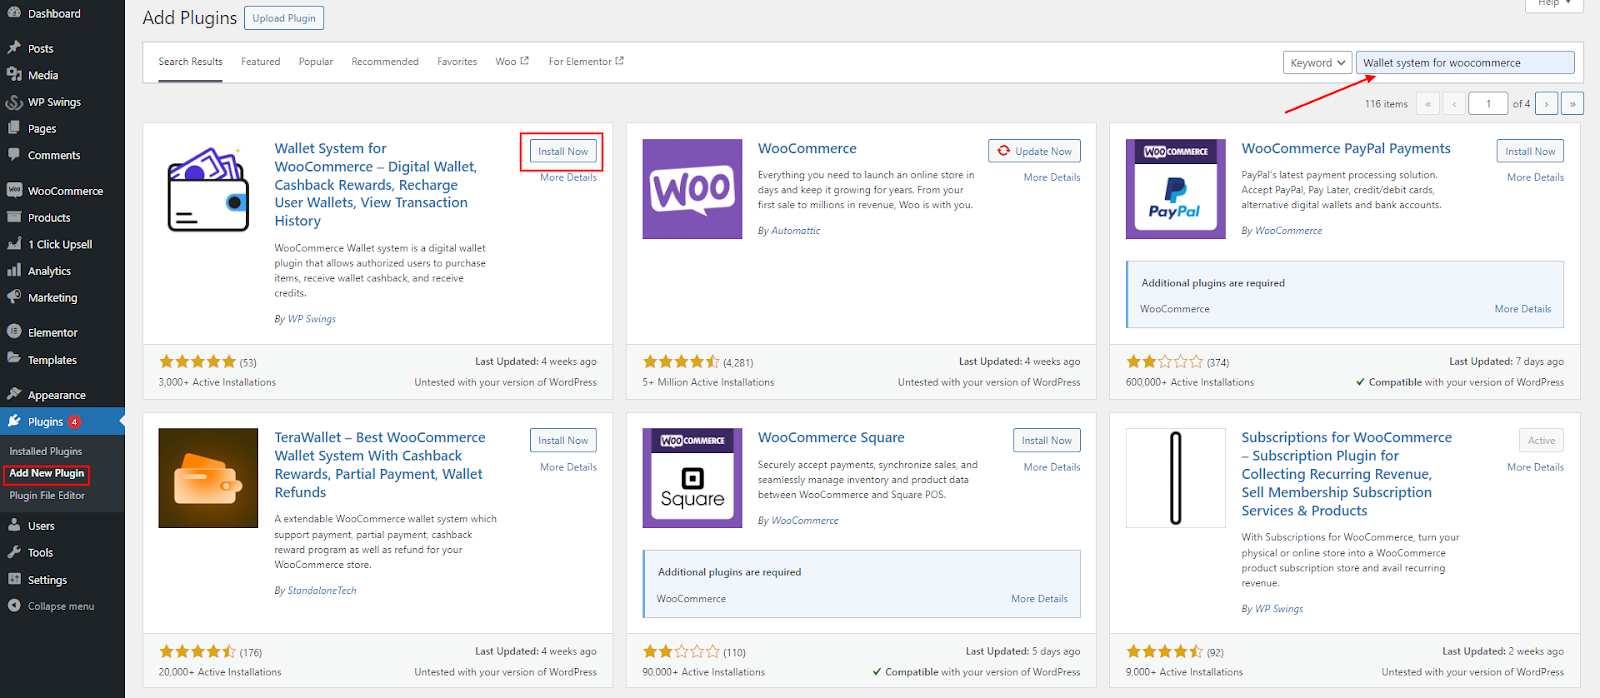
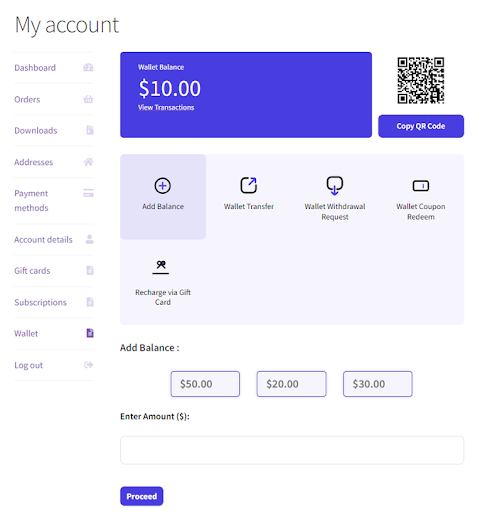
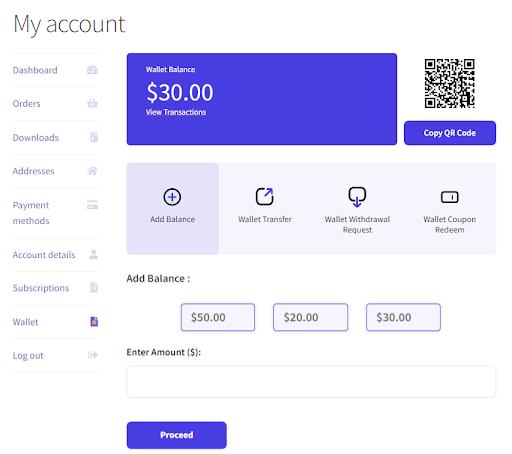
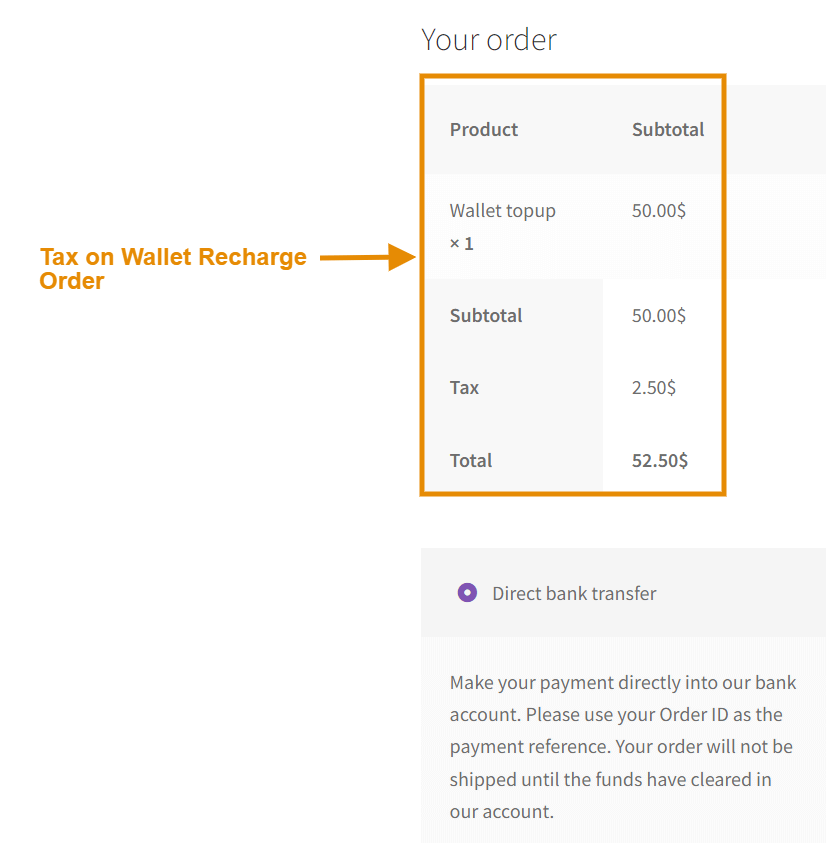
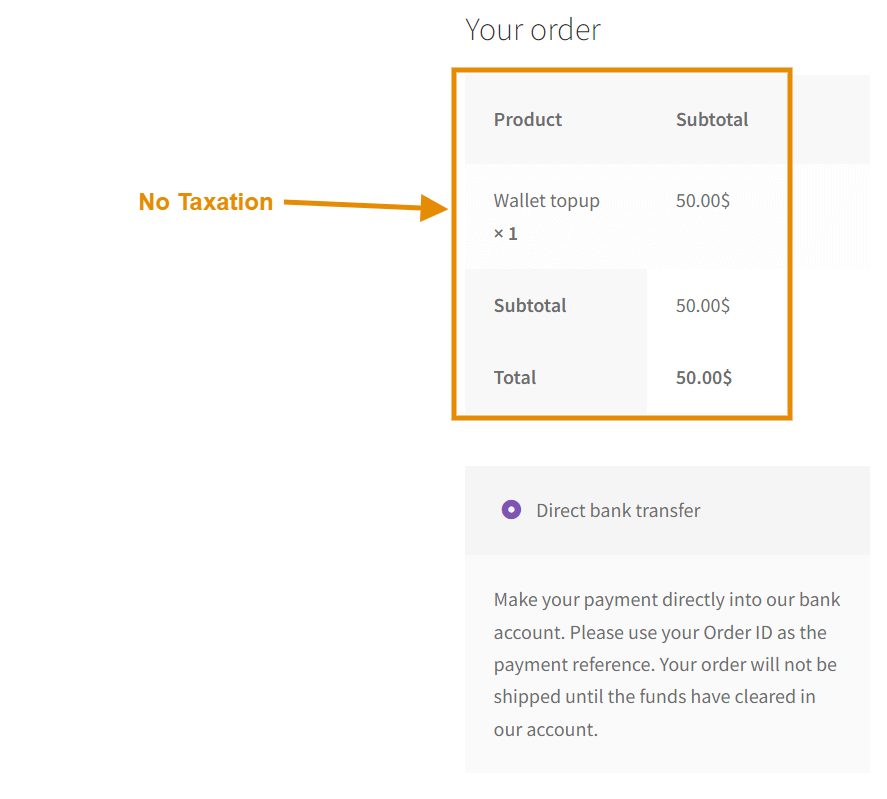
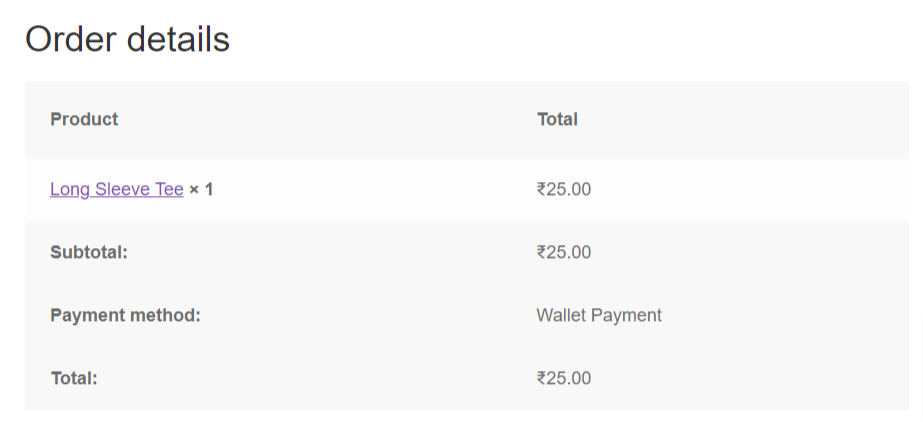
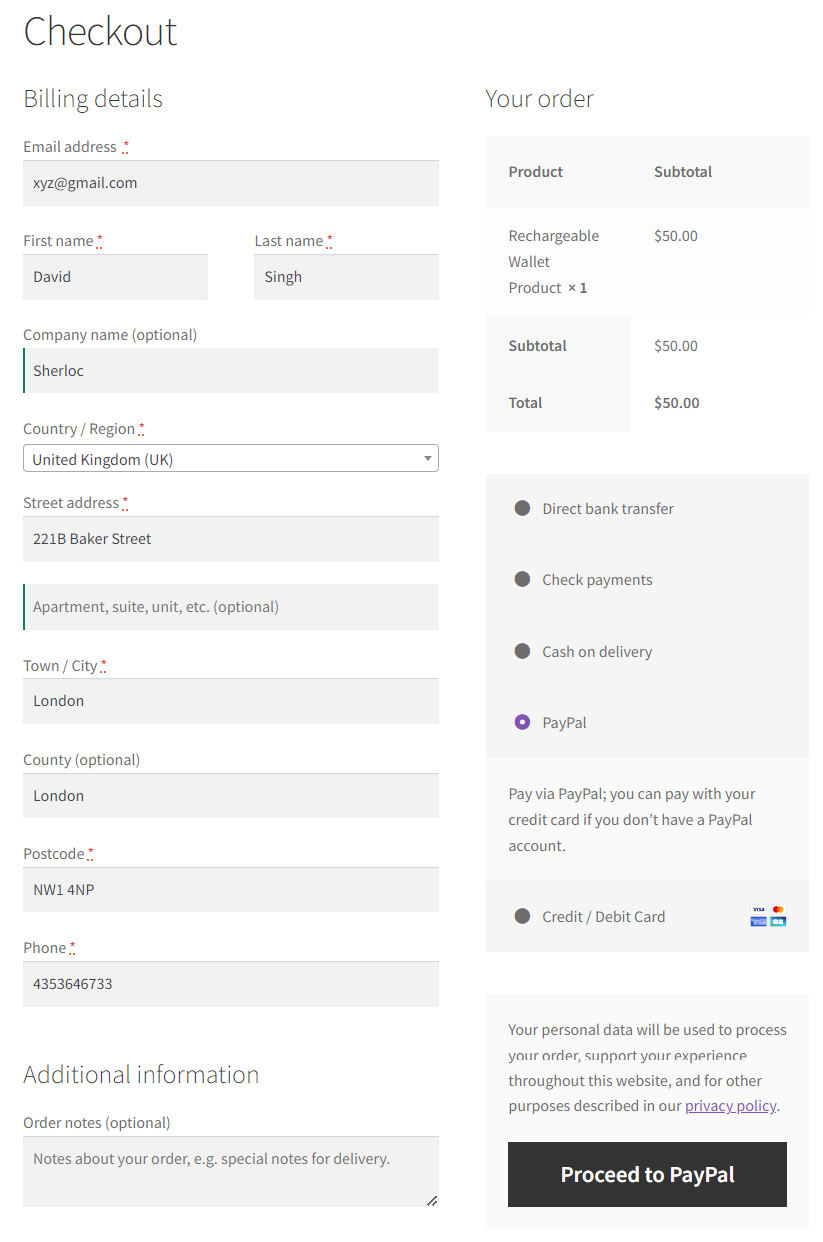
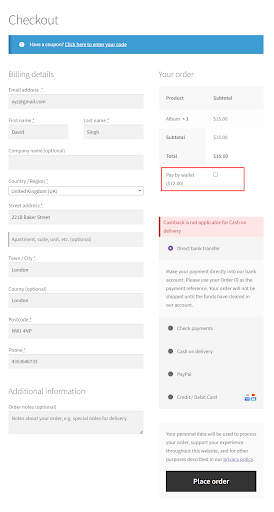
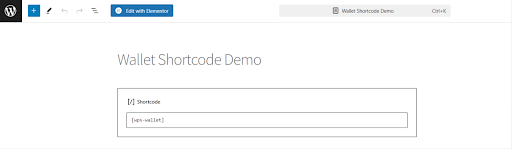
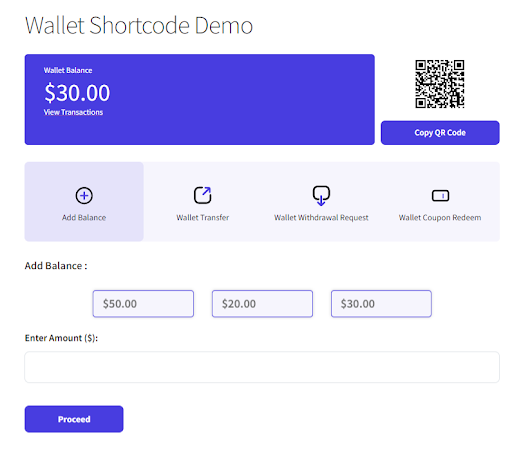
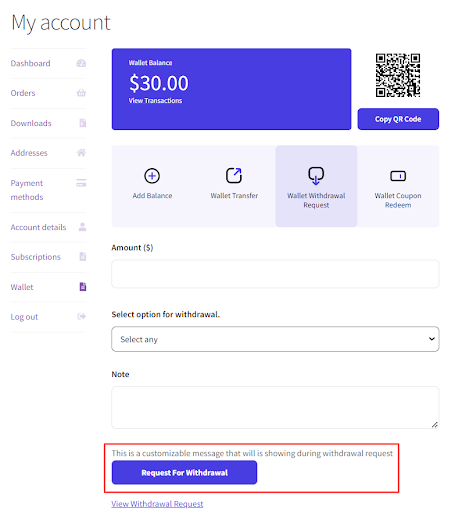
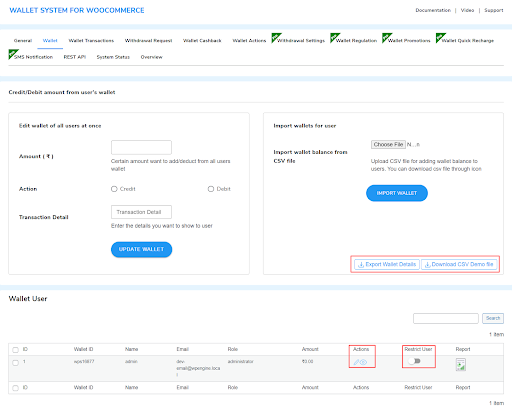
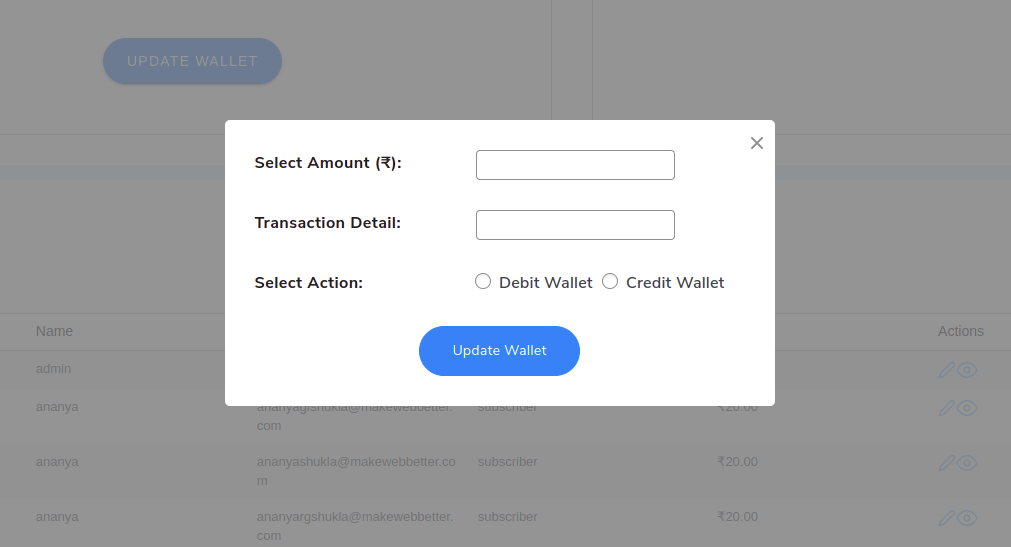
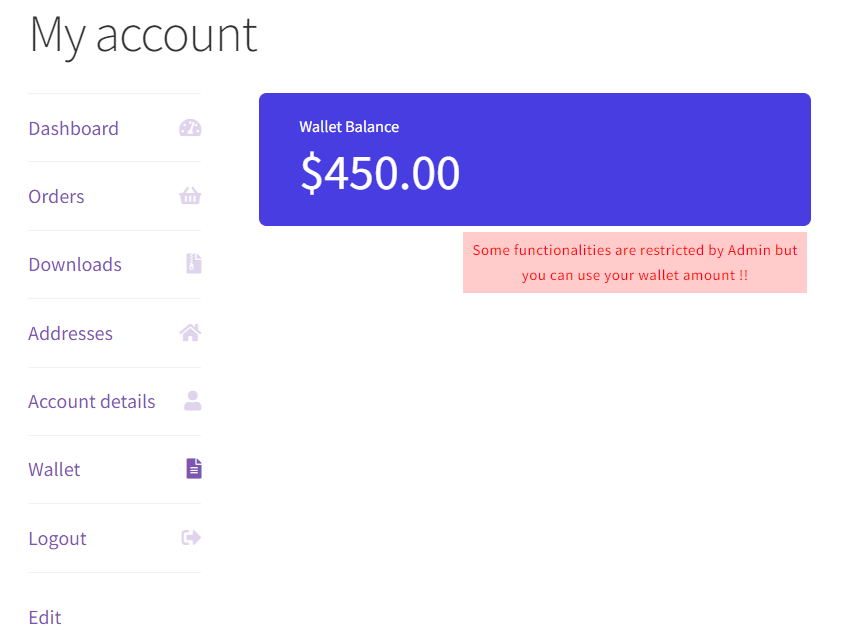
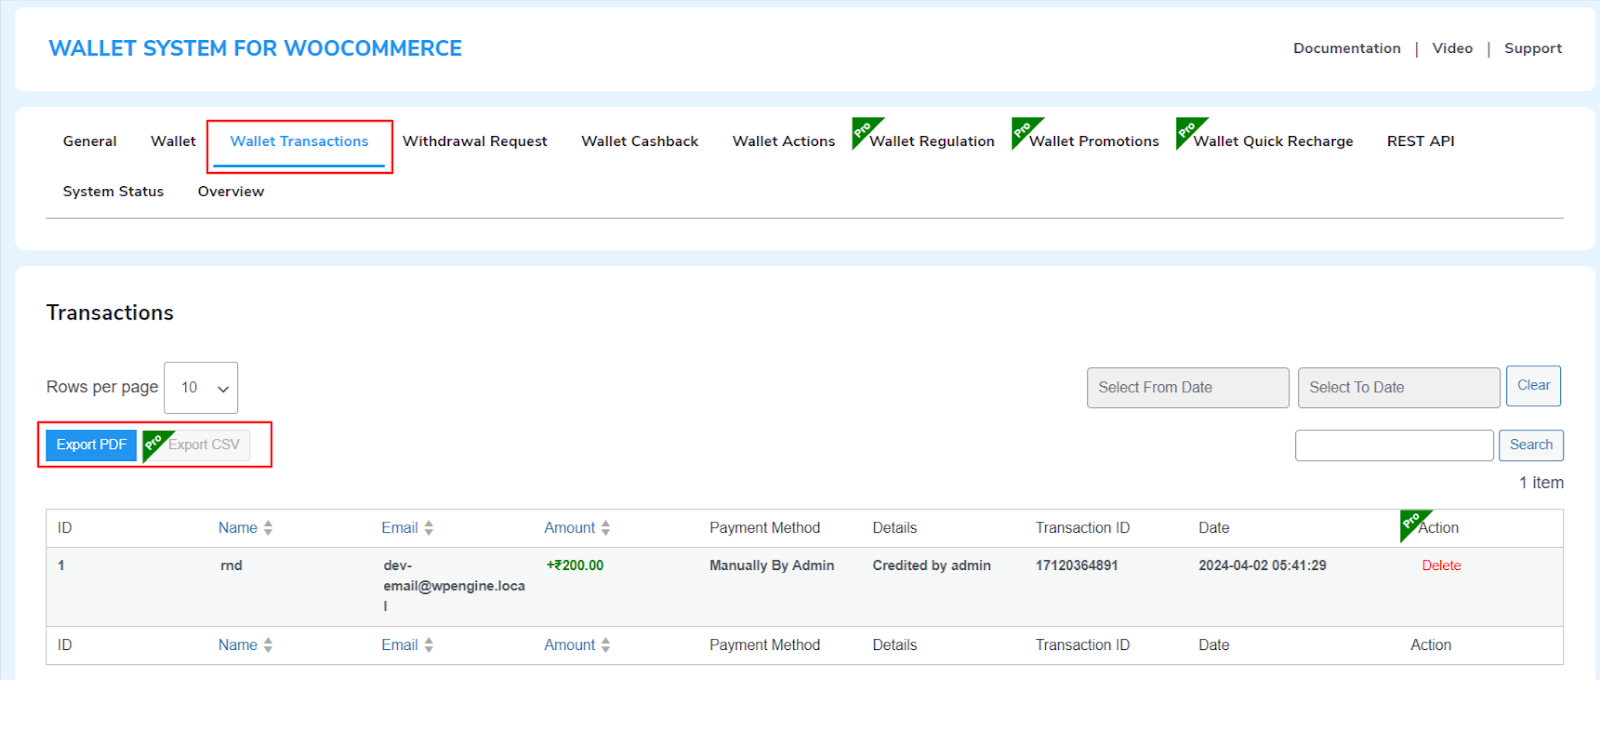
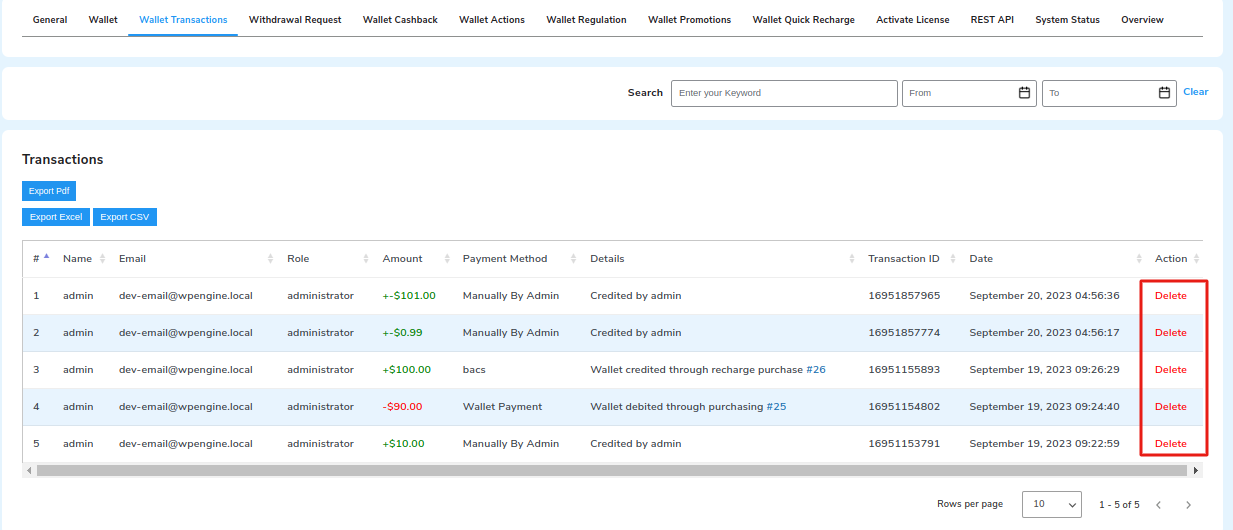
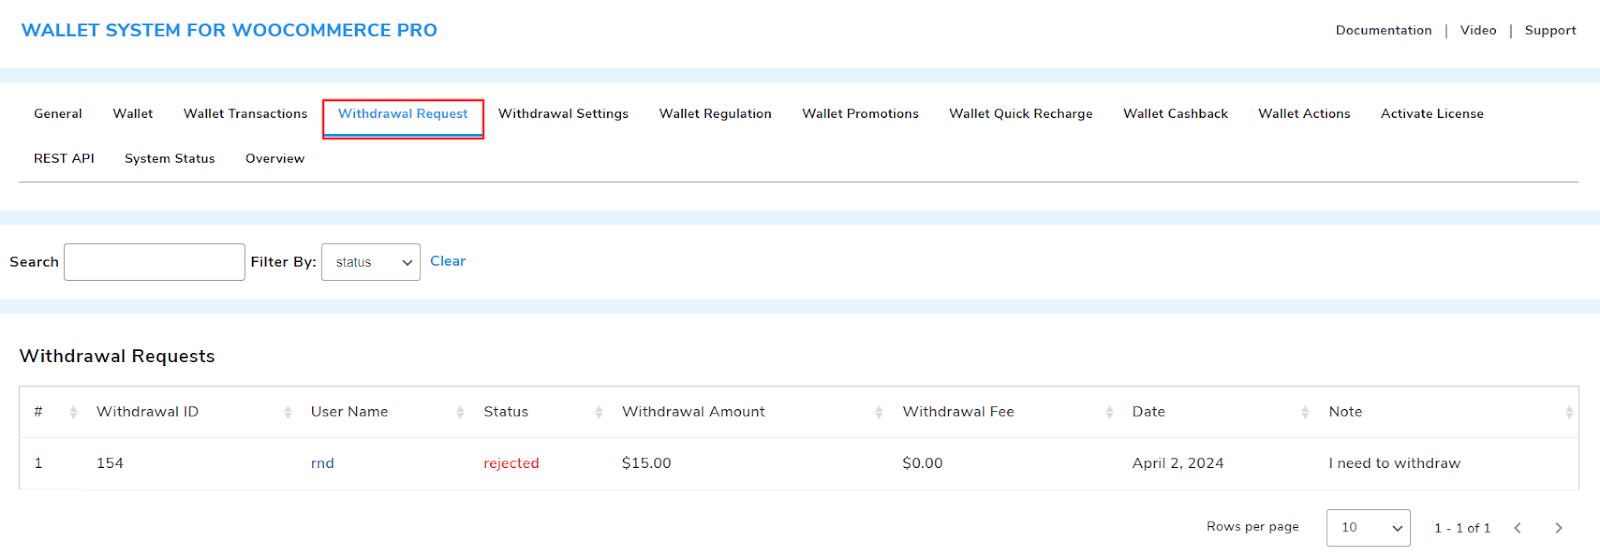
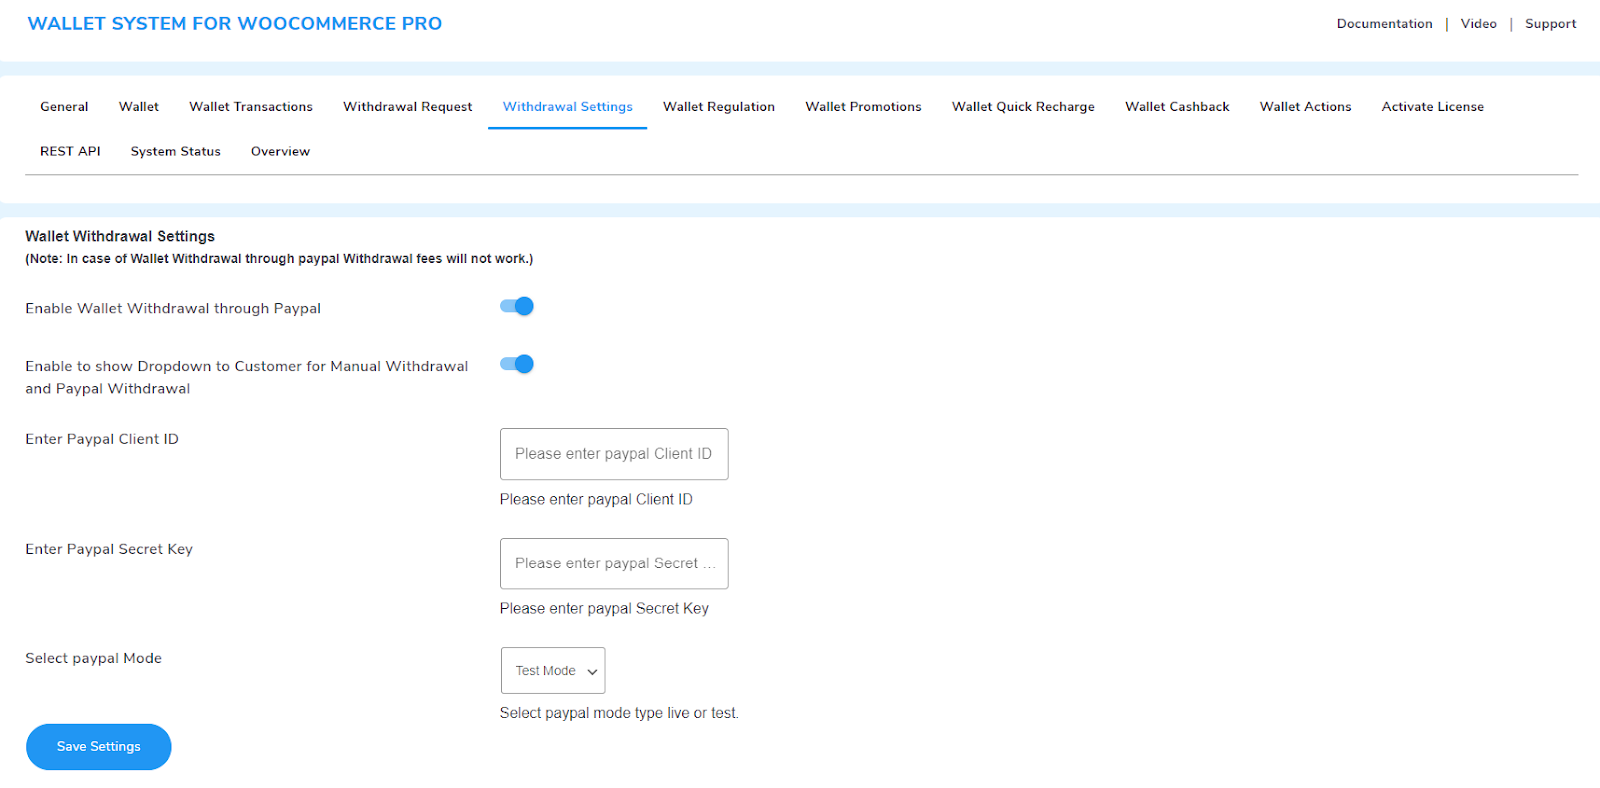
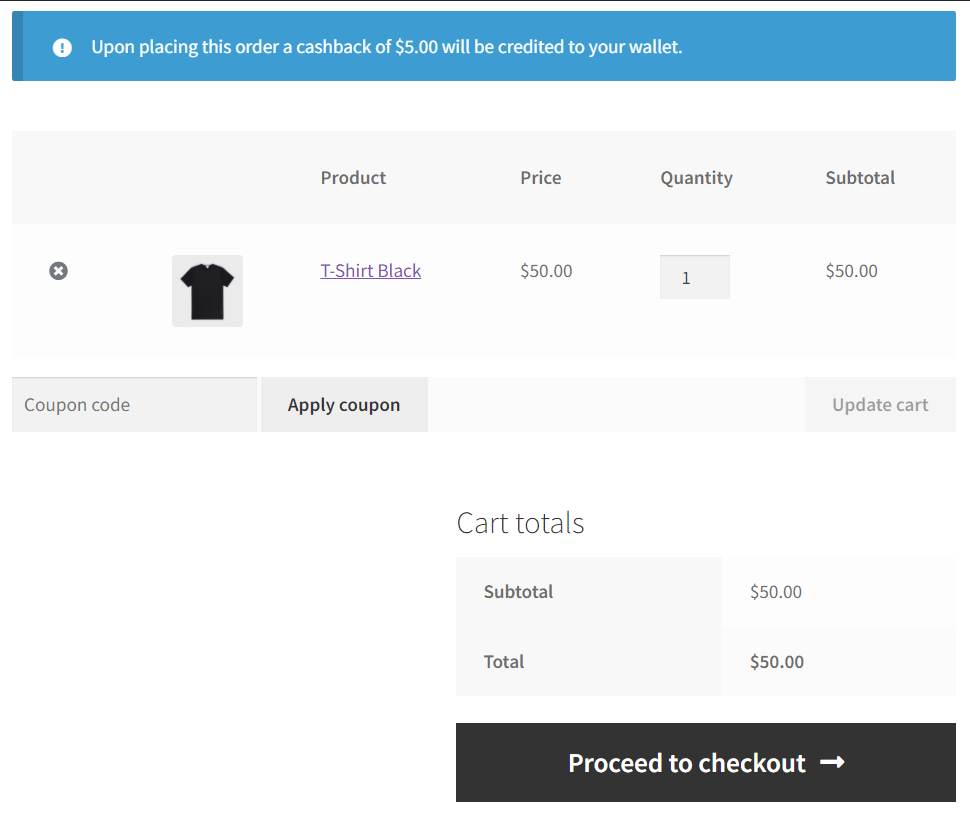
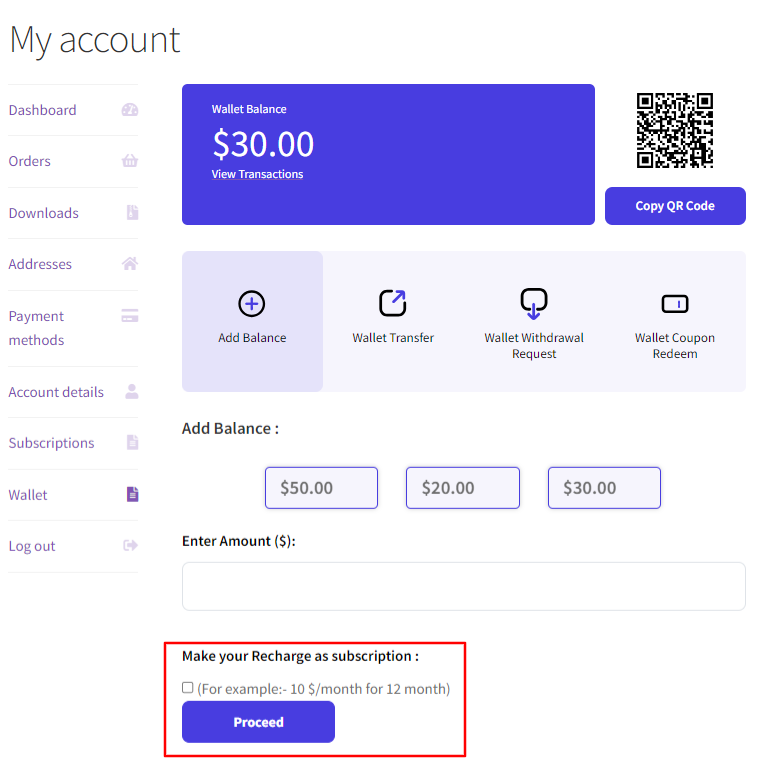
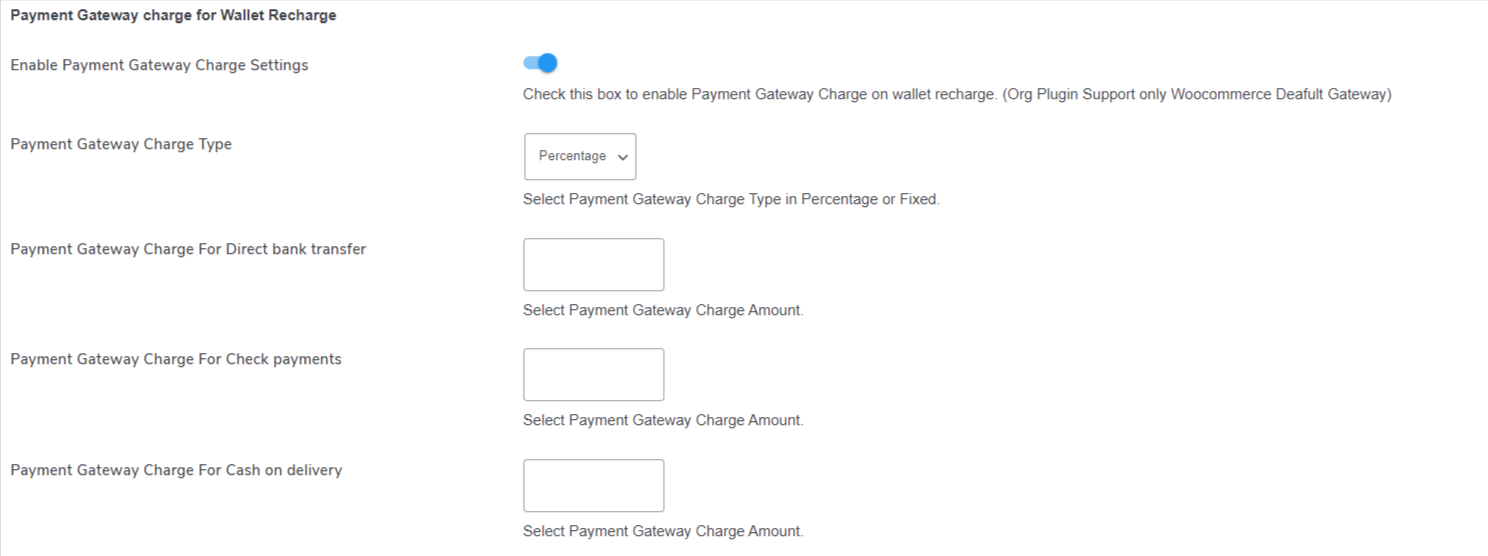
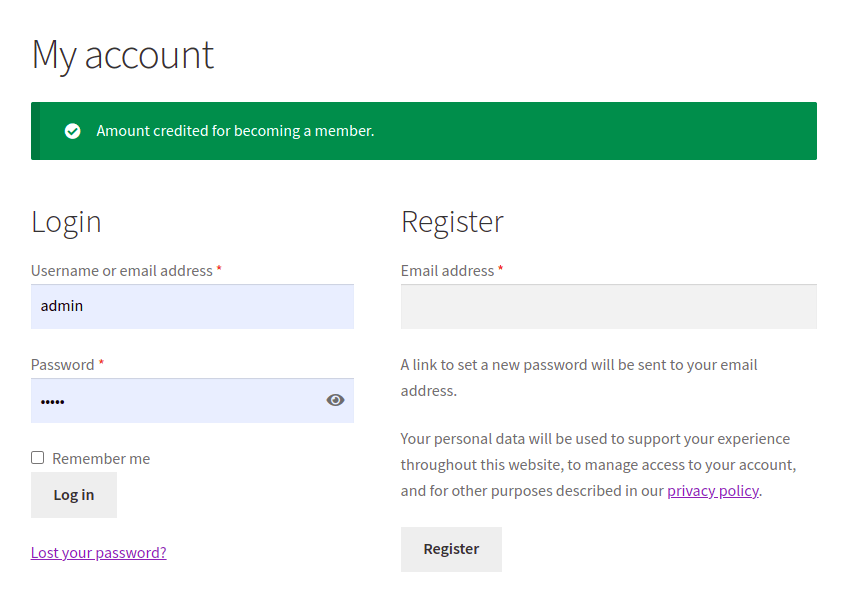
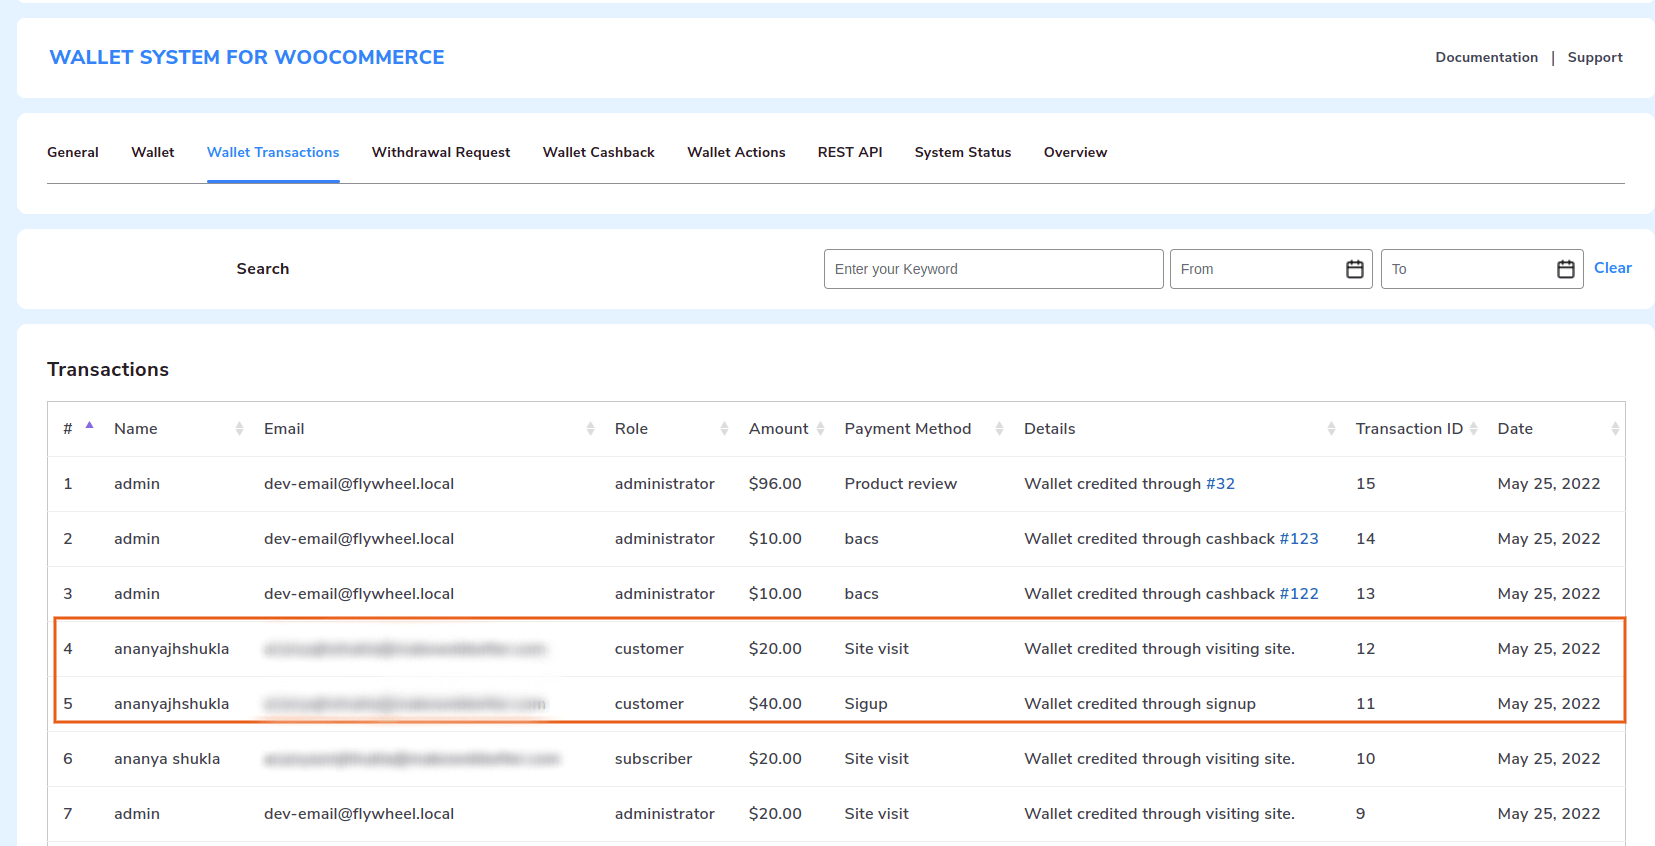
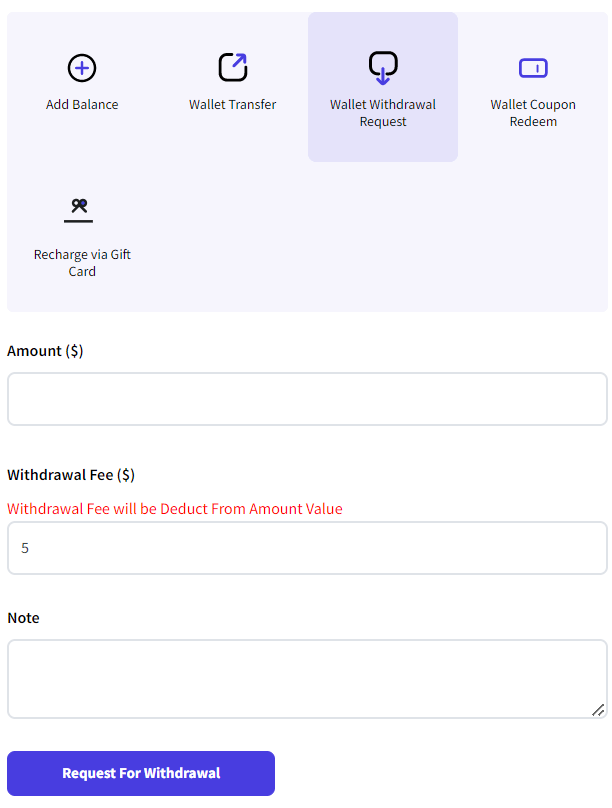
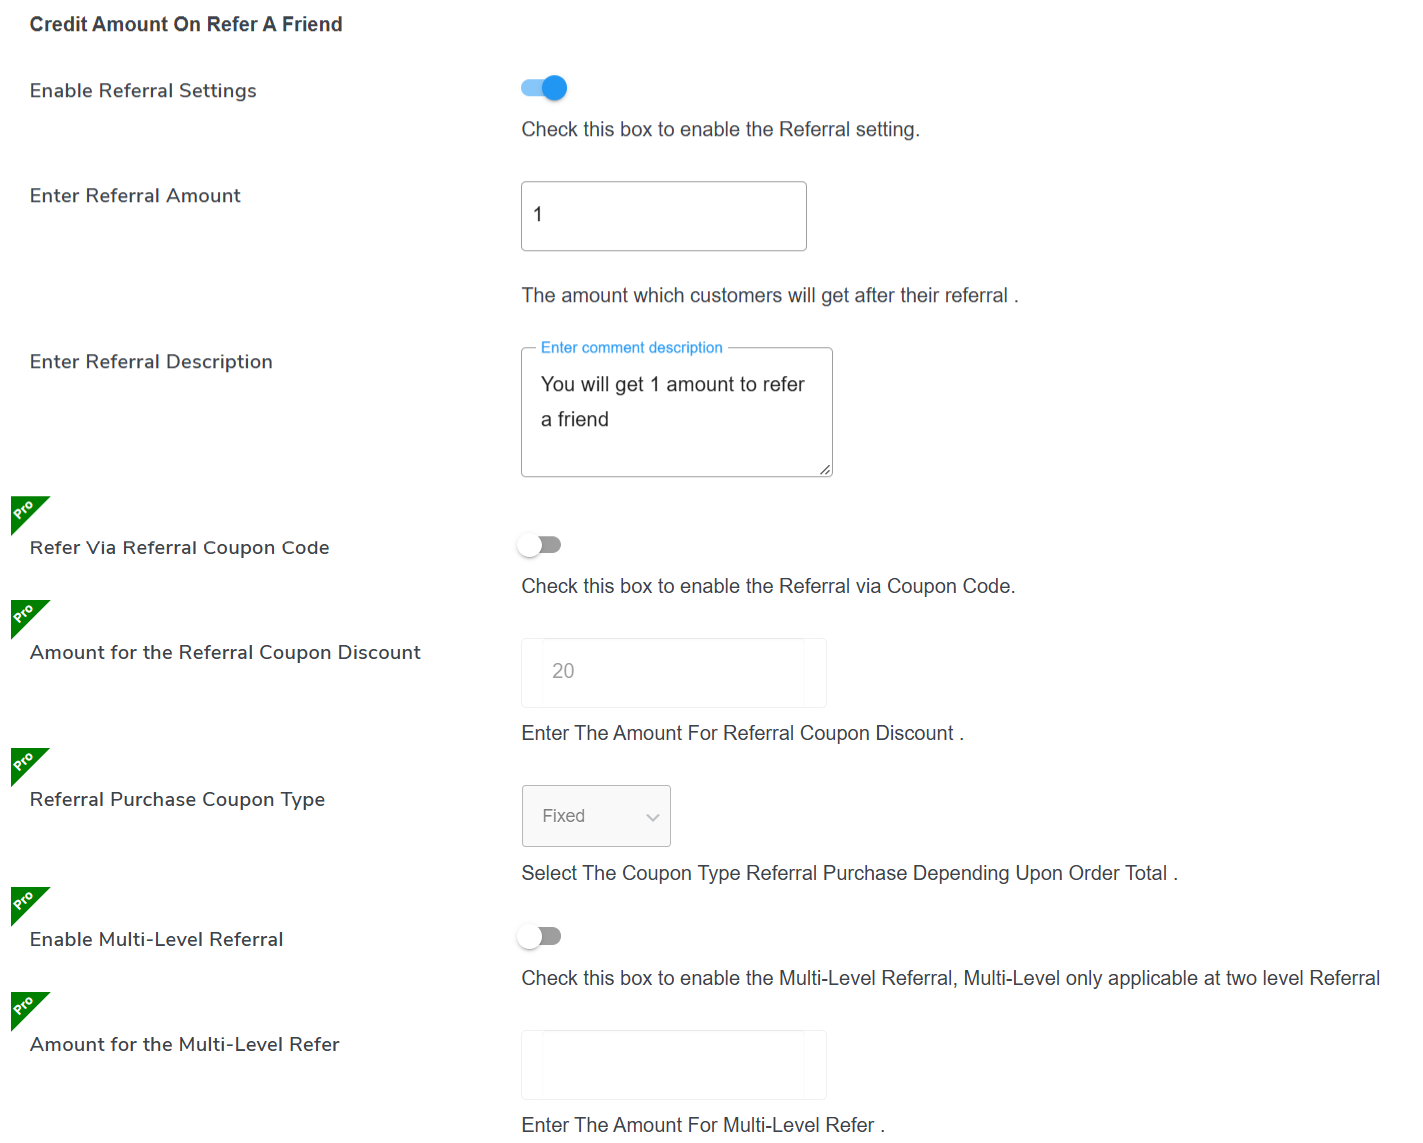
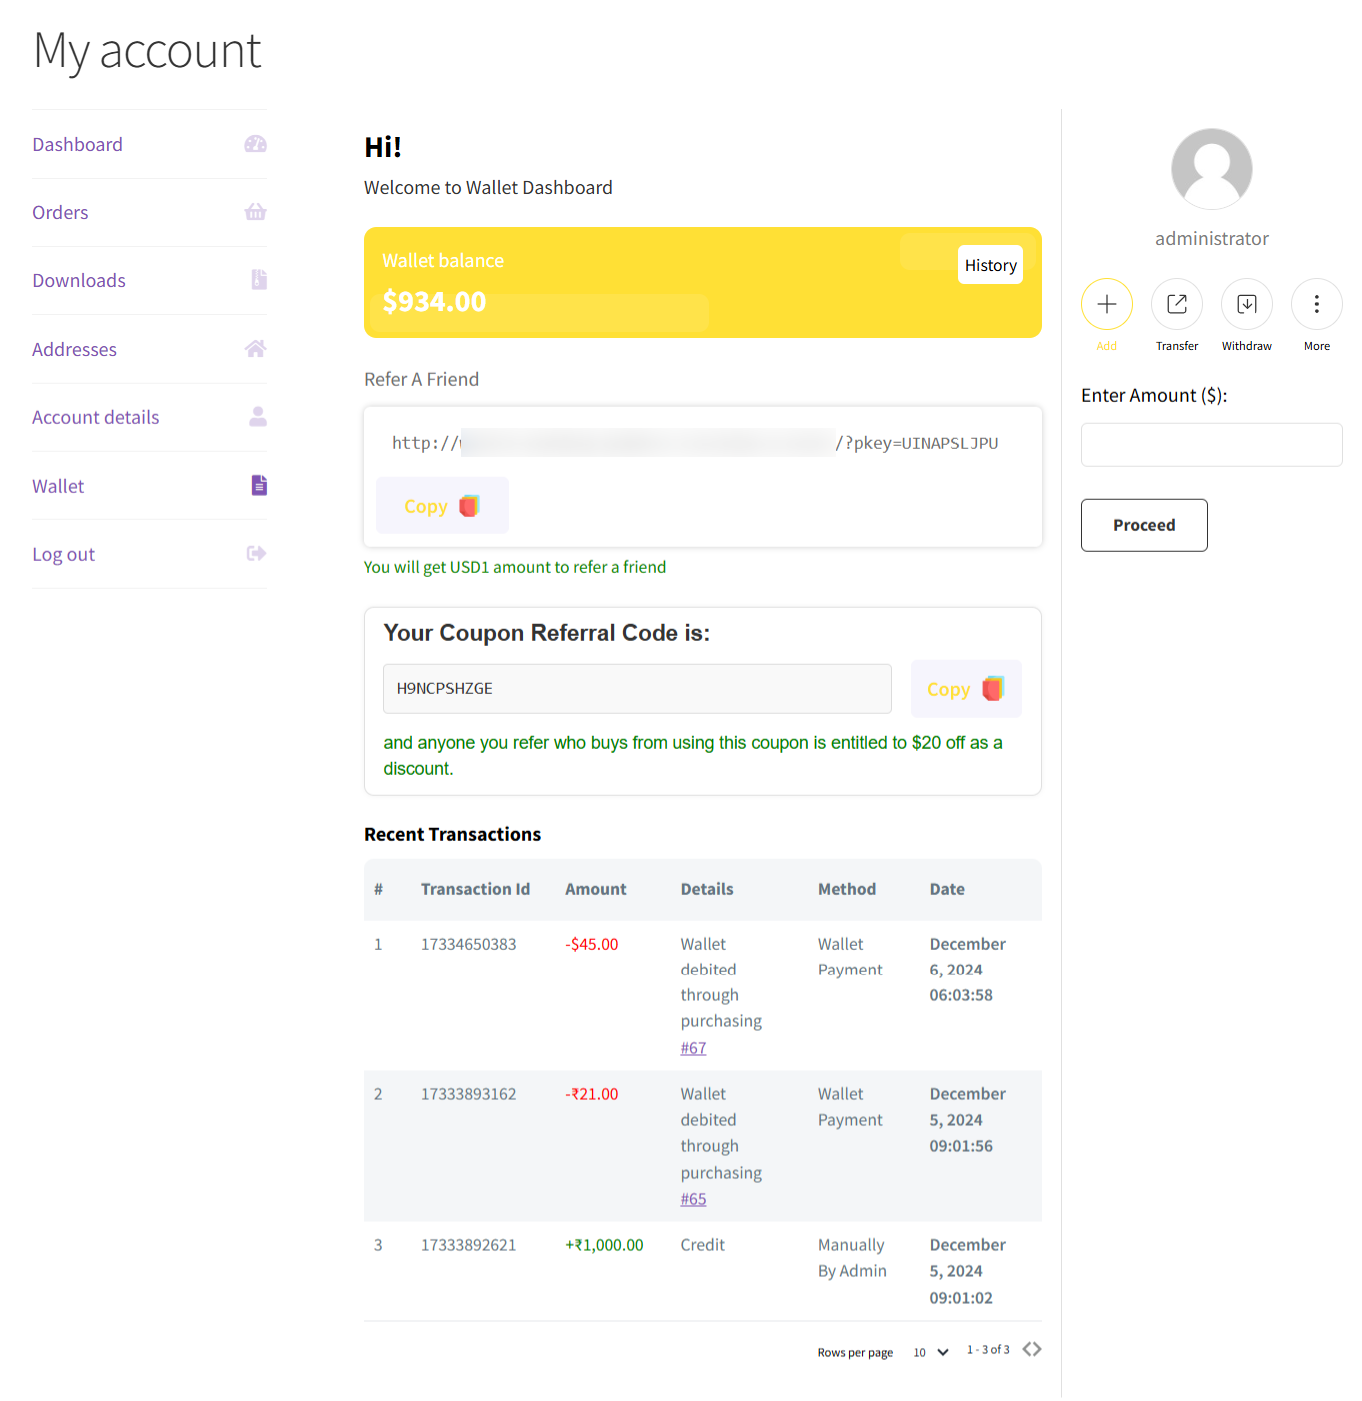
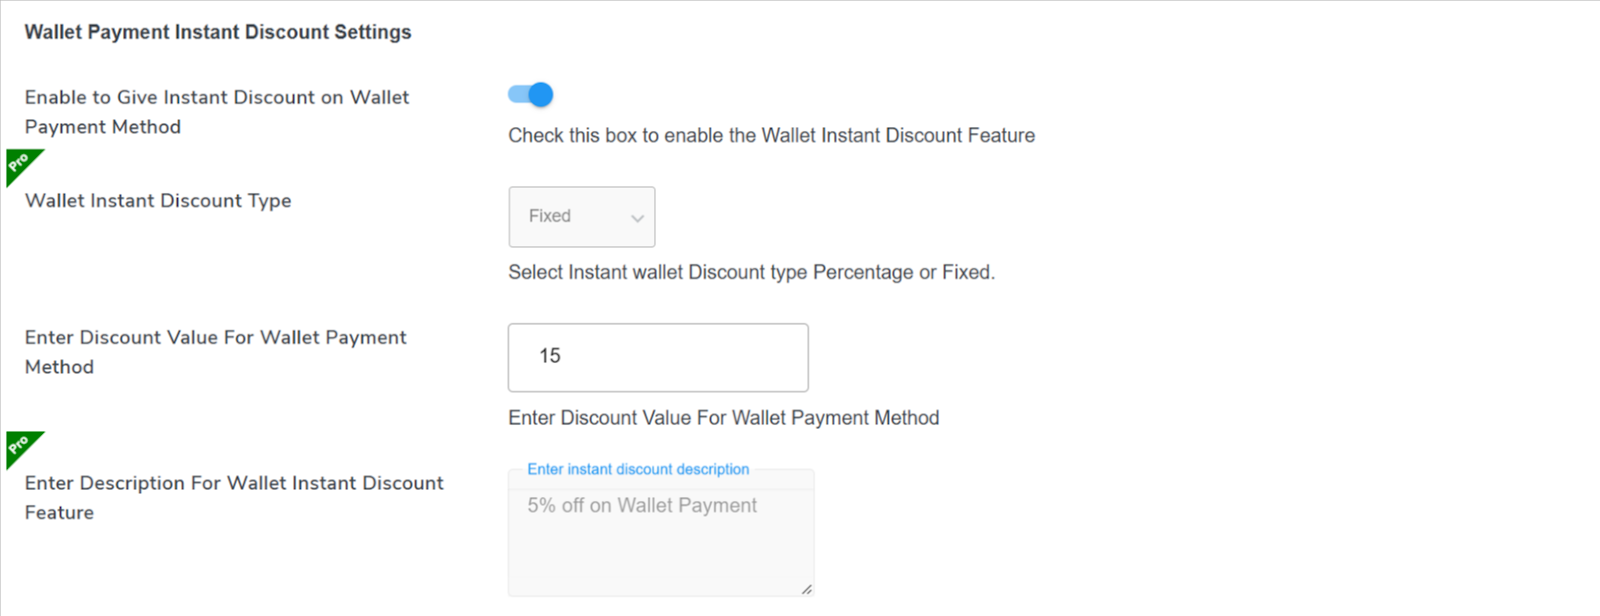
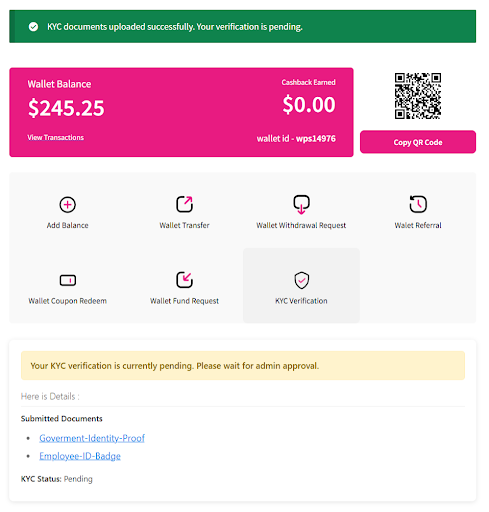
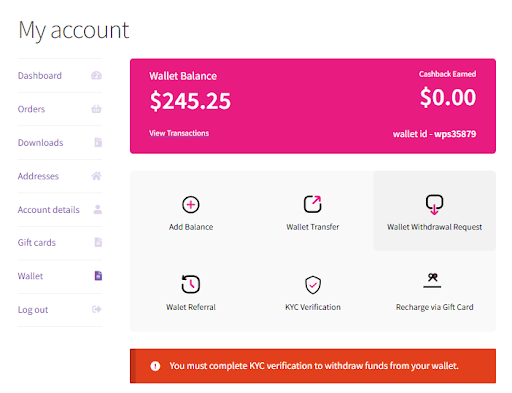
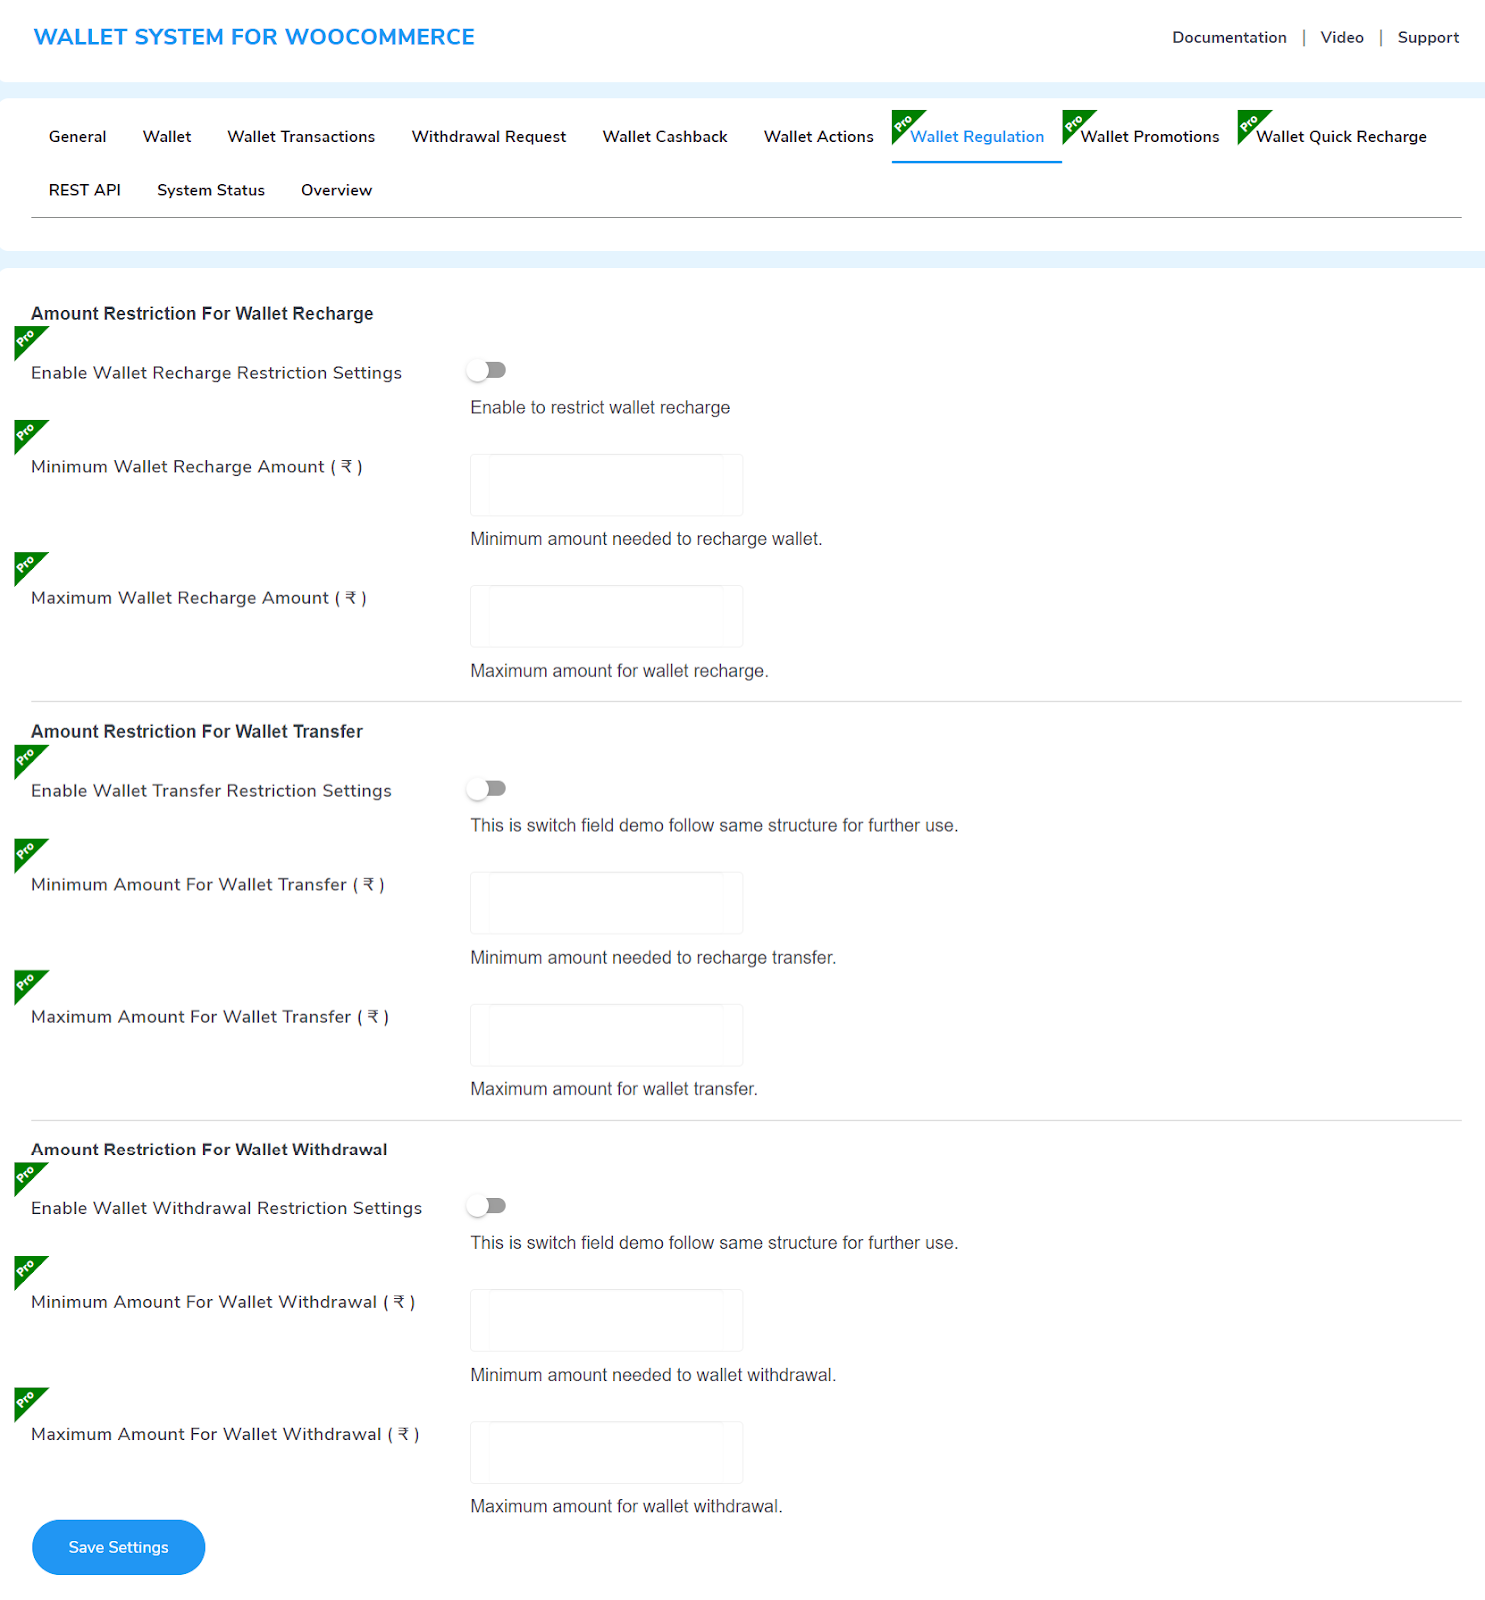
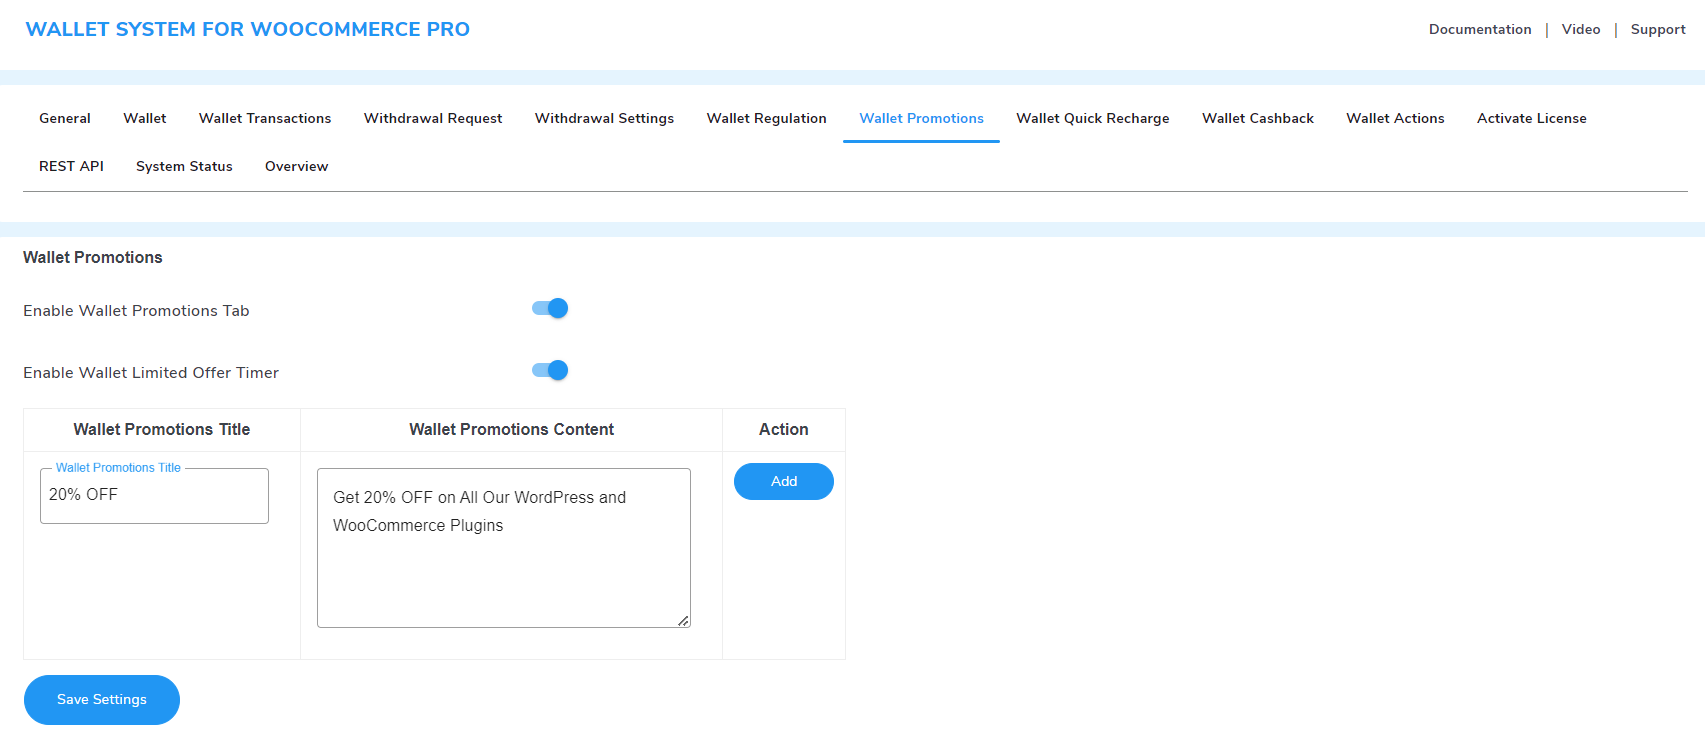
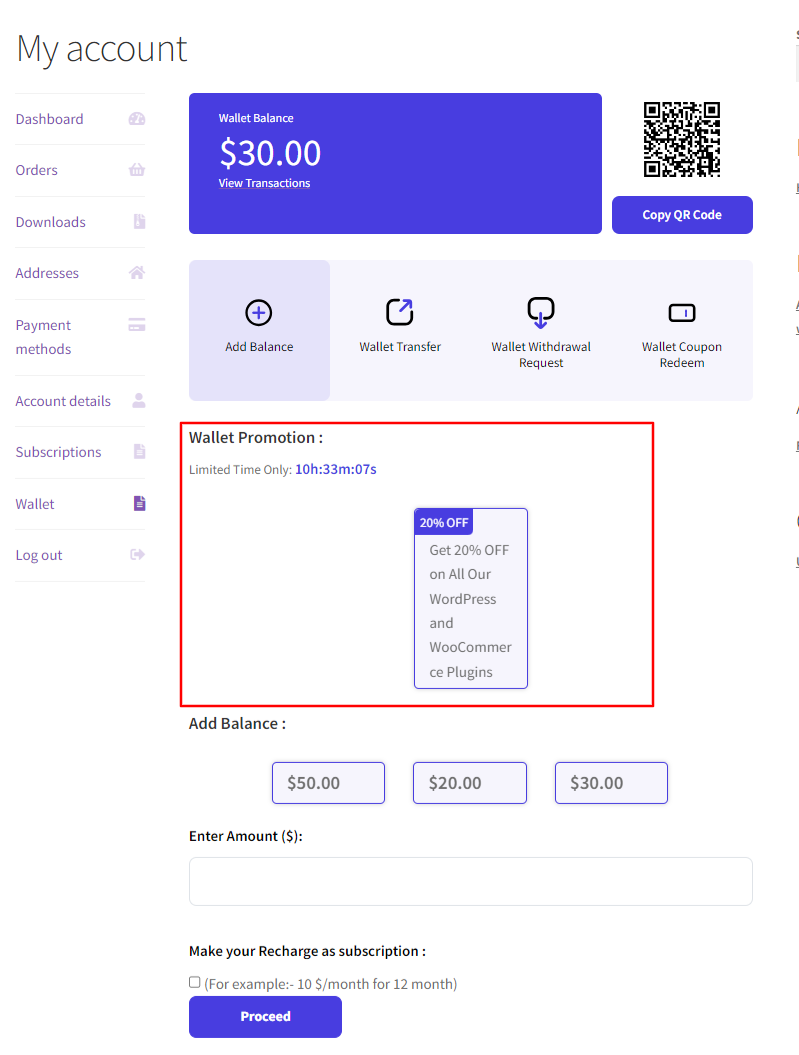
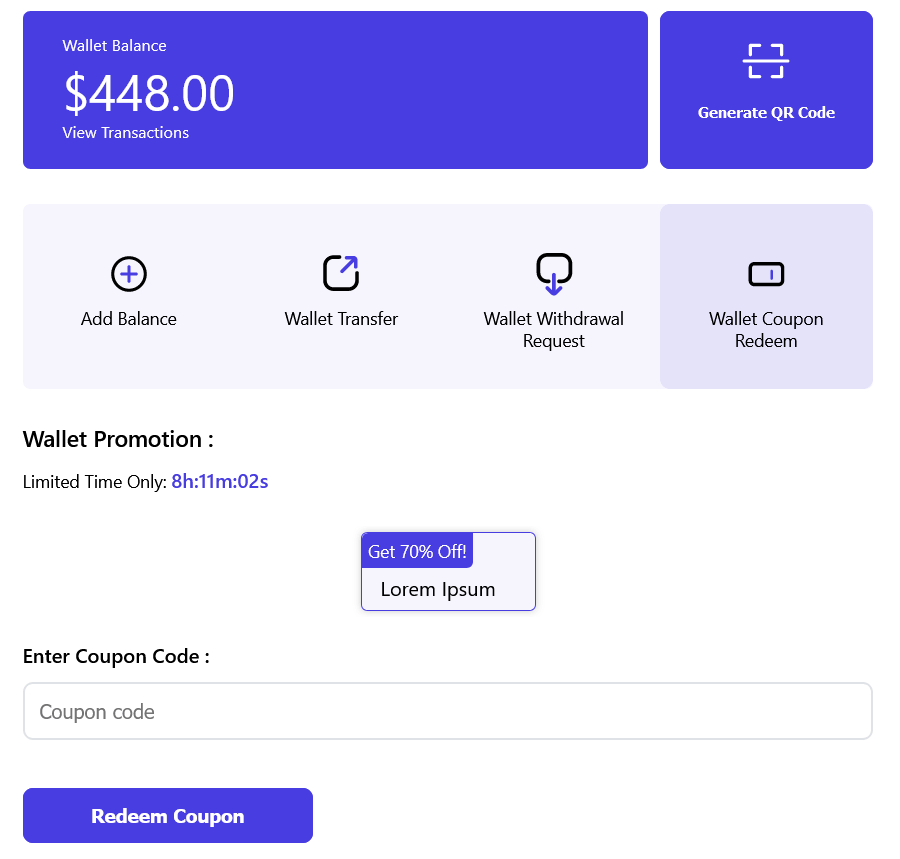
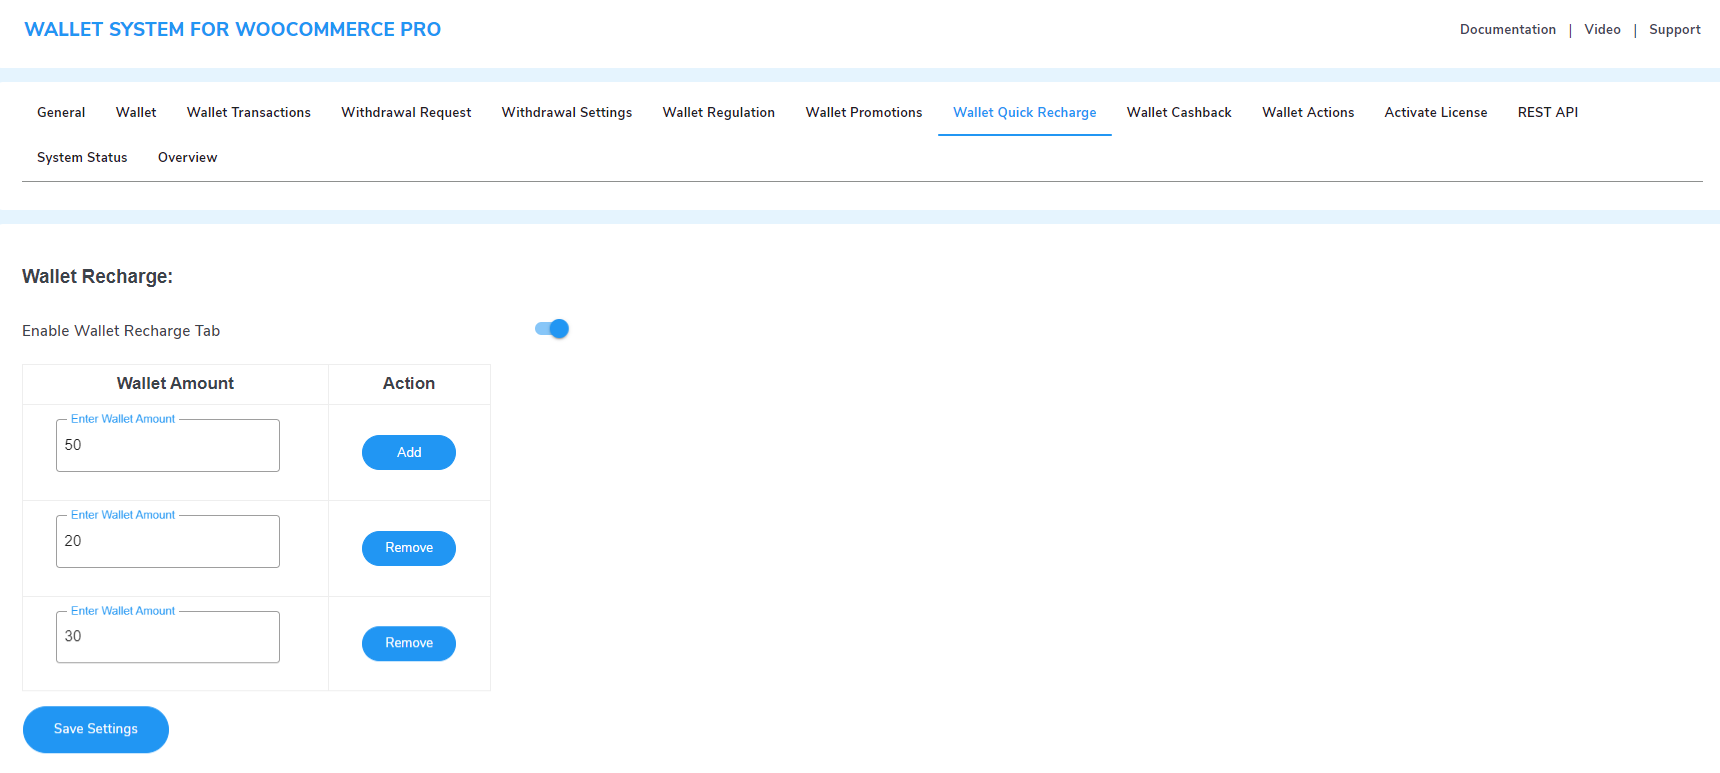
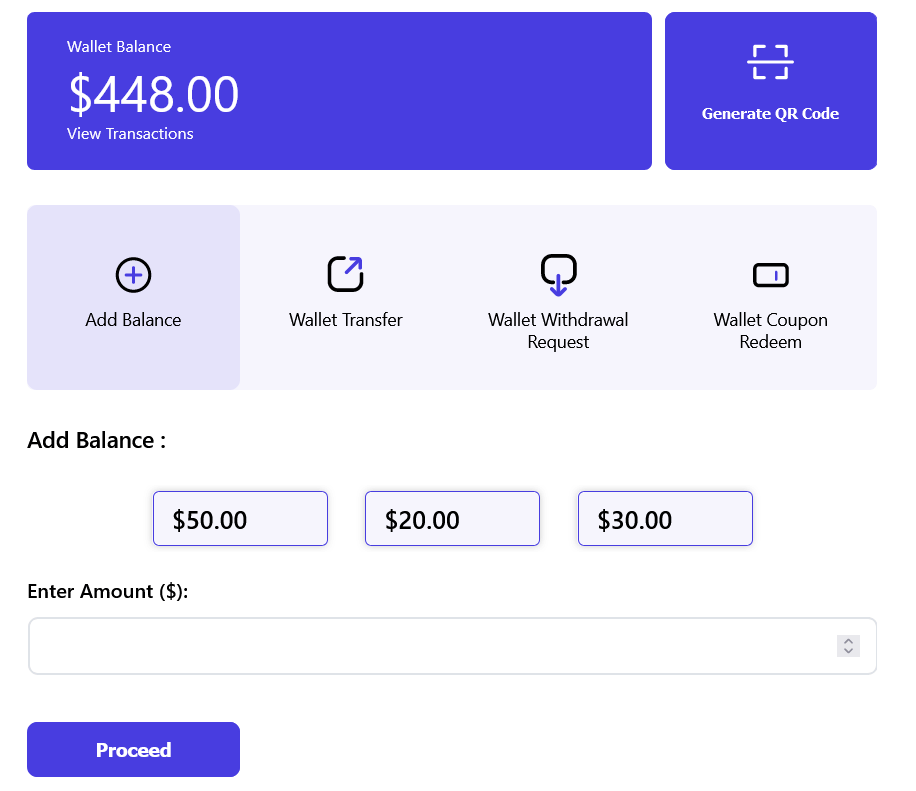
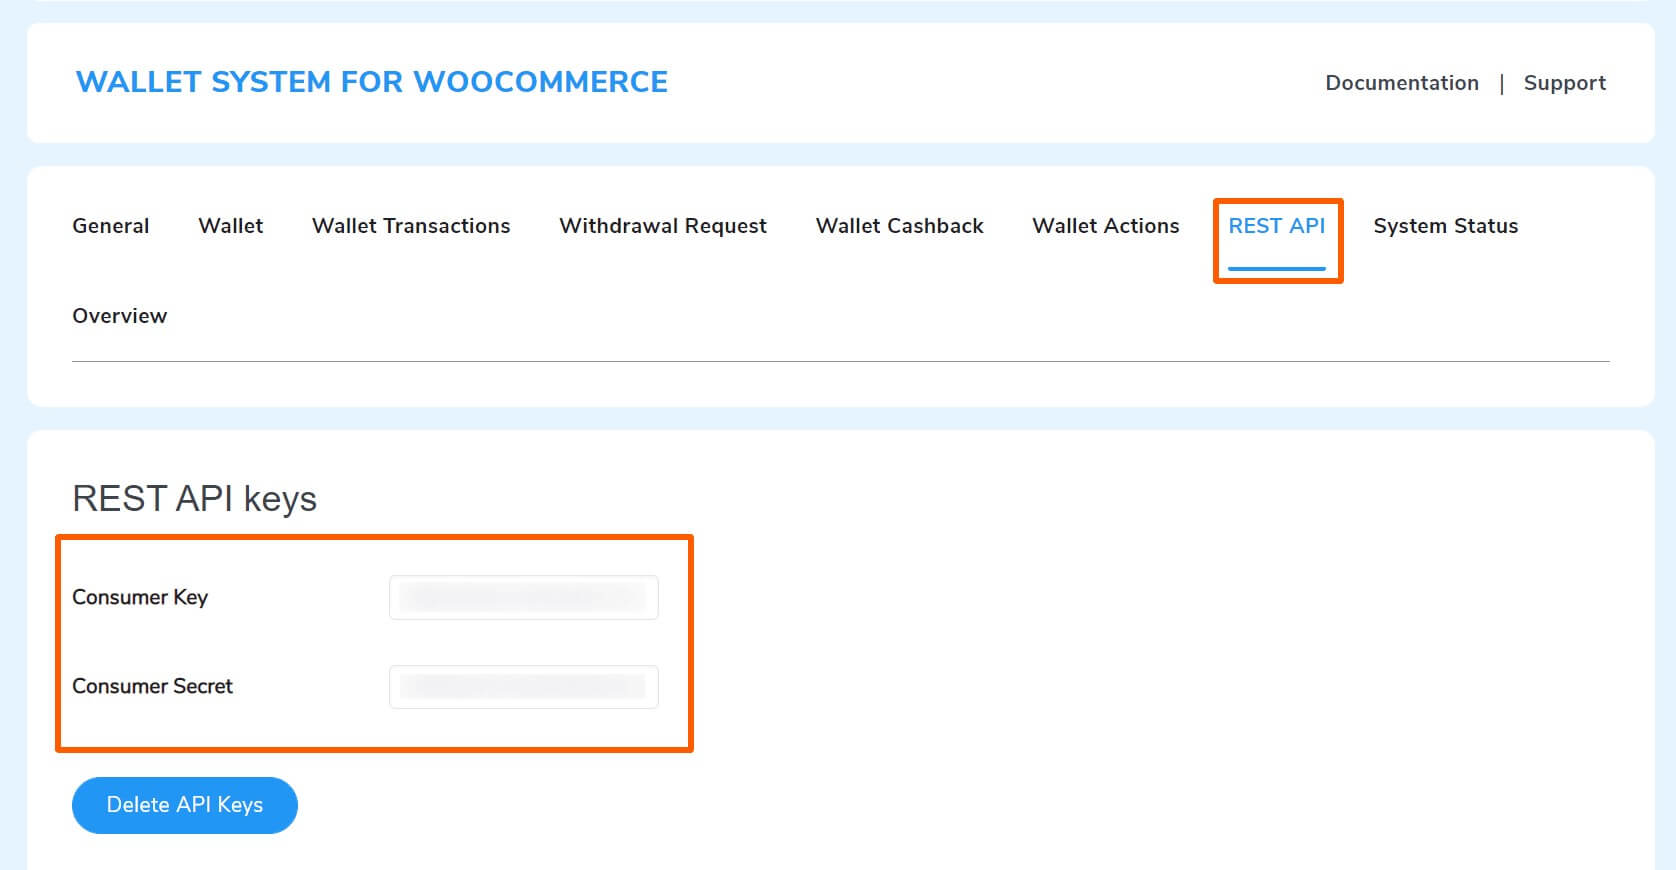
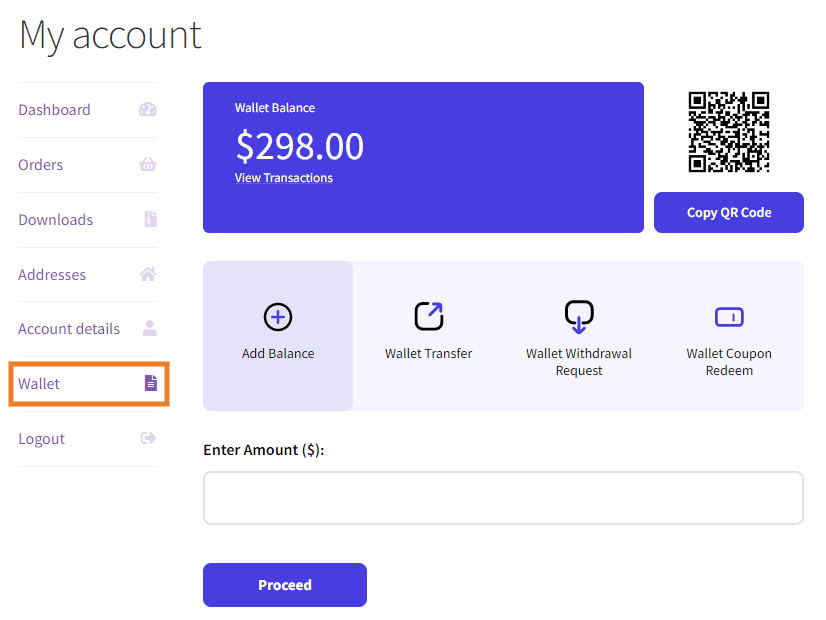
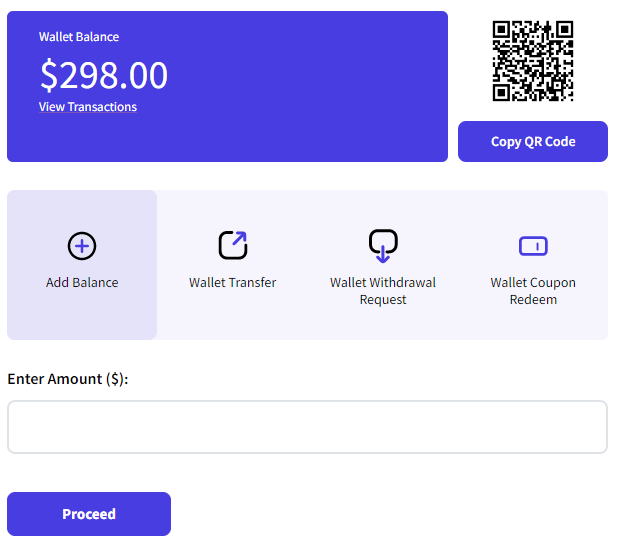
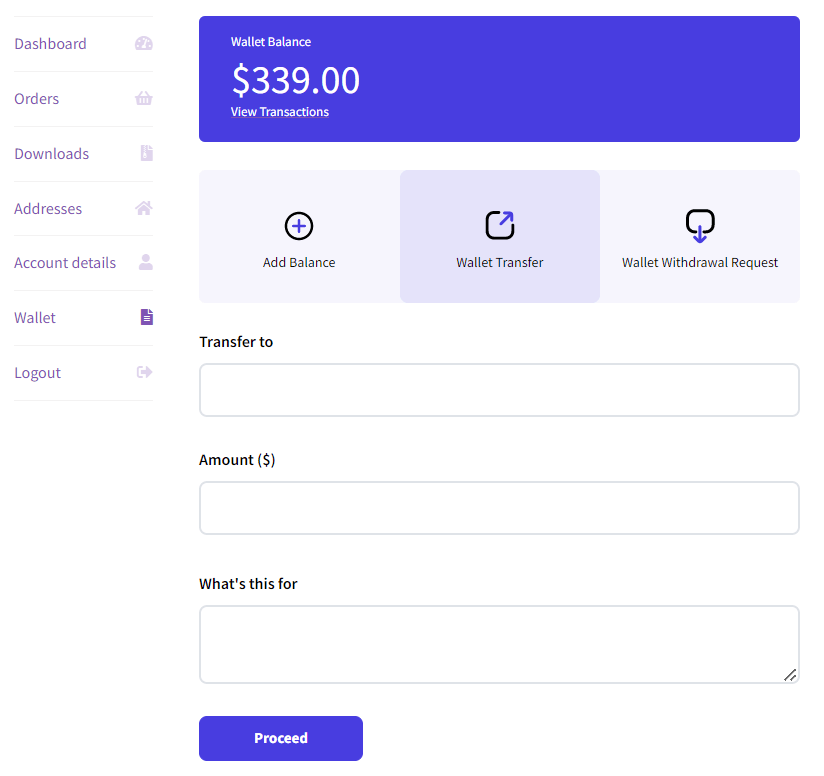
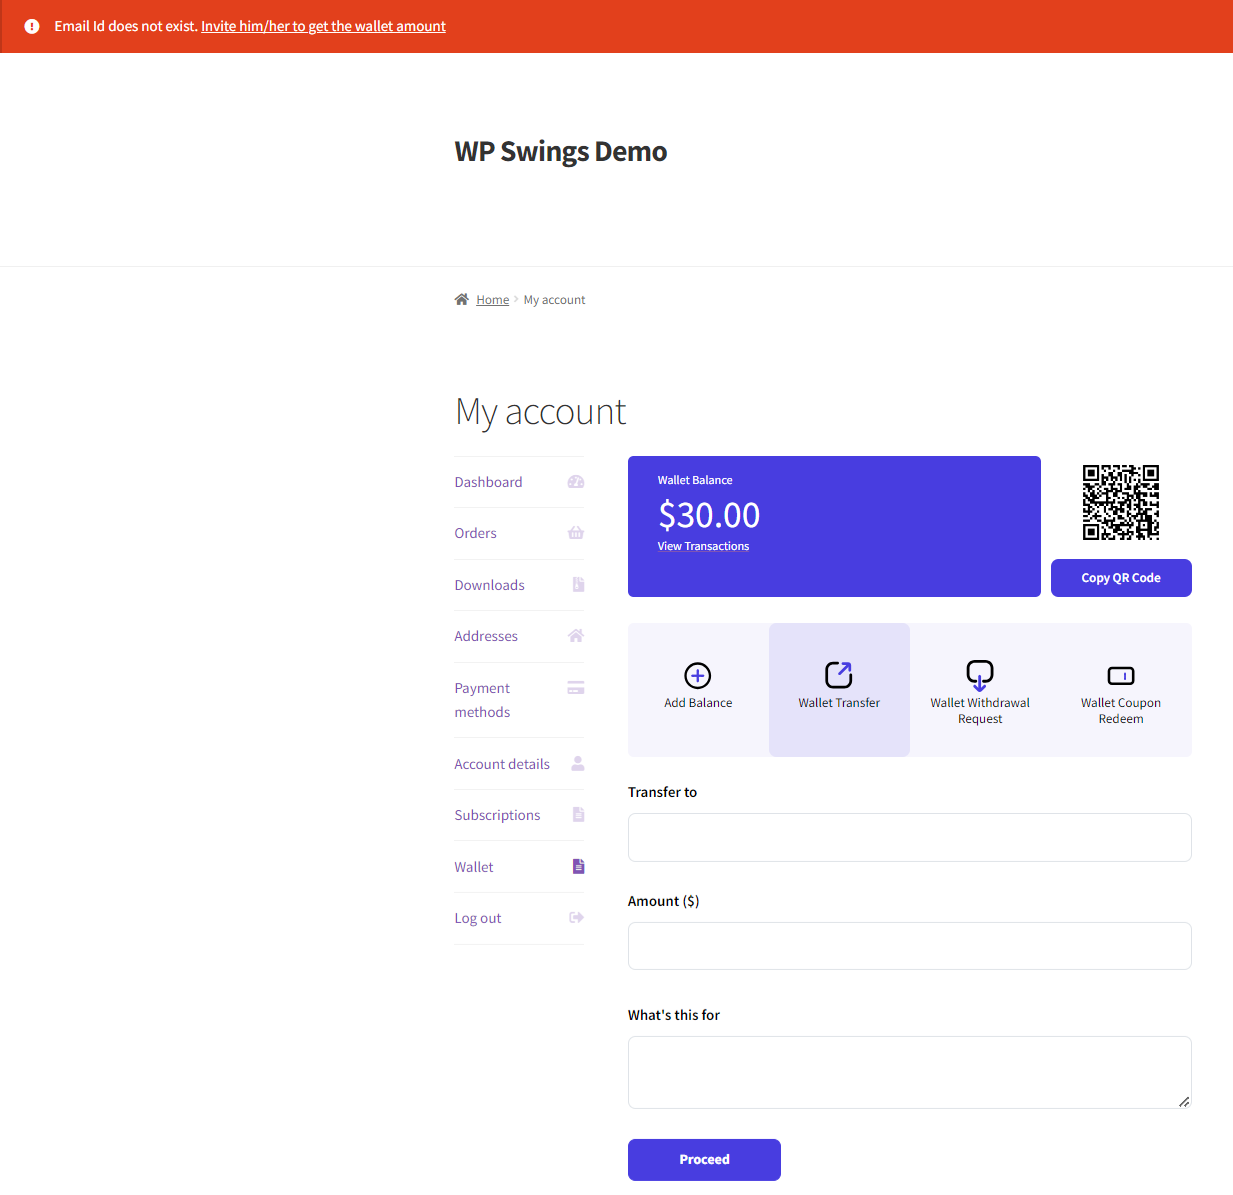
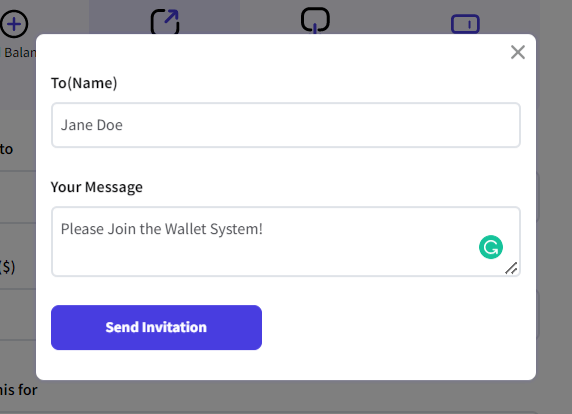
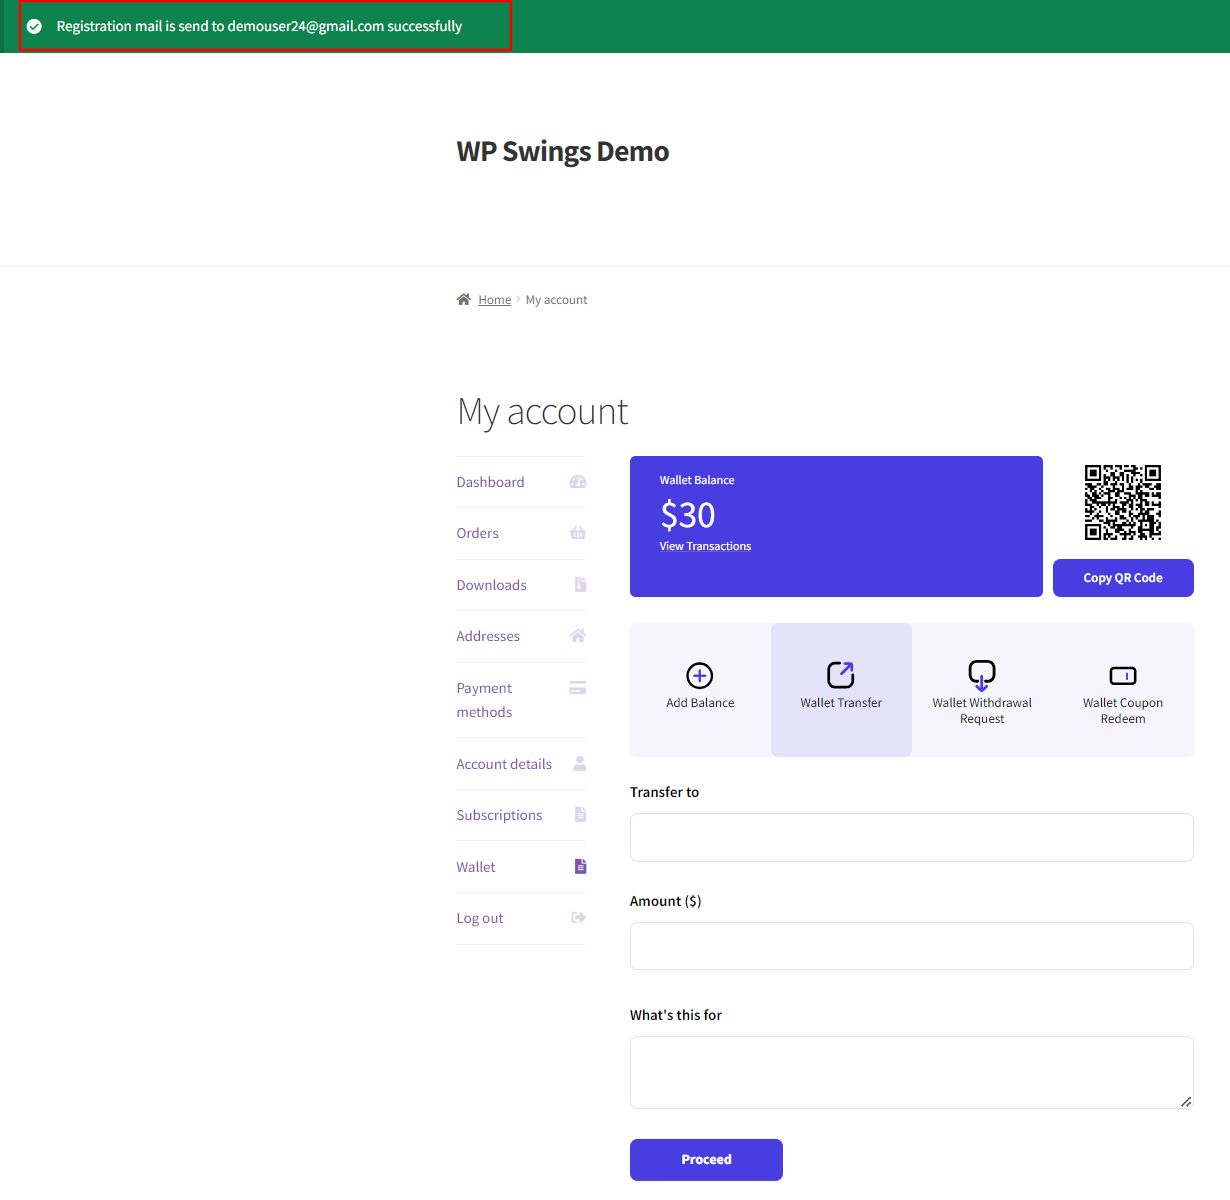
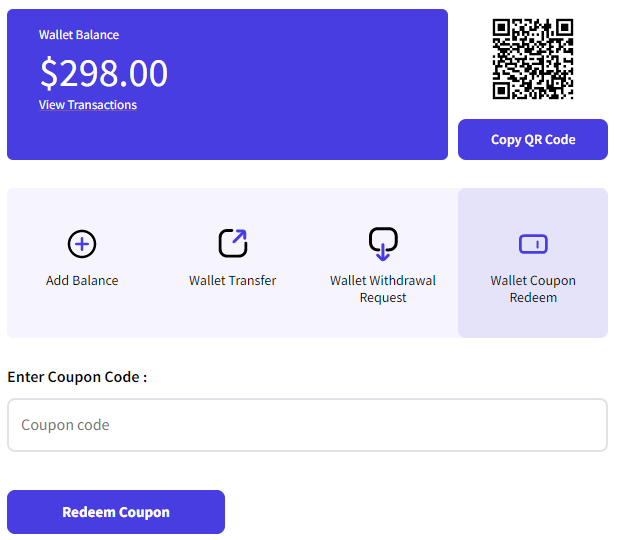
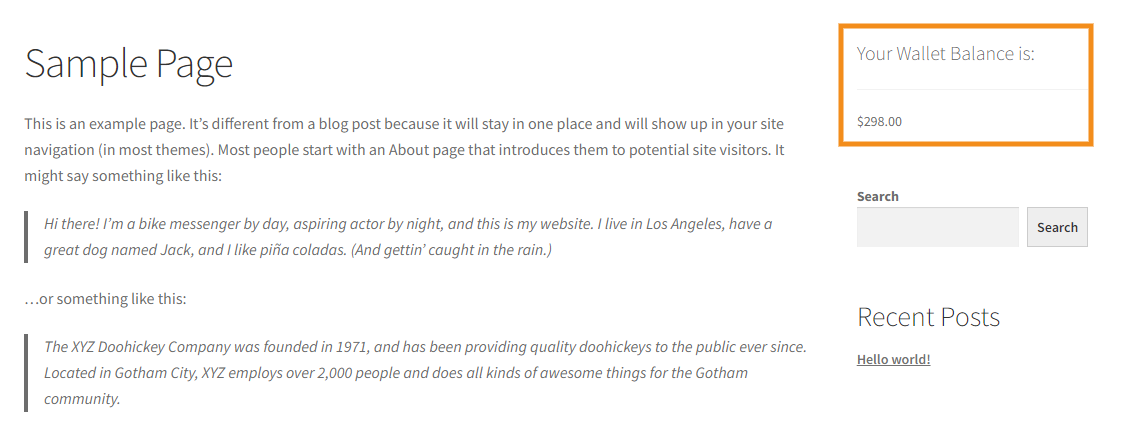
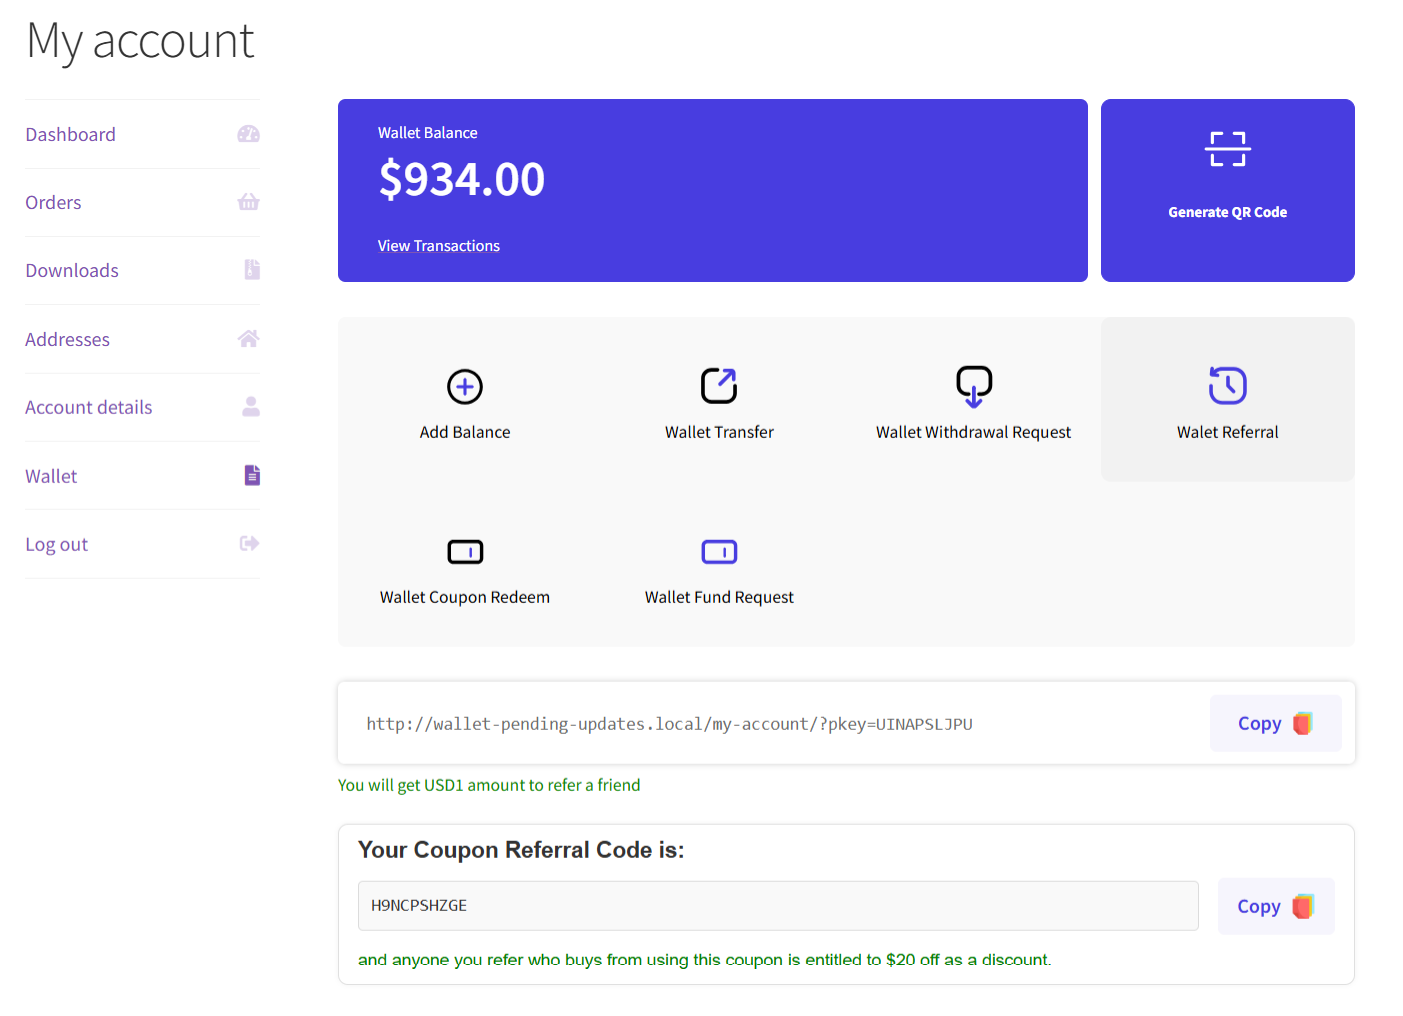
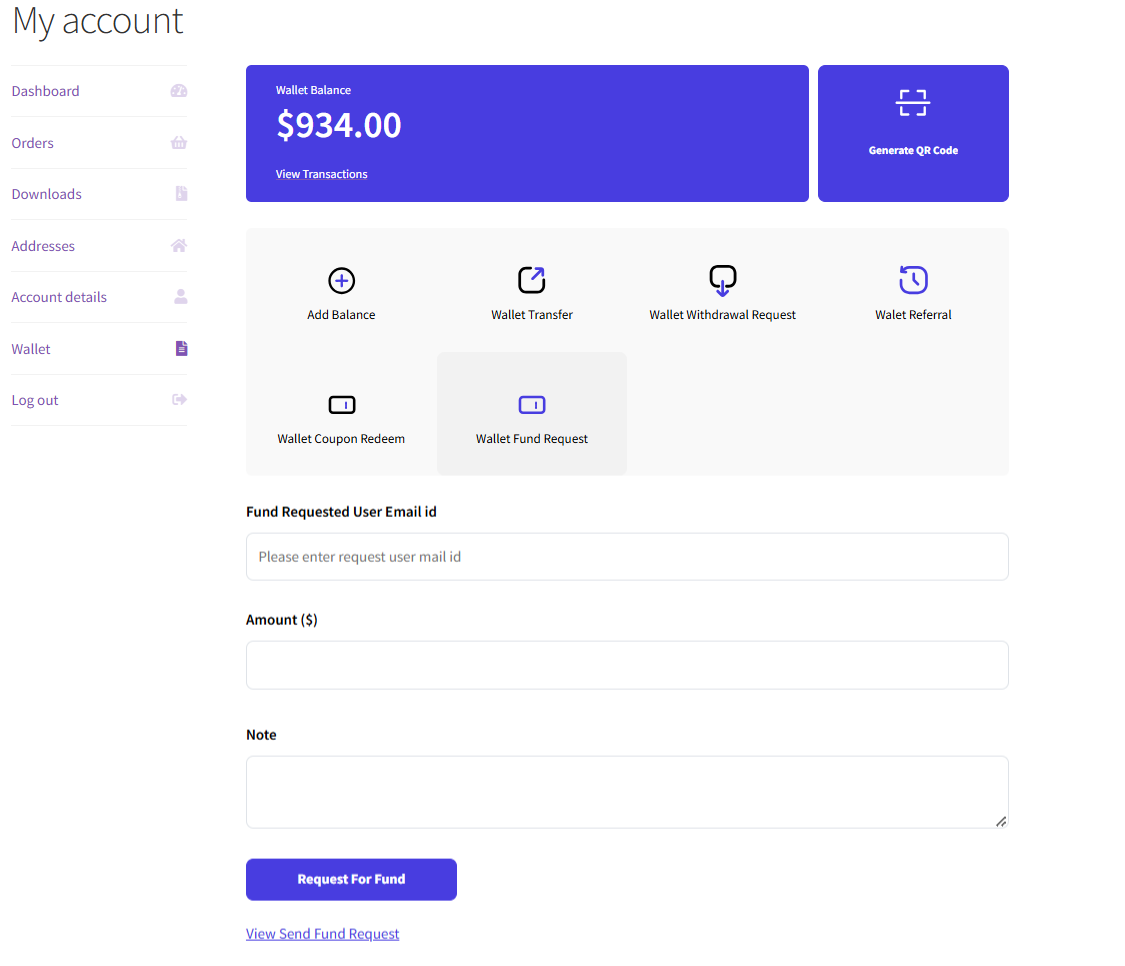
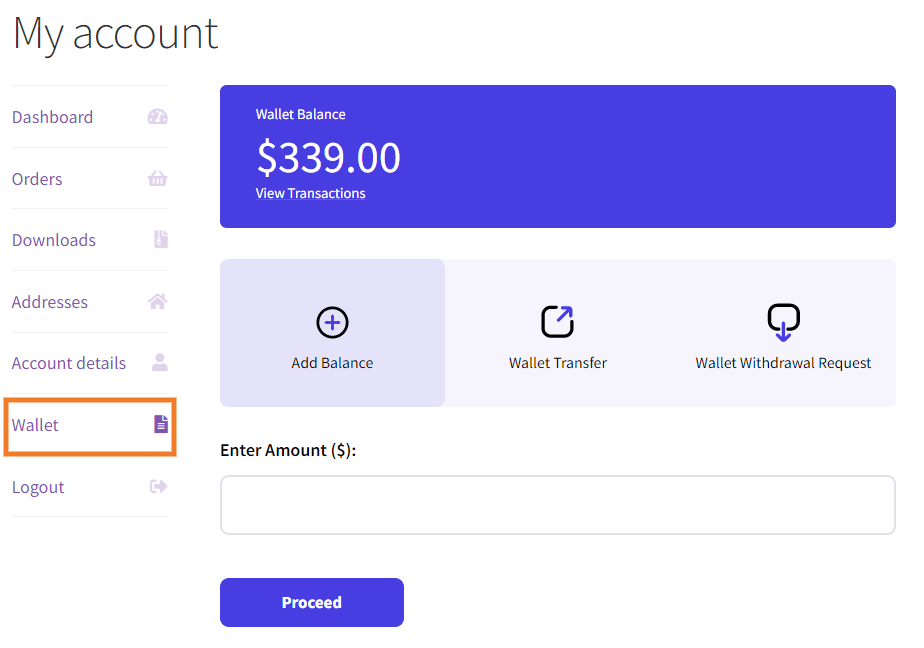
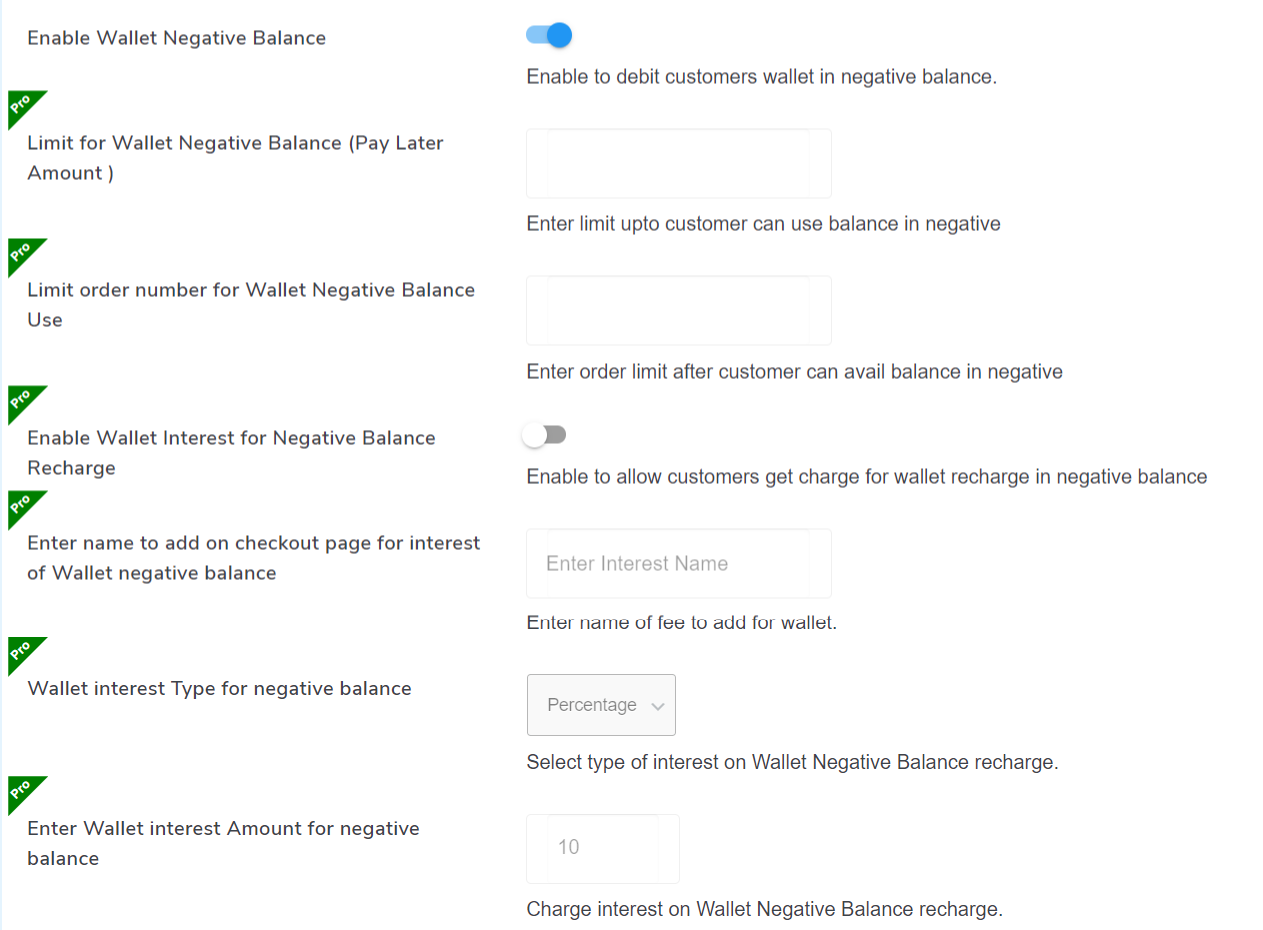
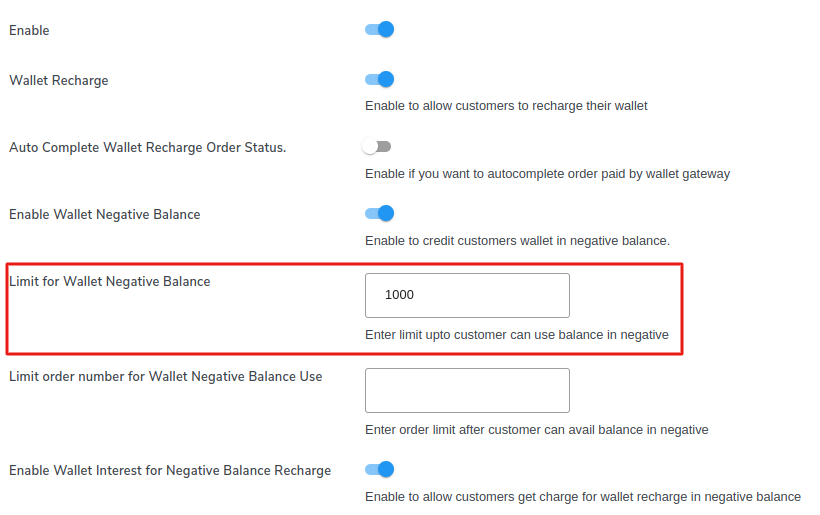
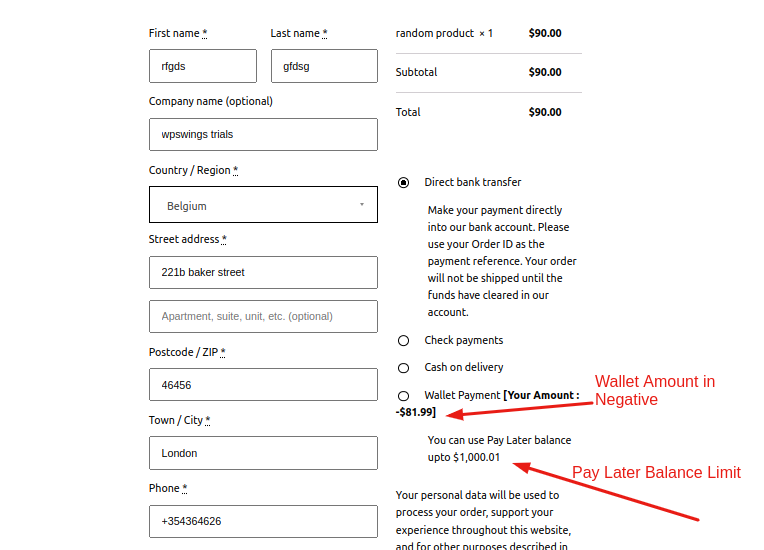
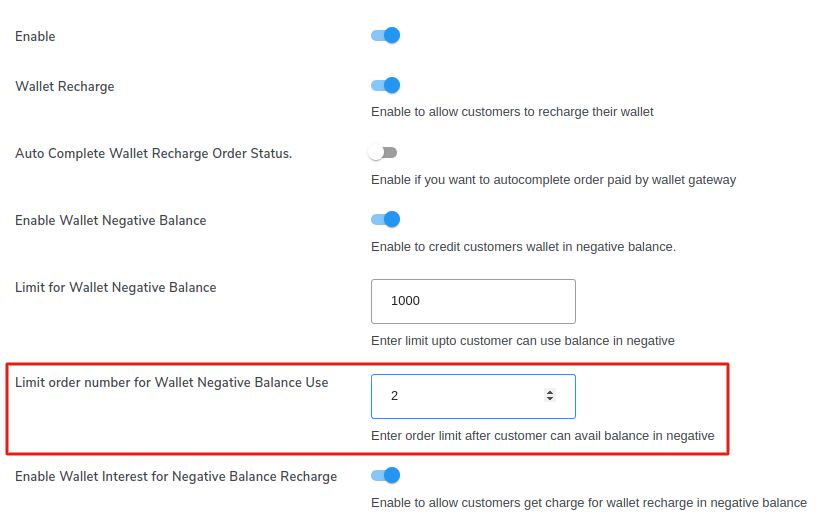
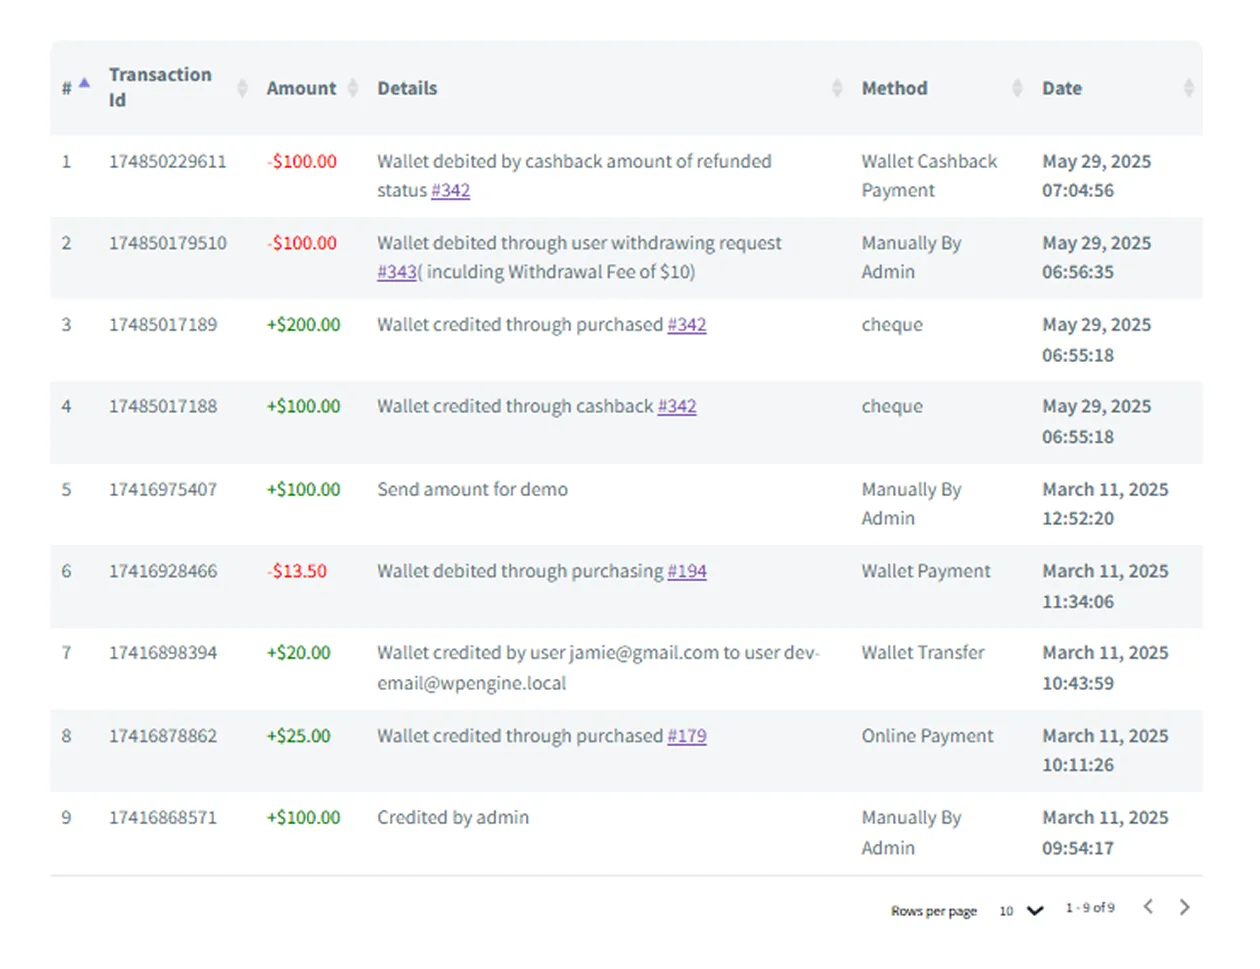
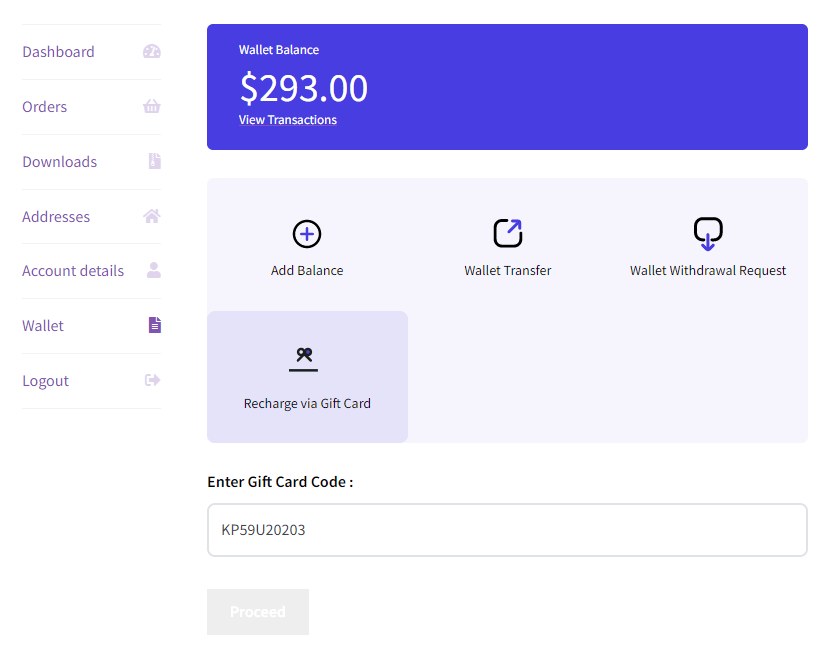
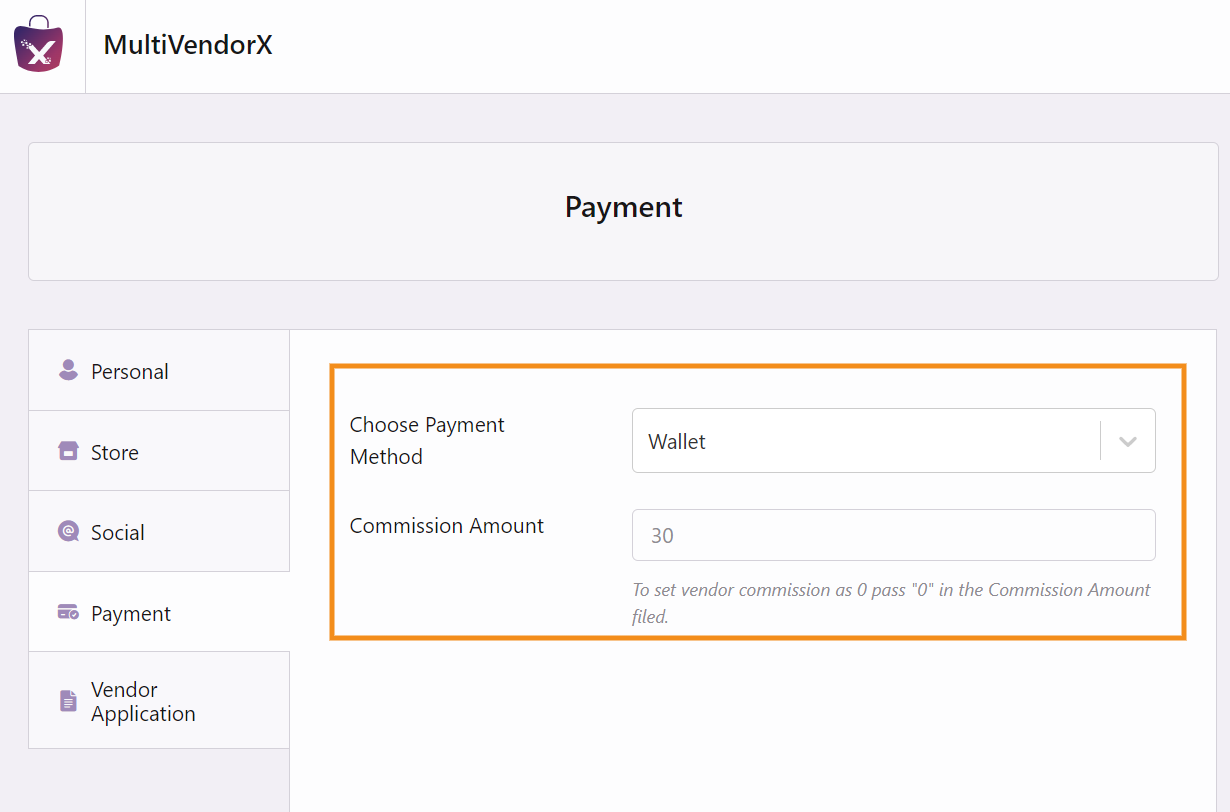
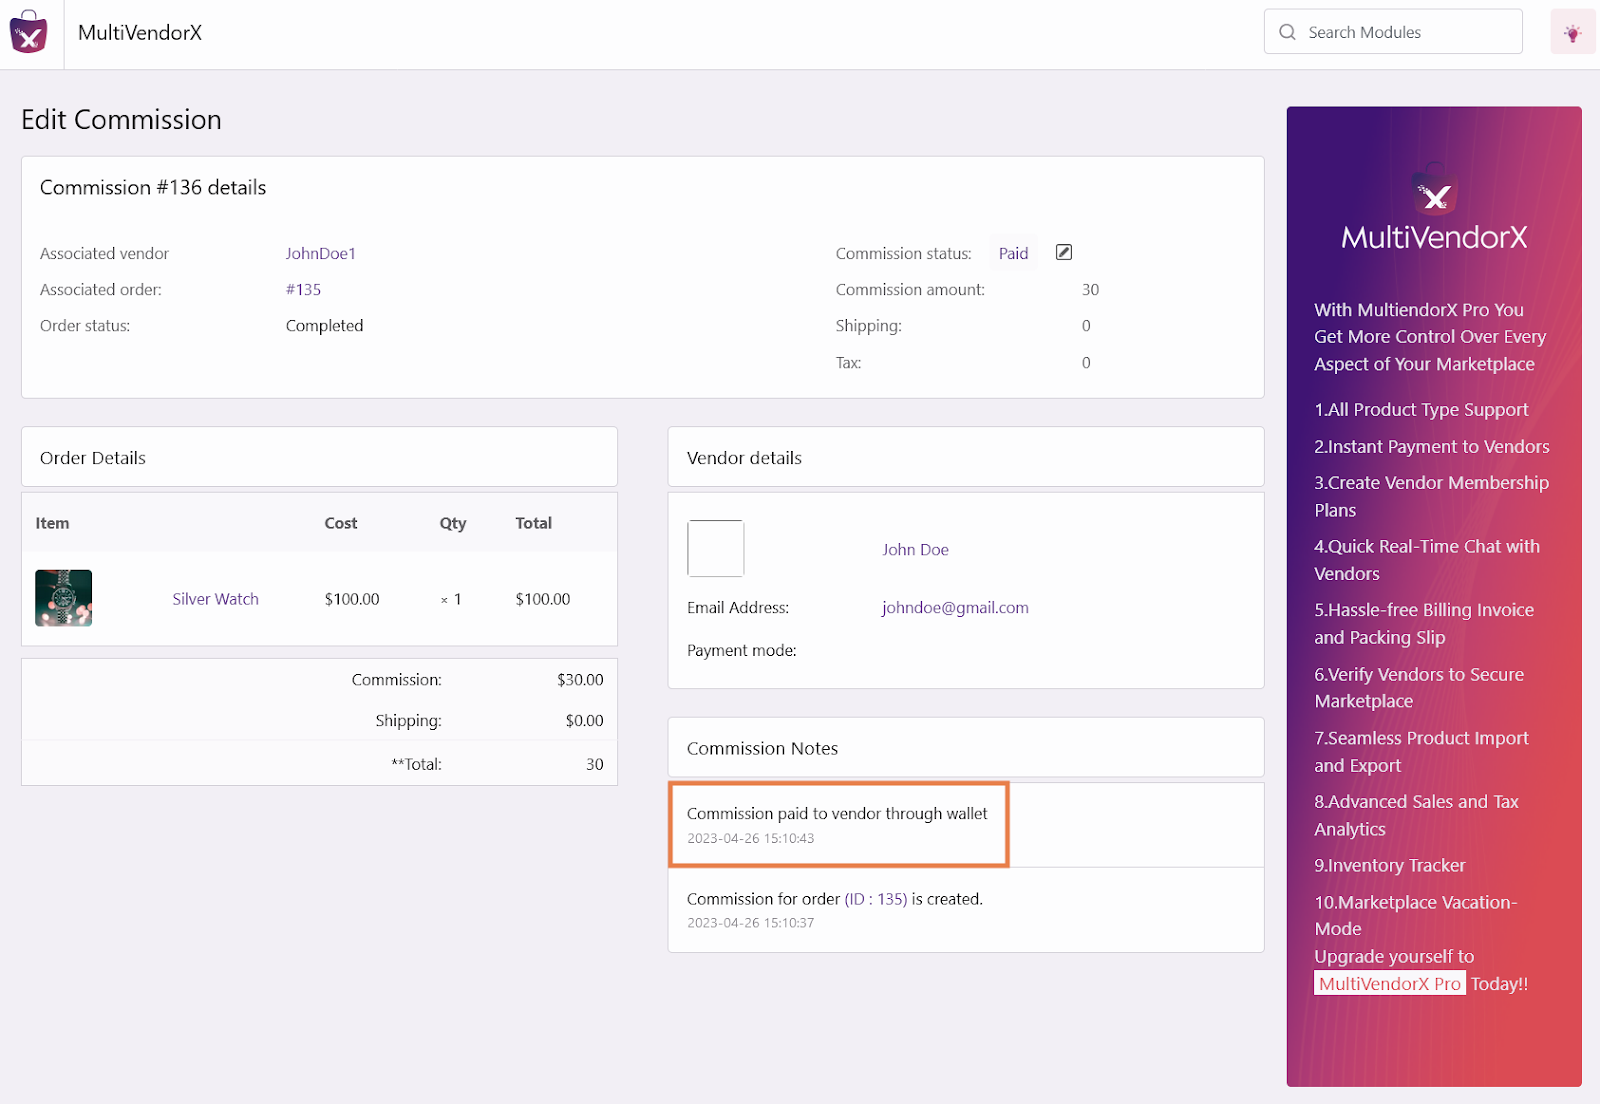
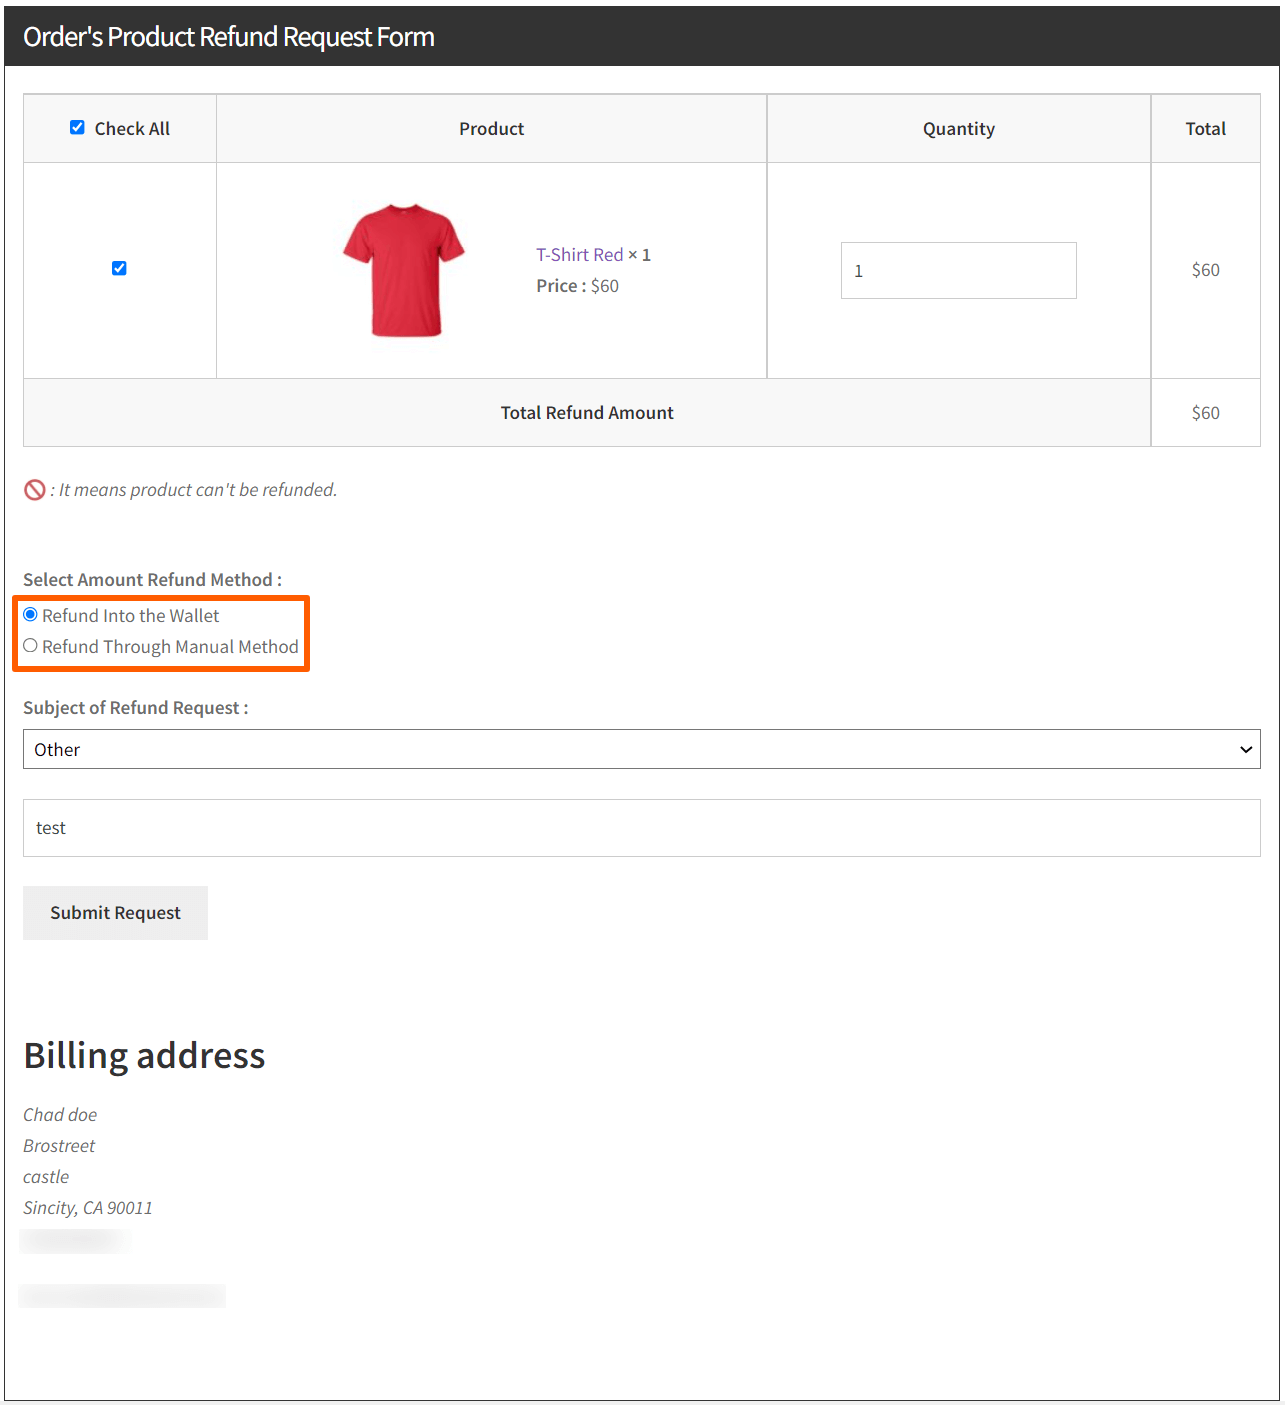
13.8.Wallet System for WooCommerce
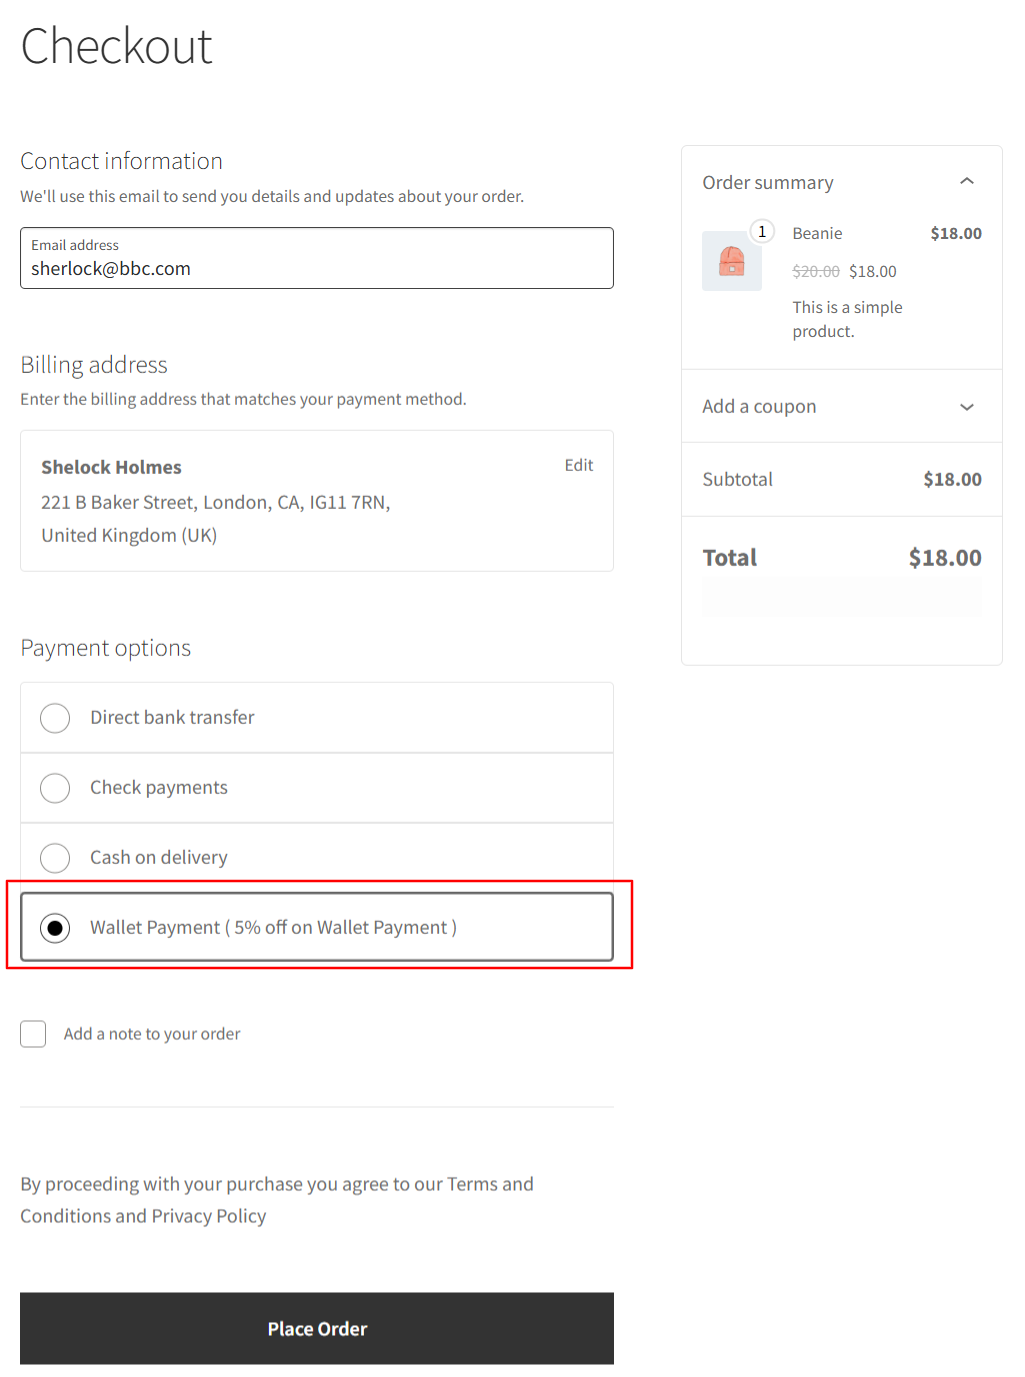
The WooCommerce One Click Upsell Plugin is compatible with Wallet System for WooCommerce Free and Wallet System for WooCommerce Pro. It shows upsell offers to customers when they use a wallet as a payment method.
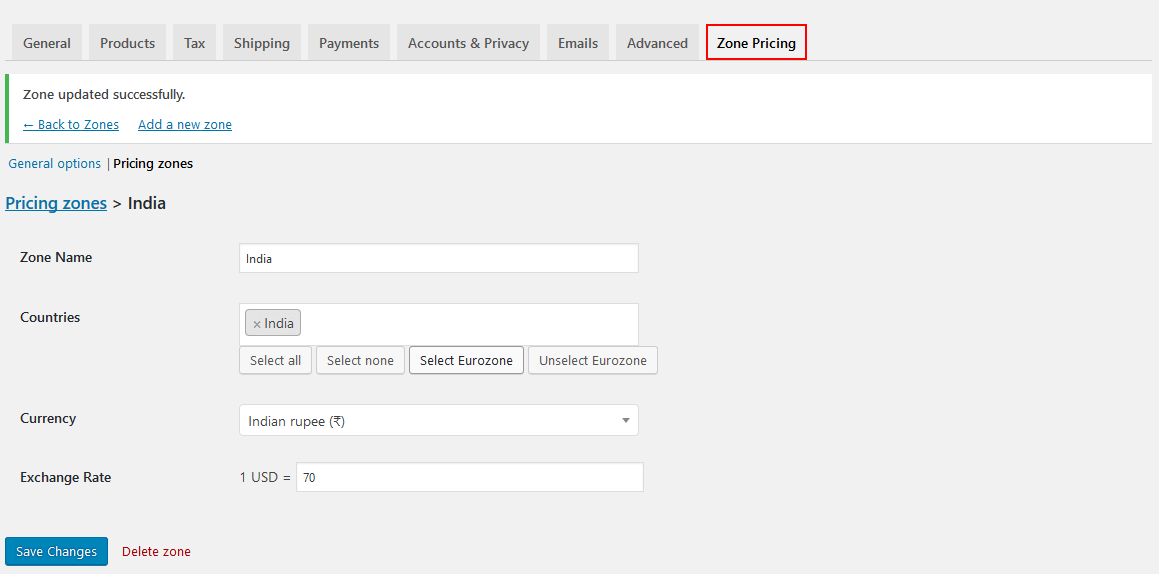
13.9.FOX – Currency Switcher Professional for Woocommerce
Our upsell WooCommerce Pro plugin is compatible with Currency Switcher for WooCommerce. It allows you to change the currency of your upsell product offers and their shipping prices to any currency type you prefer.

13.10. Tutor LMS Product Courses
The compatible with Tutor LMS allows you to create, manage, and sell eLearning courses on WordPress. With this compatibility, you can convert your courses into a paid product and run upselling and cross-selling funnels.
13.11.WooCommerce Cart Abandonment Recovery Plugin
Compatibility with the WooCommerce Cart Abandonment Recovery plugin, this plugin allows merchants to retrieve information about customers’ cart abandonments and enables them to send follow-up emails. In addition to this, merchants can create abandoned cart bump offers targeting the abandoned customers.
The settings related to this compatibility are mentioned in Section 4. If you are a user of the premium version of the plugin, you can access the “Create Abandoned Bumps”.
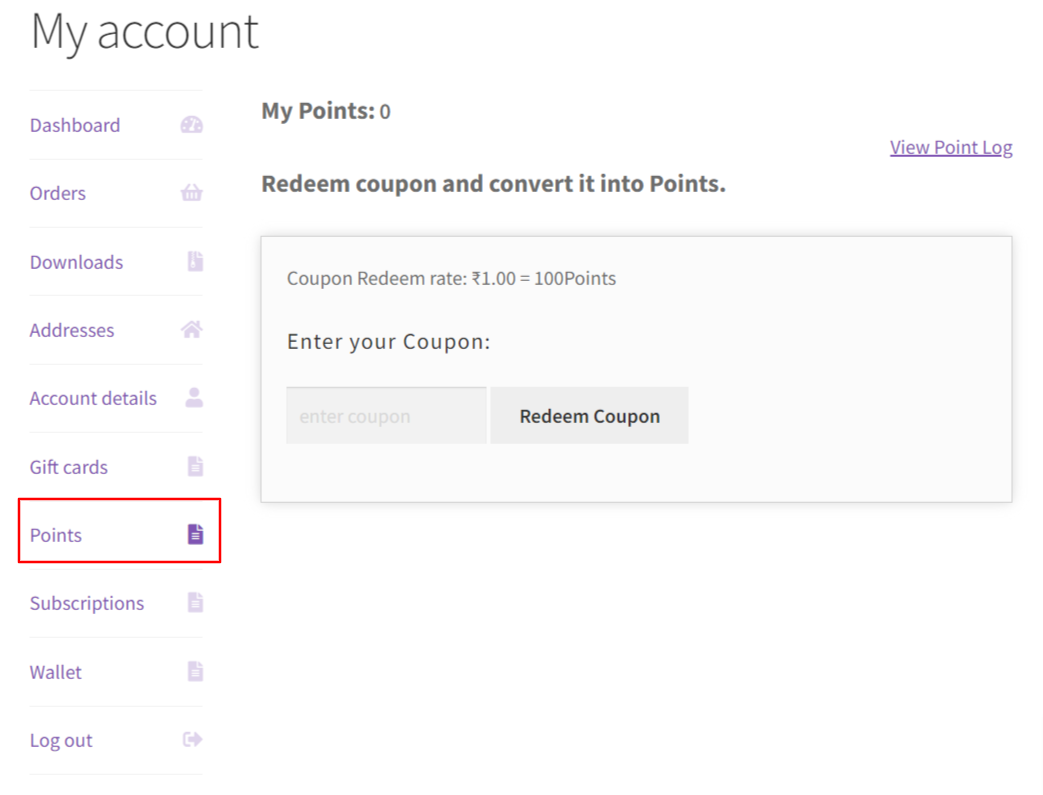
13.12.Points and Rewards for WooCommerce
Compatibility with Points and Rewards for WooCommerce and Points and Rewards for WooCommerce Pro, merchants can now run loyalty programs along with order bump & upsell offers.
14.FAQs
What is Offer Appearance?
In the offer appearance of the order bump you can show offers in two types, one is a simple offer in a static format and the other is in the form of a pop-up. Whatever suits your users you can use as per need. This Simple Offer feature is only available in the premium version of the plugin
I installed the plugin, created Bumps and added the offers too but still, it does not show up on purchasing the targets products, why?
Make sure these three things:
- Your Order Bump offer is Live and not in sandbox mode.
- You have added the correct target product or target category product in the cart.
- Your Order Bump Schedule is set to Daily or for the correct weekday that you are checking.
Are the offer templates customizable from the admin panel?
Yes, the templates are completely customizable. GoTo Appearance> Design. You will see an Offer whose design, offer size, offer content, background color, text color, and text size can be changed with the Live Preview functionality instantly.
For variable offer product why there are no drop-down to select variation?
In the case of a variable product, a pop-up will occur. The pop-up will display all the variations of the offer product along with the images and offer prices.
Can I change the location where the offer should be shown?
Yes, you can change the location of the Order Bump Offer on the Checkout page. Here is the list of the available locations :
- Before Order Summary
- Before Payment Gateways
- After Payment Gateways
- Before Place Order Button
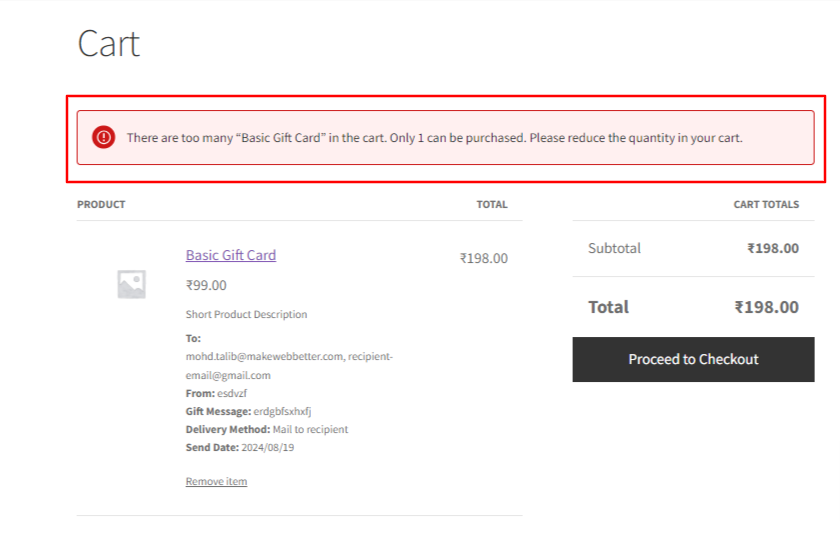
If the offer product is being added in the cart then isn't that possible that customer will add more than 1 quantity ? This could lead us to loss in revenue as well as stock. How could I prevent this ?
We have set limit functionality, so the customer can only add single quantity of the offer product. Also, the offer product quantity can't be updated from the cart page.
Who can use Upsell Order Bump plugin?
Upsell order bump plugin can be useful to all the store owners on WordPress and WooCommerce who are in search of increasing AOV of their stores and sales
- Bloggers
- E-book Sellers
- E-Commerce Owners
- Small and larger-scale businesses
- Retailers
- Trainers
- Everyone...
Can I show more than one order bump offer on checkout?
Yes, in the Premium version you can add more than one offers at a time on the checkout
How does the Countdown Timer work? Premium
The countdown time of Order Bump works in two ways-
You can use a setting like a static timer. For example, you can set a timer for 5 minutes, 5 days, 5 weeks, or 5 years. Now the timer will keep on running from that instant time and keep on reducing time, whether the user visits the checkout page or not.
The second method can be like an evergreen timer. It only starts when any user comes to the checkout page. Here checkout means whatever location is set up done from the admin end
Are the Order Bump Offers And Recommendation Offers the Same? Premium
No, and yes, means the offer feature is the same but it functions differently. Order bump offers work on given four locations mainly on checkouts but the recommendation feature is for the shop or product page of the website.
Can the Recommendation Offer And Normal Checkout Offer Be Shown At The Same Time? Premium
Recommendation offers will show on the shop page, and product page, and order bump offers will be shown on checkout at the same time
What is the use of Arrow on Offer and how to use it? Premium
The Arrow feature creates curiosity in your user while purchasing. In case he missed the offer, the blinking arrow will bring your client toward this. This will increase your AOV and sales of your store. Also, you can change the color of the Arrow as per your need
To enable the Arrow on offer, go to Global Settings> Enable the arrow feature and it will work.
Is it possible to trigger an offer on the cart amount? Premium
Yes, you can enable the feature of minimum cart value to trigger the offer on your amount as per your business requirements.
Can you customize or add new templates as per our website design? Premium
We have given a few templates and they are fully customizable. If you still need to customize or add new templates, and designs as your website needs we also do that. Contact our team here and they will tell you further steps.
What are the payment methods supported by WooCommerce upsell plugin?
Woocommerce One Click Upsell Funnel Pro is compatible with the following payment gateways:
- PayPal Payments
- Stripe
- Authorize.net
- Braintree
- Square
- Paystack
- Vipps
- Cardcom
- Mollie
- eWay
and core payment options such as Cash On Delivery, Direct Bank Transfer, and Cheque Payments.
I installed the plugin, created funnels and added the offers too but still, it does not show up on purchasing the funnel targets, why?
If the upsell offers are not showing, make sure:
- You’ve enabled the One Click Upsell funnel plugin. Navigate to Global Settings and enable the plugin if it is disabled.
- Your funnel is not in Sandbox Mode. If it is, edit the funnel and make it Live and Save Changes.
- You are testing for the correct target product or category you’ve set in the funnel.
- The offer page is published.
- You’re making the payment through one of our supported payment gateways. If you make payments through a payment gateway that is not supported by our plugin, the offer will not be displayed.
- Make sure you have selected any one of the following templates or made your own custom template and inserted page link
Can I design an upsell offer page if i don't have a designer?
Yes you can. Our plugin is compatible with Elementor and other major page builders that lets you customize your upsell offer pages as per your needs. And you don’t need a designer for it. Just drag and drop and style your elements as you need and your page will be ready in minutes.
Is it Stripe Official and Stripe One Click are the same?
No, the Stripe Official and Stripe Once Click are not the same. Stripe Official is a WooCommerce plugin that allows the merchant to accept payments via Stripe whereas, Stripe One Click is a free integration by WP Swings. Both the Stripe Official and Stripe One Click are compatible with the plugin. But we recommend to use official stripe for better results
Does the plugin support Stripe official?
Yes, the plugin supports Stripe official for accepting payments.
Can I add additional products to the upsell offer page?
Yes, you can add additional products on the upsell page using the Additional Funnel Offers feature in your funnels. But keep in mind that the additional products will only appear for only the first offer of a funnel.
Can I add additional products and custom fields using shortcodes?
You can use the shortcodes [wps_form] and [wps_additional_offers] on the upsell offer page to add additional products and custom fields.
15.Feedback and Suggestions
Didn’t see a feature in the Upsell Order Bump Offer For WooCommerce plugin that you think would be useful? We’d love to hear it.
Reach out to our Support and we’ll consider adding it to the future release.
16.Helpful Resources !!
This section covers all the other essential resources that will help you get in-depth knowledge about the workings of our upsell order bump plugin, how it helps you grow your business and increase your revenue, and how it has helped our clients,
16.1.Blogs
- The All-In-One Guide For eCommerce Order Bump – Tips, Ideas, And Examples
- Order Bump vs Upsell: What Sets Them Different From One Another?
- Master the Art Of Recurring Profits with the 6 Best WooCommerce Upsell Plugins (2024)!
- What Is Upsell? The Comprehensive Guide To Increase Your Sales
- How to Create One-Click Upsells on WooCommerce Store?
- Upselling v/s Cross-selling: Tips, Benefits, And All You Need To Know
16.2.Case Studies
16.3.Video Tutorials
- How to add an upsell on the checkout: Upsell Order Bump Offer For WooCommerce || 2024
- Upsell Order Bump: How To Add Upsell and Cross-Sell Offers on the Checkout Page For Free?
- WooCommerce Upsell Bump Offer: How To Enable Bump Offers During Checkout?
- How To Create Upsell Order Bumps on Your Website with Upsell Order Bump Offer For WooCommerce Pro
- Free WooCommerce One-Click Upsell Funnel: How to Cross-Sell & Upsell in WooCommerce WordPress?
- How To Grow Your WooCommerce Sales With One Click Upsell Funnel For WooCommerce Pro During Festive?
- One Click Upsell funnel For WooCommerce Pro: Part 3: Shortcodes and Secured Payment Gateways
- One Click Upsell For WooCommerce: How To Setup Offer Funnels || WooCommerce Checkout Upsell Funnel
- Free WooCommerce Upsell funnel: How To Setup Offer Funnel || Setup & Installation
- WooCommerce Upsell Funnel: How to Create One-Click Offers Funnel?
- How To Do Upselling and Cross-Selling Using WooCommerce Upsell Plugin?
- How To Set Up WooCommerce Upsells, Cross-Sells & Discounts with One Click Upsell for WooCommerce Pro
17.Product Offer Strip
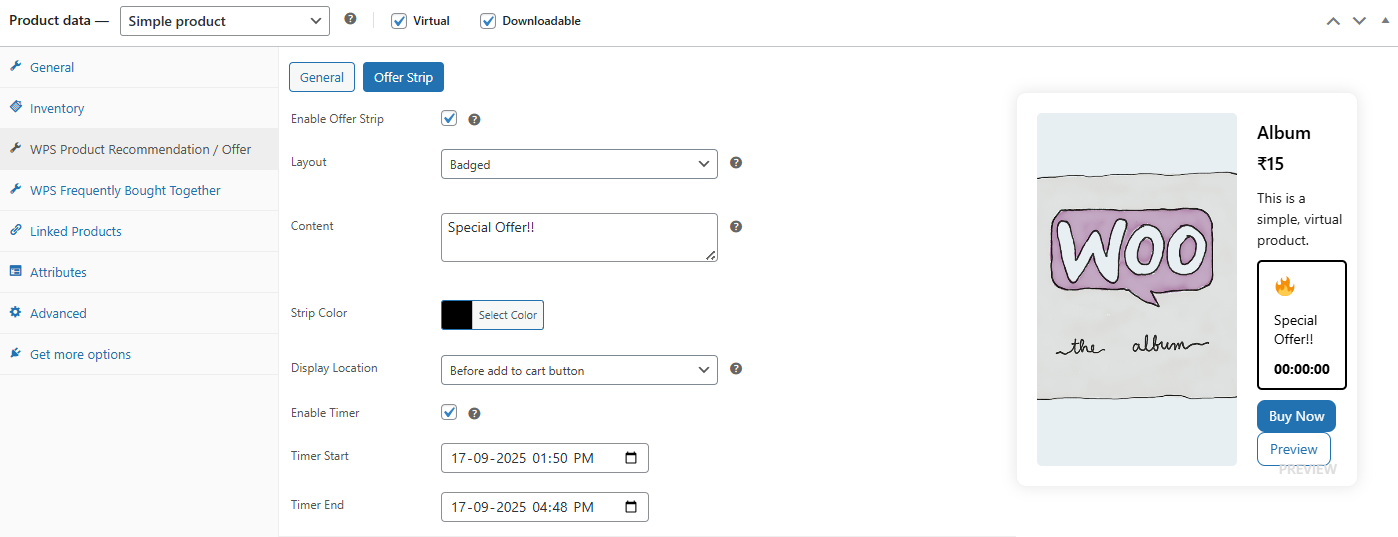
Merchants can utilize this functionality to display exclusive offer strips over selected products. All related settings are dynamic; you can also change the text, colour, and style to meet your business needs.
- Enable Offer Strip: Enable this setting to allow your customers to see product strip offers over the selected product.
- Layout: Select from three available layouts – Classic, Badge, and Bar.
Layout 1: Classic
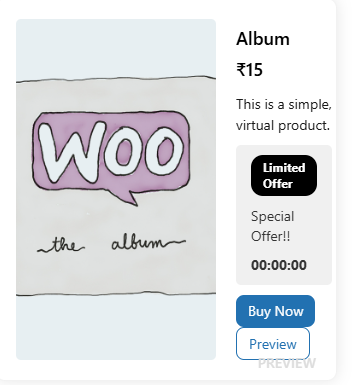
Layout 2: Badged
![]()
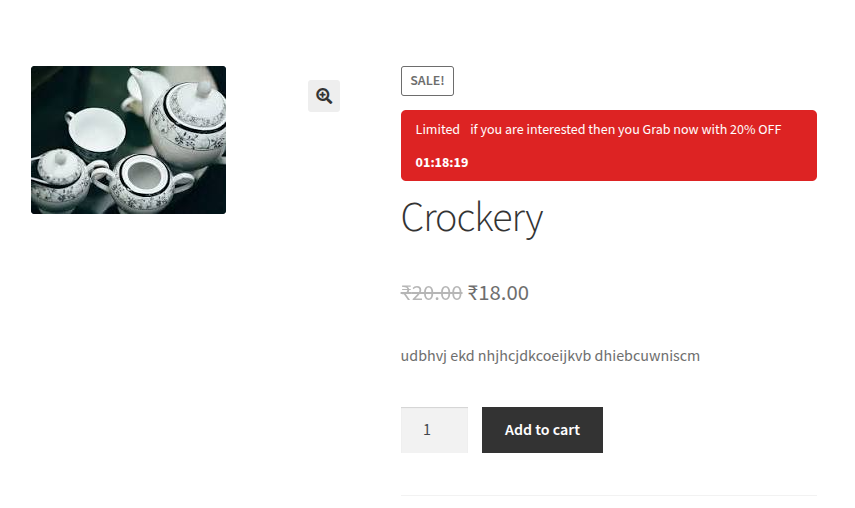
Layout 3: Bar

- Content: Enter the text that you want to display for your customers to see over the selected product.
- Strip Color: Select the colour for the product strip.
- Display Location: Select the position of the strip offer – before the add to cart button, before the product meta end, and before the single product summary.
- Enable Timer: When enabled, a timer will render in the product strip with the entered start and end time.
- Timer Start: Enter the date and time for the start of the timer.
- Timer End: Enter the date and time for the end of the timer.
Frontend Representation Of This Feature In Action:


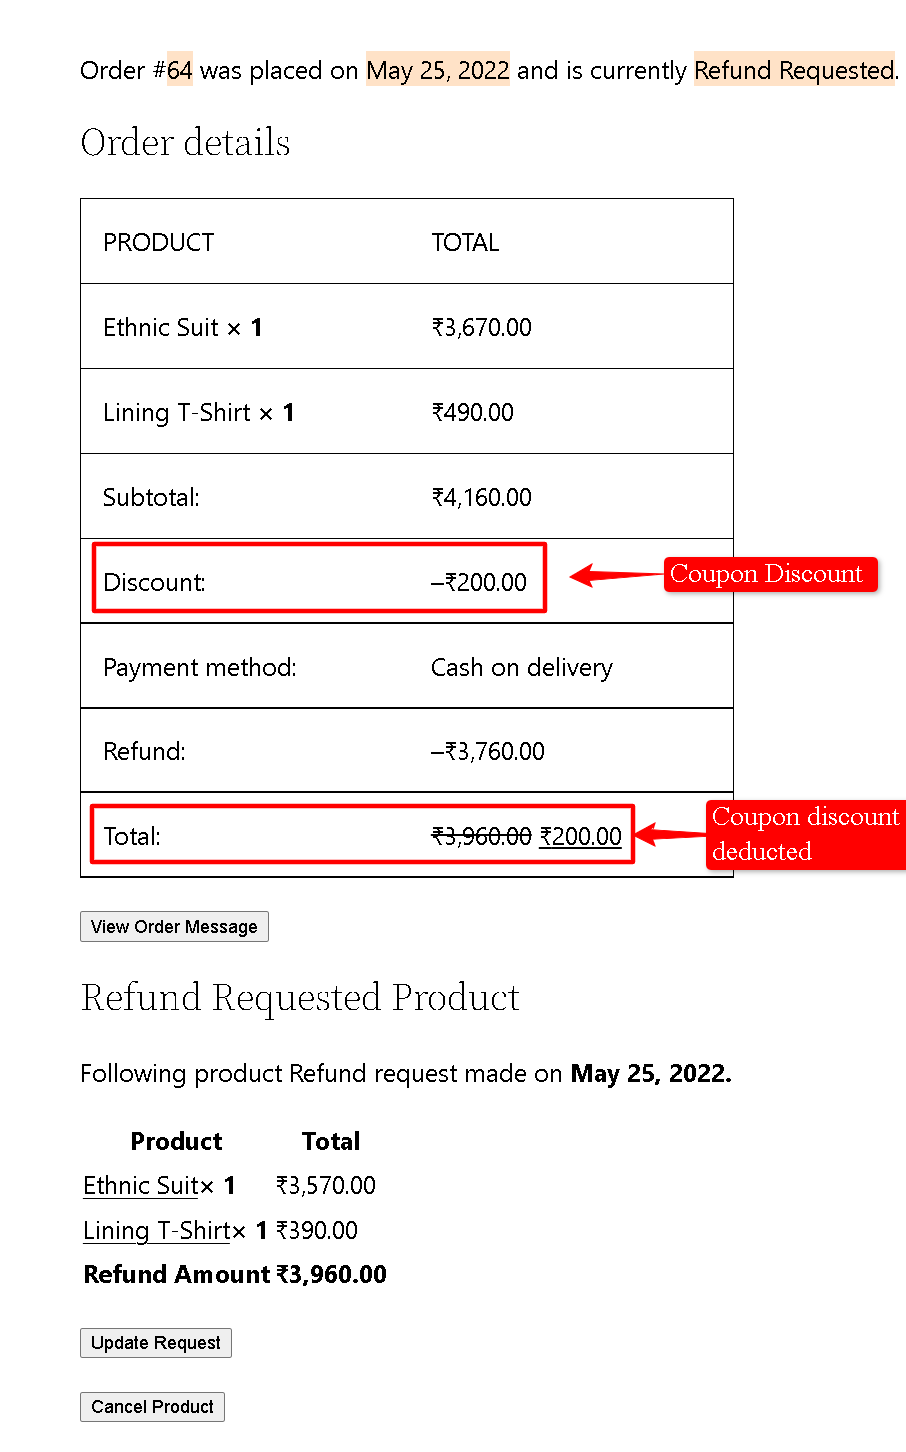
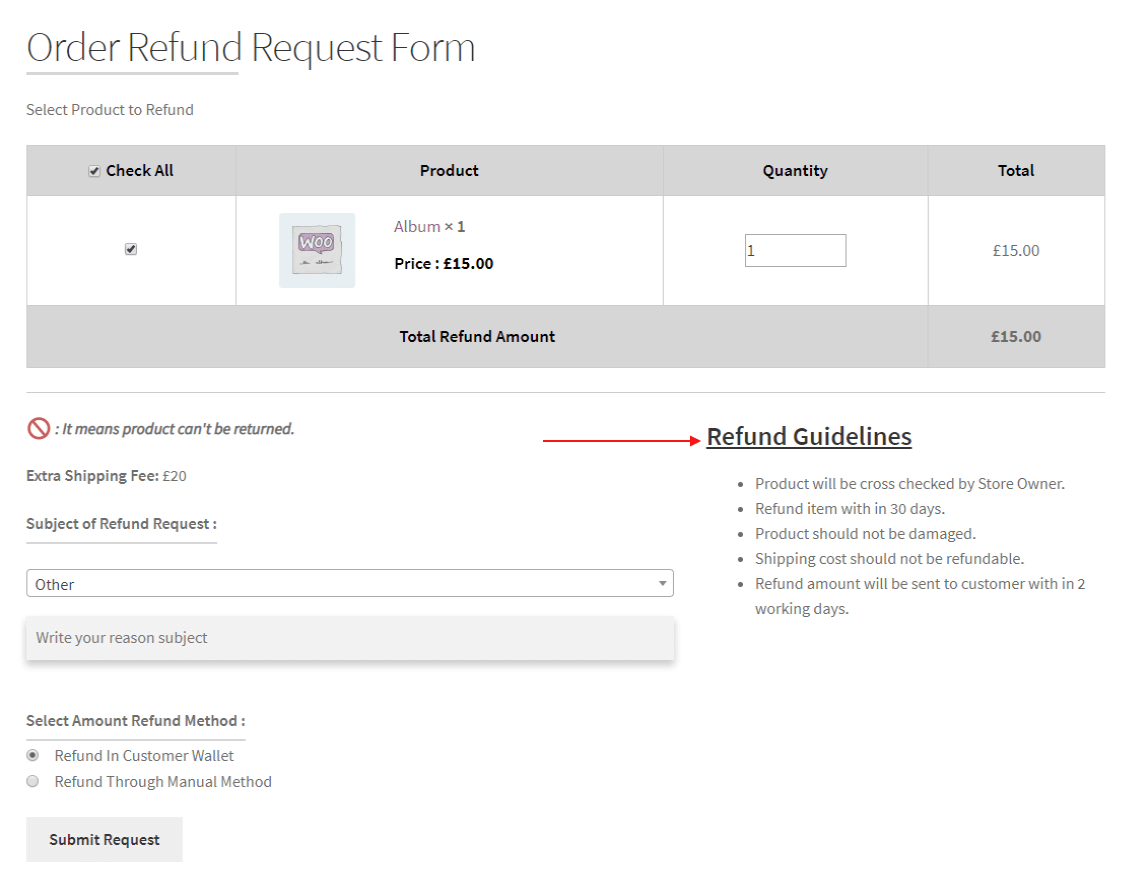
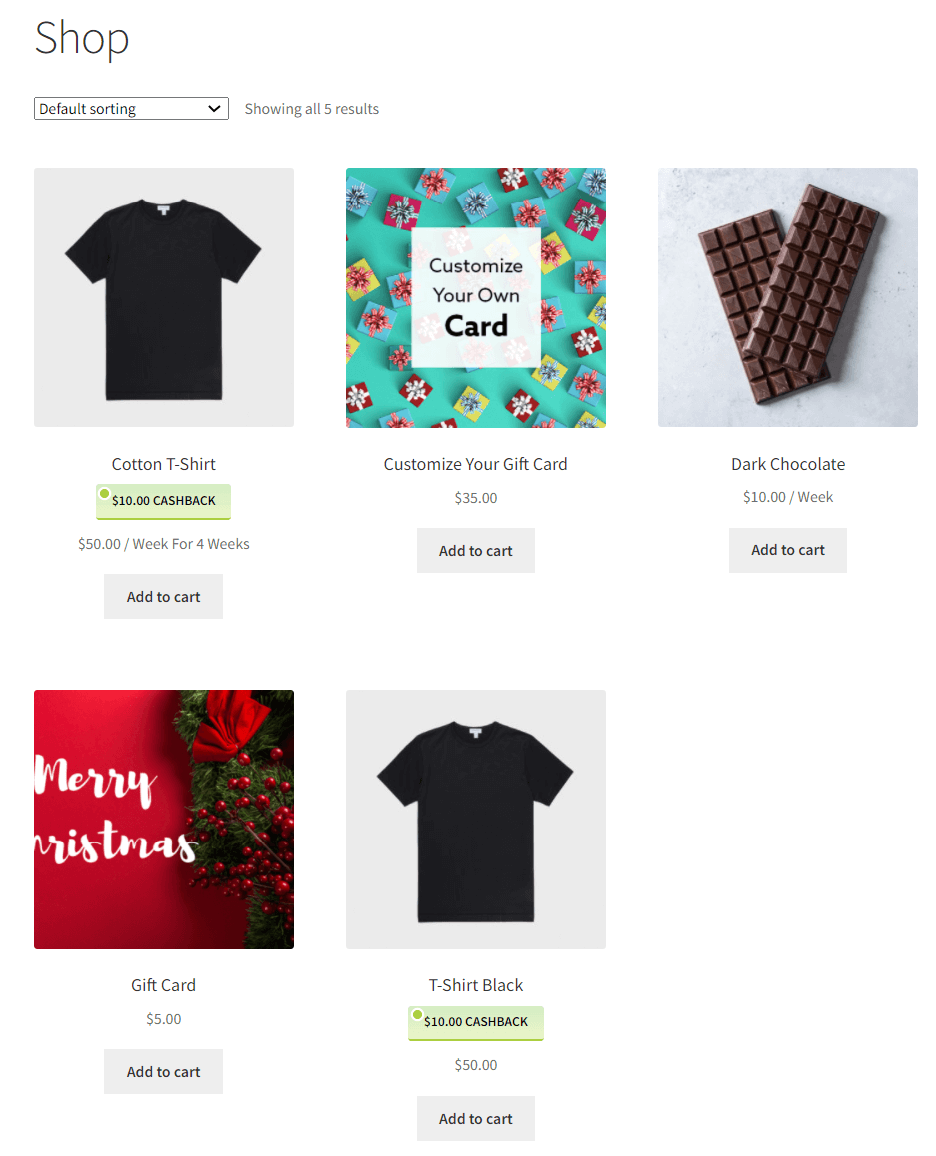
 Category-Wise: When you select the Category-Wise cashback rule, you will get the option to select the product categories in which you want to offer the wallet cashback.
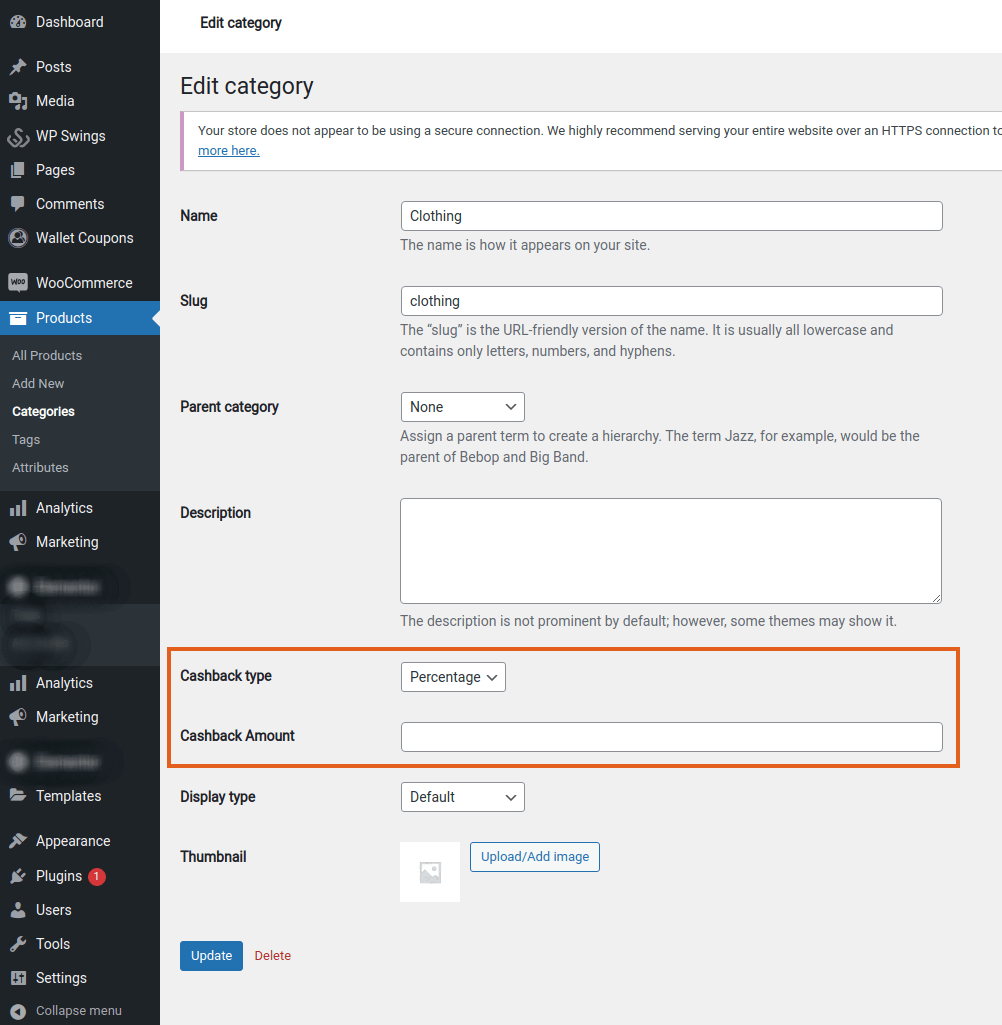
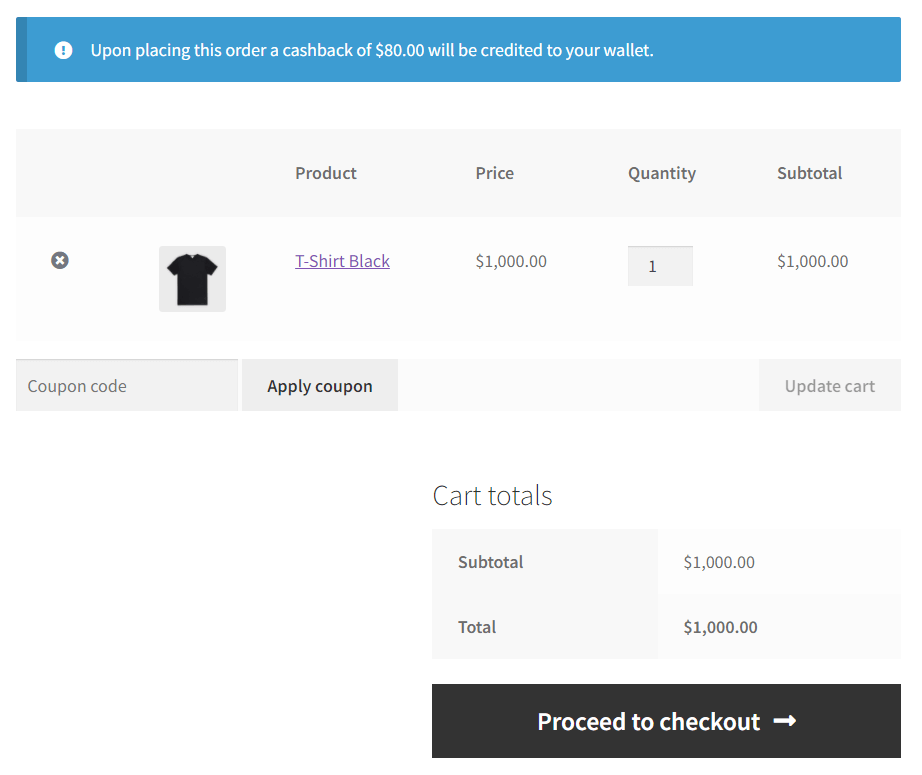


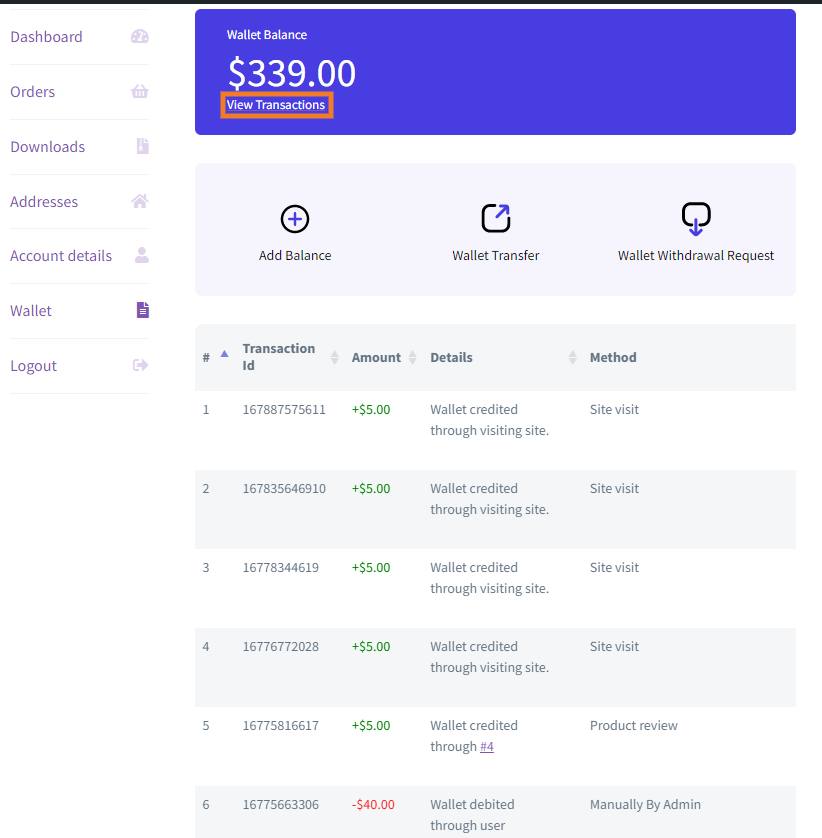


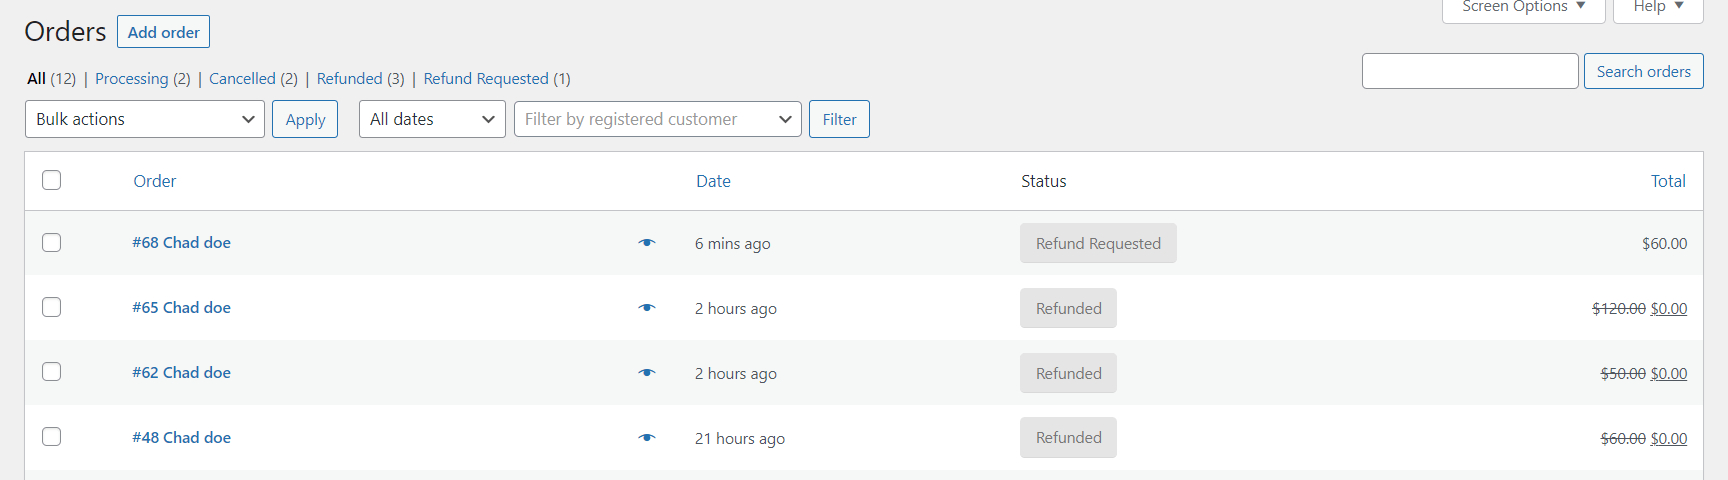
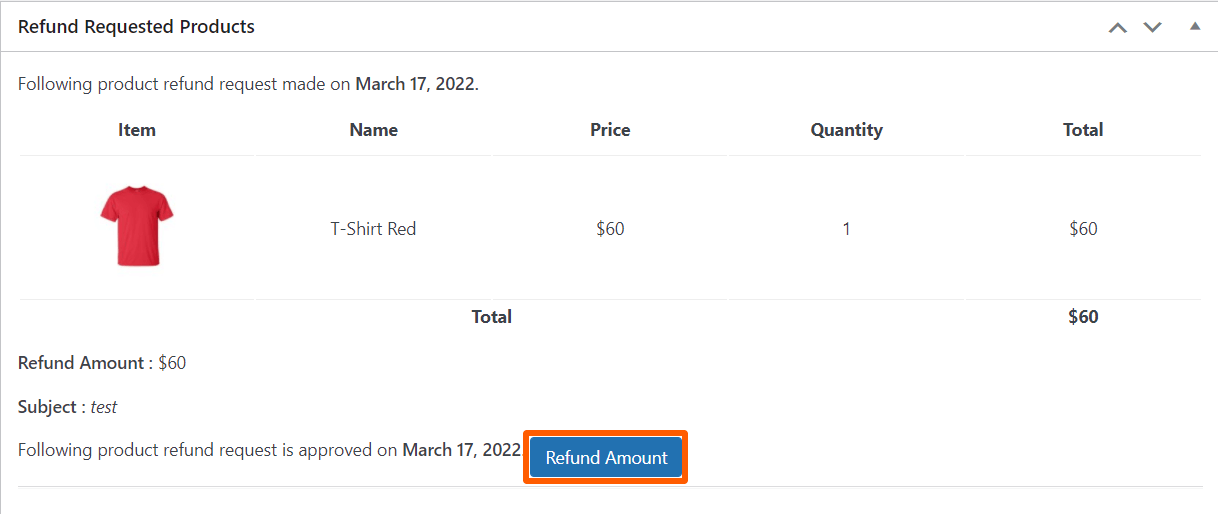
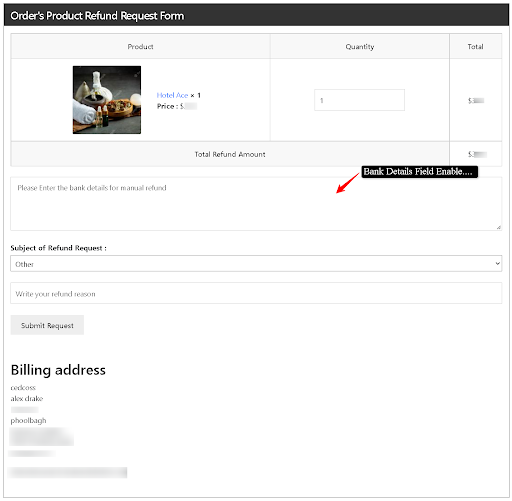
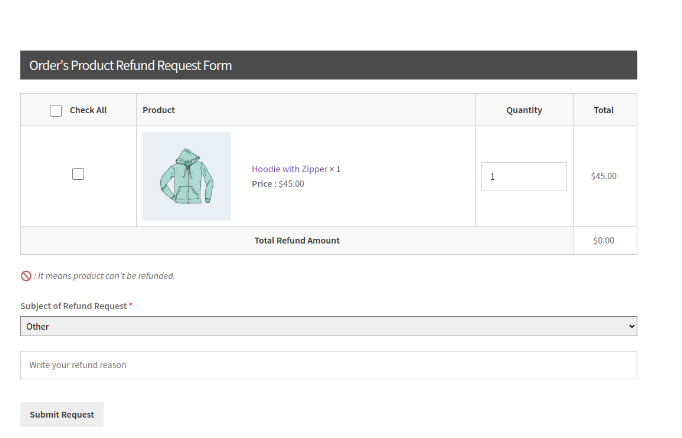
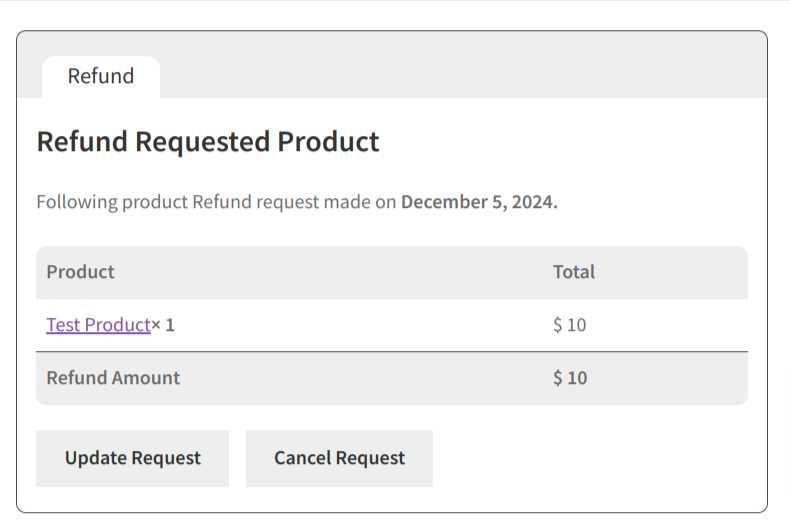
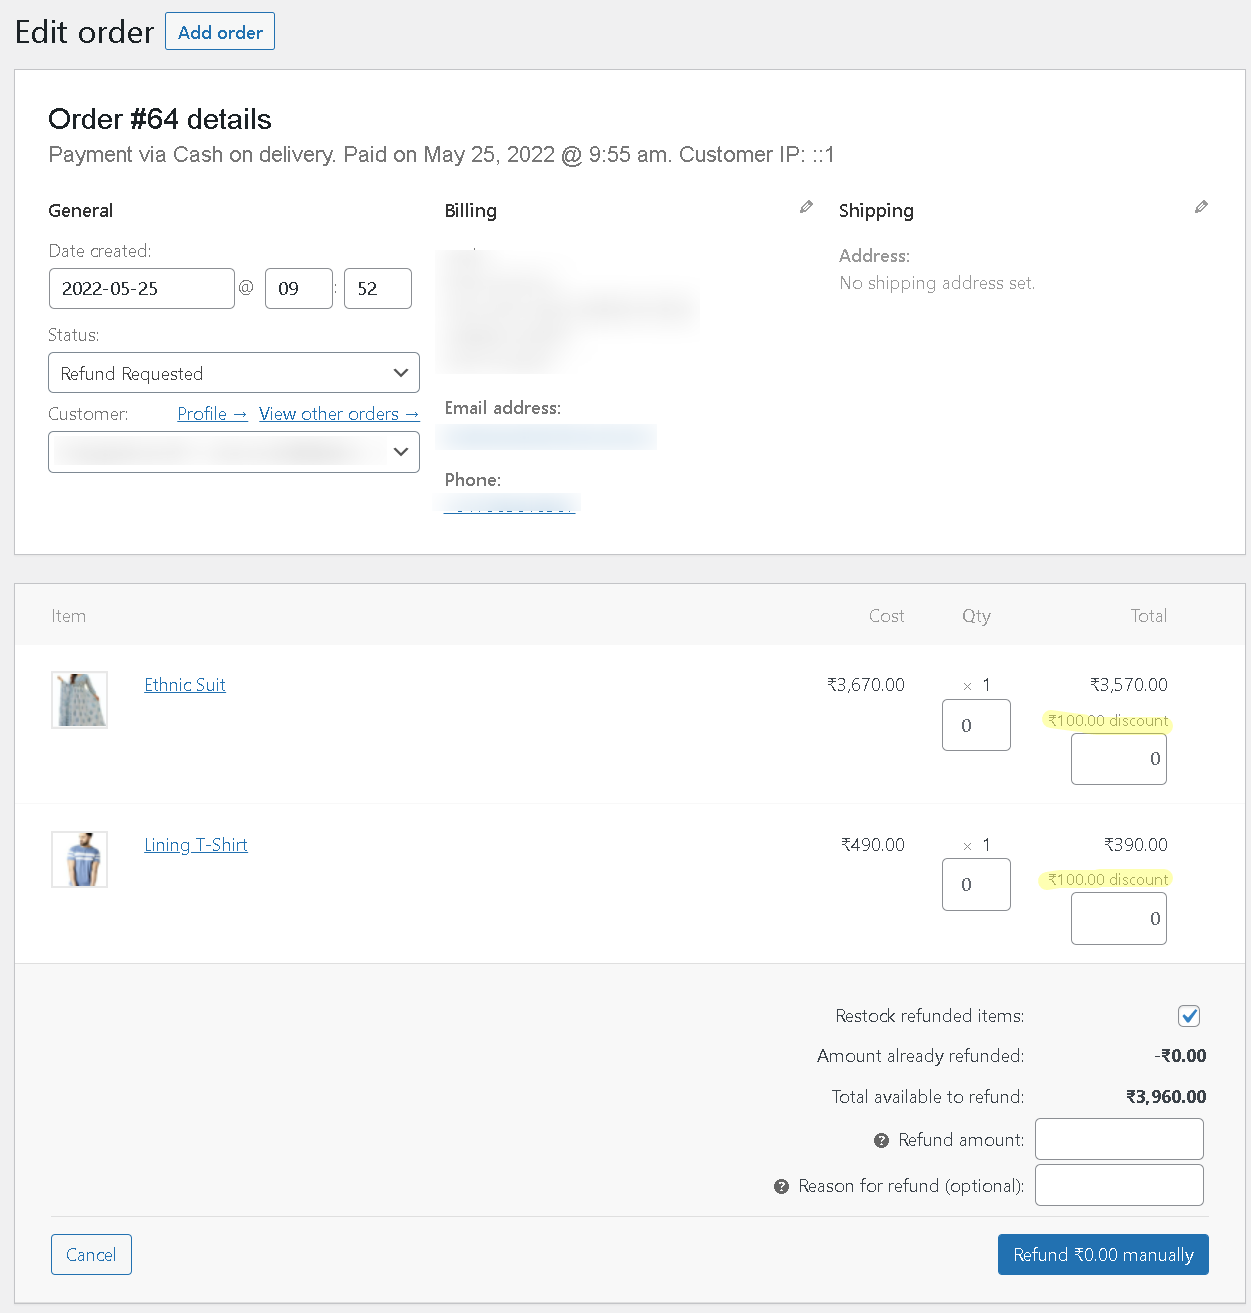
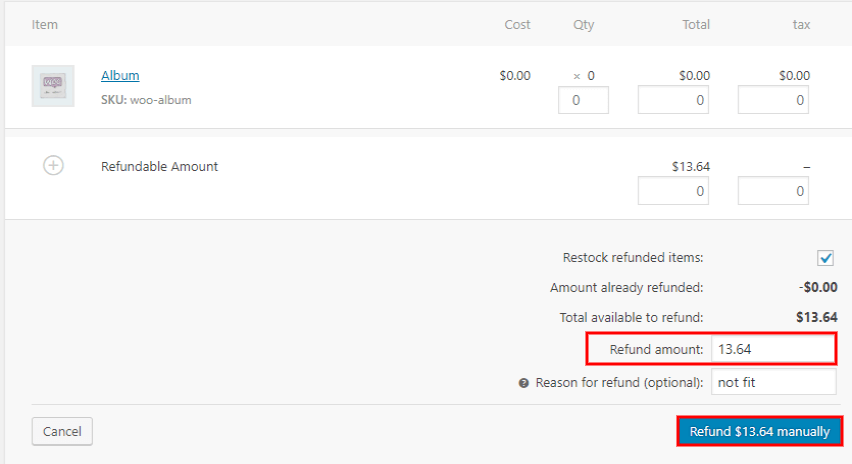
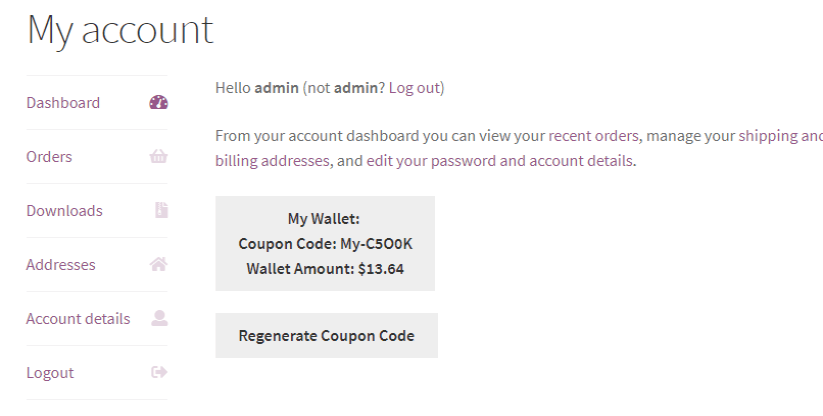
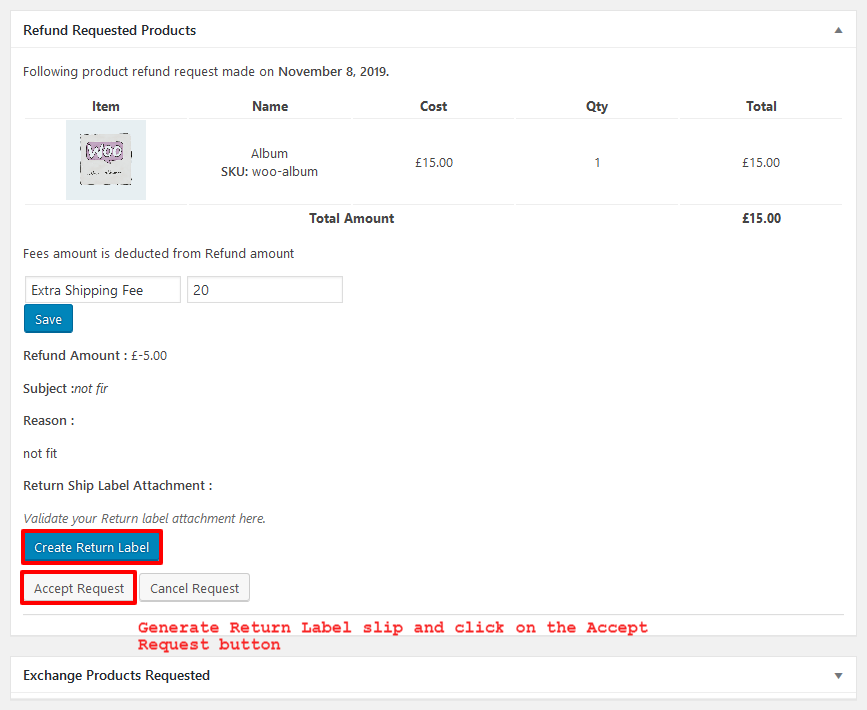
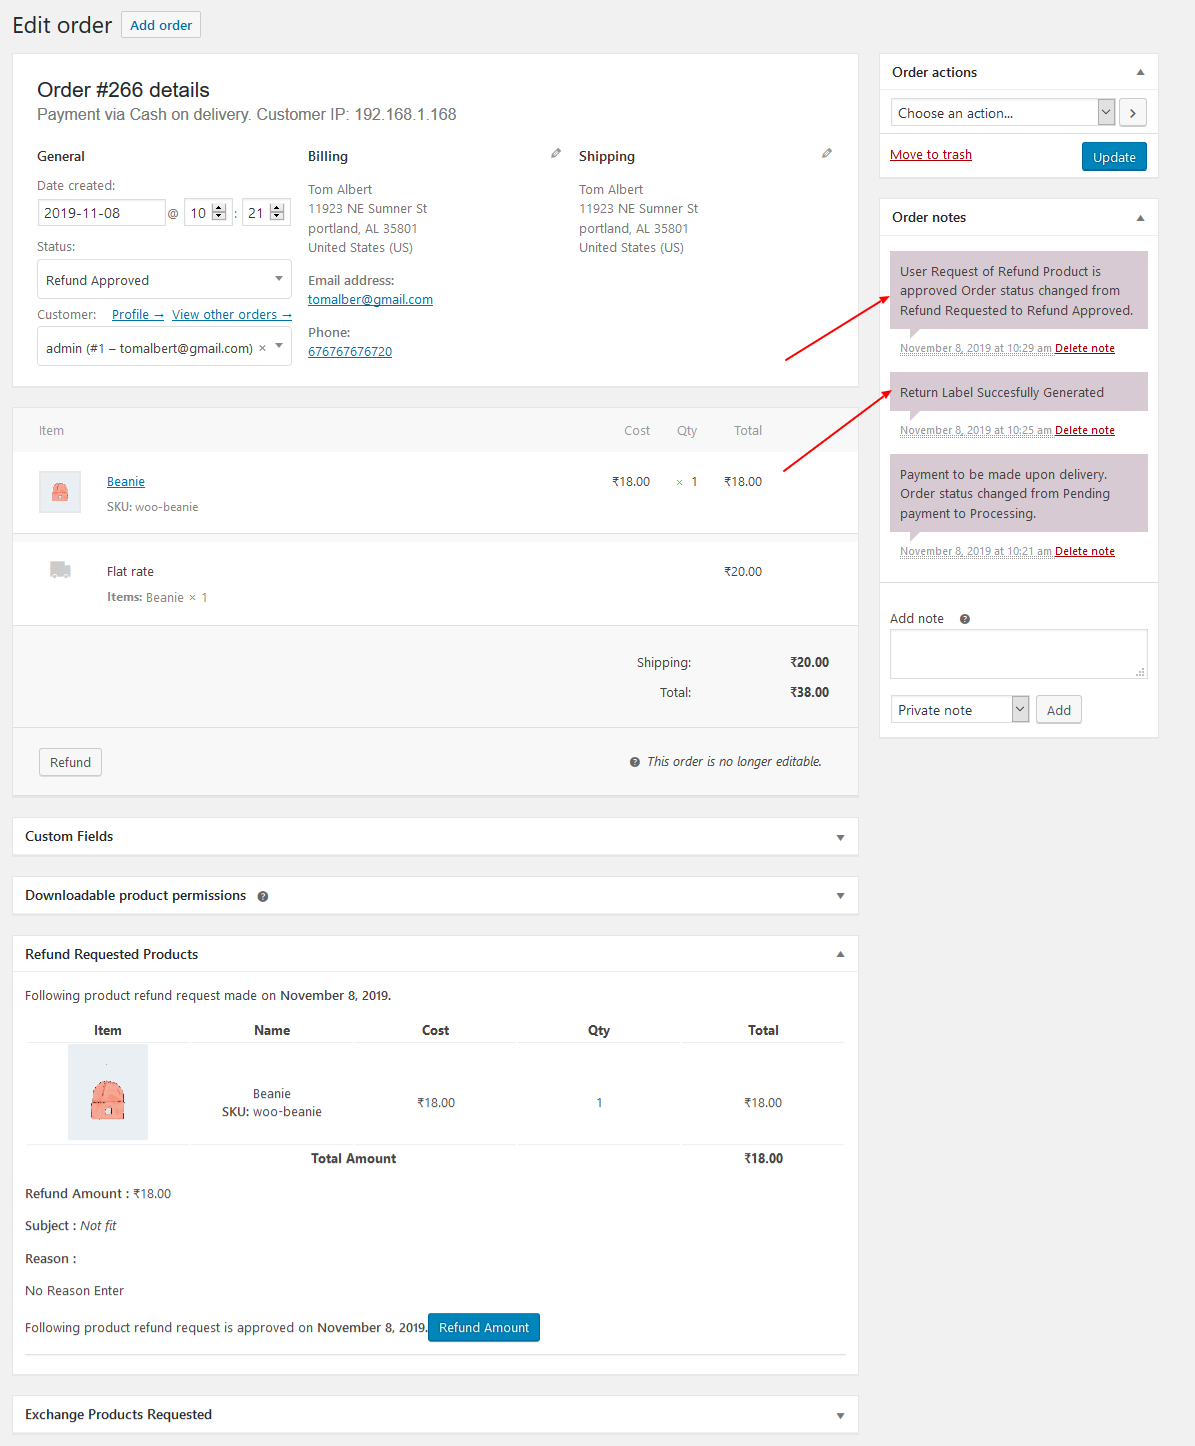
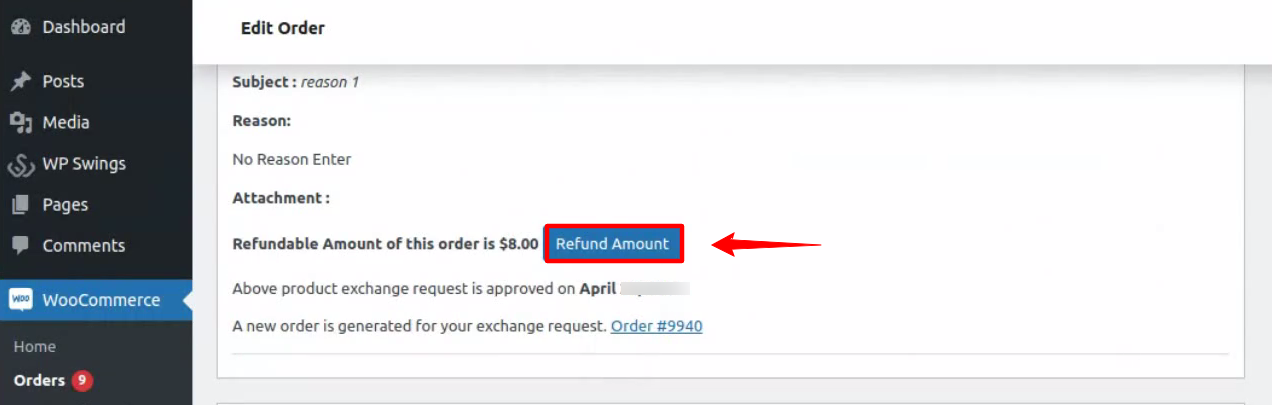
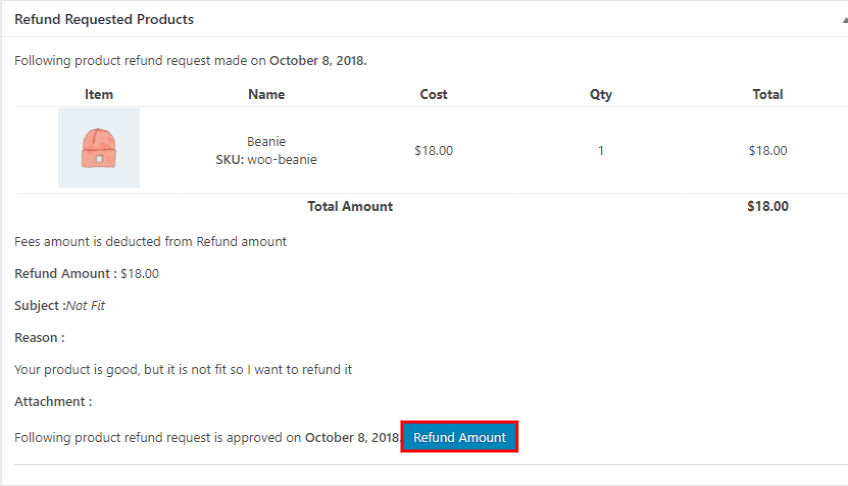
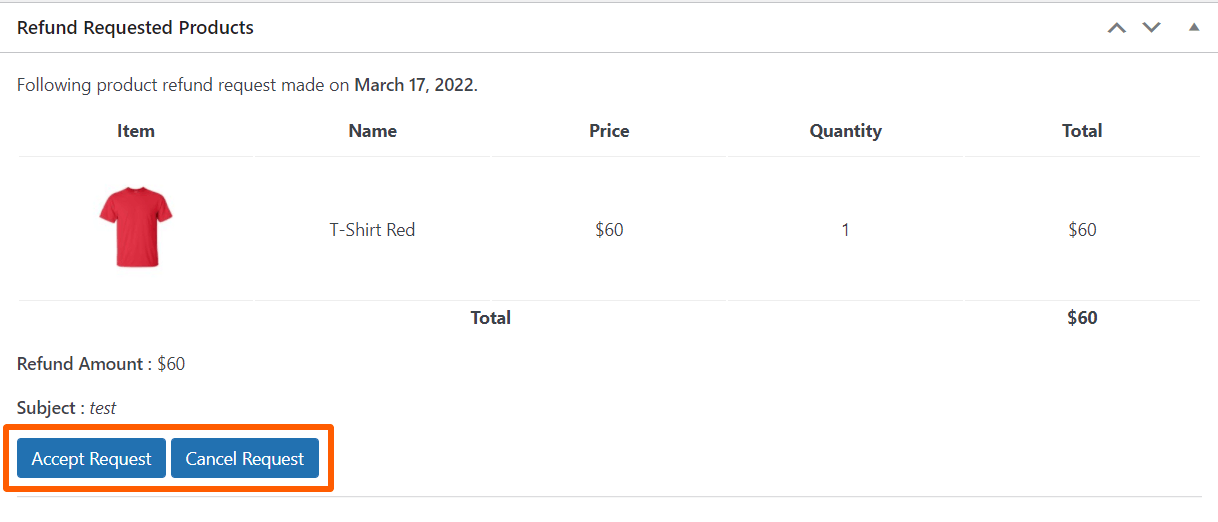 Then, click on the ‘Refund Amount’ button. The refund amount will be sent to the customer’s wallet.